
Nothing quite says summertime like biting into a crisp, ripe slice of watermelon! The juicy, refreshing fruit is an absolute favorite at picnics, barbecues and family cookouts everywhere.
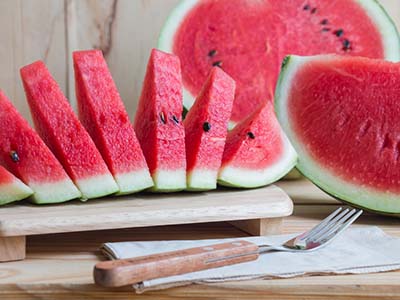
Nothing says summer like a slice of watermelon
But for one reason or another, many home gardeners shy away from trying to grow watermelons. And it really is a shame. As our guest gardener Randy Desoto points out in today’s article, not only is it easy to grow watermelons, the taste simply can’t be beat when compared to anything you find in a store.
So make this the summer you try growing your own. And to help everyone along, let’s take a look at how Randy has success growing his.
If you happen to have a few hints of your own, feel free to leave them in the comment section below.
How I Plant And Grow Watermelons
Randy DeSoto, Santa Rosa, California
Growing Zone 9
I have grown watermelons for the last 10 years or so in my little backyard garden. I have to say it is my favorite crop of all. Like most gardeners, I love growing just about everything. But for some reason, there is something so neat about growing watermelons. Maybe it’s that they get so large and look so different from every other vegetable I grow.
My Growing Tips
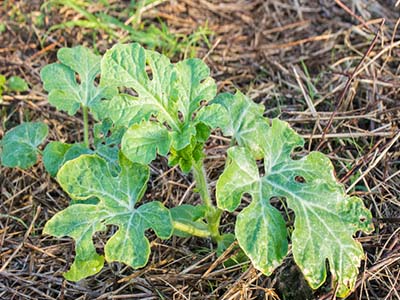
Watermelons do take up quite a bit of space with their long vines, but you can train them to stay somewhat in a confined space.
I always wait until the soil is nice and warm before planting my seeds. If you plant them too early in the cool season, they don’t seem to do as well. I plant all of my melons (watermelon, cantaloupe and muskmelon) the same way, in mounds.
One of the keys to grow watermelons successfully – starting them off in a mix of compost, manure and soil.
When I plant, I start out by using a 5 gallon bucket each of aged cow or horse manure, compost, and garden soil. I mix together to form a mound about 12″ high and about 18″ round. Then in each hill I plant 9 seeds. I plant three in each third of the mound. Next, I thin each third to just one seed once they come up. This way I am sure to have a seed germinate in each location.
My two favorites to grow are Crimson Sweet and Sugar Baby. The Sugar Baby is a smaller variety and is great for smaller gardens. It is really super sweet. The Crimson is just as delicious and grows a bit bigger. Seed Links : Crimson Sweet and Sugar Baby.
When they first come up, I make sure to give them plenty of water and not let them dry out. I always try to not water the leaves and water directly where the three stems come out of the mound. It helps keep them from getting mildew.
Once they are planted…
Once a few weeks go by, I stop watering unless we get no rain at all for extended periods. I do side dress with a little more compost and aged manure about 3 or weeks after they come up. It is all the fertilizer they really need.
The biggest threat to watermelon are cucumber beetles. If you have them bad, you can cover your plants with white row covers for the first few weeks. Once they begin to flower, you need to remove them to let the insects pollinate them.
All that is left is to wait for them to ripen. And that can seem to take forever! When the stem at the top of the watermelon turns brown, I know they are most likely ready. I always double-check by gently picking up off the ground and checking the bottom. If the spot where it was on the ground is still white, let it go a little more. If it slightly yellowing or yellow, it is ready to go. All that is left is to enjoy!
Share Your Gardening Advice With The World!
Do you have a garden tip you would like to share on This Is My Garden? How about sharing your tips with fellow gardeners on growing your favorite flowers, shrubs, trees, vegetables and more!
Email us today at info@thisismygarden.com and let us know your favorite garden tip or story. You can also use the “Feature My Garden Tip” button at the top of the website to submit your entry. This article may contain affiliate links.