
There is no better time to dig up, divide and transplant daylilies than in the early spring – not only is it easy to do, you will be amazed at just how many new plants it can create for your landscape – all for free!
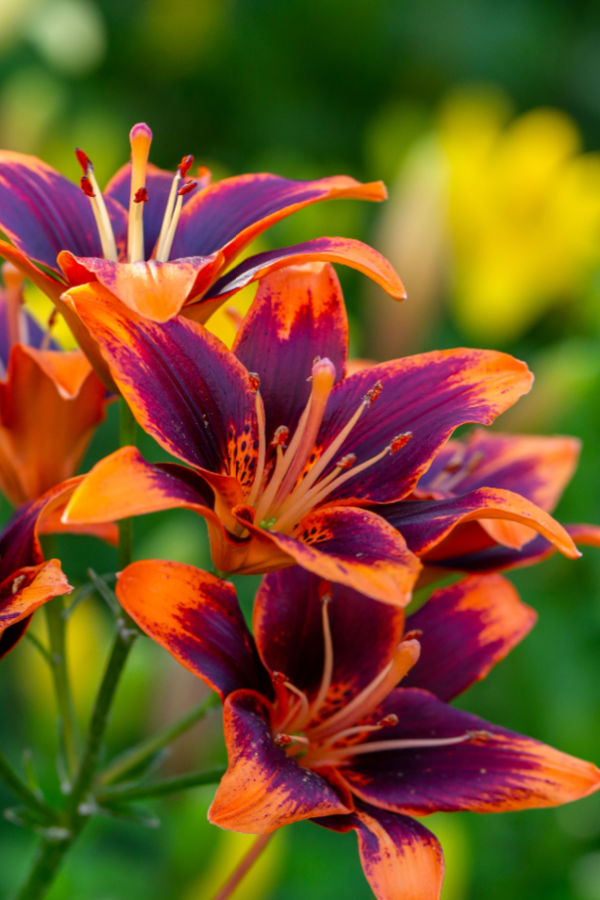
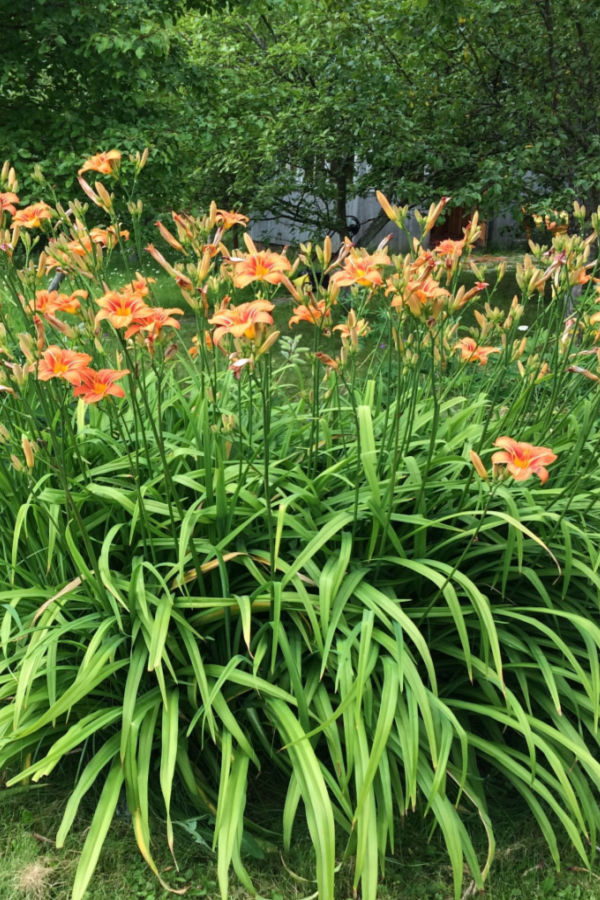
Daylilies are a popular choice for planting in flowerbeds, and for good reason. With their thick foliage and beautiful blooms that last for weeks on end, they can fill large spaces with interest and color.
But even more, they are extremely easy to maintain. In fact, it’s truly hard to find a more low-maintenance perennial than the daylily. For starters, the perennial is amazingly drought resistant. It also happens to be tolerant of almost any soil and climate condition, allowing it to grow nearly anywhere.

Perhaps what really makes the daylily plant such a great choice for flowerbeds is just how fast it grows. Once planted, with minimal care, the plants can fill in large areas of bed space with thick foliage in just a year or two.
With all of that fast growth, in just a few years time, a single plant can become more than large enough to divide into four or more new additional plants. As you can see, the daylily plant really is ideal for those looking to fill their landscape with plants without having to bust their budget!
Why Spring Is The Perfect Time To Divide Daylilies
Dividing daylilies every three to five years is an excellent way to keep the plant’s foliage in check. It also helps this perennial maintain a strong flush of blooms each and every growing season.
If allowed to grow too large, the roots and foliage begin to grow too thick. Because of this, they start to have issues being able to absorb the nutrients and moisture they need to produce strong foliage and bloom sets.

The result is an overgrown plant with foliage that is less than impressive. Even worse, the plant will begin to produce fewer and fewer blooms with each passing year. But the good news? Dividing is a quick and easy cure to solve the problem, and spring happens to be the perfect time to do it!
Dividing Daylilies In The Spring
Although you can divide daylilies at any point of the growing season without worry of killing the plant, spring dividing presents several big advantages over summer and fall efforts.
For starters, you can divide as soon as the soil can be worked. Neither a frost or even a hard freeze will harm the plants. As long as the soil is loose to dig and transplant, you are good to go. This allows you plenty of time to get the plants in before the growing season starts!
Spring dividing also helps you fill in open bed spaces before the growing season is in full swing. That can help cut down on future weeds, and even better, having to spend so much time, energy and cost on mulch! See: How To Keep Your Flowerbeds Weed Free With Ease
Removing Spent Foliage – How To Divide Daylilies In The Spring
If you did not clear the spent foliage from plants in late fall, start by removing it first. Although the decaying material can be cut off, in most cases, you should be able to pull it away from the base simply by pulling up on the foliage.


Quite often, when you remove the spent foliage, you will see new green growth appearing at the base. Do not panic or worry about harming the plant, even if it is cold. Daylilies are one of the first perennials to begin growing in early spring, and their base will green up with the slightest of warming trends.
Even though this occurs, they will simply go dormant again with a freeze or hard frost. Eventually, when the soil warms and stays warm, new growth will shoot up for good.
Digging Up Your Plants – How To Divide Daylilies In The Spring
Once the foliage is cleared and the base of the plant is exposed, you are ready to start dividing. Begin by loosening the soil with a shovel a few inches behind the outer edge of the shoots extending out from the crown.
Don’t panic if you happen to sever a shoot or two in the process. Daylilies are extremely hardy and tough to kill. Slicing into a few side shoots or roots will not harm them in the least. Next, using the shovel, dig down behind and pop the daylily out of the soil.
If you happen to be dealing with an extremely large and overgrown plant, you may need to cut the plant out in sections. Plants that have been in the ground for five or more years tend to develop extensive roots, and sectioning them off at this point will make the task much easier.
Dividing The Daylilies – How To Divide Daylilies In The Spring
Once your plant (or plant sections) are out of the soil, it is time to divide them into new transplants. The easiest way to do this is to first flip the plant over to expose the root cluster.
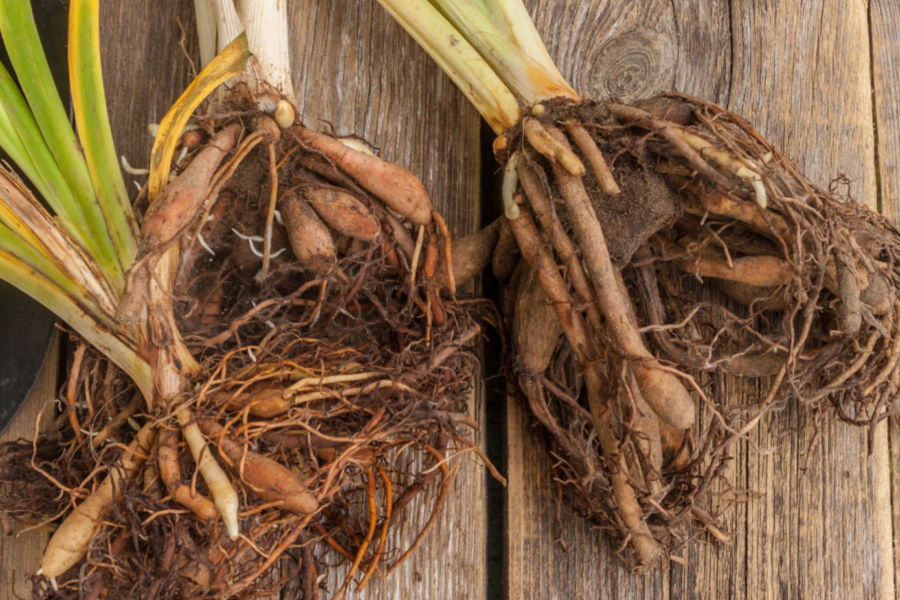
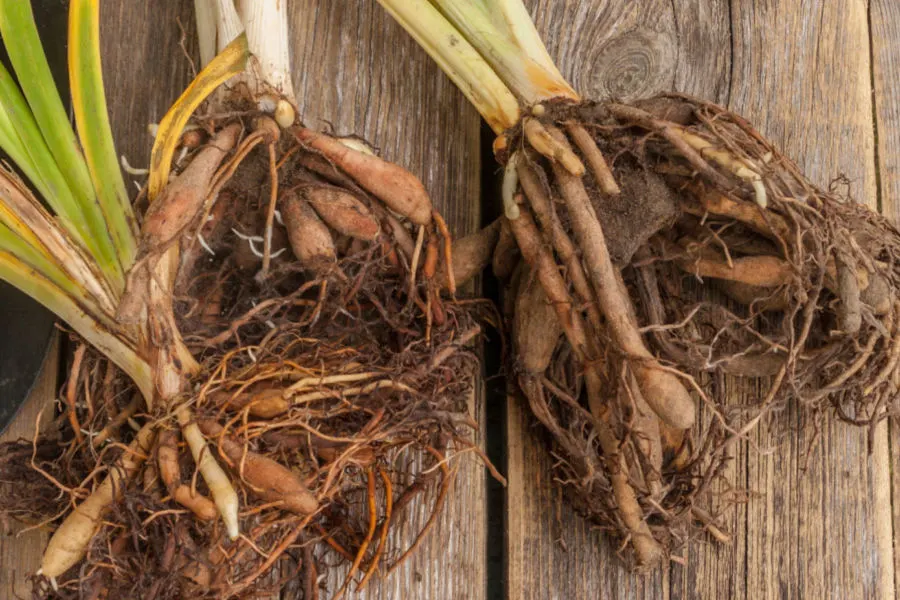
Slicing the roots is an easier proposition than cutting down through the top growth. It not only divides better, it also allows you to keep them in proportionate sizes with ease. To divide, take a shovel or an all-purpose garden knife and cut down through sections of the root ball.
The size of the new cutting directly determines the first year size of the new plant. In general, dividing new plants into 3″ x 3″ root sections will create a typical 1/2 gallon plant that will be able to grow another 3 to 5 years without issue.
Replanting – How To Divide Daylilies In The Spring
It is always best to transplant new cuttings as soon as you divide. Although they can survive wrapped up for a few days, getting them back into the ground immediately will help them begin to re-root as fast as possible.
To transplant divisions, begin by digging a hole slightly deeper and wider than your cutting. Next, put a bit of loose soil (compost is a great add here too) into the bottom of the hole. This will help the new cutting to more easily send out its roots into the soil.
Be sure the top of the plant’s soil line is level with the existing soil line. Next, fill in the edges of the hole with soil and lightly press down around the plant to help set the roots. If the soil happens to be extremely dry, you can water it. But in most cases, it simply isn’t necessary, especially in the spring.


The plant will quickly begin to grow from the roots in the coming weeks, and in nearly all cases will produce blooms the same year. Just another reason spring transplanting is the perfect time to create new daylily plants.
See how easy it is! Now it’s time to get out there and start dividing your daylilies this spring. You will be rewarded with healthy plants, and a fuller, weed-free flowerbed.
Follow Our Facebook Page For Great Gardening Tips And Advice! This Is My Garden Facebook Page
This Is My Garden is a garden website created by gardeners, for gardeners. Jim and Mary Competti have been writing gardening, DIY and recipe articles and books and speaking for over 15 years from their 46 acre Ohio farm. They publish three articles every week, 52 weeks a year. Sign up today to follow via email, or follow along!