Did you know that summer is actually one of the easiest and best times of all to divide overgrown daylilies? Not only can you rejuvenate and revive tired, worn out plants, you can also create all kinds of new starts to fill your flowerbeds with even more flower power!
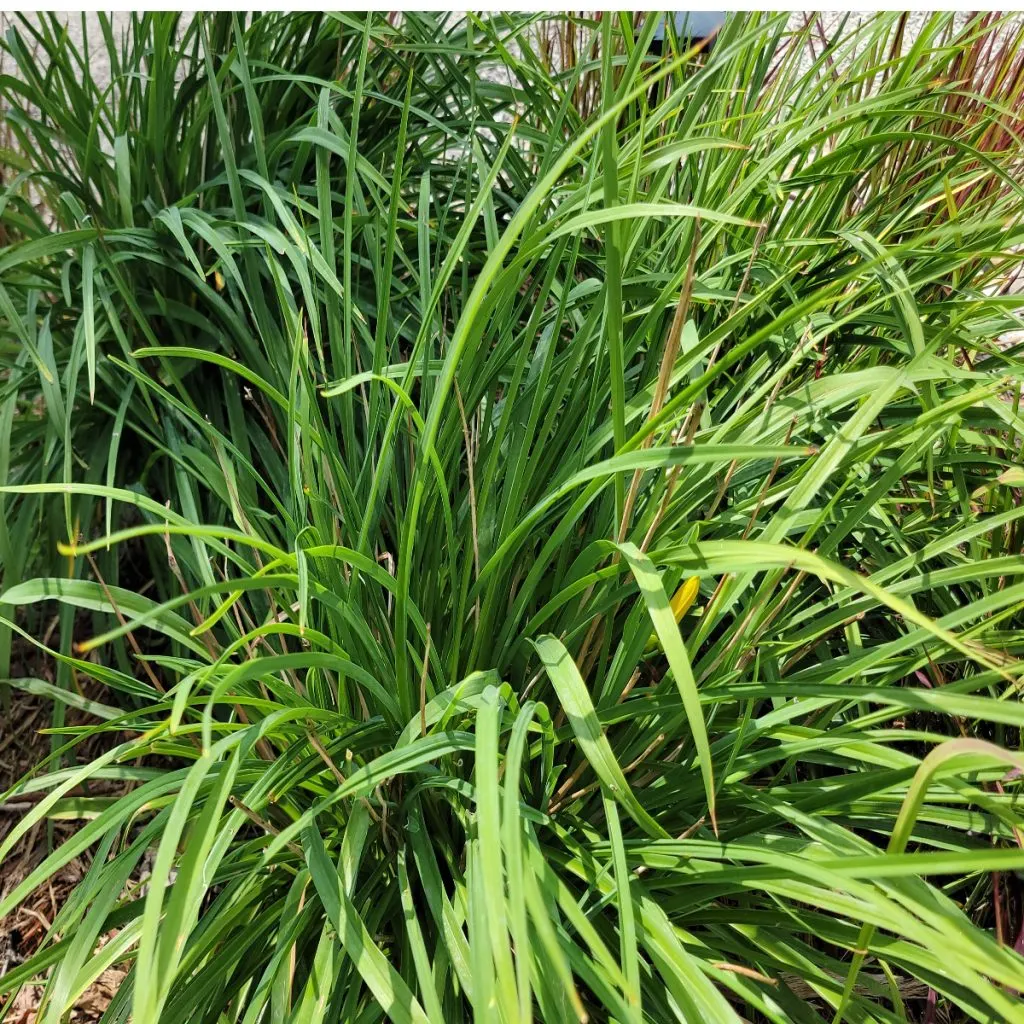
Daylilies are one perennial that can quickly grow to massive size. Within just as little as three to four years, small plants can grow to triple or more in size. Unfortunately, oversized daylilies aren’t just unsightly, they also struggle to bloom to their full potential.
When a daylily grows too large, its roots often become root-bound in the soil. In addition, the foliage up top becomes so thick, that the plant just doesn’t have the energy or space to produce many flowers. Because of this, both its health and blooms will begin to decline.

But the good news is that by simply digging up and dividing your daylilies every three to four years, you can keep them vibrant, healthy – and more importantly – blooming big and strong. And, as you will see below, summertime just happens to be the perfect time for dividing and transplanting!
Why Summer Is Great For Dividing Daylilies – How To Divide Overgrown Daylilies In The Summer
Although you can split daylily plants in the spring and fall, there are a lot of advantages to dividing them in the summer.
For one, you can easily tell which plants are overgrown and need to be split. It can be hard to judge a perennial’s growth in the early spring before its foliage has come to life. But by mid-summer, spotting over-sized plants is a breeze.
In addition, dividing and replanting in the summer also allows plenty of time for the plants to re-establish roots and a good canopy of foliage by late fall. This sets the stage for full-growth during the following year and big blooms right away!
All too often, when dividing in the fall, it can take the entire next year for new plants to really take off. The same goes for spring dividing. The plants often just don’t have enough time to grow and produce blooms. But summer dividing solves that problem with ease!

How To Divide Overgrown Daylilies In The Summer – Revive Your Daylilies!
Dividing daylilies in the summer is a bit different from spring and fall splitting. It’s important to realize that once you dig up your plants, it will take a few weeks for the root system to spring forth new foliage.
Don’t be alarmed as plants will lose all of their existing foliage. The good news is that daylilies are incredibly hardy. In fact, it’s nearly impossible to harm the roots or the life of the plant. As the current growth dies off from being dug up, fresh shoots will appear at the base of the plants as they re-establish.
Digging Up Daylilies – How To Divide Overgrown Daylilies In The Summer
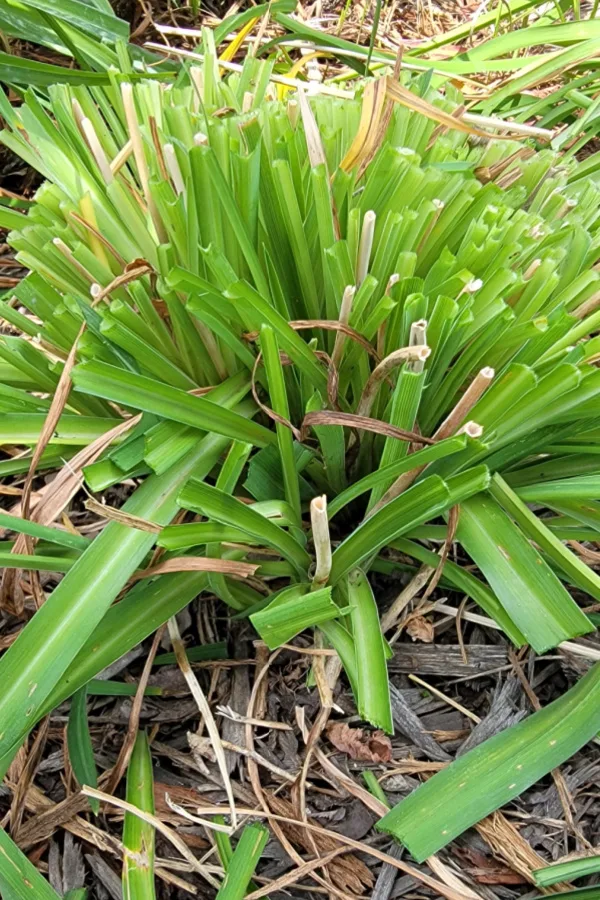
Start by cutting the foliage of the plant down to around 2″ from the ground. This not only helps make the process of digging plants up a far more simple task, it also makes it much easier when it comes time to split them into new plants.
Next, working your way around the edge of the plant, dig down about four to five inches with your shovel. Once you have cut around the edges, the plant should lift out fairly easily. For excessively large plants, you may have to dig it out in sections. This will not harm the roots in the least.

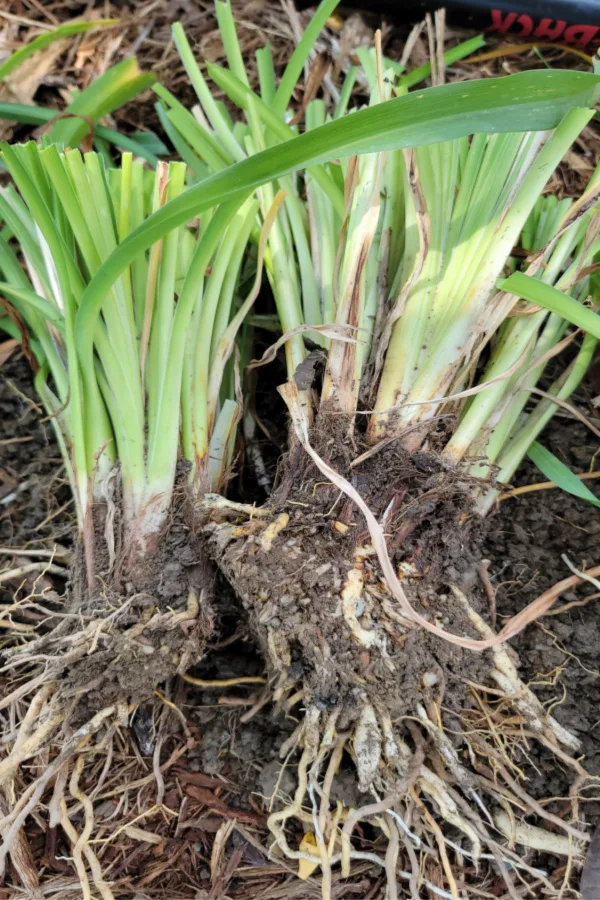
Once the plant and roots are out of the ground, turn the plant over on its side. This makes it easy to see the size of the roots and allows you to cut the new divisions into equal sized transplants.
Leave a minimum of one square inch of root ball for each new plant you would like to create. Two to three-inch cuttings are ideal for 10 to 12 inch plants when re-established. If you want larger plants, you can divide in quarters or in half.
Depending on the size of the original, you can usually get 6 to 12 new plants with each plant divided. Now, you are ready to plant!
Transplanting New Divisions – How To Divide Overgrown Daylilies In The Summer
Dig new planting holes deep enough to plant the roots and about one inch of the existing top foliage underneath the soil. By planting a bit of the foliage under the soil, it helps to keep the roots “mulched” and protected while they establish new growth.

Next, put a quarter cup of worm castings or a light dose of all purpose granular fertilizer around the base. This will ensure the daylily gets a quick burst of energy to the roots to spur new growth. Affiliate Product Link: Southern Ag All Purpose Granular Fertilizer 10-10-10
The remaining foliage on top will brown and die off completely as new growth slowly emerges. Water the new divisions when planting and continue to water every few days until new foliage begins to appear.
What To Do With Extra Plants
If you are not quite sure where to put all of your new plants, there are a couple of great options. For starters, you can pot them up to give to friends or neighbors, or to use later as needed. You can also simply plant the transplants close together in your garden as a holding bed for later use. The key is to get them into soil so they can begin establishing their roots and new foliage.
Place pots outdoors in an area that receives at least partial sun. Water the cuttings every other day until new growth appears.
At any point in the process, you can simply pop out the transplants and plant them. In late fall, all you need to do is cut back the new growth after it dies off. Then, next spring, your plants are ready to take off! See: What To Do With Daylilies In Late Fall
Here is to dividing your overgrown daylilies this summer. And, to having them bloom better than ever in the coming years!

This Is My Garden
Follow Our Facebook Page For Great Gardening Tips And Advice! This Is My Garden Facebook Page
This Is My Garden is a garden website created by gardeners, for gardeners. Jim and Mary Competti have been writing gardening, DIY and recipe articles and books and speaking for over 15 years from their 46 acre Ohio farm. They publish three articles every week, 52 weeks a year. Sign up today to follow via email, or follow along!
