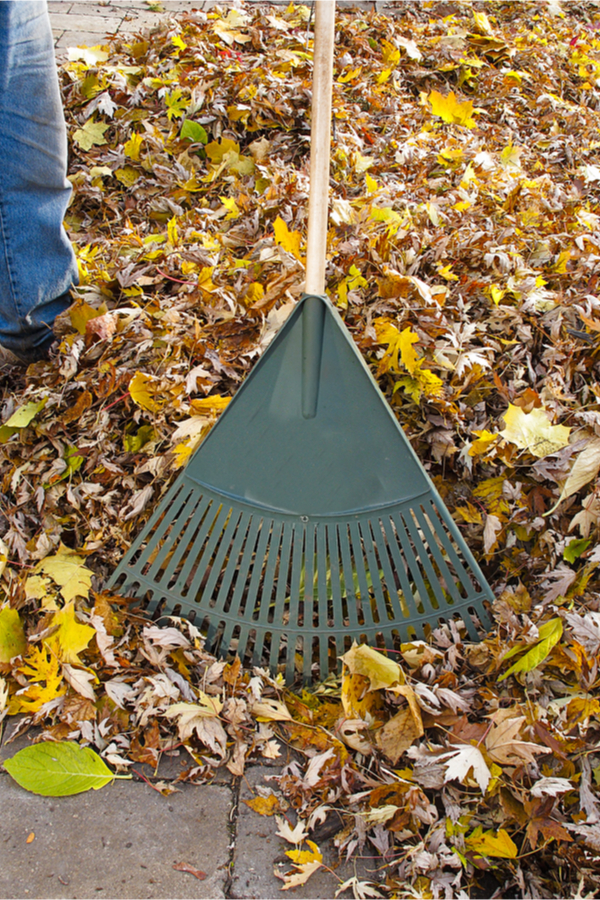
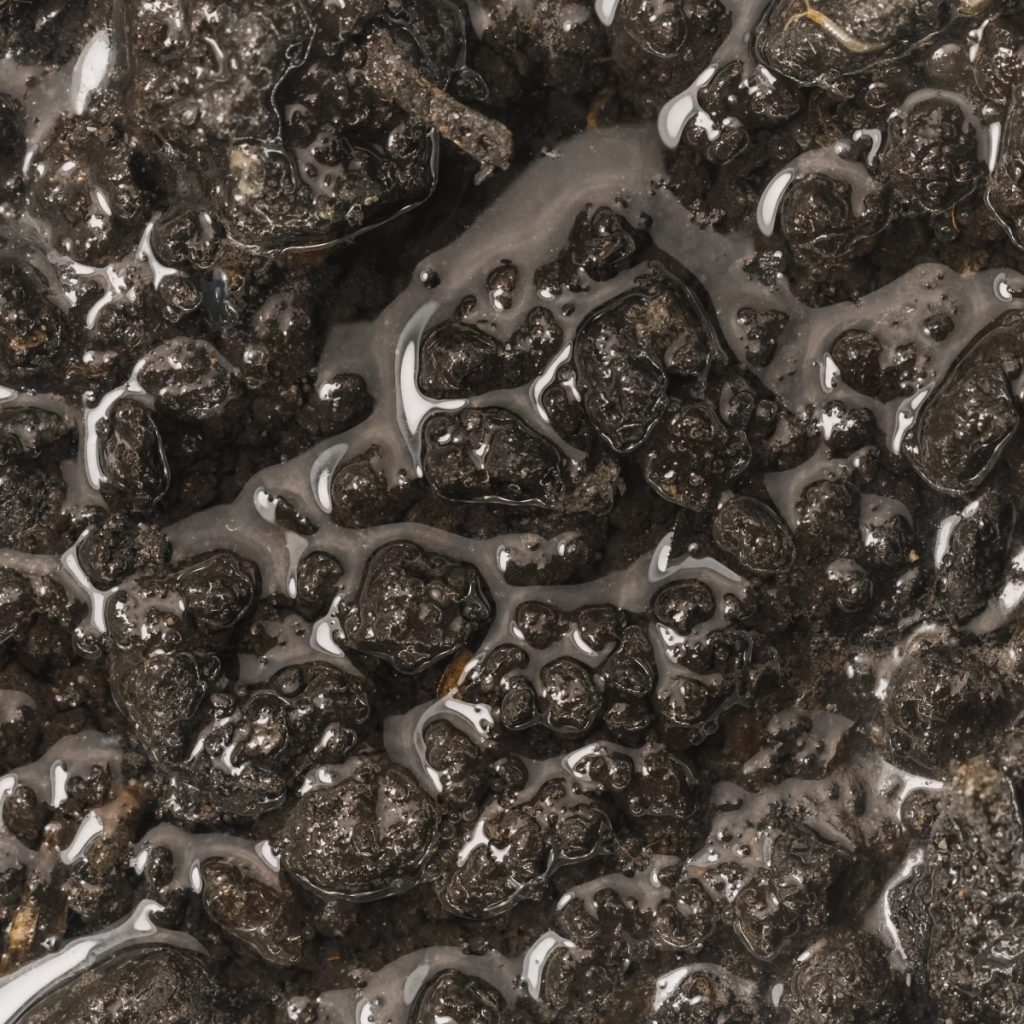
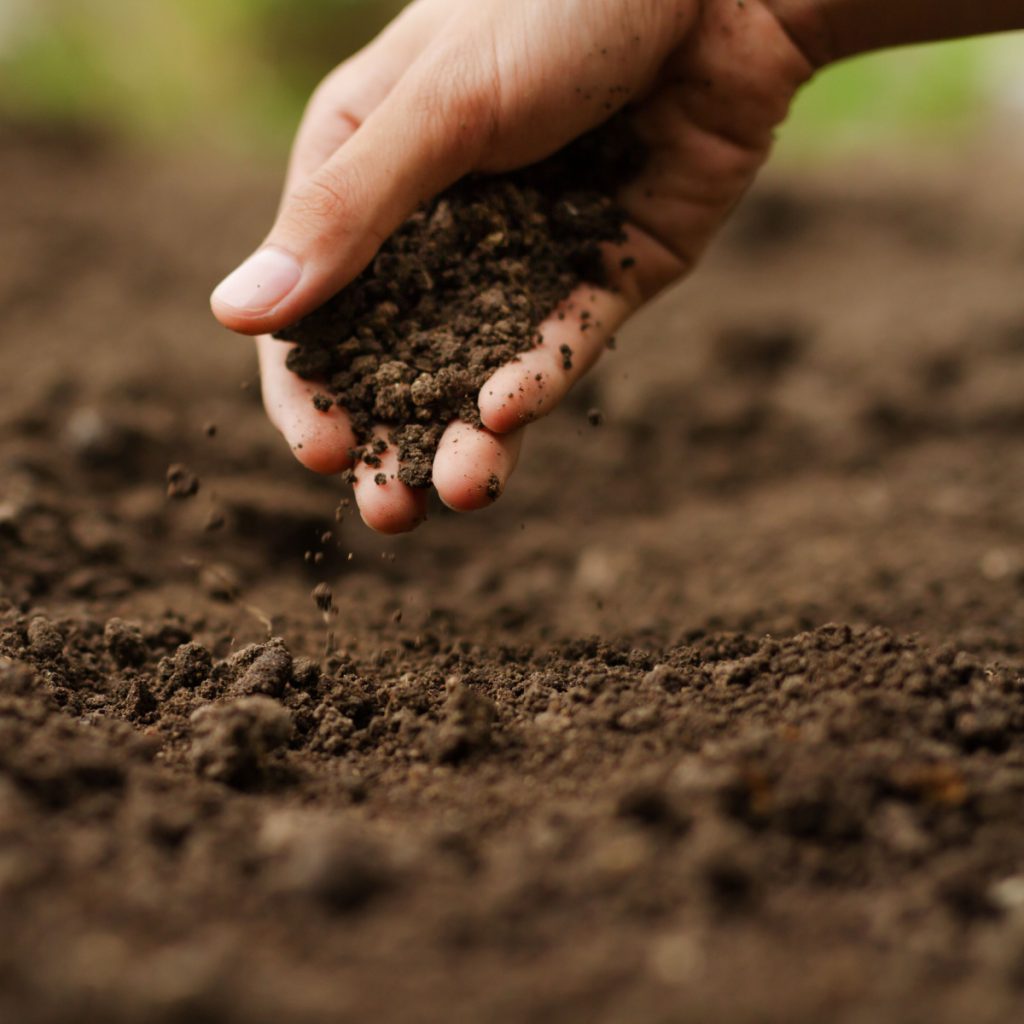
Compost is the key to growing nearly any plant imaginable, and making your own couldn’t be easier!
Check out all of our articles below how to make and use compost all over your landscape:


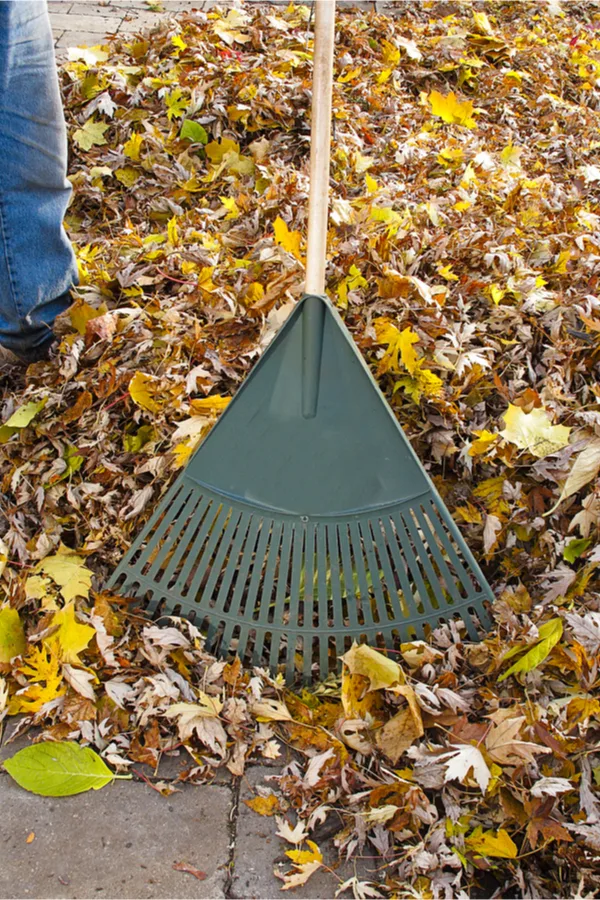
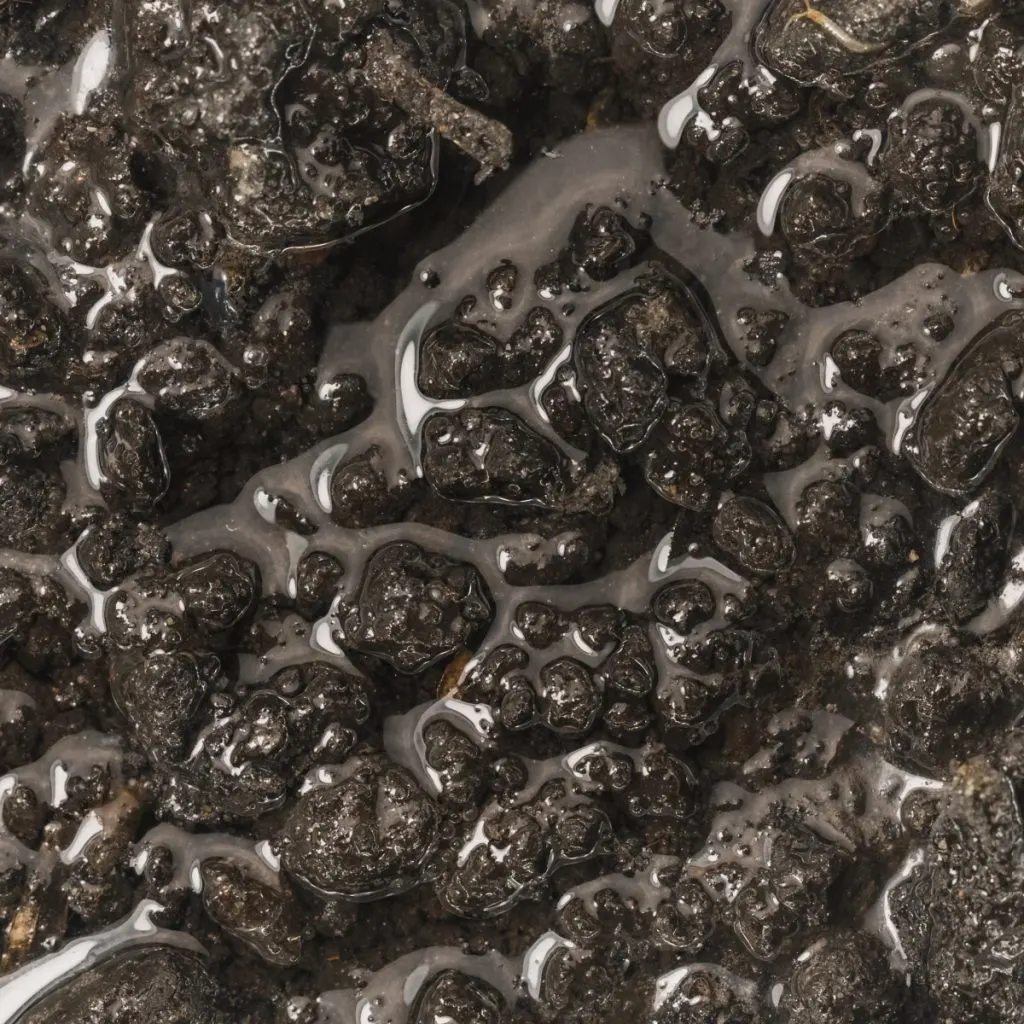
Compost is the key to growing nearly any plant imaginable, and making your own couldn’t be easier!
Check out all of our articles below how to make and use compost all over your landscape:
Looking for a simple way to create a DIY compost bin that’s not only easy and affordable – but is also durable and looks great too?
Creating compost at home is one of the easiest and most effective ways to improve garden soil. By turning everyday kitchen scraps and yard waste into rich, organic matter, compost helps plants grow stronger, improves drainage, and adds nutrients back into the soil naturally.
While there are plenty of compost bins available for purchase, many are expensive, flimsy, or simply don’t hold up over time. But that is where making your own can save the day! A well-built DIY compost bin gives you complete control over the size, materials, and design, ensuring it fits your space and works efficiently through every season.

The good news is that building a compost bin doesn’t require special tools or costly supplies. With a simple design and a few affordable materials, you can create a sturdy bin that looks good in the backyard and handles everything from kitchen scraps to fall leaves with ease.
Here’s a look at what makes a great backyard compost bin – and how to build the perfect DIY compost bin that is simple to assemble, budget-friendly, and designed to last for years!
There are 3 key factors to a good homemade compost bin design. Together, they play a huge role in the success of a pile that heats up fast, and delivers great compost.
First, the bin must be easy to use. That means ample room for loading in compost materials, turning the materials, and scooping them out. Bins with narrow designs or limited access points can be hard to load, and even harder to turn and work.
Secondly, the bin must allow for good air flow to the pile, all while holding it together for good decomposition. Ample oxygen is a huge key for heating up and decomposing a pile. Unfortunately, if there is no room for air to enter, a pile will quickly stall.

Third and perhaps most important, a compost bin has to be just the right size. It must be large enough to hold adequate material to facilitate composting, but still small enough that it’s manageable to turn and work. See: How To Create A Great Compost Pile – 3 Simple Secrets To Make Compost Fast!
The ideal size for a fast working home compost pile is 3′ wide x 3′ high x 3′ deep. A 3 x 3 x 3′ pile allows enough mass for materials to heat up internally. Any smaller, and the pile is not thick enough to hold heat for extended periods. A smaller pile also tends to dry out at a much faster rate. Both of which will slow decomposition to a crawl.
So what about a larger pile? Although piles bigger than 3 x 3 x 3′ certainly will hold in the heat and moisture, they can be immensely difficult for the average gardener to turn and manage. Not to mention, they take up more space than most gardeners have!
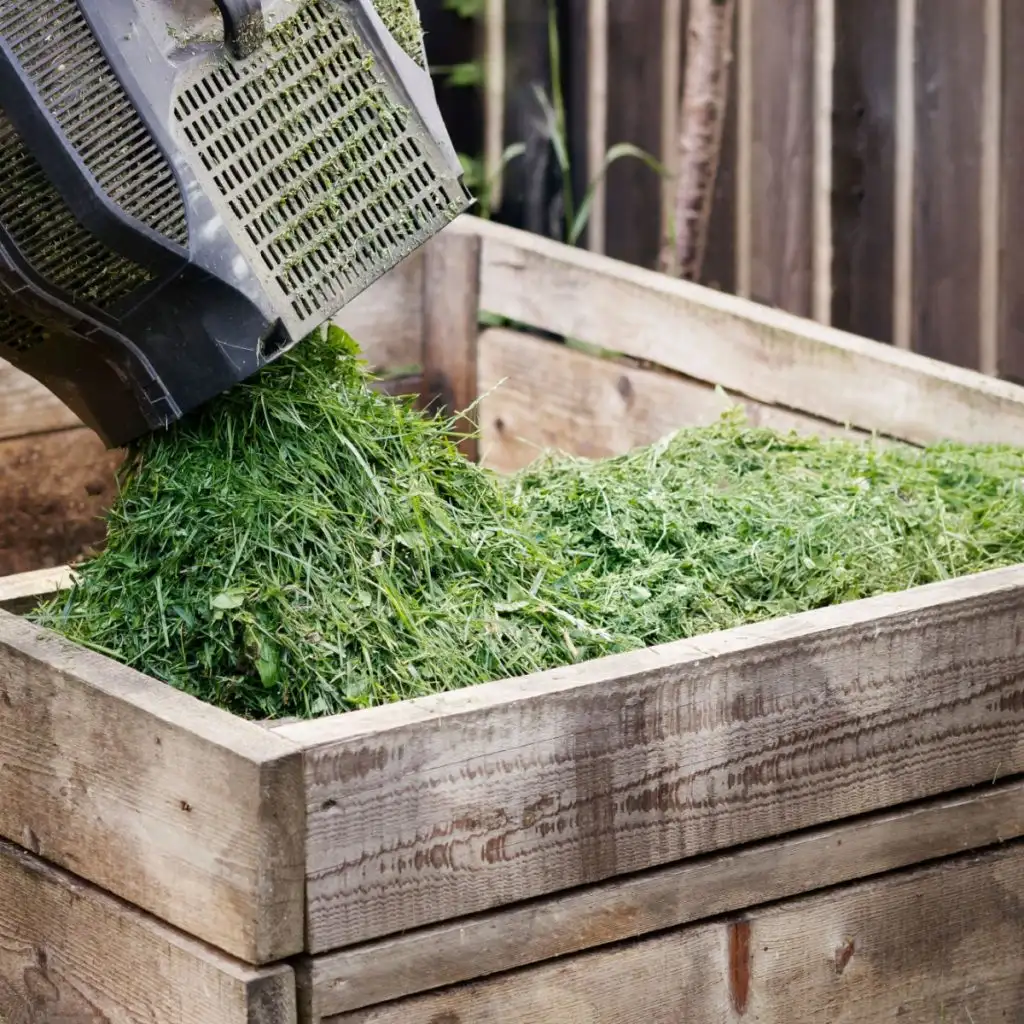
Even though there are a multitude of compost bins for sale commercially, it’s actually quite easy and inexpensive to build your own DIY compost bin with basic materials and tools. Commercial bins are created from all kinds of materials, but even so, wood remains one of the best options around. Not only is it economical, but it also helps with moisture levels in the pile.
Unlike plastic or metal, wood both absorbs and releases moisture. Instead of water pooling at the bottom or sides of a non-porous bin (which severely slows decomposition), a wood compost bin can wick it away. Especially when it incorporates an open or wooden slat design that allows for air to the pile.
A few years back, on our Old World Garden Farms sister site, we created two such compost bin designs from ordinary 2x lumber. A single 3 x 3 x 3′ bin, and a 6 x 3 x 3′ double bin for additional composting space.
2x framing lumber is actually an excellent choice for creating homemade compost bins. Not only is it inexpensive, it is also untreated. And that is extremely important when creating compost that will be used on vegetable gardens. Because of its thickness, it also lasts for years and years!

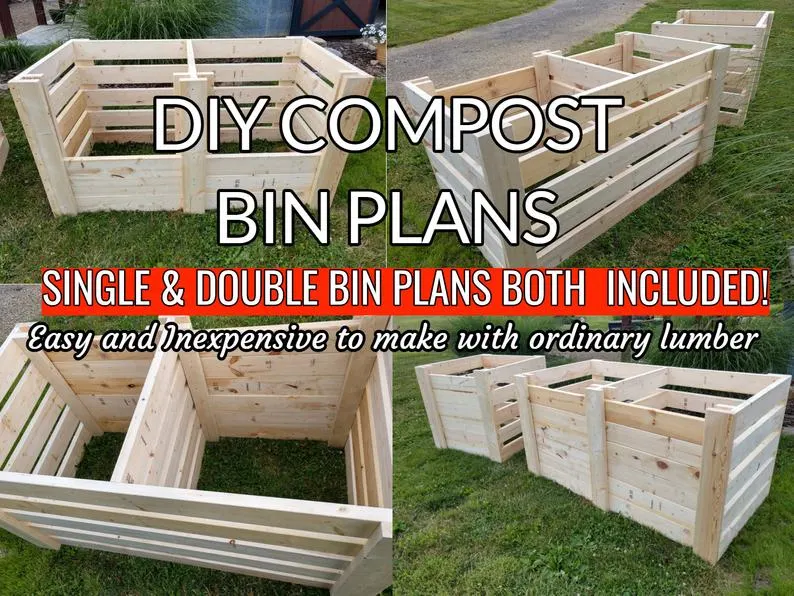
At 36″ wide and deep, and 36″ tall, the single compost bin takes advantage of the ideal 3 x 3 x 3′ pile size guidelines. And with wooden slat slides and a removable front, it allows for plenty of air flow and easy access.
Built with just (6) 2 x 6 x 12’s and a single 2 x 4 x 8′ board – the single compost bin is both economical and easy to build. It uses a simple stack system to assemble the board with screws. It is both strong and durable!
The double bin can be made from just (11) 2 x 6 x 12’s and a single 2 x 4 x 12′ board. At just a bit more cost in materials, it’s a great solution for those with larger gardens and landscapes. (For those wanting step by step plans, the instant download plans (both are included) are available here : DIY Compost Bin Plans.)
With the thicker 2X construction, these bins keep on looking good and lasting for years. Best of all, both the single and double bin can be built in just a few hours with nothing more than a circular saw and a drill driver. All for a fraction of the cost of commercial composting bins!
Here is to making your own DIY compost bin for your garden, and to making great compost next year!
Follow Our Facebook Page For Great Gardening Tips And Advice! This Is My Garden Facebook Page
This Is My Garden is a garden website created by gardeners, for gardeners. Jim and Mary Competti have been writing gardening, DIY and recipe articles and books and speaking for over 15 years from their 46 acre Ohio farm. They publish three articles every week, 52 weeks a year. Sign up today to follow via email, or follow along!
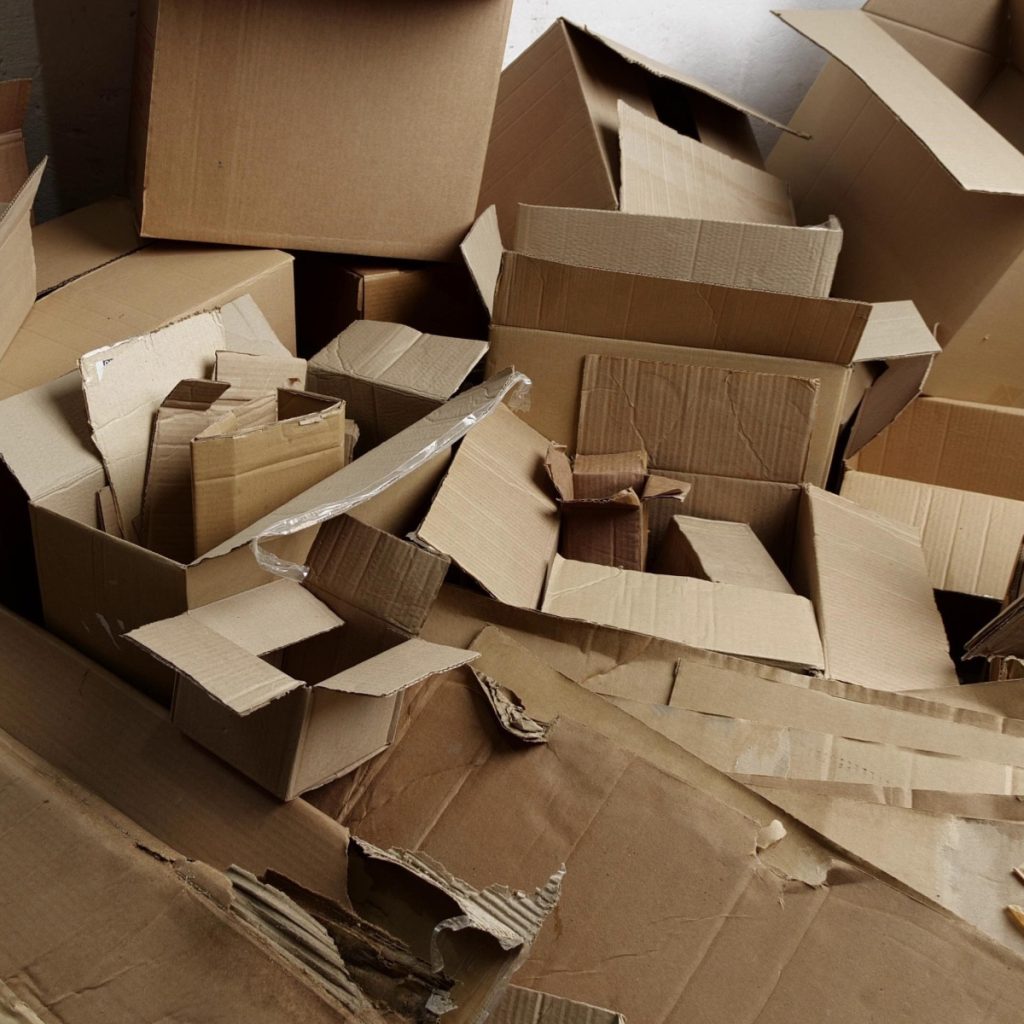
Winter is the perfect time for putting cardboard in your compost pile – and can it ever have impressive benefits to your finished compost next spring and summer!
For starters, there is often more cardboard available in the winter than at any other time of year. Holiday gifts arrive in boxes. By the dozens! And many homes stack up cardboard as December deliveries roll in. But instead of sending those materials to the trash or your local recycling center, most boxes can be put to even better use in your compost pile!
Cardboard is a carbon-rich material. And compost piles always need carbon to balance kitchen scraps and other green materials. Winter compost piles struggle when that balance becomes uneven. The good news is that cardboard solves that problem and provides steady carbon during the cold months.

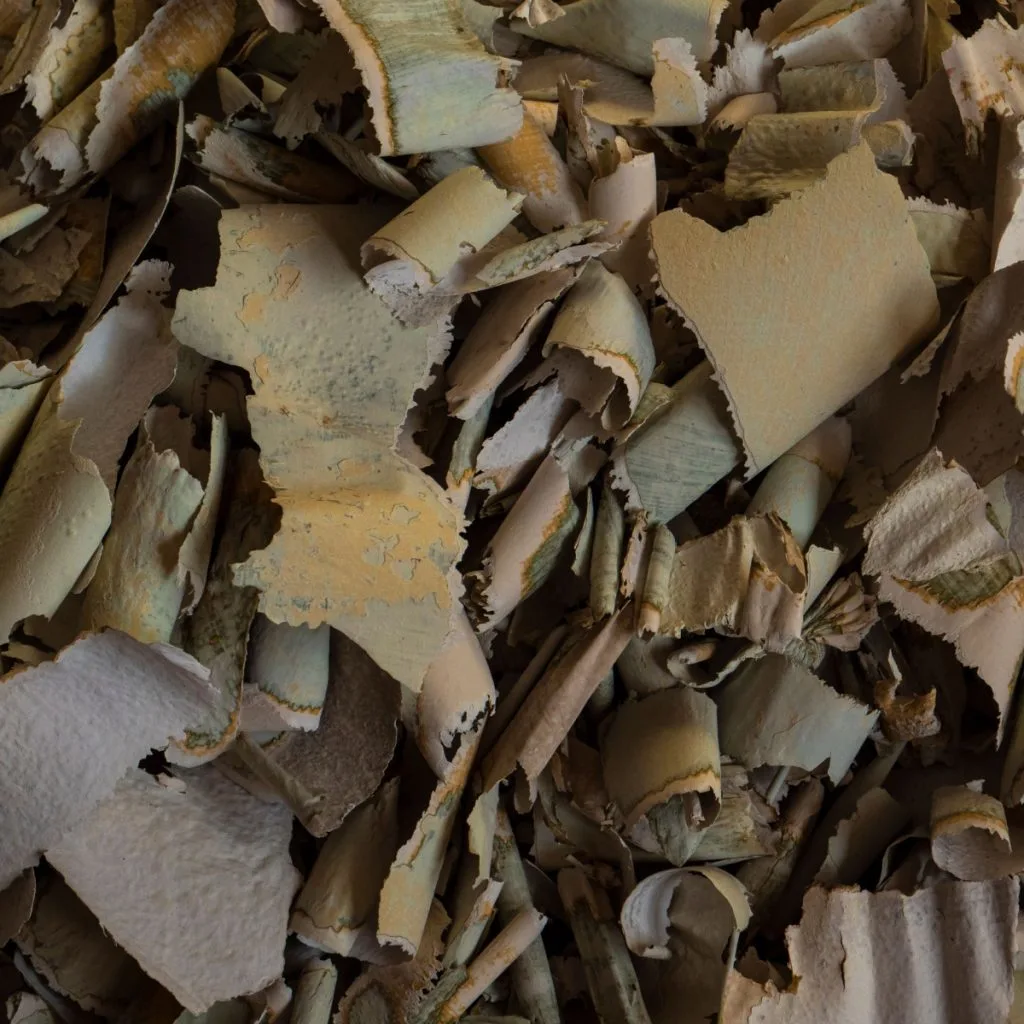
Most cardboard found during the holiday season can be composted. Many boxes are simple brown corrugated cardboard. Most shipping sleeves and packaging inserts are plain kraft paperboard. These all break down well and add incredible structure to a winter compost pile.
But it’s important to know that not all cardboard is compost friendly. Most plain brown cardboard is safe to add. These boxes usually use natural glues and contain no dyes. They are labeled as corrugated cardboard or kraft paper. They break down fast when shredded. And they absorb moisture and give a pile aeration and texture.
However, some cardboard should stay out of your pile. Cardboard with shiny coatings should never be used. These coatings often contain plastic. Plastic does not break down. It can contaminate your compost. Wax-coated boxes are also not suitable. Wax slows breakdown and can clog your pile. Frozen food boxes often have these coatings. They look like cardboard but are not a good choice.
Cardboard with colorful printing is also questionable. Many inks used today are vegetable-based. They are safe. But some bright colors may contain heavy metals or petroleum products. These inks do not belong in your compost. They can cause contamination and poor soil quality later.
Lat but not least, glue can be an issue as well. Most shipping boxes use a simple starch-based glue. These glues are safe for composting. However, some retail packaging contains stronger adhesives. If the glue feels rubbery or sticky, avoid composting it. Many gift boxes and specialty packaging use these tougher glues. They break down slowly. They can create mats in the compost pile.

If you are unsure, do a quick test. Tear the cardboard. Plain cardboard tears cleanly with a fibrous edge. Coated cardboard often feels slick. It may not rip easily. If it resists tearing or feels waxy, keep it out of your pile.
On a side note, if you use cardboard for stopping weeds, the same cautions apply. See our article: How To Eliminate Flowerbed Weeds With Cardboard – And Have Beautiful Beds!
Composting slows in winter. The pile loses heat to the cold air. Microbes become less active. Moisture turns to ice. Cardboard fights these issues with natural insulating power.
When you add cardboard to a compost pile, it holds moisture just long enough. It prevents drying out during cold, windy days. At the same time, it prevents the pile from becoming waterlogged during winter thaws.
Cardboard also gives the pile more bulk. A larger volume can hold heat better than a small pile. This is important in winter when freezing temperatures slow decomposition. When cardboard gets wet and begins to break down, it creates tiny pockets of insulation. These pockets trap warmth and allow microbes to stay active longer. That activity is the heart of successful winter composting.
Cardboard traps warm air inside the pile. This is key to maintaining microbial activity. Microbes need heat to work. Without heat, the pile can turn dormant. When cardboard absorbs moisture and softens, it creates layers. These layers protect the warm core from freezing temperatures.
Cardboard also feeds the microbes. Winter piles often lack carbon. Kitchen scraps produce a lot of nitrogen. Without carbon, decomposition slows. Cardboard gives the pile the balance it needs. Balanced piles heat better and stay warmer longer.


One of the best winter uses for cardboard is as a cover. Compost piles must stay protected from heavy snow and freezing rain. A wet pile loses heat quickly. A frozen pile stops breaking down. Cardboard helps shield the pile from the elements.
Large pieces of cardboard work well as a simple lid. Place a few flattened boxes over the top of the pile. Overlap the edges to prevent wind from blowing them away. Add a few heavy sticks or stones to hold them in place. This creates a natural roof for your compost.
This roof keeps precipitation out of the pile. It blocks snow from packing down the material. It reduces the amount of freezing that happens near the surface. More importantly, it helps hold heat inside the pile. Warm air rises. Without a cover, that heat escapes. Cardboard acts like a blanket and reduces heat loss.
Cardboard can also help block winter winds. If your compost pile sits in an exposed area, lean cardboard sheets along the sides. This shields the pile from wind that can dry it out and cool it down. A windbreak helps the pile stay warmer and more active.
As the cardboard gets wet, it will begin to break down. This is normal and helpful. As it softens, it forms a barrier. This barrier keeps the cold air from reaching the warm core below. As the top layer breaks down, work it into your pile and put more on top.
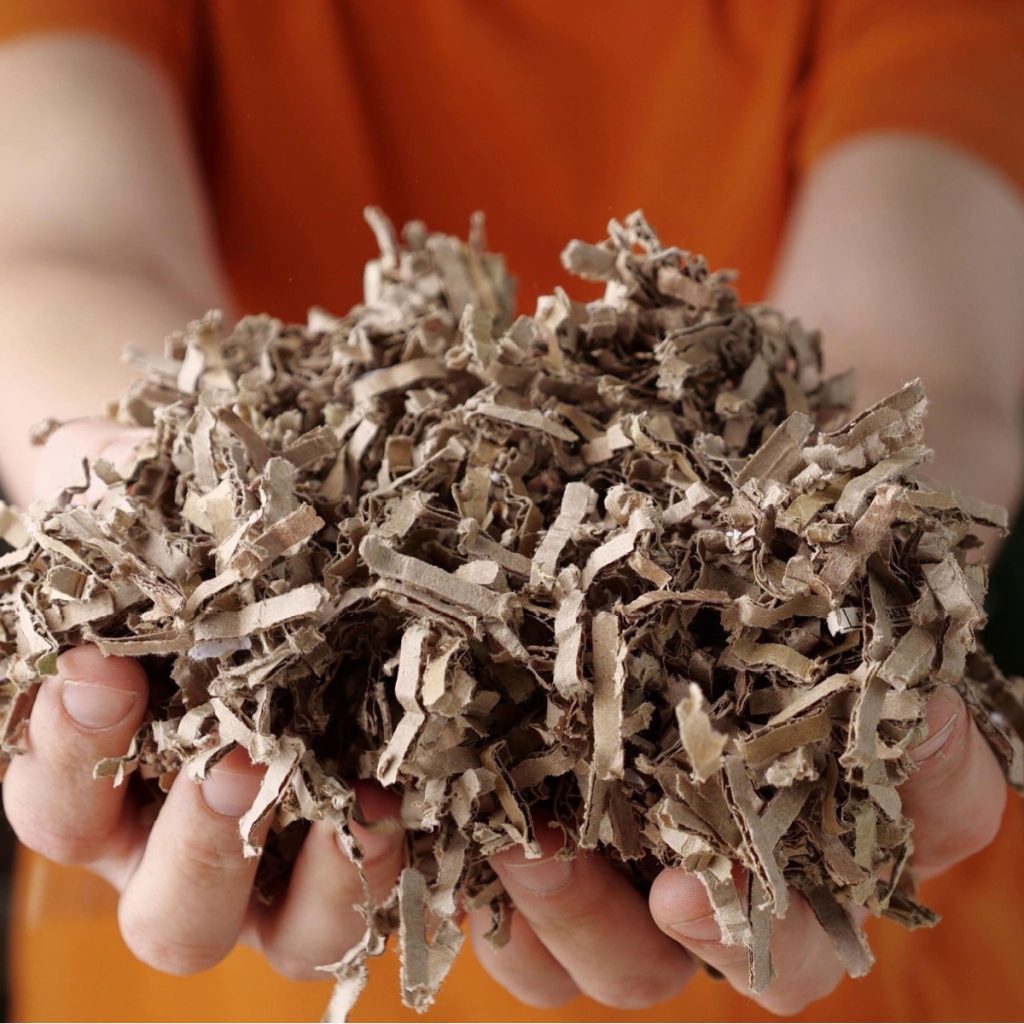

Shredding cardboard for the center of your pile is the way to go. Smaller pieces break down faster. They also mix better with kitchen scraps and other materials. Shredding increases the surface area. This gives microbes more places to work. More microbial activity means more heat.
Shredded cardboard helps the center of the pile stay warm. When you mix it with fresh scraps, the pile becomes more porous. Air flows better. Heat moves through the pile more evenly.
To shred cardboard, tear or cut it into small pieces. You can use scissors, a box cutter, or your hands. Some people soak cardboard in water first. This makes it easier to tear. However, do not make it too wet before adding it. Too much water cools the pile. Slightly damp pieces work well.
Layer shredded cardboard into the compost pile. Add a few inches of cardboard pieces. Then add kitchen scraps or other green materials. Continue layering. This creates a balanced and warm mixture. The shredded material absorbs extra moisture. It prevents slimy spots. It keeps the pile fluffy enough for air to circulate.
One more reason to use cardboard is that it also helps with odor control. Winter piles sometimes smell because decomposition slows. Cardboard helps absorb odors. It keeps the pile drier near the surface and reduces the chance of strong smells.
One thing is for sure, cardboard is one of the most overlooked compost materials. In winter, it becomes especially valuable. It boosts heat retention and balances the pile. It also keeps decomposition moving even when the weather is cold. Here is to using cardboard in your pile this year – and having better compost next spring because of it!
Follow Our Facebook Page For Great Gardening Tips And Advice! This Is My Garden Facebook Page
This Is My Garden is a garden website created by gardeners, for gardeners. Jim and Mary Competti have been writing gardening, DIY and recipe articles and books and speaking for over 15 years from their 46 acre Ohio farm. They publish three articles every week, 52 weeks a year. Sign up today to follow via email, or follow along!
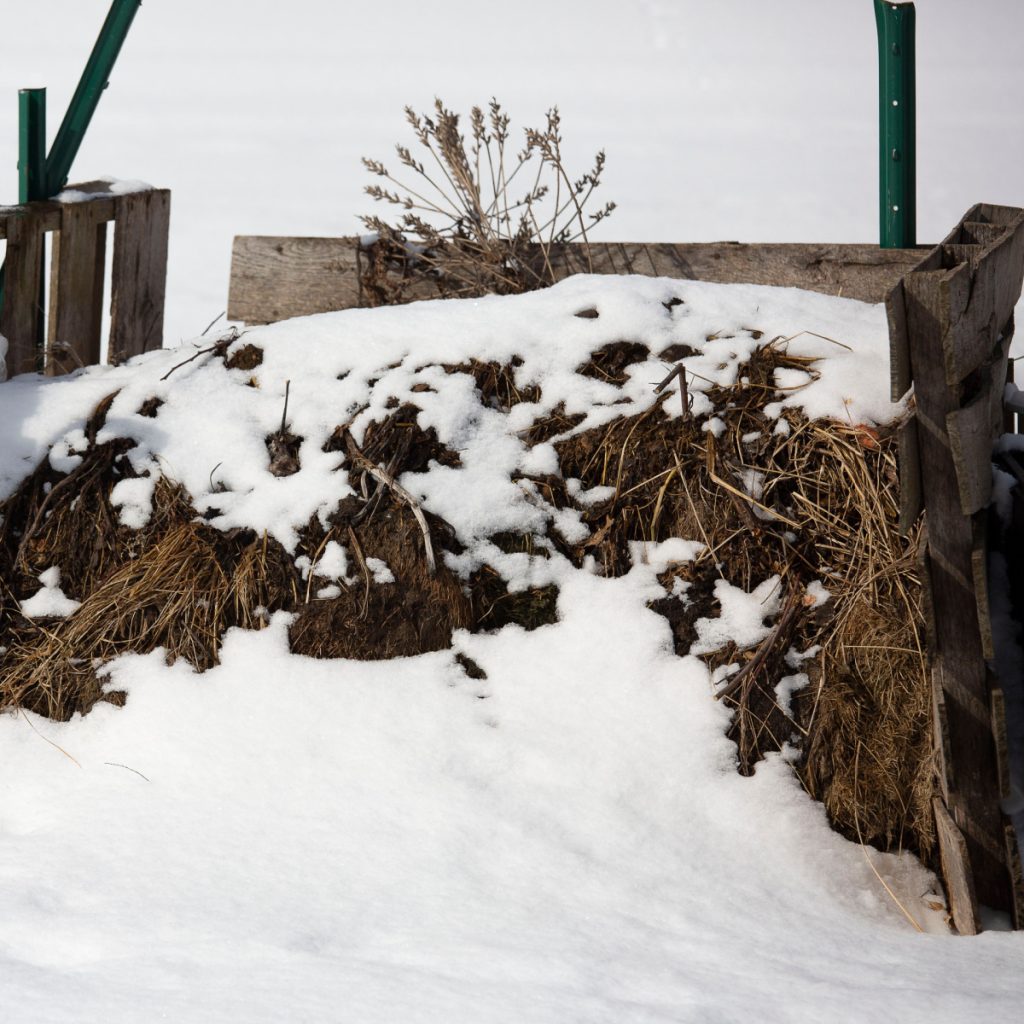
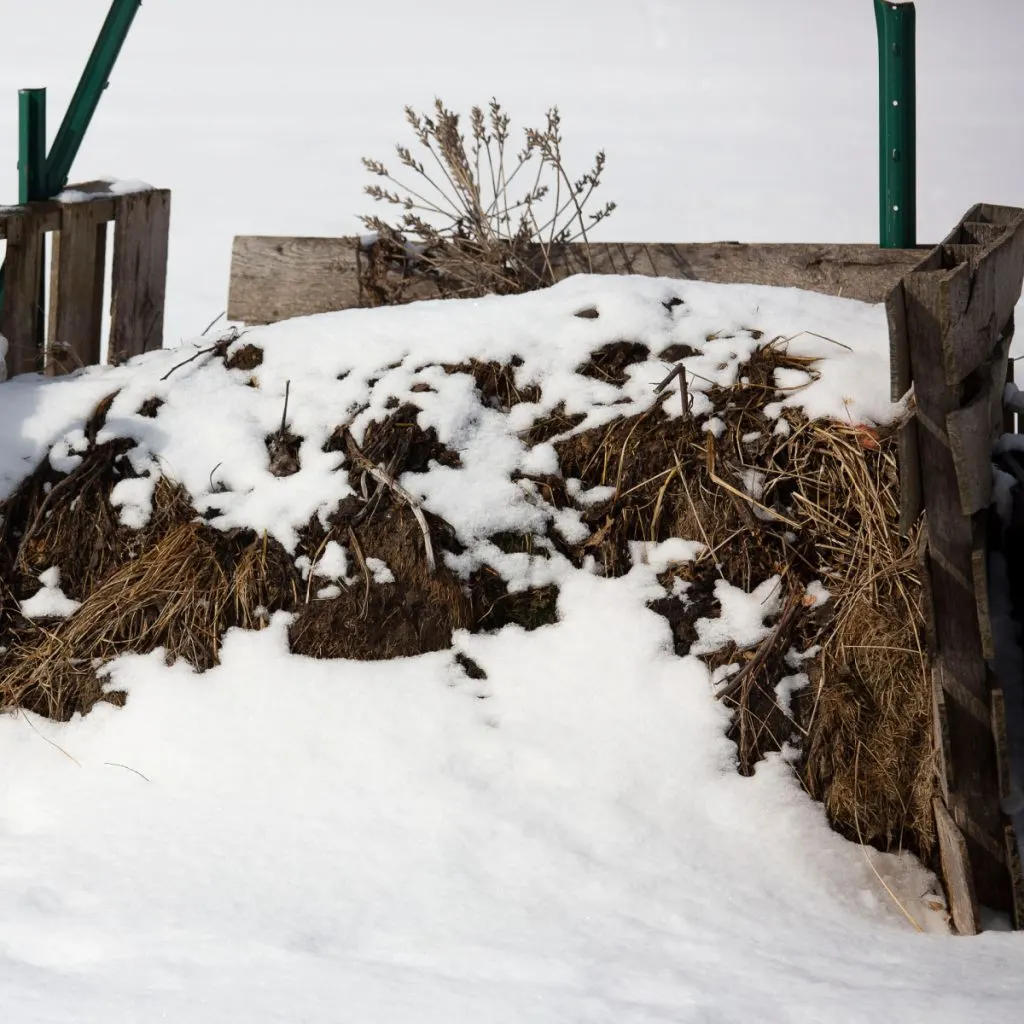
When cold weather settles in, it can feel nearly impossible to keep a compost pile going in winter. Freezing temperatures slow everything down. Kitchen scraps seem to just sit on the pile. And even worse, the top layer of the pile can harden into a block of frozen soil.
But the good news is that a compost pile can stay active even in the coldest months of the year. All you need to do is give it a little help! Winter composting takes a different approach than summer or fall composting. And with just a few simple strategies, you can keep your pile warm, working and breaking down all of those valuable materials.
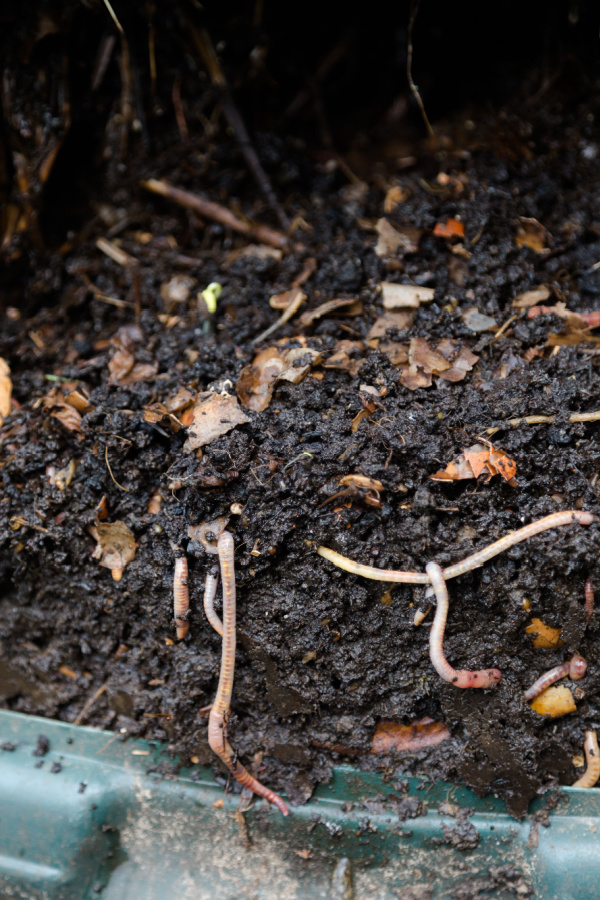
Keeping compost going in the winter matters more than most people realize. Even though decomposition slows down, it never fully stops. Microorganisms still work deep inside the pile where temperatures are warmer. That slow, steady breakdown helps you build up a rich supply of compost. And, one that will be ready to use in your garden beds as soon as spring arrives!

The key to maintaining an active pile in cold weather comes down to three things: keeping the pile insulated, giving the microorganisms enough food and air, and managing moisture so it doesn’t freeze solid.
The first big hurdle in winter composting is understanding why a pile slows down. Tiny organisms are the driving force behind decomposition, and those organisms need heat to stay active. As the weather cools, their activity naturally slows. When temperatures fall below freezing, the outside of the pile can freeze completely. It can make it look like everything inside the bin has stopped as well.
But even when the outer edges freeze, the inner core of a compost pile can stay much warmer. A large pile traps heat better than a small one, and well-balanced materials with greens (nitrogen) and browns (carbon) generate internal warmth as they break down. The more you help the inner core stay warm and protected, the easier it becomes to keep a compost pile going in winter.
This is also why the size of the pile matters. A small 2×2 pile will freeze much faster than a 3×3 or 4×4 pile. Larger piles simply hold heat better. The good news is that even if your pile is on the smaller side, insulation and proper layering can still keep it working.
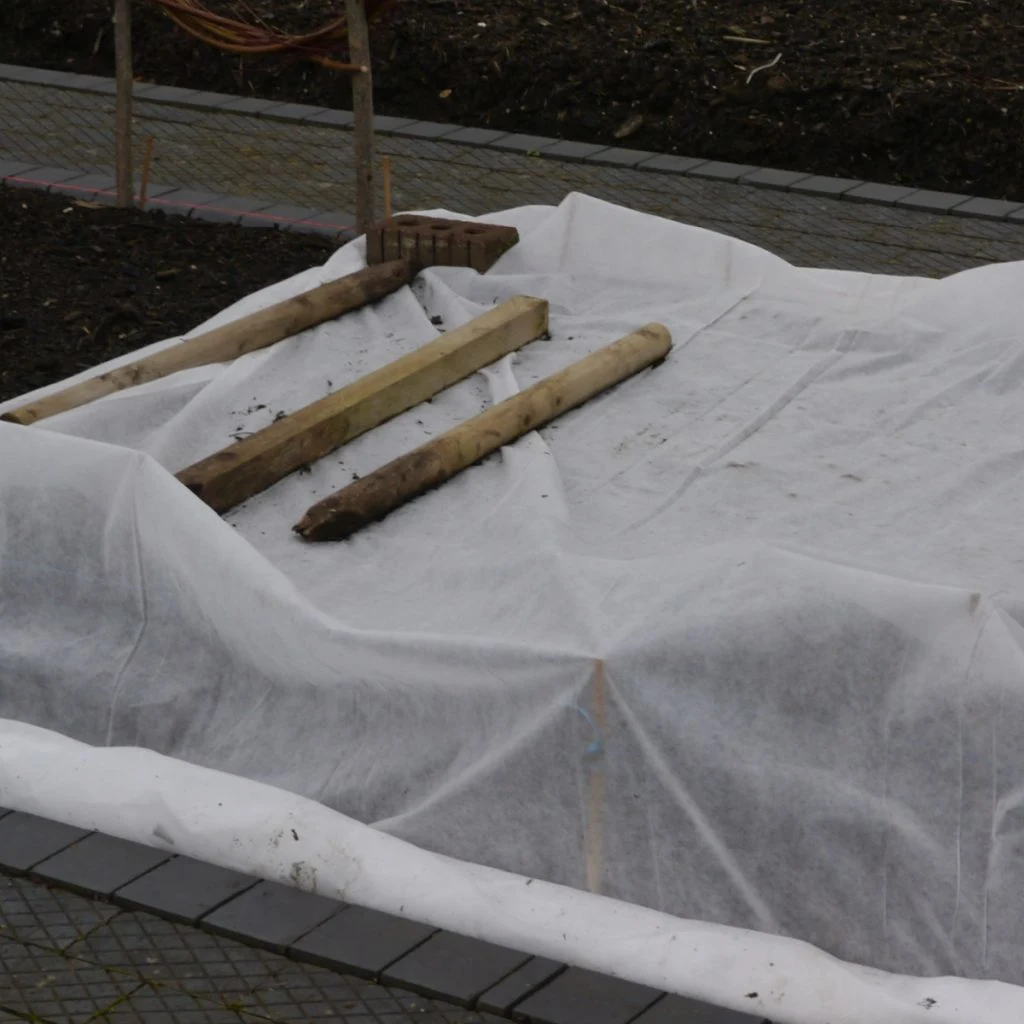
Insulation is the biggest secret of all when it comes to keeping a compost pile active in cold weather. If you want to keep a compost pile going in winter, focus on insulating it from top to bottom.
One of the easiest ways to do this is by surrounding the outside of the pile with a thick layer of leaves or straw. Leaves work especially well because they trap air and act as a natural blanket. Piling leaves around the sides, on top, and even underneath the pile can prevent cold winds from stealing away the heat a pile generates.
If your compost bin has openings or gaps, try lining the inside with cardboard or pieces of old carpet to help trap warmth. Even placing a few wooden pallets around the outside can create a windbreak. This will help protect the pile from harsh weather.
Another helpful trick is to cover the top of the pile. You can do this with burlap, old blankets, a tarp, or even pieces of cardboard. This doesn’t just hold in warmth. It also keeps rain, sleet, and snow from soaking the pile.
And if you have more than one active pile, winter is a great time to combine them. Merging two smaller piles into one larger one increases internal heat, helps microbes stay active, and makes the pile easier to insulate.
The balance of materials you add in winter needs to be slightly different than what works in summer. To keep a compost pile going in winter, you need a higher ratio of browns (carbon-rich materials) than you do during warmer seasons. Browns include dry leaves, shredded cardboard, paper, dried grass, straw, wood chips, and sawdust.
Kitchen scraps (mainly greens), tend to freeze quickly near the surface. But when mixed with browns in smaller portions, they warm up faster and break down easier. Browns help trap heat, keep the pile from becoming soggy, and prevent bad odors that can occur when food scraps sit too long in the cold.
If you have a bag or two of shredded leaves, winter is the perfect time to use them. Store them in a bin, a barrel, or a large garbage bag. Then, use them to cover every layer of food waste you add. A thick layer of leaves or cardboard over each addition helps protect the fresh scraps from freezing and keeps heat inside the pile.
Even better, browns help create small pockets of air inside the pile. Those pockets keep the pile from becoming too dense and allow oxygen to circulate. This is a big benefit when cold weather makes it harder for organisms to stay active.
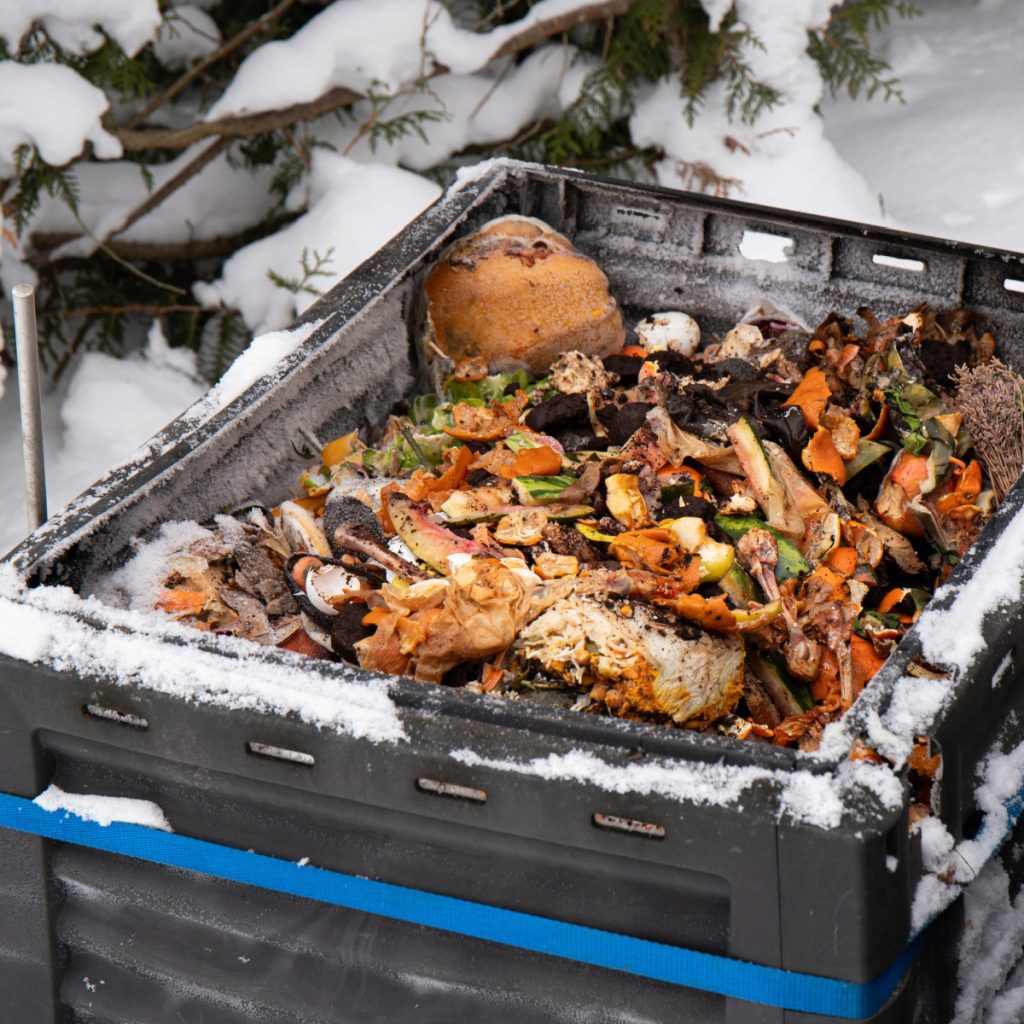
Adding kitchen scraps is an important part of keeping the pile active, but how you add them through the winter makes a big difference. To keep a compost pile going in winter, always bury new scraps deep in the warmest part of the pile, not on top where they will freeze instantly.
During winter, dig a small hole into the center of the pile, drop in your scraps, and cover them completely with a mix of browns. This keeps odors down, protects the scraps from freezing air, and places them right where the microbes are most active.
If your pile is frozen solid on top, use a shovel to break through the crust or pull back a corner of the cover. Once you reach the softer material inside, add your scraps and cover the hole again. Even just keeping one small section that you open regularly is enough to keep the pile fed all winter long.
Some gardeners use a small bucket or kitchen pail to collect scraps for a few days at a time, then take one larger load out to the pile. This keeps you from having to dig into the compost every day and reduces how much cold air reaches the center.
Winter moisture is another common issue when trying to keep a compost pile going in winter. Too much snow or freezing rain can soak the pile, turn it heavy, and create thick frozen layers that trap cold air. On the flip side, a pile that dries out in cold wind will also slow down.
The goal is to keep the pile slightly damp – like a wrung-out sponge – but never wet and never bone-dry. A cover is the easiest way to control this. A tarp, piece of heavy fabric, or any waterproof cover keeps snow out while still allowing some air to move underneath.
If the pile becomes too wet, add more browns. Dry leaves, shredded cardboard, and sawdust are your best winter moisture balancers. If the pile seems too dry, pour a small amount of warm water down a center hole. Then, cover it quickly so the warmth stays trapped inside.
Compost piles don’t need frequent turning in winter. Turning exposes warm inner material to cold air and slows everything down. Instead, focus on layering scraps and browns, keeping the pile insulated, and adding moisture only when necessary.

Even though winter composting requires a few adjustments, the payoff is huge. By keeping a compost pile going in winter, you build up a valuable supply of nutrient-rich compost long before spring planting begins. That early compost can be used to top-dress garden beds, start seedlings, fill containers, and recharge tired soil.
Winter composting also cuts down on kitchen waste. And it keeps you in the habit of composting year-round. Instead of letting scraps go to waste, you build soil even on the coldest days of the year.
With the right insulation, good layering, proper moisture control, and consistent feeding, you truly can keep a compost pile going in winter with ease. For more winter composting ideas, check out our article: How To Compost Indoors All Winter Long With Ease – With An Electric Compost Machine!
Follow Our Facebook Page For Great Gardening Tips And Advice! This Is My Garden Facebook Page
This Is My Garden is a garden website created by gardeners, for gardeners. Jim and Mary Competti have been writing gardening, DIY and recipe articles and books and speaking for over 15 years from their 46 acre Ohio farm. They publish three articles every week, 52 weeks a year. Sign up today to follow via email, or follow along!
Did you know that you can save and recharge all of that old potting soil from this year’s hanging baskets and containers and reuse it again next year?
Potting soil is one of the most expensive purchases each and every spring for gardeners. Especially for those who love to fill their porches, patios and decks with hanging baskets and big flowering containers. Unfortunately, depending on the size of your pots, and how many pots you fill – you can go through a lot of bags in a hurry!
But here’s the good news – you don’t have to buy all new potting soil every year. Not when you can simply save your old soil at the end of each growing season and recharge it by composting it. It’s fast, easy to do, and best of all, can save you a small fortune!

One thing is for sure, you can’t just save this year’s potting soil and use it again next year. That is, not without first re-supplying it with energy.
Whether you grow flowering annuals, vegetables, or herbs in your pots or containers, they all take their toll on the power of the potting soil inside. Container plants drain the life from soil. And they can do it quickly in a single growing season.
Even the most fertile of potting soils will lose most of their nutrient levels by the end of summer. But in addition to losing its power, the soil also loses a lot of its structure. And as you will see below, along with nutrient levels, soil structure is incredibly vital when it comes to growing plants in pots successfully.
So what is soil structure and why is it so important? The structure of a soil is what allows it to hold moisture and nutrients. And when a soil has no structure, no amount of watering or fertilizing can help the plants that are growing in it.


Ever notice that by the end of the growing season the soil in your pots seems dry and flaky? And that when you try to water or even fertilize it just runs right through. That is usually because of two major issues. The first is that the plant is root bound – and the second is because the soil has lost all of its structure.
Good potting soil is filled with humus. Humus is rich, organic matter. And it’s what gives soil structure, or more importantly, the ability to absorb and hold water and nutrients. And once that humus begins to deteriorate from the soil, the soil will have trouble sustaining life.
Although you can throw all of your old potting soil into your regular compost pile to recharge it, it’s far better to compost all of your potting soil separately – and for two very important reasons.
For starters, a traditional compost pile is going to leave you with only compost. And as amazing as pure compost is, you can’t simply fill your pots and hanging baskets with it to grow your plants next year. Unfortunately, pure compost is too rich and loose.
Not only will it likely burn plants, it also wouldn’t hold them up without the help of added soil structure. The second reason not to put your old potted plants into your regular compost pile is that the pile won’t break down fast enough with the other compost materials to be ready to reuse in the spring.
A traditional compost pile can take a long time to break down all of its various ingredients. Whole leaves, garden scraps, twigs and other yard waste simply can’t decompose fast enough to be ready by next spring to use. And so once again, you will be buying all new potting soil!
But by creating a stand-alone used potting soil compost pile you can change the game. Instead of adding anything and everything, you add only small ingredients that not only break down fast, but power up the soil fast too.
With this simple method, by early spring, you will be left with a pure potting soil mix that is full of life – and is perfect for planting up all of your pots, containers and hanging baskets!
You can create a potting soil compost pile anywhere. In a corner of your garden, in a flowerbed, or of course, in a traditional compost bin. Although you can simply pile the soil up, if you contain the pile with a small screen or fence, it will help it heat up a bit faster.
With a potting soil compost pile, you want to build it all at once. As you will see in a moment, you can still add some materials that break down quickly later on, but building the pile all at once is important to its overall success. This allows it plenty of time to break down and be ready for you next spring.
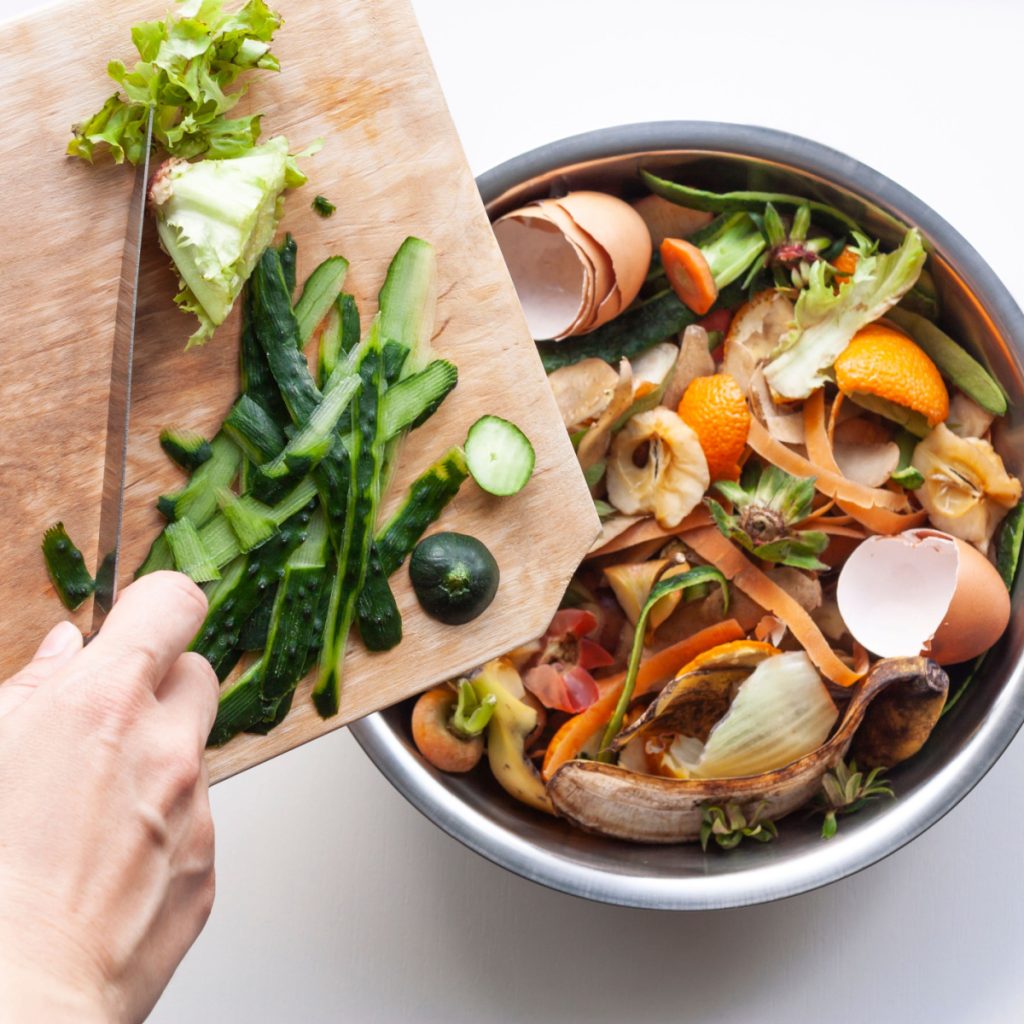
Begin by dumping all of your old potting soil into one single pile. It’s okay to put in the roots and plant materials that grew in the container, but chop them up first. The smaller the material, the faster it will decay.

Once your pile of used potting soil is in place, it’s time to add in materials that can recharge it. You will want to add enough new material to double the size of the pile.
This will provide enough energy to the pile as they all break down and decay to fill the old potting soil with nutrients, humus and structure. The good news? In the fall – finding those materials couldn’t be easier!
There are two keys to success when adding additional potting soil compost pile materials. The first is to only add materials that are full of nutrients and break down quickly. And the second is to make sure those materials are as finely chopped as possible.
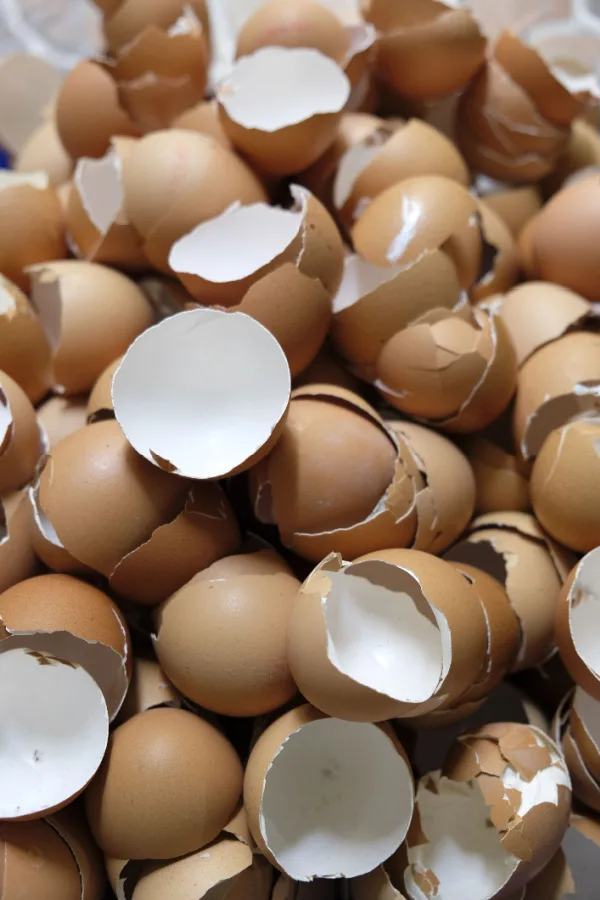
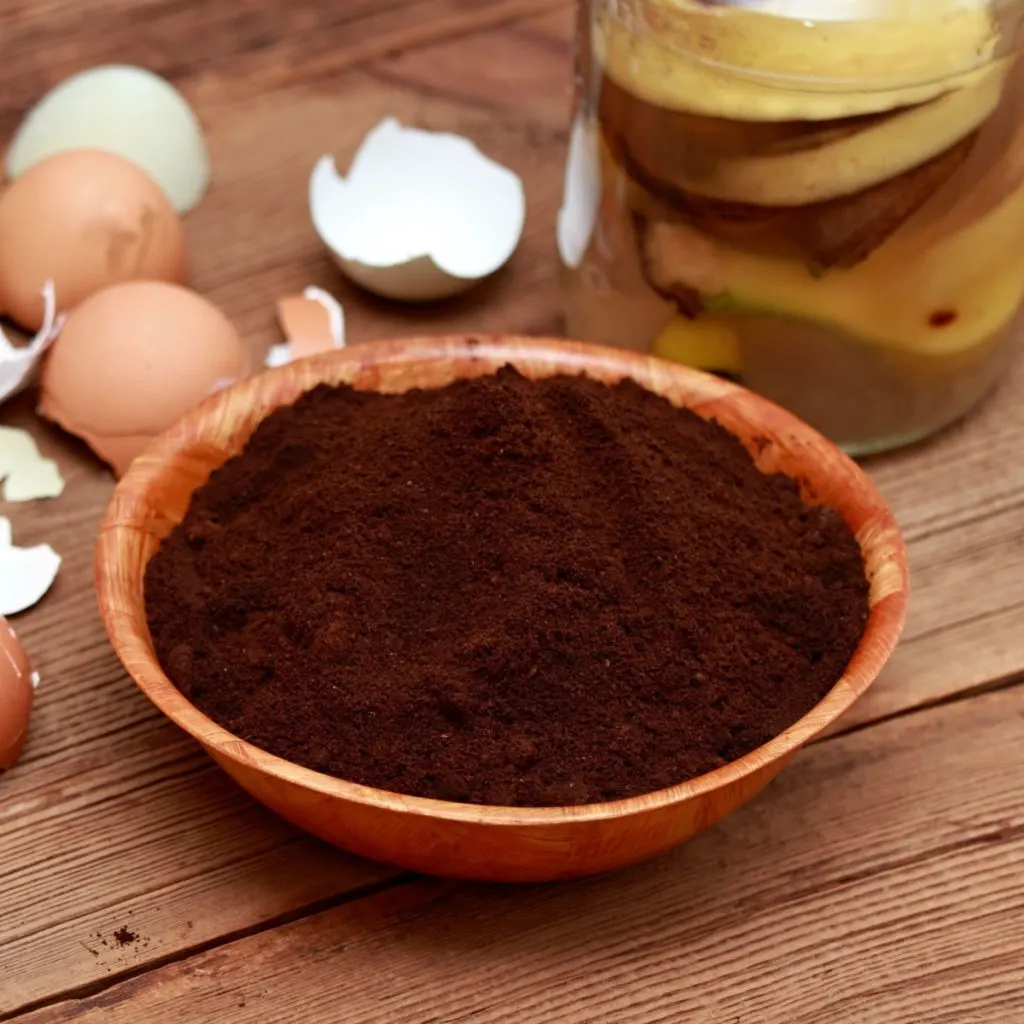
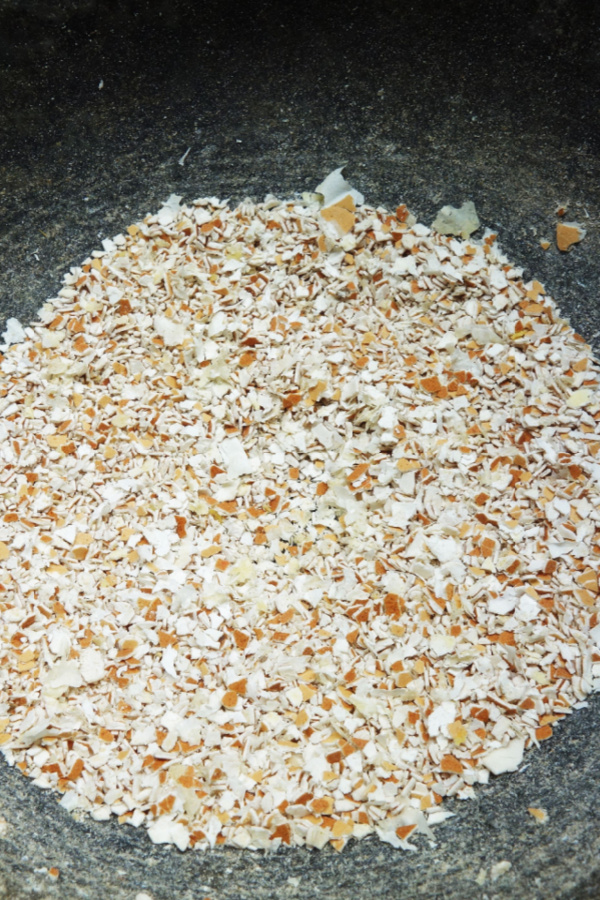
Two of the best to add are green grass clippings and finely shredded leaves. If you have a bagging attachment, this makes collecting and shredding a breeze. Other great additions are finely shredded vegetable scraps, coffee grounds, and pulverized egg shells. Make sure the egg shells are completely ground to break down into the pile.
In addition to these materials, now is the time to add in a bucket full of compost – or a compost starter. Compost is teeming with bacteria that will help break down and heat up materials fast. If you can’t add compost, a compost starter will do the same trick. Product Affiliate Link : Jobe’s Organics 09926 Fast Acting Fertilizer Compost Starter

Now that your old potting soil pile is in place, it’s time to mix together all the ingredients to recharge it. The more you can turn your pile (once or twice a week is great, daily is best of all), the more quickly it will break down. Turning adds oxygen which the pile uses to heat up. Keep turning until winter weather doesn’t allow.
If your pile becomes overly dry, water it and mix the water in. The moisture is needed along with the oxygen to get the pile as active as possible. You want the pile to be slightly damp.
Although you don’t want to add big materials – continue adding in coffee grounds, pulverized egg shells and small scraps of vegetable peels. All of these will break down quickly. They will also continue to help the pile heat up. Do this as long as you can until winter freezes the pile over.
When spring rolls around, your pile should be teeming with nutrients and ready to grow. And you will be more than happy to not have to buy all of the potting soil from scratch! As a side note, many add in worm castings or a bit of new potting soil in the spring to help recharge the soil even more before using.
Here is to recharging your old potting soil this year – and to saving big on your gardening budget next spring! For more on fall composting, check out our article: How To Create The Perfect Fall Compost Pile – Have Compost Ready For Next Spring!
Follow Our Facebook Page For Great Gardening Tips And Advice! This Is My Garden Facebook Page
This Is My Garden is a garden website created by gardeners, for gardeners. Jim and Mary Competti have been writing gardening, DIY and recipe articles and books and speaking for over 15 years from their 46 acre Ohio farm. They publish three articles every week, 52 weeks a year. Sign up today to follow via email, or follow along!
Looking for the best way to get rid of your tomato plants after they die off in late summer or fall?
As crazy as it sounds, what you do with your tomato plants as they die off this fall – and how you dispose of them – can both have a huge impact on how well your tomato plants grow in your garden next year. And even more, it can also play a major role in the future performance of your other vegetable plants too!
Whether it be in a traditional garden, a raised bed or in a container garden, one of the most important chores a gardener can perform in the fall is to clear away their vegetable plants as they die off. And the faster the better!

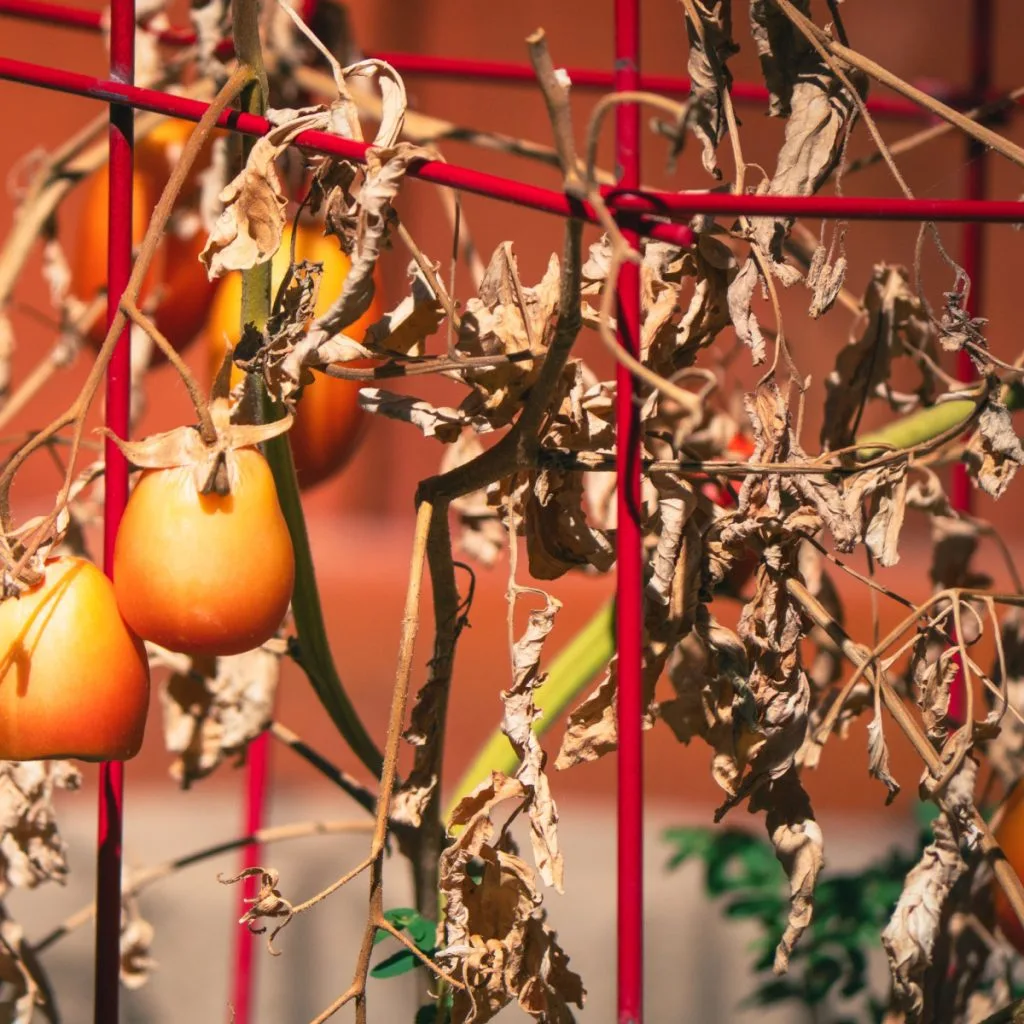
Leaving decaying plants in a garden space is the quickest way to create a whole host of future issues. As plants break down, they become easy targets for mold, mildew and disease to find a home. They also become excellent food and cover for a long list of garden pests.
Although this is true for all vegetable plants, it is especially true when it comes to tomato plants. The simple fact is, the longer you leave dying tomato plants in their space, the more danger you bring to next year’s crop.
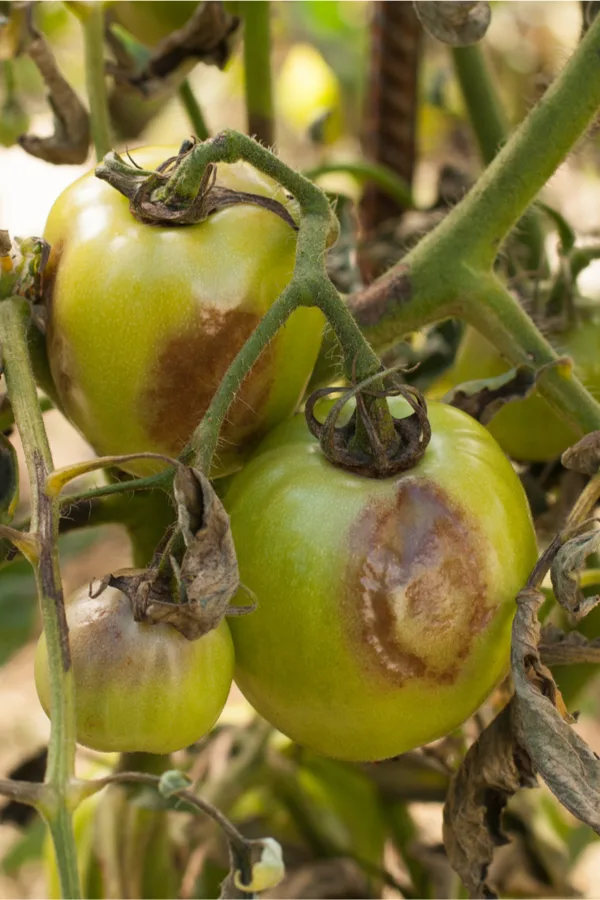
Whether it be mildew, blight, or a host of other ailments, tomato plants are one of the biggest carriers of disease. Unfortunately, the longer the plants stick around, the more likely they are to become infected. Not only infecting the tomato plants, but the surrounding soil and other vegetable plants in the process.
That is even more true when it comes to the dreaded soil borne disease of blight. As decaying foliage and fruit fall, they drop infected spores onto the soil surface. Spores that can then live for years to infect future tomato crops. See: How To Keep Tomato Blight Away
But rotting tomato plants also attract pests and insects by the thousands. Tomato hornworms, aphids, tomato root nematodes and a long list of other pests love to feast on decaying foliage and rotting fruit. And when they do, they often lay eggs that can come back to haunt next year’s crop even worse.
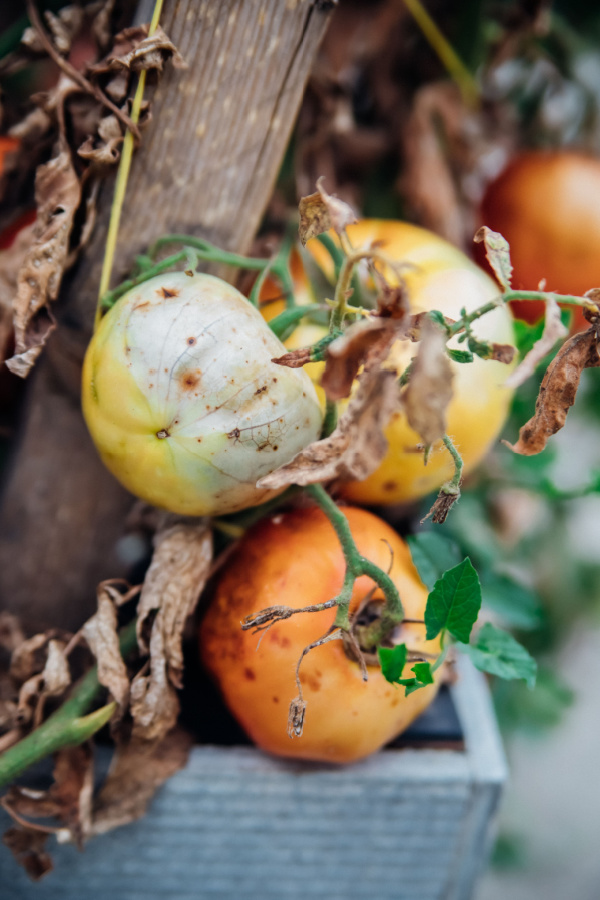

It’s obvious to see how important it is to get your old tomato plants out of their growing space as they begin to die off. But here’s the kicker – you also have to be careful with the plants once you take them out!
One thing you do not want to do with your old tomato plants and rotting fruit is place them in your home compost pile.
For most of the crops you clear from the garden in the fall, the compost pile is the perfect choice. After all, the plants break down, give back their remaining nutrients – and then help to create amazing compost. Compost that can then be used next year to help power a new garden with new plants.
Vegetable crops such as beans, greens and peas are a great example of this. Not only do they add good foliage that breaks down fast, they are also filled with nutrients. In addition, they have little chance of carrying disease to your pile.
But tomato plants are a different story. Because of the likelihood of carrying disease, they are best left far away from a home compost pile. In order to kill blight spores and other pathogens, a compost pile needs to get extremely hot. And for an extended period of time.
Unfortunately, home composting bins and piles simply do not have the size, air flow or ingredients to reach those temperatures. And that means the pathogens survive. And when the finished compost is used next year, they infect other plants as well.
So why leave out the rotting tomato fruits? For starters, they too can carry blight spores, mildew and other health issues to your compost pile. But even more, it’s best to leave them out to keep volunteer seeds from becoming an issue next growing season.
Just as with the pathogens, a home pile does not get hot enough to kill the seeds from the tomato fruits. And a single tomato can have hundreds of tiny seeds. When those seeds pass through the compost, that means they will sprout wherever it’s used to become next year’s weeding problem.
So with all of those dangers, what exactly is the best way to get rid of dying tomato plants and bad tomatoes? Obviously, the first key is to keep them as far away from your garden space as possible.
At the same time, simply throwing them in your weekly trash is such a waste. Especially when it is needlessly filling landfills with materials that still have value. With that in mind, here are three great alternatives:
Although you should not add tomatoes to your home compost pile, that doesn’t mean you can’t still compost them. After all, like all living plants, they still add valuable minerals and nutrients back to the soil when they break down. And this is exactly where trench composting works!

Trench composting is actually a great way to compost everything if you don’t have a compost pile. And is it ever easy! In fact, it’s as simple as digging a deep hole and burying the plant material. The plants then break down, and add their resources back to the soil.
With non-tomato materials, you can do this anywhere in your garden. But with tomatoes, it’s important to bury the materials away from the garden. It keeps your garden safe and allows you to dispose of your tomato plants with ease!
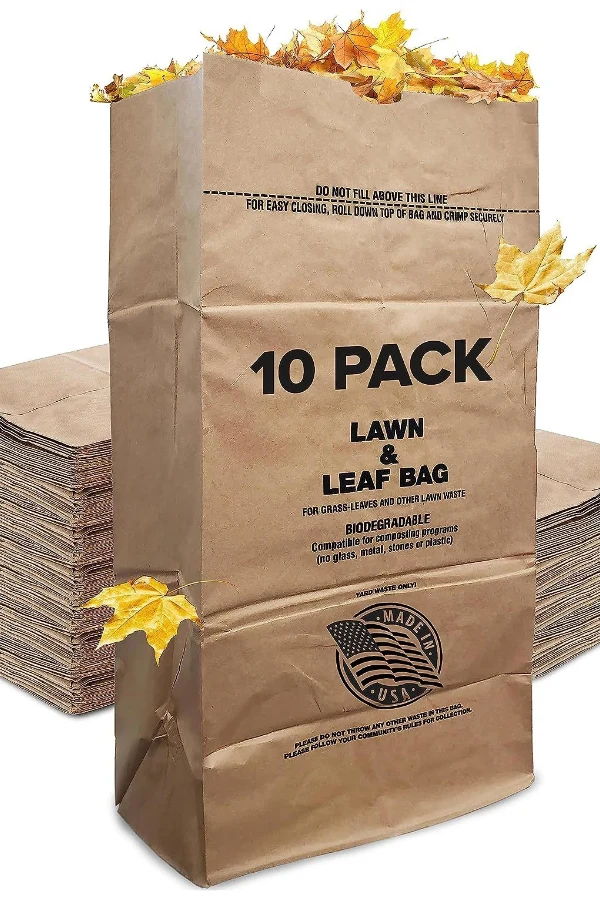
Another great way to get rid of old tomato plants after they die is at a community or local municipal composting facility. These facilities use high heat composting methods that kill off pathogens and seeds. The end result is perfectly safe and blended compost that is great for powering flowers and vegetables.
Simply clear the plants and place into approved compostable yard waste bags. Always be sure to clear any fruit that has fallen down to the soil as well to keep it out of your garden.
If you happen to have leaves and other yard waste and don’t have a home compost pile, these composting centers are a great option in place of simply throwing valuable organic materials to the curb to put in a landfill. Affiliate Product Link: Leaf / Compost Bags

Burning your plants in a fire pit or outdoor burn pile is another effective way to destroy plants and pathogens that can live in old tomato plants. The important thing here is following all local burn laws and rules.
If you live in an area where fire is a constant danger, this is obviously not a good solution. As for then using the ashes in the garden or in your compost pile, that is a matter of personal debate. Some experts and gardeners consider it completely safe, others play it safe and simply spread the ashes out away from the garden or their compost pile.
Here is to finding the best way to get rid of dying tomato plants from your garden this fall, and to keeping next year’s garden safe and ready to grow!
Follow Our Facebook Page For Great Gardening Tips And Advice! This Is My Garden Facebook Page
This Is My Garden is a garden website created by gardeners, for gardeners. Jim and Mary Competti have been writing gardening, DIY and recipe articles and books and speaking for over 15 years from their 46 acre Ohio farm. They publish three articles every week, 52 weeks a year. Sign up today to follow via email, or follow along!
Looking for an easy way to make compost tea at home – and fertilize your vegetable plants and flowers naturally with a dose of perfect power?
Plain and simple, there is no better and more economical way to power your vegetable plants and flowers naturally than to make and use your own homemade compost tea. And is it ever simple, fast and inexpensive to make. In fact, if you happen to have your own compost pile, you can make an endless supply all summer – for free!
The power of compost is undeniable. It overflows with all types of trace minerals and nutrients that plants need and love. Even better, those nutrients are easy for them to absorb. Because of that, compost can provide plants with a steady and easily absorbed flow of energy. Especially when it’s in liquid form!
Compost tea works in the same way as pure compost, but with a more “instant” power. Instead of building soil vitality, the tea harnesses all of the nutrients of compost into a very powerful liquid form. One that can then absorb into plants quickly.
But perhaps what makes compost tea so amazing is that when you apply it, the power can soak into plants in two unique ways – both through the roots as it soaks into the soil, and the stems and leaves as it absorbs into the plant.
As an all natural fertilizer, compost tea can be applied every week or two to give plants a steady supply of natural nutrients. All without the worry of overpowering plants with too much energy, or of using a commercial fertilizer that may contain questionable non-organic ingredients.
In addition, compost tea actually improves the soil where it is used. Many times, commercial fertilizers can contain heavy salts that over time will leave soils weaker. The end result is that it can take even more fertilizer each time to produce the same result, and the soil only becomes weaker.
Homemade compost tea on the other hand, contains all-natural minerals and nutrients. Instead of depleting resources or building up saline levels, it actually improves the soil, all while powering your plants in the process.
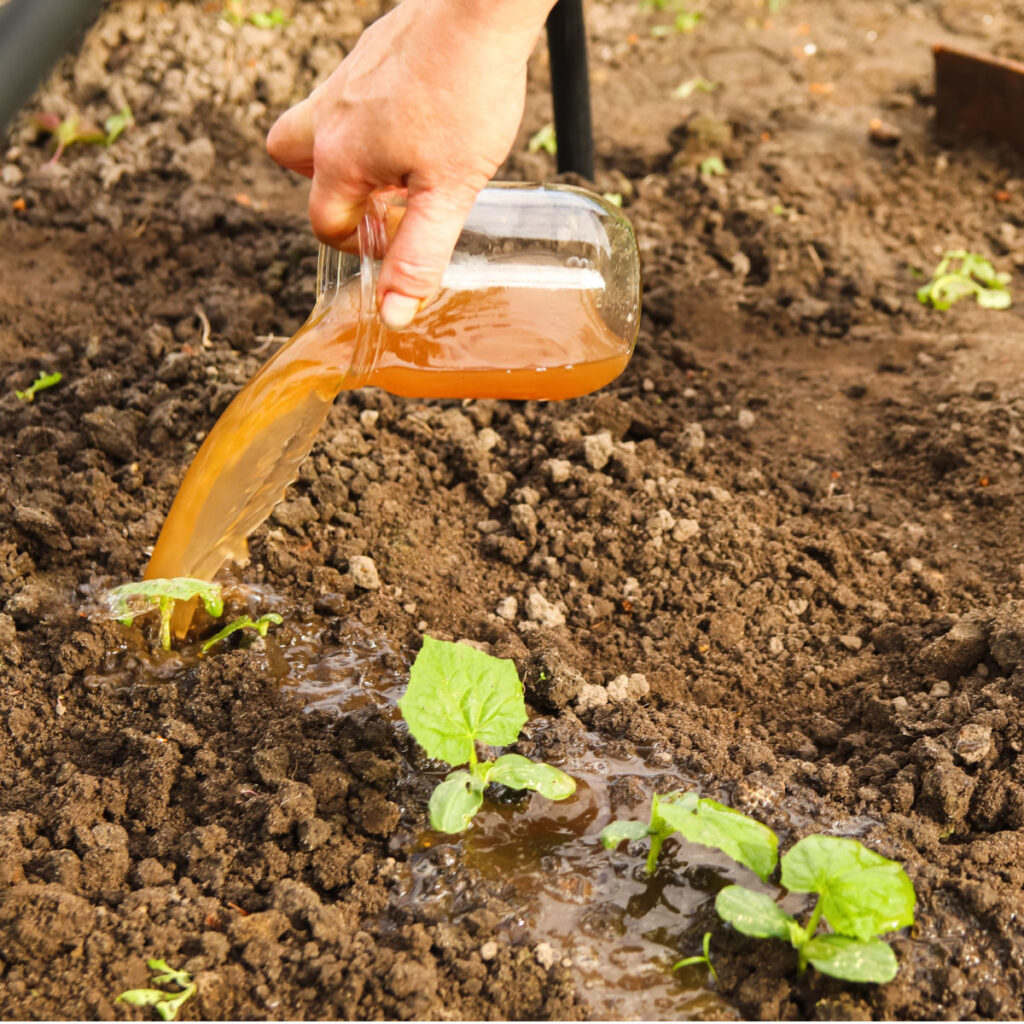

Perhaps the best thing about compost tea is that you only need two ingredients to make it – compost and water. Homemade compost tea can be applied with a simple watering can, a gallon jug, or even a pump sprayer. By simply watering plants, the power heads right to where it’s needed most.
So how easy is it to make? As you will see below, it’s easier than you can ever imagine! And, contrary to all of the conflicting information you might find on-line, you don’t need fancy or specialized equipment to make the best all-natural liquid fertilizer around.
In fact, you don’t even have to have your own compost pile. You can just as easily make compost tea from bagged or bulk compost from your local nursery, garden center, or purchasing bagged products on-line. And yes, it will create a liquid fertilizer that is just as potent and effective – and at a fraction of the cost of buying fertilizer!
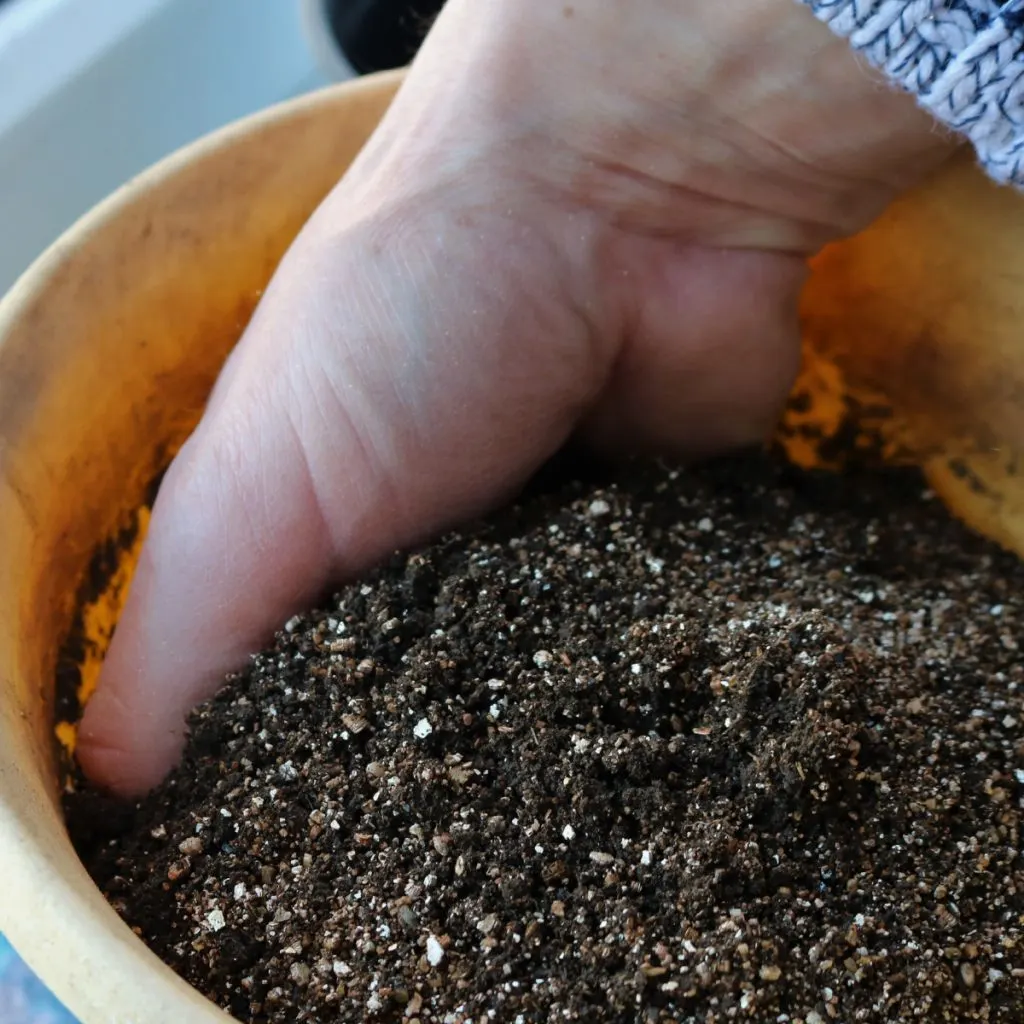
Although you can find a lot of recipes and equipment for making compost tea, the formula and equipment you need for success is simple. All you need to make your own great liquid fertilizer is a 5 gallon bucket, compost, water and a stirring stick.

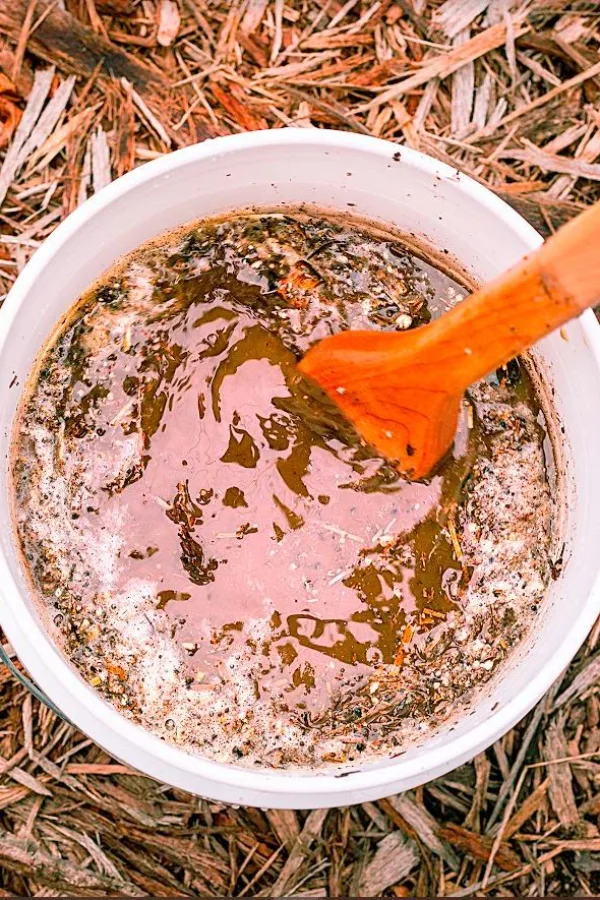
To start the process, begin by filling a 5 gallon bucket half-full of compost. If you have a backyard compost pile or bin, always select compost that is either completely decomposed or very close to finishing.
When materials have not had enough time to break down, the compost will not have the same potency or nutrient level. In addition, if fresh materials or manure have been recently added to your pile, they can actually be too potent.
If using bagged compost, always make sure you are using a product that contains 100% pure compost and not added fillers. Bags of traditional compost, composted manure or even mushroom compost all yield excellent compost tea. In fact, they often are so pure and sifted, they are even easier to use than homemade compost. Affiliate Product Link: Charlie’s Bagged Compost
Once you have your 5 gallon bucket half-filled with compost, fill the bucket to within a few inches from the top with water. As you fill the bucket, stir the compost and the water with your stirring stick. This will allow the water to start mixing with compost and begin the process of absorbing the compost’s nutrients.
One note of caution on selecting your source of water. It is extremely important to use untreated water when creating compost tea. Chlorine and other chemicals that can be present in treated water can alter the tea and even harm plants in some cases.
Listen In Below To Our Podcast On Making & Using Homemade Compost Tea!
Well water (without a water softener), distilled water and rain water are all excellent choices for compost tea. If you must use treated water, allow it to sit out a few days. This will help to let any chemicals present in the water leach out.
Once you fill and stir your bucket of tea for the first time, place in a shady area. This will help to keep it from losing valuable liquid from evaporation. Do not put a tight lid on your container. The air flow will help it to absorb better while the compost is in the bucket. If need be, place a screen over if you need to keep critters out.
It takes around 7 days for the nutrients from the compost to fully absorb into the water. Try to stir the mixture at least once a day to help re-agitate the solution. Stirring twice a day is even better.
After a week, strain the liquid through a cloth or old kitchen colander. As for the leftover compost – don’t throw it out! You can either use it as a mulch around plants or place it back into your compost pile to recharge.
Once strained, the resulting liquid becomes an amazingly balanced fertilizer perfect for applying to plants. In fact, compost tea is great for boosting the vitality of nearly any plant you can imagine. From vegetable plants, herbs and flowering annuals, to perennials, shrubs, bushes and more.
The tea is balanced enough that you can apply it to plants every seven to ten days. This will help to keep them energized and growing strong. All, of course, without the worry of giving your plants too much energy.
You can keep compost tea for a month or more if needed. Store with a lid to keep from evaporating. For more on composting – check out our article: How To Create A Great Summer Compost Pile – 3 Simple Secrets To Make Compost Fast! And for more ways to power your plants naturally, see: 5 Vegetable Plants That Love Banana Peels – How To Fertilize Garden Plants With Bananas!
Follow Our Facebook Page For Great Gardening Tips And Advice! This Is My Garden Facebook Page
This Is My Garden is a garden website created by gardeners, for gardeners. Jim and Mary Competti have been writing gardening, DIY and recipe articles and books and speaking for over 15 years from their 46 acre Ohio farm. They publish three articles every week, 52 weeks a year. Sign up today to follow via email, or follow along!
Looking for the best way to safely use chicken manure to recharge and power your garden soil and plants?
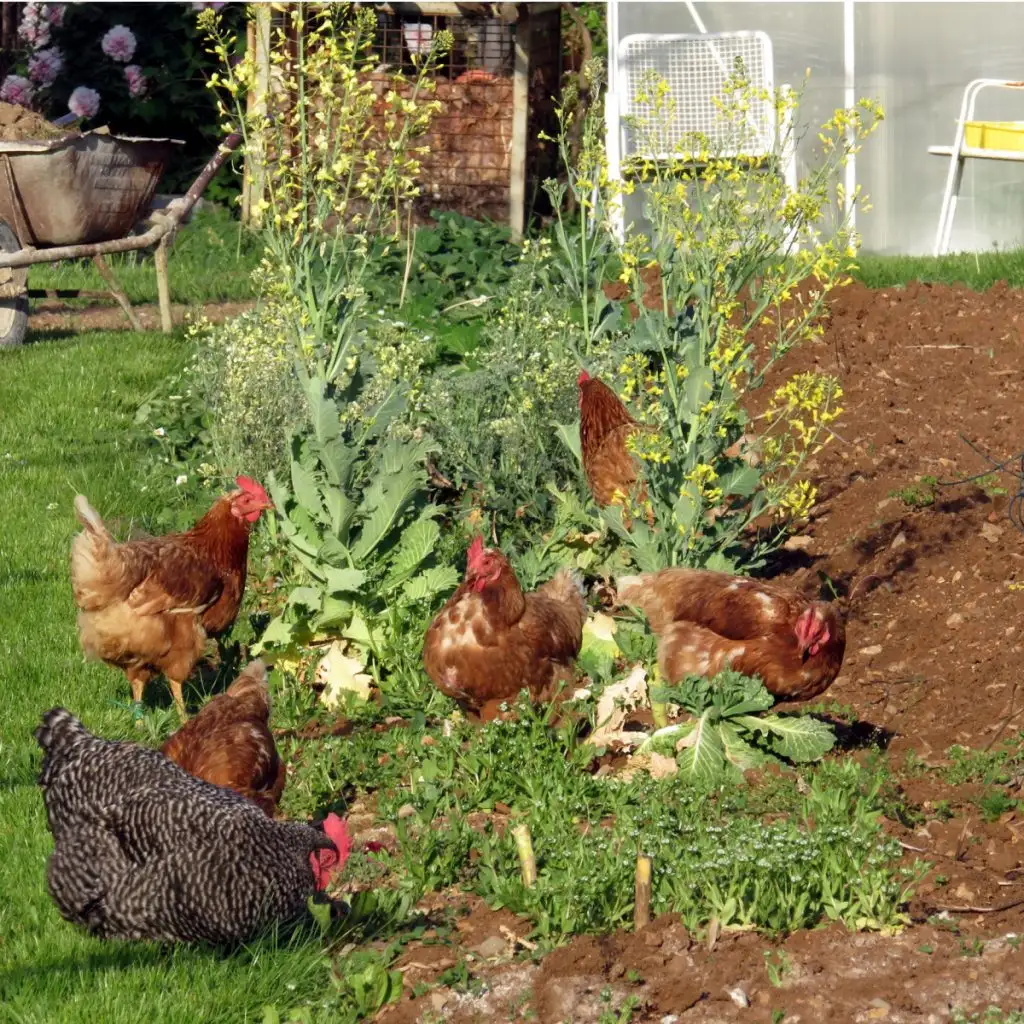
With more and more gardeners raising a few backyard chickens – or having close neighbors doing so – the availability of chicken manure is certainly soaring. And can that manure ever help to revitalize and rejuvenate tired garden soil!
Chicken manure can not only provide your garden soil and plants with amazing nutrients, it can do so for free. Especially if you happen to have your own backyard flock of chickens. But one thing is for sure – it’s important to know how, when and where you can use it in your vegetable garden to keep you and your plants safe!


Most importantly of all – chicken manure, when used properly, is an incredibly safe way to power your garden. Apply it correctly and it can help your plants grow better and increase yields. But use it wrong, and it can harm the plants growing in your garden and even make them unsafe to consume. The good news? It’s actually very easy to use in a totally safe manner – and in three great ways!
It’s truly amazing just how much raising a few backyard chickens can improve your garden. Not only because of the manure they can provide to power your garden, but how much they can help with weeds, pests and more! See our article: How Chickens Can Eliminate Ticks
Chicken manure offers an incredible array of nutrients for your garden and plants. In fact, it consists of more than ten essential plant nutrients. At the top of the list are the big three of Nitrogen, Phosphorous and Potassium.
These 3 nutrients are the basis for nearly every man-made fertilizer around. Nitrogen is key in promoting strong foliage and plant growth. Phosphorous is extremely important for blooms and fruiting. Meanwhile, potassium helps a plant to stay strong and vibrant, and is big in protecting against disease.

Together, the powerful combination of all three can energize plants and soil. But plants need other nutrients and trace elements to survive and thrive. And it just so happens, chicken manure also contains those as well – in the form of Calcium, Sulfur, Copper, Zinc, Iron, Manganese, Magnesium and more.
Even better, chicken manure releases those nutrients slowly as it breaks down. That means it keeps the soil fertilized for a longer time, whereas man-made fertilizers need to be applied more often. Last but not least, as it breaks down, it adds high levels of humus, building better soil structure in the process.
The most common and easiest way to use chicken manure in the garden is as a compost/fertilizer. Fortunately, turning chicken manure into incredibly powerful compost is a simple process. This is not the same as adding to a compost pile, but making an entire pile from chicken manure and the bedding.
Of course, it’s important to note, whenever you work with any manure or bedding, always take appropriate safety precautions. A dust mask and gloves can help keep you safe from any harmful dust – and a lot cleaner too!
Begin by collecting the shavings, straw and the manure. You want your pile to consist of about 1/3rd manure and 2/3rds bedding or straw. If there is too much manure, you can add additional straw or even grass clippings to get the right ratio.
When building your pile, try to alternate layers of the manure and bedding, straw or grass clippings. Doing so will generate more heat quickly. To keep the pile manageable, build it to a size of about 3′ x 3′ x 3′. This will be large enough to create good heat, but not too large to work.
The internal temperature of the pile will increase quickly. You can turn and mix the pile weekly to keep it composting hot. Repeat this process for at least 5 to 6 weeks to allow the pile to break down. After that, allow the pile to sit and cure for thirty to sixty days.
It will continue to break down and when it is ready, it will smell fresh, more similar to soil. At this point, the manure compost can be used in the garden!
While adding manure compost to your vegetable garden, you can spread it over the entire garden area to power plants and build soil. If putting around plants, keep a few inches away from the stem to avoid overpowering the plants.
Side dressing with chicken manure is another great way to use it – especially when it comes to powering plants. But it is very important that the manure is aged a bit first. When using it for side dressing, complete composting is not required.
One thing is certain, fresh chicken manure should not be used in an active vegetable garden. It should be aged for at least four to six weeks before application as a side dressing. Fresh manure can contain bacteria that can be harmful to you and your plants. It can also be too hot with nutrients and burn your plants.
When applying partially aged chicken manure as a side dressing, place the manure about 8 to12 inches away from the plants. You can place it beside plants growing in rows or in a ring around plants. Doing so ensures the plant absorbs the most nutrients from the chicken manure.
Even partially aged chicken manure can burn the plants, so be sure to side dress and not pile up around the plant too close. Apply side dressing early in the growing season before fruit has formed. This will power early growth and keep the manure from being too fresh around vegetables.
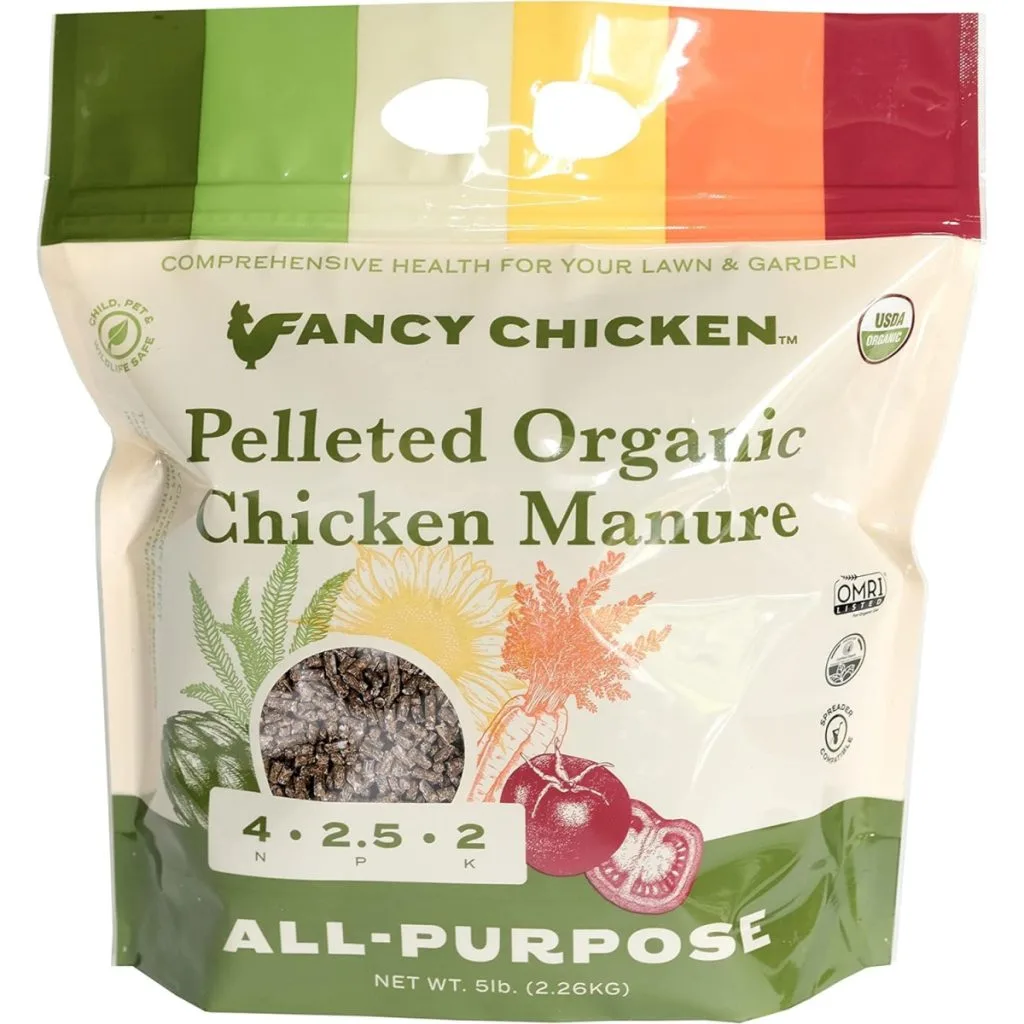
Side dressing is perfect for sweet potatoes, peppers, corn, tomatoes, squash, pumpkins and more. The high N-P-K promotes strong growth and good fruiting as well. If you don’t have access to chicken manure, dried commercial chicken manure pellets work great as an alternative. Affiliate Product: All-Purpose Manure – 5lbs Pelleted Dried Organic Chicken Manure

Finally, one of the safest, easiest and most effective ways to use chicken manure is as a cover crop soil builder. The ideal time to do this is in the fall when your garden has completed its growing season. This method builds a lot of nutrients into your soil for the following year’s garden.
After the last harvest of the growing season, apply a few inches of fresh chicken manure over top of the soil. A good rule of thumb is to use about 1 pound of chicken manure for every 1 square foot of garden area. Depending on how large your garden space is, you can mix it into the soil by hand, or till it into the soil.
In this instance, because it will have all winter to mix and age into the soil, you can use fresh manure. You never want to put fresh manure on your soil unless you won’t be planting for at least 3 months. This ensures that by the time you plant, the chicken manure mixes into the soil well, and the acidic nature of chicken manure reduces and will be safe for plants to grow in.
While handling chicken manure, whether to create manure, tea, compost, or anything else, it is a good idea to always wear protective equipment. Protective equipment is necessary because chicken manure can contain various bacteria and viruses.
In addition, whether using manure in your garden or not, you should always wash vegetables before use. This will help wash any bacteria and other harmful residues that can be from rain, watering, or present in the soil
Remember that fresh manure should go in the vegetable garden at least 90 to 120 days before planting. Here is to finding the best way to use chicken manure in your garden – and recharging your soil for free this year!
Follow Our Facebook Page For Great Gardening Tips And Advice! This Is My Garden Facebook Page
This Is My Garden is a garden website created by gardeners, for gardeners. Jim and Mary Competti have been writing gardening, DIY and recipe articles and books and speaking for over 15 years from their 46 acre Ohio farm. They publish three articles every week, 52 weeks a year. Sign up today to follow via email, or follow along!
Looking for a few simple ways to recharge and power up your garden soil before spring planting?
As winter slowly begins to wind down, gardeners everywhere begin to get excited for the new growing season ahead. But before you ever plant that first seed or transplant in the ground this spring – there is one incredibly important task to take on – and that’s recharging your soil!
Unfortunately, if you will be gardening in the same space as last year – your soil might not be ready to power your plants to a big harvest. The crops you grew last year can all but deplete essential nutrients, leaving the soil far less fertile. And even more – leave it with far less structure and stability.

Recharging soil isn’t just about adding back the nutrients it lost. It’s also about restoring the structure, microorganisms and life beneath the surface. Healthy soil supports strong plant growth, wards off disease, and helps retain moisture.
Every plant that grows in your garden takes nutrients from the soil to fuel its growth. Tomatoes, peppers, zucchini, and other popular crops are heavy feeders. Because of this, they consume large amounts of nitrogen, phosphorus, potassium, calcium, and other essential elements.
By the time a single growing season ends, the soil’s nutrients can be all but gone. And along with it, the soil become weaker as well. Soil will become more crumbly as organic matter disappears. When it does it has trouble holding moisture and nutrients. It also struggles to maintain healthy bacteria and structure.
Unfortunately, adding basic fertilizers in-season simply isn’t enough to overcome tired soil. If the soil is weak and has little structure, there is nothing to hold the fertilizer or moisture in long enough to help plants. And because of that, your plants will still suffer.
The good news is that recharging and adding life, structure and nutrients back to your garden soil isn’t difficult. In fact, with three simple ingredients – compost, eggshell powder, and coffee grounds – you can transform your tired soil into a nutrient-rich haven for plants. But how you use these three ingredients matters greatly!
Applying compost, eggshell powder, and coffee grounds across the entire garden may seem efficient, but it’s not the most effective approach. Plants absorb nutrients primarily through their root zones, so concentrating amendments where roots will grow- like in the actual growing rows or planting holes helps deliver the most benefit.
Whether you grow in raised beds or a traditional garden, it’s important to make the most of these materials when putting them in your garden soil. With that in mind – here is a look at why and how to use each in your garden to re-energize your soil.
Compost is often called “black gold” for a good reason. It’s packed with nutrients, improves soil structure, and feeds beneficial microbes that create a vibrant underground soil system.
Compost provides numerous benefits to your soil. It delivers essential nutrients, such as nitrogen, phosphorus and potassium. It also holds a large amount of trace minerals, all of which are crucial for robust plant growth.
But well beyond nutrient enrichment, compost also improves soil structure. It does this by adding large amounts of humus to the soil – breaking up heavy soils, while giving sandier soil types more heft. And better yet, the organic matter in compost acts like a sponge. Because of this it significantly improves the soil’s ability to retain moisture.
Unfortunately, most gardeners don’t have an unlimited supply of compost – so it’s important to get the most out of what you have!
For maximum benefit, spread a 2-4 inch layer of compost directly over your planting rows before you plant. This is far better than applying to the entire garden, as it puts the compost right where it’s needed most.
Then, when planting seedlings, mix a few handfuls of compost into each hole to give plants a nutrient boost from day one. For seeds, put an inch or two of compost all along the bottom of your seed trench.
The compost on top will leach it’s nutrients down into the soil. As it breaks down, it will also add structure and humus. Meanwhile, the compost directly in the planting and seed holes will provide easy root growth and a ready-to-go supply of nutrients.
You can also use compost one final way during the growing season – as a side dressing. Once plants establish, add a few inches of compost around the base as a side dressing. This too will help to supply ongoing nutrients every time it rains or you water.
Eggshells are a simple, cost-effective way to add calcium to your garden soil. Calcium plays a crucial role in cell wall development, helping plants grow strong stems. Even more, it helps plants stave off soil deficiencies that cause blossom end rot in tomatoes and peppers.
But just like compost, how you use egg shells can make a big difference in just how easily your soil and plants can take it in. Partial egg shells can take months to break down – but egg shell powder can help almost immediately!
By simply taking time to wash, dry and grind up the egg shells with a coffee grinder or blender, you can create ultra-fine egg shell powder. This powder can then be sprinkled on top of your garden soil to start leaching calcium down into the soil. Affiliate Link: Electric Coffee Grinder
Much like with compost, it’s best to concentrate your egg shell powder in the soil areas where you will directly be growing plants. Then, as you plant your transplants or seedlings, add the powder into the planting holes or rows.
To recharge garden soil for transplants, add one to two tablespoons of egg shell powder. For seedling rows, sprinkle 1/8th inch all along the trench before sowing seeds. Last but not least, you can also sprinkle a few tablespoons of powder on top of the soil around plants in season. Again, the nutrients will leach down to help power growth. For more on this, see our article: The Best Way To Use Egg Shells In Your Garden

Coffee grounds are one of the most excellent natural sources of nitrogen – and organic matter. The nitrogen in spent coffee grounds is essential for powering plant growth. It can be incredibly beneficial in the early growth of nitrogen-hungry crops like tomatoes, corn and peppers – and the overall growth of lettuce, spinach, kale and other salad crops.
The organic matter in coffee grounds mixes quickly with the soil. It not only powers it but helps add structure, all while improving better water retention.
Before your garden season begins, you can actually just “plant” spent grounds and the coffee filter they came in directly into your garden soil. The paper filters are bio-degradable and help to add more humus to the soil. And they break down fast as well!
Again, try to place the grounds and filters into your main planting rows and areas where it can do the most good. When planting transplants, place two tablespoons of spent grounds in every planting hole. Like egg shells and compost, this will put power right at the root level from the get-go.
One final note on coffee grounds – stay away from decaffeinated and flavored grounds. They can contain additional chemicals that can be harmful to soil and plants.
As you can see – recharging your garden soil doesn’t have to require expensive fertilizers or complicated techniques. By simply using compost, eggshell powder, and coffee grounds, you can recharge the soil with powerful nutrients and help rebuild its structure.
Follow Our Facebook Page For Great Gardening Tips And Advice! This Is My Garden Facebook Page
This Is My Garden is a garden website created by gardeners, for gardeners. Jim and Mary Competti have been writing gardening, DIY and recipe articles and books and speaking for over 15 years from their 46 acre Ohio farm. They publish three articles every week, 52 weeks a year. Sign up today to follow via email, or follow along!
Did you know that winter is actually the perfect time to recharge your raised bed soil – and even better, that you can do it for free with three simple by-products that come from your kitchen almost every day?
After a long spring, summer and fall of growing everything from flowers to vegetable plants, the soil in raised beds can be all but lifeless. And without re-energizing that soil before planting again next spring, it’s more than likely your plants will struggle to thrive.
But as the soil in your raised beds sits idle over the winter months, you can take advantage of the downtime to replenish its nutrients, improve structure, and prepare it for a flourishing growing season ahead. And you don’t need to look beyond your kitchen to do it!

The good news is that you don’t need expensive fertilizers or soil additives to recharge it. As it turns out, your kitchen can provide all you need with 3 perfect ingredients. And even better, all from things you usually throw into your compost pile – or simply throw away!
Coffee grounds, pulverized eggshells, and banana peels are three everyday kitchen scraps that, when applied to your raised beds can quickly return your soil to a rich, fertile state. One that will be more than ready to power your plantings next spring!
Here’s a look at how each of these ingredients can work their magic – and, more importantly, how to use each one just right to recharge your soil this winter.
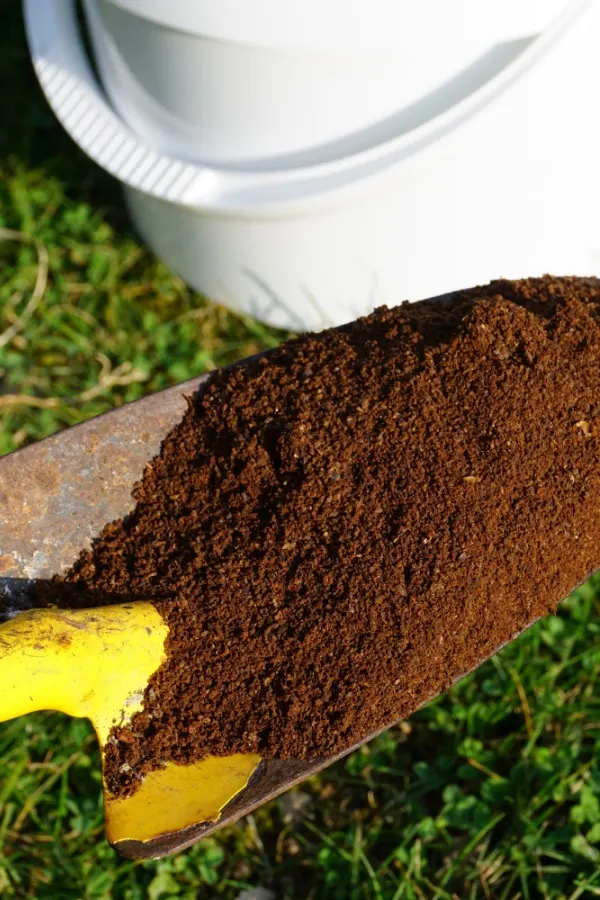
Spent coffee grounds are a powerhouse ingredient for recharging soil. They are rich in nitrogen, which happens to be an essential nutrient that plants need for strong growth. But beyond nitrogen, coffee grounds also contain trace nutrients like potassium, phosphorus, and magnesium.

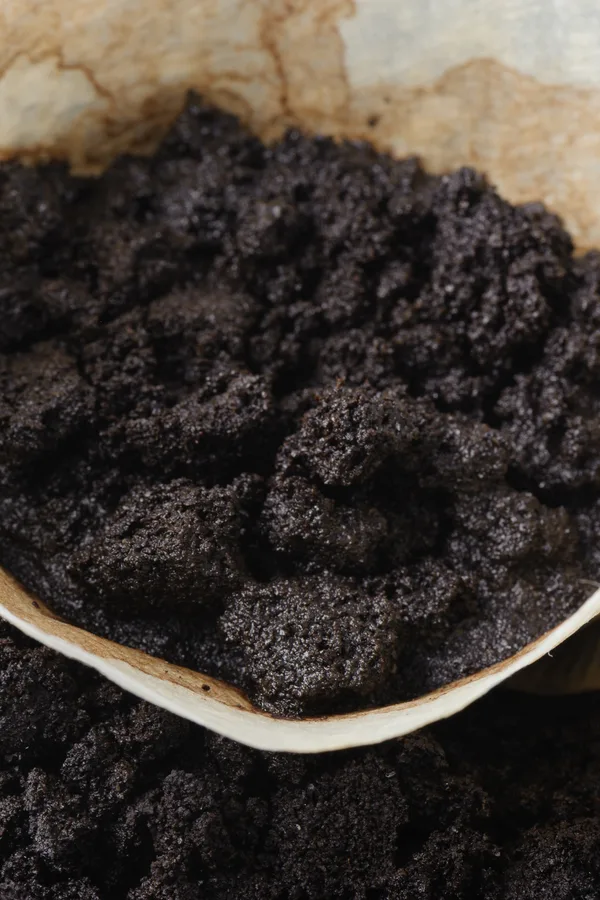
All of these nutrients play a vital role in supporting overall plant health. In addition, they are also great for boosting microbial activity in the soil. But it doesn’t just stop with adding the grounds from your morning coffee – you can throw the coffee filter in too!
Used coffee filters are an added bonus to raised bed soil. Not only do they break down quickly, they also add organic content and humus to the soil. The combination of coffee grounds and filters is truly amazing. Together, they improve soil structure, help its ability to retain moisture – and add critical nutrients. All from something you normally would just toss away.
It couldn’t be easier to incorporate coffee grounds into your raised beds over the winter months. There is no need to dry them as long as your bed soil is free of snow and ice.
If you can still dig in your soil, simply create a small hole a few inches deep. Next, bury the grounds right along with the filter. Many gardeners will tear up the filter a bit to help it decompose, but you will be amazed how even whole filters will be completely decayed by spring.
If you live in a colder climate where the ground freezes over from time to time, filters and grounds are easy to save in a 5 gallon bucket to use when the temperatures warm. Simply keep a bucket outside and throw both in – the cold temperatures will keep the grounds from molding until it warms.
As for how many grounds you can use in your soil – applying two to three filters and grounds per square foot is a good rule of thumb. By the time spring rolls around, the coffee grounds and filters will have broken down, delivering nutrients and leaving your soil better than ever.
In addition to using the remnants of your morning coffee – you can also use the leftover scraps of many a morning breakfast – egg shells!
Eggshells are an often overlooked source to recharge the soil with calcium. Calcium is an extremely critical nutrient for plants. It helps build strong cell walls, ensuring healthy stems, leaves, and fruit development. It’s also important for preventing issues like blossom end rot in tomatoes and peppers.
But when it comes to recharging raised bed soil, tossing whole or roughly crushed eggshells into your beds isn’t the most effective approach. Large pieces of eggshells take a long time to break down. And it can severely delay their benefits to your soil.
The best ways to use egg shells is to first pulverize them into a fine powder. This allows the calcium to absorb into the soil almost immediately. And that means it will be ready to power plants as soon as you plant in the spring!

Making egg shell powder is easy with a coffee grinder. Although you can chop up a few egg shells at a time, it’s best to save a few weeks worth in a resealable freezer bag and grind up all at once. Keeping the bag in the freezer keeps the egg shells from smelling while you wait. See our article: The Best Way To Easily Save & Store Egg Shells In The Winter.
Just rinse your eggshells to remove any leftover egg residue and place in the freezer bag. You can even “pre-chop” them a bit by smashing them down in the bag. Then, when you are ready, use a coffee grinder, blender, or even a mortar and pestle to pulverize the eggshells into a fine powder.
To help re-energize your raised beds, sprinkle the powdered eggshells evenly across the soil. For best results, work them into the top layer of soil to ensure they decompose quickly and their calcium becomes accessible.
As for how many egg shells you can use, a quarter to a half cup of egg shell powder per square foot is ideal. Over the winter, the powdered eggshells will integrate with the soil, providing a slow, steady release of calcium that will support your plants all throughout the growing season.
Last but not least – it’s time to use all of those banana peels! Banana peels are loaded with essential nutrients like potassium, phosphorus, and calcium. They also have important trace elements like magnesium and sulfur as well. These nutrients promote strong root development, robust flowering and healthy fruit production.
One of the best features of banana peels is how quickly they break down,. It makes their nutrients available to plants relatively fast compared to other organic materials. Additionally, their fibrous nature adds humus and organic matter to the soil, improving its ability to retain moisture.

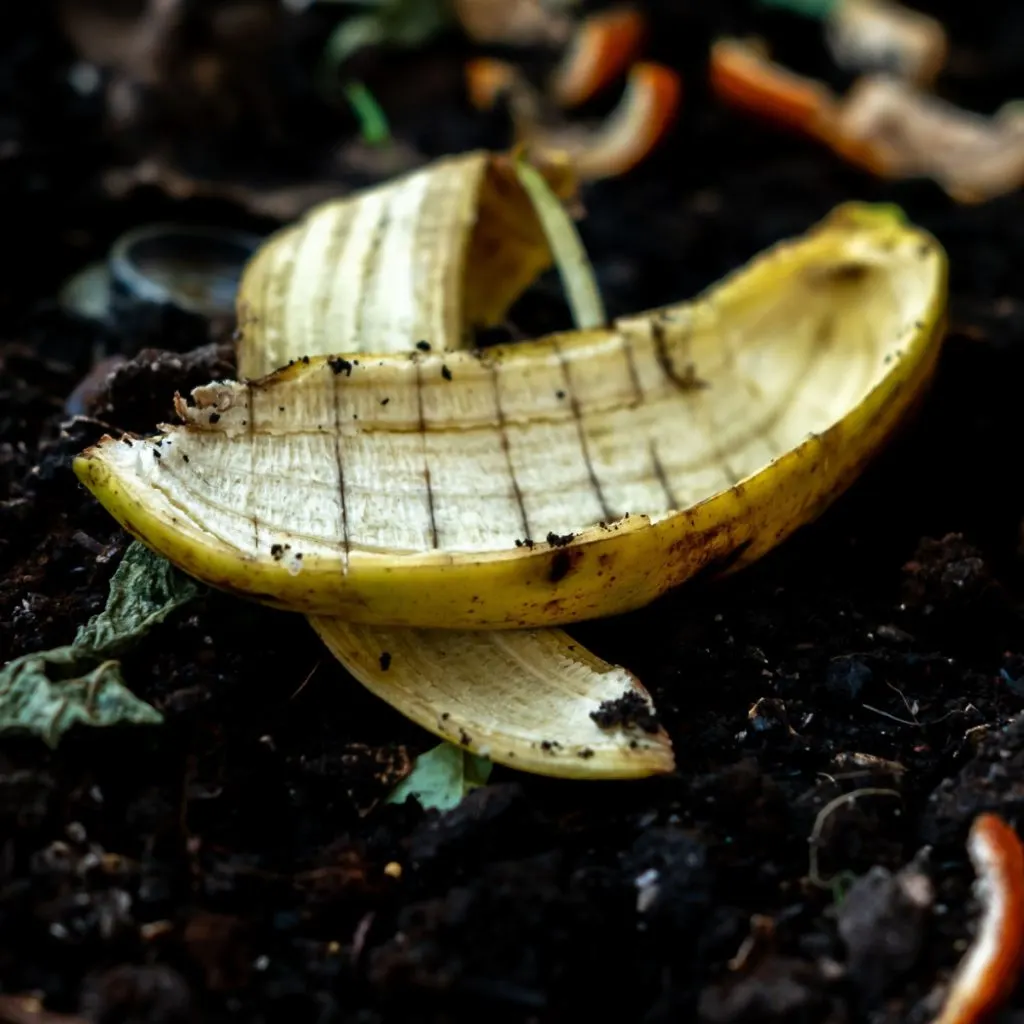
Banana peels are the easiest of all to add to raised bed soil. Simply cut the peels into small pieces to speed up decomposition. If possible, bury the pieces a few inches deep in the soil to prevent attracting pests and ensure quicker breakdown.
By the end of winter, the banana peels will have fully decomposed, enriching your soil with vital nutrients and enhancing its overall texture.
What makes coffee grounds, eggshells, and banana peels such an effective trio is their complementary properties. Coffee grounds supply nitrogen, eggshells provide calcium, and banana peels contribute potassium and phosphorus, covering a wide spectrum of essential nutrients.
Together, they support balanced soil health and ensure your raised beds are re-energized and ready to go come spring. Another key advantage is how quickly these ingredients break down, especially when added throughout the winter.
Here’s to recharging your raised bed soil this winter with coffee grounds, filters, egg shells and banana peels!
Follow Our Facebook Page For Great Gardening Tips And Advice! This Is My Garden Facebook Page
This Is My Garden is a garden website created by gardeners, for gardeners. Jim and Mary Competti have been writing gardening, DIY and recipe articles and books and speaking for over 15 years from their 46 acre Ohio farm. They publish three articles every week, 52 weeks a year. Sign up today to follow via email, or follow along!
Did you know that even though the ground and freezing temperatures make outdoor composting all but impossible through the winter months, you can still make great compost indoors with an indoor electric composter – all from the comfort of your warm and cozy house?
As the days shorten and the temperatures begin to drop, for most gardeners, keeping a compost pile going is all but impossible. Traditional compost bins often slow to a crawl when it comes to decomposition in the winter. In fact, if you live in the colder northern states, the pile usually completely freezes over from mid-winter on.
If that wasn’t enough to stop composting efforts, it’s the labor of even getting to the pile through ice, snow and more. So much so that many gardeners begin to throw all of those valuable scraps coming from the kitchen right into the garbage can!
Not only do all of those scraps find there way to a landfill – without the ability to add to their pile, it also makes it tough for gardeners to find enough compost to power their plants and soil come next spring.
Some gardeners practice hole composting in the winter – which is the art of burying scraps directly in flowerbeds or their garden to slowly decompose over the winter. But unfortunately, for many gardeners, they simply don’t have the room or ability to hole compost. See: How To Trench Compost In Winter – Composting Made Easy, All Without A Pile!
But there is good news! With the advent of electric indoor composting machines, you can now turn your kitchen scraps into rich compost year round – even during the harshest of winters.
So what is an electric composting machine and how does it work? Electric composting machines look and operate like a typical small kitchen appliance. In fact, many look like a large crock pot or instant pot. And just like them, they can sit right on the the counter looking stylish in the process.

But although they look like a cooking appliance, they instead allow you to turn food scraps into nutrient-rich compost all winter long. All without many of the drawbacks that traditional outdoor compost piles often have!
Unlike traditional compost piles that can take months to break down, indoor compost machines use electricity to accelerate the decomposition process. Using controlled heat, aeration, and grinding techniques, compost can be made from kitchen scraps in mere hours.
But there is more – they also do it without creating the slightest bit of odor. And with their compact and efficient design, they are perfect anywhere. In large kitchens, townhouses and even for apartment dwellers in urban settings – they work equally well. The real key to success is simply picking the right machine for your needs!
When indoor composting machines first hit the market, there were only a few models to choose from. That has all changed in the last few years. Now, there are models with sizes to fit almost any composters needs.
When it comes to selecting a composter that is right for you, there are a couple of key features to look for. For starters, it’s best to search for models with advanced odor control, automatic shut-off, and user-friendly controls. All three of these can make composting indoors far easier!
In addition, it’s also important to find a unit that fits your needs as far as capacity. If you produce a lot of food scraps, choose a machine with a larger processing capacity. Likewise, if you only have a few banana peels, coffee filters and potato peels a week, it’s best to select a smaller machine to save on cost and room.
One thing is for sure, the prices of the units can range pretty far and wide – from a few hundred dollars, all the way up to $500 or more. With that in mind, here is a look at a few models that are perfect for those with composting needs that range from small to large!
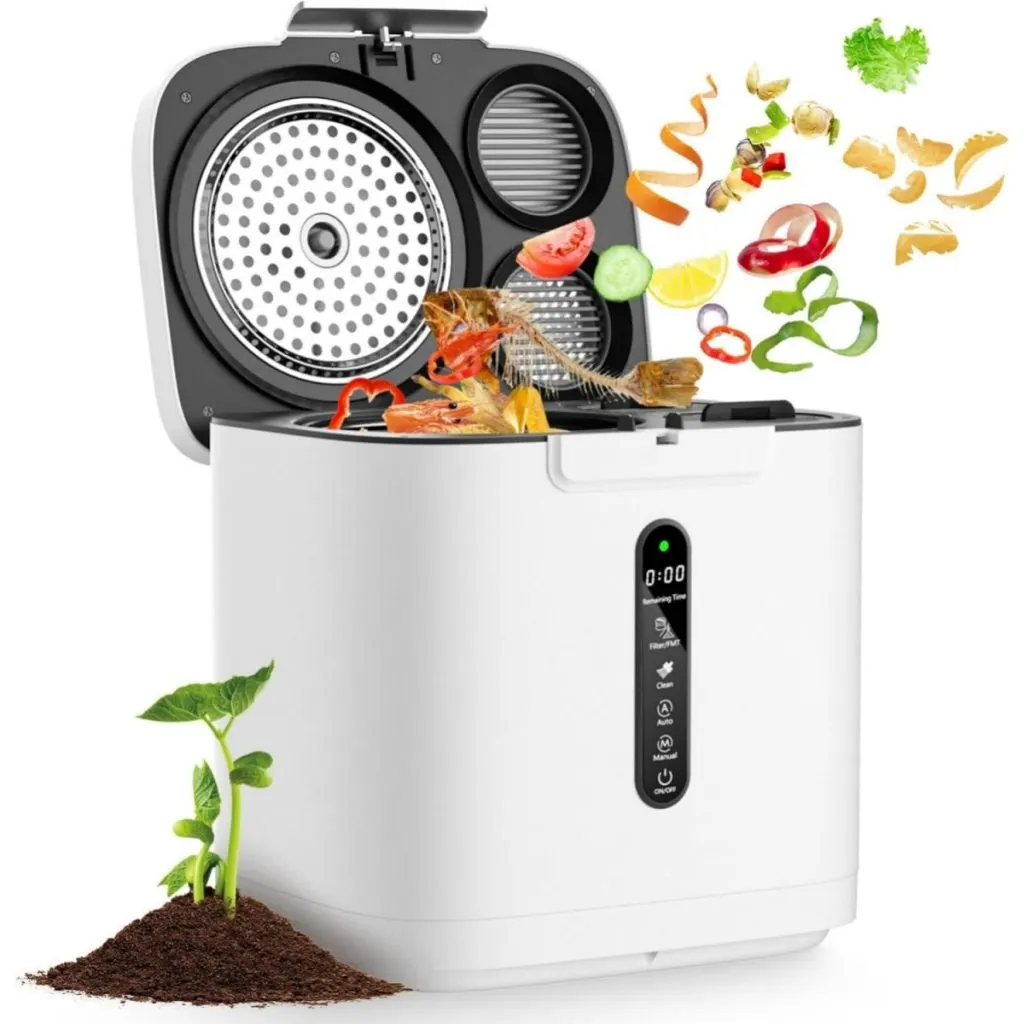
The iDoo electric composting machine features a compact design. Compact enough that it measures just 11.5 deep x 13.5 high x 12.5 inches wide. This is a great model for those looking for a countertop model that doesn’t take up too much space. Affiliate Product Link: iDOO Compost Bin, Electric Composter for Kitchen Countertop, 3L
With a 3 liter bucket capacity, it’s excellent for those who don’t produce an enormous amount of weekly kitchen scraps. By utilizing high temperature drying and milling, food waste is transformed into a compostable form in just 6 hours.
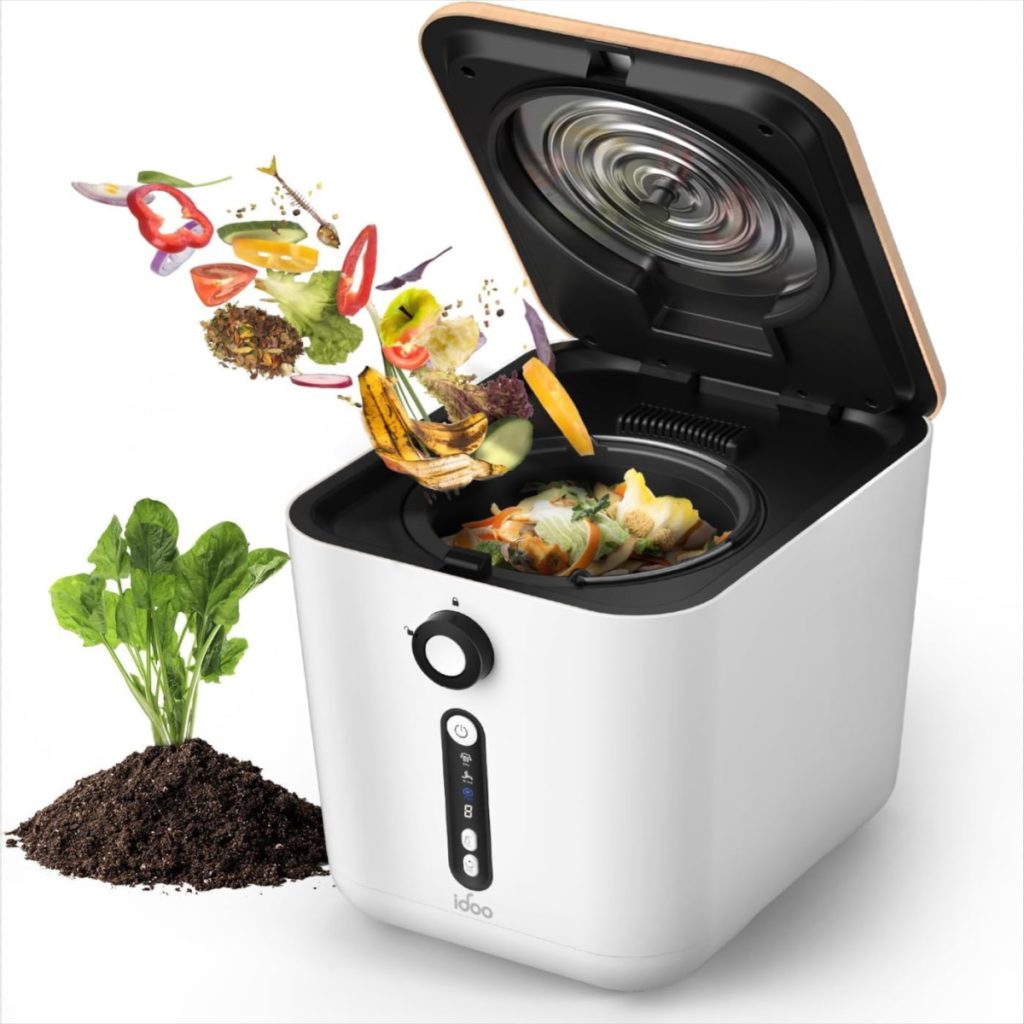

Slightly bigger but with similar looks like the 3 liter model above, this kitchen compost bin offers a larger 4 liter capacity, making it ideal for managing a family’s daily food waste and allowing for multiple cycles per day.
Using advanced grinding, dehydrating and cooling technology, the indoor composter efficiently reduces waste volume by up to 90% in just 3 to 6 hours, turning scraps into nutrient-rich fertilizer with ease.
Designed with user convenience in mind, the smart composter features an LED display. It also has three composting modes and a one-touch auto-clean function. Its dual deodorizing system is equipped with two activated carbon filters to ensure an odor-free operation.
The 6-blade churning system is powerful enough to handle tough scraps and really gives the flexibility to create fertilizer from a variety of food waste. Affiliate Link: 4L Electric Composter for Kitchen, Smart Compost Bin Outdoor/Indoor, Odorless
The GEME Bio Smart Electric Composter is one of the first compost machines to offer much larger composting capacity. At 9 liters, it has the ability to process a tremendous amount of daily food waste!


Using advanced microbial technology, it breaks down food scraps in just 6–8 hours, transforming them into rich, organic compost in a fraction of the time of conventional compost piles. Product Affiliate Link: GEME Bio Smart 19L Electric Composter for Kitchen
Unlike traditional composters, this machine operates without grinding or high-temperature dehydration, making it silent, odorless, and safe to use. Its built in industrial grade deodorization system also ensures a fresh, hassle-free indoor composting experience.
Here is to finding the electric composting machine that works for you. And even more, to being able to compost all winter long!
Follow Our Facebook Page For Great Gardening Tips And Advice! This Is My Garden Facebook Page
This Is My Garden is a garden website created by gardeners, for gardeners. Jim and Mary Competti have been writing gardening, DIY and recipe articles and books and speaking for over 15 years from their 46 acre Ohio farm. They publish three articles every week, 52 weeks a year. Sign up today to follow via email, or follow along!