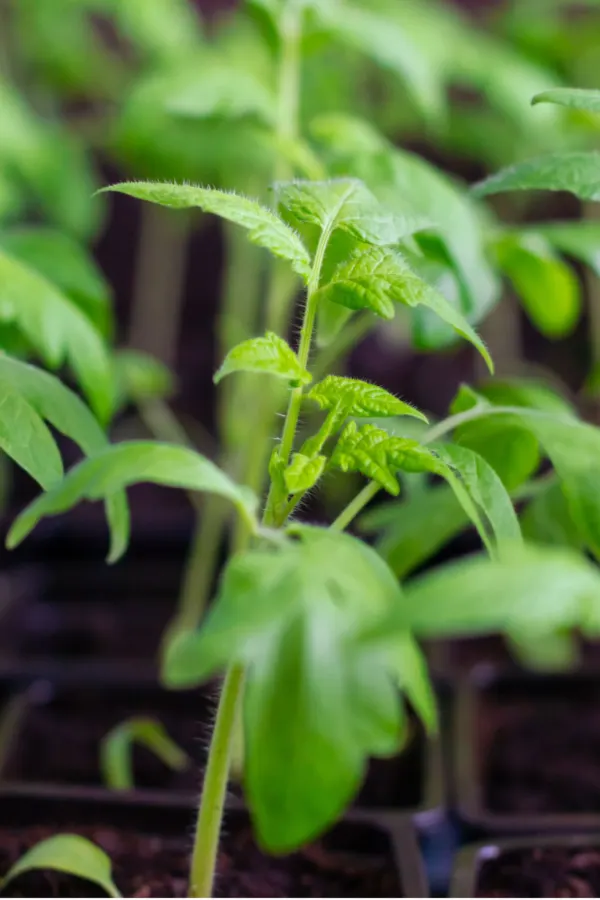
Starting your flower and vegetable plants from seed is a great way to save money, and grow all kinds of new varieties of plants that can’t be found in traditional stores. And everything you need to get started is right here on this page!


Starting your flower and vegetable plants from seed is a great way to save money, and grow all kinds of new varieties of plants that can’t be found in traditional stores. And everything you need to get started is right here on this page!
Did you know that summer is the perfect time to replant your vegetable garden, raised beds or containers with seeds?
So much focus goes into early spring planting that the summer planting season often takes a back seat. But mid-summer is actually one of the best times to start new plants. Not only is easy and inexpensive, it will also create an incredible late season harvest for you and your family, all while allowing you to take full advantage of your garden space!
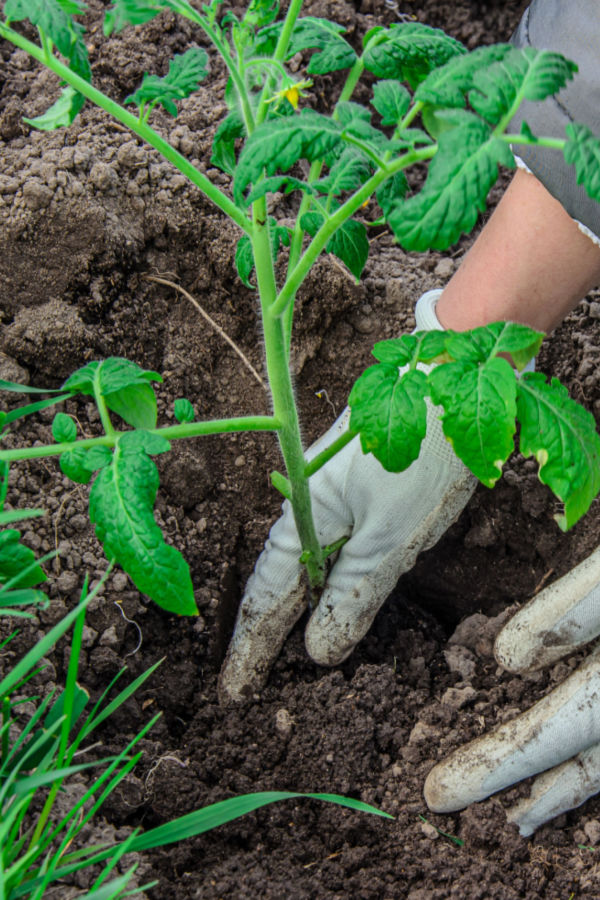
So why is summer planting so ideal? In the summer, the soil is warm. That means there are no worries of a frost or a freeze to wipe out tender young plants. And as an added bonus, instead of having to start seeds indoors or purchase expensive transplants, you can sow seeds directly into the soil.

Even better, there is plenty of daily light from the sun during the summer months. That, of course, makes it easy for seeds to germinate and grow quickly. But perhaps best of all, many of the pest and disease issues that occur in early spring are long gone by summer – making it far easier to grow healthy plants and have a successful harvest!
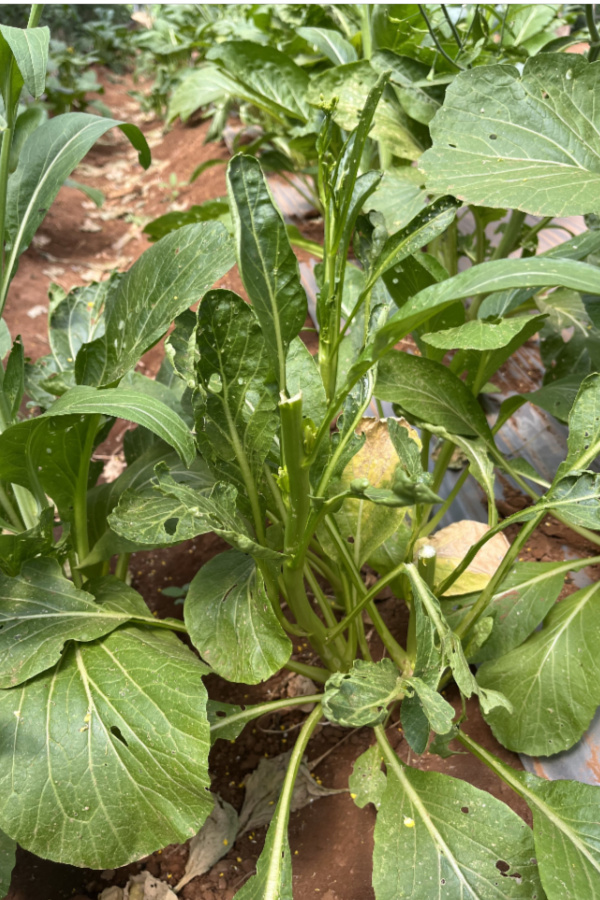
By mid-summer, many crops in a vegetable garden begin to slow down their production. Many times, spring pests and disease have taken their toll. This is especially true for crops such as zucchini, cucumbers, peas, beans and a long list of salad greens and crops.
But here is the good news – all of those crops are perfect for summer replanting! Even better, you can grow all of them quite easily and much less expensively with seeds. And with the cooler temperatures of fall around the corner, it also makes them easier to maintain and harvest as well.
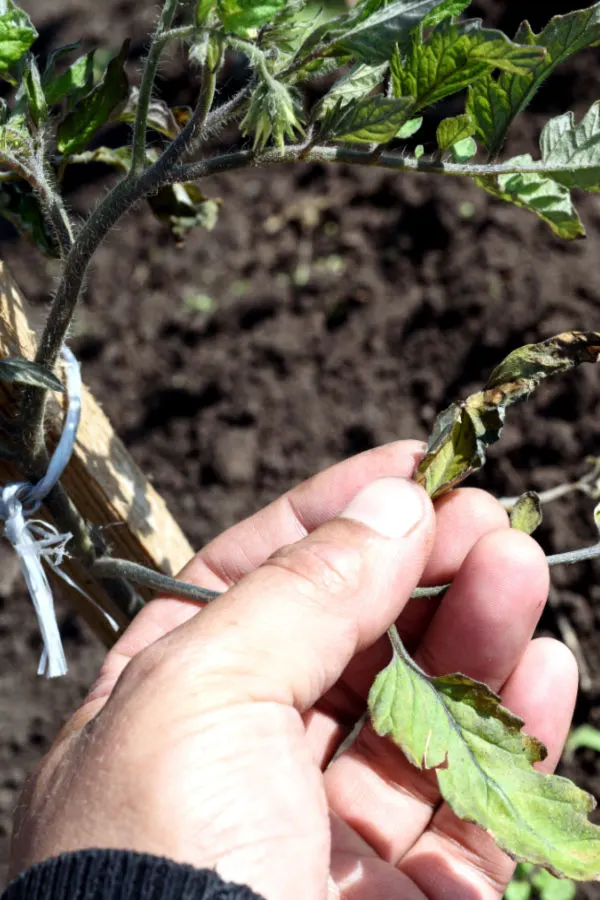
It’s important to note that not all crops are ideal for replanting in the summer. Tomatoes, peppers, sweet corn and crops that have have a lengthy seed-to-maturity fruit times are not good candidates.

Unfortunately, these crops take so long to reach maturity they are unable to produce harvestable fruit before the chill of late fall and winter set in. Luckily, there is still a long list of vegetable plants that will work incredibly well for a summer replant.
With that in mind, here is a look at some of the best vegetable crops to replant with seeds in mid-summer – along with some key tips and tricks for growing success. We have included seed links along with each variety as well for those in need of seeds, which can sometimes be hard to find in the middle of summer.
One quick note before covering some great crops for replanting, it’s important to always add a little energy back into your soil before sowing a second round of seeds. Spring crops use quite a bit of the soil’s energy to grow and mature, and a quick recharge of the soil will help your fall crops reach their full potential.
The easiest way to do this is to add in generous amounts of compost to your seed rows as you plant. Simply layer in a few inches of compost into each planting row as you go!


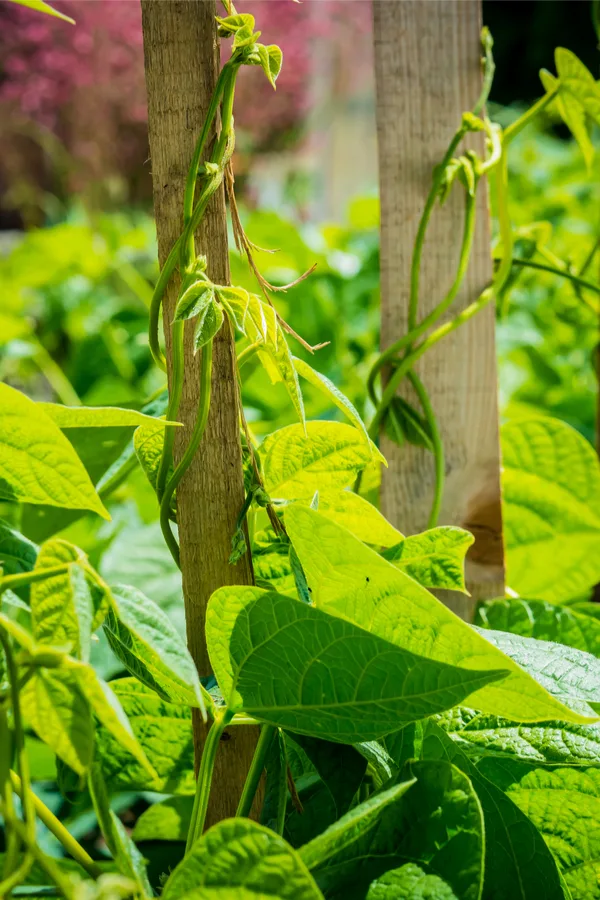
Most spring planted bean crops are just about finished by mid-July. Simply pull out your bean plants and replant with new seeds for a great fall harvest. Beans grow fast, especially with the warmth of summer. In fact, varieties such as Bush Lake can be harvested in around 60 days.
Beans are a great choice for summer replanting because they require little additional nutrients from the soil. In fact, they usually improve the soil where they grow, making it great for whatever crop you grow in the same space next year!
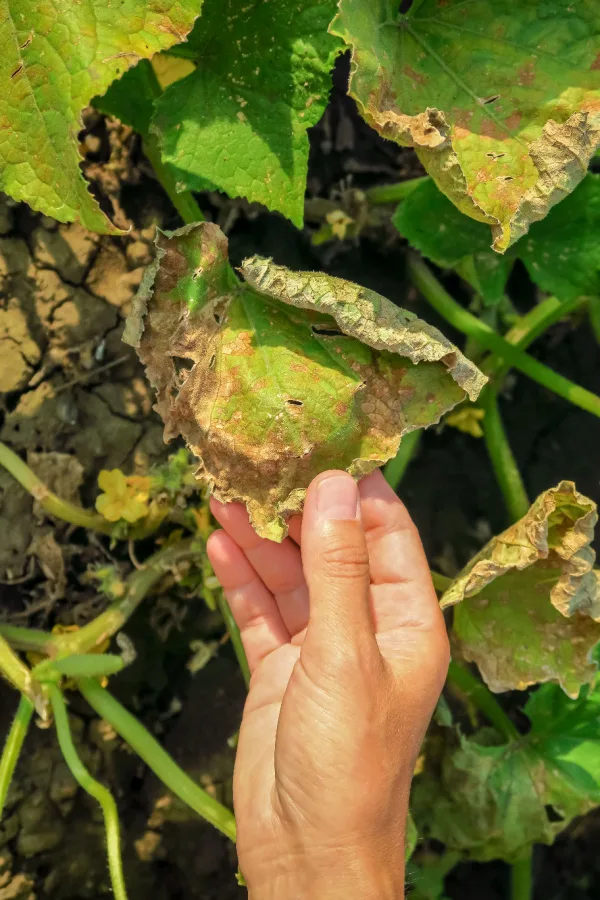
Of all summer crops to replant, cucumbers are one of the easiest and most productive. Cucumber seeds germinate fast in the warm summer soil. Even better, two of the biggest issues for cucumbers early in the season, cucumber beetles and mildew, are long gone by summer!
By choosing a quick maturing variety, you can have a second crop of cucumbers producing big by early fall. See our article: How To Replant Cucumbers In Summer With Seeds – Replace Your Dying Plants!

Although zucchini are prolific producers when they are growing, the plants often fail in mid summer. The summer heat and the age of the plants simply begin to take their toll. At this point, it’s best to simply plant new seeds and start the process all over again.
Zucchini seeds, like cucumbers, sprout quickly in the warm summer soil. Couple that with their fast seed to fruit time, and you can have plenty of zucchini back on the table from late summer to first frost.
Radishes are a super fast seed-to-harvest vegetable. With varieties that can mature in as little as four weeks, they can be planted every few weeks in mid-summer to keep a fresh supply on hand.
Plant a steady supply every 10 to 14 days into September, and enjoy them right up until your first frost!
Summertime is the perfect time to plant a second round of traditional or sugar snap peas. Peas love cool weather, and by planting in July and August, they will mature as the cool weather sets in.

Best of all, peas actually improve the soil for the next crop, so they only help to build soil strength for next year. If planting a climbing variety, be sure to put the supports in before planting, it makes maintaining your crop much easier!
Lettuce and leaf crops often wilt and bolt in the hot summer sun. But by planting a new crop of seeds in mid to late summer, they can begin to come on as the temperatures cool off a bit.
Leaf lettuce crops are among the fastest growers of all in a garden. Many varieties of lettuce can go from seed to harvest in just three to four weeks. Sow a row of seeds every few weeks through the summer weeks to keep a fresh crop coming on into late fall.
Both spinach and kale prefer growing in the cooler fall weather. In fact, the cooler weather actually improves their flavor. Sow a row every few weeks from late summer until the first week or two of September to enjoy fresh eating right up until October
Here is to replanting your vegetable garden this summer with seeds – and enjoying an incredible fall harvest!
Follow Our Facebook Page For Great Gardening Tips And Advice! This Is My Garden Facebook Page
This Is My Garden is a garden website created by gardeners, for gardeners. Jim and Mary Competti have been writing gardening, DIY and recipe articles and books and speaking for over 15 years from their 46 acre Ohio farm. They publish three articles every week, 52 weeks a year. Sign up today to follow via email, or follow along!
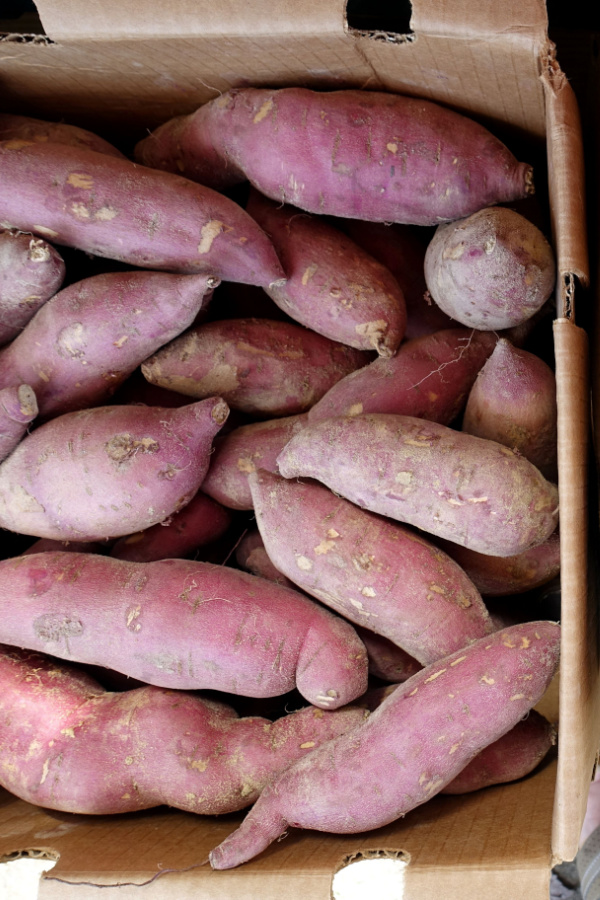
Did you know that you can grow and plant your own sweet potato plants by starting slips from an existing sweet potato? Not only is it possible, but it’s a great, inexpensive way to grow healthy and strong sweet potato plants!
Sweet potatoes are packed full of vitamins A and C, potassium, fiber, and manganese. Not only are they good for you, but they are also one of the most versatile vegetables around. But as popular as the vegetable has become, growing them in a garden is somewhat of a mystery. The good news? Sweet potatoes couldn’t be easier to grow!
Unlike traditional potatoes that sprout from the eyes of seed potatoes, sweet potatoes are grown a little differently. Instead of using seed potatoes, sweet potatoes grow from what’s referred to as slips – which are nothing more than miniature sweet potato plants that grow from the roots of an existing sweet potato.
Once they grow from the sweet potato, slips can range between four to six inches long and have a few sets of leaves on top. It’s these slips that then get planted into the ground much like you would transplant any other vegetable.
Slips can be purchased as a bare root transplant or in a traditional soil cell for planting. That is, if you can find them. Unfortunately, sweet potato slips can often be hard to source locally in stores. But luckily, growing your own is not only easy – but fun to do as well!
Sweet potato slips can be started from an existing sweet potato using soil or water as the growing medium. You need to aim to start your slips about 6 weeks before planting outside to give them plenty of time to grow.
No matter whether you use soil or water for starting, always use an organic, untreated sweet potato. Many times, stores will treat non-organic sweet potatoes with a root-prevention substance for longer storage. Unfortunately, that treatment will keep your sweet potato from growing slips.
If starting in soil, fill your container about half full of soil. Place an unblemished whole sweet potato halfway into the soil on its side. The soil should always be damp, but not soggy or saturated.

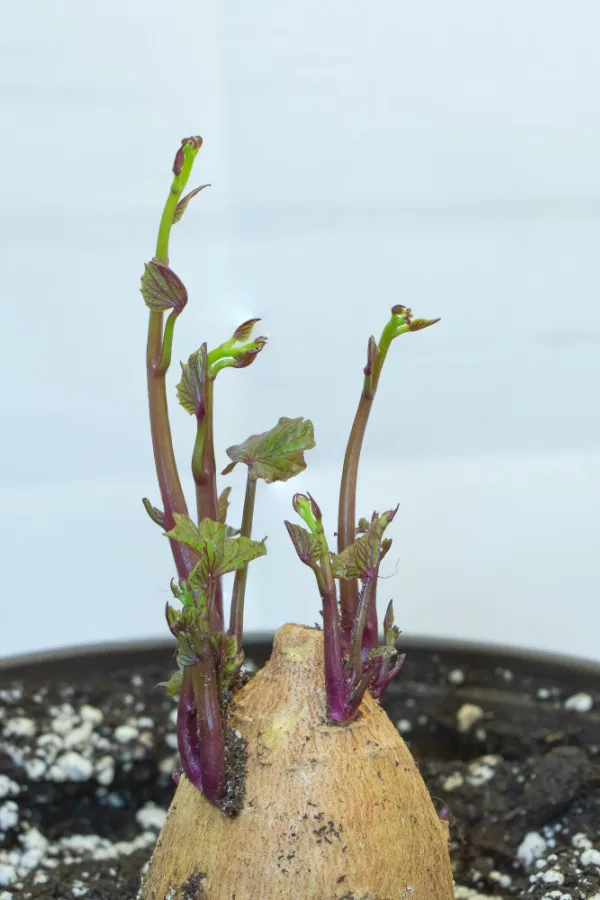
Once “planted”, leave your sweet potato in a warm, sunny location. The warmer the soil, the quicker the sweet potato will produce slip sprouts. For the “sunny” part, a window sill works well. Just be sure to locate in a window that receives light at least six hours a day.
Usually within two weeks, you will begin to see new slips forming and shooting up. Once your slips get to around four to six inches, break off the slip at the base of the potato and place it into distilled or tap water to root. Continue to keep the slips in sunlight or artificial light each day.
Once roots form, you can plant them into the soil to create soil transplants – or leave them in the water to create bare root transplants. Your original sweet potato will continue to grow new slips even after you “harvest” plants. All you need to do is continue to break off and start more slips as needed.
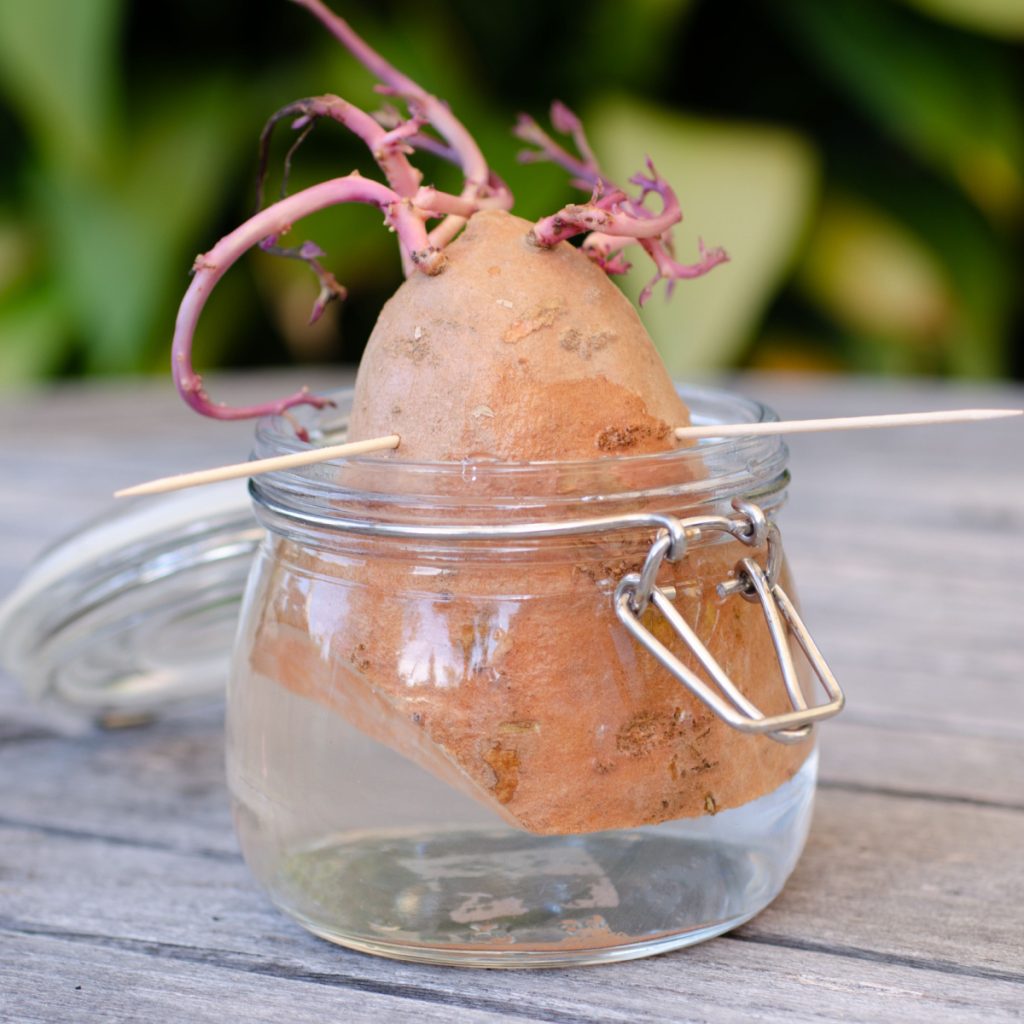
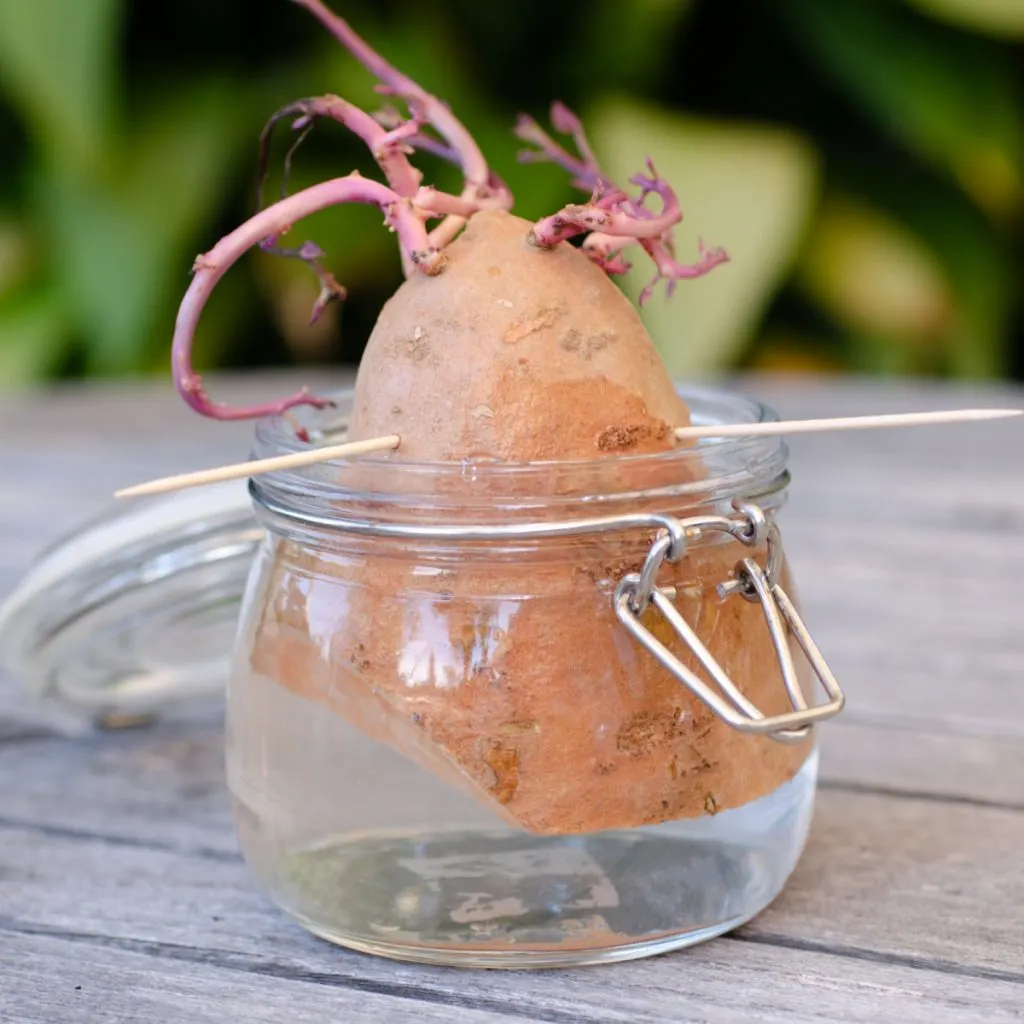
You can also create your slips entirely in distilled or tap water. To do this, place a couple of toothpicks into the potato and allow them to rest on the rim of the jar. You want half of the sweet potato to be resting under water.
Place the container in the warmest room of your house to speed germination. Similar to starting slips in soil, the container needs at least 6 hours of sunlight each day. Once again, a sunny windowsill is perfect for this method.
You will usually see slips develop at the top of the sweet potato within 2 weeks. Allow them to grow to around 4 to 6 inches before snapping off at the base and placing them into water to root.
Once roots form, you can plant them into soil or leave them in the water for bare root transplants. Both soil and bare root work well when transplanting into the garden, it really comes down to a matter of personal preference.
The best time to plant sweet potatoes is in late spring to early summer. Although you can plant traditional potatoes in early spring, sweet potatoes need warmer soil. They are highly frost sensitive, so let the weather warm before attempting to plant.
Sweet potatoes grow best in loose, fertile soil. Adding a bit of compost to each planting hole will go a long way toward success. Compost not only helps add nutrients, it also holds more moisture for the plant’s roots.
When planting, create a small mound about 3 to 4 inches in height in the middle, and 6 to 8 inches in diameter. Create the mound using half soil and compost. Again, this will help provide a good, early boost of nutrients for your sweet potatoes.
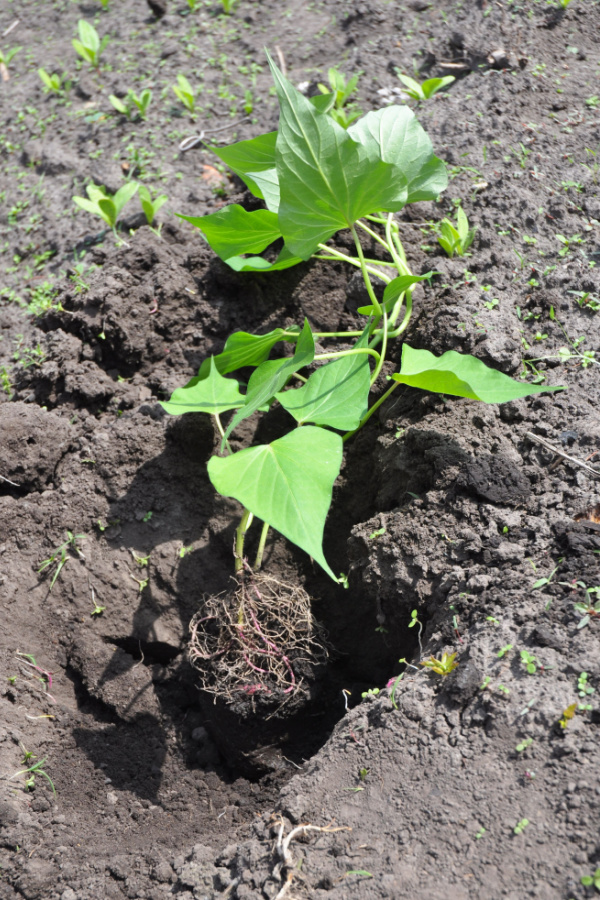
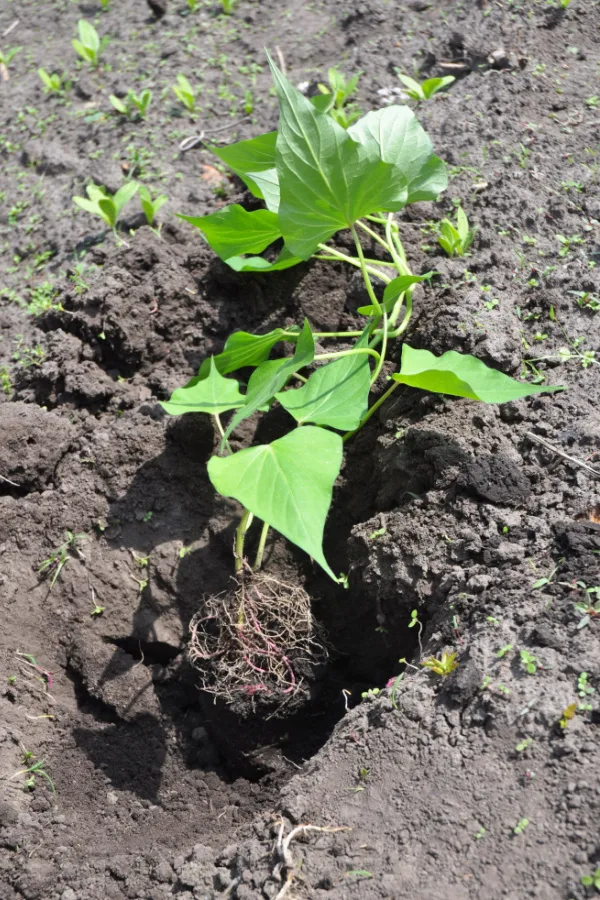
Bury each slip in the soil all the way to the top set of leaves. Once planted, tamp the soil down around the top of each plant. Space each slip about 12 inches apart to allow the roots and tubers room to expand and grow.
Sweet potatoes need water to grow to the proper size. Water plants at least twice a week if there is little rain, especially the first few weeks after planting. Keep an eye out for potato beetles as the plants grow. See our article: How To Get Rid Of Potato Beetles
It’s also important to mulch plants as soon as you plant. Place a three to four-inch layer of straw, grass clippings, or shredded leaves around each plant to help conserve water and keep weeds at bay. Once the plants begin to grow, their massive leaf structure will suppress the majority of weeds.
You can start to harvest sweet potatoes as soon as the plants begin to yellow. However, the longer they stay in the ground, the more they will continue to develop additional flavor. You can partially harvest well up until the threat of frost. Take only what you will be using until you are ready for the full harvest.
Sweet potatoes store for a long time if kept in a cool, dark place. But before storing, they need to go through a curing process first. Curing is a simple step to let sweet potatoes dry out completely before moving to long-term storage.

In addition, curing also aids in sweetening the potatoes. To cure, begin by gently brushing all of the soil off of the skins. Don’t use water as they will store much better if you keep them from becoming wet.
Once brushed off, place in a well-ventilated but warm spot for 10 to 15 days. A back porch, barn or garage are all great places to cure. After the curing period, the sweet potatoes are then ready to find a cool, dark spot for long-term storage.
Here is to starting your own sweet potato slips from seed this year, and to growing an incredible crop!
Follow Our Facebook Page For Great Gardening Tips And Advice! This Is My Garden Facebook Page
This Is My Garden is a garden website created by gardeners, for gardeners. Jim and Mary Competti have been writing gardening, DIY and recipe articles and books and speaking for over 15 years from their 46 acre Ohio farm. They publish three articles every week, 52 weeks a year. Sign up today to follow via email, or follow along!
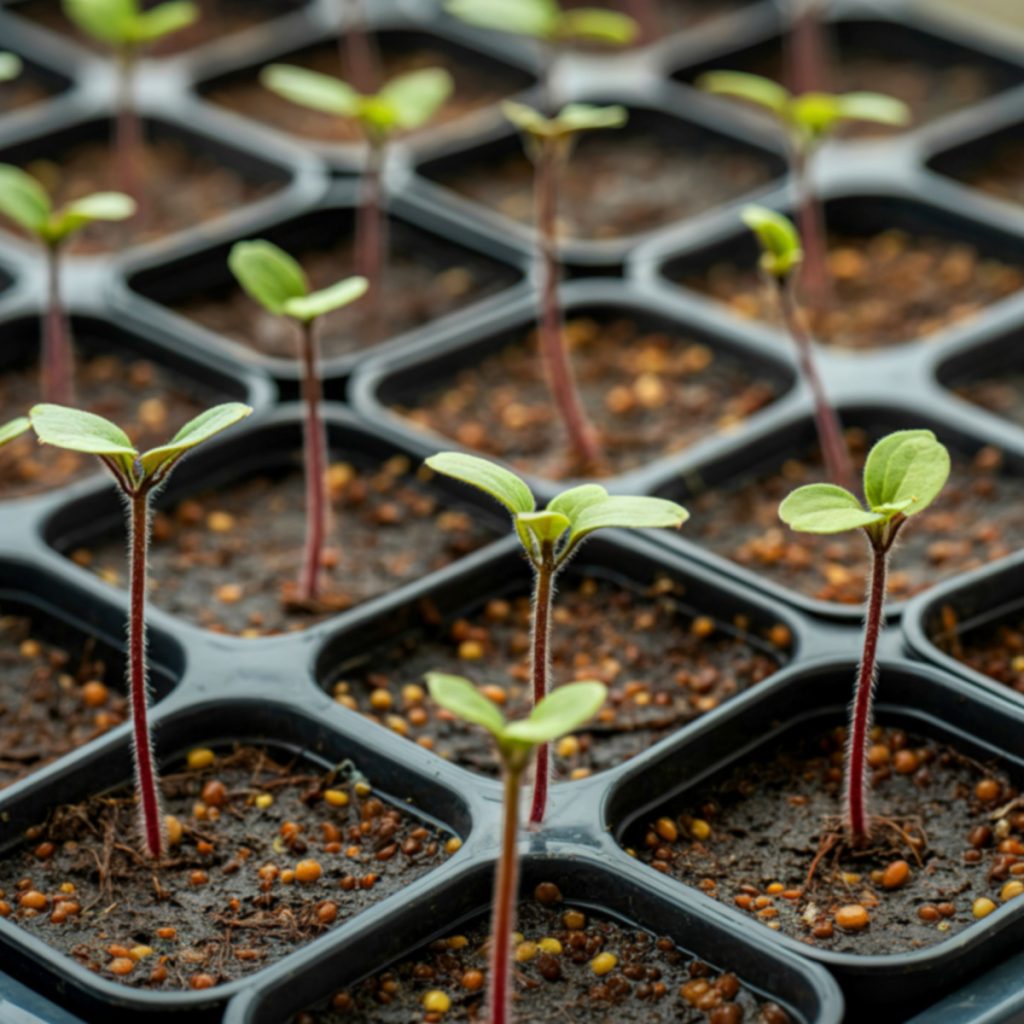
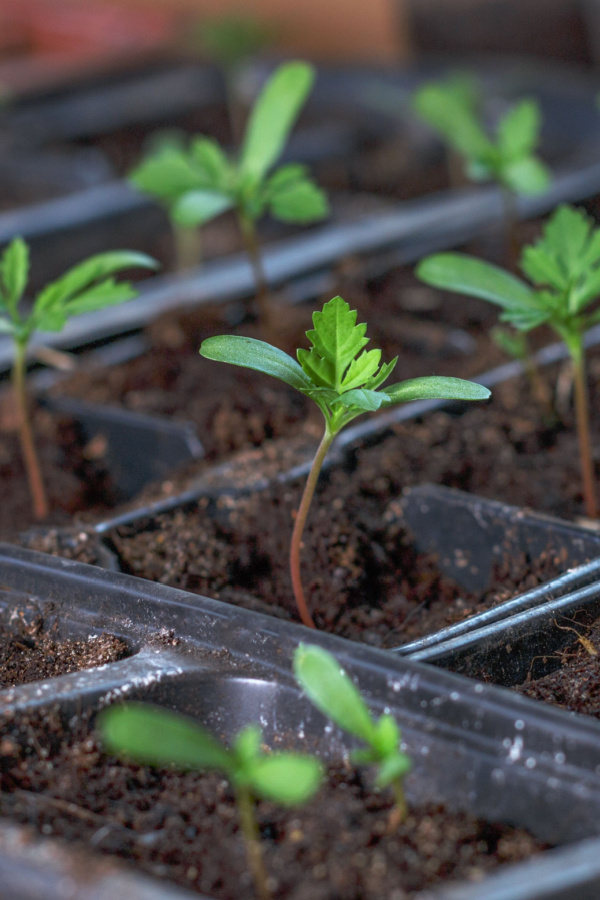
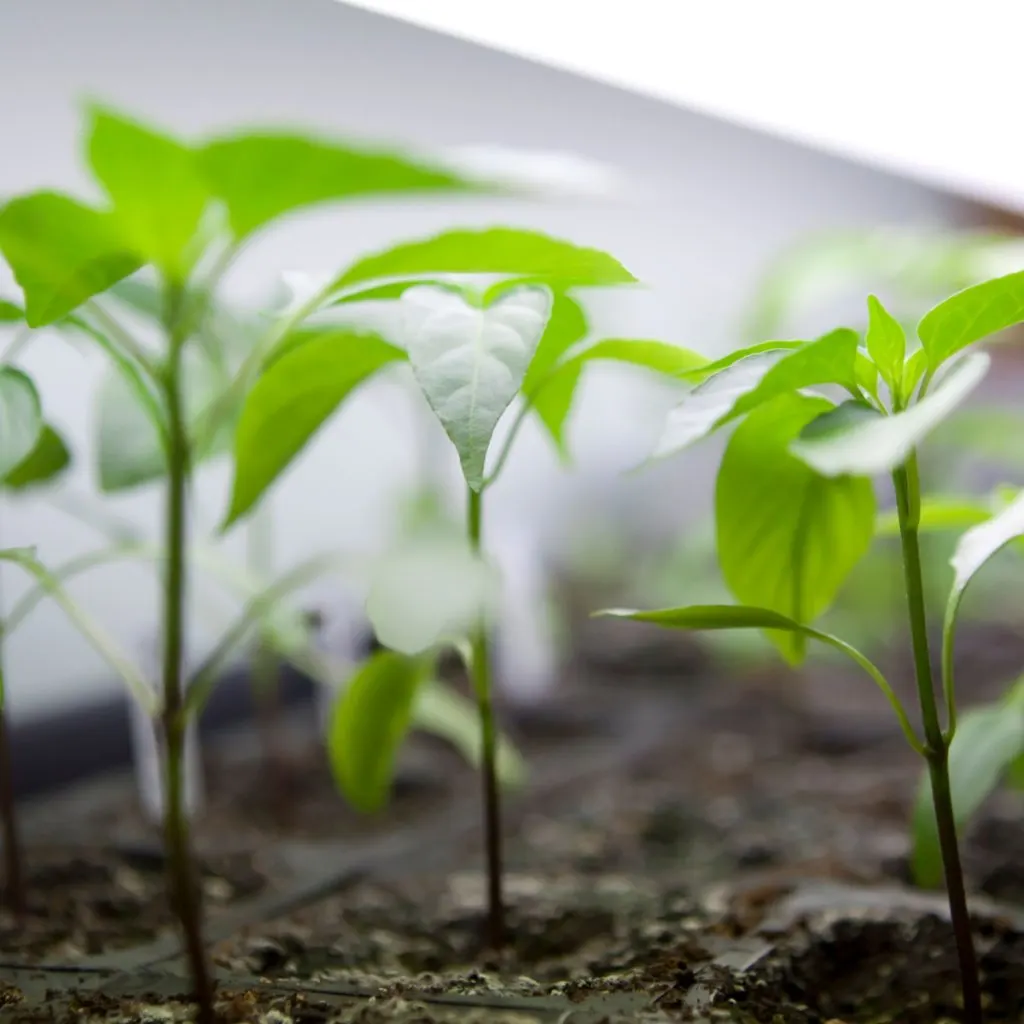
If you are wondering how to get all of those tiny plants you started from seed indoors to start growing big and strong in quick fashion – it’s time to give your young seedlings and transplants a little boost of fertilizer!
More and more gardeners are learning how fun it can be to grow their own plants from seed. Starting your own vegetable plants or flowers opens up your growing world to all kinds of unique, tasty and colorful varieties.
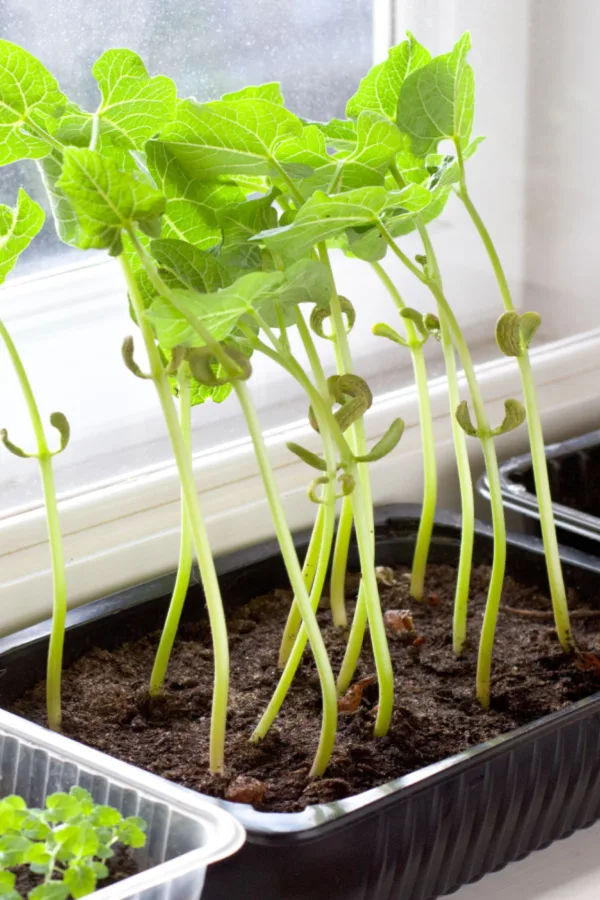
But if there is one thing many gardeners who grow their own plants struggle with, it’s how to get their tiny plants to grow big and strong enough in time for planting day outside. More times than not, the issue all comes down to the plants not getting or having enough energy and nutrients to develop fast. And that is exactly where fertilizing them early in their life can come to the rescue!
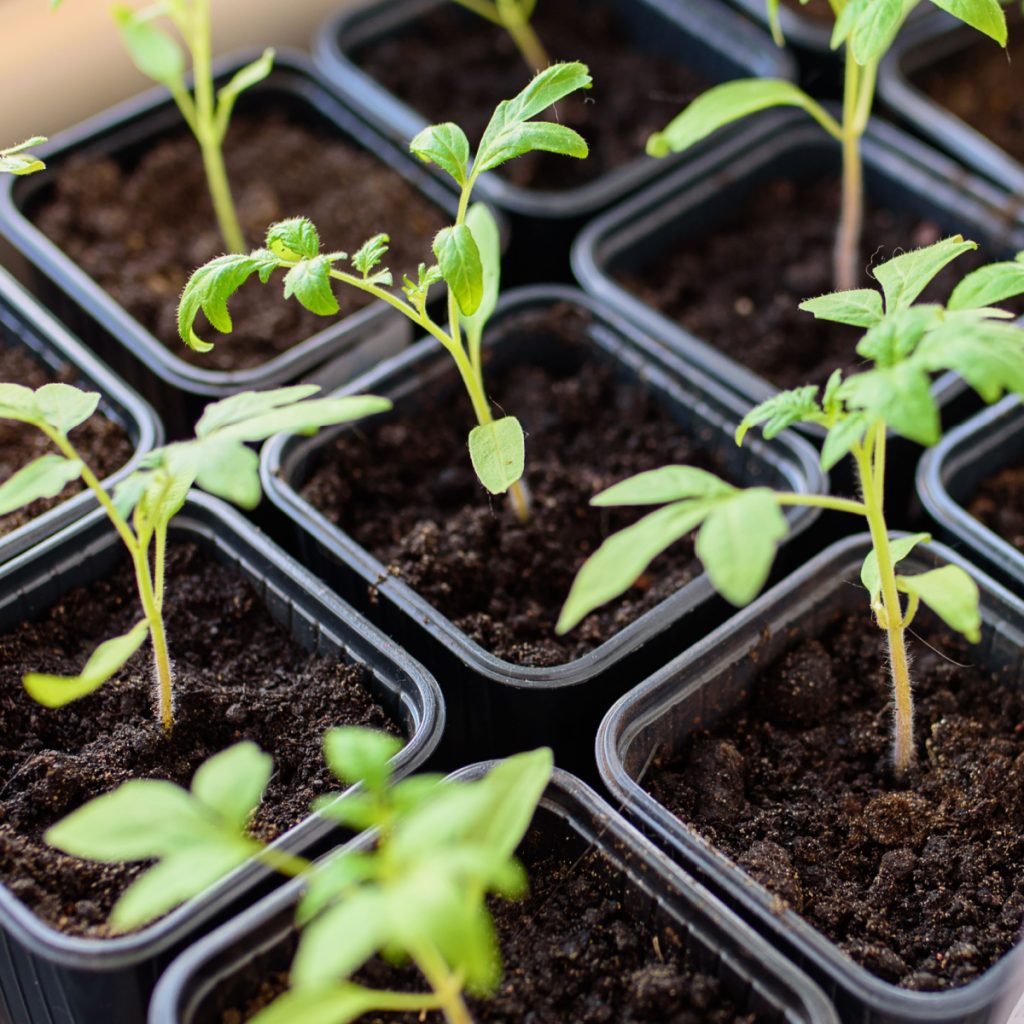

Many gardeners are surprised to learn that you can and should give a little fertilizer to tender, young seedlings. It is true that after only a few weeks of growth, seedlings can often look quite weak and feeble. But that doesn’t mean they can’t benefit from a little pick me up. In fact, as soon as seedlings are a full two weeks old – it’s exactly what they need!
But as you will see below, the simple secret to growing success is to give your tiny plants just the right dose – and in just the right way. And when you do, they it can jump start them to amazing new growth!
When fertilizing seedlings and small transplants early in their life cycle, it’s important is to give them a lower dose of nutrients. It’s also vital to give those nutrients to the plants in a form they can both absorb and handle with ease. And the best way to do that for seedlings and transplants is by using a liquid fertilizer.
Liquid fertilizers absorb into plants in two unique ways. First, when the liquid passes through the soil, it absorbs into the roots below the surface. Because it is in a liquid form, that absorption occurs quickly. For the roots of small plants, it is the exact same process of taking in water to hydrate.
But liquid fertilizers can also absorb through the foliage and stems of plants. This means when you water, mist or even spray your young plants with liquid fertilizer, they also get a dose of additional nutrients right through their leaves.
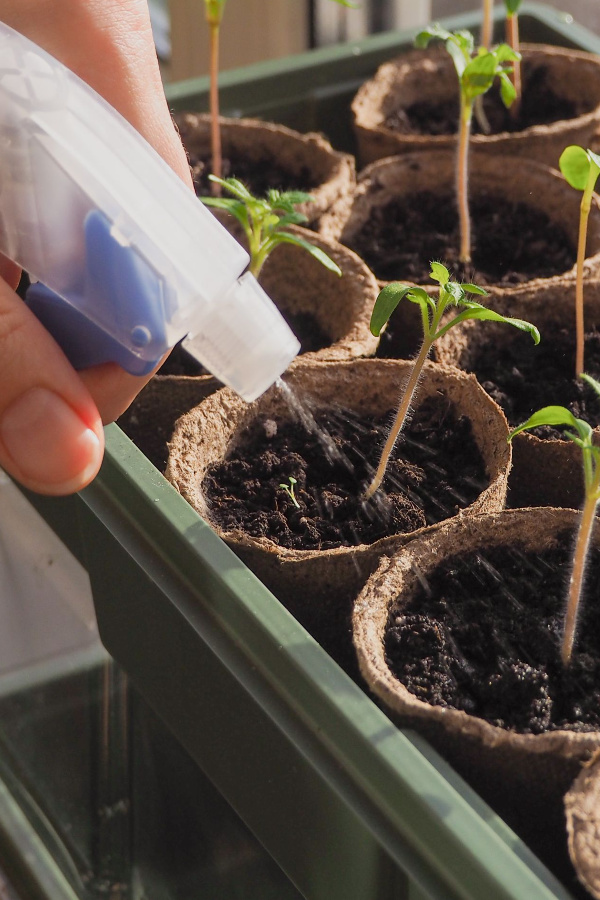
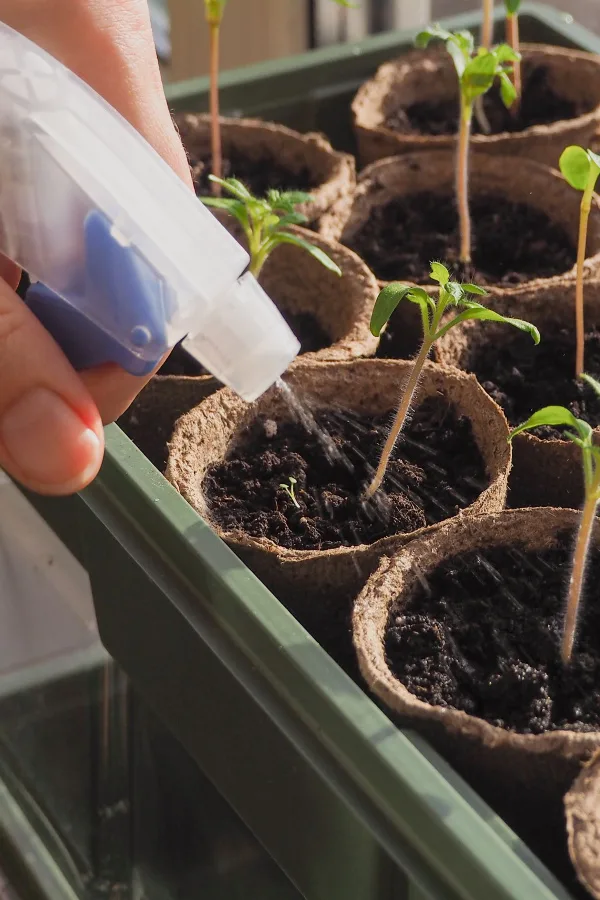
This “double” dose of nutrients can be extremely powerful for plants – and a very quick way for them to develop and grow fast. But, and this is key, you have to be very careful what type of liquid fertilizer you give your young seedlings – especially when it comes to the overall strength and consistency of the dose.
There are three great options for fertilizing young plants. The first is to use all-natural compost tea. The second is to use all-natural worm casting tea. The third and final option for fertilizing young seedlings is to use a commercial liquid fertilizer – but as you will see below, when using that option, you will need to use a bit more caution.
It is always best to allow your seedlings to reach at least two full weeks in age before giving them a light dose of liquid fertilizer. Any earlier, and the energy can actually harm more than help.
Let’s now take a look at how to use each of the above options to get your plants growing fast! Again, any of the three can work wonders, it really comes down to personal preference and availability.
Compost tea is made from soaking aged compost in water and allowing the nutrients to soak into the water. Compost tea is ideal for young seedlings because the nutrients within it are pure, but never overpowering.
To make compost tea, all you need to do is steep compost in water for a few days. When using for seedlings, we like to mix about two cups of compost in a gallon of water. Two or three times each day we stir it or shake it up. Affiliate Link: Charlies Bagged Compost
Then after two to three days, we strain the compost from the liquid. Then, simply water your plants with it! If plants are too small, use a mister. As they grow larger, you can water the surface of the soil and mist the leaves for a double dose of power.
There is no need to ever dilute compost tea. The nutrients are truly an almost ideal low and slow energy source and will not burn foliage or the roots of tender seedlings. For best results, apply compost tea every 10 to 14 days until you are ready to plant outdoors.
Like compost tea, worm casting tea is created by soaking worm castings in water and letting its power leach into the liquid. Much as with compost tea, the nutrients are pure but never overpowering in worm casting tea. Nor is there is never a need to worry about diluting the liquid tea, it too can be used at full strength. See: How To Use Worm Castings To Power Plants
To make, use 1/4 to 1/2 cup of worm castings and allow to steep in water for a few days. Shake or stir the ingredients to help the water absorb the energy in the castings a few times each day. All that is left is to strain and water plants every 10 to 14 days until planting day.
If compost or casting tea are not an option, you can also use a quality liquid organic fertilizer off the shelf. However, when using this, you will need to dilute! At full strength, commercial fertilizers have too much strength for young plants.
The best advice is to mix the fertilizer to about 1/4 to 1/5th the recommended strength. This will keep plants from getting too many nutrients all at once. This will also allow you to still give regular doses every 10 to 14 days for a continuous supply. Affiliate Link: Espoma Organic Grow! Liquid Concentrate Plant Food
That consistently is actually the most important of all for young seedlings – no matter which liquid fertilizer you use. By giving them low but regular doses of energy, they can slowly but continually grow – without the worry of overgrowing.
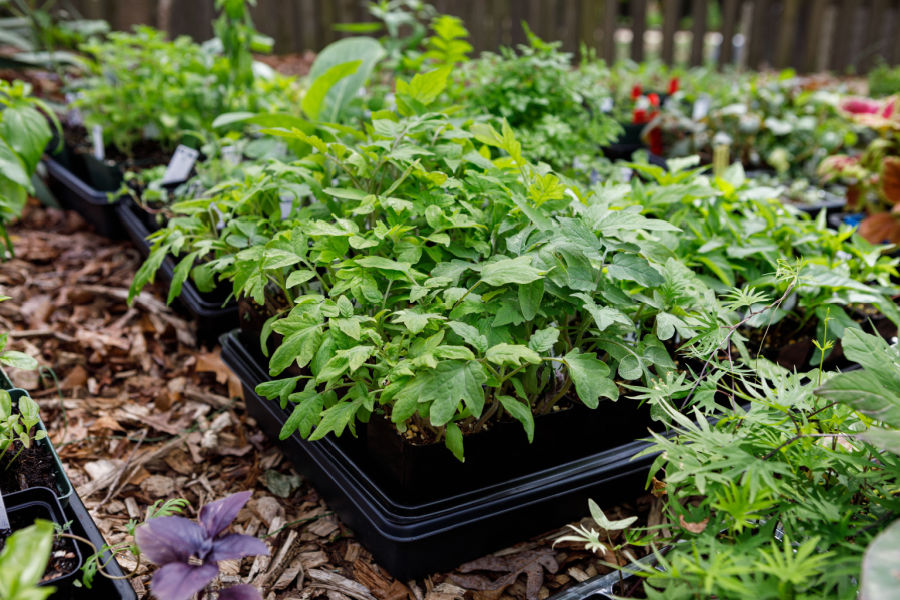
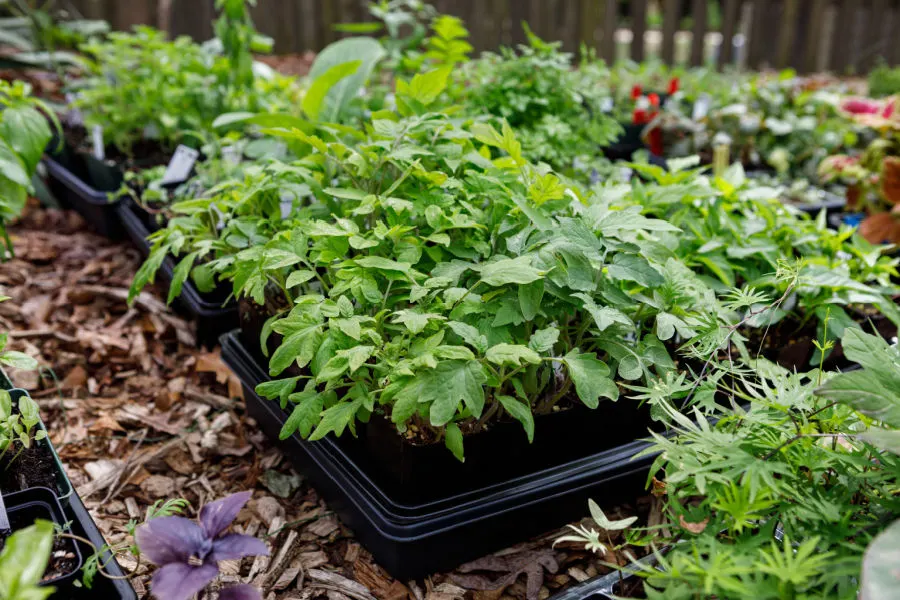
Here is to powering up your young seedlings with a little fertilizer now. And to having big, beautiful, well developed transplants that are ready to hit the ground growing on planting day!
Follow Our Facebook Page For Great Gardening Tips And Advice! This Is My Garden Facebook Page
This Is My Garden is a garden website created by gardeners, for gardeners. Jim and Mary Competti have been writing gardening, DIY and recipe articles and books and speaking for over 15 years from their 46 acre Ohio farm. They publish three articles every week, 52 weeks a year. Sign up today to follow via email, or follow along!
One of the best ways to grow healthy, strong plants from seed is to start them in loose, healthy and fertile soil – and there is no better way to do that than to make your own incredible homemade seed starting soil right at home!
Growing your own transplants from seed is one of the best ways to save money when gardening. Even better, it gives you the opportunity to grow all kinds of amazing plants you can’t find locally. After all, most nurseries and plant stores are only going to carry the most popular of plants.
But perhaps best of all, growing your own plants from seed lets you create incredibly strong and healthy transplants that are ready to grow like crazy when you plant them outdoors. And that process all begins with planting your seeds in the best soil possible.

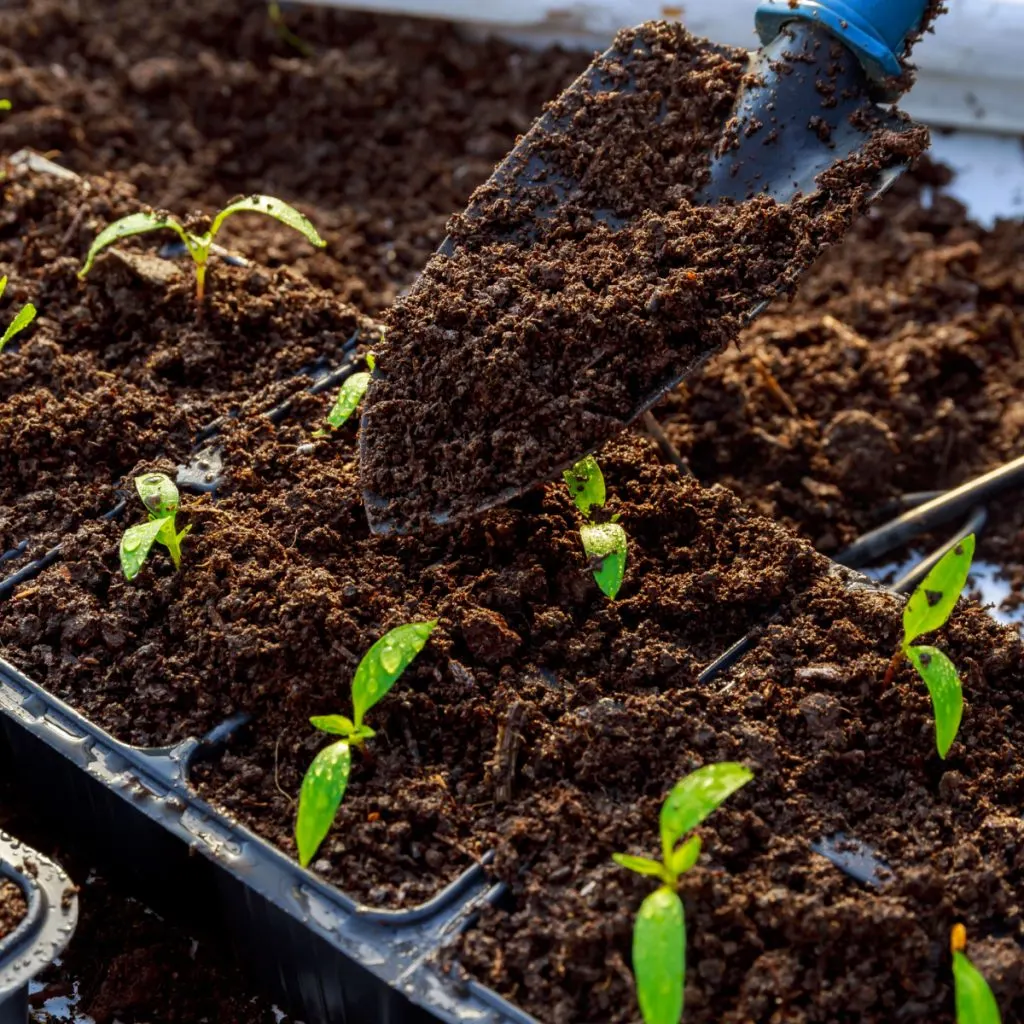
One of the biggest mistakes gardeners make when trying to start plants indoors is to use the wrong soil. Top soil or soil from the garden are both too dense and heavy for good germination. These heavier soils don’t allow seeds or seedlings to easily absorb nutrients. They also usually hold too much water, making it easy for seeds to rot before they ever germinate.
Unfortunately, potting soil isn’t the best solution either. Although potting soil contains more nutrients and is definitely lighter than regular garden dirt and topsoil, it still isn’t light enough for starting and growing seedlings. Nor does it contain the best power to promote early seed growth.
The good news is that potting soil’s lighter structure and density are a great starting point for creating an excellent homemade seed starting soil. And by simply adding just a few additional ingredients to potting soil, you can easily turn it into an incredible homemade seed starting soil. One that is ideal for quick germination – and healthy fast root growth!
Although there are a few good seed starting soil mixes available commercially, they can be quite pricey. But by mixing together a good potting soil mix with 3 additional all-natural ingredients, you can make the best seed starting soil around – and for far less!

Even better, not only will making your own mix save you a bit of cash compared to store bought brands, it also allows you to create a 100% organic mix. That, of course, can be a great peace of mind when growing vegetable plants from seed.
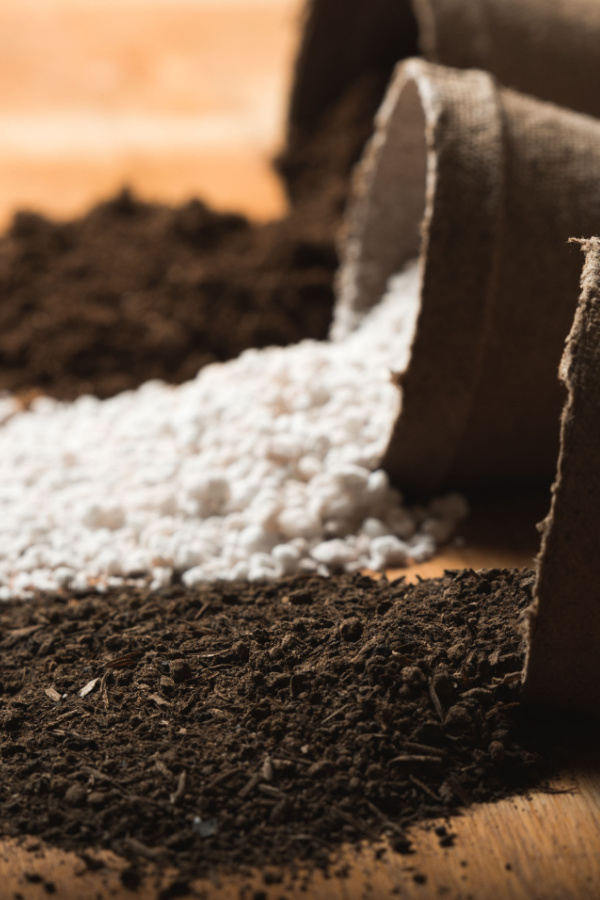
With growing success in mind, here is a look at the 4 special ingredients needed to make perfect seed starting soil – and how to mix them together to get your seeds off to an incredible start!
A great seed starting soil all starts with potting soil. Potting soil is the perfect base for creating a rich, healthy seed starting soil mix.
Start by selecting a good all-purpose potting soil. Be sure that it does not include any fertilizers in the mix. Strong fertilizers can actually hurt young seedlings more than help. Young seedlings require a lighter, slow-release fertilizer to allow for even growth.
If too much fertilizer is present, at best, it will lead to plants with excessive early foliage growth but weak stems. Unfortunately, too much fertilizer is more likely to be fatal to young seedlings.
Perlite is an all-natural substance made from volcanic glass. When exposed to extremely high temperatures (1500+ degrees), perlite puffs into an airy, lightweight substance that looks quite similar to bits of white styrofoam. And it happens to be a perfect ingredient for making great seed starting soil!
Perlite lightens the soil weight tremendously, all while creating air channels in the soil for water and air. Both of these qualities are vital to strong seedling growth. It is exactly why you will see perlite as an ingredient in many potting soils as well.
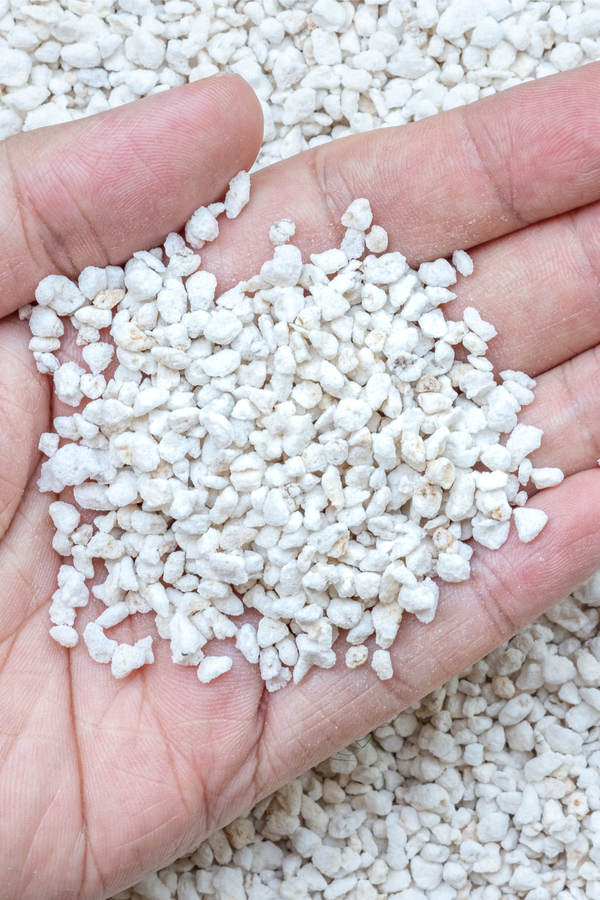
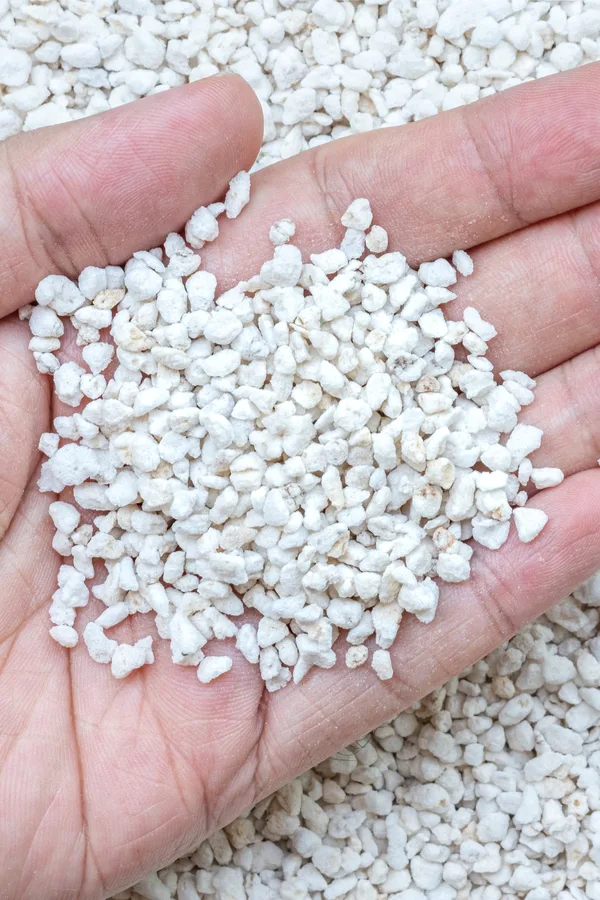
Perlite never breaks down, so it keeps the soil from compacting together permanently. Once you purchase a bag of perlite, it will stay good forever. And once it’s in the ground, it will also help forever as well! Affiliate Product Link : Espoma Perlite 8 qt. Bag
Whenever you want to add loose, lightweight and fertile power to any soil, compost is the answer! It not only helps to lighten a homemade seed starting soil mix, it also improves the overall drainage of the soil as well.
Compost is overflowing with nutrients that are easily absorbed by tender roots. Even better, those nutrients are not overly strong, so they won’t overpower young seedlings. In addition, compost can hold in excess of 10 times its weight in moisture – which means it can help seedlings get the moisture they need to sprout and grow.
When adding compost to your seed starting mix, it’s important to use use ultra-fine compost. If using compost from your home pile, screen it first to remove any large chunks that may have not fully broken down yet.
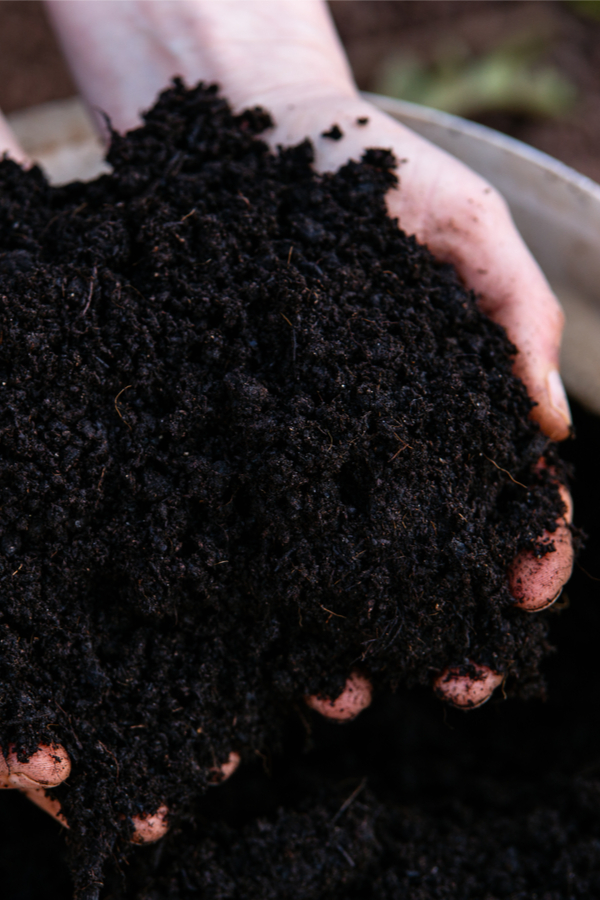

This is one time where picking up a bag of compost can be helpful. Most commercial bags of compost have already been screened and are quite fine. Affiliate Link: Charlies Compost 10 Lb. Bag
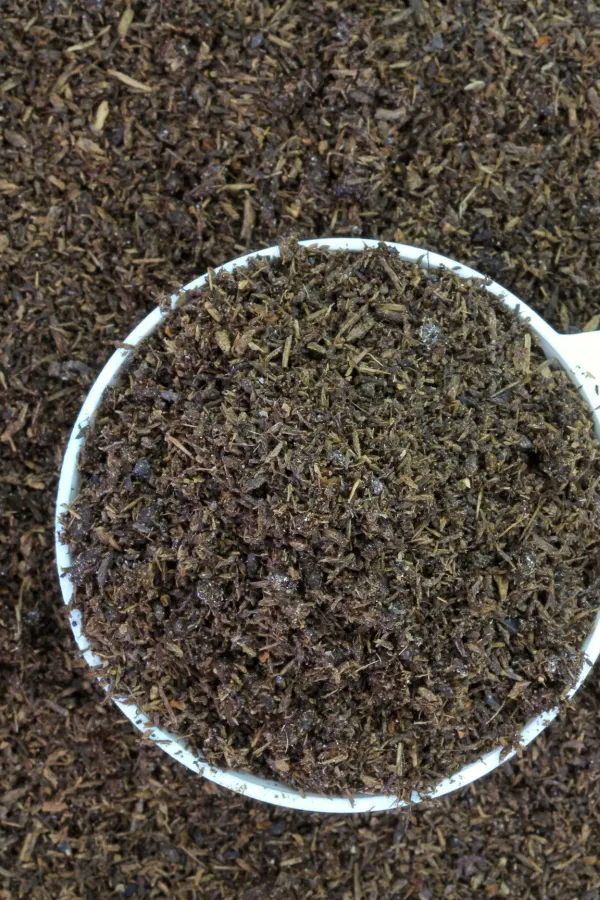
The 4th and final ingredient to add to your mix is worm castings. Worm castings, which are the manure of worms, are the true hero of a perfect seed starting mix.
The light makeup of the castings helps to break up and lighten soil much like perlite – but with one big difference – worm castings are filled with loads of trace minerals and nutrients that can easily and quickly be absorbed by seedlings to power them up.
These nutrients slowly release over time and leach into the soil as they break down. Just like compost, worm castings also act as the ultimate slow-release fertilizer for young seedlings.
Although you could use just compost, perlite, and potting soil, worm castings take homemade potting soil to another level. One that will have your plants strong and healthy come transplant day! Product Link : 100% Pure Worm Castings

The best part of all in creating your own seed starting soil is how easy it is to mix together. To make, simply combine equal parts of each of the four ingredients above. It is usually best to premix all four in a large wheelbarrow or 5-gallon bucket and then fill your seed trays.
For best results, always water down your soil in the trays a few days prior to seed planting day. This will help to provide good moisture in the soil for better germination. It also allows the soil to settle in the containers, giving you time to top it off before planting seeds.
For more great information on starting seeds and how to provide them the right lighting for success, be sure to check out our article: The Best Lights To Use For Starting Seeds Indoors – Simple, Easy & Inexpensive!
Make this the year you create your own seed starting mix and grow your best plants ever!
Follow Our Facebook Page For Great Gardening Tips And Advice! This Is My Garden Facebook Page
This Is My Garden is a garden website created by gardeners, for gardeners. Jim and Mary Competti have been writing gardening, DIY and recipe articles and books and speaking for over 15 years from their 46 acre Ohio farm. They publish three articles every week, 52 weeks a year. Sign up today to follow via email, or follow along!
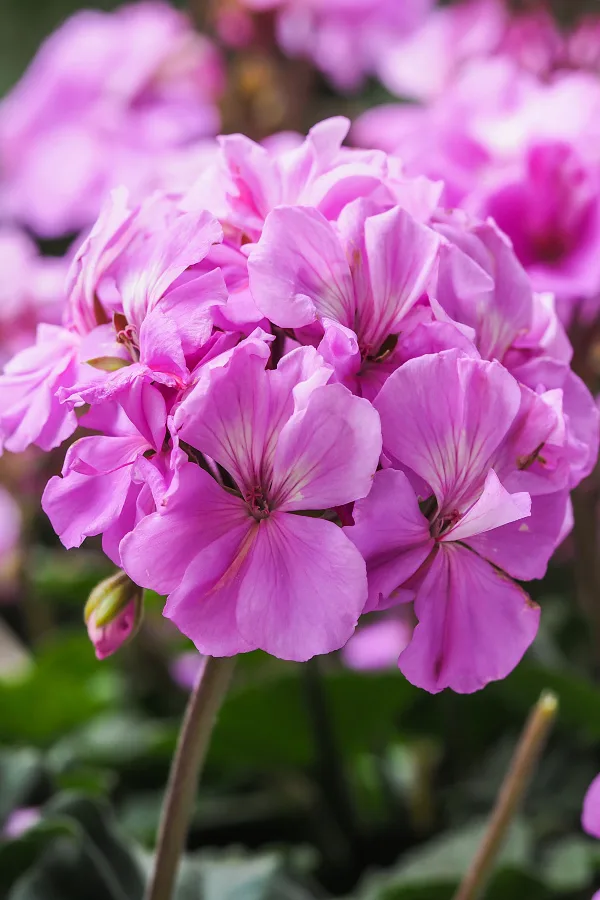
Did you know that you can start and grow your own incredible geranium plants from seed – and never have to worry about buying these attractive but often quite expensive flowering beauties again?
Geraniums are one of the most popular blooming plants when it comes to filling flowerbeds, containers and hanging baskets with big color. Their uniquely gorgeous blooms and beautiful foliage can fill any space with big interest.
But one thing is for sure, they can be expensive to buy. Especially when you have to do it each and every spring! Although geraniums are technically a perennial, they are grown almost everywhere as a annual since they simply can’t make it through a freeze or frost. And that means when the season is over, so are your geraniums.

Unfortunately, unlike many other annual flowers that can be purchased in flats at a significantly lower cost in the spring, geraniums are most often sold as larger plants in individual pots or small packs. And at a much higher cost!
In fact, depending on the size of the transplant, geraniums often cost $4 and up for a single plant. Which, of course, is exactly why growing your own from seed can save some serious cash. And even better – you might be surprised just how easy they are to grow from seed!
When you can purchase an entire pack of 75 to 100 geranium seeds for the cost of just one or two geranium transplants, it’s easy to see why growing your own is a good way to go.
For years, geraniums were most often propagated from cuttings for commercial sale. Seeds at that point were not an efficient way to grow the plants quickly. In addition, the seed quality wasn’t the best when it came to producing a healthy plant with good blooming qualities.
But that has changed dramatically over the last decade. There have been advances just not with seed quality, but also in the availability of incredibly beautiful hybrid varieties. These plants grow strong and healthy from seed and they also produce plants that bloom with intense vigor and color.

The first key to growing geraniums successfully indoors from seed is to start early. Geraniums are slow growers, and they can take a long time to start blooming.
Unlike many flowering annuals that will bloom in as little as 8 weeks, geraniums can take 12 or more weeks to go into full bloom. With that in mind, it’s best to start seeds indoors about 10 weeks before you plan on moving them outdoors.
Seed varieties can be found (we’ve included a few seed links below) with blooms in white, red, pink, lavender, salmon, orange and more. In addition, there are many more that have variegated blooms that can add even more interest. Whatever you do, get your seeds early so you can start them early!
The best way to know when to start your seeds indoors is to simply count back from your last average frost date. If your last average frost date is June 1st, start seeds indoors around March 30th. This allows for 10 weeks of growth, giving plants plenty of time to fill out before planting outdoors.
Geraniums not only grow slow, they can be slow to germinate as well. But there is a way to help speed germination, and it all starts by soaking your seeds before planting. Soaking seeds prior to planting indoors can speed up germinating times by a week or more. And it’s a simple process!
To soak, moisten a paper towel and lay your seeds on it. Next, fold the paper towel together so that the seeds are inside. Finish by placing the moist paper towel into a plastic container with a lid or a plastic bag and seal.
Place the container or bag in a warm room or location. The moisture in the paper towel will fill the seeds with moisture, and by sealing it off in the container or bag, the seed will swell a bit. Allow the seeds to soak for 24 to 36 hours – and then its time to get them planted!
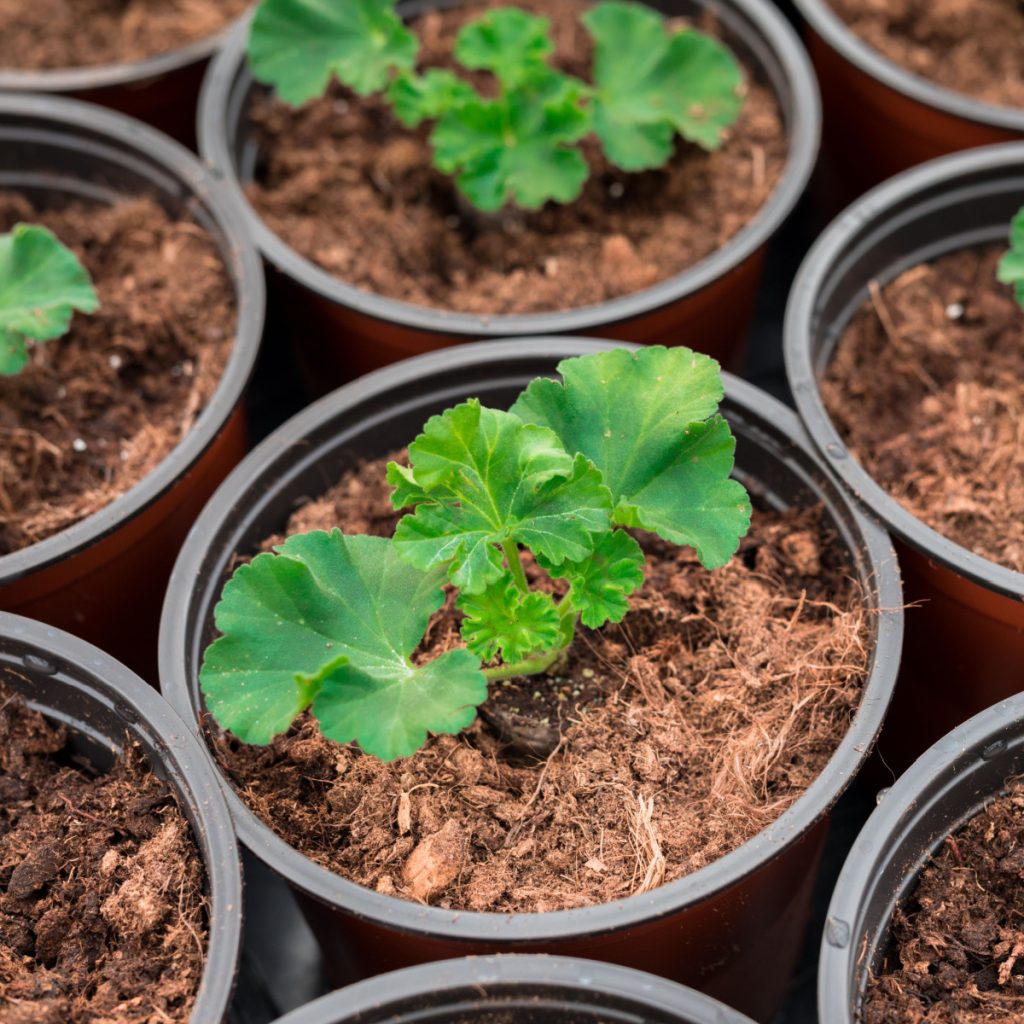
Starting geranium seeds indoors is much the same as starting vegetable plants. The only difference for geraniums is that it’s best to use a larger starting size cell or container than you would with vegetable plants.

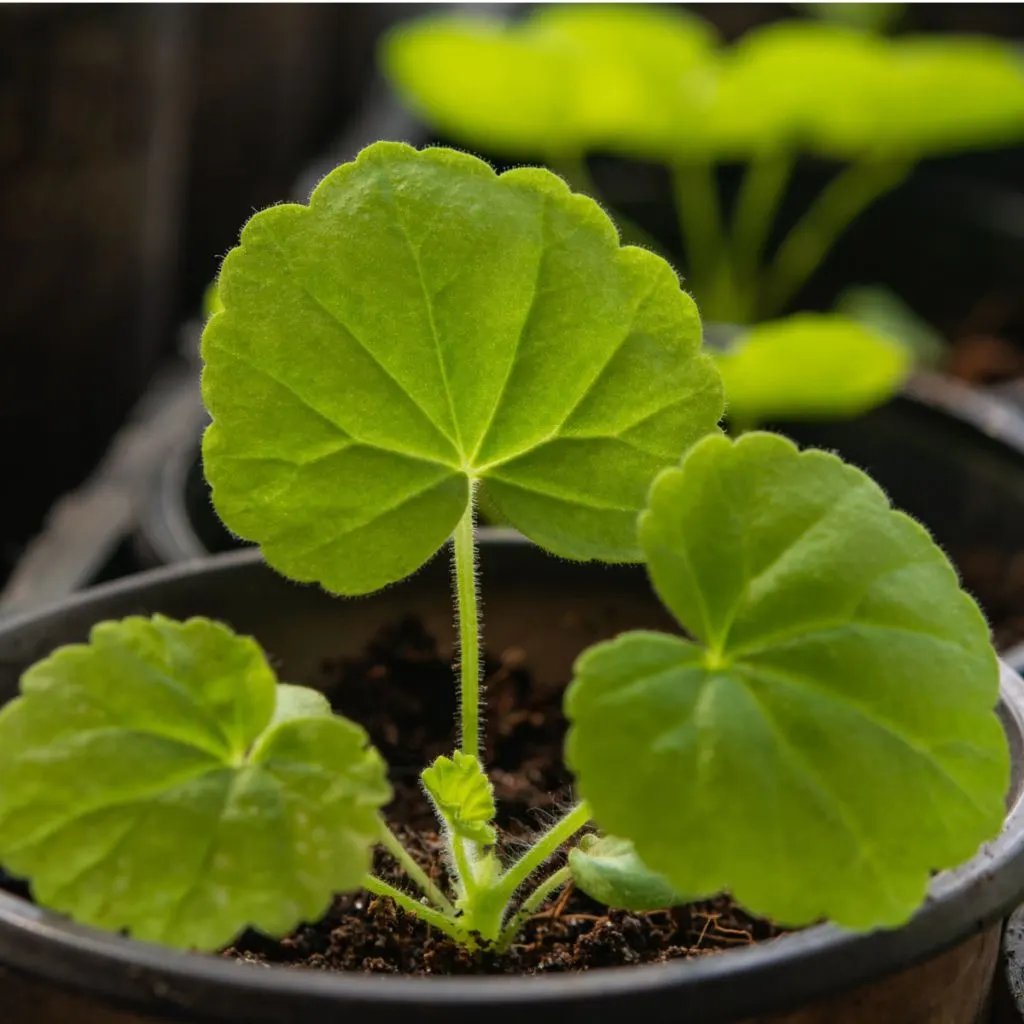
With the longer growth period of 10 weeks, geraniums need plenty of space to grow their root structure. Avoid using smaller cell flats with 72 planting holes. Although they can start a lot of plants, they won’t be able to provide enough room to handle growth until the plants are ready for the outdoors.
Instead, use flats with larger and deeper spacing that hold 24 plant – or even single larger containers. These provide plenty of room for growing indoors for 10 weeks or more. By using larger cells or pots to start your plants, you avoid the extra transplanting step.
This is important for geraniums as anytime a transplanting occurs, it slows their growth for a few days while they readjust.
Once your seeds and containers are ready to go, it’s time for planting. Fill your seed starting cells with an all-purpose, loose, nutrient-filled seed starting mix. It is really important to start your seeds with plenty of nutrients for growth right from the start to allow for faster growth.

Plant seeds 1/4 inch down into the soil, planting two seeds in about half of the pots. By planting half of the cells with two seeds, you will have extra to replant if a few seeds in the other cells don’t germinate.
Finish by watering lightly, being careful not to over-saturate the soil. A spray bottle works well for this task. Cover your seed trays or cells with a plastic dome cover or plastic wrap. This is vital to keep the moisture in until they germinate. Light is not important at this stage.
Make sure to keep the seeds in a warm room or location that is 70° Fahrenheit or above. The warmth is just as important to help germination as the moisture is. With pre-soaking, geranium seeds usually will sprout within 5 to 10 days.
Once a few of the seeds have popped through the surface of the soil, you can remove the cover. At this point, it’s time to put the seedlings under the lights.
Although a sunny window might sound good like a good place to raise seedlings in late winter or early spring, it’s far better to keep seeds directly under artificial indoor light. See: The Best Lights To Use For Starting Seeds Indoors – Simple, Easy & Inexpensive!

This is actually the best way to start any vegetable or flower seed indoors. Unfortunately, sunny windows just don’t give enough light for plants to grow strong. Especially when it comes to geraniums. The good news is this process requires no special equipment or fancy lighting.
Ordinary 4′ fluorescent or LED shop lights work great. Just keep them about an inch over plants as they grow. Moving the lights up as the plants grow will encourage slow, steady and strong growing patterns.
Providing your geraniums with a bit of extra nutrients as they grow will help them fill out fast. The secret is to provide the nutrients in a lower dose as to not overpower young seedlings. Using an all-purpose liquid plant fertilizer at half of the recommended strength will do the trick.
You can also use compost tea as an alternative – and it can be used at full strength. Fertilize when plants are 4 weeks old and every 2 weeks after that. This will help strengthen you plants and have them big enough for planting outdoors.
Finally, you will need to harden off your plants before they head outside. Hardening off is simply the process of getting plants use to life outdoors.


As the weather begins to warm, take geraniums outside during the daylight hours in a protected space. Back porches and decks work well for this. When temperatures cool down at night, bring them back inside.
A week or so before transplanting, your geraniums should be able to stay out around the clock unless a frost or freeze in the forecast. With this process, your geraniums will be more than ready to thrive!
Here is to growing your own geraniums from seed this year – and saving a little cash in the process! For more tips on growing gorgeous geraniums, be sure to check out: The Best Way To Fertilize Your Geraniums – How To Keep Geraniums Blooming Big All Summer!
Follow Our Facebook Page For Great Gardening Tips And Advice! This Is My Garden Facebook Page
This Is My Garden is a garden website created by gardeners, for gardeners. Jim and Mary Competti have been writing gardening, DIY and recipe articles and books and speaking for over 15 years from their 46 acre Ohio farm. They publish three articles every week, 52 weeks a year. Sign up today to follow via email, or follow along!
One of the easiest ways to start and grow your own vegetable and flower plants from seed is to make a simple seed starting stand to give your seedlings the perfect amount of space and light they need to thrive indoors.
Starting your own vegetable and flower plants from seed is a great way to save on your garden budget. It also allows you the ability to grow an endless variety of plants for a fraction of the cost of buying ready to go plants every spring.
But when it comes to starting plants from seed indoors, many quickly get frustrated with the process. Whether it’s finding a space for a place to grow their plants, or giving them just the right light to grow strong and healthy, gardeners often struggle with getting their plants to flourish – or even to grow at all!

Here is the good news – starting seeds indoors really can be a simple and easy process. In fact, all you really need to do is provide your seeds with a warm room and the right light and soil. And you can all but ensure smashing success. And the easiest way to do that is to make and use a simple seed starting stand.
When gardeners struggle to grow seedlings indoors, the problem almost always comes down to three issues – poor soil, a lack of heat, and most importantly, a lack of good lighting. See our article: How To Know When To Start Seeds Indoors – Vegetable or Flower Seeds!
The soil issue is easy to remedy. When starting seeds indoors, it’s always best to use seed starting soil in place of ordinary potting soil or garden soil. Seed starting soil is light and full of nutrients that allow your seedlings to grow quickly.
The warmth issue is fairly easy to remedy as well. Seedlings need warm soil and a warm room to germinate and grow. As long as you place your plants in a room that is near 70° (F), they are going to thrive.

So that leaves lighting as the final issue. Lighting for young seedlings is extremely vital to their growth and development. In fact, it is critical. And unfortunately, although many try, a window or a windowsill is not the place to grow seedlings and will only lead to disappointment.
Although a sunny windowsill may seem like a great location for starting seeds indoors, it’s not. Using a windowsill to start and grow seedlings actually poses several unique problems for plants.
For starters, even the sunniest of windows struggles to provide the right light for healthy seedling growth. There simply isn’t enough daylight in late winter and early spring to power plants. Furthermore, as a seedling grows, it naturally extends toward the light source to absorb its power. In a window, this is a big problem!
Because the sun is so far away, it causes seedlings to grow weak, spindly and crooked as they grow toward the light. It almost always results in feeble seedlings that can’t stand up to outdoor life once they are in the ground.
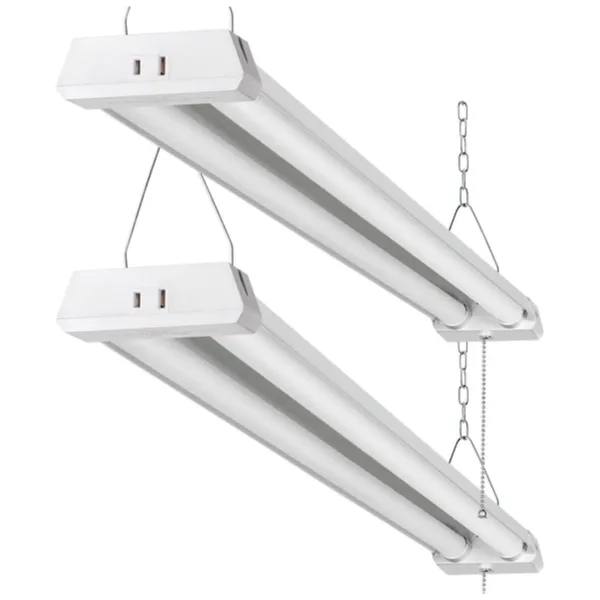
So how do you grow strong, sturdy seedlings with ease? The answer is by using simple and inexpensive artificial lighting from ordinary LED or fluorescent shop lights.
As it turns out, to grow flower and vegetables from seed, you don’t need special or expensive grow lights – and by hanging them from a simple, homemade seed starting stand – you can grow them anywhere in your home with ease!
Although there all types of growing stands on the market, they can be quite expensive to purchase and maintain. Especially when you consider many come with specialized grow lights that can cost a fortune to replace. In addition, they can also take up a lot of room!
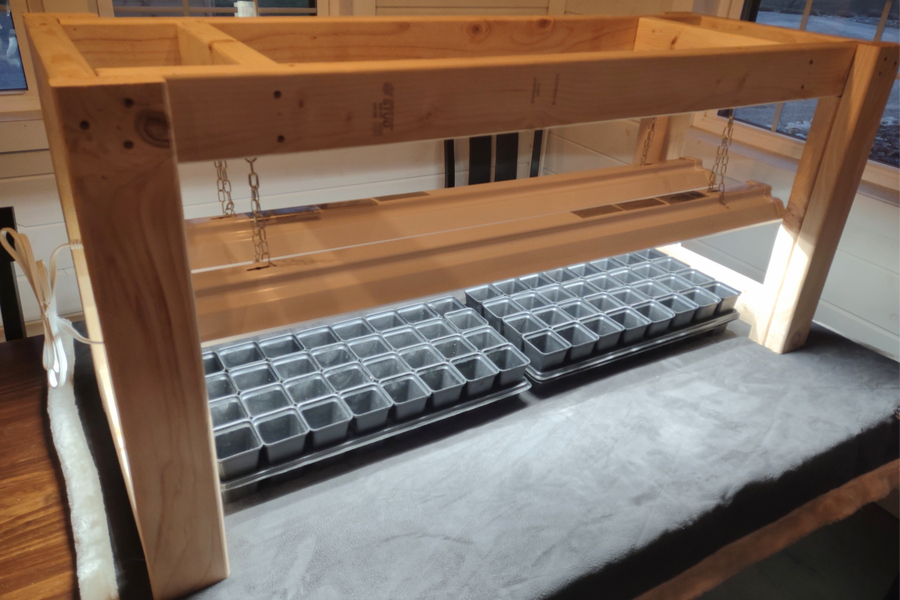
All you really need for a successful stand is the ability to hang lights over your plants. That is why a few years back we came up with a simple seed starting stand design using 2×4 lumber. The stand can hang two ordinary and inexpensive 4′ shop lights that provide all the light your plants will ever need.


Not only is it easy and affordable to build, it’s also small enough to fit on a table or in the corner of any room right on the floor. We do have complete step by step plans for the stand in our DIY Plans Store in our Etsy shop for those interested in the exact plans – but here is a look at how it looks, works and the materials you need to build it.
The stand is built using five (5) 8′ long 2×4’s. The sturdy design allows it to be on the ground or up on a table top for an easier working height. Using basic “S” hooks, the stand holds two (2) 4′ long shop lights.
At 24″ x 24″ x 51″ long, the finished stand fits in the smallest of spaces. The smaller size really makes it nice for keeping out of the way, especially when the lights are on! Depending on the containers or trays you use under the lights, you can raise up to 144 plants at once.
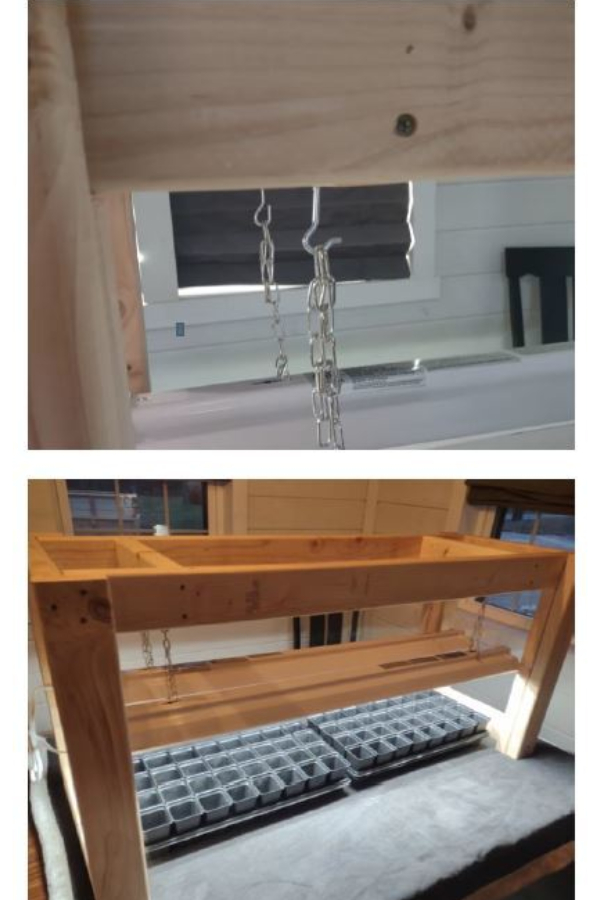

The lights can easily be lowered or raised with a chain to keep them at the proper growing height above the plants. With a spacious amount of room between the lights and ground, plants have plenty of room to grow big before transplanting.
The simple design uses the 2×4’s to create sturdy legs. Next, a rectangular frame built from the 2×4’s is attached up top to create a solid frame for hanging the lights. It goes together easily with screws – and if you don’t have storage space, by using screws, you can take it back apart at the end of the growing season.
Cutting the pieces and assembling the stand is easy to do with basic tools. In fact, if you have a tape measure, a power drill and a saw to make straight cuts to the 2×4’s, you are in business! One thing is for sure, it can make starting and growing your own seeds fun and easy!
Here is to creating your own seed starting stand – and to growing your own incredibly healthy transplants this year!
Follow Our Facebook Page For Great Gardening Tips And Advice! This Is My Garden Facebook Page
This Is My Garden is a garden website created by gardeners, for gardeners. Jim and Mary Competti have been writing gardening, DIY and recipe articles and books and speaking for over 15 years from their 46 acre Ohio farm. They publish three articles every week, 52 weeks a year. Sign up today to follow via email, or follow along!
Looking for the best lights to use for starting your vegetable or flowers seeds indoors this year? You might just be surprised how easy and inexpensive the perfect solution can be!
When it comes to getting ready for garden season, for many gardeners, it all begins with growing their own vegetable plants and annual flowers from seed. Not only is growing your own plants fun and rewarding – it also lets you grow any plant you can find a seed for. Even better, it can also save a tremendous amount of money!
But when it comes to growing strong, healthy transplants for your flowerbeds and garden, one of the biggest areas gardeners struggle with is giving their seedlings the light they need as they “grow up” indoors.

Getting the right kind and amount of light for young seedlings is absolutely critical in their development. Without enough light, plants will struggle to even develop. And if the light is too strong or too far away – it can lead to spindly, long, weak transplants that blow over with the first bit of wind after being planted outdoors.
Here’s the good news – contrary to popular belief, growing seedlings indoors doesn’t require fancy, expensive grow lights or equipment to start seeds indoors. They just simply aren’t necessary. But with that said, it does require more light than just placing your plants in a sunny windowsill.
Starting seeds in a sunny windowsill may sound like a great plan, but it has quite a few shortcomings. Especially when it comes to growing strong, healthy plants that are ready to take on the outdoors.
So why is starting and growing plants in a window a bad plan? For starters, seeds have a difficult time germinating with the constant change in temperature from a window. Daytime in the sun can be plenty warm, but many windows become quite cold in the evening and overnight hours.

But that is just the tip of the iceberg. If and when seeds finally germinate in a windowsill, they struggle to maintain proper growth. This is because the light that comes through a window from the sun is simply too far away.
Tender young plants need light. And they will stretch as far as they can to get it. In a windowsill, because the sun is so far away, they try to grow as quickly as they they can to it. The result is a seedling that grows spindly, tall and skinny.
Those same plants also lean heavily toward wherever the light is coming from. This too contributes to them becoming even more weak. Even for those that constantly turn their plants to correct the lean, the plants still grow leggy with extra long main stems.
One thing is for sure, windowsill growing will not create strong plants that are ready for the outdoors. But there is a perfect answer, and it’s cheaper and easier than you could ever imagine!
Although you can certainly use expensive grow lights and stands to grow great transplants indoors, there is a much better, easier, and best of all, less expensive option.
Unlike tropical or unique plants that require special lighting to survive indoors, vegetable and annual flowers do not. They simply need bright, consistent light. And because of that, they grow with ease under ordinary fluorescent or LED ceiling shop lights. In fact, they thrive growing underneath them!
We are talking about the common, familiar hanging lights used to light up garages and basements. The double bulb light versions of these are the best for growing seeds with their wider width. They can usually easily be found in 2′ and 4′ lengths which fit over seed trays in perfect fashion.
Even better, most shop lights come with hanging chains included that make it easy to put directly over your plants. As for which is better when it comes to fluorescent or LED – both work equally well, although LED shop lights are far less expensive to operate. They also usually last far longer as well.
Now that we have covered what lights you can use – here is an in depth look at how to use shop lights to grow amazing transplants:
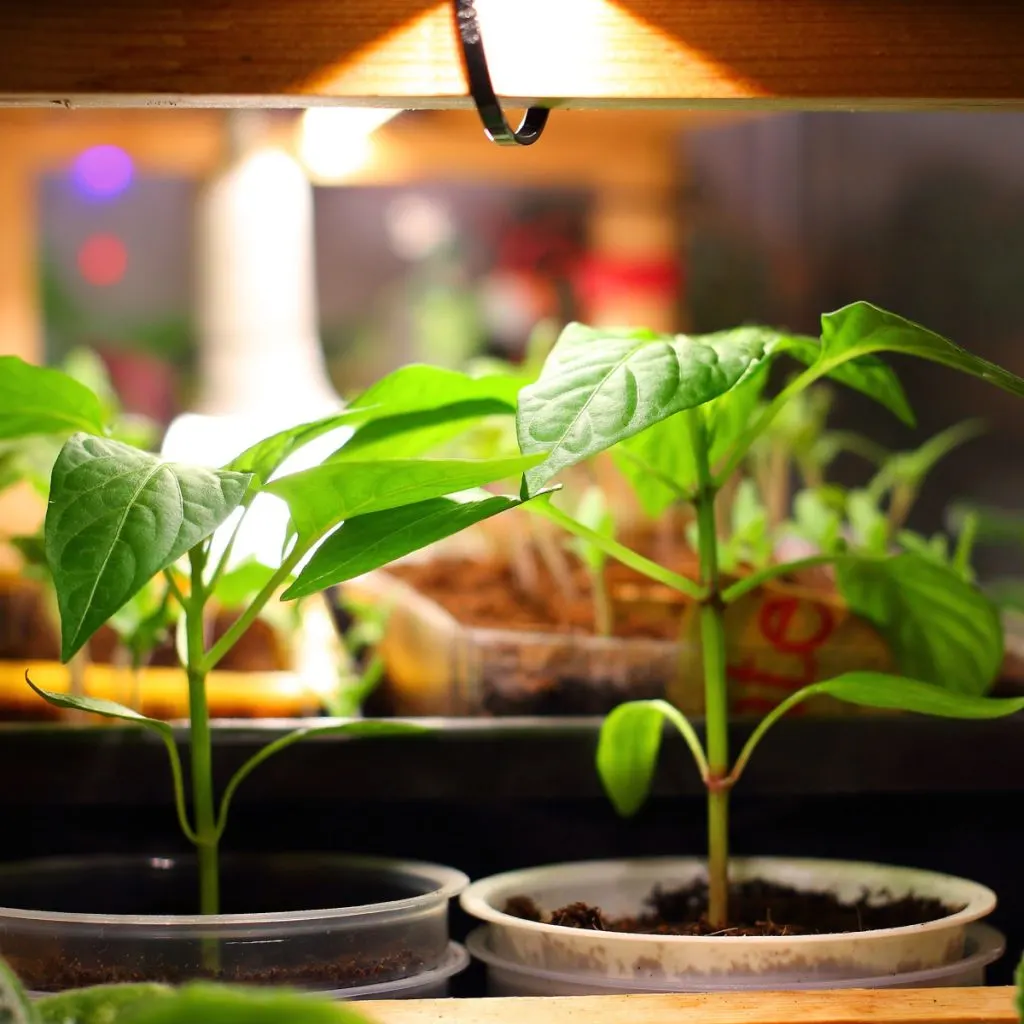
When growing seeds indoors with fluorescent or LED shop lights, it’s all about low and slow. As in keeping the lights low to the plants to encourage slow, steady growth.
Both styles of lights provide bright but cool lighting. That means placing them close to the tops of plants won’t burn their tender leaves as they grow. Even when placed as close as 1 to 2 inches over the top of the foliage. That, by the way, happens to be the perfect height for allowing seedlings to grow slow and steady.
So just how do you need to use the lights? For starters, when seeds are first planted into their cells, there is no need for the lights to be used at all. In fact, the light will only make the soil dry out faster.
Instead, when first starting your seeds, place a clear lid or even a bit of plastic wrap loosely over the top of your trays. This will help keep moisture in place until the first seeds begin to germinate. Again, they do not need light at this point, so place them in a warm room or area that will help speed sprouting.
Check the plants daily and once the first few seeds germinate, it’s time for the lights! Two, double-light fixtures can be easily used to start up to 4 large flats. By suspending the bulbs over the plants at 1 to 2 inches above the top of the leaves, plants grow slow and steady.
You can hang the lights over plants using cement blocks, bricks, or blocks of woods on the end. You can also easily create a stand from simple 2×4’s to hang and adjust the lights with a chain. We actually have plans in our Etsy shop for a great little table top stand that goes together with ease using just a few common 2×4’s. See: Easy DIY Tabletop Seed Stand

However you hang your lights over your plants, continue to adjust the lights up as needed, but always keep them just an inch or two above the foliage. This will help to develop strong stems and more compact foliage. Both of which are highly advantageous when it comes to transplanting success.
That leads to the final question of how long do the lights need to be left on each day? For best results, try to leave your lights on each day for 12 to 14 hours.
Leaving them on around the clock will cause too much early growth and have your plants too large and unruly long before planting day. They actually need the dark period each day to rest as well. On the other side, anything less than 12 hours each day and they will grow too slowly.
Use the lights to continue growing plants (usually 6+ weeks) until they are large and strong enough to begin the process of hardening off before transplanting. For more on this, see our article: How To Harden Off Seedlings & Transplants Before Planting Outdoors.
Here is to growing your own plants this year with ordinary shop lights – and to having your best transplants ever!
Follow Our Facebook Page For Great Gardening Tips And Advice! This Is My Garden Facebook Page
This Is My Garden is a garden website created by gardeners, for gardeners. Jim and Mary Competti have been writing gardening, DIY and recipe articles and books and speaking for over 15 years from their 46 acre Ohio farm. They publish three articles every week, 52 weeks a year. Sign up today to follow via email, or follow along!
Did you know that you can enjoy growing and harvesting cherry tomatoes indoors all winter long?
Cherry tomatoes are one of the most popular vegetable choices to grow for home gardeners. Not only can you get a huge harvest from just a few plants, they also produce much faster than their larger slicing counterparts. And are they ever good!
Cherry tomatoes are perfect for eating fresh in salads or for adding to salsas, juice, and sauces. And with so many different cherry tomato varieties available on the market today, there are near endless options when it comes to color and flavor.

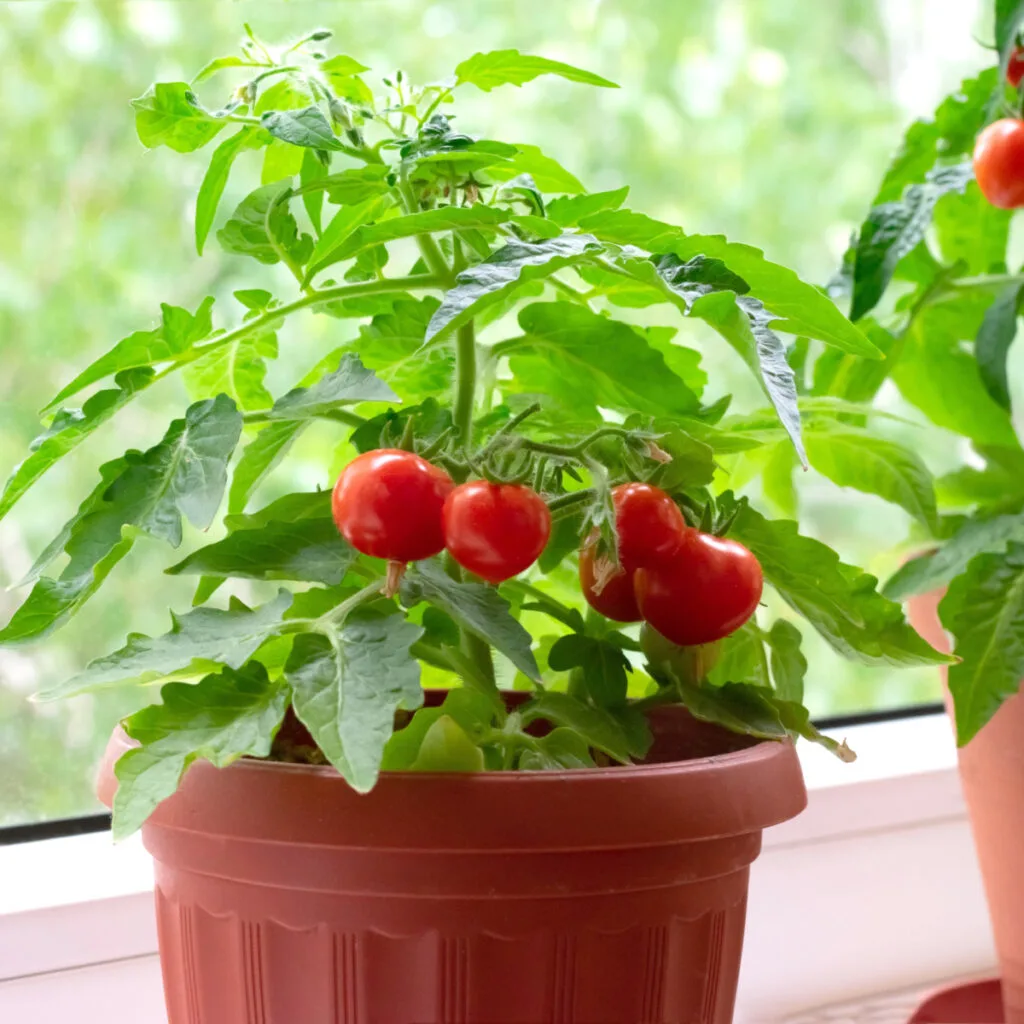
While it is quite difficult to grow larger slicing tomato inside, cherry tomatoes are actually the perfect size and shape for growing inside year-round. And since they also happen to be self-fertilizing, there is no worry about the need for pollinators like bees and butterflies to find your plants.
In fact, all you really need for indoor tomato growing success is a warm room, a little bit of light and a few tomato seeds – and you’re ready to grow!
When growing cherry tomato indoors, success all starts with selecting a variety that is well suited to small spaces.
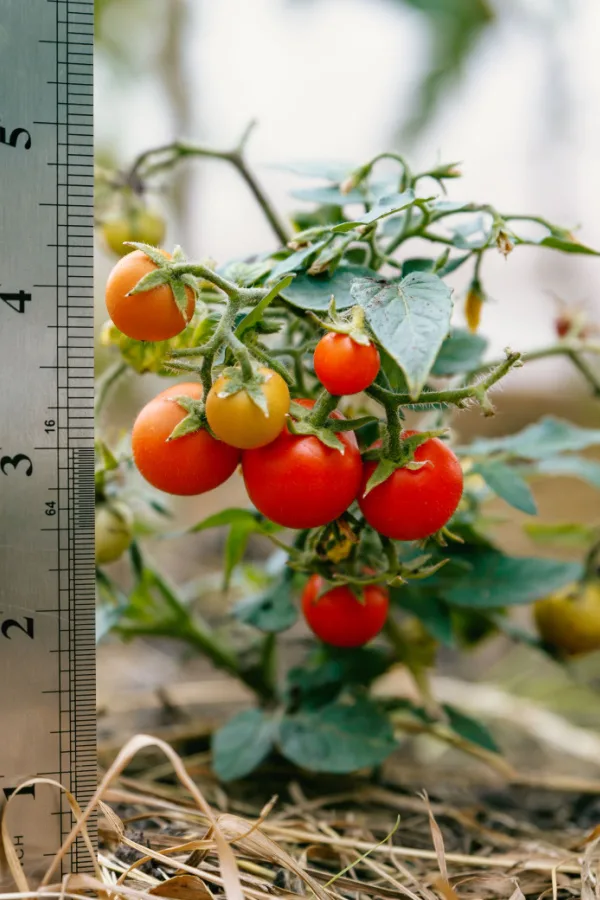
It’s best when growing indoors to look for varieties that are labeled as being “patio” or “container” friendly. There are also newer dwarf type cherry tomatoes that are even smaller and perfect for indoor growing. (For specific varieties to grow, we included a few great selection at end of the article to try)
All of these “smaller” types are usually much more compact and don’t need large containers to grow extensive roots. Their smaller plant size makes them perfect to sit on shelves or in any space where the lighting is just right.


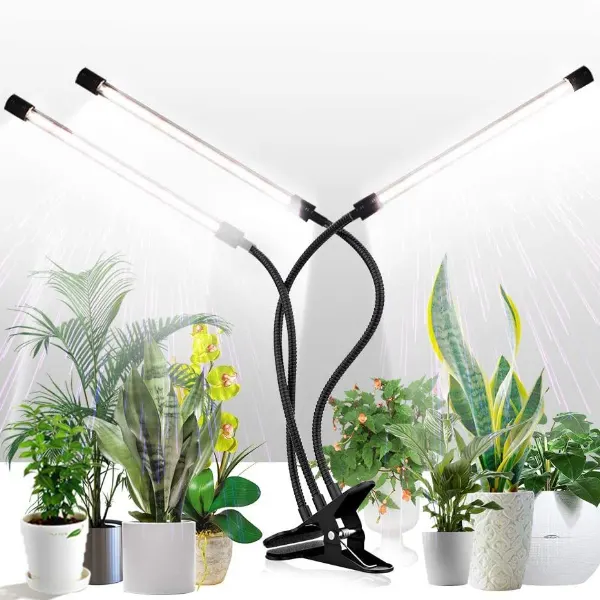
In order to grow tomatoes indoors, you will need a few basic supplies beyond your seeds, including potting soil, a good container or pot – and depending on the lighting in your house, an inexpensive fluorescent or LED shop light.
Just as if you were growing tomatoes outdoors, you need to have good soil to produce great plants. The soil needs to be light, airy, and retain moisture well.
A good all purpose potting soil is great for this, especially if you add in some additional worm castings and coffee grounds to the mix. These help to add even more energy to the soil to help plants reach their full potential and yields.
Since you are growing indoors in smaller containers, you can start your seeds right in the final growing container. This eliminates the need for transplanting and keeps the seedlings growing fast. See: How To Create The Best Potting Soil For Potted Plants – The Perfect Potting Soil Recipe!
When selecting your pot or container, it’s first important to make sure it has plenty of holes for drainage. Poor drainage can lead to the roots becoming waterlogged. For indoor plants, and especially tomato plants, that can spell big trouble.

As for size, if the cherry tomato plant is less than a foot tall at its mature height, a container of around 6 to 8 inches in diameter and at least 4 to 6 inches in depth is ideal.
For larger cherry tomato varieties, aim for a final container that is at least 12 inches in diameter and 8 to 10 inches in depth. The larger you can go, the better as it will allow for a more extensive root system to develop.
When growing tomatoes indoors, lighting is usually the biggest key of all. Tomato plants require at least 6 to 8 hours of direct daily light in order to grow healthy and strong. They will still grow with less light, but not as well – and certainly not as productively.
You can grow tomatoes in a sunny, southern facing window. But in most cases, it’s far better to give your indoor tomatoes a dose of daily artificial light to really get them to produce.
The good news – it doesn’t have to be fancy, expensive or hard to do. There is no need to purchase expensive grow lights. Tomatoes do not require a special spectrum of light to grow, which means ordinary fluorescent or LED lights will work perfectly fine.
To use, keep the lights a few inches above the tomato plants at all times. Leave the lights on for around 12 to 14 hours each day. If you are supplementing window light, adding 4 to 6 hours of artificial light will help.
Unfortunately, using only window light will usually leave plants leggy and thin. It’s better to use a combination of both if possible – as it will lead to better overall plant growth.
When your plants are growing in window light, always make sure to rotate the plants so all sides of the plant get sufficient light. When using overhead artificial light, all that is necessary is to keep the lights overhead.
So how do you keep indoor tomatoes growing strong? The first key is to water smart. It’s best to keep the soil of your growing cherry tomato plants moist but not overly saturated. Only water after the top two inches of soil is dry to touch.
Tomatoes are heavy feeders, so be sure to give your indoor plants half a dose of all-purpose liquid fertilizer every two weeks. As an alternative, you can apply compost tea or worm casting tea weekly for a more natural, slow-release fertilizer option.
As mentioned earlier in the article, cherry tomato plants are self pollinating so they do not require pollinators such as bees and butterflies. Outdoors, they rely on wind and even the flapping wings of wasps, bees and butterflies to spread pollen. But indoors, it’s easy to mimic this quite easily in order to help them out.
The first method to help pollination is to add an oscillating fan to the growing space. This helps to move pollen around, and just a few hours a day of a fan will work wonders. You can also gently shake the plant every day when there are blooms present.
Lastly, you can also hand pollinate to help transfer pollen from one flower to another. All methods will work, and it really comes to down to finding the one that is easiest and most effective for you.

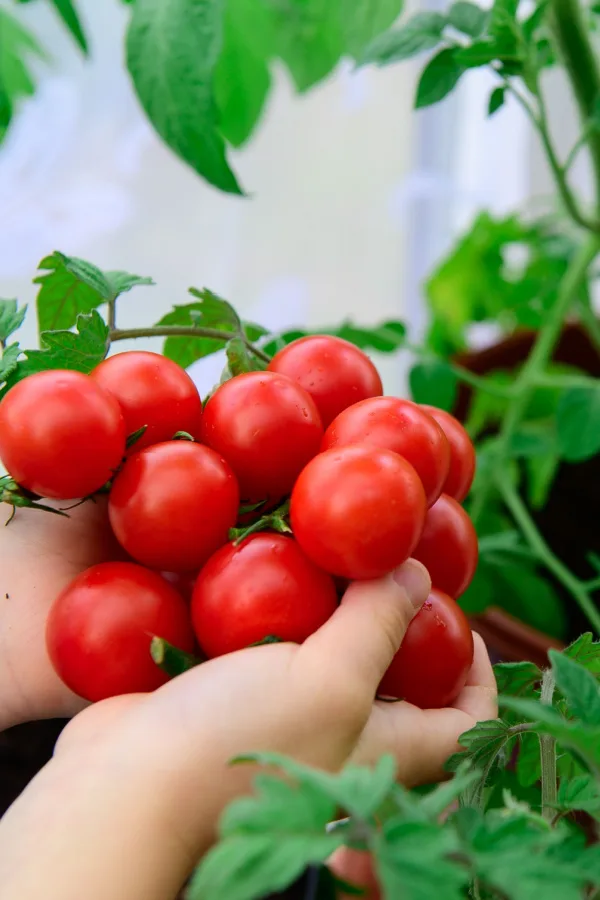
The best way to encourage your plant to keep producing cherry tomatoes when growing indoors (or anywhere for that matter) is to harvest the fruit early and often.
Thankfully, with indoor growing, you don’t have to worry about pests, bugs, or most diseases ruining your plants or tomatoes. But harvesting the tomatoes regularly will still help in overall production. Not only will it let you enjoy fresh cherry tomatoes right away, it also helps to encourage plants to send resources to produce new blooms for future fruit more quickly.
When it comes to overall harvest, the type of plant you are growing matters. If you are growing an indeterminate variety of tomato, it will continue to produce as long as you keep watering and fertilizing. Determinate varieties will produce most of their crop all at once and then begin to die off.
So what are some of the best varieties of cherry tomatoes to grow indoors? Luckily – we just happen to list 6 of the best of the best below!
Tiny Tim Tomato – Despite being compact in size, this determinant variety features large clusters of 1-inch-sized fruit. It grows well in containers as well as in hanging baskets and requires no staking or support. Days to Maturity: 60 days. Affiliate Product Link: Tiny Tim
Yellow Balcony Tomato – This small cherry tomato variety is the ideal dwarf size for growing indoors and yes, on balconies in the summer too! It grows to a total height of around 20 inches, but produces tons of small yellow fruit with a delicious sweet tomato flavor.
It is a determinate variety, so you can plant a new plant every few months to keep fresh tomatoes coming on!. Days to Maturity: 85 days. Affiliate Seed Link: Yellow Balcony Tomato Seeds

Red Robin Tomato – This dwarf tomato variety is perfect for small space growing. It is a determinant cherry tomato cultivator that reaches only up to a foot tall. The fruits are around 1 inch in diameter and feature a mildly acidic flavor profile. Days to Maturity: 55 days. Affiliate Seed Link: Red Robin
Patio Choice Red Hybrid Tomato – This determinate cherry tomato variety produces a large yield of half-ounce-sized red fruit. The vines only reach between 24 to 30 inches, which makes it a great choice for hanging baskets or small trellises. Days to Maturity: 65 days. Affiliate Seed Link: Patio Choice Red Hybrid
Small Red Cherry Tomato – This variety is an indeterminate plant that stays fairly compact. It is great for growing in hanging planters or in containers. The fruit is on the sweeter side with a slight tartness. It features a high water content which makes it great for juices. Days to Maturity: 60-90 days. Affiliate Seed Link: Small Red Cherry
Tidy Treats Tomatoes – Not only is this an indeterminate tomato variety that will produce heavily for you for a long growing season, but it also has the growth patterns of a more compact determinate variety. Basically, it’s the best of both worlds! You get tons of sweet cherry tomatoes while not taking up a lot of space in your home. Days to Maturity: 50-55 days. Affiliate Seed Link: Tidy Treat
Here is to growing your own tomatoes indoors this year in the winter – and to enjoying that fresh tomato taste even as the snow flies outdoors!
Follow Our Facebook Page For Great Gardening Tips And Advice! This Is My Garden Facebook Page
This Is My Garden is a garden website created by gardeners, for gardeners. Jim and Mary Competti have been writing gardening, DIY and recipe articles and books and speaking for over 15 years from their 46 acre Ohio farm. They publish three articles every week, 52 weeks a year. Sign up today to follow via email, or follow along!
One of the best ways to save on your vegetable garden budget and grow better and more productive plants is to save the seeds from your best vegetable plants this year – and when it comes to saving seeds from your peppers – it couldn’t be easier!
It’s no secret that the price of seed packets and transplants keeps increasing each year. And when you have a large garden to plant, it can get quite expensive if you have to purchase all of your plants.
That is certainly the case for pepper plants. Not only can they be pricey to purchase in the early spring, it can also be hard to find the varieties you love most. And that is exactly where saving seeds from your favorite and best producing pepper plants can really come to the rescue!

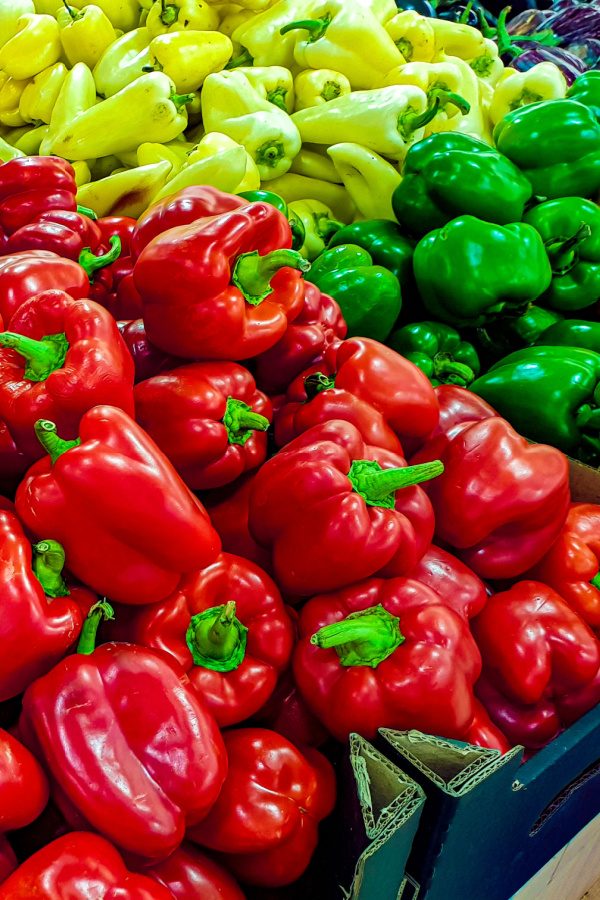
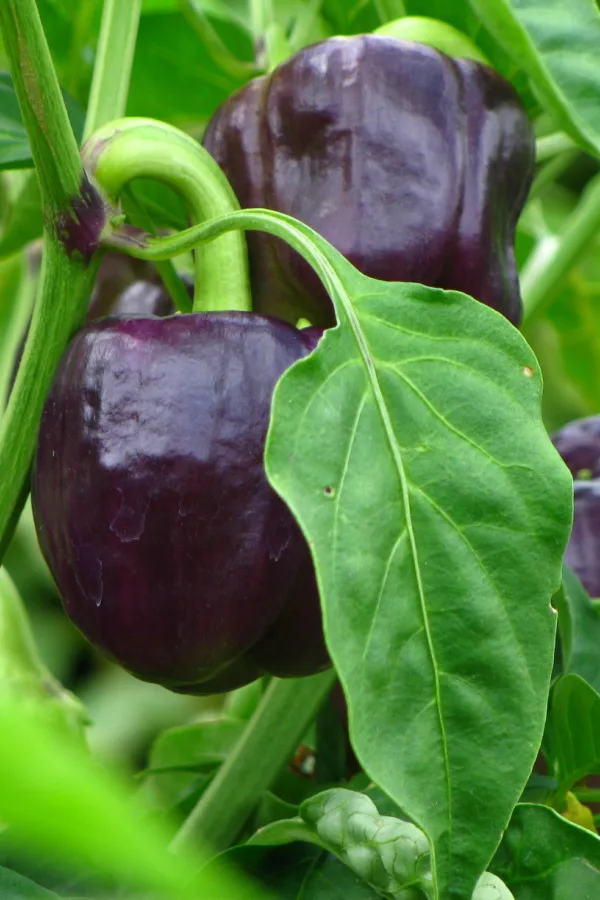
Whether it’s your favorite jalapeno pepper, a fiery cayenne or a tasty green, red or yellow bell pepper, saving seeds from the best peppers from your healthiest of plants will give you seeds that have all kinds of built-in advantages.
Strong, healthy plants produce good seed stock. And when the seeds are saved properly, not only will they have a better germination and growing rate, the plants that grow from them also have better genetics for growing to produce better and better fruit.
Saving seeds from peppers is actually one of the most simple gardening tasks of all. But success with saving your own seeds all starts with knowing which pepper varieties you can save seeds from – and which you can’t!
Like tomato plants, peppers also come in either hybrid or open-pollinated varieties. To have success with saving pepper seeds, you can only save the seeds of open-pollinated types. (See “How To Save Tomato Seeds From Tomatoes”

Hybrid varieties are created by combining two or more different varieties to create a brand-new pepper plant. The seeds of these plants will produce viable seeds. However, the seeds will not be an exact copy of the plant you grew.
Instead, the seeds will end up being a variation of one of the two plants used to create the plant. In some cases, it can even produce a new pepper plant – and one that may not even bear fruit. Saving seeds from a hybrid plant is basically like playing a guessing game with the end result usually being an undesirable pepper plant.
Open-pollinated varieties (heirloom plants) on the other hand are perfect for saving seeds. The seeds of these plants will create exact copies of the plant you get the pepper from and will produce the same peppers.
In addition to saving seeds from plant you grow, you can also save seeds from other gardeners plants or even organic farms that are growing open-pollinated plants in your area. But it’s best to avoid saving seeds from peppers from grocery stores.
Store peppers are often from hybrid plants that will not produce the same plant. In addition, even if they are open pollinated peppers, they have often been sprayed with chemicals that can affect germination and seed health.
So how can you tell when a pepper plant is a hybrid or open-pollinated variety? The best way of knowing for sure is to look at the seed packet or the information on the transplant card.
If it doesn’t say specifically on the packet, you should see the letter “F” in front of a number that shows that it is a hybrid. For example, Merlot F1 is a hybrid pepper plant that was created to be super sweet and heavy-producing. Because it has the “F”, it means it’s a hybrid – and not good for saving its seeds.
However, any pepper plant that is listed as an “heirloom” is an example of an open-pollinated plant. Emerald Giant is a perfect example of a pepper plant that you can successfully save the seeds from to create an exact copy of the plant next year. (Affiliate Product Link: Emerald Giant Seeds )

If you are still unsure but know the name of the pepper variety you are growing, a simple online search will give you the information you need on the type of plant it is. The good news is that there are hundreds upon hundreds of heirloom pepper varieties to save seeds from.
To save seeds, start by selecting the best peppers from your healthiest and most productive plant. Do not choose one from a diseased or struggling plant. Unfortunately, those genetics usually pass on and you can end up with another struggling plant.
Wait to harvest the seeds from your pepper until it is fully ripe. It is actually best to allow the fruit to soften slightly, indicating that the ripening process is over. The pepper might even start to wrinkle a little bit, and that is more than fine.
When saving pepper seeds – always let the pepper remain to fully ripen on the plant. This will allow the seeds to mature and develop to their full potential. Also, note which variety is which pepper if you are harvesting more than one variety. It sounds simple – but mixing the seeds up is quite easy without labeling!
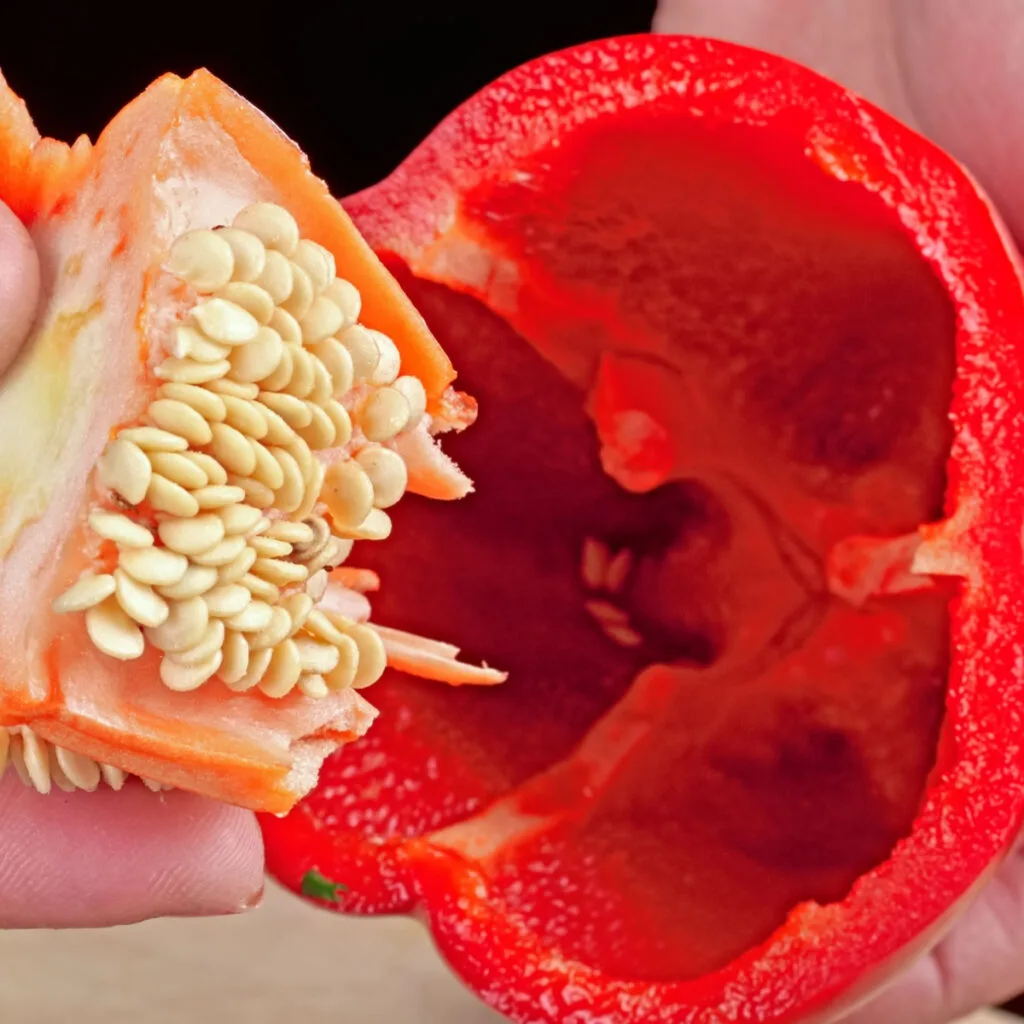
The next step is to remove the seeds. Start by washing and drying your pepper plant thoroughly before cutting. If you are using hot peppers, wear gloves to protect your hands – the heat will transfer easily!

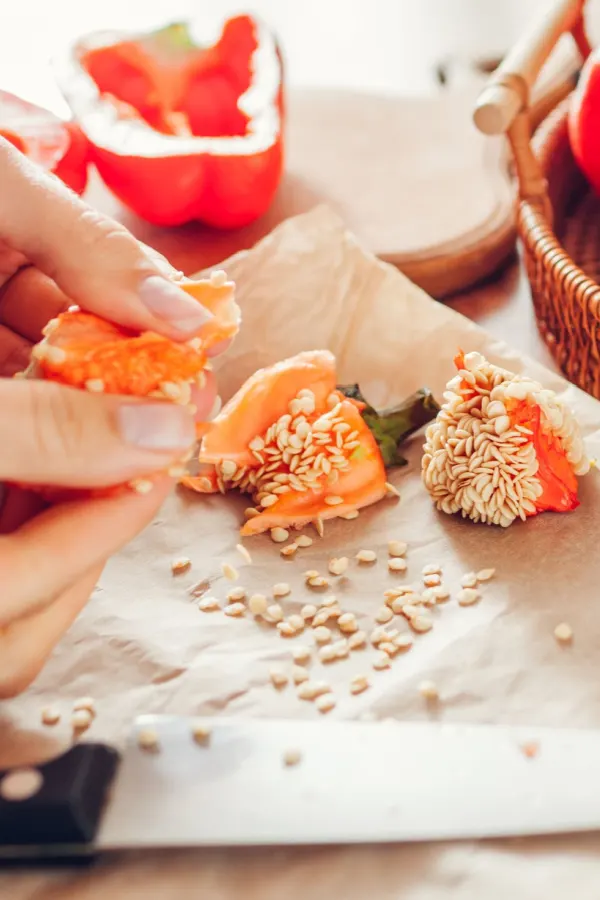
Remove the bottom portion of the pepper with a sharp knife. You can speed up the de-seeding process by gently rolling the pepper on a cutting board or between your hands to help dislodge the seeds. After most of the seeds are out, slice the pepper in half and remove any remaining seeds.
Place the seeds on a paper towel on a smooth, dry surface. Remove any discolored or damaged seeds and spread the remainder out in a single layer so they dry evenly and quickly. Place the seeds in a dry location that is out of direct sunlight.
The seeds can take up to a week to completely dry out. Tossing the seeds around carefully occasionally can help to ensure all sides of the seed dry evenly.
After a week, test one seed for dryness by breaking it in half. If it snaps easily, then the seeds are fully dry and ready for storage. If it bends, then the seeds need a little longer to dry. One thing is for sure – allowing the seeds to dry thoroughly before storing will help keep them strong!
Once the seeds are 100% dry, it’s time to store them. Place the seeds in a paper envelope, plastic or glass container or an old seed packet. Label the seeds with the variety as well as the date you are saving them.


Place the seeds in a cool, dark location for long-term storage. A great location is in the back of a refrigerator or in a cool basement that is dry. Do not put the seeds in a freezer. Under ideal conditions, the seeds will stay viable for up to 3 years.
Even with that said, it is best to save new seeds every year to use the following year. The more fresh the seeds are, the better they will germinate and perform. By saving the seeds of your open-pollinated pepper plants now, you are not only saving money – but also ensuring you will have an amazing crop of healthy, productive pepper plants next year!
Follow Our Facebook Page For Great Gardening Tips And Advice! This Is My Garden Facebook Page
This Is My Garden is a garden website created by gardeners, for gardeners. Jim and Mary Competti have been writing gardening, DIY and recipe articles and books and speaking for over 15 years from their 46 acre Ohio farm. They publish three articles every week, 52 weeks a year. Sign up today to follow via email, or follow along!
What is the best way to harden off tender young seedlings and transplants before planting them outdoors? And perhaps even more importantly, why is the practice so important to a plant’s long-term success and well being?
If there is one spring gardening topic that causes a fair amount of confusion for gardeners, it is the subject of hardening off plants. In a nutshell, hardening off is the process of preparing young plants for life outdoors.
Although the task is not particularly difficult or time consuming to do, it does play a major role in just how well your plants adapt and grow once they go in the ground. In fact, in some cases, hardening off correctly before planting can actually mean the difference between life and death for a plant!
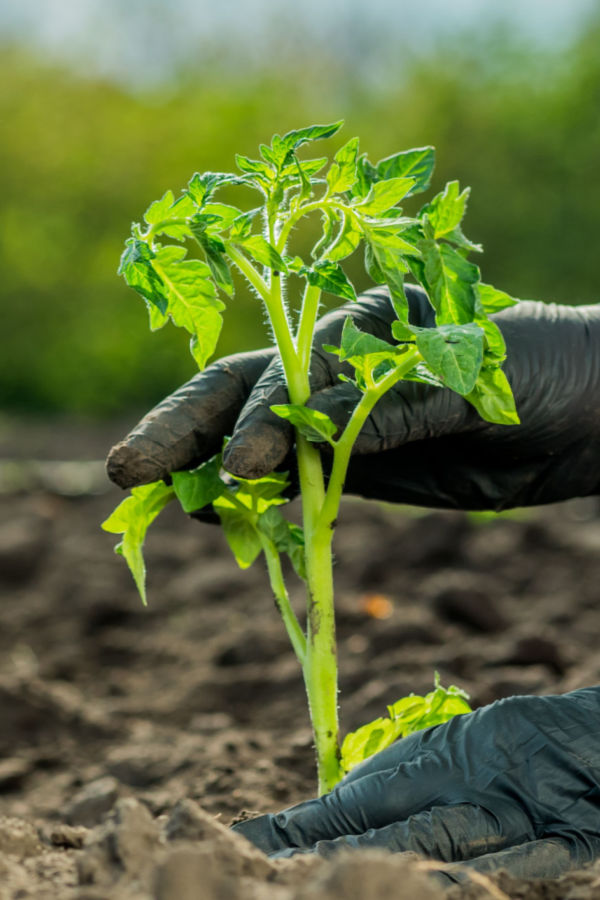

One thing is for sure, whether you grow your own vegetable and flowers from seed – or purchase transplants from a local nursery, greenhouse or big-box store, they need to toughen up a bit before they can be planted outside.
The first six to ten weeks of a seedling’s life is extremely easy no matter where they grow. Whether inside of your home or in a commercial greenhouse, young plants are completely pampered and sheltered from the many dangers of growing outdoors. (See: How To Know When To Start Seeds Indoors)
There are no heavy winds to topple them over. No pounding rains that might smash their small leaves and stems to the ground. Even more importantly, there are no huge swings in temperatures.
Indoors, seedlings don’t have to deal with scorching afternoon sun or chilly nights. And of course, if cared for properly, they get plenty of water when they need it too. But all of those cozy conditions change drastically on transplanting day. And if plants are not ready for harsh conditions, they can suffer serious damage quickly.

That is exactly why hardening off your transplants is so important. Not just for plants you are growing yourself from seed, but for many of the plants you purchase from a store. The good news is – it’s easy to do. And it can help to get your plants off to their best start ever!
Young plants need time to adjust to the sunlight, wind and temperature swings that outdoor life brings. If you take a seedling or transplant directly from inside and plant it in your garden or flowerbed, it most likely will fail quickly. It simply won’t be able to handle the stress of the quick transition.
But by slowly giving it time to adjust to outdoor life, and protecting it a bit as you do, that very same plant will begin to strengthen. Even better, in a fairly short amount of time, it will then be able to withstand all that nature can bring.
How much adjustment time your plants will need before planting day depends on whether you have raised your own seedlings or purchased them from a greenhouse. On average, home-raised plants need two to three weeks of hardening off, while nursery plants usually need a few days to a week at most.
Why the difference? Plants raised from seed in a home tend to be less developed than store bought plants. The main reason is commercial growers start their seeds extremely early. Because of this, plants have had longer to grow and mature.
In addition, commercial greenhouses have controlled lighting, watering and fertilizing. They also often place large fans on the plants as they grow to help them strengthen even more.
All of these advantages help greenhouse-raised plants to be more developed early on. But with a little extra prep on your home grown plants, you can have them equally prepared to take on the outdoor growing season with ease.
The process of hardening off seedlings and transplants at home all begins by setting your plants outside for a few hours each day during warm afternoons. It is best to try to do this (if the weather allows) about two to three weeks before your anticipated planting day.
Whatever you do, on those first few days, don’t just sit them directly out in the hot sun or in a wide open space. It is extremely important for the first week to ten days to provide them with a bit of protection.
Porches are perfect. Covered and protected decks and patios are as well. You can even open up the garage door and keep them near the edge to give them a little sun. This initial protection helps them get acclimated to the outdoor elements slowly.

It’s very crucial at this point to protect them from any strong winds. Wind can whip tiny stems over. It can also whip the foliage, injuring leaves or even killing plants in the process. If need be, place a few boards around the edges of your plants to protect them from direct wind.
As each day progresses, allow your plants to get more sun and more exposure to the elements. With a week or so to go before planting day, only move your plants indoors if the temperatures dip towards a frost, or brisk winds or heavy rains are forecast.
A few days before your planting day, leave plants outside in the full sun and light. At this point, they are hardened off and ready for planting!
So what about preparing store-bought plants for planting outdoors? How long these plants need all comes down to how large they are, and at what point of the growing season you will be planting them.
As covered above in the article, most nursery raised plants are already further along in the growing process. Many large flat of plants at nurseries have already spent a bit of time outdoors on racks or shelves. For these more mature plants, hardening off is really not necessary.

But if plants are on the smaller side, or have been inside exclusively at the nursery, allowing them to have a bit of protected time outdoors before planting can reduce the chance for transplant shock. A few days outside is usually more than enough to do the job.
Finally, if you are planting late in the spring or even into early summer when temperatures have already warmed permanently, there is no need for hardening at all. Here is to hardening off your flower and vegetable seedlings – and to getting the most from your plants this year!
Follow Our Facebook Page For Great Gardening Tips And Advice! This Is My Garden Facebook Page
This Is My Garden is a garden website created by gardeners, for gardeners. Jim and Mary Competti have been writing gardening, DIY and recipe articles and books and speaking for over 15 years from their 46 acre Ohio farm. They publish three articles every week, 52 weeks a year. Sign up today to follow via email, or follow along!

