There is nothing more sinister to a gardener than the sight of weeds! Here are some of our best tips and tricks for combating weeds:


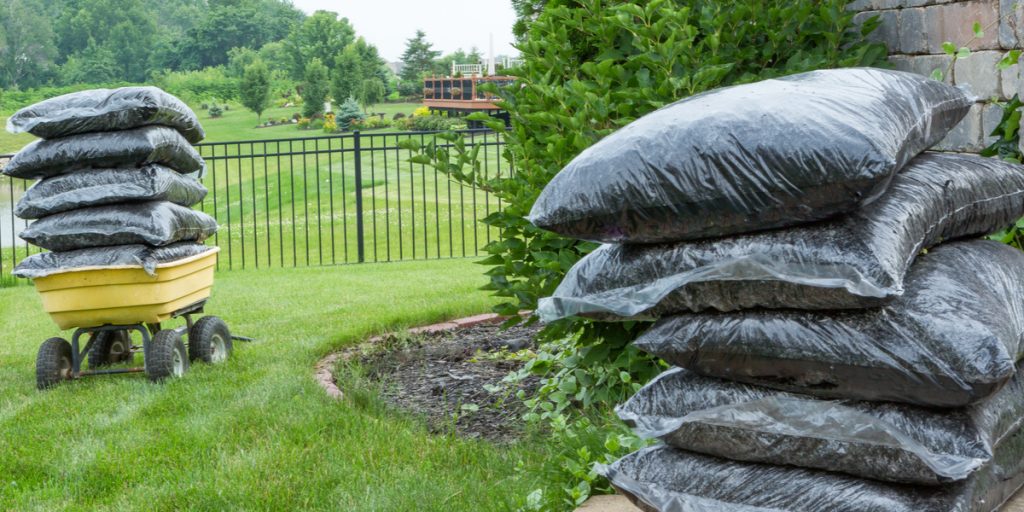


There is nothing more sinister to a gardener than the sight of weeds! Here are some of our best tips and tricks for combating weeds:
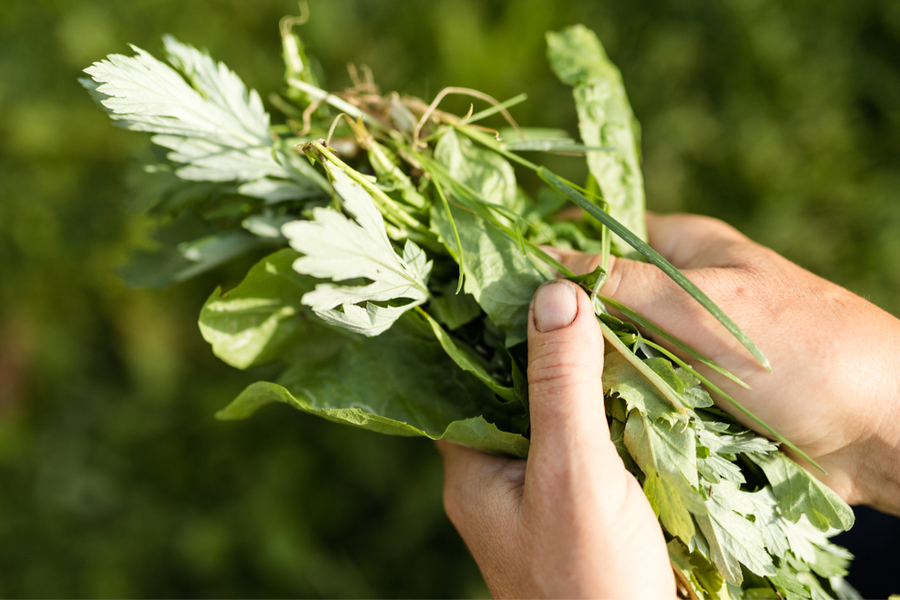
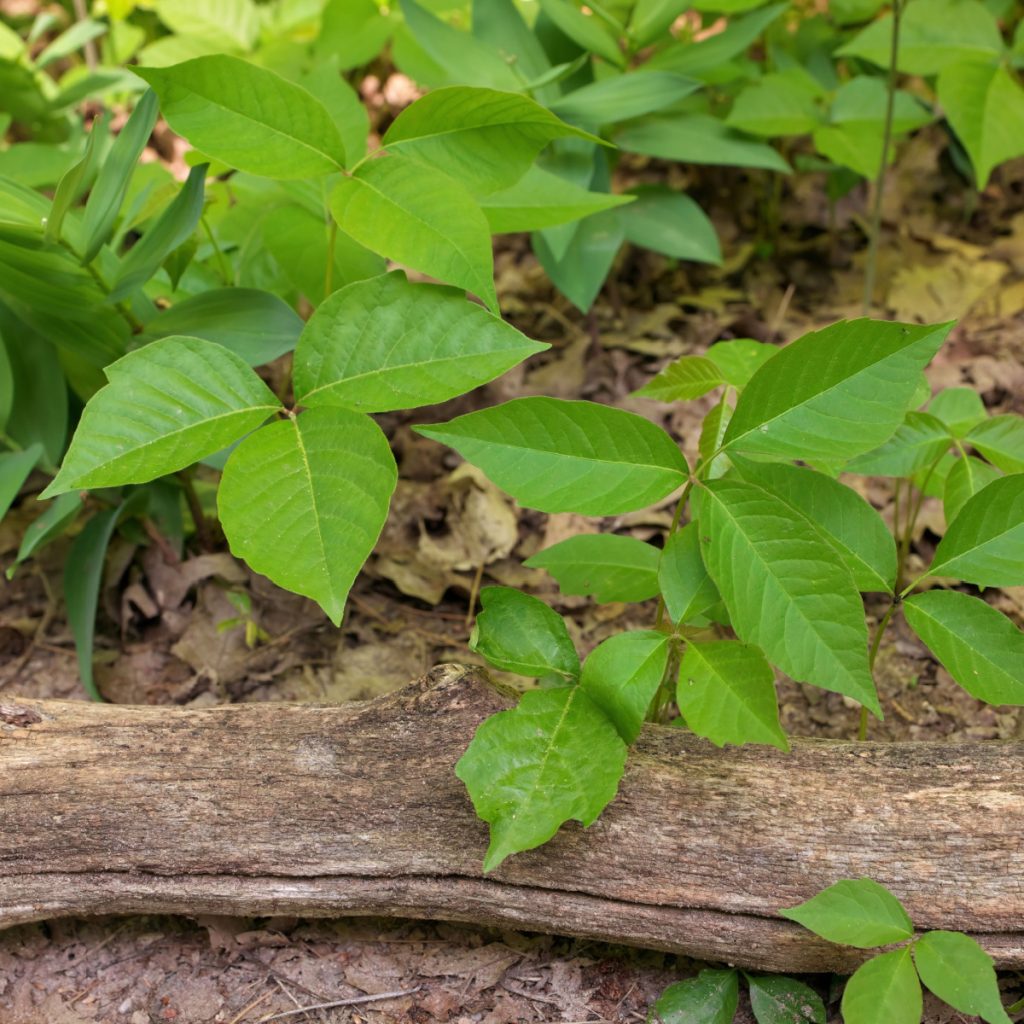
Believe it or not – there are actually a few incredibly effective methods to kill poison ivy plants in your flowerbeds, lawn and landscape – without having to resort to harsh commercial sprays that can be dangerous to children, pets, other plants – and you!
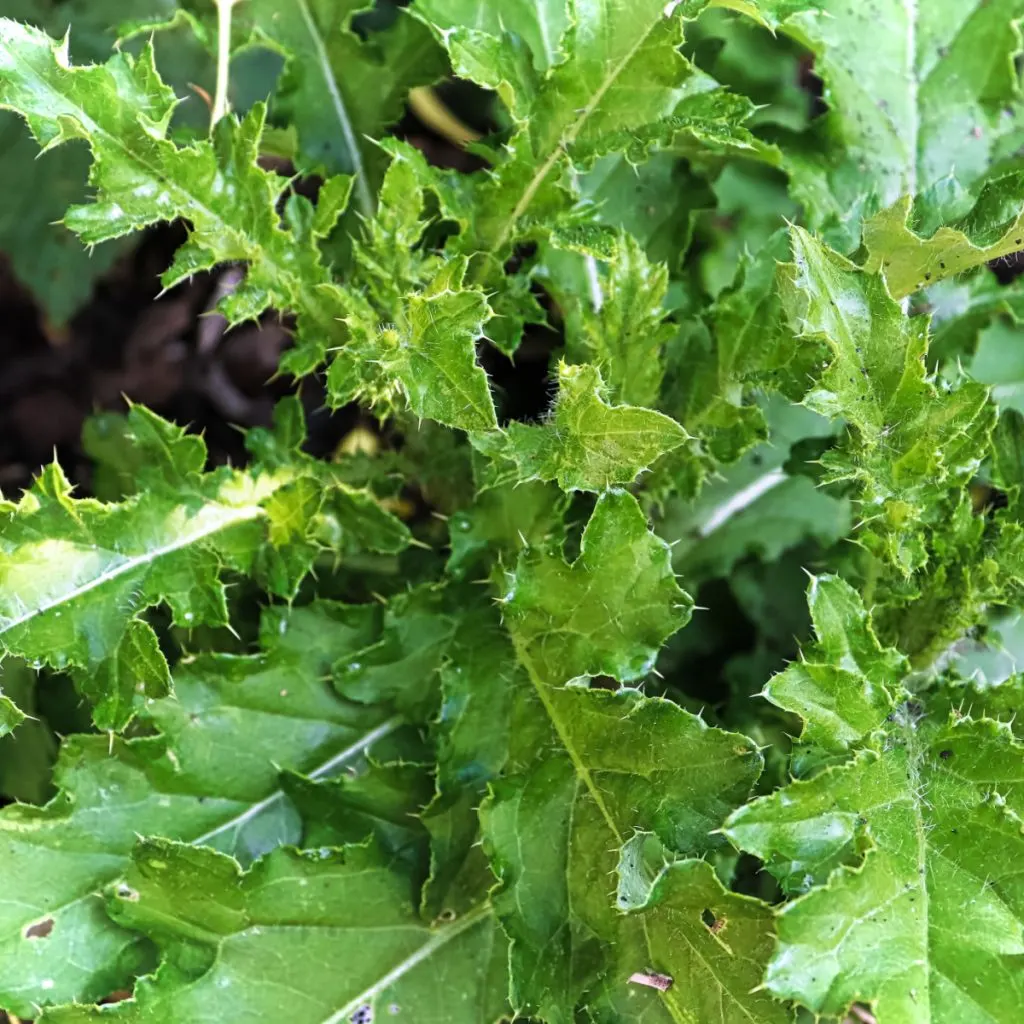
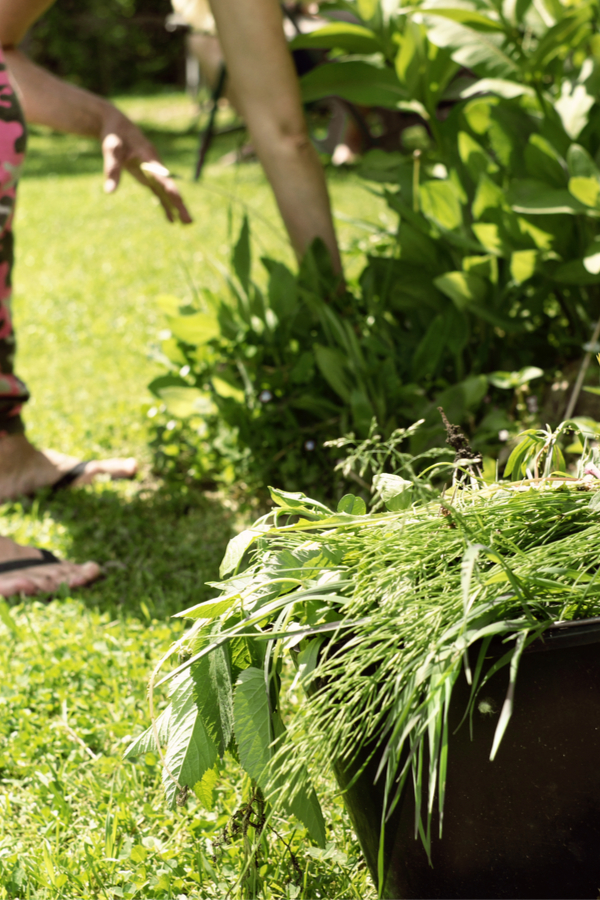
Poison ivy can pop up anywhere. Although many think of coming in contact with the dangerous plant while hiking or in woodland settings, poison ivy can appear and grow quite easily in residential flowerbeds, garden, lawns and more. And once it does, it can spread like wildfire!
Poison ivy is a fellow member of the Sumac family of plants. Along with its close relatives poison oak and sumac, the three are known for the red, itchy and painful rashes they can cause when they come in contact with human skin.
One thing is for sure, no matter where it’s found, it can be quite the painful experience for those unlucky enough to be allergic to it’s toxic resin. And even more – extremely dangerous for those who happen to be highly allergic to it!
Contrary to popular belief, you can get poison ivy by coming in contact not just with its leaves, but with any and all parts of the plant – and at any time of the year.
It is not the actual foliage of poison ivy that causes an issue with humans. Instead, it’s the resin that lies within the leaves, stems and roots of the plant that cause the painful burning and itching.
There is a slight percentage of the population that is immune to the resin. For these lucky folks, no amount of exposure to the plants’ leaves, roots or stems will harm them. But for the large majority, poison ivy can and does cause serious bouts of rashes and itching – which is exactly why getting it out of your yard is so important!
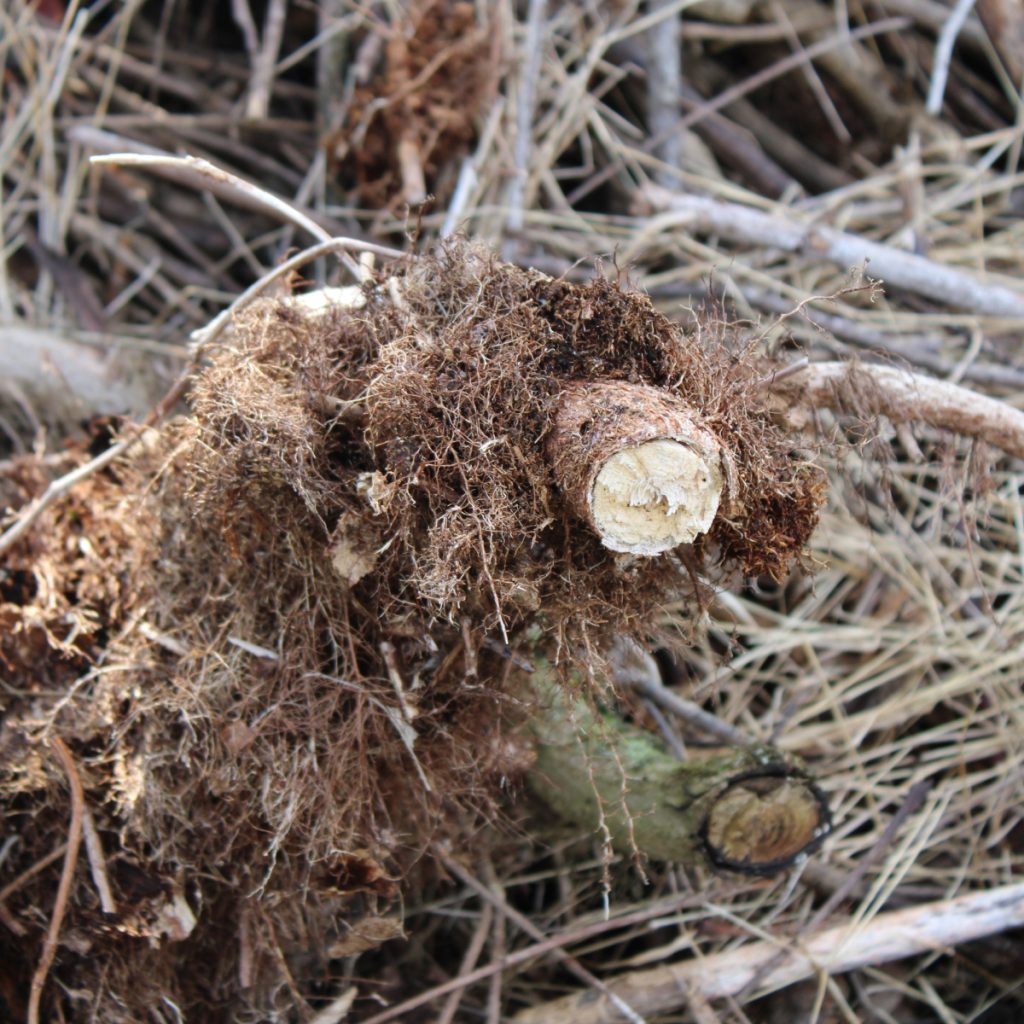

Unfortunately, it’s not an easy plant to kill off. The deep roots of poison ivy can range far and wide – and as they do, they can spur new plants as well. The good news? With a few tried and true all natural methods, you can get rid of the plants from your landscape. And for good!
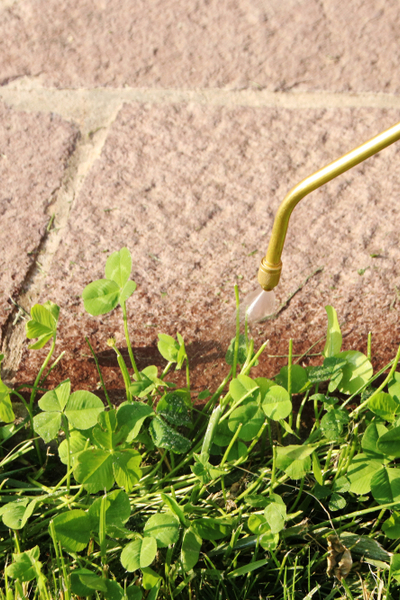
When it comes to homemade sprays, there are a couple of great options that do wonders for eliminating poison ivy – one is a mix of regular vinegar and salt, the other is using a solution of high strength (industrial or horticultural) vinegar. Deciding which spray to use really comes down to the severity of your problem.
The first spray is made up of two common household items that most gardeners usually have on hand – regular vinegar and salt.
This spray is highly effective for smaller or young poison ivy plants that do not have massive or extensive roots – which is usually the case for poison ivy growing in gardens and flowerbeds. In fact, for most poison ivy situations, this mix will do the trick!
To make, start by mixing two cups of table or kosher salt with 1/2 gallon of water. Next, add in 1/2 of a gallon of store bought (5%) vinegar. It can be apple cider or regular white vinegar. To finish the mix, add a few drops of mild liquid dish soap. This will help the mixture stick to the leaves of the ivy as you spray.


At just 5% acidity, the household vinegar is still strong enough to knock out most poison ivy plants. Especially with the addition of the salt. The acid in the vinegar and the caustic power of the salt work together to kill off the ivy when applied to the foliage.
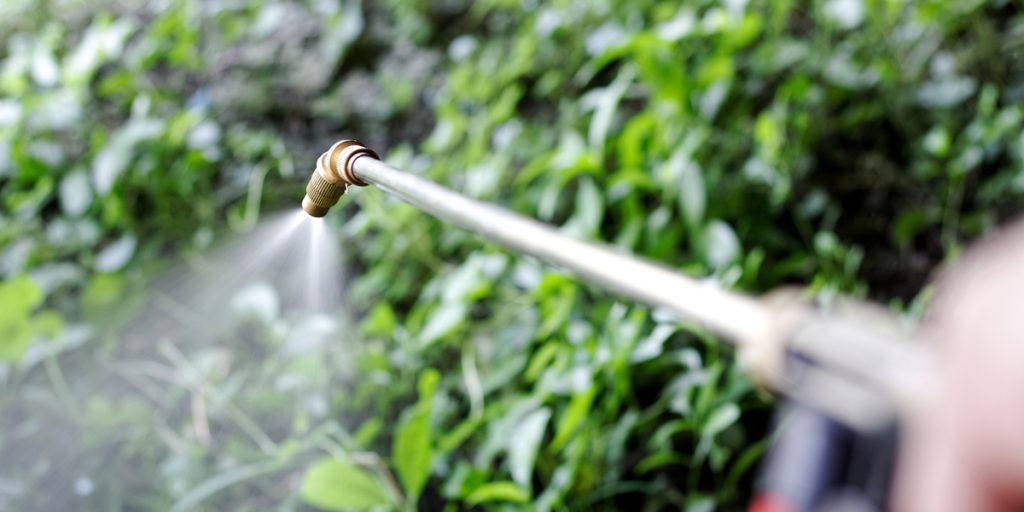
Apply the spray with a hand held sprayer. This is great for spot spraying plants in flowerbeds or a garden setting. For large areas, you can use a large pump or backpack sprayer. Coat the leaves of the ivy thoroughly when spraying.
You should begin to see the plant die off within a few days. To increase effectiveness, apply the mix during the heat of the day when the sun is in full force. You may need to apply a few times (every 2 to 3 days) to kill the roots and the entire plant.
It’s important to note that this spray will kill any foliage it touches. With that in mind, be careful not to spray the foliage of annuals and perennials nearby. It is safe, however to use on ivy growing up on larger trees. The mix is not strong enough to harm large trees or bushes.
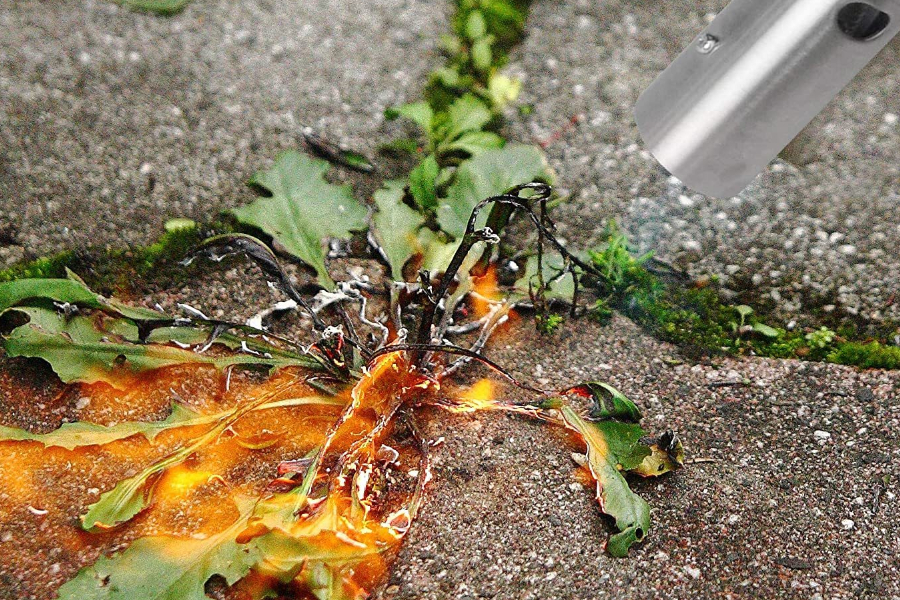
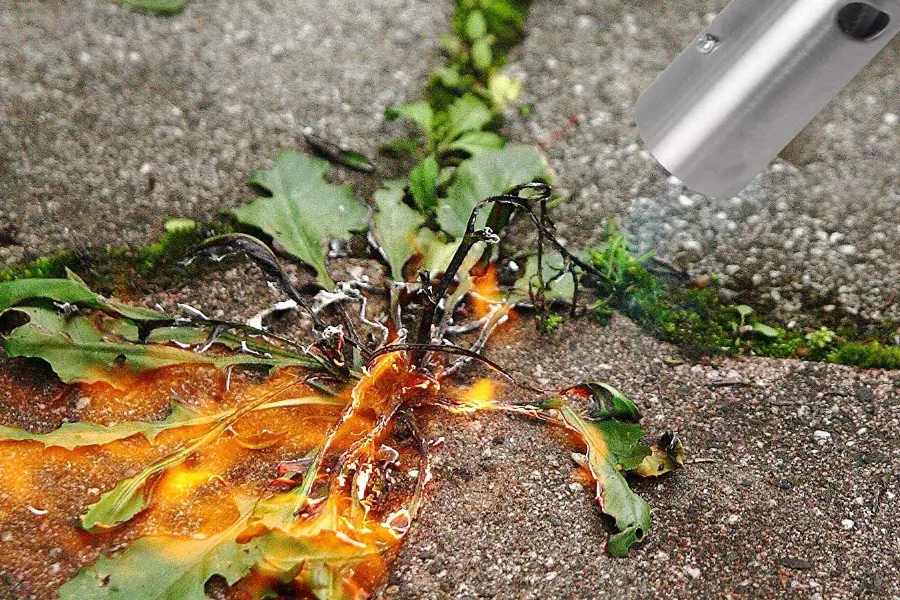
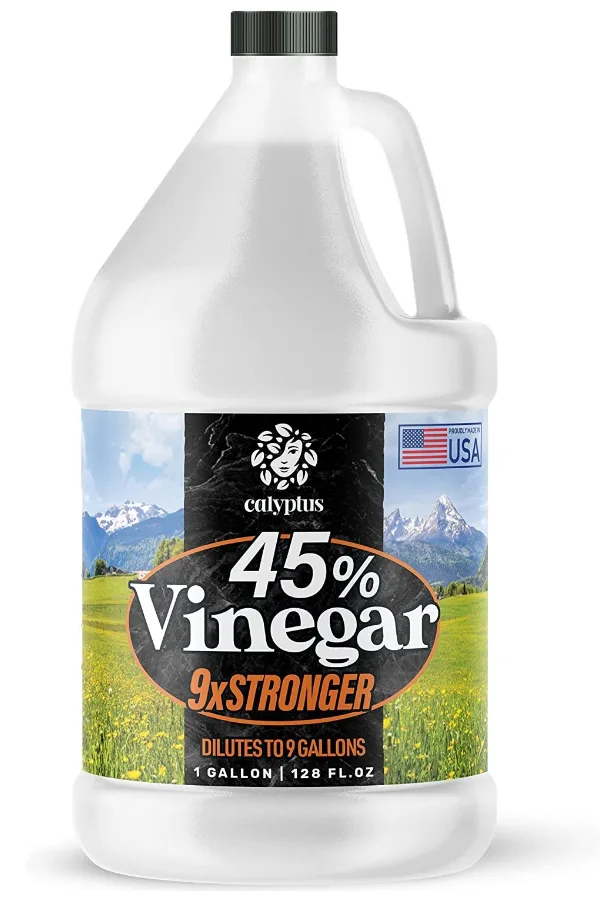
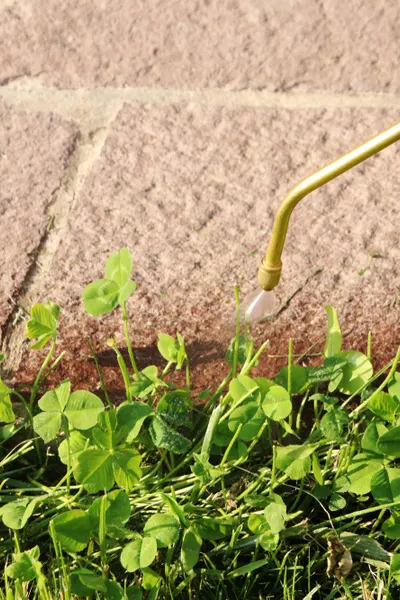
Horticultural vinegar is created at a much higher strength than vinegar found on store shelves. Instead of the usual 5% acidity, its acidity is usually in the range of 30 to 45%. At this high strength, the acid quickly kills off ivy and its roots.
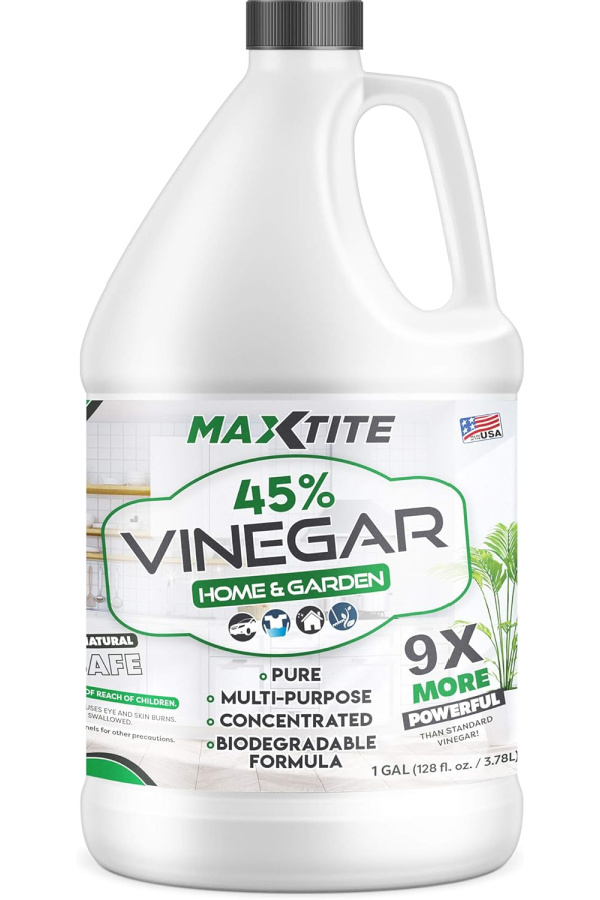
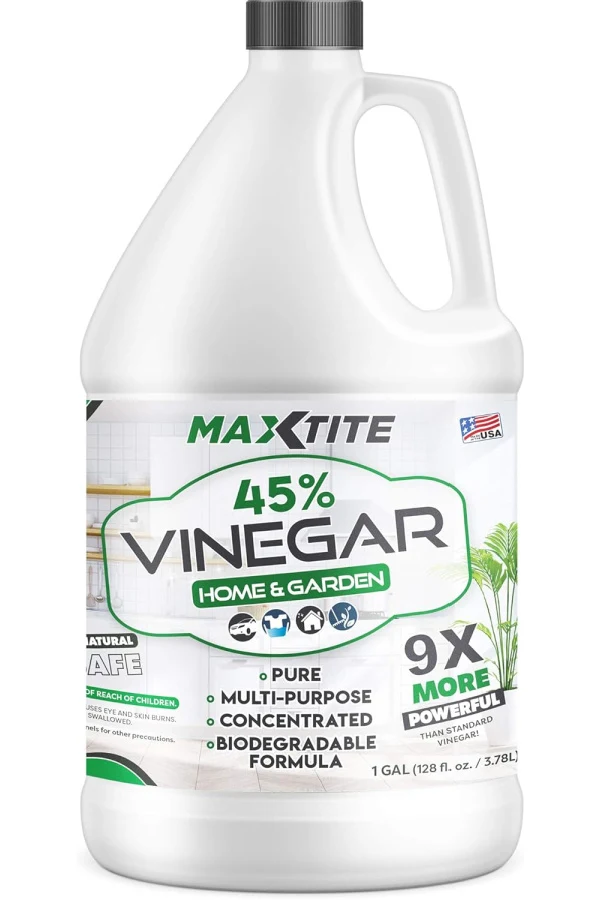
This is best to use for large areas of poison ivy or for extremely stubborn roots that continue to come back. Use the vinegar at full strength for maximum effectiveness. Product Affiliate Link: MaxTite 45% Strength Pure Concentrated Vinegar for Home & Garden
Remember that vinegar is an acid, so it is important to always wear protective eye and hand protection. It can burn both the skin and eyes when it comes in contact, so use with caution. Especially when dealing with high strength vinegar.
To increase effectiveness, you can add 1 cup of salt to 3 cups of high strength vinegar. This is best if you have severe poison ivy plant problems. In most cases, however, the pure strength of the higher vinegar acidity will be more than enough to take care of plants.
Again, like the salt and vinegar solution above, it will kill off any tender vegetation it comes in contact with. Spray carefully to avoid hitting the foliage of perennials and annuals nearby. Much as with the vinegar-based spray above, it will not cause harm to large trees or shrubs.
High strength vinegar can also be highly effective against another invasive plant – thistle! See our article: How To Get Rid Of Canadian Thistle – Forever!

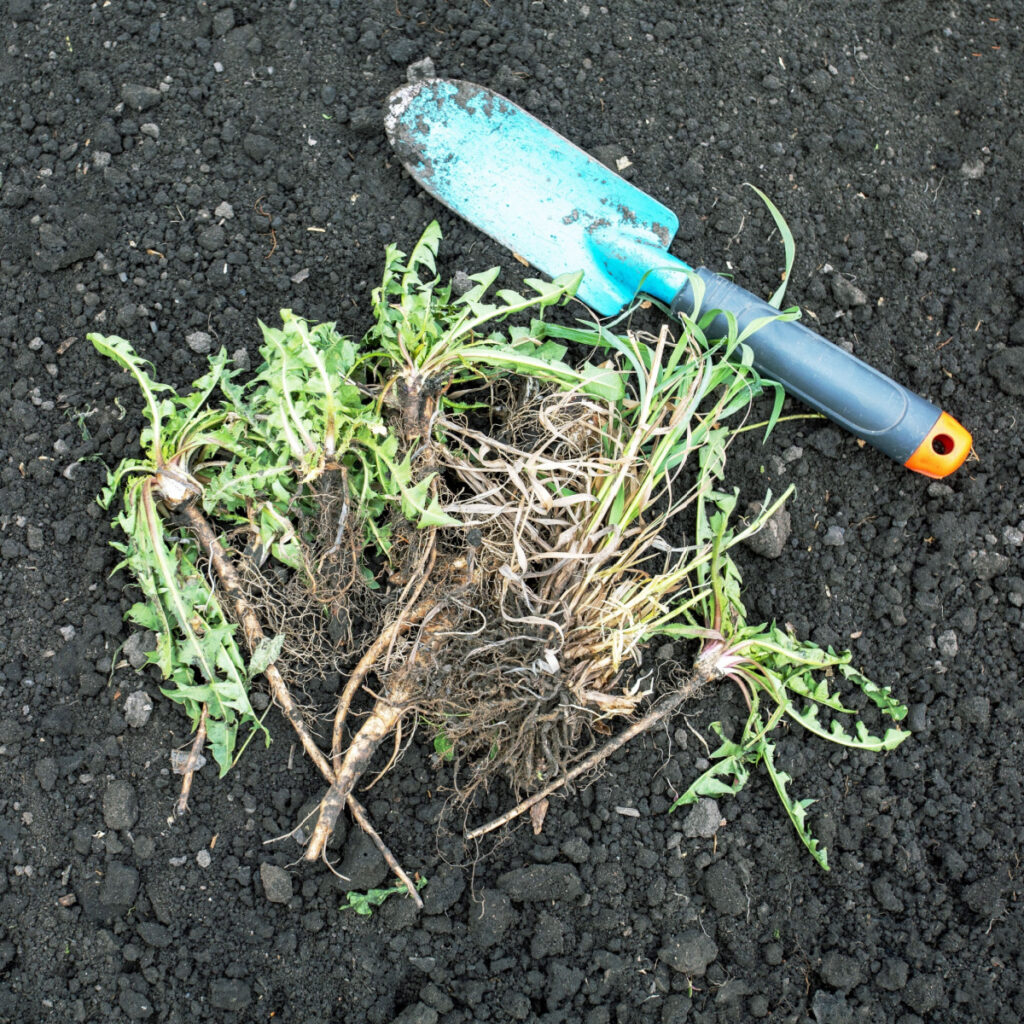
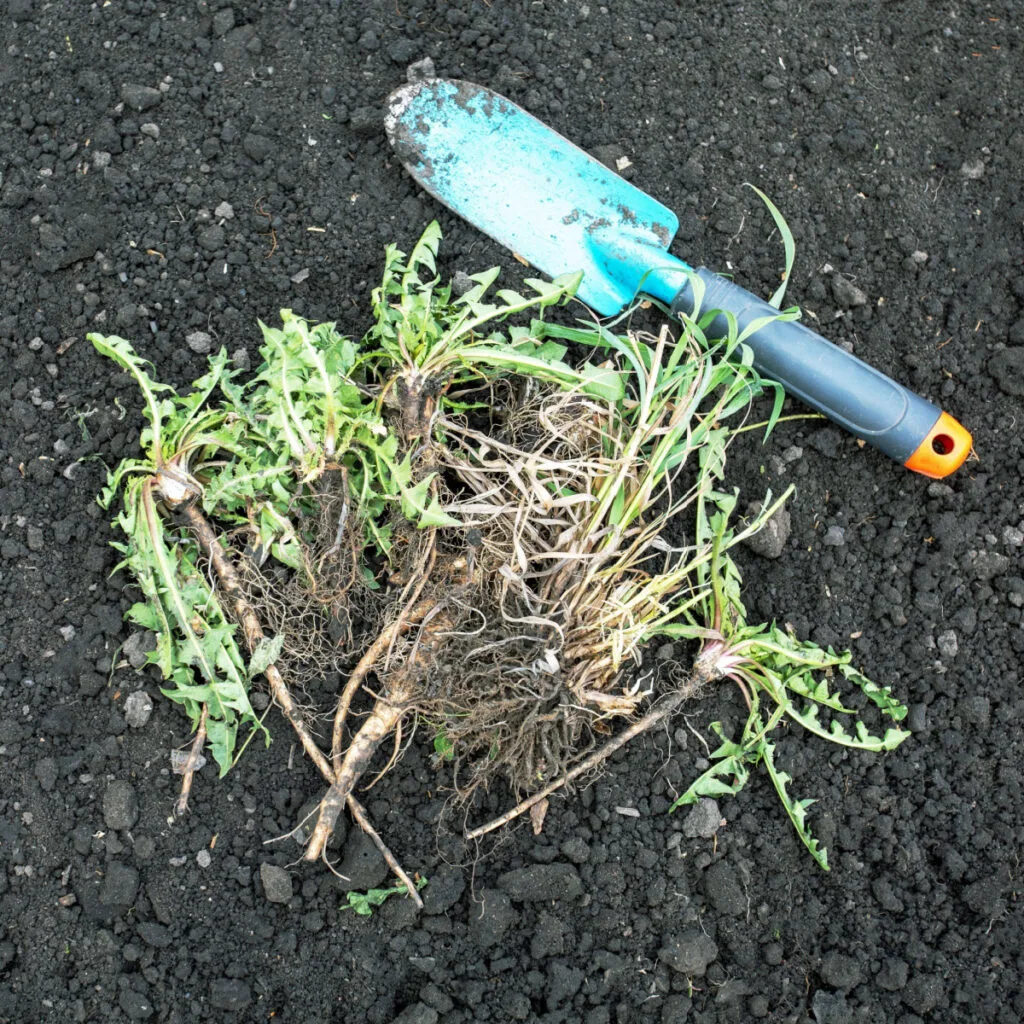
There is no better way to terminate poison ivy than by removing the plant’s root system. For those that are highly allergic, this is often not even a possibility. But for those who can gear up and take it out, it is by far the most effective – and the quickest way to end the problem.
Poison ivy’s roots, although extensive, can usually be pulled or lightly dug from the earth fairly easily. The key is to wear protective gloves and clothing that cover every inch of exposed skin.
Begin by cutting the plant off near the base, setting aside the top foliage out of harms way. Then, pull or dig the roots, being careful to get the entire root structure. Poison Ivy can easily regenerate from a small section of root, so getting all of them out is a must!
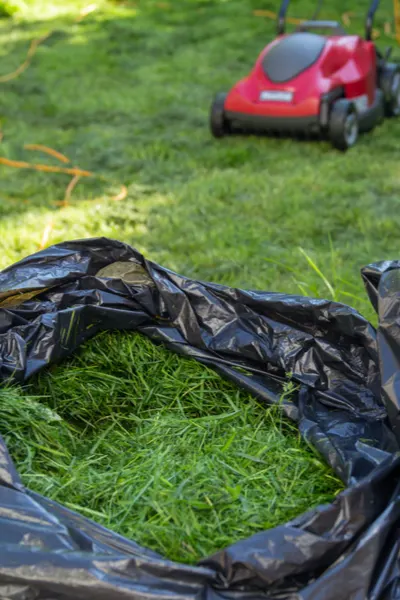
Place the roots and foliage in a sealed bag and dispose. Never put ivy remnants in a compost pile as they can re-root and generate new plants quite easily. Finish by carefully removing clothing and washing them with detergent in the hottest setting you can.
Here is to killing off the poison ivy growing in your yard for good this year – and to far less itching and scratching this summer too!
Follow Our Facebook Page For Great Gardening Tips And Advice! This Is My Garden Facebook Page
This Is My Garden is a garden website created by gardeners, for gardeners. Jim and Mary Competti have been writing gardening, DIY and recipe articles and books and speaking for over 15 years from their 46 acre Ohio farm. They publish three articles every week, 52 weeks a year. Sign up today to follow via email, or follow along!
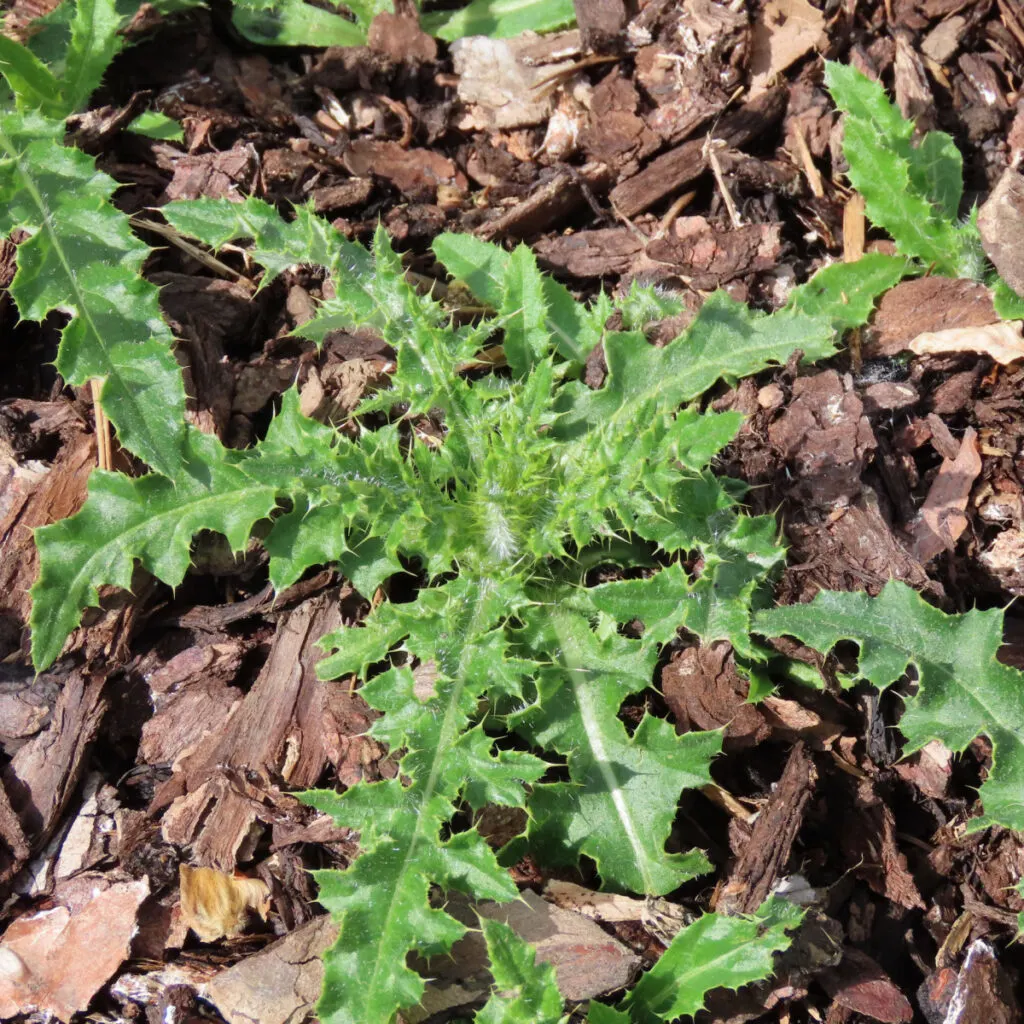
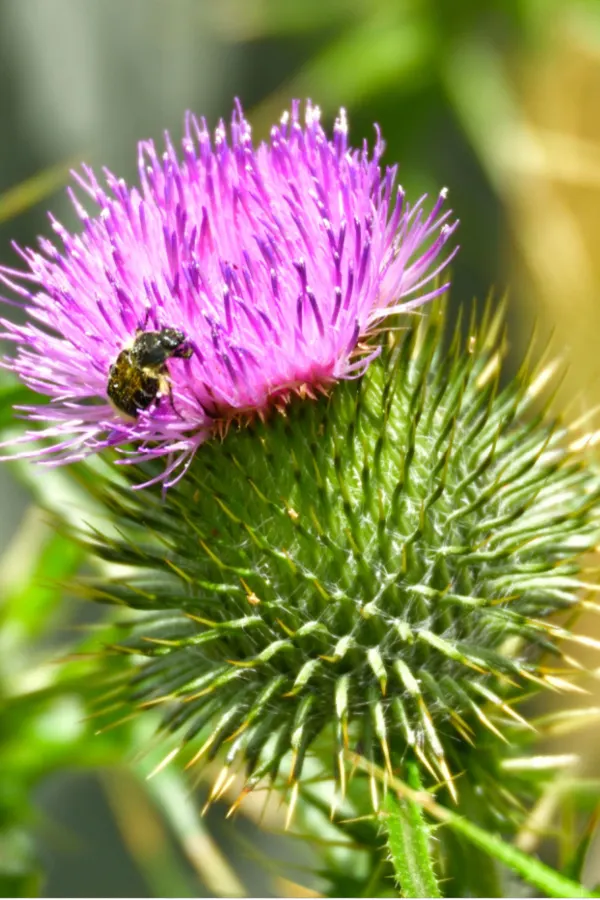
Looking for a few tips and tricks to finally gain the upper hand and get rid of those pesky Canadian thistle weeds growing and regrowing in your flowerbeds?
No matter if it’s Canadian thistle, Milk thistle, Scotch thistle or the myriad of other thistle types that exist – once the pesky weeds get a foothold in the soil, it can seem nearly impossible to eliminate them. So much so that many times, it seems as though pulling them up only results in producing more of them!
One thing is for sure, thistles are a thorn in the side of gardeners all over the world. With a taproot that can dive deep in the soil and spread like wildfire, they are hard to stop. What makes them even worse is how fast they can spread via seed.
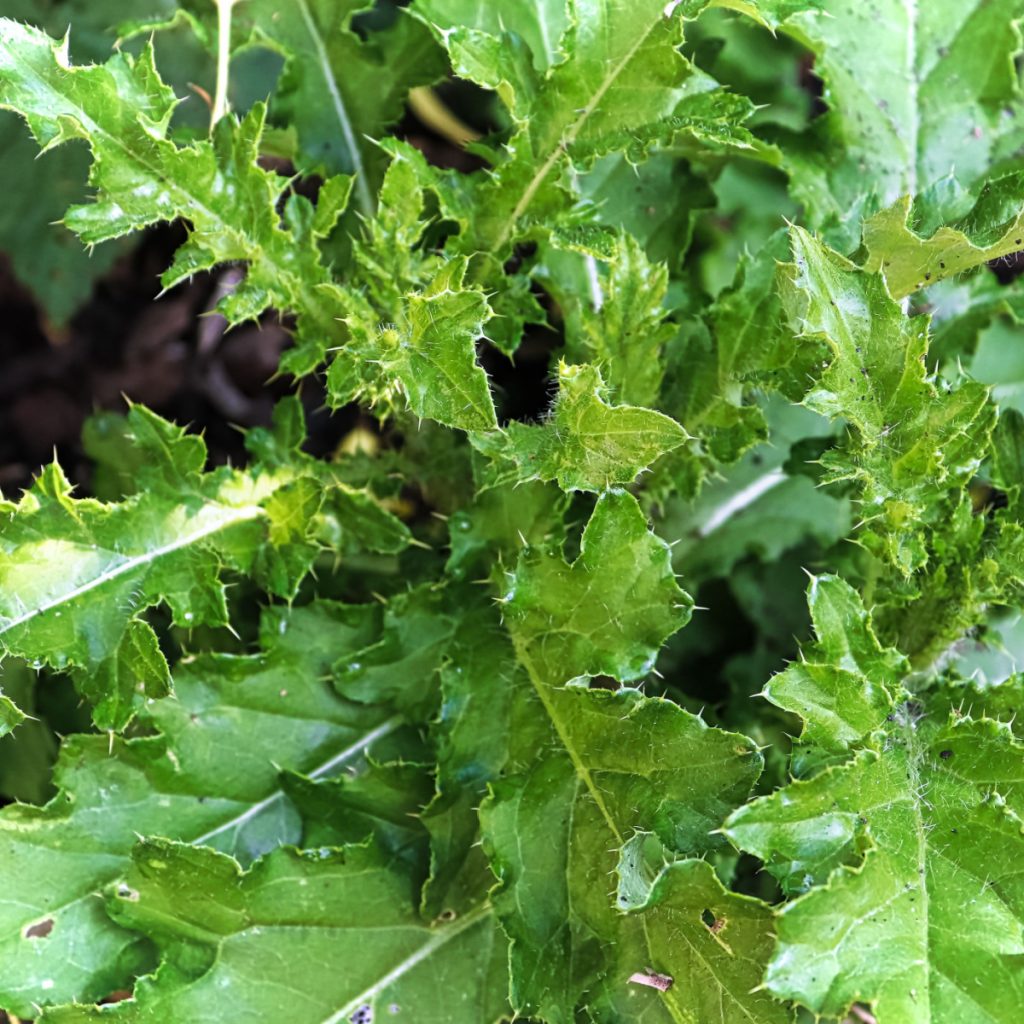
Thistle plants produce an astonishing amount of seeds. In fact, depending on the variety, a single plant can produce as many as 10,000 to 100,000 seeds or more! That might be great for the birds that enjoy snacking on them – but when it comes to spreading the weeds in your flowerbeds and vegetable garden, it can mean big trouble!
But here is the good news, you can win the battle! Even better, you get rid them naturally, without having to resort to harsh man-made chemicals. As you will see below, armed with one single secret – you can eliminate them faster than you ever imagined!
Gaining the upper hand on thistles all starts with knowing how they grow and spread. Thistles multiply in two separate ways – by their seed and by their roots.
By far, the most prolific way thistle spreads is by producing a seed head. Once its seeds mature, they then scatter by the wind, or get carried to new locations by birds and wildlife. And not only do thistle plants produce a lot of seed, it can stay fertile for 15 to 20 years!
But thistle plants also can reproduce quite easily via their root system. As the roots of thistle plants grow, they sprout new horizontal roots. The horizontal roots then shoot up new stems through the soil – and just like that, it becomes even harder to get rid of thistle weeds!

Unfortunately, if you dig up a thistle plant and portions of the roots remain in the ground, they too will grow back into new plants.
It’s certainly easy to see why thistles can be such an issue for gardeners – and how the battle can often seem futile. But believe it or not, there is one single (and natural) substance that can get rid of thistles fast. Especially when you apply it in just the right way!
Vinegar, or more precisely, horticultural vinegar, is a true hero when it comes to killing Canadian thistle. And best of all, it not only kills the plants above ground, but the deep roots under the soil as well.
Horticultural vinegar is a stronger version of household vinegar. Household or common vinegar usually has an acidic makeup of 4 to 5%. But horticultural vinegar is much more potent. It can have an acidic makeup anywhere from 15% all the way to 45% or more. Product Link: Calyptus 45% Pure Super Concentrated Vinegar
This strong acidic makeup is exactly what makes it so deadly against thistle. It also happens to be why the product is a great choice when clearing driveways, patios and walkways of weeds as well. See: How To Use Horticultural Vinegar To Kill Weeds In Driveways

How and when you use horticultural vinegar on your thistle weeds is important. Although you can carefully spray the foliage of the plants, it often doesn’t result in a total kill. It will usually brown off all of the foliage, but allow the roots stay strong enough to send up new growth.
But there is a little secret to killing the roots and all of thistle plants – and it involves getting the vinegar directly into the root system – and fast. And the best way to do that is to cut the plant back near the soil line and spray the open cuts.
Not only does this pinpoint the use of the vinegar, it also allows the vinegar to go directly into the thistles and be absorbed down deep into the roots. The result? A near 100% percent chance of killing off the entire thistle plant!
Although you can effectively spray thistle at any point of the growing season, there are actually two great times of the year that are best for spraying – early spring and in the fall.
In the spring, thistle is spending a lot of energy trying to develop. This means the roots are absorbing energy as fast as they can. That also means the roots will take in the spray more easily. Late fall is great because the plant is trying to absorb and conserve energy in its roots for winter.
Both spring and fall are also easy for this task as it’s easy to see the green thistle among the other foliage that is dead.
There are a couple of things to know before using horticultural vinegar on thistles. The first and most important thing to know is that because of its acidic nature, you do need to use personal protection.
The acid is extremely caustic and can burn the skin and eyes. Long gloves, long sleeves and eye protection are a must when spraying it on plants. Also, always keep pets and children far away when spraying until the spray dries.
Secondly, because horticultural vinegar is acidic, it can alter the pH of your soil when used broadly. This is exactly why you do not want to spray your entire garden or flowerbeds with the solution.
Instead, it is best to put the vinegar into a small, hand held spray bottle and try to spray only the thistle. In addition, be careful not to allow the spray to touch nearby perennials, annuals or vegetable plants as it can kill them off as well. Here is to getting rid of thistle weeds in your landscape for good!
Here is to getting rid of Canadian thistle (and all thistle) for good this year!
Follow Our Facebook Page For Great Gardening Tips And Advice! This Is My Garden Facebook Page
This Is My Garden is a garden website created by gardeners, for gardeners. Jim and Mary Competti have been writing gardening, DIY and recipe articles and books and speaking for over 15 years from their 46 acre Ohio farm. They publish three articles every week, 52 weeks a year. Sign up today to follow via email, or follow along!
Looking to finally eliminate all of those pesky weeds that come back to haunt you and your flowerbeds every single spring, summer and fall? Today, we’ll showcase two simple secrets that can do just that – and do so with you working in your beds less than you ever have before!
When it comes to some of the most dreaded of all outdoor chores, weeding is high on the list. In fact, for many gardeners, it tops the list! Especially when it comes to trying to keep flowerbeds free and clear of unsightly weeds that just keep coming back.
Weeds are unfortunately more than just a visual nuisance. Not only do they take away from the natural beauty of perennials, annuals and shrubs, they also steal valuable moisture and nutrients from the soil where they grow. All of which can lead to your plants not getting the energy they need for better health and stronger blooming.

But as difficult as it can seem to keep weeds out of your flowerbeds, you might just be surprised how easy it can be to finally get a handle on your weeding issues – all by working less in your beds. That’s right, as it turns out, more often than not, many of the recurring weeding headaches that gardeners face are a result of simply working their beds too much!
So with weed free success in mind, let’s take a look at two simple secrets that can have your flowerbeds healthy, blooming, and most of all – free and clear of weeds this year!
When it comes right down to it, weeds need one thing to establish – bare soil. And the less bare soil there is, the less chance weed seeds will ever find a home to sprout.
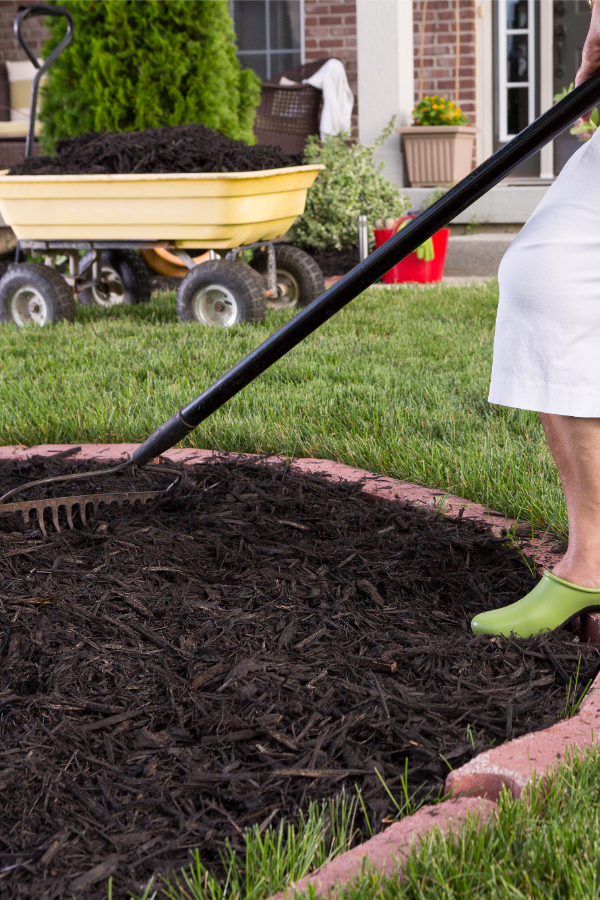
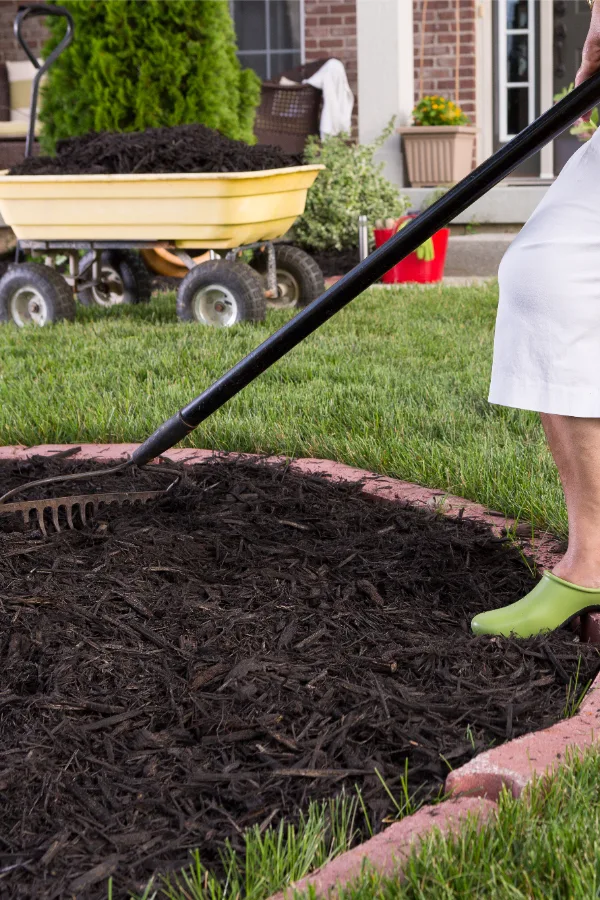
So how do you keep soil covered up? The first and easiest way is with mulch. But as you will see below, it’s how and when you put that mulch down, and what you do with it once it’s down that really matters most when it comes to eliminating weeds.
It happens every spring for most gardeners. The annual ritual of mulching their flowerbeds. But as simple and straightforward as the process of mulching flowerbeds sounds, it’s at this very point that gardeners often make a few critical mistakes that instead of helping to stop weeds, actually aid in creating more future weeds than ever.


The first mistake gardeners make is to rake and stir up last year’s mulch. It seems like a good idea on the surface. After all, it freshens up the beds and helps the old mulch look new again. But it’s actually one of the fastest ways to fill your beds with future weeds!
When mulching in the spring, the key is to disturb the mulch and soil as little as possible. Why? Because since last fall, weed seeds have been blowing in and dropping from everywhere. And the minute you turn that mulch or dig into the soil, you now allow those weed seeds a path to the soil. And to germinate in the future.
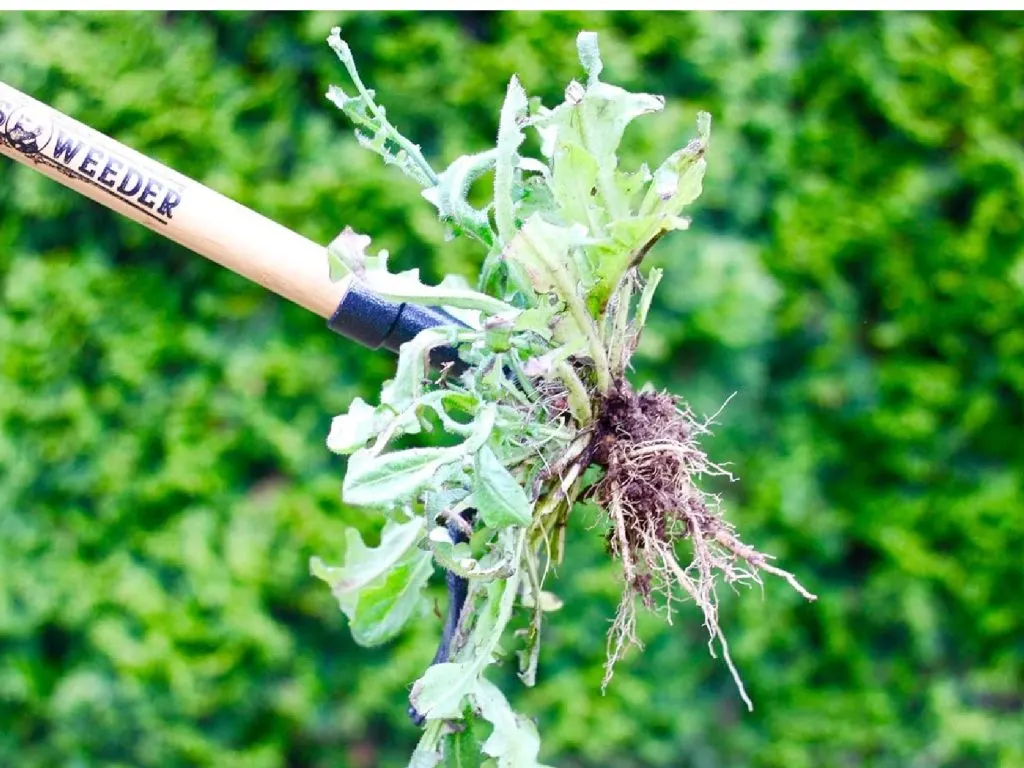
Instead, approach your spring beds with a simple “work less” approach. Start by digging out any single weeds that may be in the bed spaces. And when you do, dig only the weed out – opting against digging large shovel fulls of dirt up.
Again, the less dirt and mulch you disturb, the less weeds seeds on top find a home below. Use a small weeding tool or a stand up weeder than grabs only the root and pulls it from the earth. They make weeding easy – and help to stop future weeds. Affiliate Link: Grampa’s Weeder – The Original Stand Up Weed Puller Tool With Long Handle

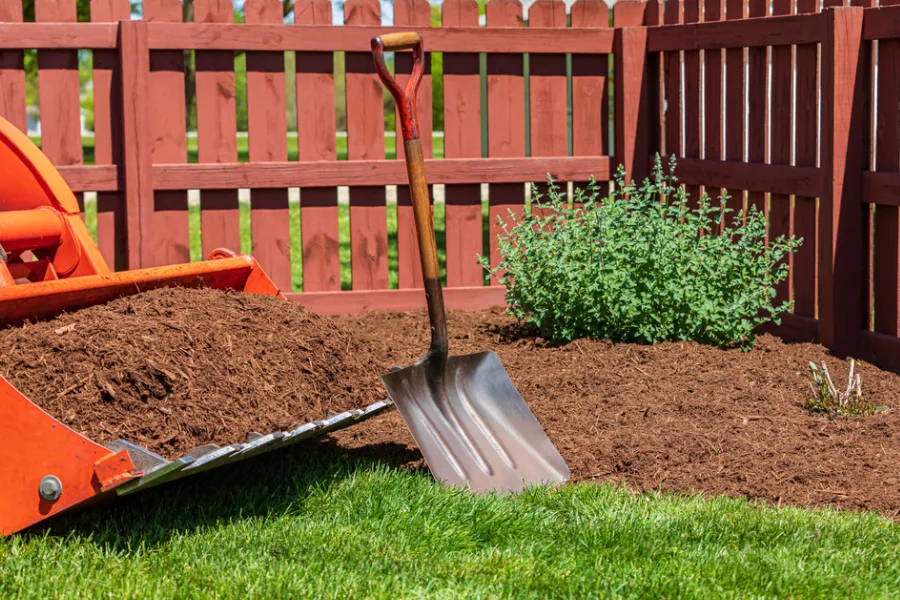
Once your beds are clean – now it’s time to mulch. And for success, you have to mulch deep! The second mistake gardeners make when mulching is to only put a few inches of mulch on their beds. It simply isn’t enough.
Two to three inches of mulch cannot protect weed seeds from sifting down to the soil. Nor can it prevent weed seeds underneath from germinating. If you only put a few inches of mulch in your flowerbeds, it really is like throwing your money away.
In order to work, a layer of mulch needs to be a full four to six inches thick. This will not only eliminate the chance of seeds sifting down to bare soil, but will also snuff out seeds that happen to be on the soil’s surface, keeping them from sprouting.
And last but not least, once you put your thick layer of mulch down, leave it alone! Do not stir or rake the mulch during the season to try to “freshen” it up.
Again, raking and turning the mulch will only allow weed seeds a chance to find a home. Instead, spot pull small weeds, and if need be, only add to existing mulch on top to freshen it up. See: The 3 Biggest Flowerbed Mulching Mistakes – And How To Avoid Them
The less you touch the mulch and the soil, the less weeds you will have. As for the mulch itself, four to six inches in depth might sound like a lot of mulch. Well, the thickness for sure is. But as you will see, by following the second secret tip to eliminating weeds below – you will need less and less of that mulch with each passing year!
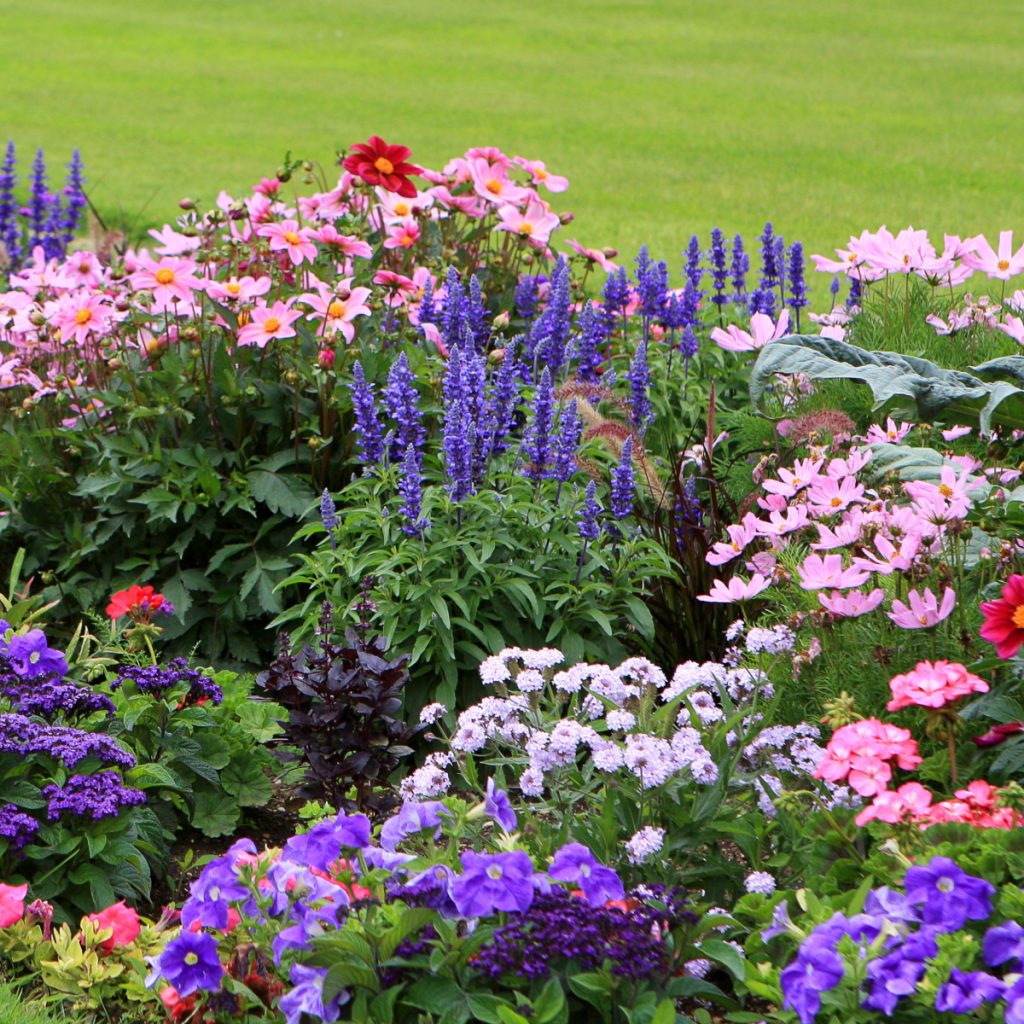
Although you do need to put mulch on thick, by simply filling your flowerbeds with more plants – and less open spaces and mulch, you can cut your weeding issues to almost zero. All with little extra effort!
Packing plants into your flowerbeds is the answer to so many flowerbed issues. For starters, when there is a full canopy of foliage, weeds seeds can’t find a way to the soil’s surface. And even if they happen to, all of those plant leaves block the light they need to germinate.
But even more, all of that foliage helps to conserve valuable moisture in the soil. That in turn means your plants stay healthier and stronger, and require far less watering too.

The best part of all? Filling your beds doesn’t have to be costly. Perennials can be divided regularly to create additional plants for free. How To Divide Your Perennials In The Fall – Create More Plants For Free!
In the short term, when planting in flowerbeds, don’t leave large open spaces of mulch. Keep flowerbeds smaller but full – and only expand them as you can divide and transplant more plants to keep them filled. You will be amazed at how by simply packing your beds full of gorgeous flowers – your weed problems all but disappear.
Here is to working less – and eliminating the weeds in your flowerbeds by doing so!
Follow Our Facebook Page For Great Gardening Tips And Advice! This Is My Garden Facebook Page
This Is My Garden is a garden website created by gardeners, for gardeners. Jim and Mary Competti have been writing gardening, DIY and recipe articles and books and speaking for over 15 years from their 46 acre Ohio farm. They publish three articles every week, 52 weeks a year. Sign up today to follow via email, or follow along!
Want to know if it is possible to compost weeds in your home compost pile? One thing is for sure, the topic always brings up a lot of questions and debate among gardeners!
On one side, some gardeners will tell you that placing weeds in a compost pile is simply asking for trouble. By doing so, you risk having your finished compost turn into a planting medium for seeds wherever you use it.
On the other side of the argument are gardeners who feel that the nutrients in weeds can be extremely beneficial to home compost piles. Not only can they help you create more compost for free, but the compost will be more balanced with the added power they bring to a compost pile.
One thing is for sure, all gardeners can agree that creating and using compost can pay off big for the health and growth of trees, plants, flowers and vegetables. Not only is compost packed full of nutrients, but all that organic matter helps to improve the soil composition on your property.
So which side of the debate is correct when it comes to composting weeds? As it turns out – it really all depends on how and what part of the weeds you compost!
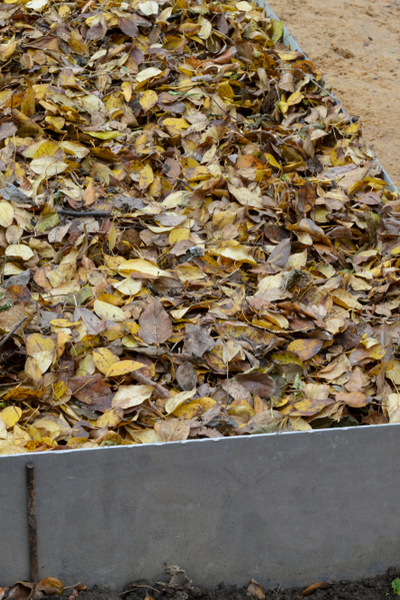
Composting is a great way to recycle and reuse organic products from your home and property. From dry fallen leaves to shredded cardboard, crushed eggshells and more, all of these materials help to create a product that is like no other.
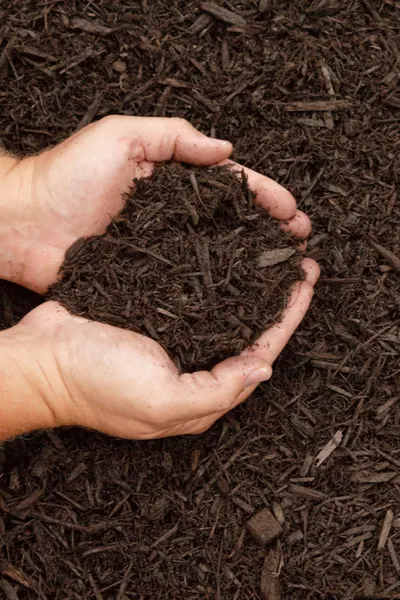
The finished result of all these materials breaking down and decomposing is a supercharged soil amendment that you can use to improve and power the plants and trees around your home. (They don’t call it “black gold” for nothing!)
Not only is the compost good for your soil, but it’s good for your environment as well. You can reduce the amount of trash that winds up in local landfills when you choose to compost instead. It truly is a win-win!


You can compost on a large-scale level where you have multiple 3-foot by 3-foot bins. Or, you can compost on a small scale level by only filling a couple of 5-gallon buckets with compostable products. Each method is great a way to improve your soil while reducing your amount of trash at the same time! And yes, that can include composting weeds safely when done correctly!
The first step in this debate is understanding what a weed really is. Technically speaking, a “weed” is a plant that is unwanted and competing for plants that are cultivated. But when it comes to plants and gardening, it’s important to realize that the term might be different for two different people.
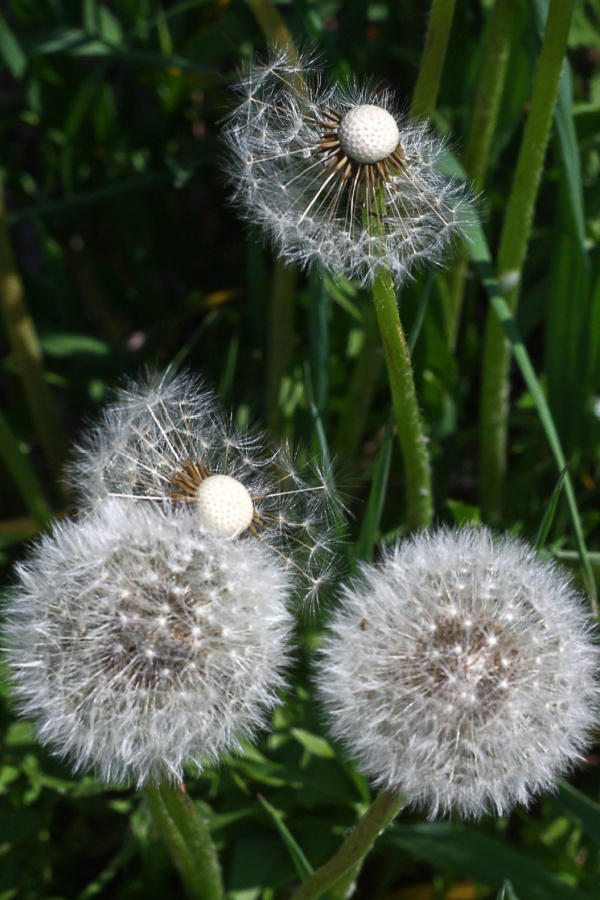
For example, some people consider dandelions to be a weed and a huge nuisance. They fill your beautiful lush green grass with bright yellow blooms that eventually turn into little white puffballs. And don’t forget how they seem to grow 10 inches the day after you mow your yard!
But to others, dandelions are an excellent pollinator plant, helping to attract bees, butterflies, and more. In addition, some people even use dandelion for food as well. You can make everything from dandelion jelly to sauteed dandelion greens and wine from this “weed.”
So does that mean dandelions can go into the compost pile and benefit the compost? Or will they be more of a pain if they are added to the pile? And the same question applies to clover as well!
Many homeowners trying to keep an immaculate turf lawn would consider clover to be a weed. But clover can also be beneficial on so many levels.
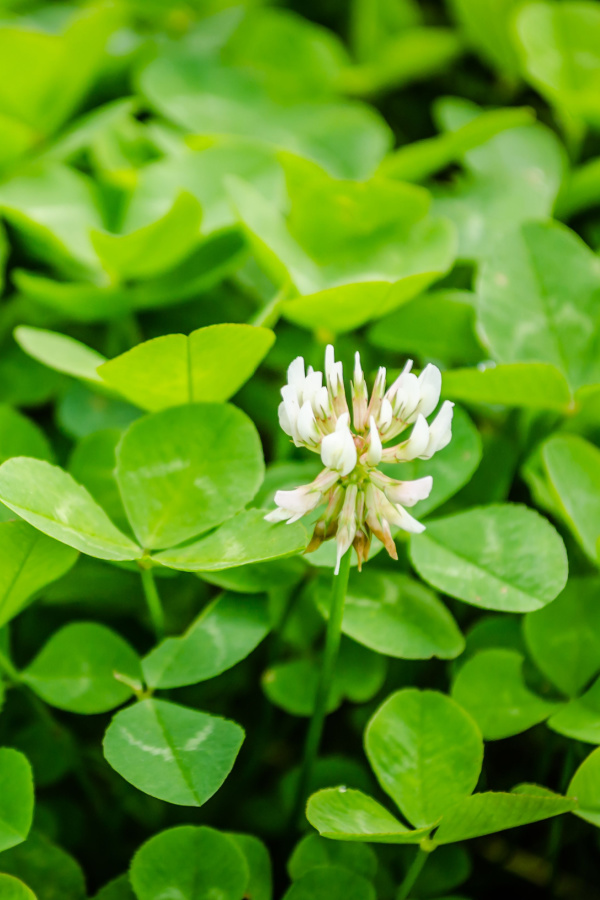

Not only does it feed important pollinators like bees, but it also helps to fix the nitrogen levels in the soil, allowing other plants around it to grow better. In fact, it works so well in providing nutrients that many gardeners use it as a cover crop! (See, “How To Plant A Green Manure Crop”)
The point is that all green living plants are teeming with nutrients and can be beneficial in their own ways. And because of that, weeds can be extremely valuable as they decompose in a compost pile – just the way a non-weed plant can be. That is, of course, as long as you are using a bit of caution when adding them to your home compost pile!
Even though weeds are a great addition to a compost pile by helping to add nutrients and organic matter, there are a few risks you take when including them. You can reduce those risks by taking two simple steps prior to adding them to your pile.
As with any plant material going into your home compost pile (i.e., flowers, vegetables, fruit, etc.), always be sure to remove any seeds prior to adding them to your pile. This includes the seeds within the fruit or vegetables – or the flower heads themselves.

Unfortunately, most home compost piles just don’t heat up to high enough levels to kill the seeds from plants. And because of that, the seeds can easily hang out only to be carried and sprouted wherever you go to use your fresh compost.
In addition to keeping the seed heads out, you should also avoid plants that reproduce from their roots. A great example of this would be the Canadian thistle.
Canadian thistle can be a nightmare to eradicate from flowerbeds and gardens. Its long, tenacious roots can produce hundreds of runners and buds to create a seemingly endless supply of new plants. These roots might not break down well enough in compost piles, allowing them to regenerate once the compost has been used around your property.
But beyond these few precautions, there is little worry about adding “weeds” to your compost pile. Not only is it a great way to create more compost for free, but it finally gives all of those weeds a purpose in your landscape!
Follow Our Facebook Page For Great Gardening Tips And Advice! This Is My Garden Facebook Page
This Is My Garden is a garden website created by gardeners, for gardeners. Jim and Mary Competti have been writing gardening, DIY and recipe articles and books and speaking for over 15 years from their 46 acre Ohio farm. They publish three articles every week, 52 weeks a year. Sign up today to follow via email, or follow along!
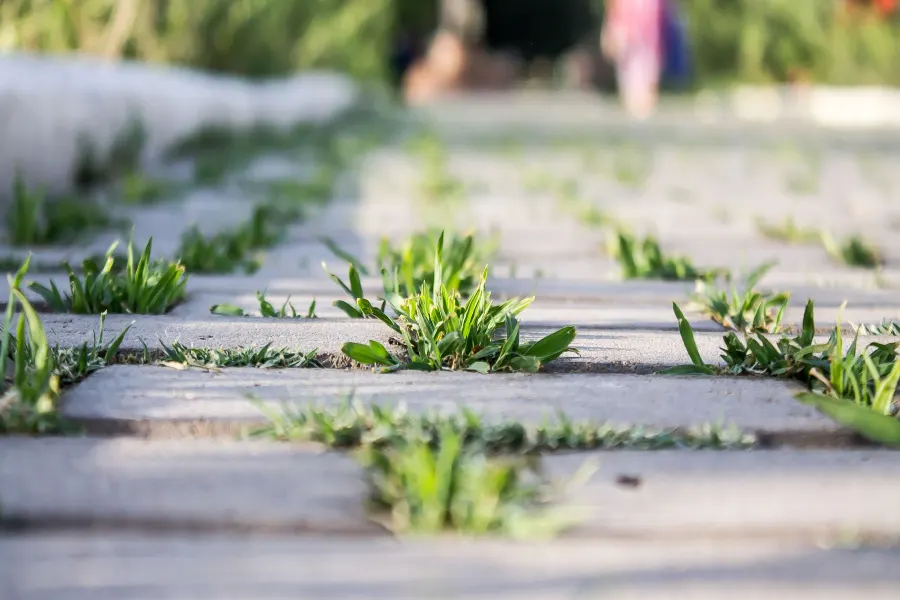
Looking for a few great all-natural methods to kill stubborn weeds in your driveway, sidewalks and patio areas?
Contrary to popular belief, you don’t have to use harsh chemical concoctions to control weeds in the non-grassy areas around your home. Not only can herbicides be dangerous to you, your pets and the environment, they can also be quite expensive.
Luckily, there are a whole slew of natural methods to stop those pesky and persistent weeds quite well. In fact, many help control them far better than store bought herbicides. And even better, at far less cost to you!

The first key to success when taking on stubborn weeds in taking a consistent approach. Quite often, weeds develop an extensive root system. And to completely kill off the weed and keep it from coming back, it can take several applications before the roots are entirely dead – no matter what method you use!
It’s important to note, all of the methods below are non-discriminatory. In a nutshell, they will kill anything and everything they come in contact with. A few can even change the PH of the soil when used, making it hard for anything to grow in the future.
Because of this, these methods should only be used for weed control in hardscape areas. These are areas where you will not be trying to grow grass, vegetables, flowers, trees and bushes.
With that in mind, here are some of the best solutions that work wonders for all-natural weed control on driveways, patios and sidewalks.
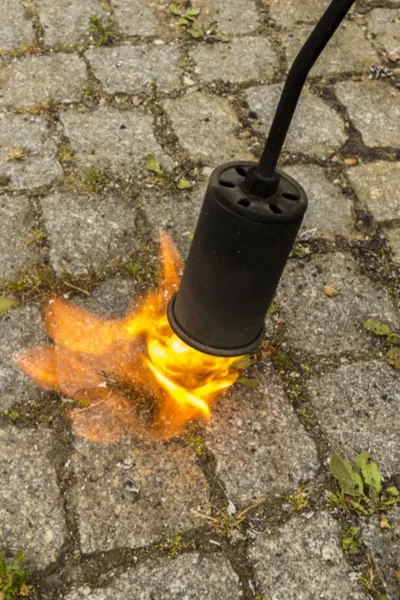
Weed torches are great for keeping brick, gravel and paver patios free and clear of weeds. Even better, they work fast, eliminating the weeds instantly by burning them up in a flash.
Weed torches work by using a fuel source (usually propane) to ignite a burner on the end of a wand. To use, simply light the torch and apply the flame to the weeds. There are a wide variety of models available to control weeds for both small and large areas.

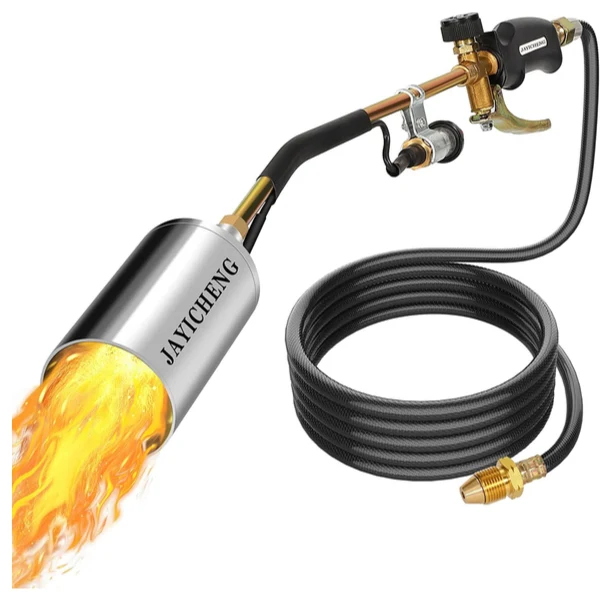
Small torches use a propane or butane canister that can be easily carried around for quick use. Larger weed torches can attach quickly to a 20 pound (gas grill tank,etc.) propane tank for easy use as well. Product Link : Propane Weed Burner Torch
The larger torches are great for bigger driveways and patios. With a longer hose and bigger surface flame, they make quick work of stubborn weeds. They are also great to have on hand for lighting everything from charcoal grills to fire pits and more. Especially when you consider they eliminate the need for ever having to use lighter fluid again.
One note of caution, weed torches should only be used where there is no danger of setting fire to mulch or nearby structures. They should also never be used when conditions are extremely dry and vegetation could catch fire and spread.
For more on weed torches, check out our article: How To Use A Weed Torch To Control Weeds – Simple, Effective & Fun!
Looking for an inexpensive yet totally effective way to control weeds on your hardscape areas? Try boiling water!
Boiling water is a great choice when trying to eliminate stubborn weeds growing through the cracks and crevices of sidewalks and driveways. The hot water easily finds its way to the plants, and burns the foliage and the roots in the process.


It can be a much better option for small areas. Even better, there is no need a sprayer. To use, simply heat up a boiling pot of water and pour it over the foliage of the weeds. It is both fast and effective – and extremely inexpensive!
Another highly effective and inexpensive homemade solution can be made by mixing water with a little salt. This method works by drying out and dehydrating the weeds, leaving them unable to absorb water. It also leaves the soil unable to sprout new weed seeds in the future.
Ordinary table salt works well, and the recipe is simple and economical:
For best results to control weeds, heat the water to a low boil in a pan. Add in the salt and olive oil, and stir until dissolved. Let the mixture cool and then transfer to a spray bottle to apply. Apply on hot and sunny days for maximum effectiveness.
The mixture will be most effective when weeds are under the most stress. On hot and sunny days, the sun’s rays and heat already raise the stress level of plants, and the salt mixture becomes more effective than ever as the weeds try to soak it up.
Although great for driveways and patios, do not use the salt mixture on existing flowerbeds. The salt will settle in the soil over time, making it hard for anything to grow. Be careful when using on the edges of concrete paths as well as it can kill the grass nearby.
Vinegar has long been used for creating an effective all-natural weed killer. Traditional store-bought vinegar will work, but it’s lower acidity of 5% is not as effective as horticultural vinegar.
To use store bought vinegar, use at full strength and only for small areas with few weeds. For more effective control, horticultural vinegar is the way to go. Horticultural vinegar can range from 20 to 35+% acidity, and is highly effective at weed control.
You can use it at full strength to kill large or stubborn weeds. However, mixing a 30% solution of horticultural vinegar at a 1:1 ratio with water will effectively kill most weeds in driveways and on patios.
Horticultural vinegar can be hard to find in local stores, but start by asking your local farm stores. If not, you can also find it quite easily on-line. Product Link: Horticultural Vinegar
Remember that vinegar is acidic and will burn the skin. Always be sure to wear protective clothing and goggles when applying. A pump sprayer is best for applying a thin mist to the weeds. Much as with the salt mixture, do not use vinegar around flowerbeds, gardens, or along the edges of walkways and driveways where grass is growing.
Here is to killing off the weeds in your driveway, sidewalks and patios – naturally!
Follow Our Facebook Page For Great Gardening Tips And Advice! This Is My Garden Facebook Page
This Is My Garden is a garden website created by gardeners, for gardeners. Jim and Mary Competti have been writing gardening, DIY and recipe articles and books and speaking for over 15 years from their 46 acre Ohio farm. They publish three articles every week, 52 weeks a year. Sign up today to follow via email, or follow along!
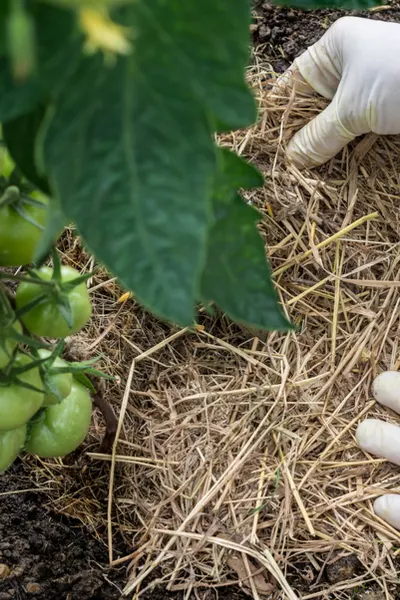
When it comes to using mulch to stop weeds in your flowerbeds – four simple tips can make all the difference between having gorgeous, easy care, weed-free beds – or dealing with a weeding nightmare over and over again all summer long!
Mulch is the single greatest weapon in the fight to control weeds. Not only can it help snuff out existing weeds, it also protects new weed seeds from getting a start.
Even more, the right mulch can help to protect and power your perennial and annual flowers all at the same time. In fact, a good layering of mulch has a long, long list of benefits for plants. In addition to stopping weeds, it can also help hold valuable moisture in, regulate the soil temperature and protect plants from disease.

But one thing is for sure, not all mulches are the same. Some mulches can not only stop weeds, but also help to improve your soil. Meanwhile, other mulching choices give you far less protection against weeds – and can even change the make-up of your soil, harming your plants over time.
Equally important to selecting the right mulch is how you apply and maintain it around your plants. With that in mind, here are 4 simple secrets for mulching your flowerbeds for weed-free success!
It used to be that there were only a handful of selections available for flowerbed mulch. Now there are hundreds upon hundreds! But that doesn’t mean they are all good for your plants.
One of the biggest mistakes homeowners make when mulching is selecting a mulch that is too fine. Often called ultra-fine, super-fine or triple shredded mulch, this type of mulch may seem appealing for both its appearance and ease of spreading. But unfortunately, it is a poor choice for stopping weeds.
The issue with super-fine mulch is that it more like soil than mulch. Not only will it not block weed seeds from the soil, it will actually grow weeds within it. Even worse, it breaks down so quickly into the soil, you need to constantly replace it.

A good mulch needs to keep blowing and drifting weeds from finding the soil below. It also needs to help insulate plants and conserve moisture in the soil.
When mulching flowerbeds, super shredded and ultra fine mulches simply do not provide this protection. Instead of forming a barrier, they actually become part of the soil layer. They also disappear quickly, leading to more expense and more mulching.
So what is the best choice for mulch? For maximum protection, select a double shredded hardwood or hardwood bark mulch. They both provide extremely good protection for the soil below. It also breaks down at a much slower rate. Even better, as it does, it replenishes nutrients in the soil.
In addition to hardwood, cedar is another good option. Again, look for a double or mid-grade shredded product for best results. One mulch to avoid is cypress. Although popular, it does not improve the soil as it breaks down.
Cypress is also not very adept at preventing weeds. Its more jagged and woody make-up allows seeds to find their way to the soil below quite easily. Pine needles can be an option in beds with more acidic-loving plants (azaleas, blueberry bushes, etc.), but are not the best option for most perennial plants.
Gravel and stone are two more options that are not usually in the best interest of plants. They absorb heat during the day, and can easily burn plants. Gravel and stone also allow weed seeds to easily find a way to the soil surface to germinate.
Just as important as selecting the right mulch is applying the right thickness of mulch. In fact, under-mulching is one of the biggest culprits when it comes to allowing weeds to take over a flowerbed.
In order to stop weeds and insulate plants, mulch needs to be applied at least four inches thick in flowerbeds. Anything less simply isn’t enough to keep weeds from finding a path to the soil. For best results, a four to six inch layer is the perfect amount for both insulating and weed protection.
On the flip side, be careful not to over-mulch. More is not always better when it comes to mulch. When applied too thickly, it will suffocate plants and keep oxygen and water from getting to the roots. This same principal applies to vegetable gardens too. (See: How To Easily Eliminate Garden Weeds)
When it comes to keeping your mulch effective in the fight against weeds, one of the best ways to help is to leave it alone! One of the easiest ways to invite weed issues into flowerbeds is by disturbing the mulch.
Raking and turning mulch to “freshen” up the look of a flowerbed causes much more harm than good. The minute mulch is turned or flipped, all of the weed seeds on top of the mulch now find an easy path to the surface below. And once there, the germination begins!
Instead of turning the mulch, simply add a thin top coat to freshen it up. This way, the protective barrier stays in tact, and weeds simply can’t find a way to germinate.
Finally, another great way to keep your flowerbeds weed free is to fill them with plants – and not wide open spaces of mulch!

The best weed blockers of all are the foliage of plants. Large open expanses of mulch are not only difficult and expensive to maintain, they also make it easy for weed seeds to find a home. Instead, plant perennials closer together so that they can help in the fight against weeds.
The best part of all, it doesn’t have to be expensive. By simply dividing your perennial plants every few years, you can double or even triple the amount of plants in your flowerbeds – for free! The more plants you have, the less mulch you will need and use. (See : 6 Great Drought Resistant Perennials To Plant)
Here is to keeping your flowerbeds weed free this year – and enjoying their beauty without all of that hard work!
Follow Our Facebook Page For Great Gardening Tips And Advice! This Is My Garden Facebook Page
This Is My Garden is a garden website created by gardeners, for gardeners. Jim and Mary Competti have been writing gardening, DIY and recipe articles and books and speaking for over 15 years from their 46 acre Ohio farm. They publish three articles every week, 52 weeks a year. Sign up today to follow via email, or follow along!


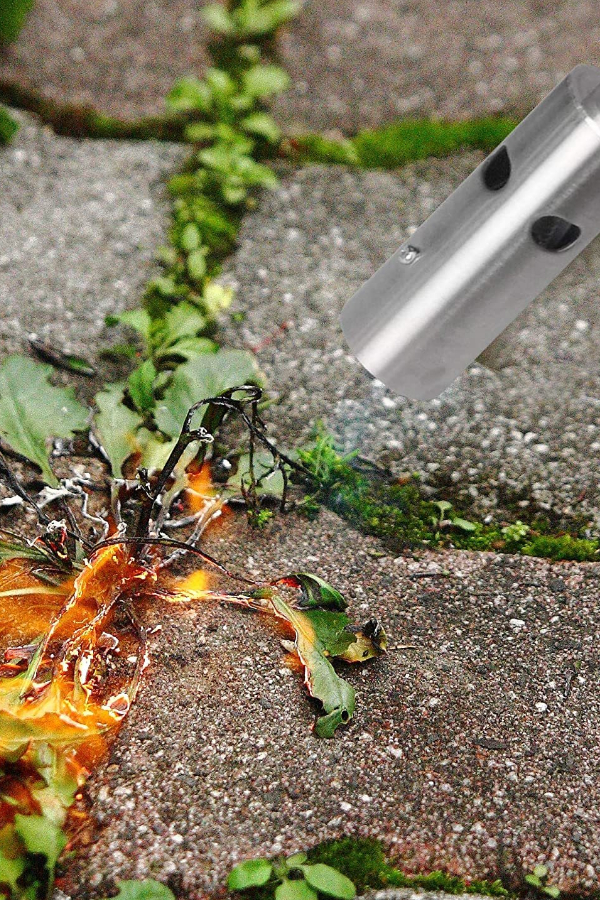
If you are looking for a no-spray, chemical free method to control weeds on patios, walkways, driveways and more, using a weed torch might just be the answer for you. Even better, it can actually be quite fun to use!
Long before herbicides came into play, burning weeds with a flame was a popular method for handling weeds. It was not only effective, but could quickly burn away unsightly weeds. For homeowners driveways, walkways and patios, it truly was the perfect solution.
There was no waiting for days for a product to take effect. The unwanted foliage simply burned up and disintegrated as soon as it was hit with the flame.
But as chemical sprays became more potent, faster and efficient at killing weeds, they became the product of choice. Sprays were easier to apply, and could cover large areas quickly. Add in that spraying didn’t require a fuel source and was extremely economical, and the weed torch quickly became a thing of the past.
In recent years, the old flame torch has made a resurgence, and with good reason. As more gardeners and homeowners begin to worry about the health dangers of spraying, inhaling and ingesting chemical herbicides, they looking for less invasive ways to control unsightly and unwanted weeds on their hardscapes.
And even though less harmful weed killing sprays can be made from vinegar and salts, they can unfortunately leave stains and residue on patios and walkways.
But with a low flame from a torch, weeds simply vanish into thin air. All without a trace weeds were ever there, or that something was used to remove them. Even better, today’s weed torches are easier to use, and even more effective.
Heat is an extremely effective method for killing plant life. When high heat hits a plant, it causes the cells within the stems and foliage to rupture.
Once that occurs, the plant is no longer able to take in water or nutrients. In addition, the plant also loses it’s ability to harness the power of photosynthesis to grow and repair damage. The end result of both – the plant and it’s roots die off.

For smaller weeds with an annual growing cycle, one hit with a torch is usually enough. For established perennial weeds, it can sometimes take a few applications to totally eliminate the roots. But in the end, the torch usually wins out!
Before we take a look below at selecting the best torch for weed control, there are a few precautions to keep in mind when using a torch.
First and foremost, it’s important to note that a weed torch is not ideal for every situation. Using them around extremely dry areas, or where there is a high chance for wildfires is never a good idea. Likewise, a weed torch should never be used around flammable materials, tanks, etc.
In addition, weed torches should never be used in close proximity to bedding plants, bushes and shrubs. The heat that emanates from the torch can still harm these plants, especially tender annuals.

Finally, for poisonous weeds such as poison ivy, sumac and oak, it is best not to use a torch. While burning, these poisonous weeds release their toxins into the air – and they can easily find their way into your lungs.
The good news is that there all kinds of weed torches now on the market that can handle any size job – from small backyard torches, to large ones that can handle big driveways and more. Here is a look at a few great choices depending on your needs.
With their resurgence in the past few years, there are quite a few new weed torches on the market. Selecting the right torch really comes down to where you will be using it.
For starters, if you have a small patio or walkway, a small hand held torch can more than do the trick. For this task, a butane kitchen torch is the perfect choice.
Most models have a small fuel canister that attaches right to the flame end. They are 100% portable and easy to use to direct a flame right where you need to to kill a few pesky weeds. And – you can still make your creme brulee in the kitchen with them too!

For larger areas, it is important to select a weed torch that has a long arm to keep you from bending down. It also keeps the flame far away from you as well.
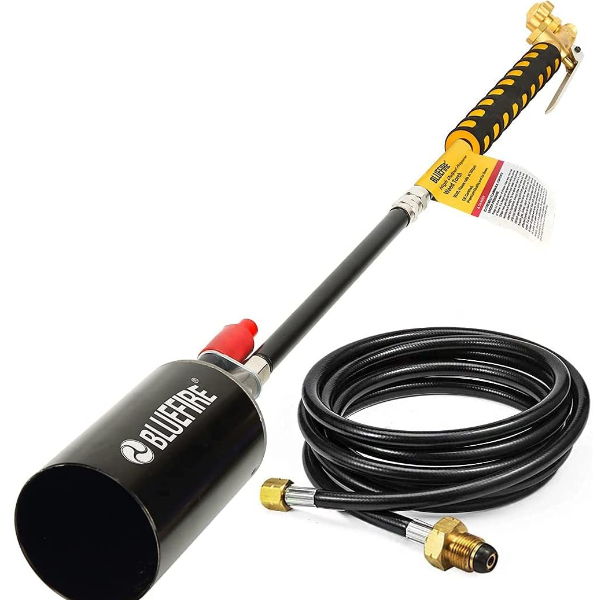
Torches like the BLUEFIRE 32″ Long Propane Weed Torch or the BLUEFIRE 150,000 BTU High Output Propane Weed Burner Torch with 10ft Hose are perfect for the job. With a trigger, self-igniting switch on the handle, starting the torches are a breeze.
Torches like the Bluefire models work with nearly any standard fuel cylinder. From MAPP gas to propane tanks, you can hook the torch to whatever size tank you need for both mobility and length of use.
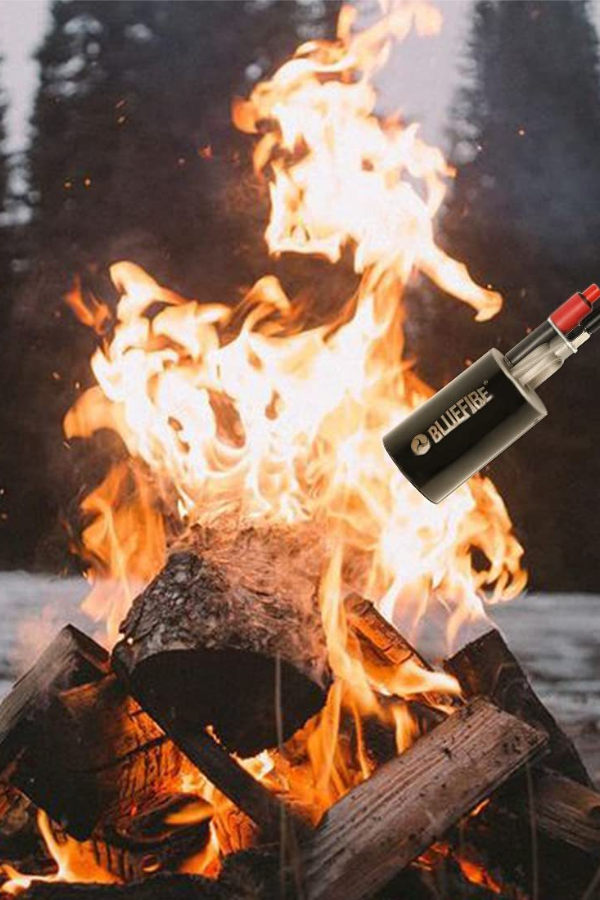
A weed torch can work for more than just torching weeds. They are also perfect for melting off dangerous snow and ice on sidewalks and driveways. And having trouble starting the campfire? Once again, the weed torch can light that wood up in mere seconds!
For more information on natural and organic weed control methods, be sure to check out our “Controlling Weeds” tab on the website. Here is to keeping your yard and landscape neat, tidy, and safe!
Follow Our Facebook Page For Great Gardening Tips And Advice! This Is My Garden Facebook Page
This Is My Garden is a garden website created by gardeners, for gardeners. Jim and Mary Competti have been writing gardening, DIY and recipe articles and books and speaking for over 15 years from their 46 acre Ohio farm. They publish three articles every week, 52 weeks a year. Sign up today to follow via email, or follow along!
When it comes to spraying weedkiller around trees and throughout your landscape, it may be more dangerous to existing plants than you might think.
Beyond weedkillers harmful effects to bees and important pollinators, and their possible contamination to wells and nearby water supplies – they can also be quite harmful to the long-term health of trees, shrubs and perennials in your landscape.


Especially when sprayed in excessive amounts around the entire root zones of trees and plants.
Weedkillers works via foliar absorption. When sprayed onto the leaves of plants, the chemical is then absorbed into the plant. For that very reason, many use it right up onto the base of trees and bushes, thinking it cannot harm these non-leaf areas.
But there are two problems with that concept. One is that many trees and shrubs send up small shoots in the root zone nearby. And these shoots, with their tiny foliage, can indeed absorb the chemical and injure the tree.
The second issue is that by spraying and defoliating large areas around trees and bushes, the bare ground exposes the root zones to massive moisture loss.
Without any mulch or ground cover around a tree, the sun can quickly dry out the soil, and the roots below. This can be especially detrimental to newly planted or young trees.
So what are the best alternatives to spraying herbicides to control weeds around trees, plants and hardscape areas? Well, that all depends on what and where you will be spraying.
When it comes to keeping weeds out of flowerbeds, and away from trees and shrubs, nothing works better than a heavy coating of mulch.
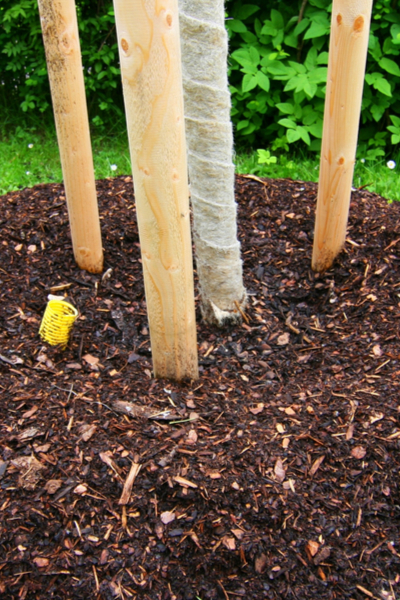

Mulch not only insulates and protect plant’s root systems, it also helps conserve moisture. To be effective for weed control, mulch must be applied at least 4 to 6″ deep around trees and shrubs.
And if you don’t want to mulch around trees, simply using a string trimmer to keep weeds and grass down is the best answer. That patch of grass under the trees is vital to keeping moisture to the trees!
For hardscape areas like walkways and driveways, horticultural vinegar is an excellent option vs. spraying weedkiller. The higher acidity of horticultural vinegar (30%) compared to store-bought vinegar (5%) serves as an effective weed killer. See: How To Use Vinegar To Control Weeds

Another great option in these non-growing areas is a weed torch. Weed torches make quick work of burning out weeds without the need to spray anything at all.
They work by using propane to fire up a flaming tip to burn weeds to the ground. In addition to working for weeds, they also make a great fire pit starter! Product Link : Weed Burner Torch
And of course, there is always a string trimmer when it comes to edging walkways or trimming the sides of barns, sheds and your house. It may take a bit more work, but it is a far safer option – for you and the environment!
Here is to keeping weeds under control naturally – and without the need for spraying weedkiller!
This Is My Garden is a website dedicated to spreading the love and knowledge of gardening around the world. We publish two new garden articles each week. This article may contain affiliate links.
So what is the best mulch to use in your flowerbeds and garden? The answer all depends on exactly what you are mulching, and where it will be going.
Mulch really is a gardener’s best friend. There is no better way to keep weeds from becoming established than keeping bare soil covered. Mulch also creates enormous interest and beauty to the overall look of your landscape.
But even more, mulch promotes healthy, strong plant growth. And in a lot more ways than you might think.
Mulch is an incredible soil insulator. It can help to keep the scorching-hot summer sun from overheating the soil. On the flip side, it also retains heat on nights when the thermometer dips too low.
And whether it is vegetable plants, flowers or shrubs and trees, keeping the soil from wild swings in temperature is important. Quick changes in soil temperature damages roots, and can easily injure or even kill plants.

But the benefits of mulch don’t end there. Mulch also helps you water less by protecting the soil from drying out too fast.
And when it rains too hard or too often, that same covering can help to shed off the excess moisture. Last but certainly not least, over time, mulch adds valuable nutrients to the soil as it breaks down.
It all begins with what you will be mulching. Will it be for flowerbeds, the garden, shrubs and trees, or for a walkway?
The choices are nearly endless, and can actually be somewhat overwhelming. Shredded bark, wood chips, pine chips, cypress, dyed, straw, shredded leaves, rock, and synthetic rubber mulches are just a few. But there are hundreds of other options as well.
The key to success starts with selecting the best mulch for the application.
When it comes to flowerbeds, there are many choices for the home gardener.
Shredded wood based products are by far the most commonly available. They range from finely shredded, to large nuggets and even chunks.
Shredded hardwoods do a nice job of adding back organic material to the soil as they break down.
Be aware that the more finely shredded you choose, the quicker it will disappear. That is not necessarily a bad thing. This will add nutrients to your soil quicker, but you will need to apply it more often.

As an alternative, consider using low-growing ground crops as well as a living mulch in these beds. Perennials like Pachysandra, phlox or ground ivy quickly grow a thick living mulch around larger perennials, shrubs and bushes.
Not only do they add interest, but they are an inexpensive, all natural alternative to mulching over and over.
When it comes to the garden, organic and natural is the best way to go. Not only are they safe to use around food producing plants, they also enrich your garden soil quickly.
For mulching directly around plants, compost, shredded leaves, grass clippings or straw are all great options.

They also break down quickly each season, adding back much-needed nutrients that vegetable plants take from the soil as they grow.
Wood chips and bark products are great for walkways and paths in the garden, but avoid using them directly around vegetable plants. They can do more harm than good when it comes changing the soil PH level in the soil.
Mulching around trees and shrubs is important for more than just aesthetics. As noted above, mulching also helps regulate soil temperature and moisture levels too. Both of which are those extremely important to the long-term health of trees and shrubs.
Bark, larger-style wood chip products, and even stone or pebbles are great choices for these areas. They provide good insulation and weed suppression qualities, while breaking down slowly over time.
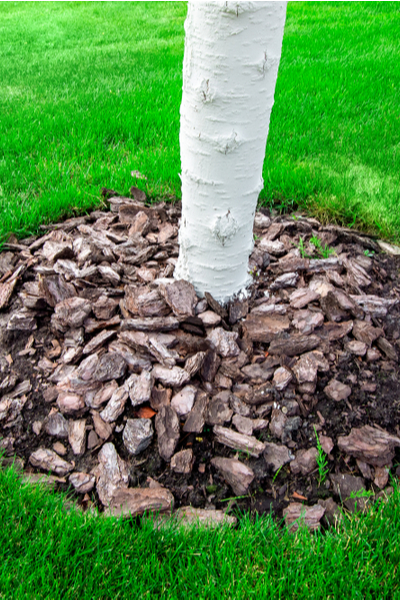

If you use a stone-based product, it’s a good idea to first put down a breathable and permeable weed barrier. Without it, the rocks can work their way into the soil over time. In addition, it can make weeding a nightmare.
When it comes to walkways and pathways, it’s all about choosing low-maintenance mulches. Since there are no issues with trying to create plant or soil vitality, the sky is the limit.
Gravel and stone-based products are among the best. Synthetic rubberized mulches will work here as well, although they can get pricey. (See : How To Keep Driveways & Walkways Weed Free Naturally)
Here again, putting down a barrier underneath is a big key for easy, long-term care. And if you’re wondering how to choose the best flower to fill your flowerbeds this year, take a look at our article: Why You Need To Plant Blanketflower – The Amazing Perennial That Blooms All Summer!
Here is to choosing the best mulch for your flowerbeds, gardens and landscape this year!
This Is My Garden is a website dedicated to spreading the love and knowledge of gardening around the world. We publish two new garden articles each week. This article may contain affiliate links.