
Starting your own sweet potatoes from slips is not only easy to do, it also happens to be one of the best ways to grow healthy, strong and productive plants. Even better, it can help save on your plant budget too!
Sweet potatoes have become so much more than just a Thanksgiving day side dish staple. As an excellent source of Vitamin A & C and with loads of potassium, fiber and manganese – the humble sweet potato is at the top of the list when it comes to selecting healthy vegetables to grow in your garden.
Along with their long list of nutritional benefits, sweet potatoes can also deliver some amazing flavors to a wide range of dishes. Because of that, they have been finding their way into more backyard gardens with each passing year.
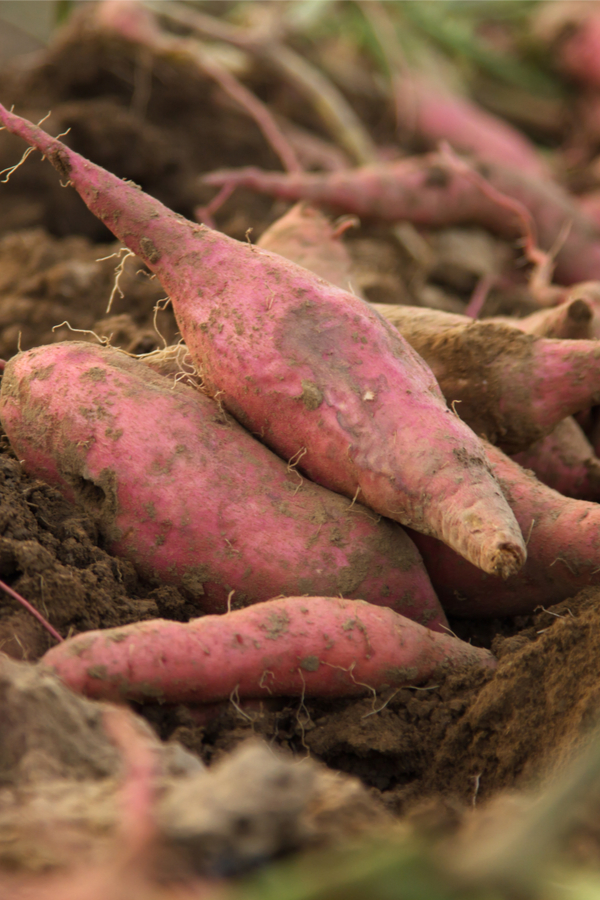

Growing sweet potatoes is a bit different than growing regular potatoes. Traditional potatoes are sold and planted as “seed” potatoes. To plant a potato, you can simply cut “seed” from a portion of a potato that contains a sprout or two (known as eyes), and then place in the ground.
A traditional potato will then grow stems and leaves from the eyes. As a result, a new potato plant emerges above ground. Underground, new potatoes then form off the roots.
However, with sweet potatoes, the process for creating and planting seed is a bit different. Instead of growing from portions of a potato planted in the ground, sweet potatoes grow from slips.
Starting Sweet Potato Slips
So what are sweet potato slips? Slips are are miniature sweet potato plants that grow from the roots of an existing sweet potato.
Slips will usually be four to six inches long with a few sets of leaves up top. They are then planted much like any other vegetable transplant would be into the garden, and new sweet potatoes form from the roots below.
Slips can be purchased as a bare root transplant, or in a traditional soil cell for planting. That is, if you can find them. Unfortunately, sweet potato slips can often be hard to source locally in stores. But luckily, growing your own is not only easy, but fun to do as well!
How To Start & Grow Your Own Sweet Potato Slips
Sweet potato slips can be started from an existing sweet potato using soil or water as the growing medium. You will want to start your slips about 6 weeks ahead of time to give them plenty of time to grow before planting outside.
No matter which method you use for starting (water or soil), always use an organic, untreated sweet potato. Many times, stores will treat non-organic sweet potatoes with a root prevention substance for longer storage. Unfortunately, that treatment will keep your sweet potato from growing slips.
Starting Sweet Potato Slips In Soil
If starting in soil, fill your container about half full of soil. Place an unblemished whole sweet potato half way into the soil. Lay the sweet potato on its side. The soil should be damp, but not saturated.
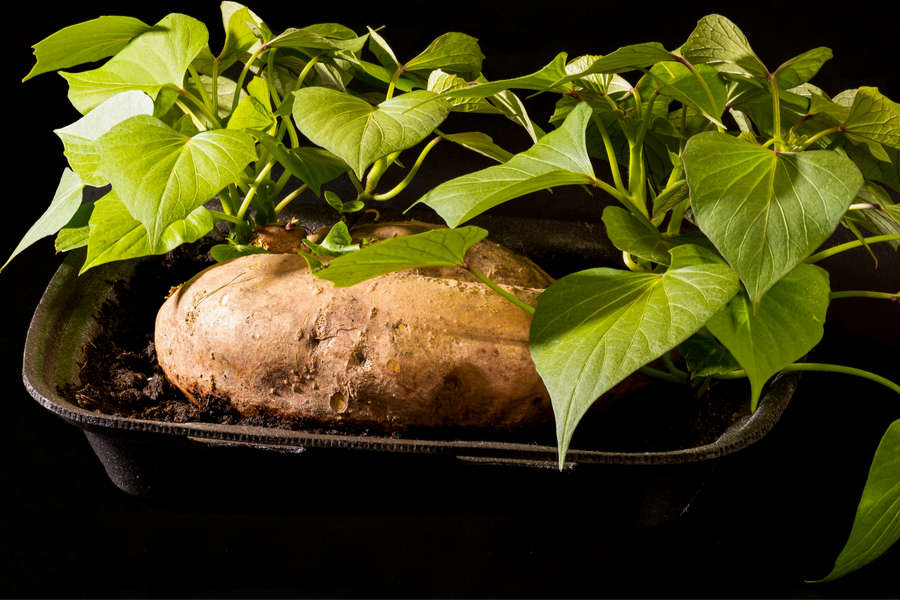

Leave in the warmest room possible as the warmer the soil, the quicker the sweet potato will produce slip sprouts. Placing the container on a heating mat will speed the process up even more. Place in a sunny location where the potato can receive light at least six hours a day.
Usually within two weeks, you will begin to see new slips forming and shooting up. Continue to keep the soil moist.
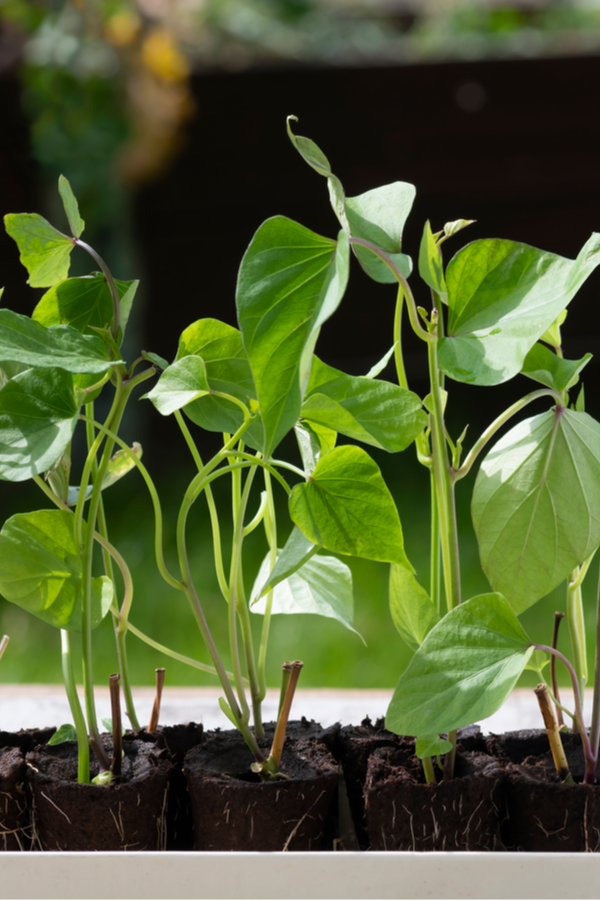
Once your slips get to around four to six inches, break off the slip at the base of the potato and place into water (distilled or tap) to root. Continue to keep the slips in sunlight or artificial light each day.
Once roots form, you can plant into soil to create soil transplants, or leave in the water to create bare root transplants. Your original sweet potato will continue to grow new slips that you can continue to break off and start more slips as needed.
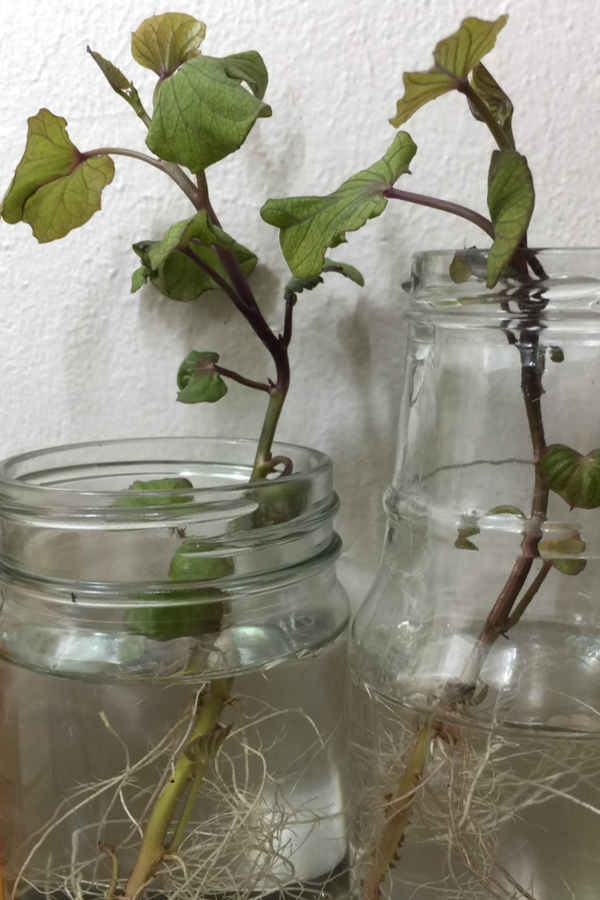
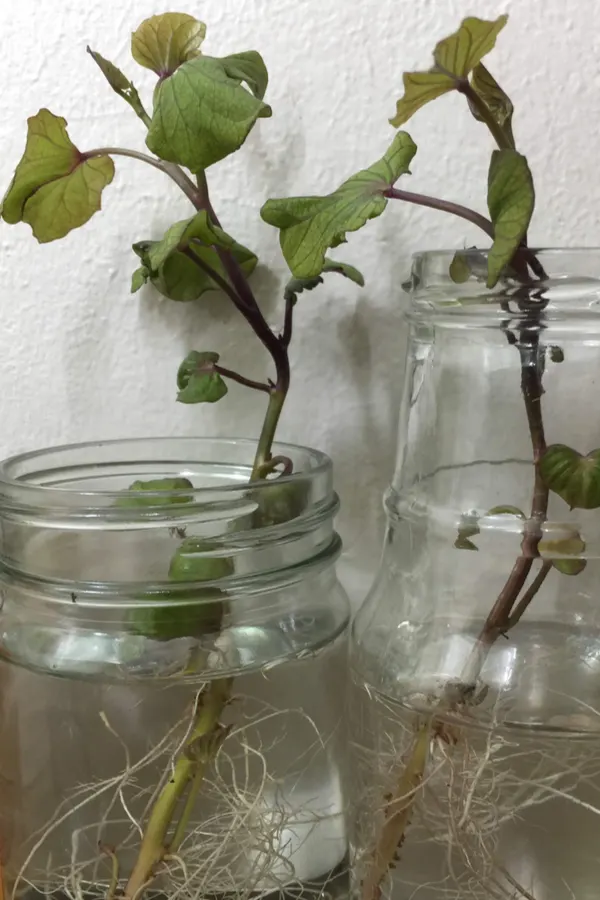
Starting Sweet Potato Slips In Water
You can also create your slips entirely in water if you wish. For this process, you can submerge a sweet potato in a jar of distilled or tap water.
Place a couple of toothpicks into the potato, and allow them to rest on the side of the jar. Insert the toothpicks so that about 1/2 of the sweet potato is under water. Place in the warmest room of your house to speed germination. Place the jar in a location that receives at least 6 hours of light each day.
Just as with the soil planted slips, you will usually see slips develop at the top of the sweet potato within 2 weeks. Again, allow them to grow to around 4 to 6 inches before snapping off at the base and placing into water to root.

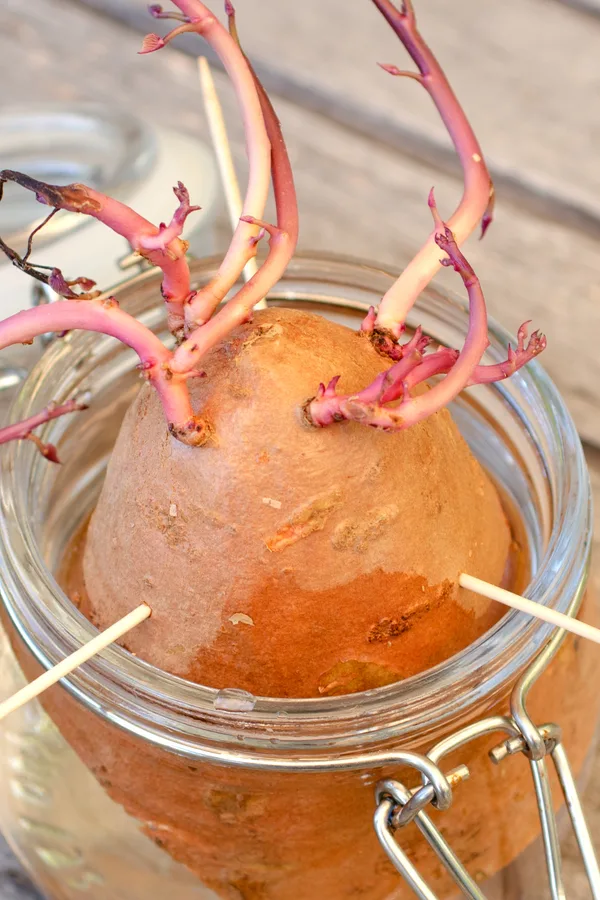
Once roots form, you can plant back into soil, or leave in the water for bare root transplants. Both soil and bare root work well when transplanting into the garden, it really comes down to a matter of personal preference.
How To Plant And Grow Sweet Potatoes
The best time to plant sweet potatoes is in late spring to early summer. Although you can plant traditional potatoes in early spring, sweet potatoes need a bit warmer soil.
Plan your slip growing to coincide with planting day, allowing anywhere from 6 to 8 total weeks of growing time before you want to plant. One thing is for sure, they are highly frost sensitive, so let the weather warm first!
Sweet potatoes grow best in loose fertile soil. Adding a bit of compost to each planting hole goes a long way towards success. To plant, place slips 6 inches deep in the soil. Space each slip about 12 inches apart to allow the roots and tubers room to expand and grow.
It is best to mound the soil a bit before planting. Create a small mound at each hole about 3 to 4 inches in height at the middle. Bury each slip in the soil all the way to the top set of leaves. Once planted, tamp the soil down around the top of each plant.


You can also plant sweet potatoes in containers or crates with success. This can allow for easy growing with little need for weeding or extra maintenance. See : How To Grow Sweet Potatoes In Crates With Ease
Maintaining Plants In The Summer – How To Start & Grow Sweet Potatoes From Slips
Sweet potatoes need water to grow to proper size. With that in mind, water plants at least twice a week if there is little rain, especially the first few weeks after planting.
It is a good idea to mulch plants as soon as you plant. Place a three to four inch layer of straw, grass clippings, or shredded leaves around each plant helps to conserve water and keep weeds at bay. Once the plants begin to grow, their massive leaf structure will suppress the majority of weeds.
Harvest Time – How To Start & Grow Sweet Potatoes From Slips
You can start to harvest sweet potatoes as soon as the plants begin to yellow. However, the longer they stay in the ground, the more they will continue to develop additional flavor.
You can partially harvest well up until the threat of frost. This is a great method to take only what you will be using until you are ready for a full harvest.

Another great benefit to growing sweet potatoes is that they can store for a long time if kept in a cool, dark place. But before storing, they will have to go through a curing process first. Curing is a simple process of letting sweet potatoes dry out completely before moving to long-term storage.
In addition to preparing them for long-term storage, curing also aids in sweetening the potatoes up. To cure, begin by gently brushing all of the soil off of the skins. Do this without water as they will store much better by not allowing them to become wet.
Long Term Storage
Once brushed off, place in a well-ventilated but warm spot for 10 to 15 days. A back porch, barn or garage are all great places to cure. After the curing period, the sweet potatoes are then ready to find a cool, dark spot for long-term storage.
Here is to starting your own sweet potato slips from seed this year, and to growing an incredible crop!
Follow Our Facebook Page For Great Gardening Tips And Advice! This Is My Garden Facebook Page
This Is My Garden is a garden website created by gardeners, for gardeners. Jim and Mary Competti have been writing gardening, DIY and recipe articles and books and speaking for over 15 years from their 46 acre Ohio farm. They publish three articles every week, 52 weeks a year. Sign up today to follow via email, or follow along!

