Whether it be insects or animals, pests can cause big headaches in the garden. Check out our latest articles below on how to handle pests in your backyard!


Whether it be insects or animals, pests can cause big headaches in the garden. Check out our latest articles below on how to handle pests in your backyard!
Looking for a few simple, easy, and all-natural methods to get rid of aphids on your houseplants?
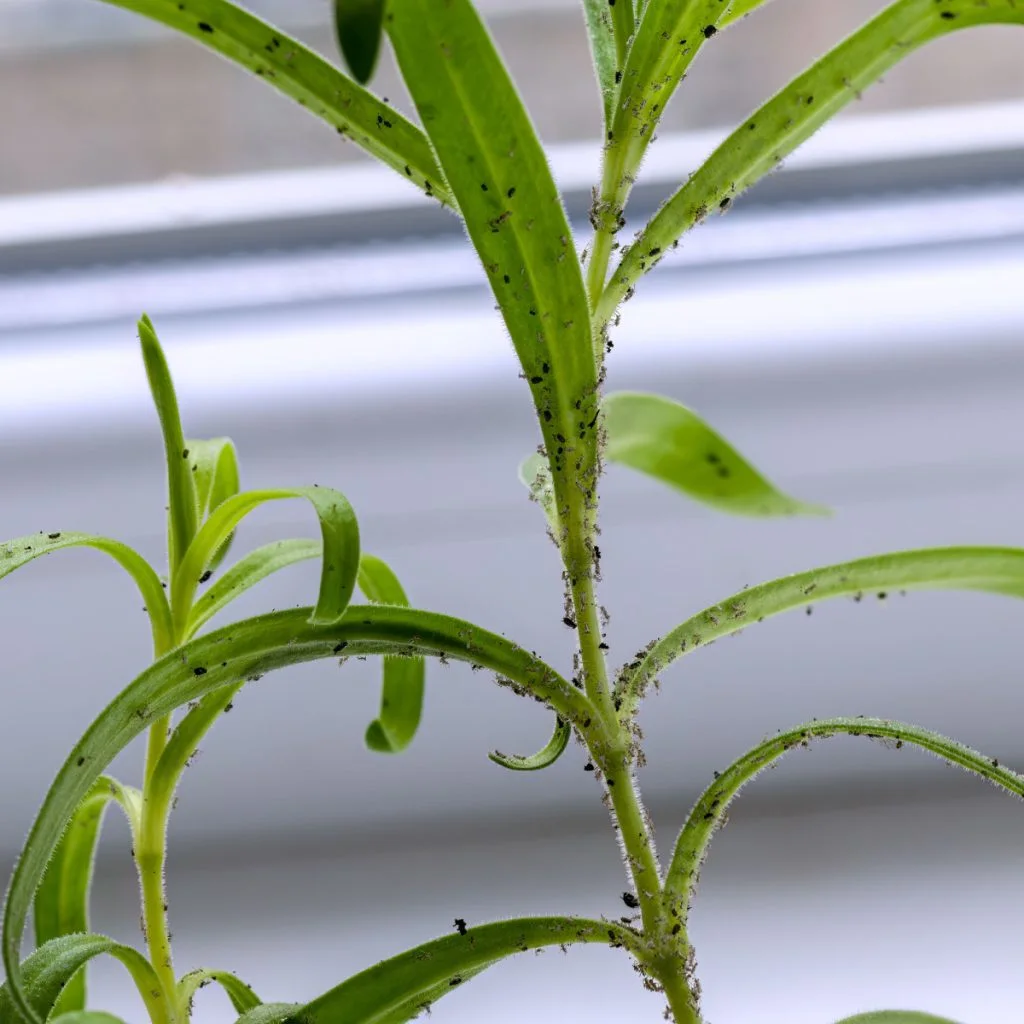
Aphids may be tiny, but they can cause huge problems when they show up inside. The soft-bodied insects are some of the most common indoor plant pests of all, and once they find a plant they like, they can multiply faster than most people realize. In just a short time, they can take over the stems and leaves of your favorite plants, sucking the life right out of them.
Aphids usually find houseplants in a few different ways. Sometimes they hitchhike indoors on plants brought in from outside. Other times, they attach themselves to clothing, cut flowers, outdoor tools, or even new plants from stores or greenhouses.

Once inside, they discover a very comfortable environment where temperatures are steady and there are no natural outdoor predators to keep their population in check. And that combination allows them to establish themselves quickly!
When aphids begin feeding on a plant, they use their small, needle-like mouths to pierce plant tissue and suck out the sap.
This weakens the plant and robs it of energy needed to grow and stay healthy. Leaves begin to curl, yellow, and wilt. New growth becomes deformed. Flowers fail to bloom, and entire plants can eventually die if the infestation becomes severe enough.
Another serious issue comes from the sticky residue aphids leave behind. As they feed, they produce a sugary substance known as “honeydew.” This sticky coating covers leaves. Not only is it messy, but it also encourages mold growth. And before long, a small aphid problem becomes a messy, frustrating issue that can take out your plants.
The good news is that aphids are actually one of the easiest pests to control when you use the right methods. You do not need harsh chemicals, expensive sprays, or complicated treatments. In fact, there are two simple solutions that stand out as incredibly effective at getting rid of aphids quickly, safely, and for good: a basic water and soap spray, and neem oil. Here is a look at how to use both!


One of the easiest, cheapest, and most reliable ways to eliminate aphids on houseplants is with a simple mixture of soap and water. It works incredibly well, uses ingredients most people already have at home, and is very gentle for indoor use.
Aphids have soft, delicate bodies that are protected by a thin waxy coating. This coating helps them hold in moisture and survive. When mixed with water, mild liquid soap breaks down that protective coating. Once the coating is gone, aphids quickly dehydrate.
In simple terms, the soap causes the aphids to dry out and die without harming the plant when applied correctly. It also disturbs the aphids’ ability to breathe. Soap clings to their bodies and blocks their breathing pores, causing them to suffocate. Because of this double effect, soap sprays are incredibly powerful pest control tools even though they are so basic and simple.
Making soap spray is quick and extremely simple. Start by filling a spray bottle with warm water. Add a few drops of mild liquid dish soap and mix gently. You do not need to create thick, bubbly foam. The idea is to have just enough soap in the water to coat the aphids.
A good rule of thumb is to use around one teaspoon of soap per quart of water. Avoid using heavy de-greasing soaps, antibacterial soaps, or soaps with strong perfumes. A gentle, basic liquid dish soap works best. Affiliate Link: Dawn Free & Clear EZ-Squeeze Dish Soap Liquid


When spraying, focus especially on areas where aphids usually gather: the undersides of leaves, new growth tips, flower buds, and stem joints. Aphids love tender growth, so take your time to carefully inspect these spots.
Coat the insects directly. They must come in contact with the soap solution for it to work. The spray does not work as a long-term residue but rather as a direct contact treatment.
Let the soap sit on the plant for about 20 to 30 minutes so it can do its job. After that, gently rinse the plant with clean, lukewarm water. This helps remove dead insects, honeydew residue, and any leftover soap that could irritate the plant if left on too long.
Repeat the process every two to three days until no more aphids are present. Most infestations clear up after only a few treatments, especially if caught early. But if you have a serious aphid issue – neem oil is the way to go!
Another incredibly effective and completely natural way to get rid of aphids on houseplants is by using neem oil. Neem oil comes from the seeds of the neem tree and has been used for hundreds of years for pest control. It’s safe to use indoors, and non-toxic when used correctly. It is also very powerful against aphids.
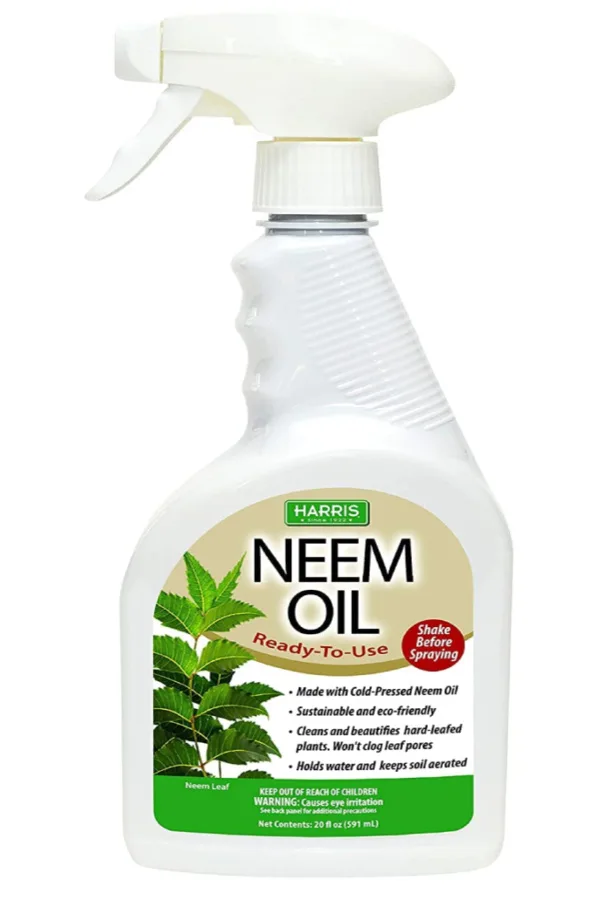
Neem oil does far more than simply kill aphids on contact. It works in several different ways, which makes it one of the best long-term solutions for indoor plant pest problems. Affiliate Link: HARRIS Neem Oil Spray for Indoor and Outdoor Plants, Cold Pressed Ready to Use

First, neem oil coats the body of the aphid. Much like soap spray, it suffocates them and blocks their ability to breathe. But neem oil goes beyond that. It also interferes with aphids’ natural life cycle. It affects their hormones and disrupts their ability to reproduce.
Since aphids multiply rapidly, stopping their reproduction cycle is extremely important. Neem oil prevents new generations from forming, which means the infestation ends rather than continuing. Neem oil also has a natural repellent effect. After treatment, aphids and many other pests are far less likely to return to the plant.
You can purchase neem oil in ready-to-use spray bottles, or as a concentrated oil that you mix yourself with water according to label directions. Both work well. If you use a concentrate, always follow the instructions carefully to avoid using too strong of a mixture.
Spray all surfaces of the plant thoroughly, including the tops and bottoms of leaves, stems, and new growth. Neem oil must coat the aphids to be effective, so do not rush the process. Apply the spray until leaves are lightly wet but not dripping heavily.
Unlike soap spray, neem oil does not need to be rinsed off. Instead, it remains on the plant and continues working for days. It is best to keep the plant out of direct bright sunlight while neem is fresh on the leaves, as strong light may cause leaf burn on some plants.
Repeat neem oil treatments every 7 to 10 days until aphids are gone. Because neem oil disrupts the full life cycle of the insect, it works especially well for persistent infestations. Neem oil has many uses for pests. It can be used outdoors on plants and even your lawn to help get rid of grubs – and ground moles! See: How To Eliminate Ground Moles.
One thing is for sure, keeping aphids under control does not need to be stressful, complicated, or expensive. With a simple soap and water spray or a natural neem oil treatment, you can get rid of aphids, protect your houseplants, and stop the tiny pests from taking over your home and plants!
Follow Our Facebook Page For Great Gardening Tips And Advice! This Is My Garden Facebook Page
This Is My Garden is a garden website created by gardeners, for gardeners. Jim and Mary Competti have been writing gardening, DIY and recipe articles and books and speaking for over 15 years from their 46 acre Ohio farm. They publish three articles every week, 52 weeks a year. Sign up today to follow via email, or follow along!
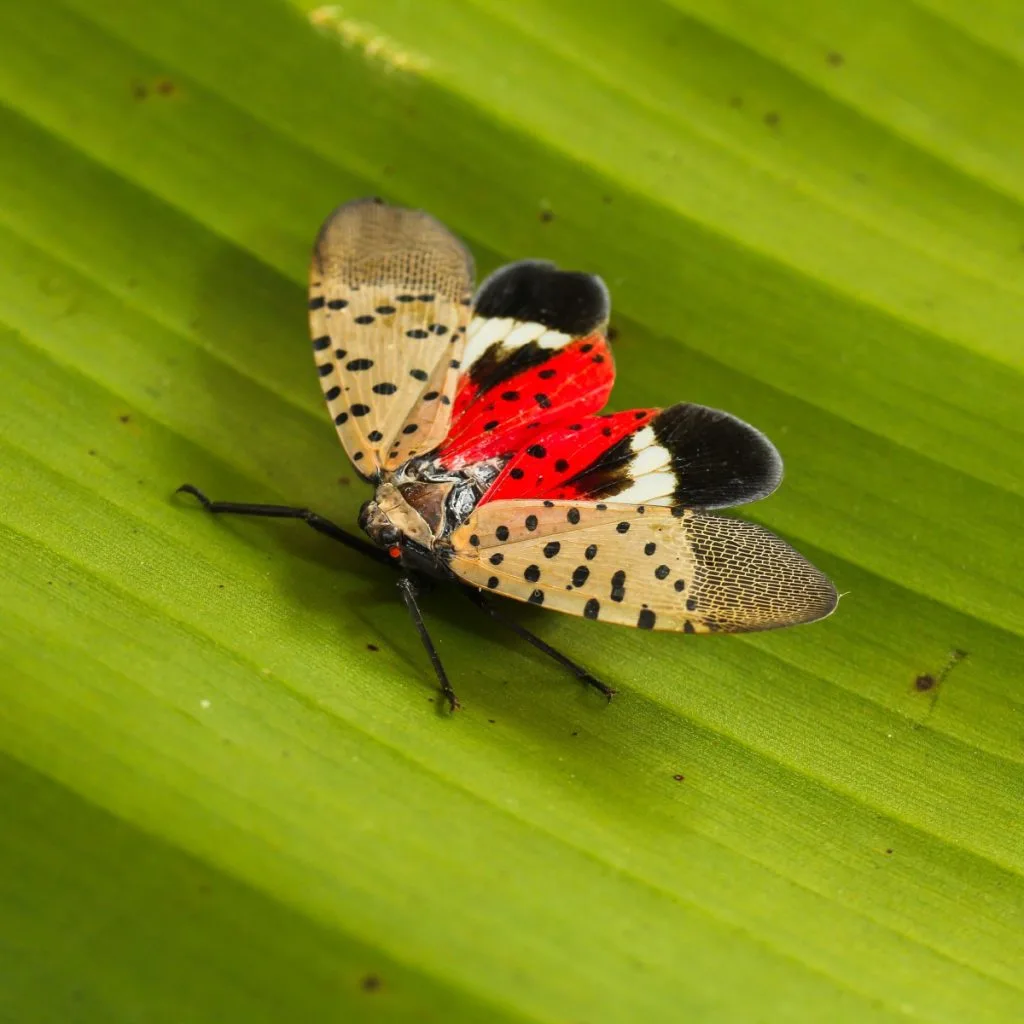
The spotted lanternfly has quickly become one of the most troublesome insects to appear in the United States in recent years. And it doesn’t show any signs of stopping its rapid spread and growth anytime soon!
The lanternfly first showed up in Pennsylvania sometime around 2014. It is though to have most likely come from Asia on shipping materials or outdoor goods. Since then, it has spread to many eastern states, damaging crops, trees, and gardens along the way.
The insect doesn’t move far on its own, but easily travels when people unknowingly carry its eggs or adults on vehicles, firewood, plants, or patio furniture. Because of that, homeowners play a big role in stopping it from spreading even farther.

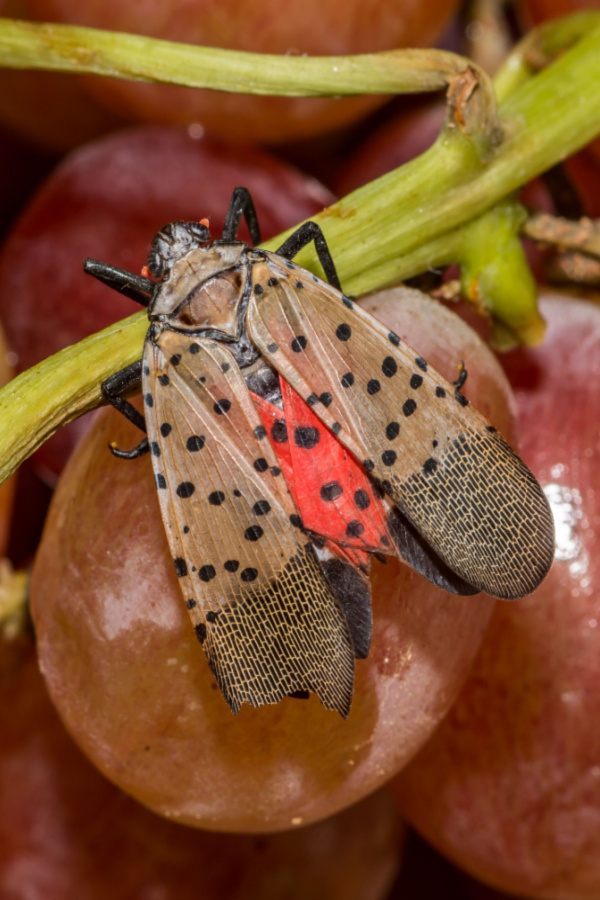
The biggest danger from the spotted lanternfly is how it feeds. It uses a sharp mouth to pierce plants and suck out sap. When hundreds or even thousands of them feed on a single tree, vine, or shrub, they weaken the plant by draining away nutrients it needs to survive.
This can cause leaves to wilt, growth to slow down, and fruit or flowers to stop developing. Over time, repeated attacks will kill branches or even entire plants. Vineyards, orchards, and nurseries have suffered the most because the insect loves grapevines, apple trees, and maples. But even home gardens are at risk, especially if there are fruit trees, grapevines, or decorative plants like roses and lilacs nearby.
In addition to weakening plants, the spotted lanternfly creates a sticky mess everywhere it goes. As it feeds, it releases a sugary liquid called honeydew.
The honeydew coats leaves, decks, and patio furniture and soon grows a black, sooty mold. The mold blocks sunlight from reaching leaves and makes everything beneath the insects look dirty and stained. Homeowners often notice this mess before they even see the insects themselves.

Cars parked under infested trees can be covered in sticky residue. Outdoor furniture and walkways can become slippery. They also attract ants and wasps looking for the sweet liquid. The problem can get bad enough that people find it hard to enjoy time outdoors when lanternflies are active.
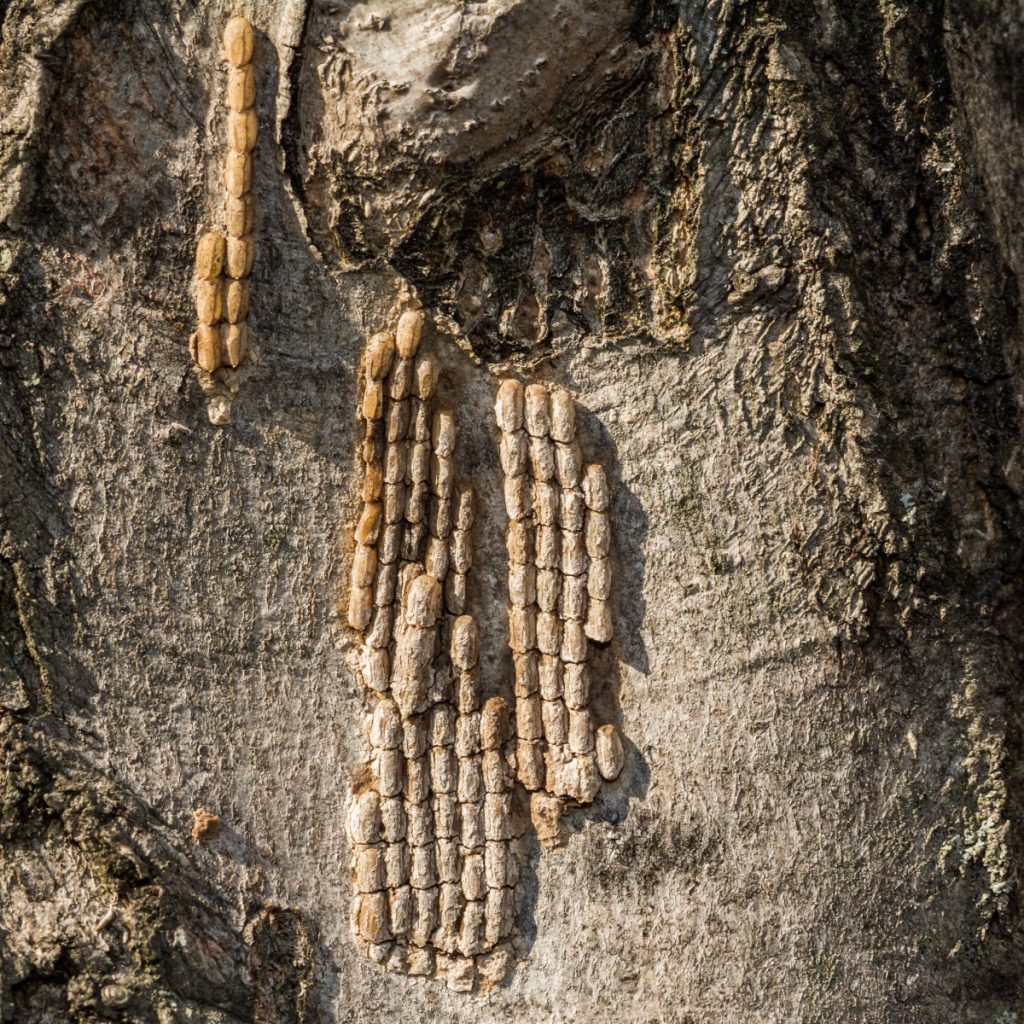
The spotted lanternfly’s life cycle makes it a year-round concern. In the fall, females lay egg masses that look like patches of gray, dried mud. These eggs can be found not only on trees but also on fences, rocks, firewood, campers, grills, and even house siding.
Each patch holds 30 to 50 eggs, and they survive winter very well. In spring, the eggs hatch into tiny black-and-white spotted nymphs that begin feeding on soft new plants. As summer comes, they grow larger and develop red markings before turning into the gray, spotted adults that most people recognize.
Adults are most noticeable in late summer and fall when they gather in large groups on trees and structures.
At home, you can take several simple steps to protect their property and help stop the spread of the spotted lanternfly. One of the most important things to do is to inspect outdoor items regularly. In the fall and winter, check tree trunks, outdoor furniture, firewood piles, and vehicles for egg masses.

If you find them, scrape them off with a plastic card or putty knife into a bag filled with rubbing alcohol or hand sanitizer to kill the eggs before throwing them away. If you are traveling from an area known to have lanternflies, always look over your vehicle and trailer before leaving.
A quick inspection can make a big difference in preventing the pest from moving to new places. Keeping yards tidy can also help. The spotted lanternfly’s favorite tree is the tree-of-heaven, an invasive species that grows along roadsides and in open areas.
If you have one of these trees on your property, consider removing it. It looks similar to sumac but has smooth edges and a strong odor when the leaves are crushed. Getting rid of tree-of-heaven can reduce the number of lanternflies near your home since they often use it for feeding and laying eggs. It can also help eliminate stink bugs too as they love the tree! See: How To Stop Stink Bugs From Getting In Your House
Another good prevention step is not to move firewood, building materials, or outdoor decorations from one area to another, especially from places that already have lanternflies. Even a small egg mass can lead to a new infestation miles away.
Try to buy firewood locally and burn it where you buy it. If you store wood, keep it off the ground and away from trees or structures so it’s easier to inspect.
In gardens and around the home, focusing on plant health is one of the best defenses. Strong, healthy plants are better able to handle some feeding damage.
Regular watering during dry spells, keeping weeds under control, and adding mulch around the base of plants can all help reduce stress. Cleaning sooty mold from leaves with a light spray of water can also help plants recover and continue to grow.
In small gardens, keeping a close eye on new growth in spring and summer helps catch problems early before the insects build up in large numbers.
Because spotted lanternflies often gather on sunny surfaces, they can become more than just a plant problem. Homeowners have reported finding them on patios, fences, and even siding. Their jumping behavior can be surprising but they do not bite or sting humans or pets.
For many homeowners, one of the most frustrating parts of dealing with the spotted lanternfly is how quickly it can multiply and how persistent it can be. However, small actions taken by many people add up to big results. Checking outdoor items before traveling, removing egg masses, keeping trees healthy, and reporting new sightings all work together to slow down its spread.
The spotted lanternfly is more than just a nuisance; it’s a serious threat to crops, trees, and gardens across the country. But with awareness and simple prevention steps, homeowners can protect their property and help stop the insect from spreading.
Follow Our Facebook Page For Great Gardening Tips And Advice! This Is My Garden Facebook Page
This Is My Garden is a garden website created by gardeners, for gardeners. Jim and Mary Competti have been writing gardening, DIY and recipe articles and books and speaking for over 15 years from their 46 acre Ohio farm. They publish three articles every week, 52 weeks a year. Sign up today to follow via email, or follow along!
Looking for the best way to get rid of the ticks in your backyard this summer?
When it comes to one insect that gardeners and homeowners want to eliminate from their backyard entirely – it’s ticks. And believe it or not, as it turns out, it’s actually quite easy to keep them out of your yard with one simple, all-natural solution!
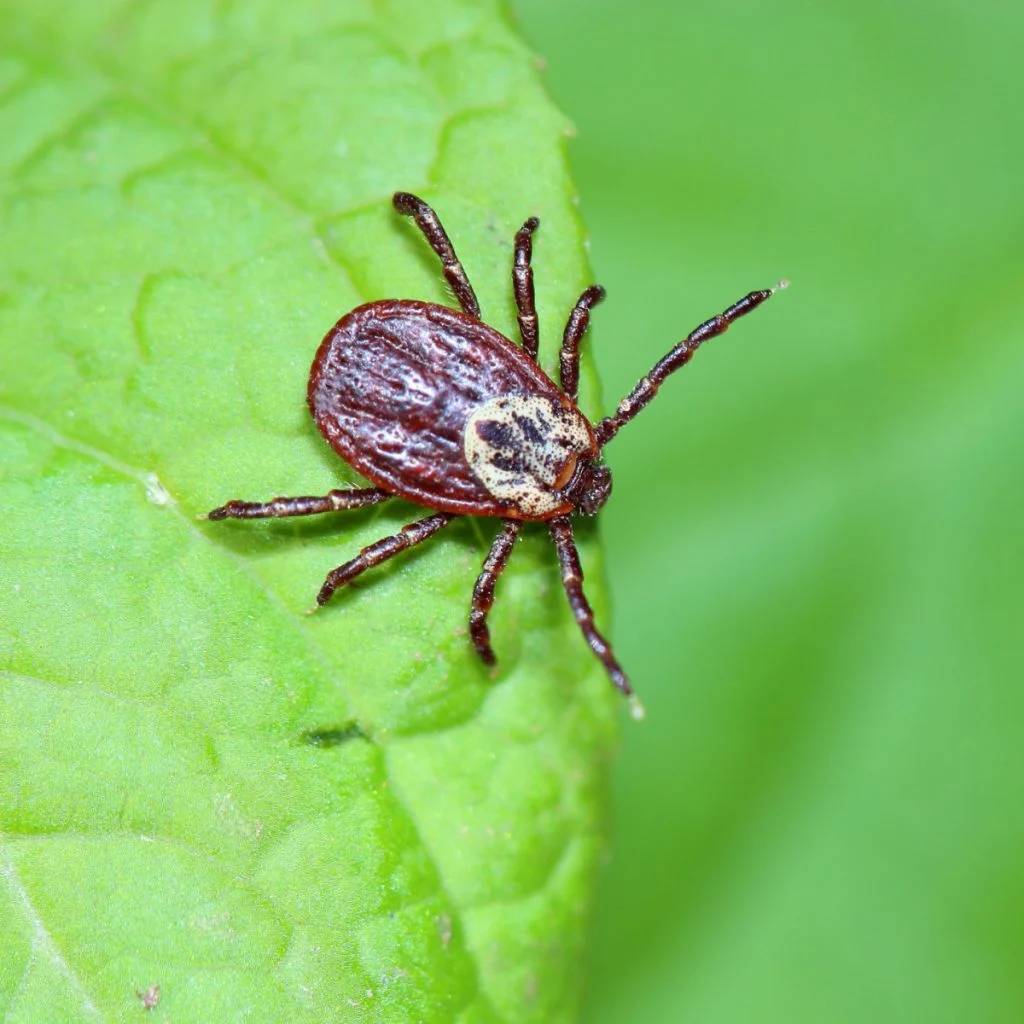
Ticks can be extremely dangerous for humans and pets. With one single bite, they can transmit a long list of diseases that can bring on both short and long term complications. From rashes and viruses to other highly dangerous medical conditions, such as Lyme disease and more, they pose a serious health risk.
And for all of the danger they bring, about the only thing they give back to nature is being a food source for possums, turkeys, chickens and other foraging animals. Which is exactly why most have no qualms about trying to rid their property of the ever-multiplying insect!

The good news is that although ticks are highly dangerous and can breed and expand their population quite quickly, you can all but eradicate them from your backyard without having to resort to dangerous chemical pesticides, powders and sprays.
All by simply using one all natural solution that’s not only easy to apply – but safe for pets, children and adults!
So what is the miracle substance that can stop ticks in their tracks? It happens to be neem oil, which is a 100% organic substance made from squeezing the oil from the seeds of neem tree fruit.
Neem oil has actually been used for centuries as an all natural pesticide. In fact, it was the go-to choice for protecting all kinds of crops up until synthetic man-made pesticides started to appear. And is it ever making a big comeback now for helping to naturally control all kinds of insects and pests – including ticks!
The fruit the tree produces closely resembles the shape of an olive. The fruit usually grows to about 3/4 to 1 inch in diameter when it’s mature. Although the fruit can be consumed, it’s the oil within the seed of the fruit that is valued for its pest control ability.


The brownish oil that comes from the seed of neem fruit is quite bitter. It also has a bit of a sulfur aroma. But when mixed with water and sprayed, it becomes quiet the powerful insecticide. And can it ever control ticks!
How does neem oil control ticks so well? Because when sprayed on lawns, garden soil and flowerbed areas, it comes in contact with the exterior body of ticks that are roaming around. And when it does, it stops the biting insect from being able to take in and process oxygen.
This, of course, results in the death of the tick. But the oil also works against ticks in another important way. When ingested, neem oil impacts both the digestive and reproductive ability of ticks as well.
This means that even the ticks that survived by dodging the initial spray are still vulnerable after the solution dries on the lawn, soil and plants. Not only will it wipe them out, they can’t reproduce to create the next generation either!


The key when using neem oil is to always make sure you are purchasing pure oil or pure oil concentrate. This will mix with water well and give you the coverage and effectiveness to clear your property of ticks. Affiliate Product Link: 100% Cold Pressed – Horticultural Neem Oil
What really makes neem oil the best solution to get rid of ticks is how easy it is to make and spray. All it takes is pure neem oil, water and few drops of liquid dish soap – and you are in business.
Begin by mixing 6 to 8 teaspoons of neem oil for every one gallon of water. Then, put the desired amount into either a hand-held or backpack sprayer. All that is left is to mix in a few drops of liquid dish detergent into the solution. The liquid soap helps allow the spray to stick and cling better to both the ticks – and the lawn.
When applying to your lawn and garden areas, simply lay down a light mist of spray. If you have a more serious tick issue, you’ll want to spray every few weeks for the first few months. For most, however, a once a month application is more than enough for total control.
The type of sprayer you will need really comes down to how big of an area you will be covering. Smaller 1 to 2 gallon hand help pump sprayers can easily cover small lawns, but for larger areas, a back back sprayer is the answer. Affiliate Product Link: D.B. Smith FIELD KING 190328 Backpack Sprayer, 4 Gallon
The good thing with spraying neem oil on your lawn and garden areas is that it can help keep other pests other control too. It not only eliminates ticks, but Japanese beetle larvae as well, which means it’s great in the fight against ground moles. See our article: 3 Simple Tricks To Get Rid Of Japanese Beetles This Year
But it doesn’t stop there. Neem oil is also extremely effective against aphids, mites, mosquitoes and fleas. As for being safe for pets and children, the oil is not toxic. It is good to allow the spray to dry for an hour or so before allowing people to roam. This simply improves its effectiveness by not having it wipe off.
In addition, it’s also important to remember that neem oil can affect beneficial insects as well. Bees, butterflies and other pollinators can be harmed if they come in direct contact with the wet spray. The good news is that once it’s dry, it doesn’t affect them in the least. Because of this, always spray for ticks in the very early morning or late evening when pollinators are not out.
Here is to using neem oil this year. One of the best methods of all for getting rid of ticks naturally in your backyard! For tips on controlling pests in your landscape, be sure to check out: 6 Great Plants To Grow That Repel Mosquitoes – How To Keep Mosquitoes Away!
Follow Our Facebook Page For Great Gardening Tips And Advice! This Is My Garden Facebook Page
This Is My Garden is a garden website created by gardeners, for gardeners. Jim and Mary Competti have been writing gardening, DIY and recipe articles and books and speaking for over 15 years from their 46 acre Ohio farm. They publish three articles every week, 52 weeks a year. Sign up today to follow via email, or follow along!
When it comes to finding a great way to help repel mosquitoes from your patio, porch and outdoor areas, nothing can be better than growing a few great plants that mosquitoes simply don’t like to be around!
It really is possible to enjoy your patio without the nuisance of mosquitoes, all without having to use offensive sprays, bug bombs or annoying bug zappers. And believe it or not, one of the easiest ways to accomplish that is by simply growing plants that mosquitoes detest right near the outdoor spaces you enjoy most.
With a mosquito free outdoor experience in mind – here is a look at 6 great plants that will help keep mosquitoes from hanging around!

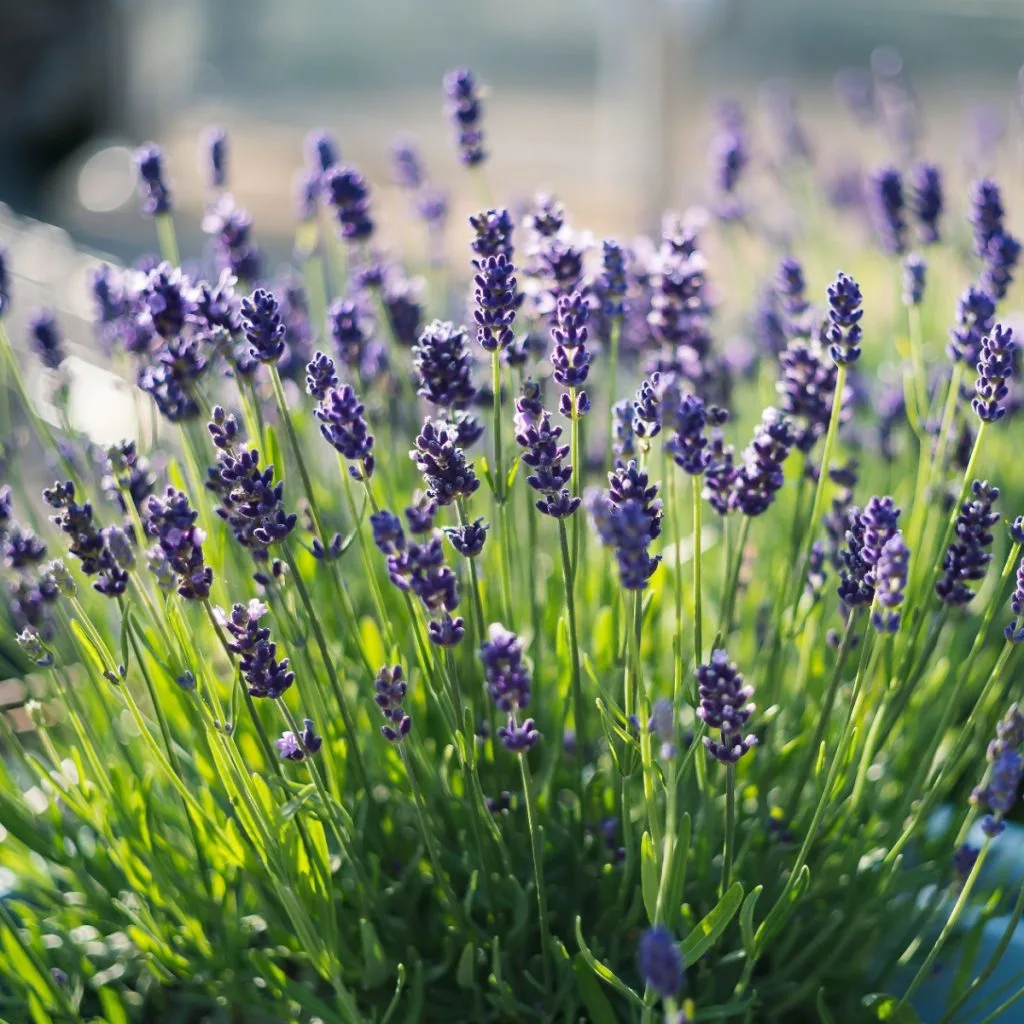
Lavender not only adds a beautiful, pleasant fragrance for humans to enjoy, but it is also wonderful for clearing the area of mosquitoes wherever it grows. Mosquitoes detest the strong lavender scent and will steer clear of the plant at all costs.
Lavender can grow well in pots, containers and directly in flowerbeds and gardens. For thriving lavender plants, choose well-draining soil and ensure they bask in sunlight for at least 6 hours each day. Prune back plants after each flush of blooms to help the plant re-bloom all summer long.
Not only is lavender a perennial that will come back every year, it also can protect you and your plants from far more than just mosquitoes. The gorgeous perennial plant is also great for keeping gnats, flies, fleas and ticks at bay as well.
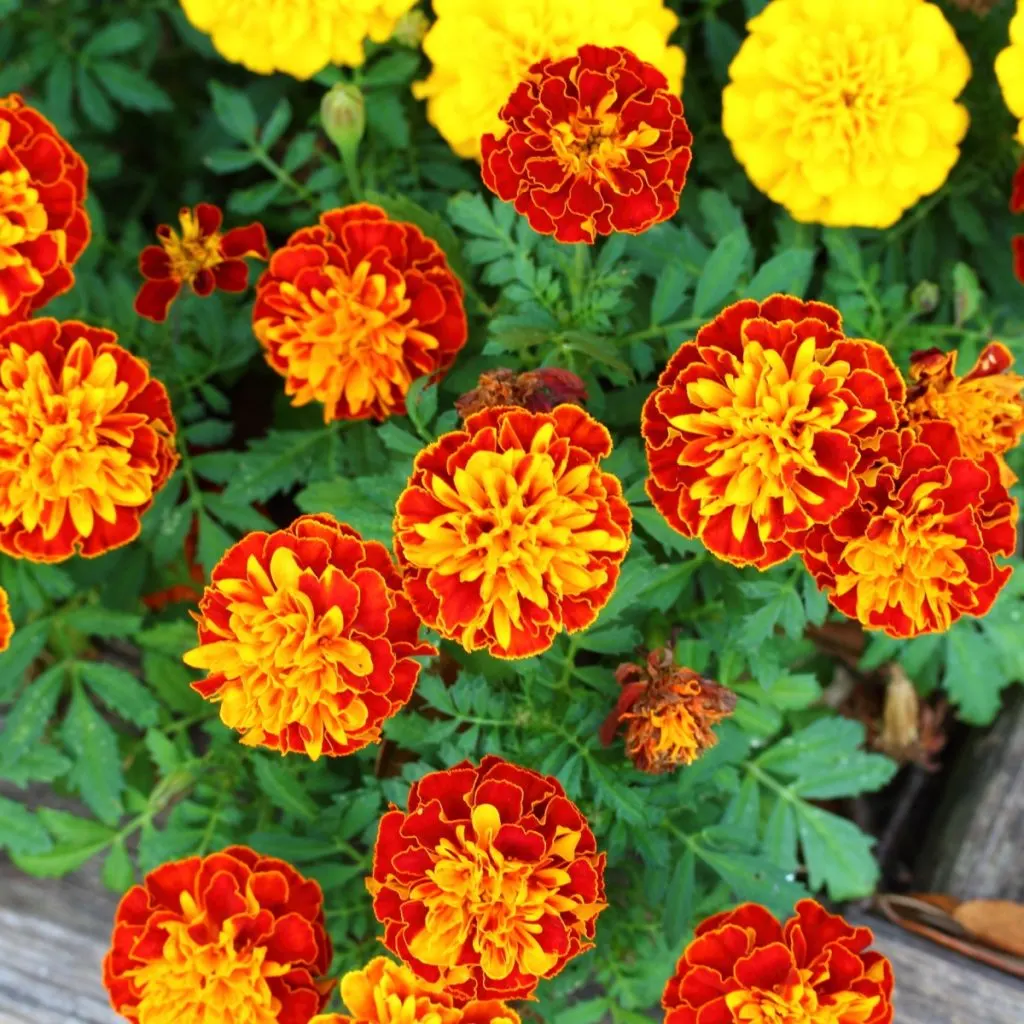
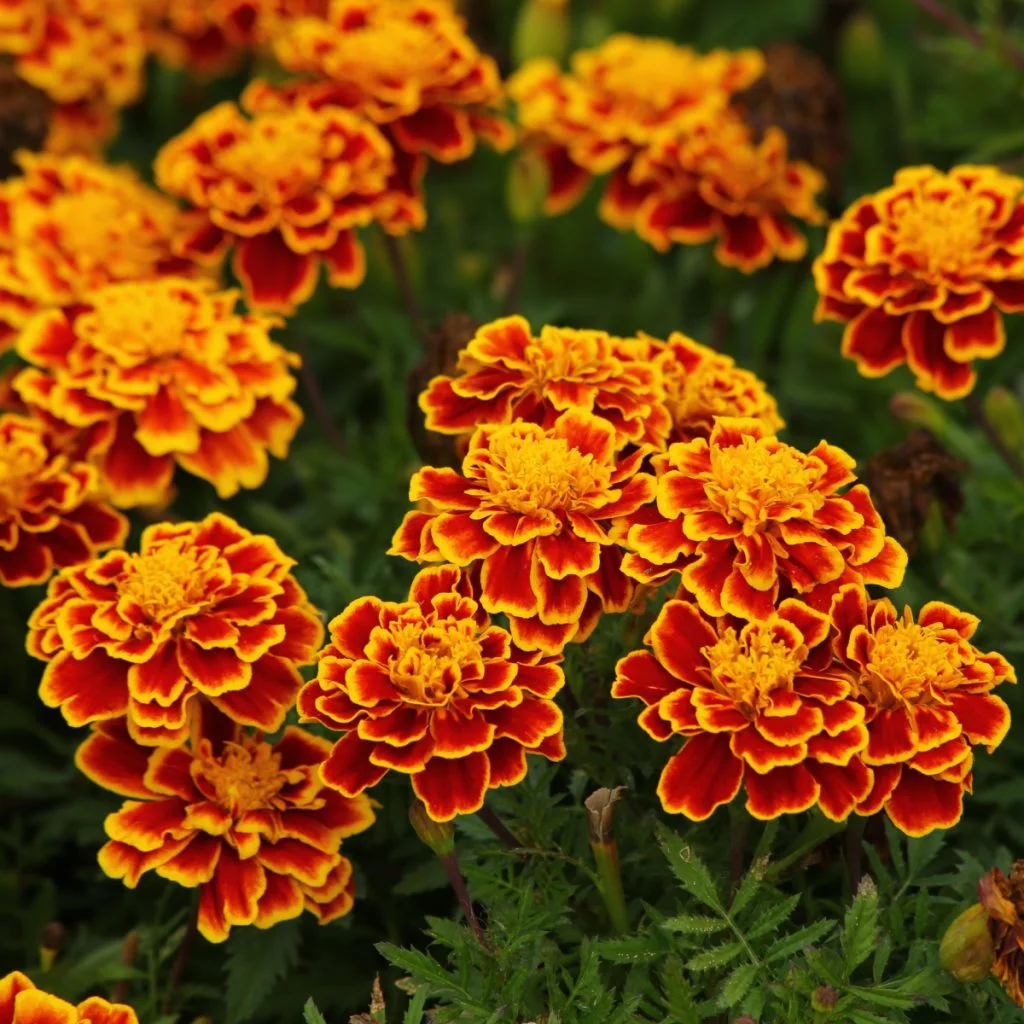
Marigolds, much like lavender, have an amazing ability to ward off a long list of insects – and they can be especially effective against mosquitoes.
Mosquitoes detest the pungent odor of both marigold blooms and foliage. And where ever marigolds grow, mosquitoes will stay far away. Marigolds grow easily from seed or transplants in pots and containers making them ideal for sitting around your patio or deck.

Many gardeners also sow marigold seeds heavily on the borders of their vegetable garden. Its blooms attract pollinators by the thousands, all while allowing gardeners to work their space without the worry of mosquitoes attacking them in the least. See: The Best Marigolds To Grow To Repel Pests, Attract Pollinators – And Add Big Color!
Marigolds are budget friendly as well. Not only can you sow them directly from seed eliminating the need for costly transplants, you can easily save seeds from year to year. Marigolds need a sunny location to grow best. Select an area that receives at least six to eight hours of direct sunlight for best results. Affiliate Link: HOME GROWN Petite French Marigold Seeds
It’s true! The same plant that drives our feline friends wild is also a powerful and natural repellent for mosquitoes. And all thanks to a simple natural compound found in the plant. In fact, the same compound cats love is the same one that makes mosquitoes lose interest in pestering you and your guests.
Catnip can be grown from existing transplants or directly from seed. The plant can often be found year round in nurseries and garden centers. Its smaller stature makes it wonderful for potting up and placing as a centerpiece on outdoor tables.
The perennial does not require much maintenance to come back year after year. It will grow best with at least six to eight hours of direct sunlight, but can survive partially shaded areas.
Oregano has long been known to protect vegetable plants growing in the garden from all kinds of insects. The plant is offensive to everything from aphids and whiteflies to the dreaded cabbage moth. But it is especially offensive to mosquitoes!
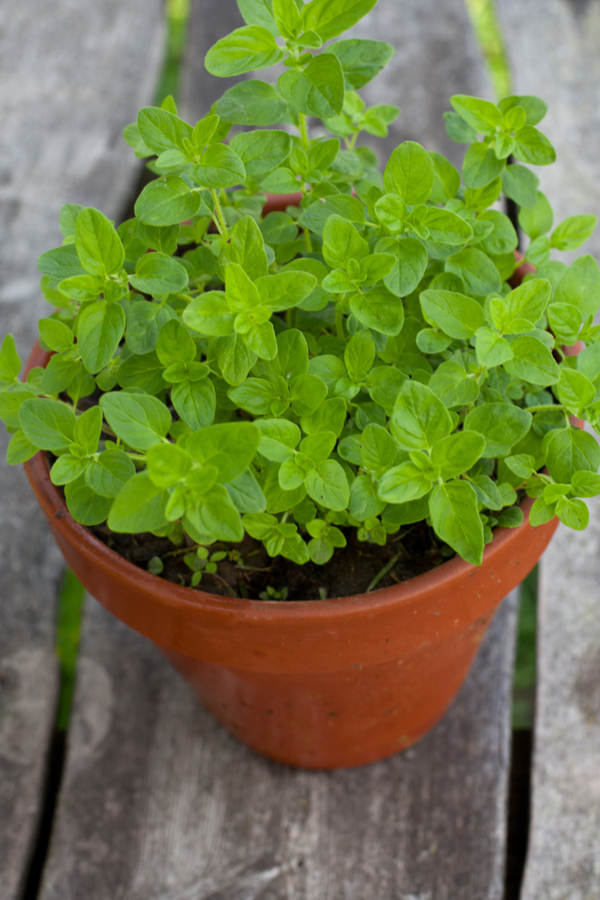
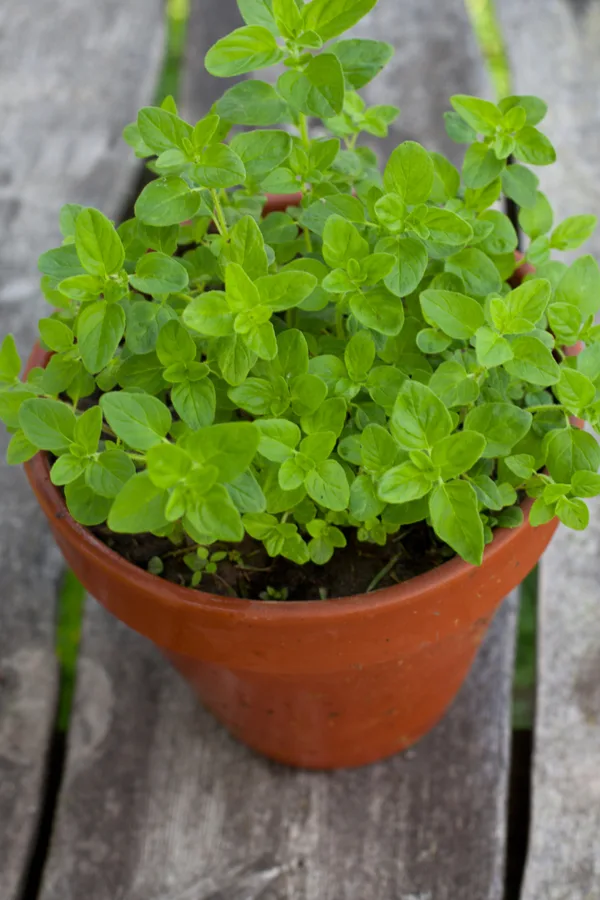
Oregano’s slow growth habit makes it perfect for growing in pots on patios and porches. It requires little in the way of additional nutrients and is fairly drought proof as well. The only real requirement is to locate the plant where it can get at least six to eight hours of sunlight each day.
Of course, oregano has many uses in the kitchen as well, doubling its uses around the home! The perennial comes back strong year after year and is easy to divide to create additional potted plants for free.
Rosemary’s aromatic leaves make it a must-have herb in the kitchen. But, it also doubles as an amazing mosquito repellent when grown near outdoor entertaining spaces. Like many of the other plants featured today, rosemary performs best in well-draining soil and sunlight.
Whether growing in pots or directly in flowerbeds, regular pruning will not only enhance its mosquito-repelling properties – but also provide you with even more fresh herbs for cooking.
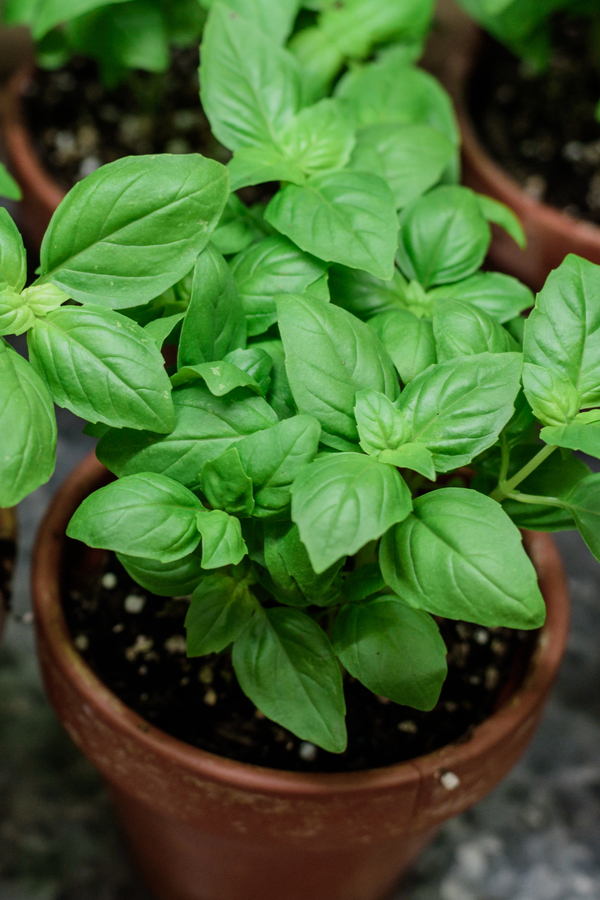

Lat but not least on our list of mosquito repelling plants is basil. Basil is yet another helpful mosquito deterring plant that also doubles as a delicious herb in the kitchen. Even better, it grow just as well in pots and containers as in a traditional garden space.
Not only is this annual herb good at keeping mosquitoes away, it also is excellent for keeping flies at bay too. And who doesn’t want their patio and entertaining areas to be free of flies!
There really are so many great benefits to using plants instead of chemicals to repel mosquitoes. And as you can see from above, many of the plants have advantages that extend beyond simple bug control. Here is to enjoying your patio without the nuisance of mosquitoes, all while enjoying the beauty and flavor that growing plants can bring! For more pest control tips for the landscape, be sure to check out our article: The Best Way To Get Rid Of Ticks In Your Backyard – With Ease!
Follow Our Facebook Page For Great Gardening Tips And Advice! This Is My Garden Facebook Page
This Is My Garden is a garden website created by gardeners, for gardeners. Jim and Mary Competti have been writing gardening, DIY and recipe articles and books and speaking for over 15 years from their 46 acre Ohio farm. They publish three articles every week, 52 weeks a year. Sign up today to follow via email, or follow along!
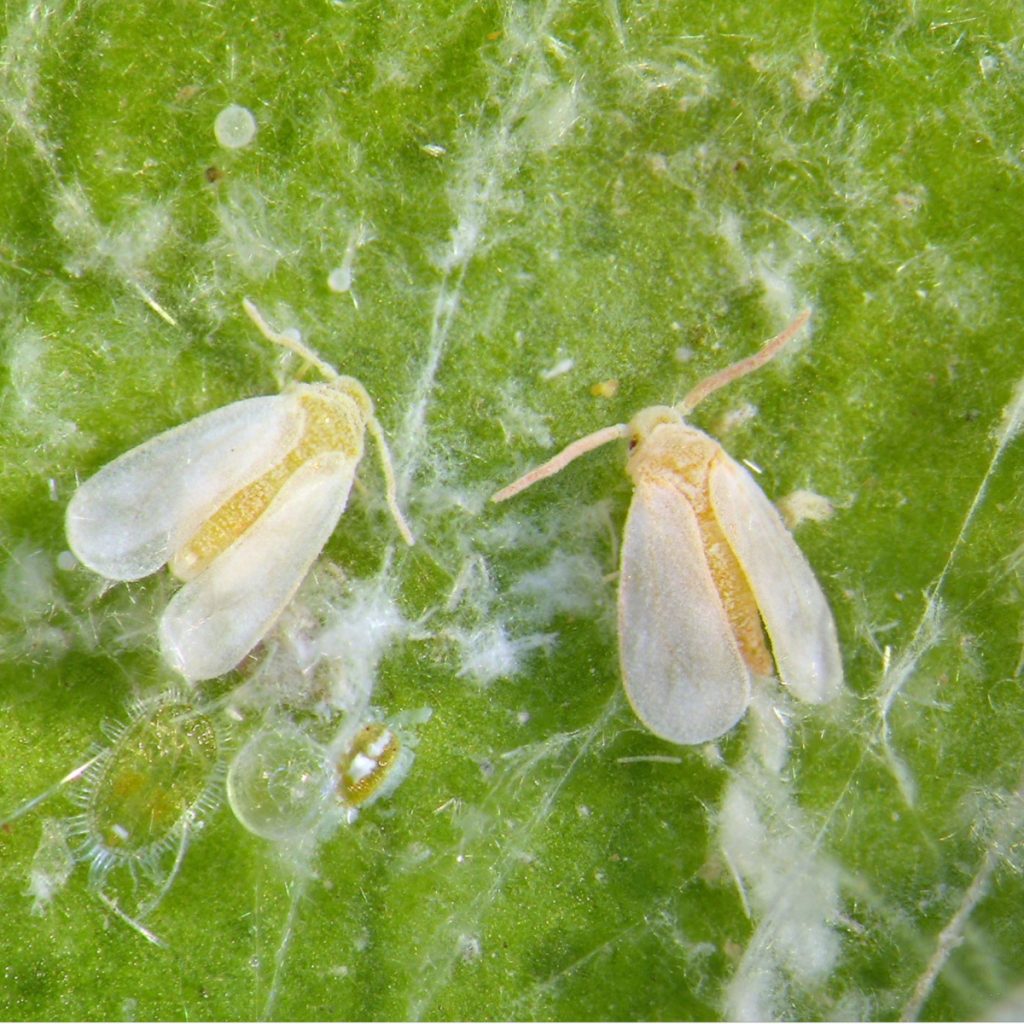
Wondering how to get rid of the whiteflies on your tomato plants? And how to do it fast? Whiteflies can be devastating to a tomato plant – and unfortunately – in several different ways.
For starters, whiteflies love to feed on the leaves of tomato plants. They do this because they love the sap that is inside of the leaves. When they devour the sap, it causes leaves to yellow, curl, and eventually die. As they feed, they take precious nutrients from the plant.
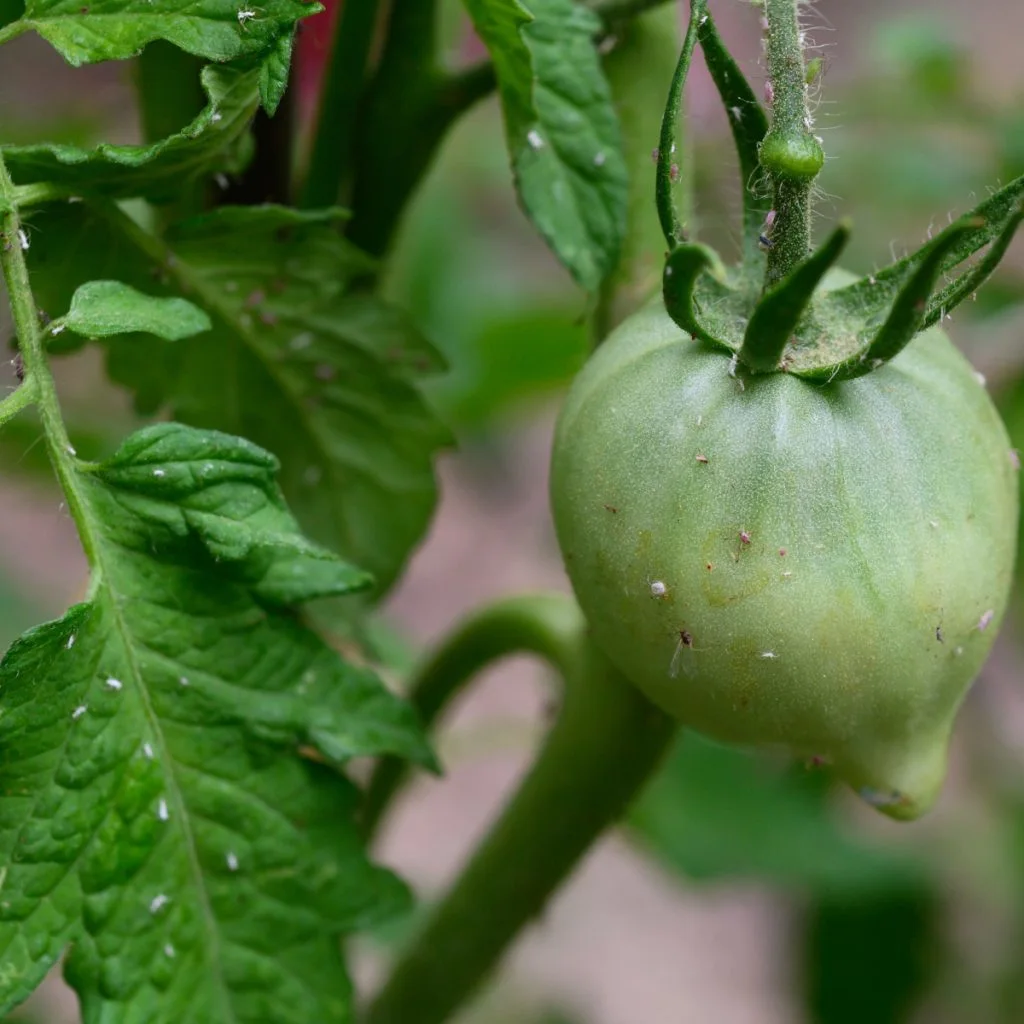
Not only are the leaves affected, but the entire plant begins to suffer from a lack of nutrition. That can lead to lower bloom and fruit production. It can also leave the plant far more susceptible to disease and pest attacks.

Whiteflies can also cause a fungal infection in tomato plants as well. And if all of that wasn’t enough, the energy whiteflies steal from plants can cause the few tomatoes that do appear to ripen unevenly. Usually, when this occurs, a portion of the tomato rots from over. Most often, it results in the fruit becoming completely inedible.
One thing is for sure, allowing whiteflies to stick around and increase in numbers can be disastrous for your garden. The good news? Battling whiteflies can be done quickly with the right treatments. And even better, without the need for questionable chemical sprays!
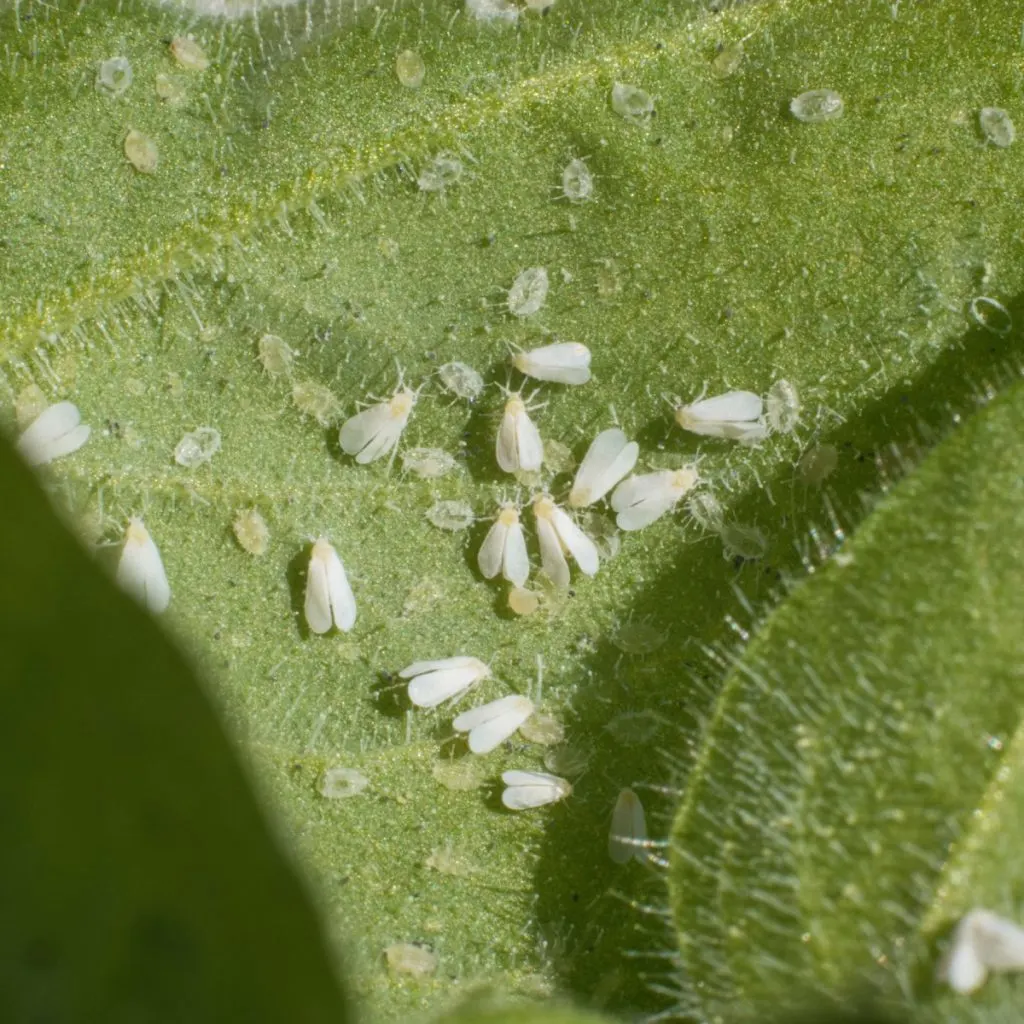
What really makes fighting whiteflies tough is that they can be hard to spot when they first arrive. Unfortunately, these tiny little creatures prefer to hang out on the underside of plants. Because of that, they often go unnoticed until it’s too late and damage occurs.
Whiteflies begin by laying eggs on the leaves of the plant. It can take about ten days for the eggs to hatch, but once they do, the young whiteflies (known as nymphs) begin feeding on the plant’s leaves and sap immediately.
As they do this, they continue to find new leaves and new plants to consume. When you consider an adult whitefly can live for an entire month, not only can it cause a tremendous amount of damage, but it can reproduce at an alarming rate.

And although they love tomato leaves, they will attack other nearby plants as well. In fact, whiteflies can actually be incredibly devastating to a long list of plants in the vegetable garden once they appear. So how can you get rid of whiteflies fast? The first line of defense is with a quick spray of soapy water!
One of the easiest, fastest and most economical methods to get rid of whiteflies is with a simple homemade mixture of liquid dish soap and water. To make, simply mix four tablespoons of liquid soap to one gallon of water. Affiliate Link: Sonett Organic Dishwashing Liquid
The best way to apply the mixture is with a small hand held spray bottle or a larger sprayer. Simply mix well and spray it on the leaves of the affected tomato plants. Always be sure to hit the undersides of the plants where the whiteflies usually reside and hide.
Whiteflies that come in contact with this solution will be killed instantly. Since liquid soap is mild, there is no worry about harming the tomato plant. Repeat the process daily for at least 7 days to eliminate any that may still be hanging around your plants.
Neem oil can not only keep whiteflies at bay but other pests and insects as well. In addition to keeping whiteflies away, a neem oil spray will smother the larvae and eggs, thereby eliminating the entire population of whiteflies all at once. It is especially helpful when there is a heavy infestation. Affiliate Product Link: Neem Oil Spray

To make your neem oil mix, combine four teaspoons of neem oil to 1 gallon of regular water. Some gardeners like to add a few drops of organic liquid dish soap to the solution as it helps the spray adhere better to the whiteflies and leaves of their tomato plants.
Neem oil is 100% organic so there is no worry of using it on vegetable plants. It is made by pressing the seeds of a neem tree for oil. It is an all-natural organic insecticide that can be effective in the fight against many pests – including even ticks! See our article: How To Eliminate Ticks In Your Yard With Neem Oil.
One of the best ways to get rid of whiteflies for good is to make your garden unfriendly to them. And that all starts with having beneficial insects already there. Ladybugs, dragonflies, parasitic wasps and even garden spiders all love to dine on whiteflies.
Although you can often purchase beneficial insects for release, the best and easiest way to bring them in is by planting the plants they love to visit. Marigolds, zinnias and nasturtiums are all flowers that attract the beneficial insects that can feed on whiteflies.
There are also plants you can grow that actually repel whiteflies. Marigolds, basil, thyme, and chives are all known to keep whiteflies far away. To have them work for you, simply plant them as companion plants right along or near your tomato plants and watch whiteflies disappear from your garden!
Did you know that worm castings are not only great for powering your tomato plants as a low and slow fertilizer, they also happen to help get rid of whiteflies away in a big way.
Worm castings help to increase an enzyme in the soil and plants that whiteflies detest. And when plants contain higher levels of this specific enzyme, whiteflies will not feed from them. Simply plant a half cup of worm castings in your planting hole, or sprinkle a cup around your plants.
As the casting’s nutrients soak into the plant, the enzyme levels increase, defending your plants naturally from attack. At the same time, the worm castings fertilize the soil, improving the tomato plant’s yield. It’s a win-win for tomato plants for sure!
Here is to getting rid of whiteflies naturally this year – and to keeping your tomato plants safe!
Follow Our Facebook Page For Great Gardening Tips And Advice! This Is My Garden Facebook Page
This Is My Garden is a garden website created by gardeners, for gardeners. Jim and Mary Competti have been writing gardening, DIY and recipe articles and books and speaking for over 15 years from their 46 acre Ohio farm. They publish three articles every week, 52 weeks a year. Sign up today to follow via email, or follow along!
Looking for a way to quickly get rid of the aphids on your tomato plants? And keep them off for good?
Aphids might be small insects, but they can cause huge problems in a short amount of time. Especially when it comes to tomato plants. Once they find your plants, they can multiply fast. So fast, in fact, that their numbers can double or even triple in just a few days!
If you don’t catch them early, a small group can turn into a major infestation that damages or even kills your plants. Even worse, aphids don’t stop with tomatoes. If left untreated, they can quickly move to other plants in your garden. And when they do, they can all but decimate an entire garden’s harvest for the year.

The damage aphids leave behind can not only reduce plant growth and hurt fruit production, in some cases, it can even lead to the death of the plant. The good news? You can stop aphids quickly and naturally. Especially if you act early and know just what to do!
Aphids feed by piercing plant leaves and stems and sucking out the sap. This sap is full of nutrients, and when aphids remove it, they rob the plant of important energy needed for growth and fruit development.
As they feed, aphids cause leaves to curl, turn yellow, or become deformed. You may notice that your tomato plant stops growing. In other cases, new leaves that appear look misshapen or weak. In severe cases, the plant may even lose leaves and start to die back.
But that is just from the initial sap loss. What makes aphids worse is that they very often carry viruses and plant disease. So not only can their feeding weaken your tomato plants, they can also spread infection from plant to plant. And once a virus takes hold, there’s usually no way to reverse it. That’s why early detection and action is a must when it comes to aphids.


Since aphids are tiny – often no larger than a pinhead – it can be easy to miss them at first. They often gather on the undersides of leaves, out of sight. That’s why it’s important to look closely when checking your plants.
Flip a few leaves over and see if you can spot any light green, black, yellow, or white insects grouped together. If you see any sticky sap or curling leaves, it usually is a sign they’re already feeding.
Another sign of aphids is an increase in ants around your plants. As aphids feed, they produce a sugary waste called “honeydew,” which ants love to eat. If you see ants crawling up and down your tomato plants, there’s a good chance aphids are nearby.
Honeydew can also leave behind a black, moldy-looking coating on leaves, which can further harm a tomato plant’s health. If you see this or any of the signs above, it’s time to take action quick. And the easiest way to do that is with a quick stream of water!
One of the easiest and fastest ways to remove aphids is with a strong spray of water from your garden hose. The water knocks the aphids off the leaves and stems and onto the ground. Once they fall, they usually can’t make their way back to the plant and will die shortly after.
When spraying, make sure to focus on the undersides of the leaves where aphids like to hide. But it’s important to be careful when doing this not to damage your plant. Start with a light spray and adjust the pressure as needed. You may lose a few flowers or small tomatoes, but your plant will recover faster than if the aphids are left alone.
This method works well for light to moderate infestations. For bigger problems, or if aphids return quickly, you’ll want to use more than just water. And the easiest way to do that safely and naturally is with neem oil.
If water alone doesn’t solve the problem, neem oil is an excellent next step. Neem oil is made from the seeds of the neem tree and is completely natural. It’s safe for pets and people and breaks down quickly in sunlight.
When sprayed on plants, neem oil coats the aphids and stops them from feeding and reproducing.To use neem oil on tomato plants, add two tablespoons of neem oil per gallon of water. In addition, squirt in a few drops of dish soap to help the mixture stick to the leaves.
Use a handheld spray bottle or garden sprayer to coat the leaves, especially underneath where the aphids hide. For best results, spray in the early morning or late evening when pollinators are not active. This helps protect helpful insects like bees and butterflies.


To eliminate aphids entirely, reapply the spray every 5 to 7 days until you no longer see any sign of activity or damage. Affiliate Link: HARRIS Neem Oil Cold Pressed Water Soluble Concentrate
Another great way to keep aphid populations in check is by attracting insects that eat them. Ladybugs, lacewings, and parasitic wasps are all natural predators of aphids. These helpful bugs can help manage small infestations before they ever become a serious problem.
The easiest way to attract these beneficial insects is to plant flowers and herbs that offer pollen and nectar. Some great options include:
Not only do these plants bring in helpful bugs, but they also add beauty to your garden and even help repel other pests. You can plant them directly in your garden or in pots and place them near your tomato plants.

Another smart way to protect your tomato plants is with companion planting. Certain plants naturally repel aphids due to their strong smell or taste. By planting these near your tomatoes, you can keep aphids from ever wanting to visit.
Some great aphid-repelling plants include:
Plant these close to or between your tomato plants for best results. If you’re short on space, you can grow them in small containers and place them right next to your tomato plants. See our article: The Best Marigolds To Grow To Repel Pests & Attract Pollinators.
Whether it’s spraying them off with water, treating with neem oil, attracting beneficial insects, or planting helpful companion crops, one thing is for sure, a little care goes a long way in helping to get rid of aphids on your tomato plants – for good! For more tips on keeping destructive pests out of the garden, see our article: How To Keep Groundhogs Out Of The Garden – 4 Simple Ways To Stop Groundhogs!
Follow Our Facebook Page For Great Gardening Tips And Advice! This Is My Garden Facebook Page
This Is My Garden is a garden website created by gardeners, for gardeners. Jim and Mary Competti have been writing gardening, DIY and recipe articles and books and speaking for over 15 years from their 46 acre Ohio farm. They publish three articles every week, 52 weeks a year. Sign up today to follow via email, or follow along!
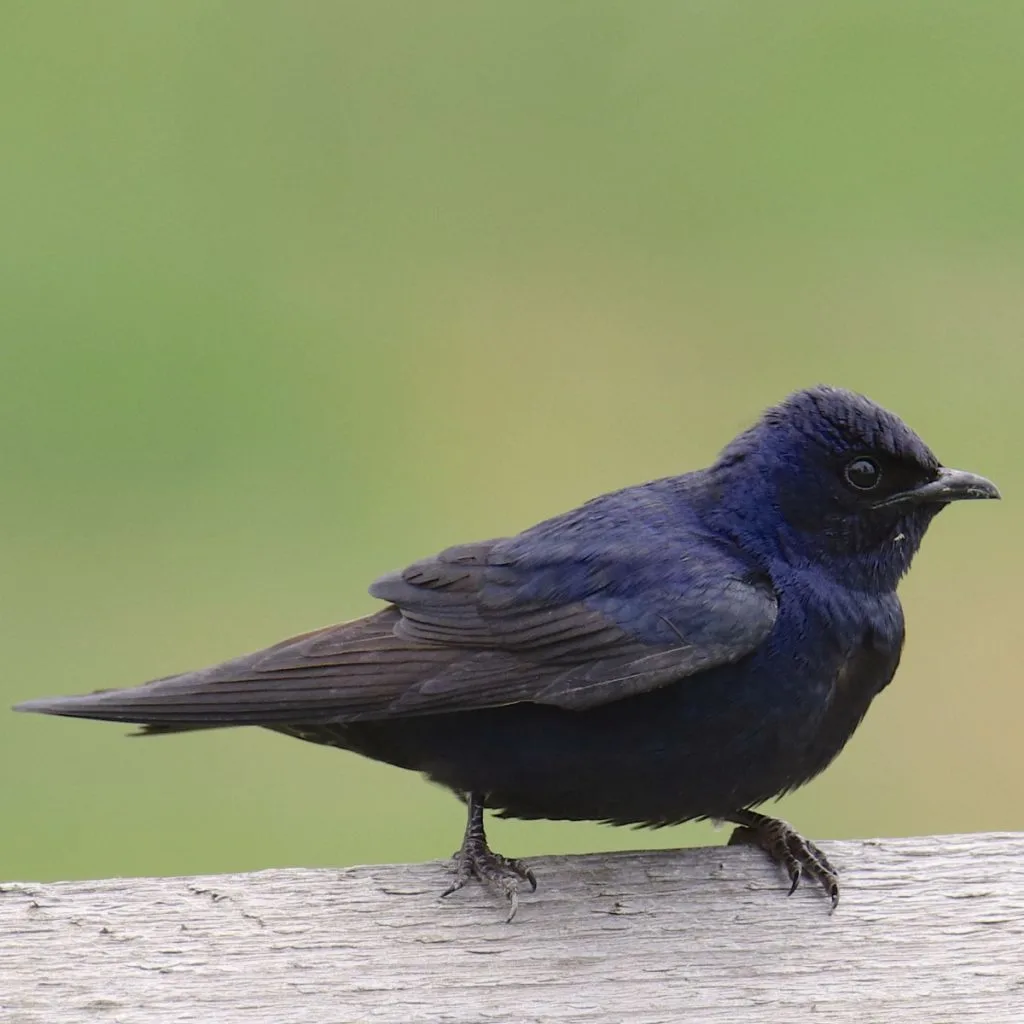
Did you know that one of the best ways to eliminate a long list of garden pests is to simply get purple martins to visit it on a regular basis?
Purple martins are among nature’s best insect eating machines. Not only do they consume beetles, moths, horseflies and wasps – they do so in astounding numbers. In fact, they can consume a thousand or more insects each and every day!
In addition to devouring many pests that bring harm to flowerbeds and gardens, purple martins also eat a fair amount of mosquitoes as well. But as incredible as purple martins are to have around, they have been in decline in recent years. It is thought that widespread use of pesticides is a leading factor. As are the ever dwindling habitat areas where they can create their nests and call home. But there is hope!

The good news is that by simply providing these incredible birds with a safe and inviting space, you can not only get them to take up residence in your yard – but keep them coming back year after year.
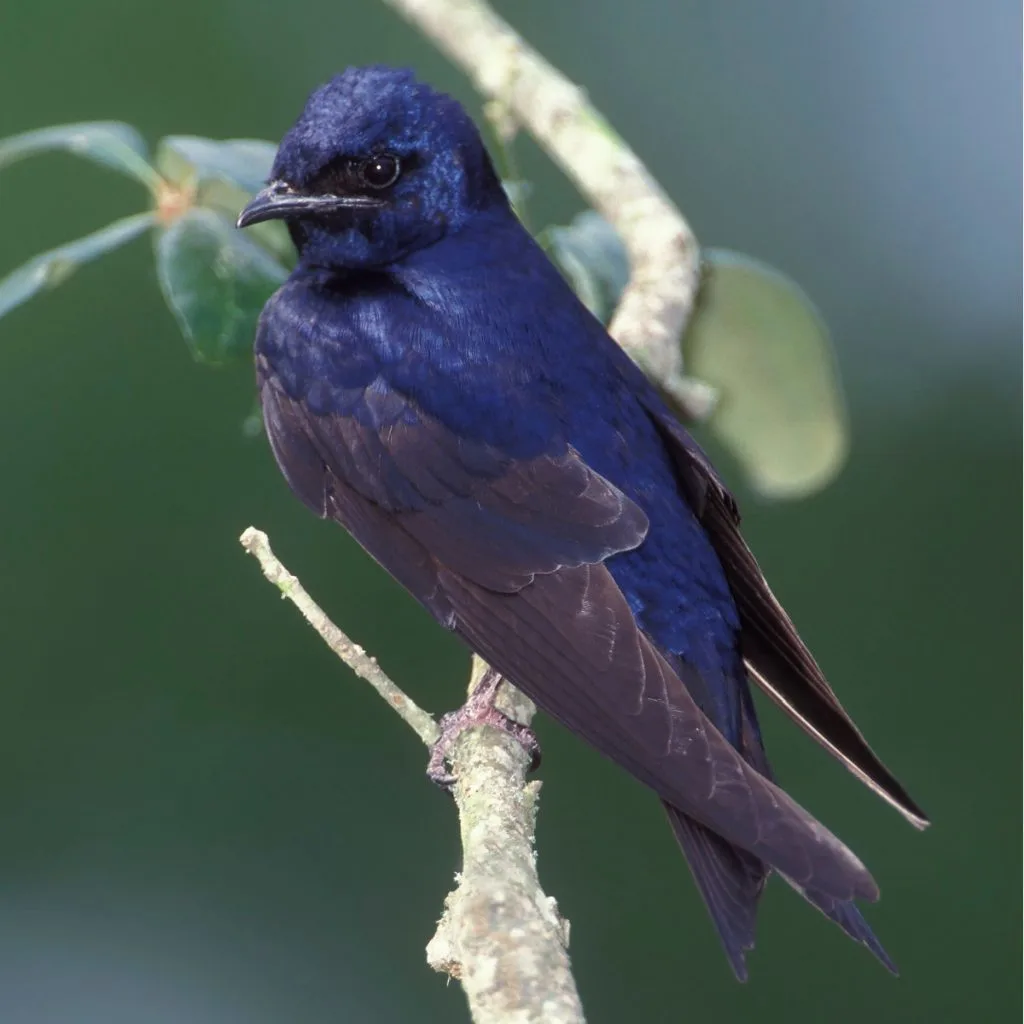
One thing is for sure, getting purple martins to your yard is a bit different from getting other birds to come calling. Unlike when attempting to attract other types of birds such as cardinals, blue jays and bluebirds, simply filling your bird feeder with food will not have purple martins flocking to your backyard.
When it comes to getting a meal, they actually prefer fresh insects to seeds and feed. It’s not that they won’t occasionally snack on a few mealworms on a feeder, but for the most part, they want fresh insects for dinner.
Although it’s hard to entice purple martins with a supply of food, they are very fond of finding a great place to nest and rear their young. And it is by supplying them with the right type of shelter at just the right time – you can find success!
As with their food choices, martins are also a bit more picky than other birds when it comes to where they will live.
Martins are community nesters by nature. They enjoy living in larger groups than most other bird species. Because of that, when providing them a future home, it needs to be spacious enough for more than just a couple of birds.

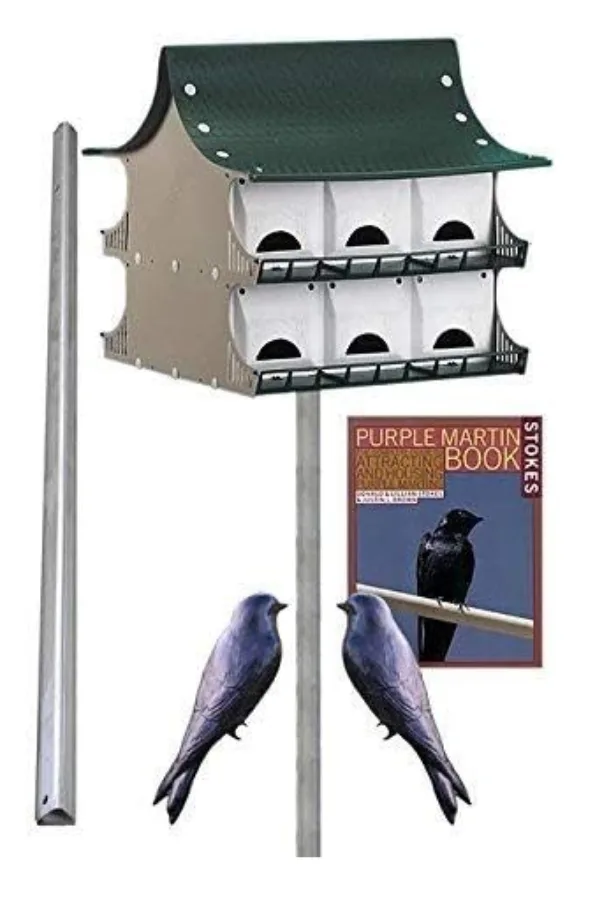
For best results, it’s best to start with a home that has at least four to six individual nesting spaces. Having more (6 to 18) is even better as it will allow the martins to readily expand. Just as important is to have the house up high and out in the open.
Martins like to have easy flight paths to and from their homes. Because of that, it’s vital to place their homes out from buildings and obstacles. As noted earlier, in addition, their homes need to be high off the ground. This is to both help with protection and to help them soar directly upward, where they enjoy feeding at higher altitudes.
It’s best to keep houses on long poles or posts at least 12 to 18 feet or more in height. The good news is that many martin house kits offer telescoping poles for easy mounting and placement.
Timing is everything when putting up a martin house. In fact, when you put up a martin house is just as critical as having the right type of structure. As a migratory bird, the first of the martins usually come calling in late winter to early spring.
Because of that, potential homes have to be put up early enough for the first scouts that are looking for homes to find them. For most areas, that means putting up structures anywhere from late March to Early May, depending on where you live.
You can find a wide selection of housing options, from martin motels to gourd houses. There is a lot of debate on which is better for attracting martins – a martin house or a martin gourd. The fact is that they are both great at housing purple martins as long as they meet their requirements. Affiliate Link: S&K 12 Room Martin House Package
It is generally thought that martins prefer white houses. This is most likely because white reflects heat and keeps their home cooler in the summer. They also need to have a hole for entering and exiting that is not too big or small. The best size for an opening is 2-1/8th inches, however slightly larger or smaller holes will work.
Last but not least, the size of the home matters. Each individual chamber or room needs to be at least 6 inches wide, high and deep. This allows enough room for their young to hatch and co-exist. Avoid anything too much larger as it can be too spacious and make martins feel more vulnerable. That, in turn, will make them less likely to choose the home site.
Even though you need to place the houses high, you will need to make sure you can reach the nests to get them down occasionally. This is to both be able to clean and service them – and remove nesting materials from other birds that might try to use them.

Sparrows and starlings are two bird species that will often try to take over martin houses. It is important to remove their nesting material to keep them from driving out the martins. In addition, you will need to take down or cover the houses after late September.
By this time, the purple martins have migrated south. Leaving them up is only an invitation to allow other birds species to take over, and keeping the martins from coming back in the spring.
Here is to getting purple martins to take up residence and visit your garden on a regular basis this year – and to less insect problems too! For more on attracting birds, check out our article: How To Attract Orioles To Your Yard This Spring.
Follow Our Facebook Page For Great Gardening Tips And Advice! This Is My Garden Facebook Page
This Is My Garden is a garden website created by gardeners, for gardeners. Jim and Mary Competti have been writing gardening, DIY and recipe articles and books and speaking for over 15 years from their 46 acre Ohio farm. They publish three articles every week, 52 weeks a year. Sign up today to follow via email, or follow along!
Looking for a few beautiful marigolds to grow this year that will not only add huge color to your flowerbeds and containers – but also repel pests and bring in loads of pollinators?
Marigolds are absolute showstoppers in gardens, flowerbeds and containers. Not just because they’re easy to take care of, but also because they produce so many big, bright and colorful blooms. All with little to no effort. But what really makes marigolds special is how much more they can bring to your garden!
Marigolds are one of the easiest plants around to grow. In fact, planting them is as easy as scattering seeds into the soil. In addition, they are also superb self-starters – and when planted in flowerbeds, they often return on their own year after year simply from the blooms that fall and seed the soil below.
But perhaps best of all, marigolds often serve an even bigger role in gardens and flowerbeds – helping to repel a whole host of pests, including nematodes, whiteflies, hornworms, mosquitoes and more. All while bringing in bees, butterflies and many other helpful pollinators!
The scent of the marigold plant is extremely offensive to a long list of common garden pests. And with certain varieties of marigolds, such as the French Marigold, the aroma is even more offensive. That is good news for gardeners, because planting them in and around your garden and flowerbeds can help to keep other plants safe!
But all of those colorful blooms are also quite inviting to bees and butterflies – and even ladybugs – which also help to keep harmful aphids at bay. With that said, it’s hard to go wrong with marigolds, especially when planting any of the 6 fantastic marigold varieties highlighted below.
Each boasts big color, heavy blooms – and the uncanny ability to keep pests away. Here is an in-depth look at each, including seed links to each variety.
French marigolds steal the show for helping out in flower and vegetable gardens. Not only are they a near perfect size at ten to twelve inches of height at maturity, their two inch blooms are big enough to bring a whole slew of pollinators and beneficial insects.
Listen In To Our Podcast Below On The Amazing Benefits Of Growing Marigolds
But more than anything else, these plants are at the top of the list for ease of planting. And when it comes to repelling pests and bringing in pollinators, their pungent blooms and foliage can simply outwork any other companion plant around – all while looking stunningly beautiful. Affiliate Seed Link: French Marigold Sparky Mix Seeds
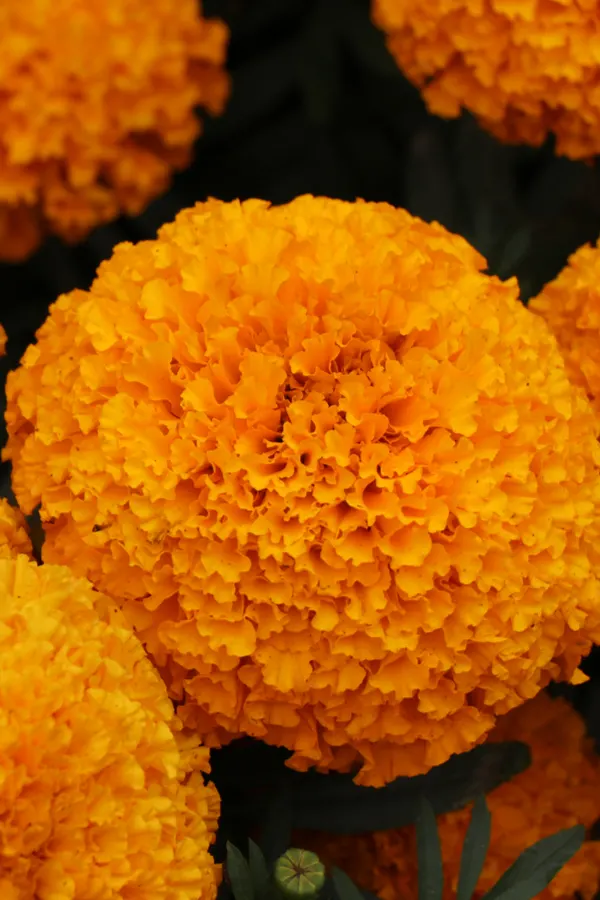
The Orange Flame Marigold has blooms resembling that of a double-layered flame of red and orange. It comes from the French variety of marigolds, which means it’s also particularly effective against repelling pests away from your flower beds and garden.
The compact flowering plant sports gorgeous double flowers. In addition, it grows from seed directly sown into beds with ease. It is perfect for placing in boxes, pots and border edges, all without being invasive to its neighbors.
Orange Flames can tolerate periods of drought with ease, and require little care. You’ll need to water when first establishing in the soil or pots, but beyond that, they tend to handle dry conditions well. Orange Flames also really take off with a bit of fertilizer too! See our article: How To Fertilize Marigolds – 2 Secrets To Keep Marigolds Blooming Big All Summer!
This marigold type needs full sun in order to truly shine. The more, the better! To encourage more flowering, deadhead spent flowers on a regular basis to keep new blooms coming on. Affiliate Link: Nana Champion Orange Flame Seeds.


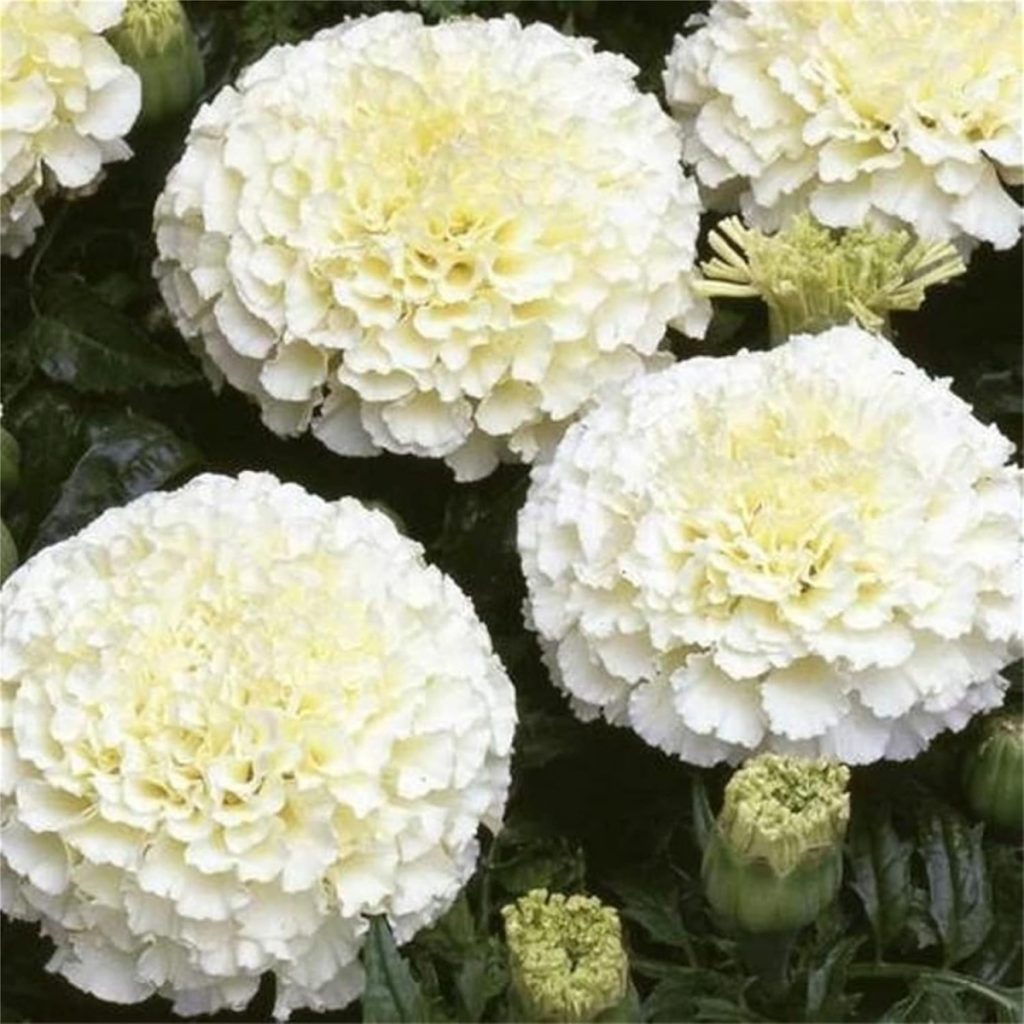
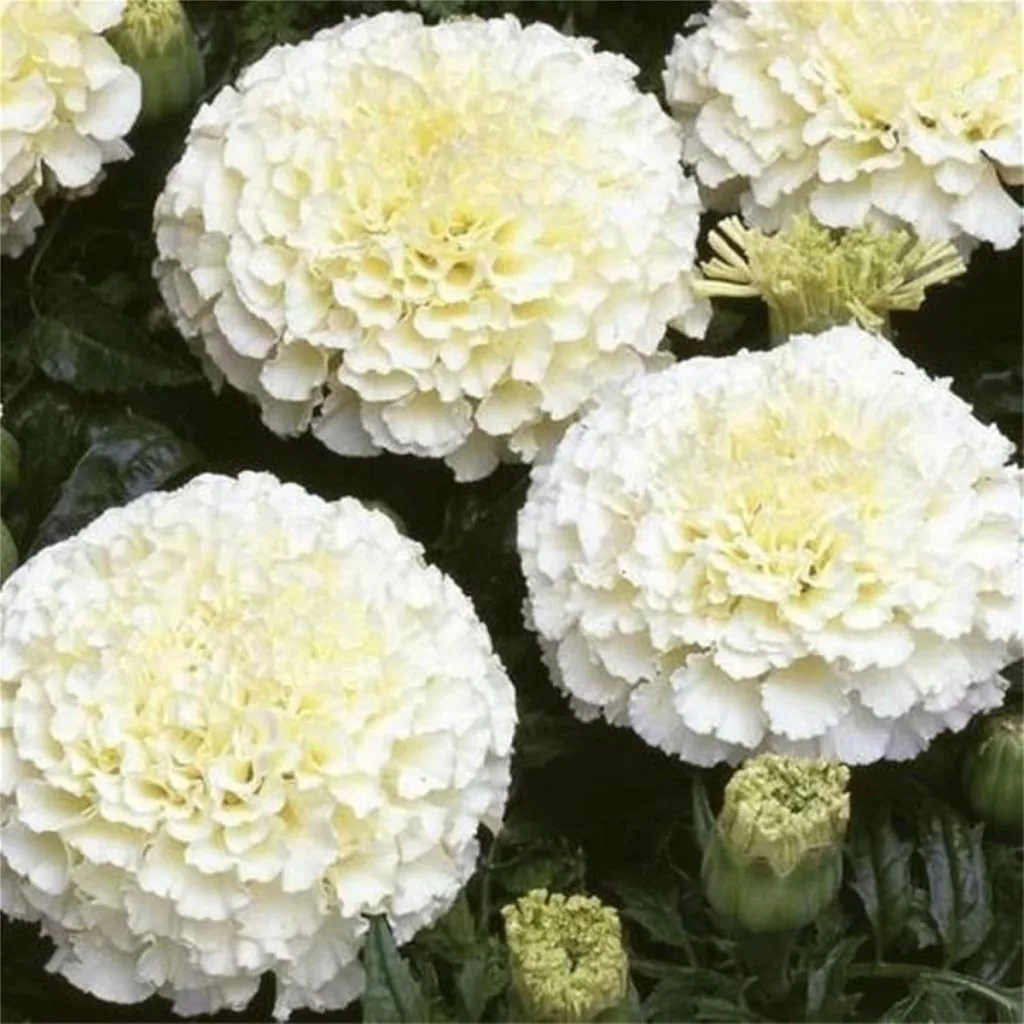
Think marigolds only bloom in red, orange or yellow? Think again. The Kilimanjaro White variety is stunning with its pure white blooms. Blooms that contrast nicely with its deep green foliage.
If you like white flowers this should definitely be on top of your to-grow list. Kilimanjaro is actually fairly rare and its white blossoms will definitely stand out from other annuals. Its scent is slightly sweet, and much like other marigolds, known to help repel everything from nematodes to mosquitoes.
Kilimanjaro are tall plants that need full, continuous sun in order to thrive. Once mature, they burst out with vanilla-white blooms that can be up to two to three inches wide.
Their flowering period is from mid-summer to frost, but it may have slower bloom cycles during periods of extreme heat. It’s worthy to note that Kilimanjaro White is an heirloom variety, which means you can sow the seeds of spent flowers and watch it turn into its original parent.
However, nature and cross-pollination might occur if you have other marigolds in your garden or flower bed. If you grow other marigolds nearby, you may need to use fresh seeds every season. Seed Link : Kilimanjaro Marigolds
The African Hawaii marigold is a towering giant compared to its other marigold kin. Make sure you leave enough room for these plants to grow to their full potential, and you can enjoy 4 inch beautiful orange flowers right up until the first frost.
Although its name suggests roots from the Hawaiian Islands, the Orange Hawaii actually hails from the mainland. Like nearly all marigold varieties, Orange Hawaii grows best when getting its fair share of the sun.
To make the most of your seeds or plants, seed or transplant after the threat of frost has passed. Pick a nice, sunny spot and plant with a bit of compost for added nutrients. This variety does not require a lot of additional nutrients, but does prefer soil that drains well.
The large blooms add big color to any space, all while helping to protect nearby plants from all sorts of invaders, from rabbits to mosquitoes, nematodes and more.

Orange Hawaii is large enough that it can withstand summer heat, but they will need a bit of additional watering during periods of extreme drought. Like most marigolds, they can benefit from a dose of all-purpose fertilizer a few times throughout the summer. Overall, they are an extremely low-maintenance annual.
Regular deadheading of the large spent blooms will keep the plant blooming strong all summer long. With the bloom’s size, a large pair of scissors or garden shears are best for deadheading. Seed Link: Orange Hawaii
Bon Bon Border Mix (sometimes referred to as Calendula Bon Bon), are often called pot marigolds. They do, however, share the same pest repelling characteristics as traditional marigolds.
As the annual matures, the greenery gives way to brilliant, multi-colored blooms of double yellow, orange and apricot flowers. This marigold variety is recommended to use as a border plant, but can also do well in pots and containers. It definitely grows in a more bushy style than most marigolds, but once it starts to bloom, it nearly covers the foliage with prolific flowering.
Growing requirements are practically non-existent, so you can sit back and take it easy and the plants will do their part. Seed Links : Calendula Mix Seed. For more powerhouse companion plants that are great for the garden and easy to grow, be sure to read our article: Why To Grow Zinnias In Your Vegetable Garden This Year – The Ultimate Companion Plant!
Here is to growing some of the best marigolds around to repel pests and attract pollinators – and add big beauty to your flowerbeds and garden! For more marigold growing tips, see our article: How To Keep Marigolds Blooming Big In The Summer – 3 Simple Secrets For More Blooms!
Follow Our Facebook Page For Great Gardening Tips And Advice! This Is My Garden Facebook Page
This Is My Garden is a garden website created by gardeners, for gardeners. Jim and Mary Competti have been writing gardening, DIY and recipe articles and books and speaking for over 15 years from their 46 acre Ohio farm. They publish three articles every week, 52 weeks a year. Sign up today to follow via email, or follow along!
Need a few simple tips and tricks that can stop slugs fast – and keep your vegetable and flower beds safe from their damage this year?
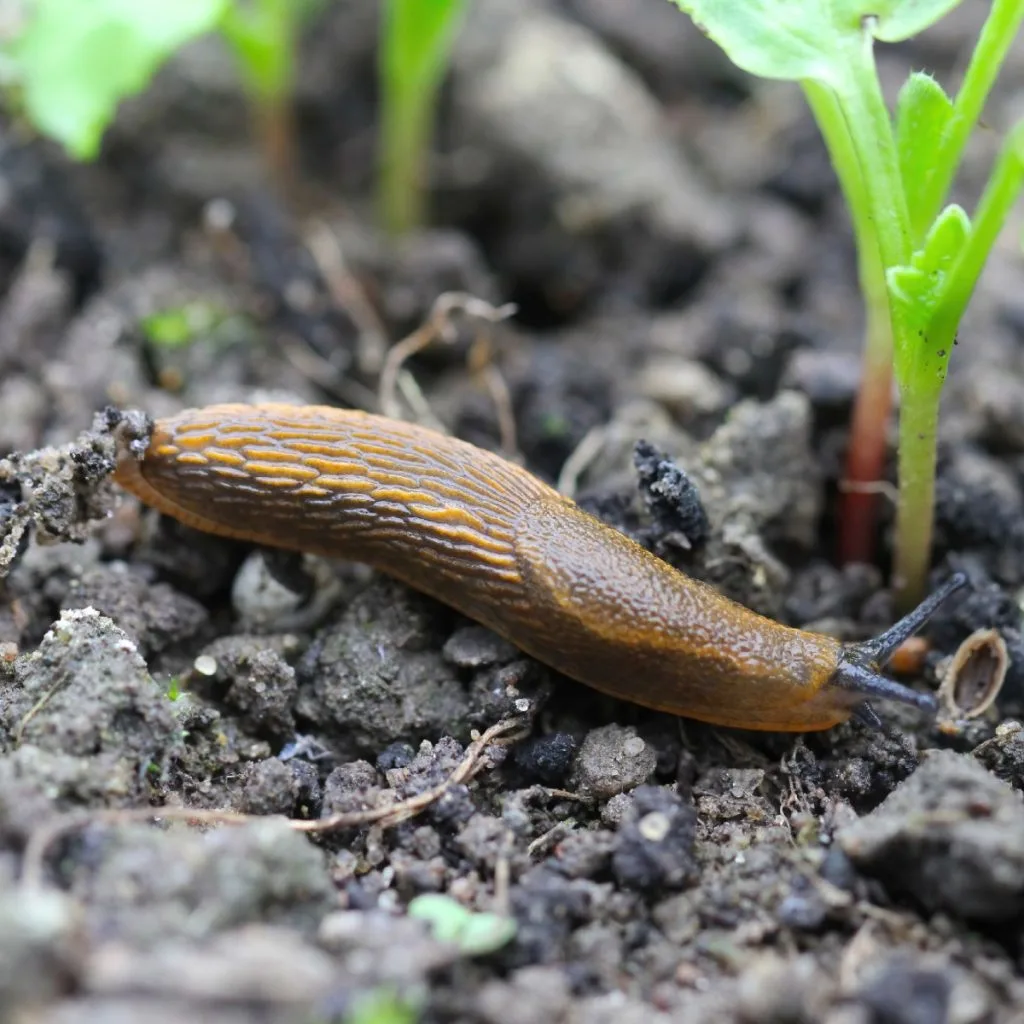
Slugs cause serious damage to vegetable plants, annuals and perennial flowers. In the blink of an eye, they can destroy hostas in your flowerbeds – or chew hole after hole in cucumber plants, tomato plants and more. In fact, there aren’t too many plants slugs won’t attack!
What makes slugs so difficult to defend against is that they can do all of their damage almost completely out of sight. Slugs are night-shift workers, coming out in the moist, cool temperatures of the overnight hours to feast and dine on almost anything with greenery. Unfortunately, by morning they are usually nowhere to be found.

As the sun begins to rise, slugs take cover on the underside of leaves or bury themselves in the soil below the very plants they love to eat. It is certainly one of the reasons they can be so difficult to combat. But there are ways to stop slugs in their tracks. And best of all, it doesn’t require commercial pesticides or chemical sprays to be 100% effective!
One of the easiest methods to attract and stop slugs is with beer, sugar or yeast traps. It’s common because it really does work well to keep them away from your plants – and eliminate them in the process!
It is not the actual taste of beer that slugs love. It’s instead the yeast and sugar in it that attracts them by the dozen. And if you don’t want to waste beer – you can make your own homemade solution with a gallon of water, a yeast packet, and a half cup of sugar!
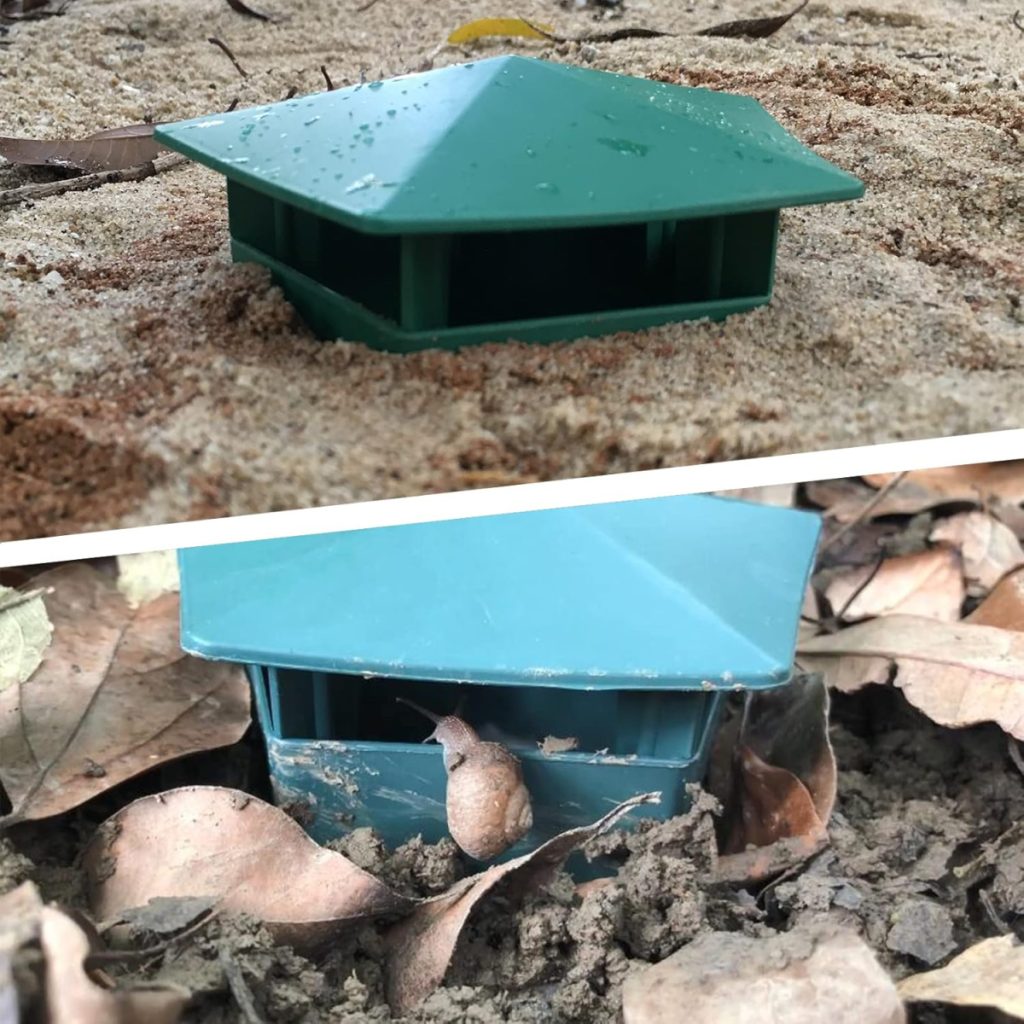
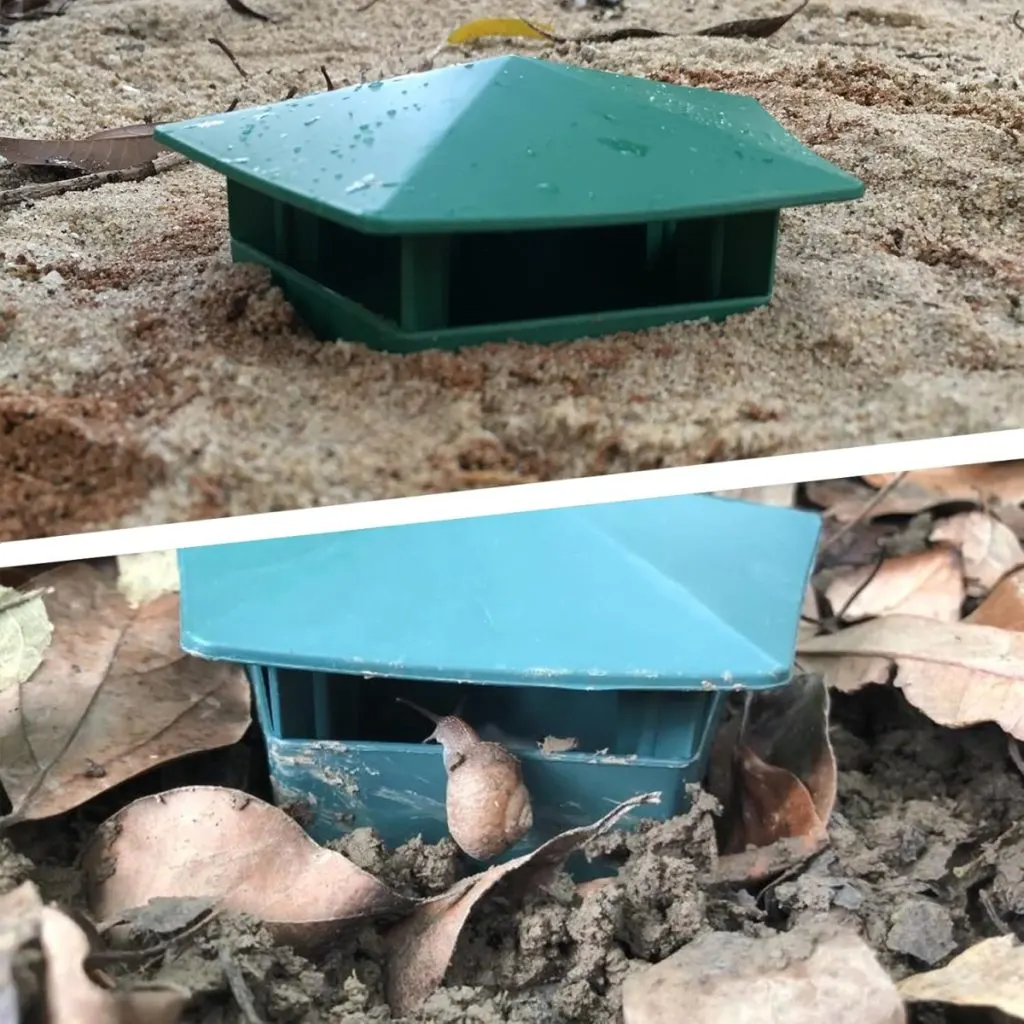
Small, low-ridged containers filled with beer or a sugar/yeast solution attract the slugs with their scent. The slugs then climb in to fill up – but can’t get back out and die inside the solution.
Although you can use homemade shallow containers, there are some great options on the market that have covered lids and can be buried in the soil for a clean and very effective trap. Even better, the cover keep the liquid from washing out during rains. Affiliate Link: Snail Traps With Cover Lids
Crushed egg shells are another great all-natural method for stopping slugs from damaging your plants.
The soft, slimy exterior of the slug’s body are easily damaged by the rough, course make-up of crushed egg shells. In fact, as they try to inch over top of them, the jagged edges of the shells slice into their soft skins, killing them in the process.
To protect plants, simply crush up a few egg shells and scatter them around the main stem of the plant. Don’t over-crush the shells, simply break them down into small 1/4 to 1/2 inch pieces. This size will allow you to easily ring the plant with protection.
Not only will the egg shells keep the slugs from slithering up the stem, as they break down, they will also add calcium and other trace minerals and nutrients to your soil over time. It’s a great way to both power and protect your plants at the same time!
Slugs are not exactly the best of attackers when it comes to getting access to plants. In fact, their only path to a plant is to slowly slither up the main stem to the tasty foliage above. That is exactly why the ring of egg shells works so well – as will putting a simple plant collar around each of your stems.
It’s quite easy, if you cut off the access, you eliminate a slug’s path to destruction. And plant collars work like a charm for this. Even better, they are a snap to make and install.
To create plant collars, take toilet paper or paper towel rolls and cut them into two inch sections. Then, slit the roll and slide it like a collar around each plant. The height and smooth roll is more than enough to keep slugs from climbing up. Plant collars are especially effective for vegetable plants with thick stems like tomatoes and peppers.
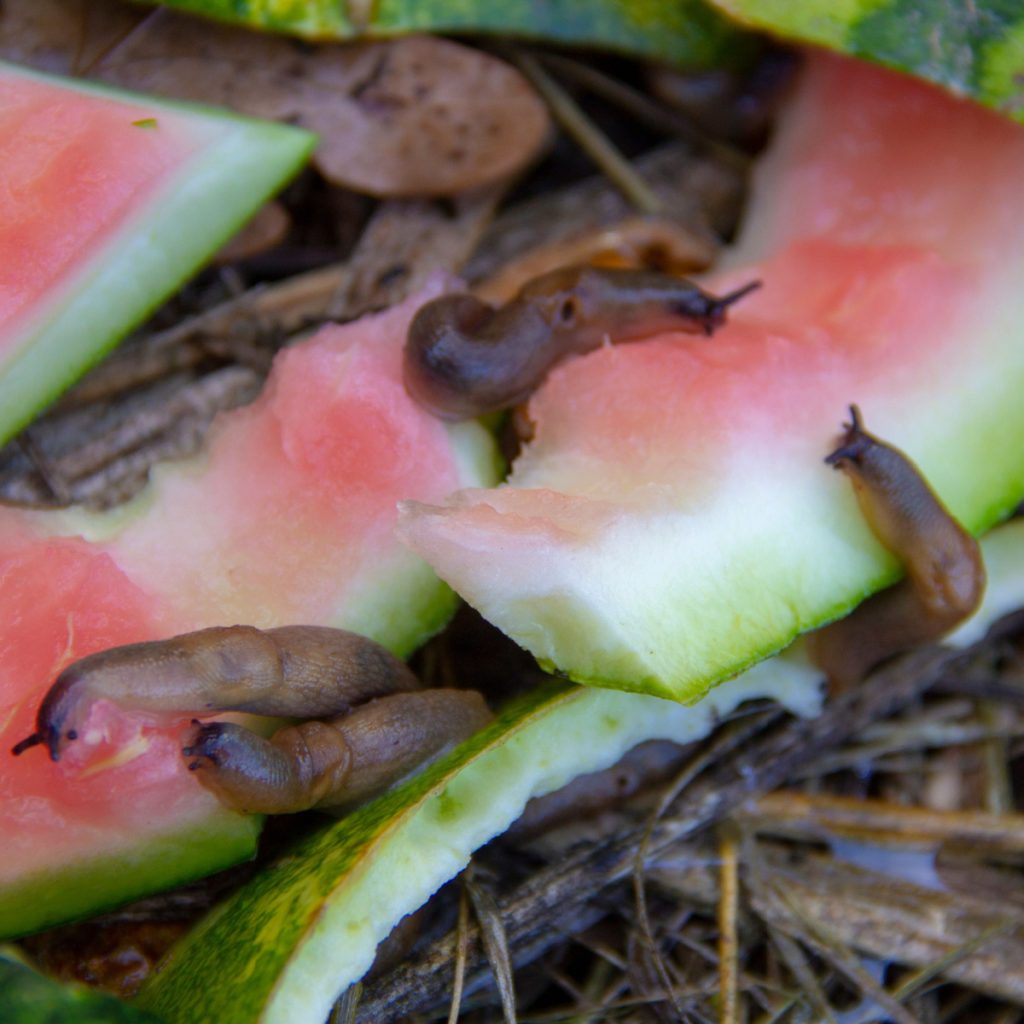
Melon rinds are another great option for attracting and stopping slugs naturally. Slugs love the wet, sweet taste of watermelon, muskmelon and cantaloupe. They will quickly find the rinds of the melons when placed near your plants.
To use, take leftover rinds and place them flesh side down on top of the soil or mulch. The slugs will congregate in droves and stay on the rind since the flesh side is underneath and out of the sunlight. All you need to do is scrape them into a bucket of soapy water each morning!
You can actually re-use a rind for several nights to continue to trap the slugs in infested areas. It’s best when trying to trap to keep the rinds more on the edge of your plant rows and not right near the plants where the slugs can have access to both.
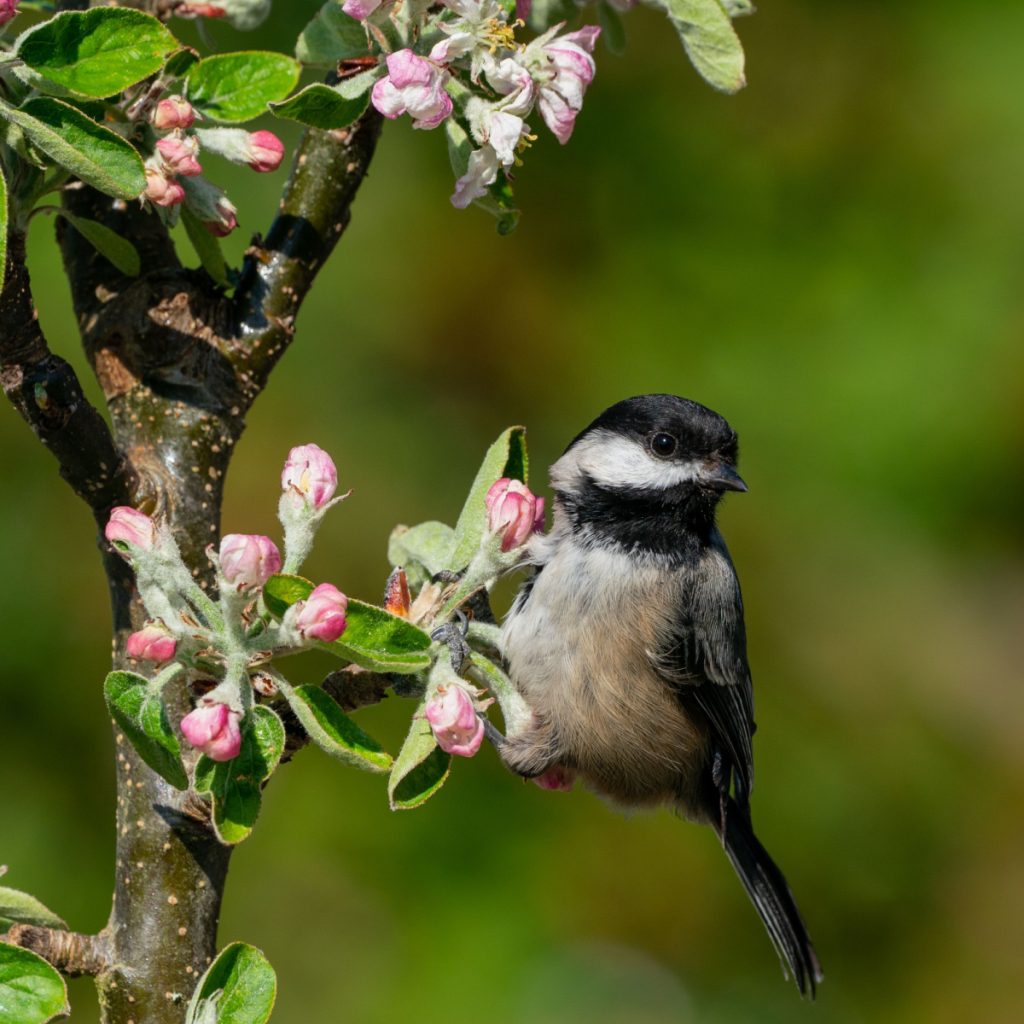
You may also notice a big influx of helpful birds such as chickadees visiting the rinds. The slugs are easy meals for them – especially against the bright backdrop of the flesh. See our article: How Chickadees Can Help Your Garden!

And last but not least, there is hand picking to control slugs. Early morning hand picking is the fastest and one of the most effective natural methods for slug control. In fact, when hand picking is done on a regular basis, it can almost eliminate a slug population entirely.
Although slugs go to work at night, most continue to chew away into the first few hours of the morning daylight. As the sun begins to rise, it’s still cool and wet enough to allow them to work. Because of this, they are extremely easy to spot and hand pick at this point from the foliage of plants.
For hand picking, begin by placing a few drops of liquid dish soap in a bucket. Plain water will not kill slugs, but the soapy water will. The oils in the soap create a film over their slimy skin that prevents oxygen from getting through.
As you walk through your plants, be sure to turn leaves over to look underneath. It is here where most slugs will hide from predators and the impending hot sun. You will be amazed at after just a few days of hand picking, how much you can reduce the overall slug population.
Yes, you have to get up on the early side, but it’s worth it! One final note, do not dump the dead slugs out near your flowerbeds or garden. Believe it or not, the decaying slug scent will actually attract even more to the area.
Here is stopping slugs fast this year in your garden and flowerbeds – and to keeping your plants safe from harm!
Follow Our Facebook Page For Great Gardening Tips And Advice! This Is My Garden Facebook Page
This Is My Garden is a garden website created by gardeners, for gardeners. Jim and Mary Competti have been writing gardening, DIY and recipe articles and books and speaking for over 15 years from their 46 acre Ohio farm. They publish three articles every week, 52 weeks a year. Sign up today to follow via email, or follow along!
Did you know that one of the best ways to help defend your garden from a long list of insects and pests that attack your plants is by simply attracting chickadees to hang out in it?
Not only are chickadees one of the friendliest and most social of all backyard bird species, they also happen to be one of the most vocal – filling the air with a wondrously happy chirp as they fly about. In fact, they are so friendly, that many gardeners tame them enough to land right on their hands for food!
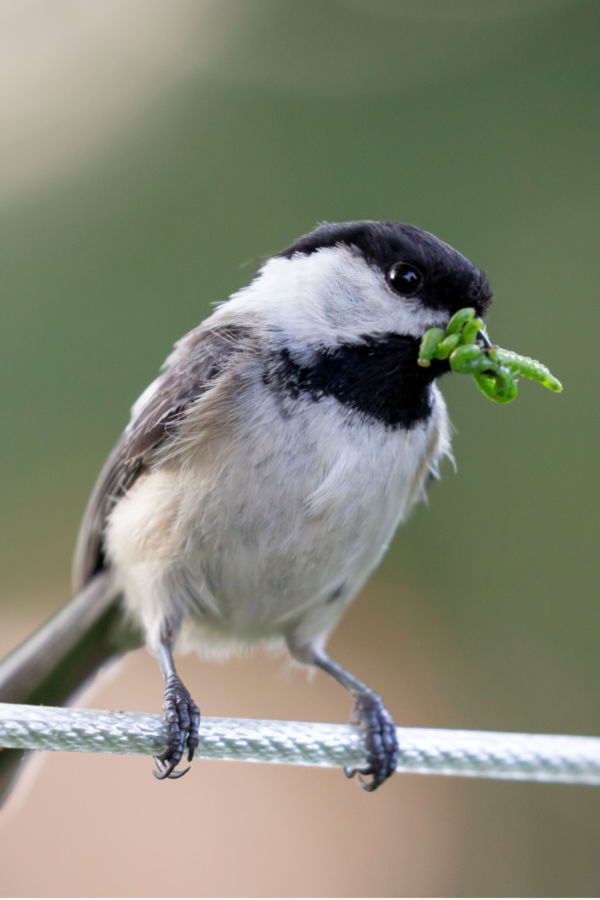
But beyond all of their friendliness and cuteness, what really makes chickadees valuable is their ability to keep insect populations under control. Insects that love to feast on everything from vegetable plants and fruit and nut trees, to all kinds of perennial and annual flowers.
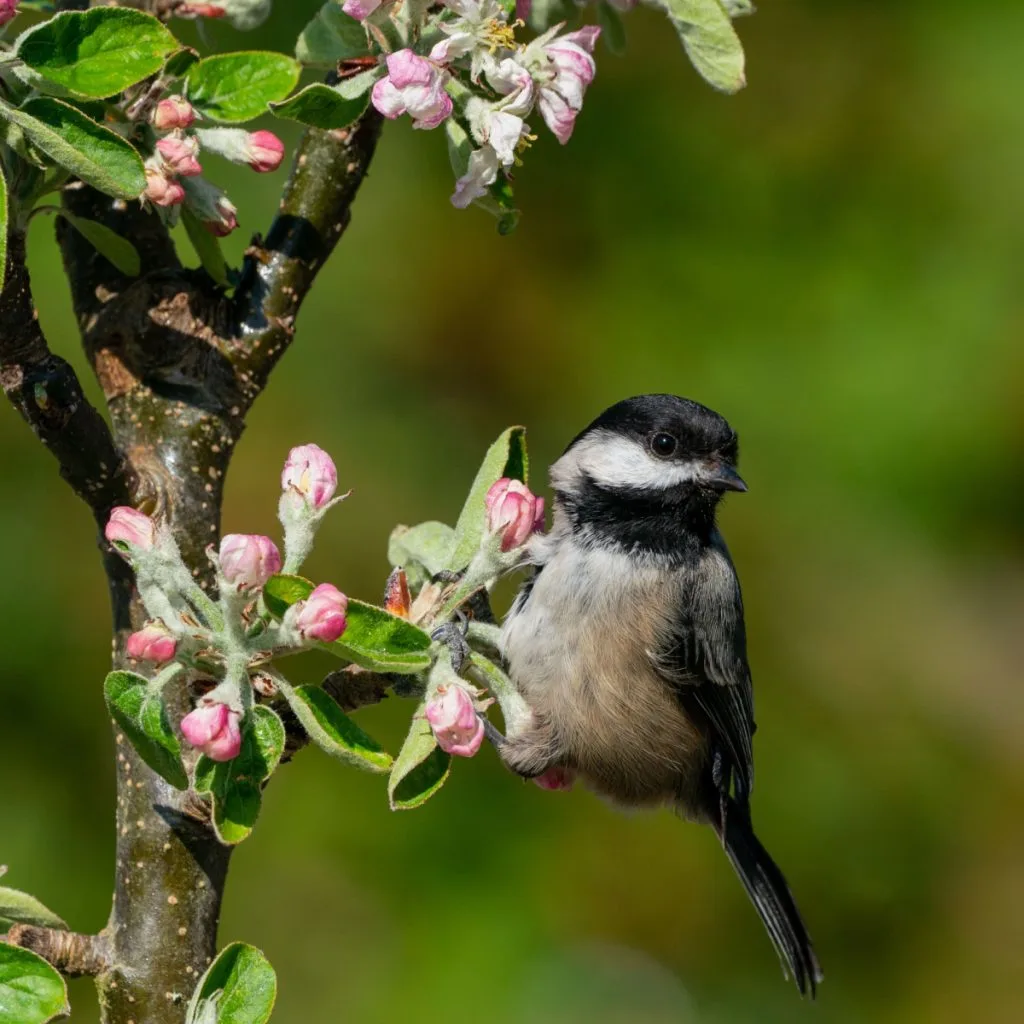
The chickadee might be small in stature, but it has an incredibly big appetite. It’s appetite is so big that it routinely consumes over 30% of its body weight each and every day. But it can help your garden in even more ways than just eating insects.
Not only do chickadees consume insects that can be serious pests to plants such as caterpillars, aphids, moths, beetles and ants, they also love to feast on a wide variety of weed seeds too. That, of course, can play a big role in keeping weeds out of your gardens and flowerbeds right from the start.
Perhaps best of all, chickadees are not fond of migrating. That means that once you attract them, they can remain in your garden and yard throughout their life. With all of those benefits, it’s easy to see why attracting them to your garden is such a win-win!
Getting chickadees to come calling is actually a relatively easy task. To have them visit and stay – it all comes down to providing them adequate sources of food, water and shelter. When doing this, however, you need to think of what they will need in all four seasons, not just the spring, summer and fall.
Like nearly all living creatures, the most important attraction of all for chickadees is food. And the more of their favorite food sources you can provide, the likelier they will be to stay.

Number one on the list of what chickadees love are plants. Why? Because the more plant life you have growing, the more likely there will be insects and seeds for the chickadees to consume. And the plants chickadees love most are ones that have flowers with seed heads.
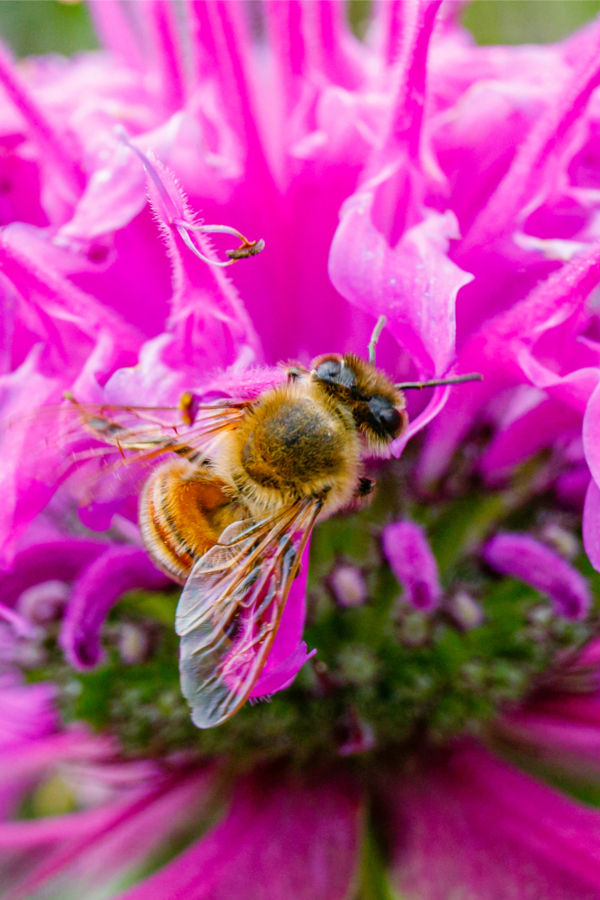
Four of the best perennials of all to plant for this are Black-eyed Susan, Coneflower, Blanketflower and Bee Balm. All have attractive blooms and produce large seed heads that chickadees love. All of these happen to attract pollinators, which also help your garden and flowerbeds as well.
Chickadees also love having shelter trees nearby. Oak, birch, maple and other hardwood trees all provide excellent shelter for the birds. As do pine trees. But even more, these trees are often home to caterpillars and insects, providing even more food for the chickadees.
In addition to providing chickadees with the plants they love for food and insects, supplementing their food supply with bird feeders is one of the easiest and best methods for attracting chickadees and getting them to take up permanent residence.
This can be especially true when feeding them through the winter – when insects and seeds may not be readily available. The key here to success is keeping the feeders filled regularly. See our article: How To Help Chickadees Survive Winter – The Best Way To Feed Chickadees.

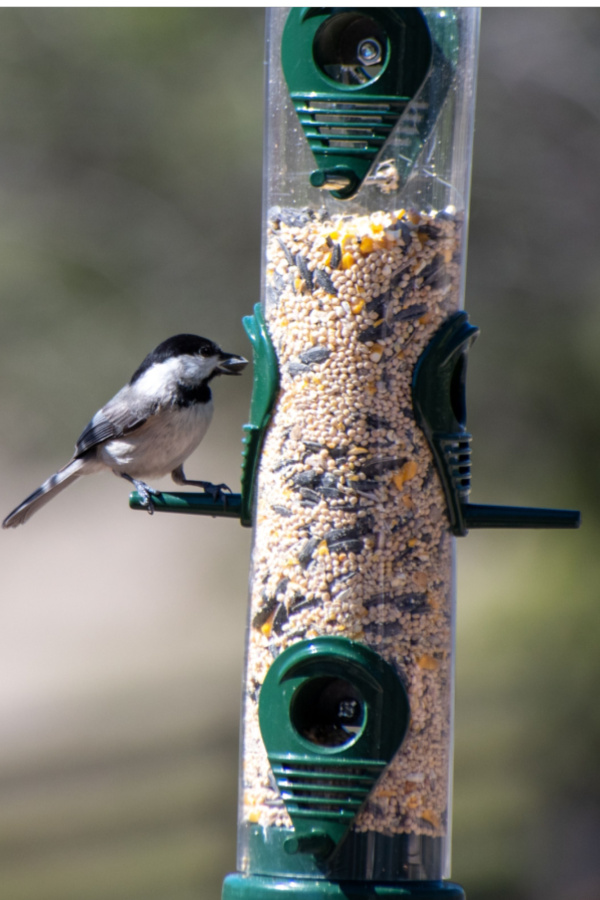
In the spring and summer, start by installing a feeder that is easy for them to use and visit. Chickadees are small birds and aren’t high up in the food chain. Because of this, they need a bird feeder to keep them safe from predators. One of the best choices for chickadees is a metal cage tube bird feeder.
The metal cage gives chickadees plenty of space to get in and out while feeding, but keeps the larger birds and animals at bay. It’s best if your cage feeder has multiple feeding ports and can handle weather elements. Affiliate Link: Caged Bird Feeder, Large – Squirrel-Proof.
So now that you know which feeders work best, what is the best food to use to attract chickadees in order to get them to help your garden?
Chickadees stick for the most part to a healthy diet. Because of that, sunflower seeds are high on the list of the healthy nuts they enjoy. So much so that even the type of sunflower seeds does not matter. Making such seeds available through feeders in your garden will attract chickadees, titmice, woodpeckers, finches, and many other small birds as well.
Peanuts are another great choice. They have protein and fat in ample amounts. Both of these nutrients are especially necessary for chickadees during the winter months. When feeding chickadees peanuts, always feed with shelled peanuts. It can be difficult for them to break the hard outer shell because of their small beaks.

Nyjer seeds are also a great feed for chickadees and many other birds. You can also mix nyjer with sunflower seeds and peanuts for a chickadee feast. Affiliate Link: Nyjer/Thistle Seeds Wild Bird Food
Last but not least, safflower seeds are a regular staple of chickadees. However, there is a difference between safflower seeds and other seeds. Most other birds will ignore safflower seeds. So, if you only want to attract chickadees, they are an excellent choice for bringing them in!
As with attracting all birds, a water source is important for hydration for chickadees. Chickadees will source water quite easily from anywhere. They are more than happy to visit bird baths and small outdoor ponds.
If you have neither, consider placing a few dog bowls of water under trees and out of the way. As with any stagnant outdoor water source, always be sure to empty and refill bowls regularly to keep the water both clean and free of mosquito larvae.
In the spring, chickadees are cavity nesters. They will occupy any cavity left empty by other birds. However, they modify these cavities by collecting moss and animal fur to soften the spot for eggs.
To mimic this for chickadees, you can install a nesting box. These are great for not only chickadees, but wrens and other small birds. When installing a nest box, do not put a perch on the box as it can make it easy for predators to get to them. Affiliate Link: Stokes Select Wren & Chickadee Nesting Bird House, Natural Wood
Chickadees also love to use unoccupied nest boxes during the winter. An unoccupied bird house provides a much-needed warm winter place and an easy entry point. It also helps insulate them from the winter winds and cold.
Here is to attracting all kinds of chickadees to your garden this year – and getting them to help you keep your plants safe from attack!
Follow Our Facebook Page For Great Gardening Tips And Advice! This Is My Garden Facebook Page
This Is My Garden is a garden website created by gardeners, for gardeners. Jim and Mary Competti have been writing gardening, DIY and recipe articles and books and speaking for over 15 years from their 46 acre Ohio farm. They publish three articles every week, 52 weeks a year. Sign up today to follow via email, or follow along!