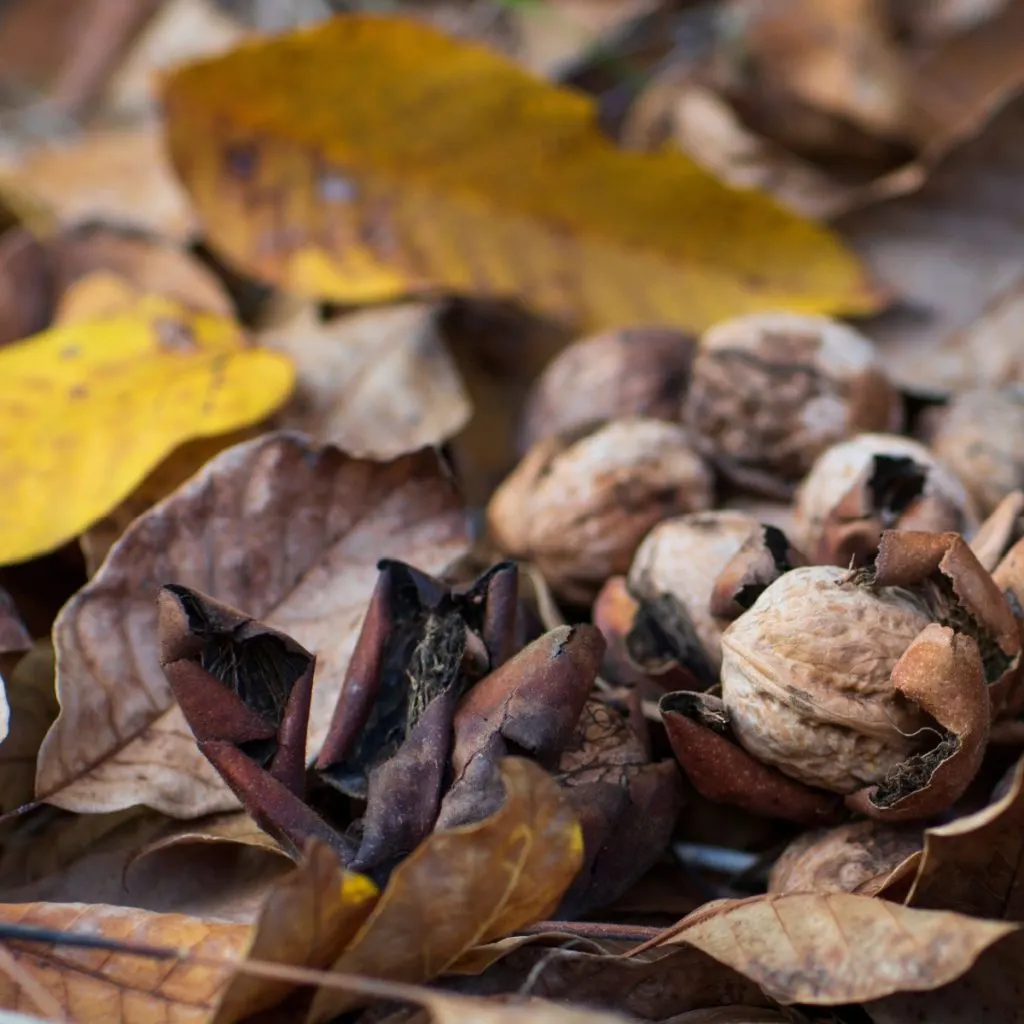
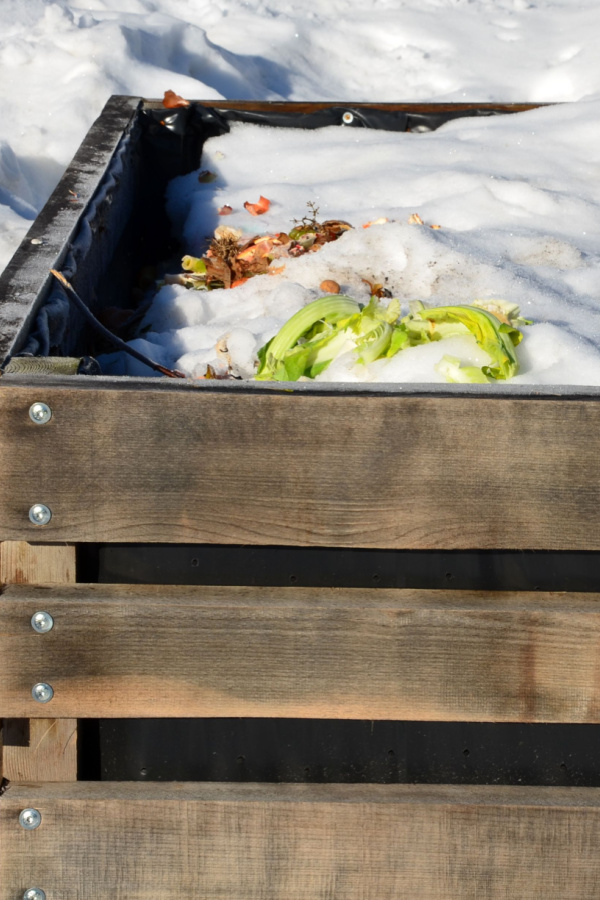
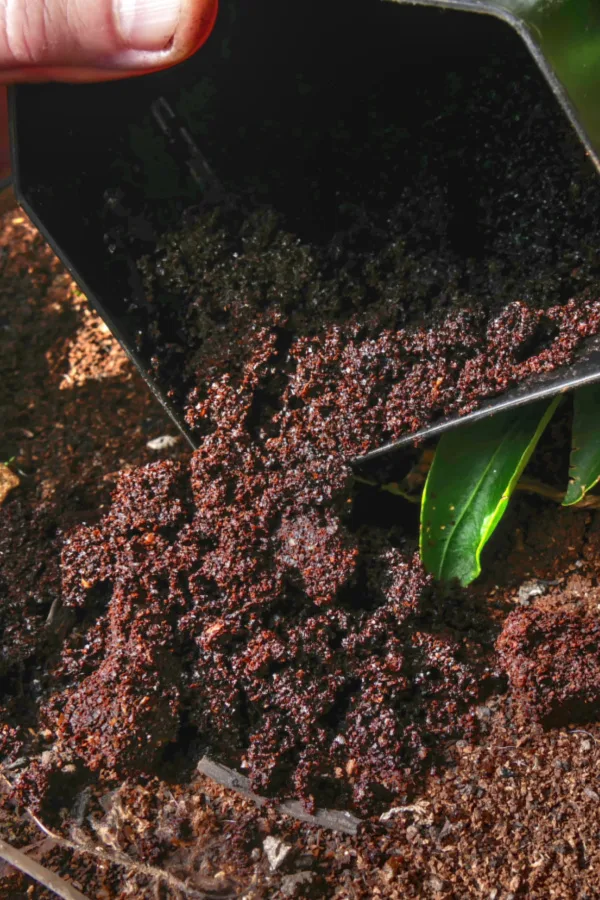
Compost is the key to growing nearly any plant imaginable, and making your own couldn’t be easier!
Check out all of our articles below how to make and use compost all over your landscape:


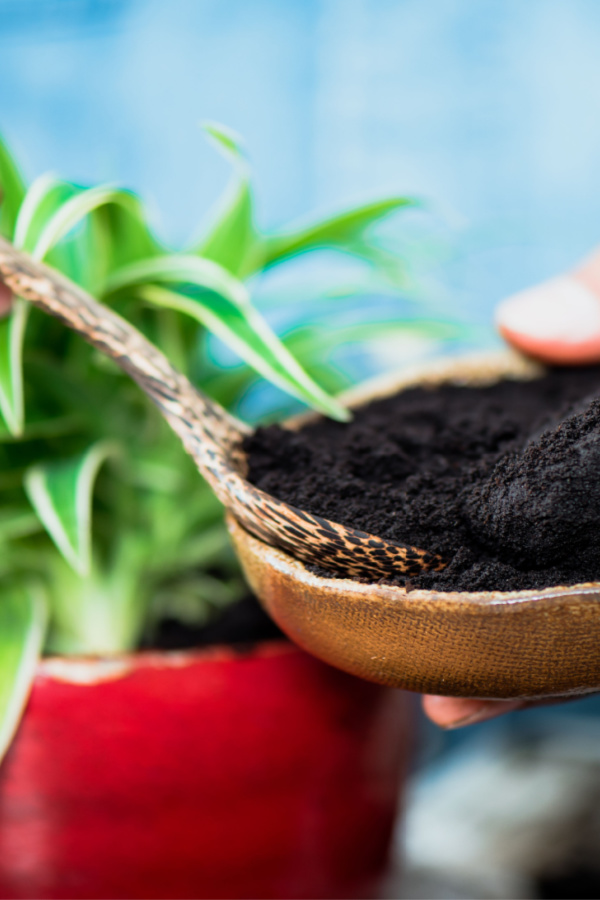
Compost is the key to growing nearly any plant imaginable, and making your own couldn’t be easier!
Check out all of our articles below how to make and use compost all over your landscape:
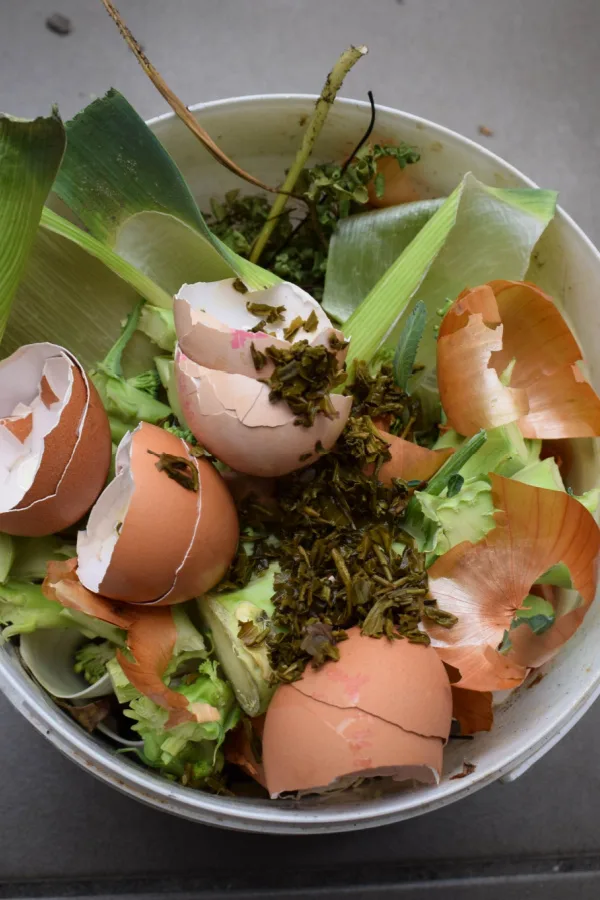
Wondering how to easily and safely store and save egg shells this fall and winter to use in your garden and flowerbeds next spring?
Whether it’s placing crushed egg shells around the base of plants to help fend off slugs, using them as a soil amendment to help prevent blossom end rot on your tomatoes, or simply adding them to the soil to help energize and replenish lost nutrients, egg shells are truly a gardener’s best friend. To learn more about how to use them in your garden, check out our article: The Best Way To Use Egg Shells In Your Garden – And Why You Need To Save Them Now!
Egg shells are an incredibly powerful resource for gardeners. Loaded with calcium and a whole host of other trace minerals and nutrients, they are excellent for helping to power the soil and plants in your garden and flowerbeds. And all, of course, for free!
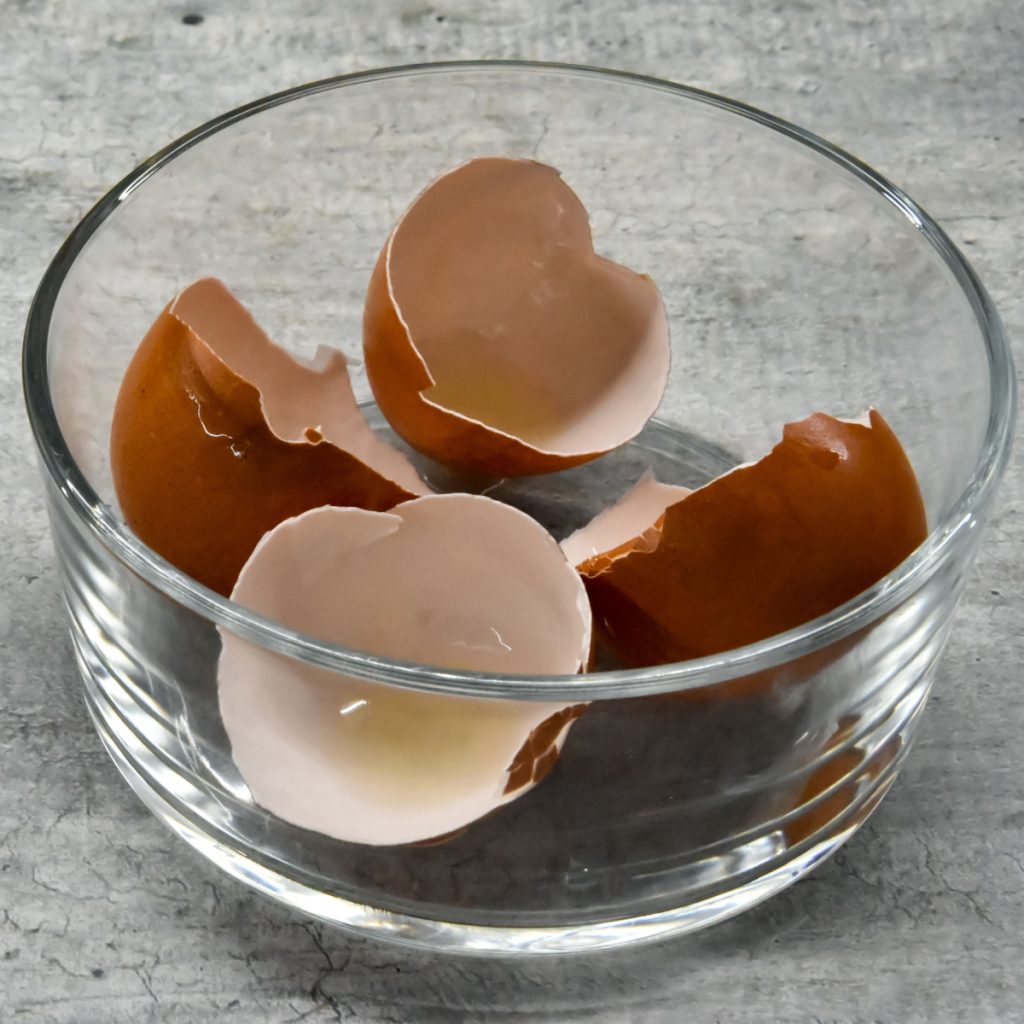

But if there is ever a problem with egg shells for gardeners, it’s finding a way to have enough of them on hand right when you need them. Unfortunately, all too often, the need for egg shells for your garden or flowerbeds arrives all at once.
A great example of this is during spring planting, where egg shells can help almost everywhere in your garden and flowerbeds.
Looking to prevent blossom end rot on your tomato and pepper plants? Simply add four to six crushed egg shells into each planting hole. Want to help all of your vegetable and annual flower transplants develop strong stems and structure? Once again it’s egg shells to the rescue! See: How & Why To Plant Coffee Grounds & Egg Shells With Tomatoes!
But the use of egg shells during the spring planting season doesn’t stop there. Crushed shells are also great to mix in with your potting soil for healthier containers and hanging baskets. In addition, you can sprinkle shells on the soil around tender plants to ward off slugs.
As you can see, with all of those uses, it can require quite a stash of egg shells to do the job! But that is exactly where saving them up through the fall and winter can come to the rescue. By simply saving your egg shells in the off season, you can always be sure to have plenty on hand whenever you need them in the spring.

Not only is it easy, it doesn’t need to require a lot of space or time either. Especially when you use a simple trick that makes storing them safe and ready to use at a moment’s notice!
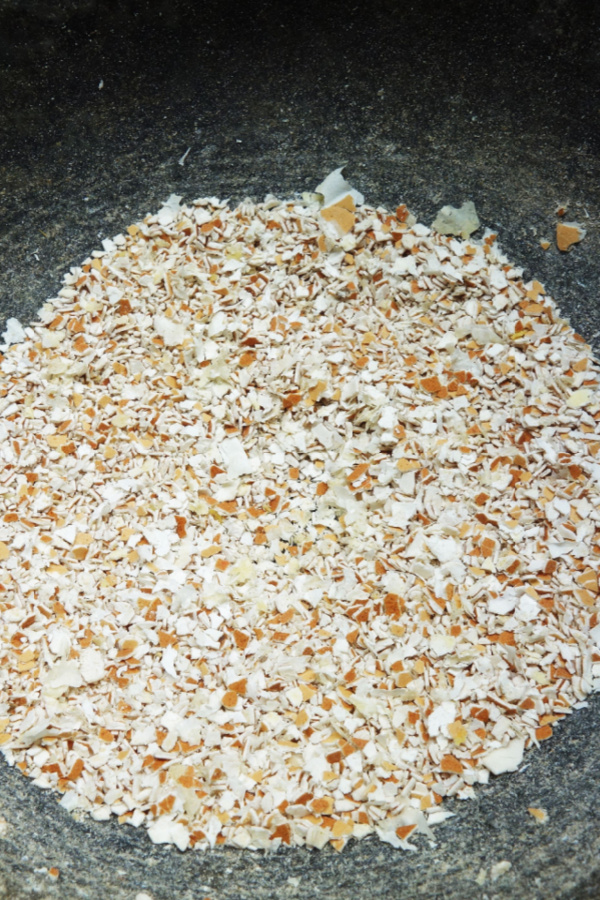
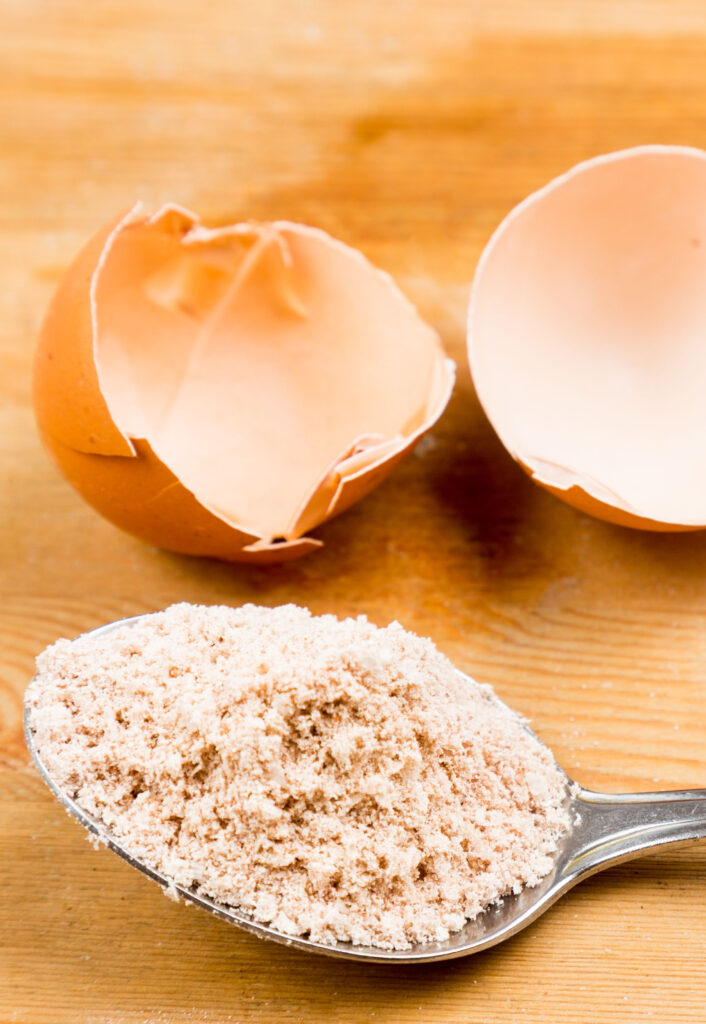
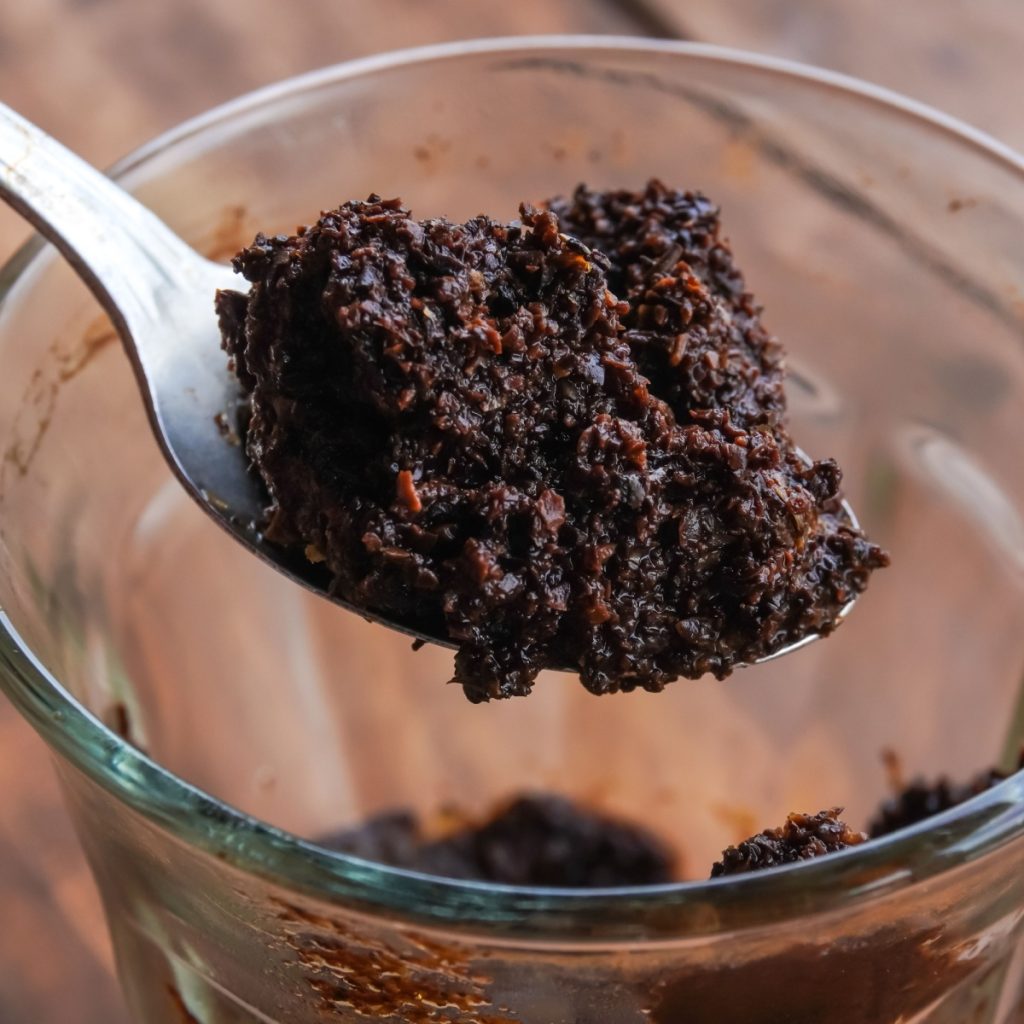
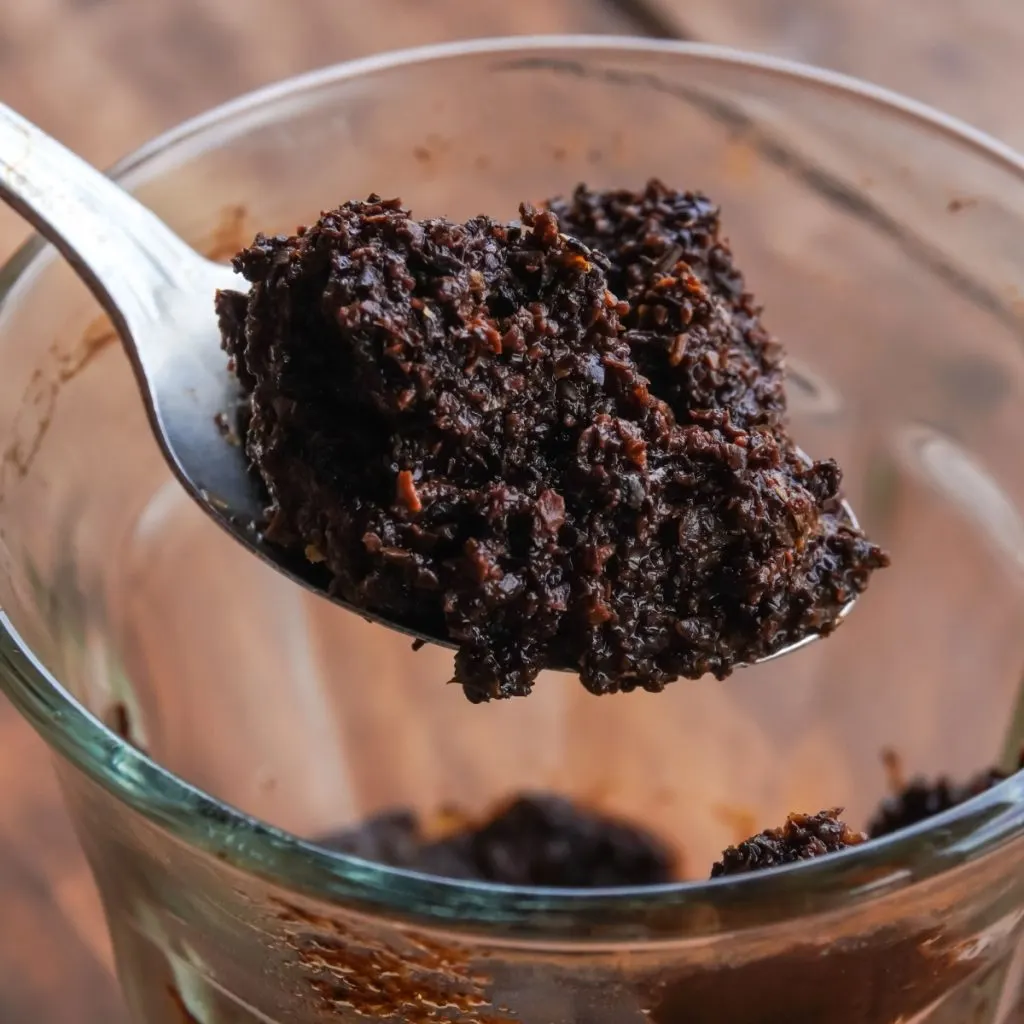
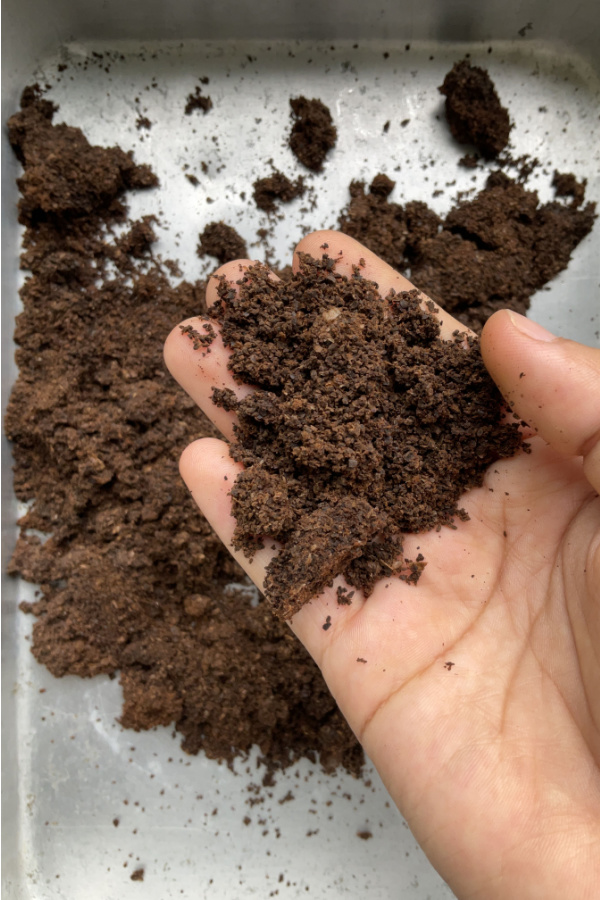
So what is the simple secret? When it comes to storing egg shells, it’s all about grinding them up and storing them frozen!
Grinding or crushing egg shells down to a fine powder has more benefits than simply allowing for better storage. When it comes to using egg shells in your garden and flowers, the finer the egg shells are ground, the more quickly they will benefit your plants.
Whole or large egg shell pieces can take a long time to break down. Until they do, they can’t provide much in the way of nutrients to your soil or plants. But when you crush eggs shells into a fine grind, the powder-like substance is able to release its nutrients into the soil much more rapidly.
This is exactly why you want to always add finely ground egg shells and not large egg shell fragments to your planting holes in the spring. This way, the calcium and other trace minerals can help your plants almost immediately.
In fact, other than using a few slightly broken shells around plants to protect them from cutworms and slugs, the majority of the time you will be using egg shells, it is best to have them finely ground. So why not store them that way from the start?
It’s fast, easy, and best of all, allows you to compactly store them in your freezer. Even better, you can store them safely, with no worries of mold, bacteria or foul odors!
Two of the biggest issues with storing egg shells are safety and storage space. Especially if you are trying to store egg shells all winter long. When left out, egg shells can create a bit of a foul odor from the leftover egg remnants inside the shell.
If the smell wasn’t bad enough, they can also grow bacteria and mold. And then there is the issue of where to store all of the shells until you need them. But by simply grinding them up and plopping them into a storage bag in your freezer, both issues are solved in an instant!
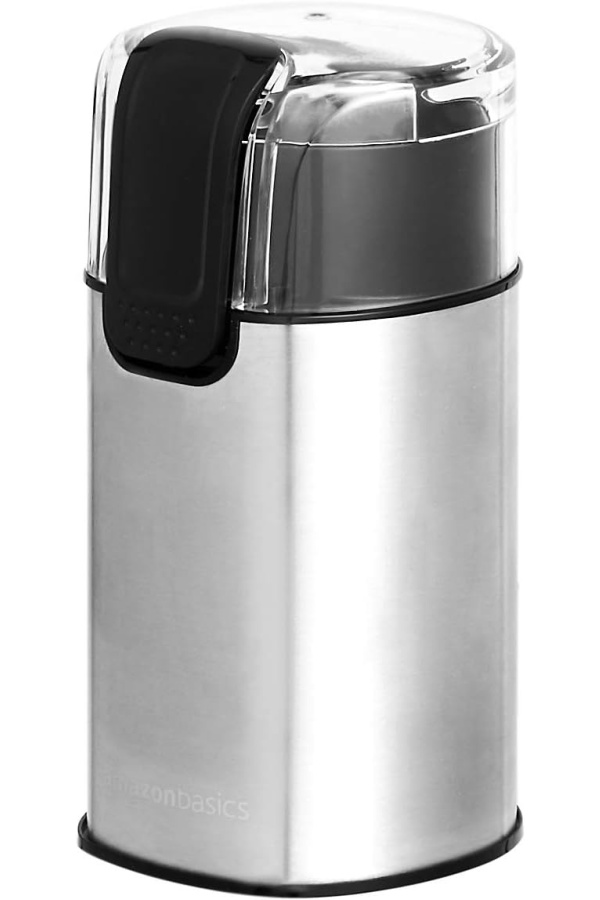
To make our egg shells easy to grind, we place them on an old cookie tray. We then dry them out in the oven set on low for just a few minutes. We simply save our shells for a few weeks in a resealable bag until we have enough to dry them out on the tray.
This step can be omitted, but it makes the shells even easier to grind when completely dry. Next, using a basic hand-held coffee grinder (a blender works will work well too), you can chop up egg shells in an instant.
The grinder does a great job of creating a very fine powder that hand crushing simply can’t do. So fine that you can fit hundred and hundreds of eggs into a one gallon size freezer bag with ease. Affiliate Link: Basics Electric Coffee Grinder, Coffee Bean and Spice Grinder
Once in the freezer, the egg shells can remain without worry until you need them. And, if you use an easy-open freezer bag or container, you can add to them every time you have a few new egg shells with no problem at all.

One final note, always be sure to clean and sanitize your coffee grinder blades after chopping eggs in them. Warm soapy water will do the trick in a flash.
When spring planting season rolls around, you have a ready supply of egg shell powder. You can remove and use from the freezer as needed. And as a powder, it’s easy to take out only what you need, saving the rest for later.
Here is to saving and storing your egg shells the whole year around. And even better, to having them on hand to power your plants and soil whenever you need! For more information on powering your garden soil with free resources, see our article How To Recharge Your Garden With Wood Ashes – The Best Way To Use Ashes In Fall & Winter!
Follow Our Facebook Page For Great Gardening Tips And Advice! This Is My Garden Facebook Page
This Is My Garden is a garden website created by gardeners, for gardeners. Jim and Mary Competti have been writing gardening, DIY and recipe articles and books and speaking for over 15 years from their 46 acre Ohio farm. They publish three articles every week, 52 weeks a year. Sign up today to follow via email, or follow along!
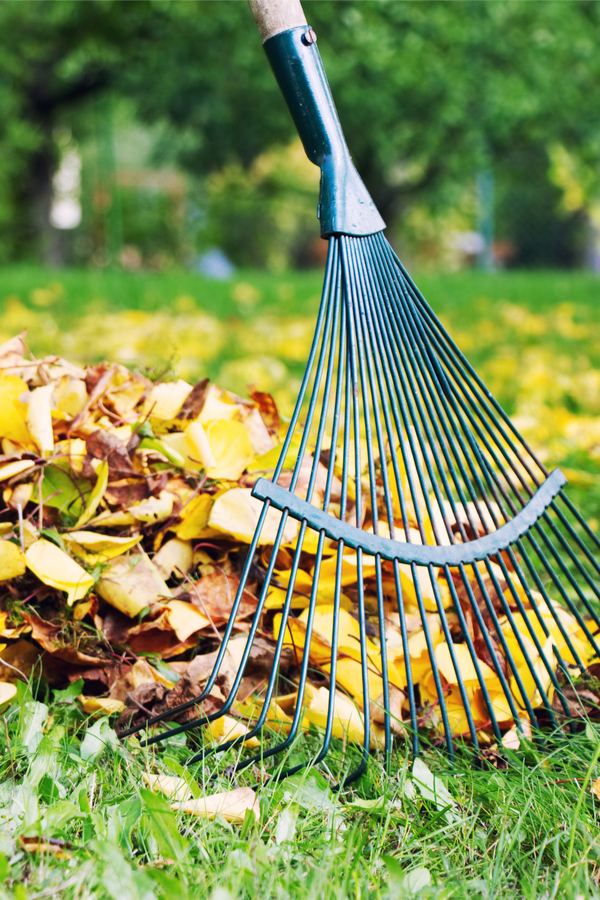
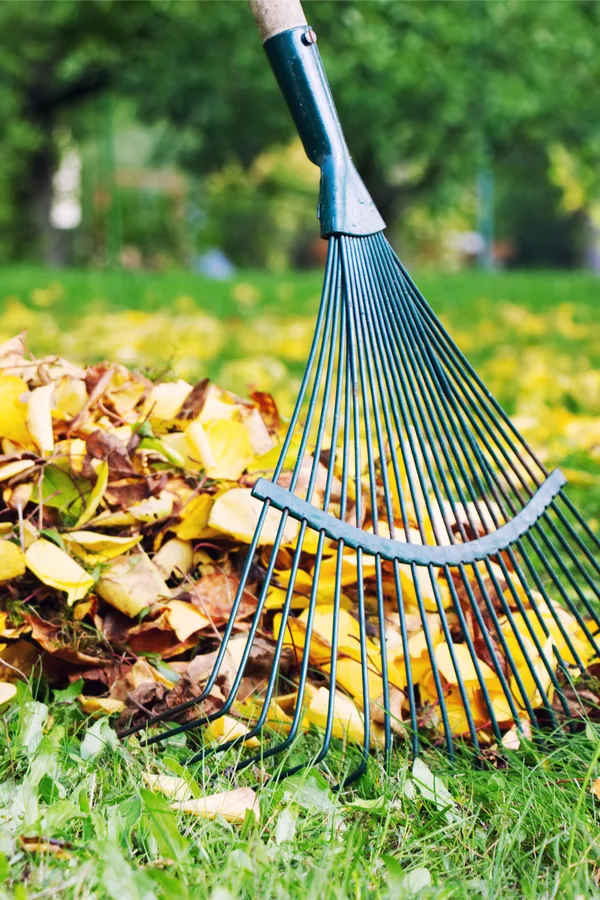
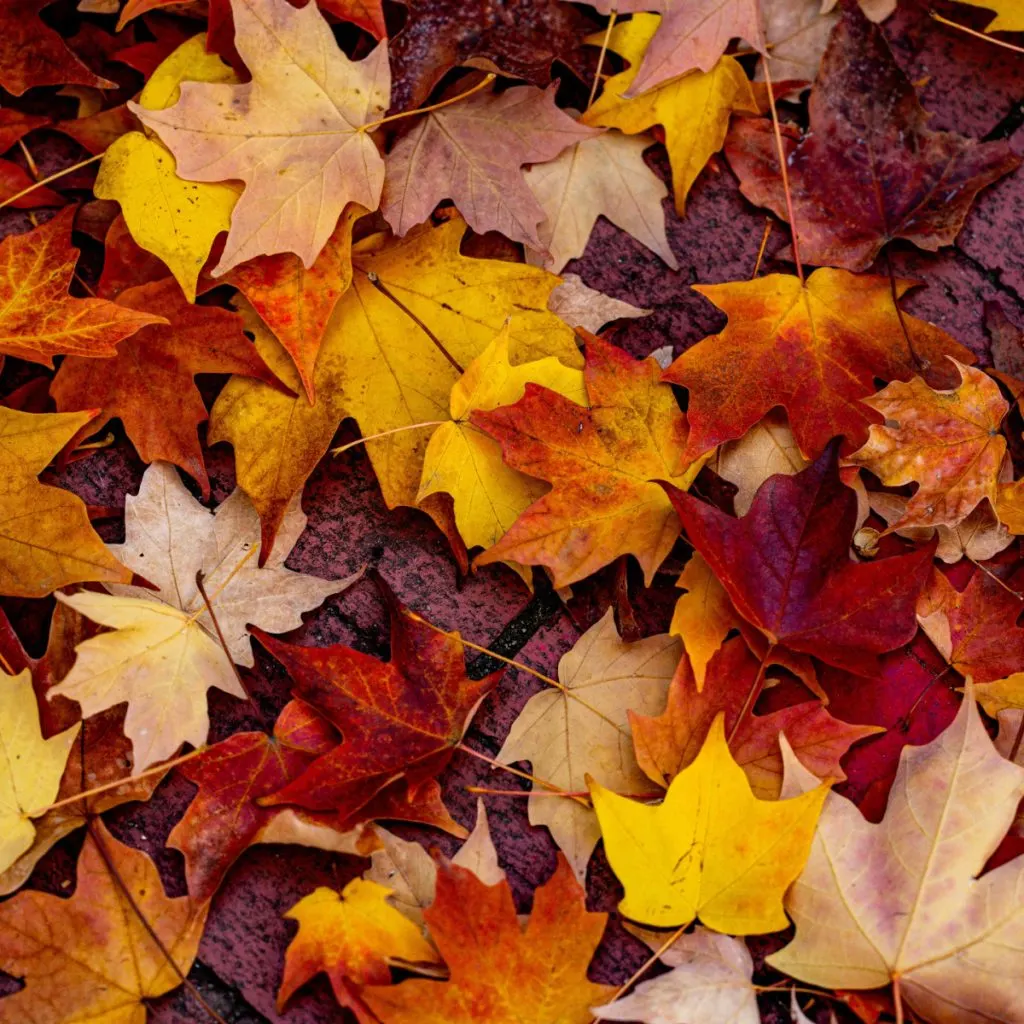
Did you know that one of the easiest and best methods to boost the health of the soil in your gardens and flowerbeds and protect the perennial plants you have growing in them is to use all of the leaves falling from your trees this fall?
Although raking and bagging leaves might feel like a dreaded task, leaves are actually a valuable resource. They can help nourish and protect your garden, flowerbeds, shrubs, and trees. And the best part? They’re completely free!
Leaves are packed with nutrients and trace minerals. As they break down, they return those nutrients to the soil, feeding your plants and making your soil healthier. Plus, they’re great as mulch to shield your plants and soil, especially over the winter.

Whether left whole, shredded, or mixed with grass clippings, there are so many ways to use leaves this fall. So, before you rake them out to the curb for to be whisked away – check out these easy ways to make the most of them in your garden!
Mulch and Protect Perennials, Roses, and Shrubs
Perennials, roses, and shrubs need protection from the harsh winter. And leaves are the perfect choice to use as a fantastic natural insulator!
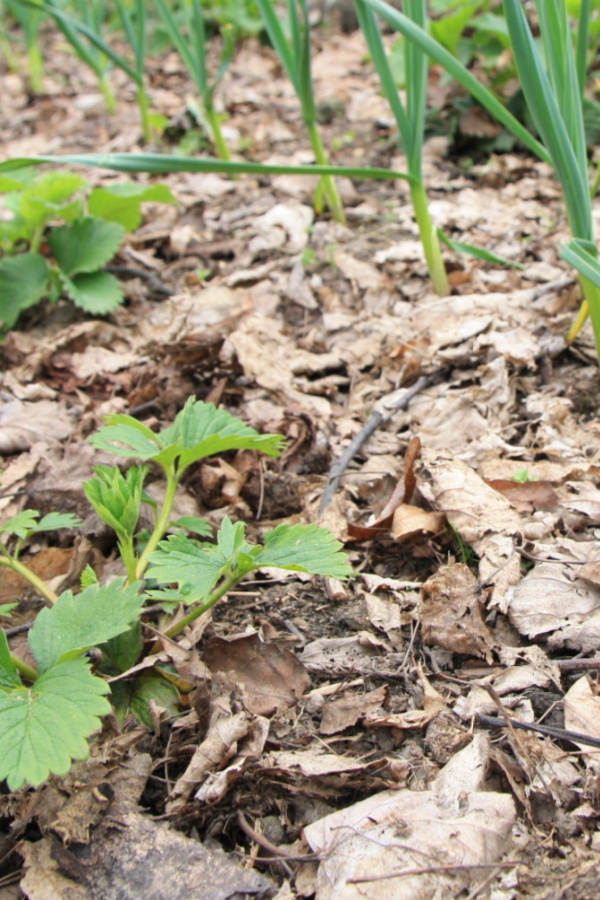
A thick layer of leaves (three to four inches deep) around the base of your plants can protect roots from constantly freezing and thawing. This is especially important during extreme temperature swings, where freezing and thawing can damage plants quite quickly.
On top of that, the layer of leaves helps keep weeds from growing around your plants, which means less competition for nutrients. Leaves can also protect cold-sensitive crops like garlic, onions, blueberries, strawberries and asparagus, keeping them safe through the winter.

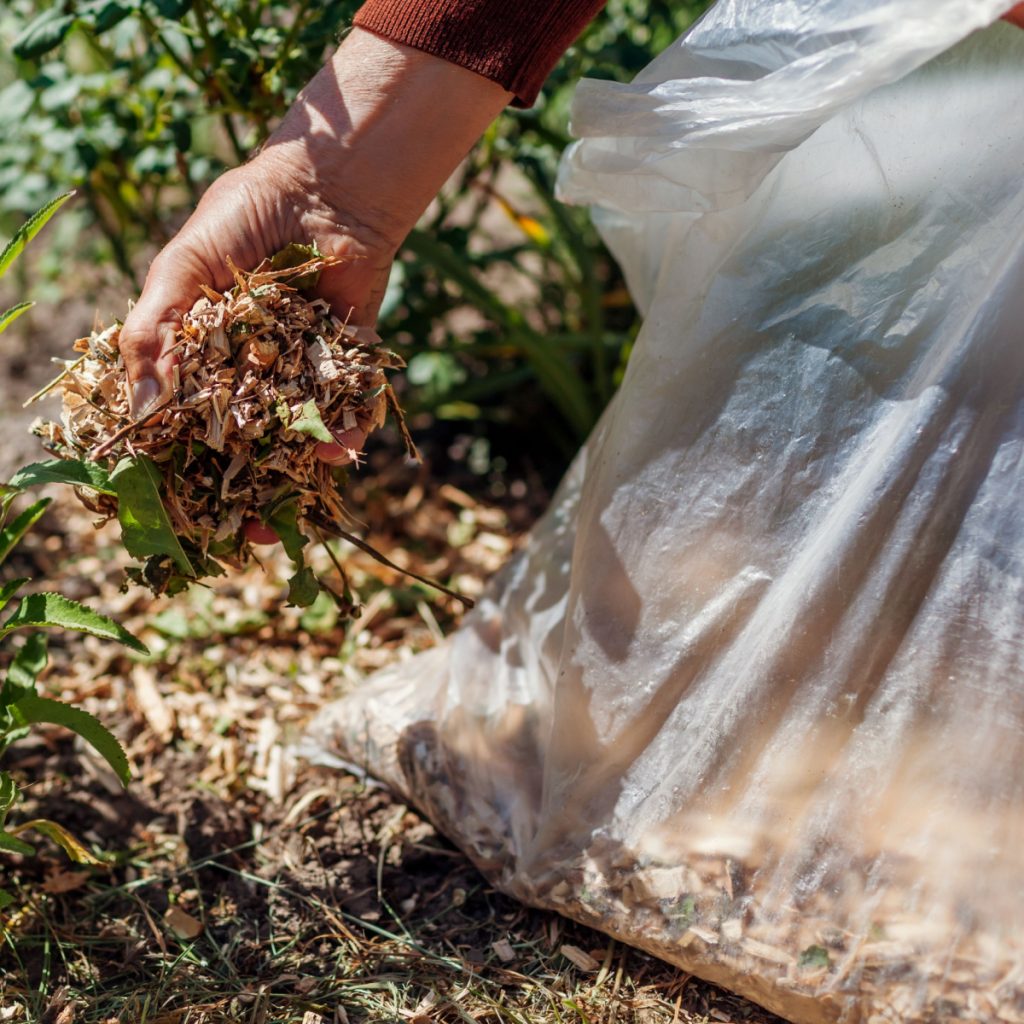
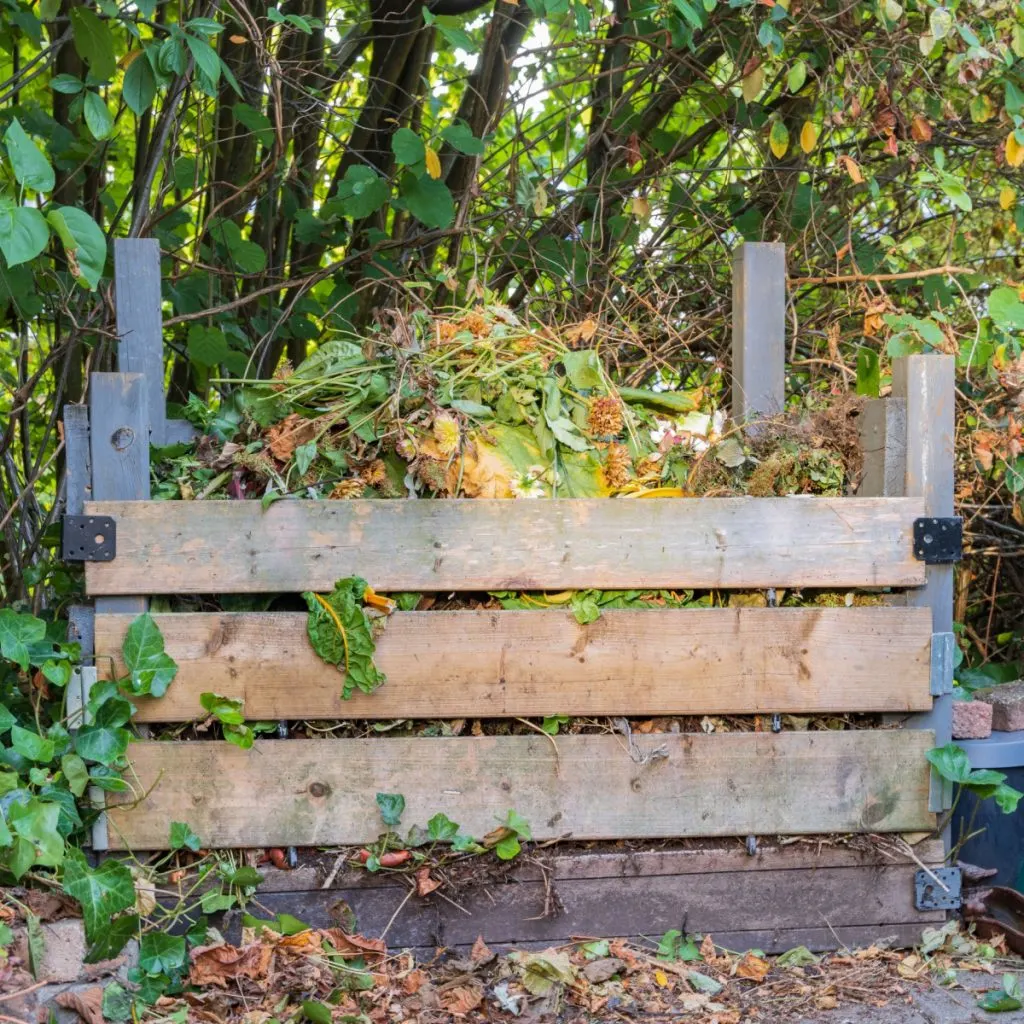
If you’ve been struggling to find enough materials for your compost pile, fall is the perfect time to change that! Fallen leaves provide an ideal base to create a big compost pile that can break down fast and be ready to use by next spring and summer.
Leaves are an excellent “brown”, carbon-rich material for composting. Since a good compost pile should have a balance of three to four parts “brown” for every part “green,” – leaves are the perfect solution.
Some leaves are better than others for composting. Maple, ash, birch, ornamental, and fruit tree leaves are great, while oak leaves should be added in smaller amounts to avoid making the compost too acidic. A good rule is to keep oak leaves to about 10% to 20% of the pile. See our article: 3 Leaves You Should Never Compost Or Use In Gardens & Flowerbeds!
To help leaves break down faster, always shred them before adding them to your compost pile. The smaller the pieces, the quicker they’ll decompose. You can easily shred them with a lawnmower. Adding some old compost or a compost starter to your pile is also important to speed up the process. Affiliate Link: Compost Starter


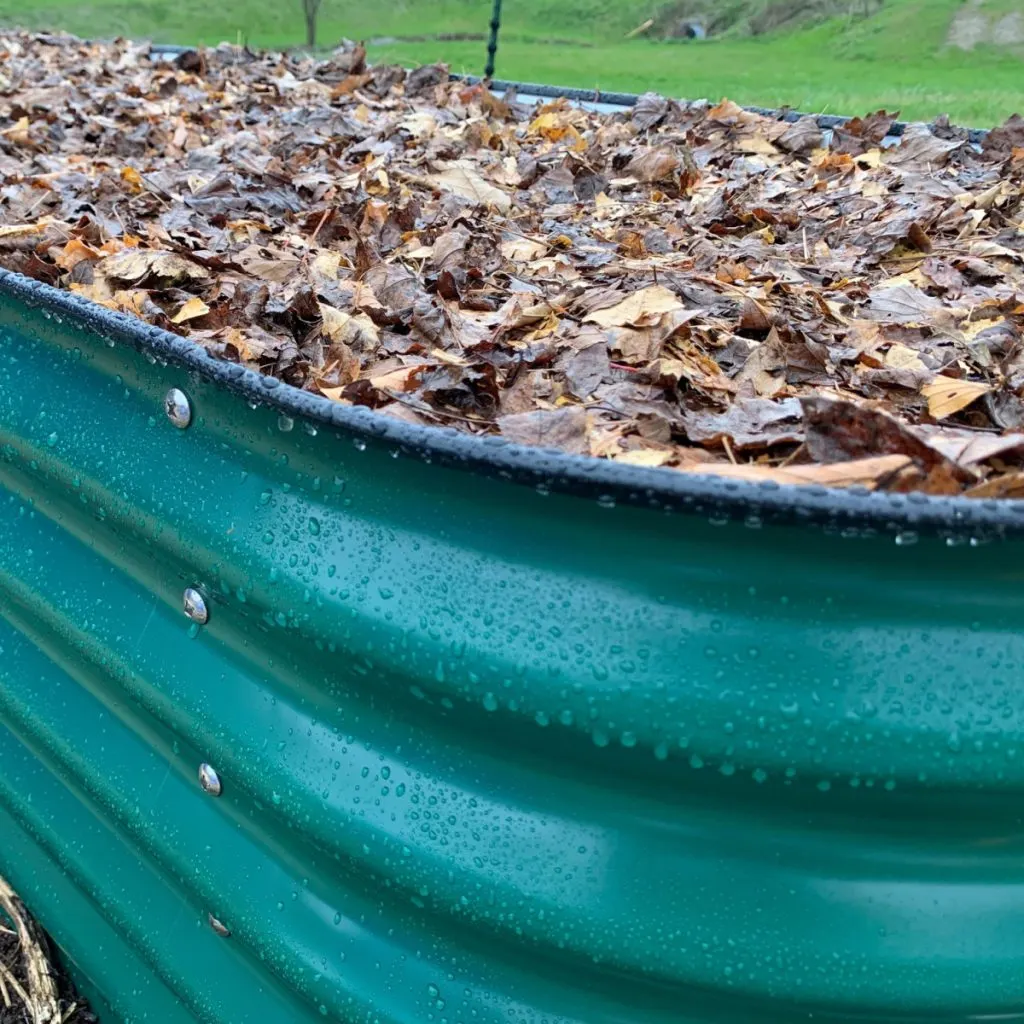
Don’t have time to plant a cover crop in your garden this fall? Or, are you looking for a great way to power and protect the soil in your raised beds? Leaves are the perfect substitute, and they’re free!
Leaving your soil bare over the winter can cause damage. Winter winds, rain, and snow can wash away your topsoil, and exposed soil can allow weed seeds to settle in and sprout next spring. By covering your garden or raised beds with a thick layer of leaves, you can protect it from both erosion and weeds.
When covering, start with a few inches of shredded leaves to add nutrients as they break down. Then, top it off with a layer of whole leaves to create a stronger barrier that will stay in place.
Next spring, you can mulch the whole leaves by mowing over them, or leave them on top as they are. For raised beds you can simply pull off the layer of protective whole leaves, or mulch them into the soil as well. They’ll break down over time and help enrich your soil with little effort on your part.
If you don’t have a compost pile, you can still use your leaves to make leaf mold. Leaf mold is an amazing, rich, soil-like material that helps improve soil structure and holds moisture. And it’s made entirely from leaves!

Unlike compost, leaf mold doesn’t heat up. Instead, the leaves slowly break down into a dark, crumbly material that’s perfect for using in your garden or flowerbeds. To make it, just pile up your leaves in a corner of your yard. For faster results, shred the leaves first.
Keep the pile moist and turn it every few weeks to help it decompose. Shredded leaves can turn into leaf mold in as little as six months, while whole leaves can take a year or more to break down.
Last but not least, it’s a great idea to shred and save some of those leaves for next spring! Shredded leaves can be a great addition to your spring garden. They can be mixed into planting holes, raised beds or containers to add nutrients and improve soil health.
Shred a large batch of leaves now and store them in a pile with a cover. By next spring, you’ll have a ready-to-use soil booster for your garden. Here is to using leaves in your gardens and flowerbeds this fall – not only is it a simple and natural way to boost your soil’s health this fall, but a great way to protect your plants too! For more tips on keeping your flowerbeds weed-free, see 3 Simple Tips That Will Keep Your Flowerbeds Weed Free This Year – Without Spraying! And for more information on fall care tips to keep your landscape looking great, be sure to check out: How To Plant Grass Seed In The Fall For A Thick Lawn Next Spring – 3 Big Secrets To Seeding!
Follow Our Facebook Page For Great Gardening Tips And Advice! This Is My Garden Facebook Page
This Is My Garden is a garden website created by gardeners, for gardeners. Jim and Mary Competti have been writing gardening, DIY and recipe articles and books and speaking for over 15 years from their 46 acre Ohio farm. They publish three articles every week, 52 weeks a year. Sign up today to follow via email, or follow along!
As wonderful as many of autumn’s falling leaves can be for home gardens, flowerbeds and compost piles – did you know that there are three leaf varieties you should never compost – or use in and around your garden and flowerbeds?
Unfortunately, every fall, many gardeners unknowingly fill their compost bins with leaves that can either poison future plants – or slow their compost pile’s ability to actively decompose. And many, times they also put those same harmful leaves around many of their plants as a winter mulch.
But although most leaves are wonderful for making compost and using as a mulch to protect and power plants, there are indeed a few leaves that can actually harm plants. In fact, in some cases, they can actually spell the end of the line for them. Which is exactly why knowing which leaves you can use and which you can’t when gardening is extremely important!

With that in mind – here is a look at three leaves you should leave out of your compost pile entirely – along with a few others to use in moderation.
At the top of today’s list are the leaves of the buckeye tree. Also known as a horse chestnut tree, the leaves of this tree should be avoided altogether when gardening – and for several reasons.
For starters, the waxy leaves of the tree are incredibly difficult to compost. With a protective coating, the leaves simply take forever to break down. But if that wasn’t bad enough, the leaves also contain a toxin that can cause all kinds of stomach discomfort.
Unfortunately, even though you don’t consume the leaves, when it is used to make compost or as a mulch around vegetable plants or fruit trees and bushes, the toxin can leach into the soil and into the fruit.
The toxin can actually be found in all parts of the tree, including the nuts it produces as well. It does take a large concentration to pass through to humans, but at the end of the day, it’s simply not worth the risk to use in the garden.

Another tree’s leaves to keep entirely out of your garden, flowerbeds and compost pile are the leaves from black walnut trees. And once again, it is because of a chemical that the tree produces and releases.
In the case of black walnut trees, the chemical (juglone) isn’t dangerous to humans, but to the livelihood of plants. And the list of plants affected by it is quite long! It includes common vegetable plants like tomato, pepper, asparagus and potato – along with peonies, lilacs, petunias and more. It can even be detrimental to many fruit bushes and trees as well.
So what does juglone do to these plants? When it is present around the root zones of affected plants, it acts as a poison. And it can all but kill plants in a matter of weeks.
Juglone can be found in the roots of black walnut trees as well as their stems, buds and nut hulls. This is exactly why you never want to grow black walnut trees within 50 feet of gardens or flowerbeds. The roots of the tree will all but make growing plants nearby impossible.
There are also trace amounts of the toxin in the leaves as well. And when you factor in that when raking the leaves up, you can also rake up nuts and shells that have even more of the chemical – it’s simply best to leave black walnut leaves out.
Why? Because in the compost pile, the chemical will pass right through to the plants wherever you use the compost. And the same goes for when using the leaves as a mulch.
The leaves of beech trees are not poisonous to humans, pets or to plants – but they do contain a compound that makes them very unattractive to use for gardening.
Beech trees contain high amounts of lignin – which acts as a preservative for the leaves. Beech tree leaves can take forever to break down. Because of that, when used in compost piles, they can slow the entire piles’ decomposition process down.
In fact, compost piles with beech tree leaves can take four to five times the normal amount of time to break down! See our article: How To Compost Leaves Fast – 4 Secrets To Turn Leaves Into Great Compost This Fall!
In addition to the three leaf types above, there are a couple of other tree leaves to be cautious about using. And at the top of that list are the leaves from oak trees.
Oak tree leaves are more acidic than other leaves. If you use too many around non-acidic loving plants, it can change the pH of the soil. That in turn can harm the plants. The same goes for using oak leaves in a compost pile. They are good to use, but always make sure to keep the pile at less than 10% oak leaves to not affect the pH of the finished compost.
Another two trees to only use in moderation are holly and magnolia trees. Like beech trees, they also contain higher amounts of lignin as well. If composting these leaves, always shred the leaves first to help decomposition. It’s also best to never use more than 10% of them in a compost pile.
As for trees that are safe to use at will – maple, ash, birch, cottonwood, poplar, elm cherry, and the leaves of fruit tree leaves are all excellent for using in the garden, in flowerbeds and in compost piles!
Follow Our Facebook Page For Great Gardening Tips And Advice! This Is My Garden Facebook Page
This Is My Garden is a garden website created by gardeners, for gardeners. Jim and Mary Competti have been writing gardening, DIY and recipe articles and books and speaking for over 15 years from their 46 acre Ohio farm. They publish three articles every week, 52 weeks a year. Sign up today to follow via email, or follow along!
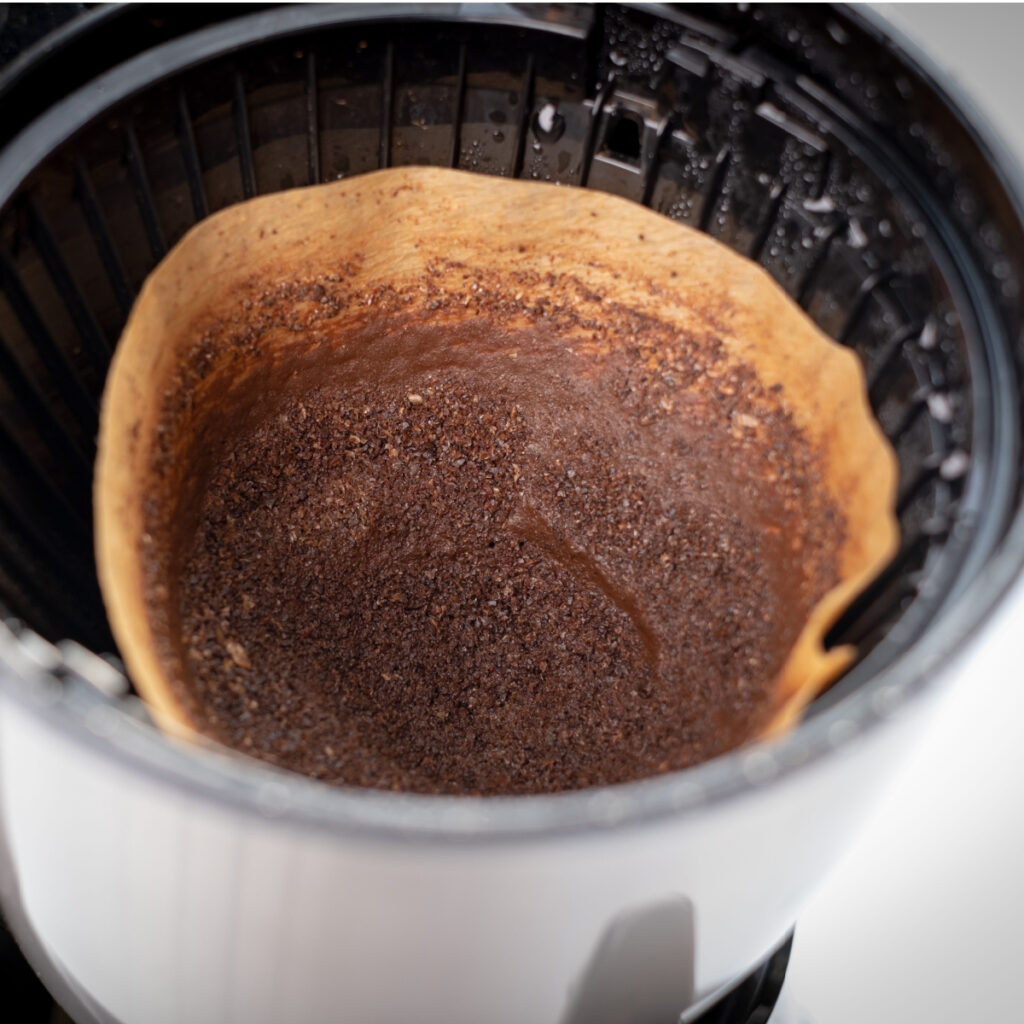
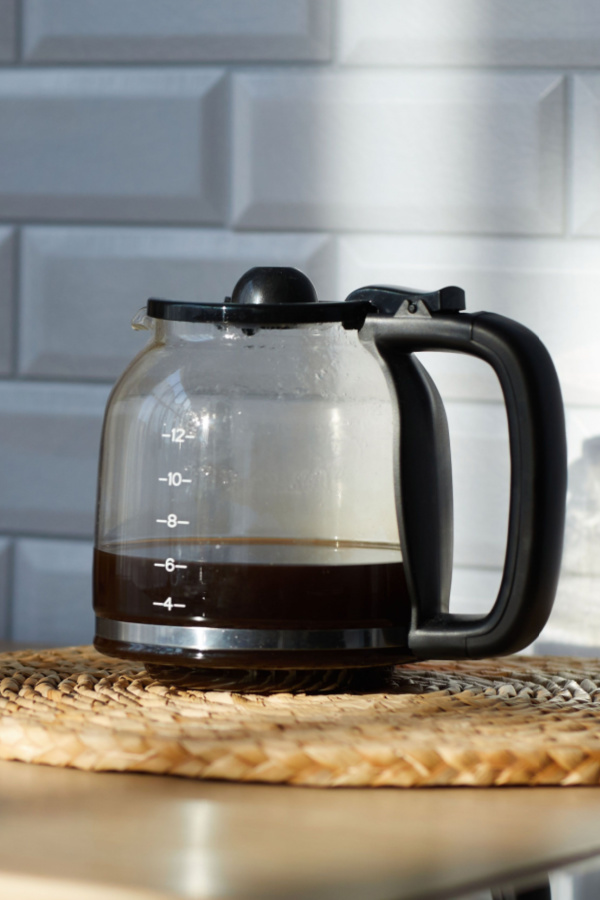
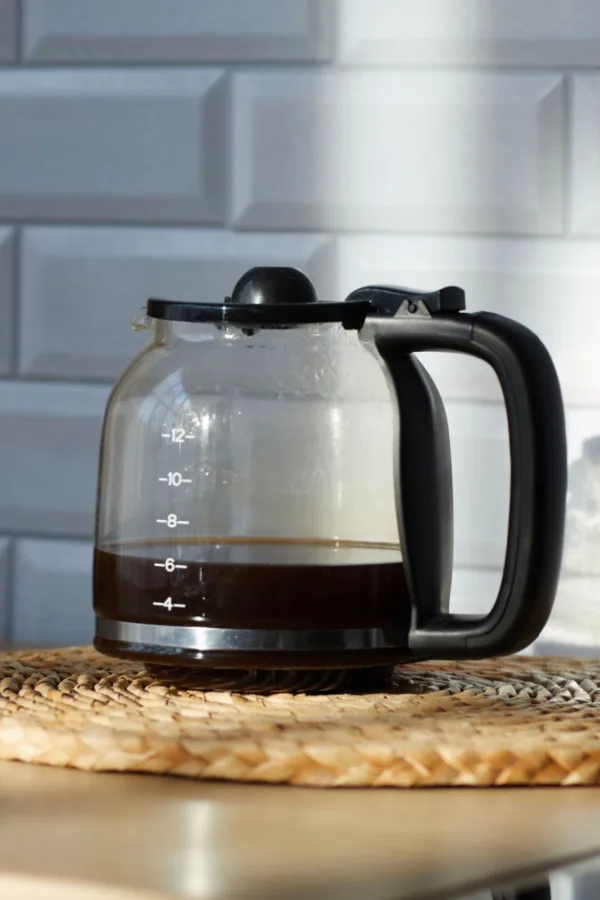
Looking for few ways to use all of those spent coffee grounds to good use during the cooler fall months? Believe it or not, instead of simply tossing the grounds into the trash, you can use them to power your soil, improve your lawn, and keep pests away!
Coffee is definitely an important morning staple for many people. This is especially the case during fall months when the iced coffees from summer are starting to fade to the background as warm, steaming cups of brew help combat the cooler mornings.
But all of those grounds that come from that coffee are valuable to gardeners. And in so many ways! And with an overabundance of coffee being made as the weather turns cooler – it’s time to put all of those grounds to great use!
Before we get started with the list, it’s important to note that these suggestions only work with spent coffee grounds. You never want to use fresh coffee grounds for a couple of reasons.
First, it would be a waste of good coffee! Second, it can get rather expensive to purchase coffee grounds just for the sole benefit of using them around your property. But most importantly of all, fresh grounds contain a higher acidity level compared to spent grounds – and that acidity can overpower or damage plants if you aren’t careful.
And even if you aren’t a coffee drinker – don’t let that stop you from getting your hands on some powerful grounds. Consider asking friends or family members who are if they will collect their used grounds for you. Most likely, they will be more than willing – if they aren’t already using them themselves!
You can also visit local coffee shops and restaurants to see if you can have their used grounds as well. Many local and chain coffee shops save grounds for those who ask – and it’s a great way to get your hands on a larger amount of grounds all at once.
An entire season of growing vegetables and flowers can really take a toll on the soil in raised beds. Not only have the plants likely depleted it completely of nutrients and resources, but the overall texture and structure of the soil has changed too.
This can make raised bed soil dry, crumbly and unable to support growing plants another season. The best way to fix this is by adding soil supplements, and spent coffee grounds are a great one!
Coffee grounds help to recharge and fertilize the soil by adding trace nutrients. At the same time, the grounds work to also help loosen the soil and improve its structure. Coffee grounds are also great for absorbing moisture which will really come in handy in the spring to keep the soil moist.
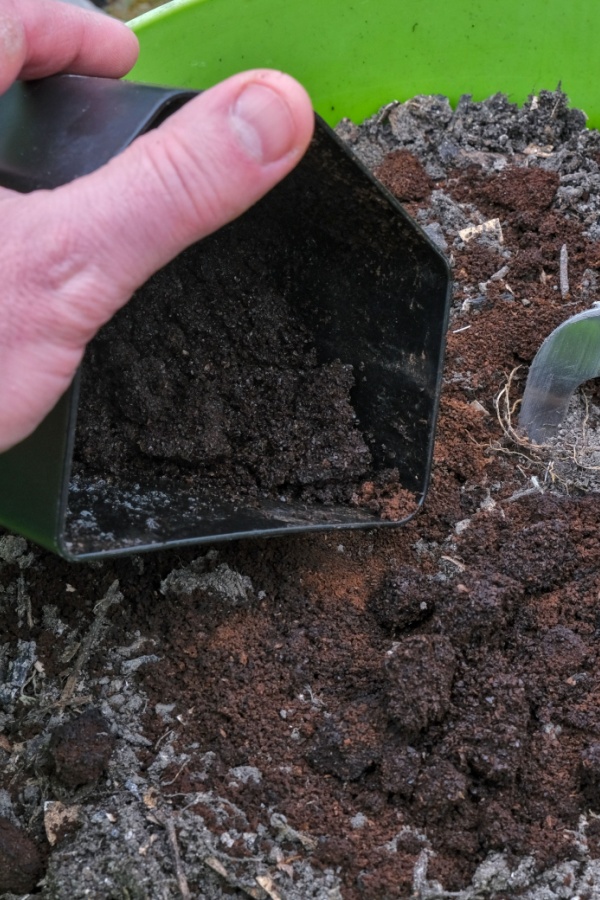

To use, simply sprinkle the grounds right on top of the soil. If you have a filter, you can bury it with the grounds a few inches down and all will decompose to help regenerate the soil. As for how much you can use, 2 to 3 of grounds per square foot is ideal – but even lesser amounts will help!
Compost piles need a good mixture of both brown and green materials. Brown materials help to add carbon to home piles as well as plenty of organic materials and all kinds of nutrients.
Green materials, on the other hand, are full of nitrogen. Their job is to help heat compost piles up quickly so the materials can be broken down faster. As it turns out, coffee grounds are an excellent source of “green materials” – and they can power up the heat in a compost pile quickly.
Simply add your spent coffee grounds to your home compost pile. Be sure to mix the pile at least weekly if not twice a week to speed up the decomposition process.
Coffee grounds are not just great for raised bed soil. They are also perfect for raking into lawns to help fertilize the grass and add organic matter to the top layer of the soil.

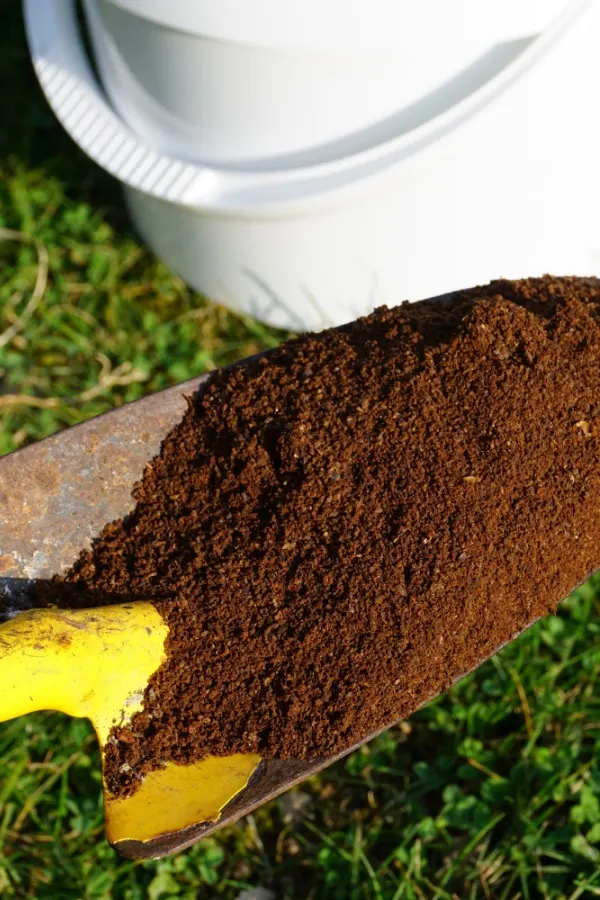
Spent grounds are filled with phosphorus, nitrogen, and other trace minerals. These minerals are vital for healthy, lush lawns. When raked into lawns, the grounds slowly break down, leeching these nutrients into the soil – much like a synthetic fertilizer would be but without all the chemicals.
Coffee grounds are also great for earthworms. As the worms travel through the soil, they consume the easily digestible grounds. In return, they create worm castings while also working to aerate the soil at the same time. See: How To Use Worm Castings – The Best Fertilizer For Flowers & Veggies!
Lastly, did you know that you can use spent coffee grounds as an excellent mosquito repellent? Even though the temperatures are dropping, mosquitoes are still out in full force this time of year.
While there are several commercial repellents on the market today, they all come with their own risks. Not only that, but they can get rather expensive as well! But instead, you can use coffee grounds to keep mosquitoes away and other pests like bees and wasps. This is mainly due to the fact that these pests are all repelled by the strong scent of coffee.
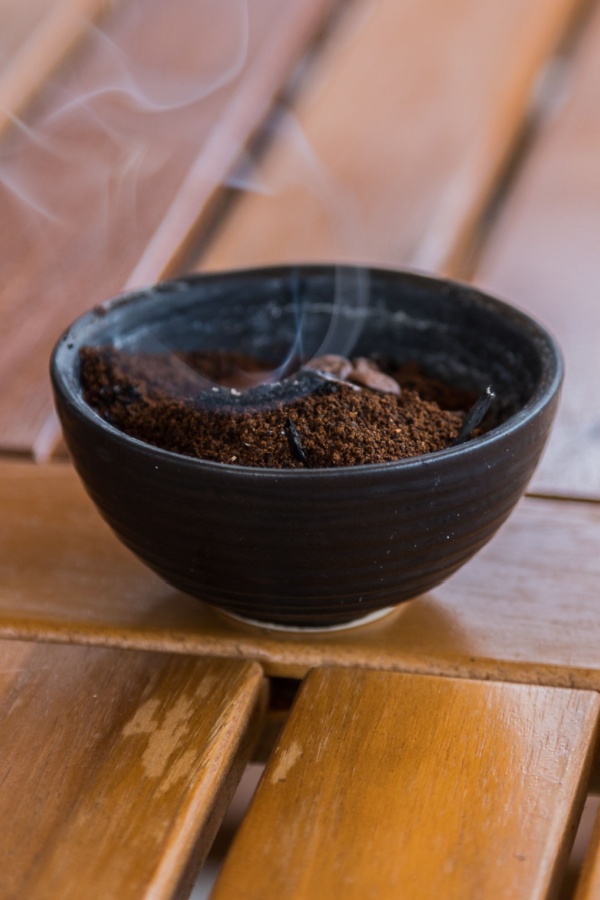

While spent grounds can work by themselves, their scent is even more potent when you burn them. The scent combined with the smoke produced helps to keep mosquitoes away from you and the surrounding area.
To burn coffee grounds, start with dry grounds. After making your coffee, place the grounds in a covered shallow bowl or plate to cool and dry. Once dry, burn the grounds much like you would incense on a heat-resistant plate or bowl.
Here’s to putting your spent coffee grounds to use this fall to power and protect your home instead of simply adding them to landfills!
Follow Our Facebook Page For Great Gardening Tips And Advice! This Is My Garden Facebook Page
This Is My Garden is a garden website created by gardeners, for gardeners. Jim and Mary Competti have been writing gardening, DIY and recipe articles and books and speaking for over 15 years from their 46 acre Ohio farm. They publish three articles every week, 52 weeks a year. Sign up today to follow via email, or follow along!
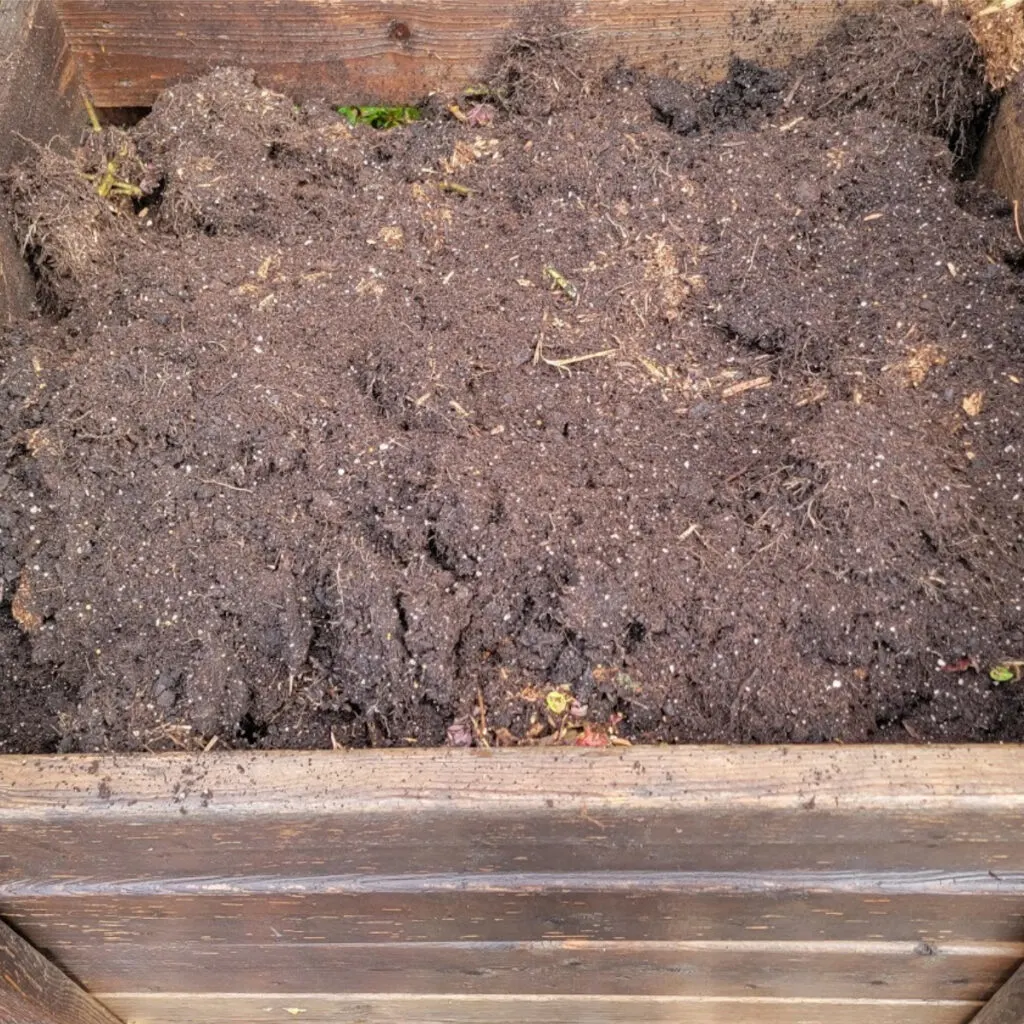
Looking to create the perfect fall compost pile – and have loads of incredible compost ready for all of your planting needs next spring and summer?
When it comes to getting your garden and flowerbeds to produce and grow better than ever, compost is the answer. Whether mixing it into the planting holes of vegetable plants, annuals or perennials, or adding it to potting soil for hanging baskets and container plants, compost helps provide vital nutrients to young plants.
In addition, it helps create better soil structure and improves drainage, all while helping the roots of plants retain moisture more easily. One thing is for sure, the more compost you can have on hand in the spring, the better. And the easiest way to do that is to create a fast working pile this fall!

The good news is that fall might just be the easiest of all times to find all the materials you need to put together the perfect compost pile. Not only is there a wide variety of excellent composting materials available, they can be found with ease. And even better, quite often in large quantities!
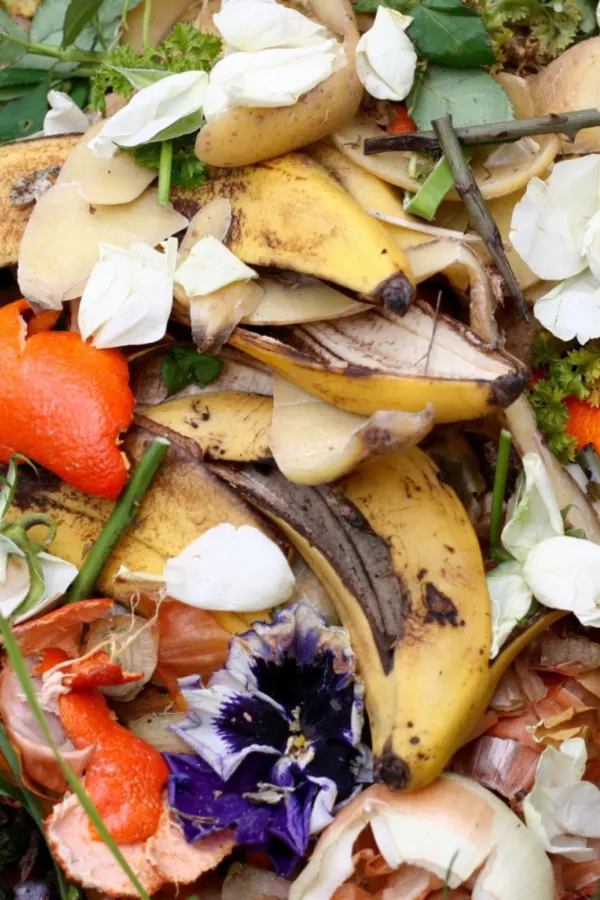
From falling leaves to spent plants from vegetable and flower gardens, there are always plenty of incredible ingredients at the ready throughout fall. Especially when you add in the soil and spent foliage from summer’s hanging basket and container plants, grass clippings from the yard, and vegetable peels and kitchen scraps.
Together all of these materials can create the perfect mix of ingredients that heat up quickly and break down fast. But the real secret to success is getting that mix just right – and that is what today’s article is all about!
What you put in your compost pile and how you put it in will make a big difference in how quickly you will have finished compost.

If a compost pile is made up entirely of dry, brown materials such as leaves, sticks and dead plant material, it can take a long time to break down. Likewise, if it is made up of all “green” materials such as grass clippings, decaying fruit, manure or coffee grounds, it can also take months if not years to totally decompose.
But when you get the right mix of both, the magic happens. That’s because the pile has a good ratio of dry and wet materials to have just enough moisture and energy to produce heat, but not so much that it suffocates it and slows the decomposition. Sound complicated? It’s not!
For a fast working fall pile, the simple secret is to use a ratio of nearly 4 parts dry materials to one part green. As an example, if you add four buckets or bags of shredded leaves, one bucket or bag of greens should go in too.
But here is the real secret to a fast pile – whenever you add materials, make them as small as you can get them. Why? Because the smaller the ingredients going in, the faster they will break down. And that means your compost will be ready to use by spring.


It’s also important to keep your pile at the right size. For best results, a pile around 3′ x 3′ x 3′ has enough mass to heat up, but is still small enough to maintain with ease. (For easy DIY compost bins – check out our DIY 3’x3′ Single & Double Compost Bin Plans)
Finally, when creating a fall pile that you want to use the following spring, it’s important to try to make the pile all at once or over just a few short weeks. That allows it to heat up, begin decomposition, and have enough time to be ready by spring. Unfortunately, if you keep adding materials, it simply won’t be ready.
With that in mind, here is a look at some of the best fall materials to use to get that pile started!
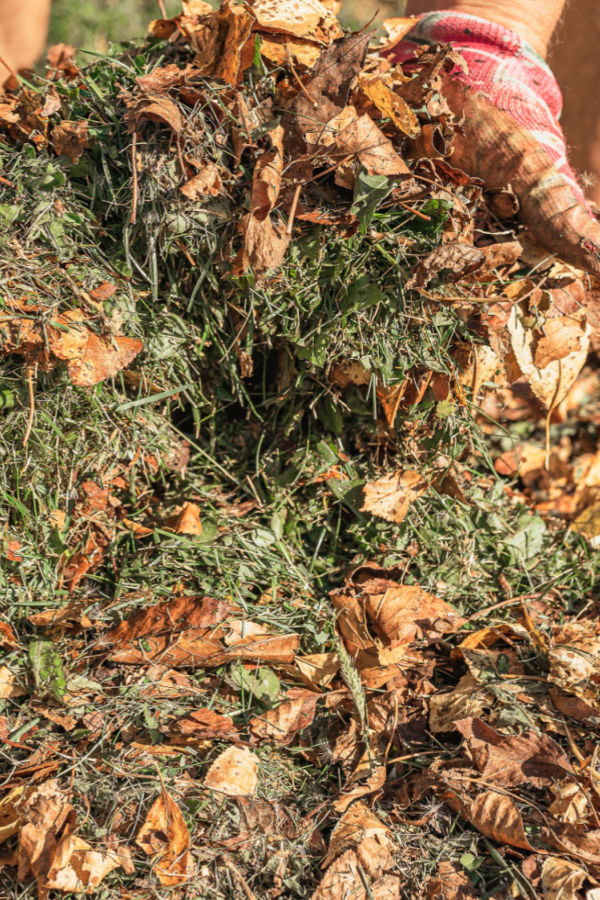
There is no better easier way to build a great base for a fall compost pile than with leaves. Not only are they abundant, but they can be easily gathered. Even if you don’t have trees in your back yard.
Take a drive through any wooded area this time of year, and you will find mounds of leaves for the taking. Many times, they are already bagged and at the curb for your convenience!
The key to composting leaves is to shred them before putting them into the pile. For a quick shred, use a push or riding mower. In addition, select leaves for composting that are well balanced in nutrients such as maple, ash and fruit tree leaves.
It’s important to avoid using too many oak leaves in your pile as they can make the pile more acidic. Black locust and chestnut leaves should be kept out of a compost pile completely due to their toxicity to vegetable plants.
Old flower pots and container plants and soil are one of the best ingredients to add to a fall pile. The soil will help to add density and the spent foliage from the plants breaks down quickly.
Green grass clippings (fresh cut grass) add both nitrogen and moisture to a pile. Mix them in well with the ingredients to heat it up fast. You can actually add grass clippings during the first few weeks after you build your pile. This can help greatly in keeping moisture in.
Grass clippings break down quick, so they will still have time before spring to completely decompose. Do not add clippings if you have your yard treated chemically. It can create compost that can contain herbicides that can harm or even kill plants.

As you clean out your fall garden crops, be sure to chop and add them to your pile. Fall crops that have bolted such as lettuce, spinach, and other greens are great “greens” to add to the pile. So are corn stalks, pumpkin and gourd vines.
One thing to avoid is tomato and pepper plants and their fruit. They simply carry too much risk for disease, and the seeds from the fruit can sprout nonstop next year! See our article: How To Dispose Of Tomato Plants – What To Do When Tomato Plants Die
Be sure to include all of the kitchen scraps from your vegetable garden and cooking. Potato peels, cucumbers peels and vegetable scraps are great green materials. And don’t forget those coffee grounds – they are perfect for helping to heat up a pile.
And while you are at it, throw in the coffee filter too. Nearly all paper coffee filters compost with ease, and with non-bleached filters, there is no worry at all. (For more tips on using those spent coffee grounds, see: 4 Great Ways To Use Coffee Grounds In The Fall – Recharge Soil, Fertilize & More!)
Follow Our Facebook Page For Great Gardening Tips And Advice! This Is My Garden Facebook Page
This Is My Garden is a garden website created by gardeners, for gardeners. Jim and Mary Competti have been writing gardening, DIY and recipe articles and books and speaking for over 15 years from their 46 acre Ohio farm. They publish three articles every week, 52 weeks a year. Sign up today to follow via email, or follow along!
Looking to create a compost pile this summer that heats up fast and makes great use of all of those vegetable and flower scraps coming from your garden, flowerbeds and kitchen?
When it comes to finding an abundance of materials to build a compost pile, it doesn’t get any better than in the middle of summer! Whether it’s scraps and peels from the garden’s harvest, or plenty of trimmings from the yard, flowerbeds and landscape, there is a near endless supply of materials that are perfect for creating a compost pile.
Even better, not only are materials easy to find, the warm temperatures and increased humidity during the summer months also make it easy for piles to heat up and decompose rapidly. In fact, so quickly that if you create your pile just right, you can easily have finished compost ready for fall planting and to help recharge your bed soil for next spring.


When it comes right down to it, there are three simple secrets to building a summer compost pile that will heat up fast and decompose quickly. And when all three are met, great things happen to a compost pile.
Not only will your pile heat up quickly – it will also heat to a higher temperature. That allows for the materials to decompose far more rapidly. Even more, the higher internal temperature also helps to kill off any weed seeds and pathogens that might be in the mix, making your finished compost safe for using anywhere.
With creating the perfect summer compost pile in mind – here is a look at the 3 simple secrets to turn all of your summer plant material into black gold – fast!
A hot, fast-working compost pile all starts with having the right mixture of carbon and nitrogen based materials. Carbon materials are dry materials such as old leaves, straw, wood, ash, wood chips and dry grass. These are the more lifeless or “brown” materials that make up a compost pile.

Nitrogen materials on the other hand are the hot or “green” materials of a pile. They are responsible for activating a pile and heating it up. Great sources of nitrogen are fresh vegetable scraps, green lawn clippings, coffee grounds and animal manures.
To create a pile that heats up and decomposes rapidly, you need to have the right ratio of materials. A “perfect” mix for a hot pile should fall somewhere close to the range of 4 parts carbon for every 1 part nitrogen.
When starting a fast pile, it’s best to add and mix all of your materials at once. If you continue to add materials over time, like done in a traditional pile, it will take longer to continually decompose the new addition of ingredients. The good news is that in the summer, it’s easy to find enough to start a big single separate pile!
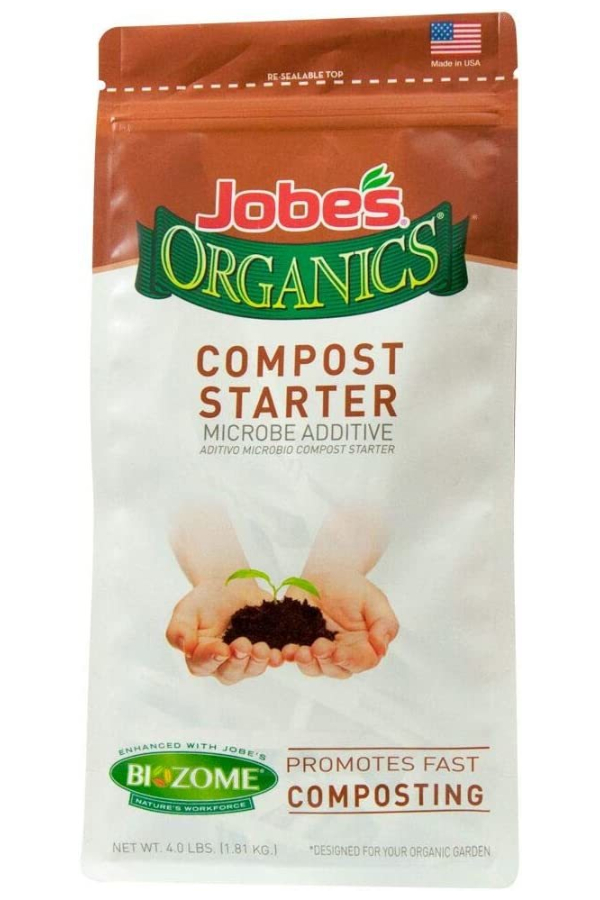
Finally, make sure you are starting your compost with a helping hand. There are two ways to do this. The first is to add a few shovels of compost from an old pile. If you don’t have that, you can also add in a compost starter.
Either way, you will introduce ready-to-go bacteria and organisms into the pile. This is a huge key in letting your pile start working right from the start! Affiliate Product Link: Jobes Compost Starter
Once you have the right mix of materials, it is time to build the pile. A compost pile needs to be large enough in size to generate good heat, but manageable enough for you to work. The perfect size for a backyard compost pile is right around 3′ x 3′.
This allows enough materials to allow for good heat, but also makes it easy to turn and keep well-maintained. But most importantly of all, for a faster working pile, you need materials to be as small as possible to speed decomposition. The smaller the better!
Always shred or chop all ingredients prior to adding to the pile. The more you shred the ingredients, the quicker they break down. In fact, if ingredients are broken down to 1/2″ pieces or less, finished compost can happen in as little as 30 to 60 days!
A great example are leaves. Whole leaves can take two years or more to completely break down in a traditional compost pile. When shredded and added to a hot pile however, they can break down in as little as 3 to 4 weeks.
Chop materials by hand, or use a lawn mower or push mower to take care of the task. An old push mower with a bagging attachment makes for an excellent shredder.

Once you have the right size and mix of materials, success all boils down to keeping the pile active with consistent moisture and oxygen.
In order to create heat, a compost pile needs both water and oxygen. Without both, a pile will decompose slowly and in some cases even sit stagnant. In fact, when most piles begin to smell foul, it’s usually a result of a lack of these 2 critical components.
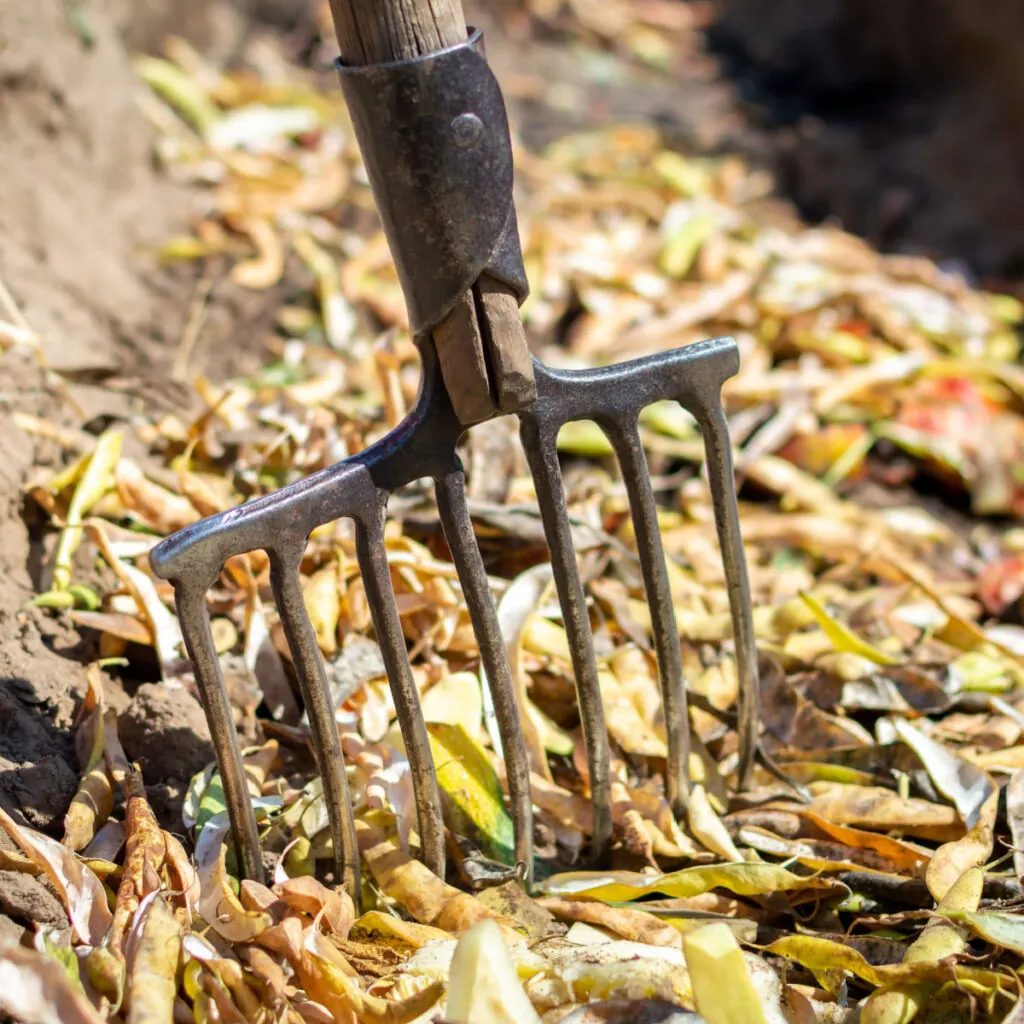
By turning a compost pile every day or two with a pitchfork or shovel, you provide oxygen to all parts of the pile. It allows the organisms that decompose your pile to remain alive and well.
A pile also needs water in much the same way it needs oxygen. Compost should be damp and moist to the touch. If it dries out completely, it stops generating heat, and the decomposition process stops as well.
Keep your pile moist, adding water before it dries out completely. Be careful though of adding too much water. If a pile becomes too wet, it can have an adverse effect and stop working. A proper compost pile should feel like a damp sponge when you touch it. Anything less is not enough to keep the pile going strong. And anything more can stop the decaying process as well.
Here is to creating compost fast this summer – and to powering your soil and plants to new heights! For more on composting in the cooler months of winter, be sure to check out our article : How To Trench Compost In Winter – Composting Made Easy, All Without A Pile!
Follow Our Facebook Page For Great Gardening Tips And Advice! This Is My Garden Facebook Page
This Is My Garden is a garden website created by gardeners, for gardeners. Jim and Mary Competti have been writing gardening, DIY and recipe articles and books and speaking for over 15 years from their 46 acre Ohio farm. They publish three articles every week, 52 weeks a year. Sign up today to follow via email, or follow along!
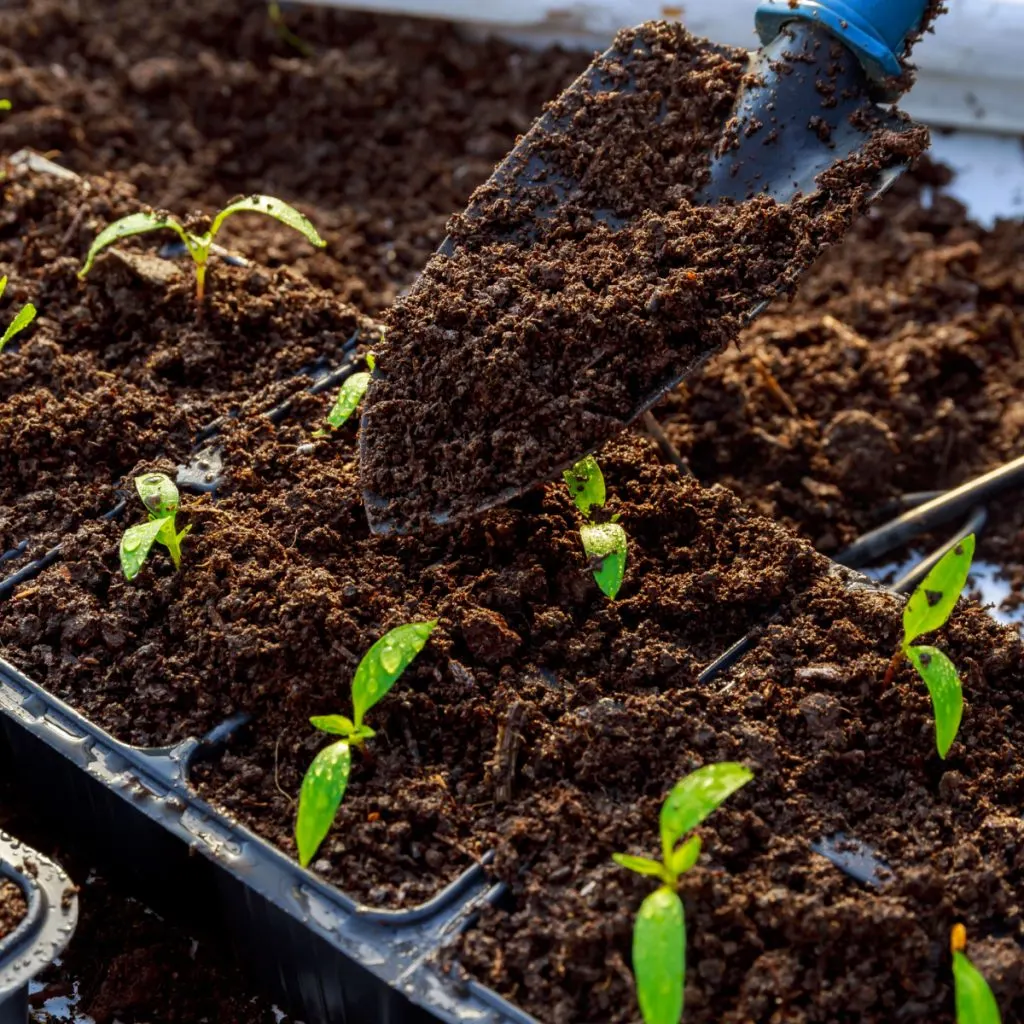
One of the best ways to grow healthy, strong plants from seed is to start them in loose, healthy and fertile soil – and there is no better way to do that than to make your own incredible homemade seed starting soil right at home!
Growing your own transplants from seed is one of the best ways to save money when gardening. Even better, it gives you the opportunity to grow all kinds of amazing plants you can’t find locally. After all, most nurseries and plant stores are only going to carry the most popular of plants.
But perhaps best of all, growing your own plants from seed lets you create incredibly strong and healthy transplants that are ready to grow like crazy when you plant them outdoors. And that process all begins with planting your seeds in the best soil possible.

One of the biggest mistakes gardeners make when trying to start plants indoors is to use the wrong soil. Top soil or soil from the garden are both too dense and heavy for good germination. These heavier soils don’t allow seeds or seedlings to easily absorb nutrients. They also usually hold too much water, making it easy for seeds to rot before they ever germinate.
Unfortunately, potting soil isn’t the best solution either. Although potting soil contains more nutrients and is definitely lighter than regular garden dirt and topsoil, it still isn’t light enough for starting and growing seedlings. Nor does it contain the best power to promote early seed growth.
The good news is that potting soil’s lighter structure and density are a great starting point for creating an excellent homemade seed starting soil. And by simply adding just a few additional ingredients to potting soil, you can easily turn it into an incredible homemade seed starting soil. One that is ideal for quick germination – and healthy fast root growth!
Although there are a few good seed starting soil mixes available commercially, they can be quite pricey. But by mixing together a good potting soil mix with 3 additional all-natural ingredients, you can make the best seed starting soil around – and for far less!

Even better, not only will making your own mix save you a bit of cash compared to store bought brands, it also allows you to create a 100% organic mix. That, of course, can be a great peace of mind when growing vegetable plants from seed.
With growing success in mind, here is a look at the 4 special ingredients needed to make perfect seed starting soil – and how to mix them together to get your seeds off to an incredible start!
A great seed starting soil all starts with potting soil. Potting soil is the perfect base for creating a rich, healthy seed starting soil mix.
Start by selecting a good all-purpose potting soil. Be sure that it does not include any fertilizers in the mix. Strong fertilizers can actually hurt young seedlings more than help. Young seedlings require a lighter, slow-release fertilizer to allow for even growth.
If too much fertilizer is present, at best, it will lead to plants with excessive early foliage growth but weak stems. Unfortunately, too much fertilizer is more likely to be fatal to young seedlings.
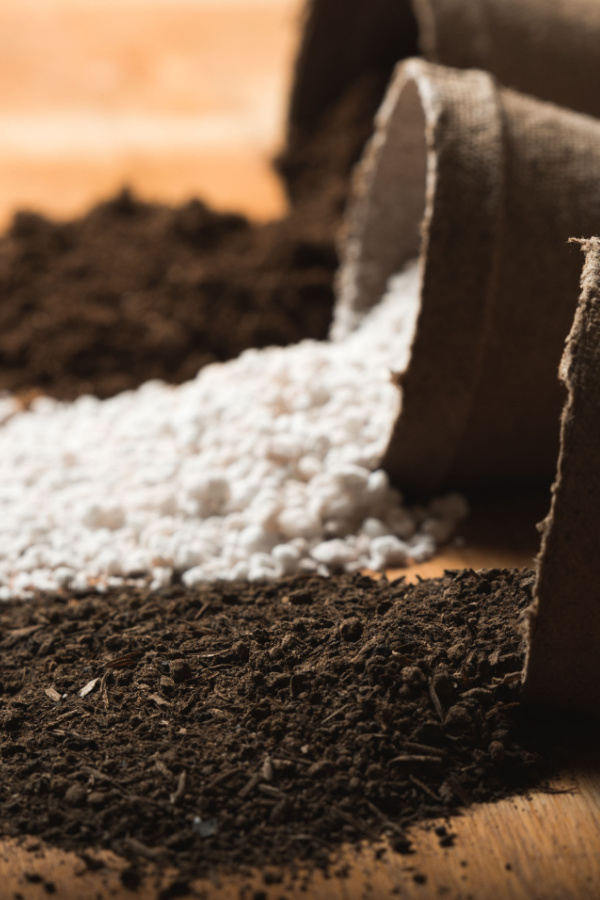
Perlite is an all-natural substance made from volcanic glass. When exposed to extremely high temperatures (1500+ degrees), perlite puffs into an airy, lightweight substance that looks quite similar to bits of white styrofoam. And it happens to be a perfect ingredient for making great seed starting soil!
Perlite lightens the soil weight tremendously, all while creating air channels in the soil for water and air. Both of these qualities are vital to strong seedling growth. It is exactly why you will see perlite as an ingredient in many potting soils as well.
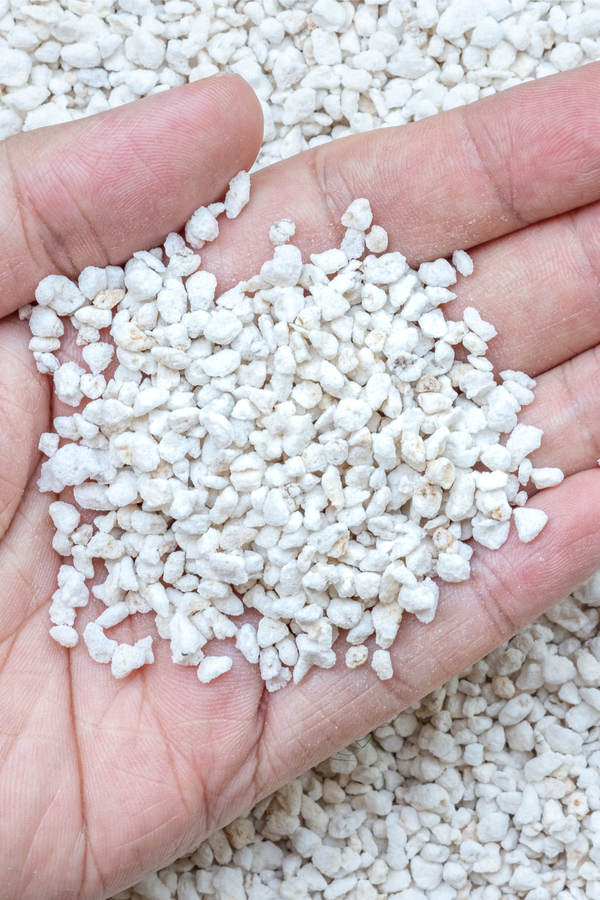
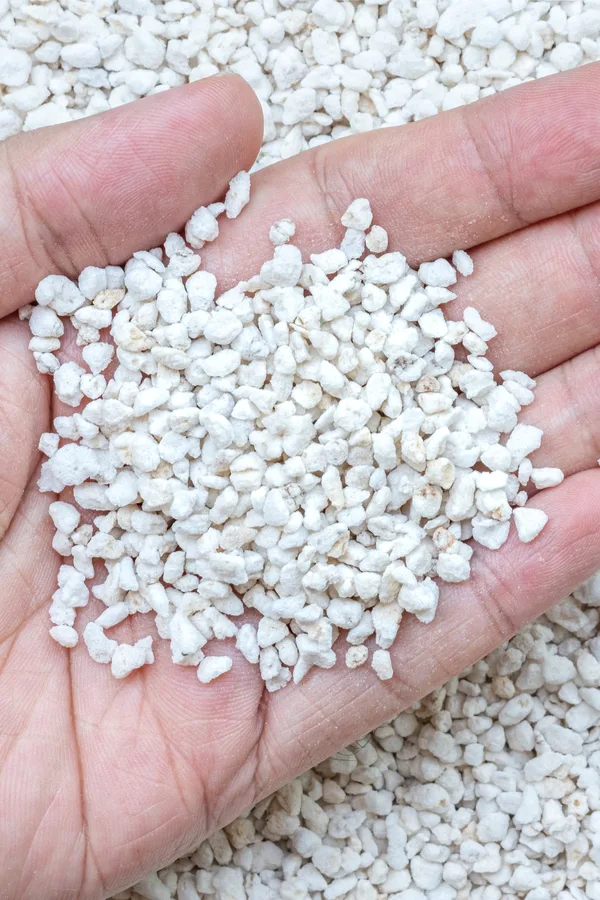
Perlite never breaks down, so it keeps the soil from compacting together permanently. Once you purchase a bag of perlite, it will stay good forever. And once it’s in the ground, it will also help forever as well! Affiliate Product Link : Espoma Perlite 8 qt. Bag
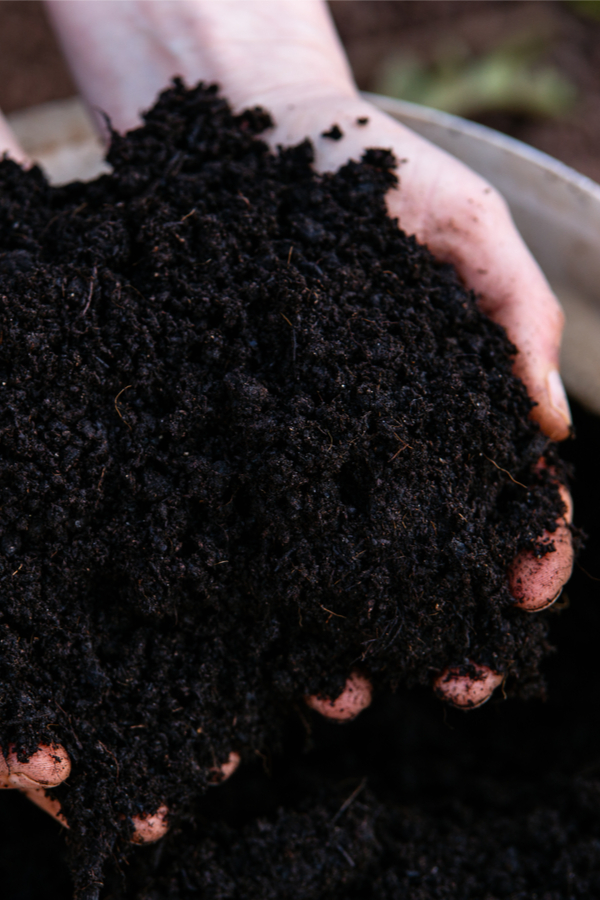
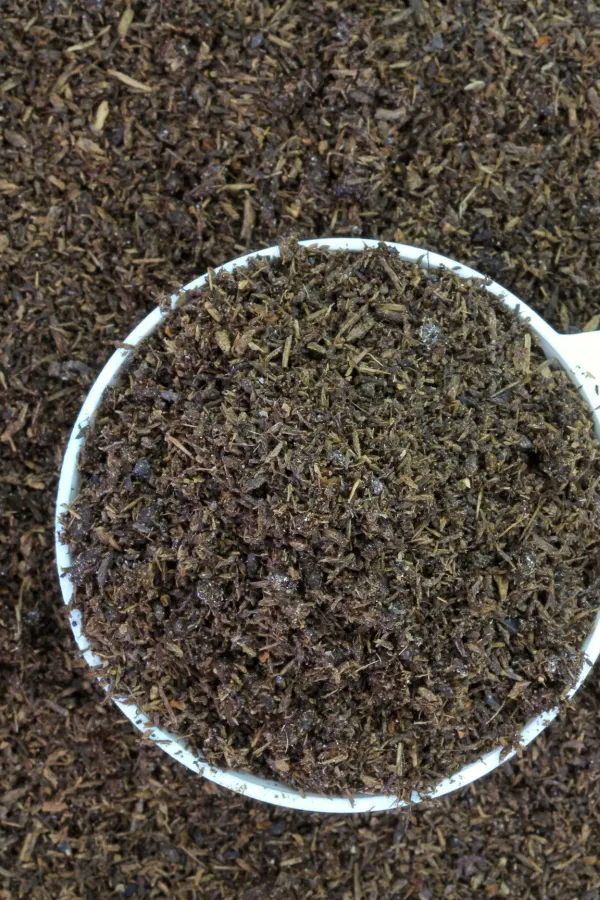
Whenever you want to add loose, lightweight and fertile power to any soil, compost is the answer! It not only helps to lighten a homemade seed starting soil mix, it also improves the overall drainage of the soil as well.
Compost is overflowing with nutrients that are easily absorbed by tender roots. Even better, those nutrients are not overly strong, so they won’t overpower young seedlings. In addition, compost can hold in excess of 10 times its weight in moisture – which means it can help seedlings get the moisture they need to sprout and grow.
When adding compost to your seed starting mix, it’s important to use use ultra-fine compost. If using compost from your home pile, screen it first to remove any large chunks that may have not fully broken down yet.
This is one time where picking up a bag of compost can be helpful. Most commercial bags of compost have already been screened and are quite fine. Affiliate Link: Charlies Compost 10 Lb. Bag
The 4th and final ingredient to add to your mix is worm castings. Worm castings, which are the manure of worms, are the true hero of a perfect seed starting mix.
The light makeup of the castings helps to break up and lighten soil much like perlite – but with one big difference – worm castings are filled with loads of trace minerals and nutrients that can easily and quickly be absorbed by seedlings to power them up.
These nutrients slowly release over time and leach into the soil as they break down. Just like compost, worm castings also act as the ultimate slow-release fertilizer for young seedlings.
Although you could use just compost, perlite, and potting soil, worm castings take homemade potting soil to another level. One that will have your plants strong and healthy come transplant day! Product Link : 100% Pure Worm Castings

The best part of all in creating your own seed starting soil is how easy it is to mix together. To make, simply combine equal parts of each of the four ingredients above. It is usually best to premix all four in a large wheelbarrow or 5-gallon bucket and then fill your seed trays.
For best results, always water down your soil in the trays a few days prior to seed planting day. This will help to provide good moisture in the soil for better germination. It also allows the soil to settle in the containers, giving you time to top it off before planting seeds.
For more great information on starting seeds and how to provide them the right lighting for success, be sure to check out our article: The Best Lights To Use For Starting Seeds Indoors – Simple, Easy & Inexpensive!
Make this the year you create your own seed starting mix and grow your best plants ever!
Follow Our Facebook Page For Great Gardening Tips And Advice! This Is My Garden Facebook Page
This Is My Garden is a garden website created by gardeners, for gardeners. Jim and Mary Competti have been writing gardening, DIY and recipe articles and books and speaking for over 15 years from their 46 acre Ohio farm. They publish three articles every week, 52 weeks a year. Sign up today to follow via email, or follow along!
Did you know that one of the best ways to compost all winter long is by using a simple process known as the trench method? In fact, not only is it easy to do – it also doesn’t require a compost pile to do it – which makes it great for someone without access to a compost bin to compost all year long!
Trench composting isn’t new. In fact, it has been a tried and true method of enriching and powering the soil dating back thousands of years. Instead of using a traditional compost pile or bin, compostable materials get buried directly into the soil.
Long ago, civilizations that grew their own food used it as a way to power crops. Along side of plants, they would simply dig trenches and fill them with food scraps, fish and other compostable materials. Then, as the materials broke down, they enriched the soil and helped give nutrients to their crops.

There is no need to add or mix in more ingredients later. Nor is their any worry about getting the right combination of materials together to heat up and break down fast. The scraps and other biodegradable materials simply get buried – and then begin to slowly break down under cover of the soil.
The trench method can be amazingly helpful in the winter for gardeners as a way to keep on composting – even long after their traditional compost piles have frozen over and stopped for the winter season.
Today, most avid gardeners use a dedicated compost pile instead of the trench method for composting. It allows materials to break down completely over time, giving them access to pure, rich finished compost.
There is little doubt that finished compost is ideal for adding to planting holes, potting soil – and even making powerful compost fertilizer tea. See: How To Make Homemade Compost Tea – Power Your Plants Naturally!
But for a large majority of areas, it can be hard to compost once the cold and freezing temperatures of winter settle in. As the frigid temperatures arrive, decomposition slows down or even stops in some cases. Piles can also become frozen, covered with snow, or overloaded due to materials not breaking down.

Not only can open materials on top attract mice, raccoon and other animals, they can also often begin to smell if materials don’t break down and the temperature suddenly warms up.
Unfortunately, this causes many gardeners to stop composting in the winter altogether. Instead of using all of those valuable vegetable peels, scraps, coffee grounds and more, they simply throw them out. But this is exactly where trench composting can help!
So how does trench composting work in the winter? Well, it all depends on how severe your winters are and how often and how long your ground stays frozen. But no matter where you live, trench composting can work for you. In some case with brutal winters, you just need to prepare ahead a bit.
If you live in an area with warm or moderate winters, digging through unfrozen soil is fairly easy. Although cooler winter temperatures might be chilly enough to slow a regular compost pile, it won’t affect trench composting at all. And by burying the materials, there is no worry of smell or odor.
Start by selecting an unused area of your garden and dig a hole about 10 to 12 inches deep. Next, place your scraps directly in the hole. Allow enough room at the top for at least 4 inches of soil to cover the hole.
By burying to that depth, the soil stays warmer and helps to break down the materials faster. But even more importantly, it’s also deep enough that rodents and other animals won’t dig it back up. Beyond the garden, you can also trench compost in flowerbeds or around bushes and shrubs.
Burying scraps in flowerbeds near perennials and bushes provides nutrients slowly as the materials break down. Again – it’s so much better than simply throwing those valuable winter kitchen scraps away!
So what if the ground freezes in your area often or for months at a time? There are actually two different ways to still practice trench composting in the winter.
If you happen to live in a climate with absolutely frigid temperatures, you can create a hole or several holes in the fall or early winter while the soil is still workable. Cover the holes with a board and then lift and drop materials in as needed.
Be sure to replace the cover after filling it and anchor it with a heavy object. The extremely cold temperatures will prevent the scraps from smelling, and the cover will keep unwanted pests from scrounging around. As soon as it warms enough to cover with a bit of soil, fill the hole and your trench compost pile will begin to break down.

You can also save compost materials in colder areas by keeping a 5-gallon bucket with a tight-fitting lid nearby outdoors. Fill the bucket with kitchen scraps, coffee grounds, and other compostable materials as they become available.
The good news is that when outside temperatures get that cold, the compost materials won’t cause any issues with smell or have any chance of rotting in the bucket.
They can simply be held until it warms enough to break through the soil and bury. It is far better than throwing on top of a cold compost pile and having animals rummaging through them. Or even worse, the pile starting to rot and smell when it warms up.
Whether or not you have a compost pile, you can also use the power of trench composting throughout the entire growing season. In fact, it is a great way to side-dress your plants to help power them with slow-release nutrients and minerals.
Egg shells, coffee grounds, and vegetable scraps are all perfect for trench composting using the side dress trenching method. Start by digging four to six inches away from the edge of the roots of your vegetable or flower plants.
Because the soil is warm, you don’t need to dig as deeply as you do in the winter. Once the materials are in the trench, simply cover up with soil and let the magic happen. As the materials break down, they provide extra nutrients to the plants slowly and naturally. To help the process work even faster, chop up the ingredients as finely as you can before adding.

This side dressing technique is perfect for coffee grounds and filters for tomato and pepper plants. These plants love nitrogen, and coffee grounds have plenty of it. Just dig a few inches down four to six inches away from the main stem and bury the filter and grounds together.
Almost all coffee filters are 100% biodegradable. And all of grounds and filter will add both nutrients and humus as they break down in the soil.
Another great side dressing ingredient is crushed egg shells. They are wonderful for trench composting around tomato and pepper plants. As the shells break down, they enrich the soil with calcium, a key mineral in stopping blossom end rot for both tomatoes and peppers. Here it is best to pulverize the egg shells into a fine powder to speed the release of their nutrients.
Vegetable scraps such as potato and carrot peels are another great choice. They break down quickly in the soil to provide extra nutrients and help add organic matter to the soil.
No matter your growing location or what you experience during the winter season, try trench composting and put those kitchen scraps to good use this year. Here’s to enjoying all the benefits of trench composting in the winter – or any time for that matter!
Follow Our Facebook Page For Great Gardening Tips And Advice! This Is My Garden Facebook Page
This Is My Garden is a garden website created by gardeners, for gardeners. Jim and Mary Competti have been writing gardening, DIY and recipe articles and books and speaking for over 15 years from their 46 acre Ohio farm. They publish three articles every week, 52 weeks a year. Sign up today to follow via email, or follow along!
Although most gardeners have heard about the amazing benefits of using spent coffee grounds to power annual flowers and vegetable plants outdoors – did you know that you can also coffee grounds to help fertilize and energize your houseplants too?
Spent coffee grounds are teeming with all kinds of helpful trace nutrients. So is the leftover coffee that remains in your pot after your morning cup of Joe. And as it turns out, both can do wonders to help perk up many of the houseplants you have growing indoors – and all for free!
Both spent coffee grounds and brewed coffee contain a long list of nutrients, including phosphorous, magnesium, potassium, calcium, zinc, and copper. But they but also contain a fair amount nitrogen. And nitrogen just happens to be one of the biggest nutrients that plants need for strong growth.

Nitrogen is vital for several critical needs when it comes to plant growth. For starters, it helps to provide the energy plants need to produce new stems and foliage. But nitrogen is also important for powering the process of photosynthesis, helping convert light into valuable energy for plants.
With all of that goodness, it’s easy to see how coffee grounds can help plants grow – especially when you use them in just the right way. But when it comes to successfully powering houseplants, you need to know when and where to use coffee grounds and leftover coffee – and how much to use!
With that in mind, let’s take a look at how to use both on houseplants, and dispel a common myth about the acidity of spent coffee grounds – one that unfortunately leads to a lot of confusion about how safe they are to use on plants.
Let’s start with the myth that spent coffee grounds (and leftover coffee) are highly acidic. And – that if you use them around plants it will turn the soil acidic. This is simply not true!

Although fresh coffee grounds are more acidic, used coffee grounds are not. In fact, once hot water has run through the grounds, nearly all of the acidity is gone. Enough that used coffee grounds and leftover coffee usually have a pH of around 6.7 to 6.8 – with seven being neutral.
One thing is for sure, unless used in massive quantities (which it shouldn’t be), it will not turn the soil highly acidic.
With that said, when it comes to using grounds or old coffee on houseplants, moderation is the key. Not because of the acidity, but because it contains a good source of nutrients. And just as with any living plant, giving it too much power at once will actually harm the plant more than help it.
In addition to being filled with nutrients, coffee grounds also happen to retain a tremendous amount of moisture. Although that might sound like a positive, it can actually be very detrimental to house plants. Coffee grounds are so good at retaining moisture that when placed directly on the soil surface, they over-saturate a plant’s root system.

When this occurs, the roots of the plant swell excessively and become unable to take in nutrients. The end result is a houseplant that turns yellow from a lack of nourishment, and a root system that slowly rots and dies.
So exactly how can you use coffee grounds and leftover coffee to help plants and not harm them? By turning them into a weak tea that will power them low and slow. One that will have your houseplants growing like crazy!
There are a couple of ways to make fertilizing tea. You can actually make it with leftover coffee – or leftover coffee grounds. But when using leftover coffee, you will need to dilute it first.
Why can’t you water your plants with regular coffee straight from the pot? Unfortunately, fresh brewed coffee is too strong in the nutrient category. And for nearly all houseplants, using it at full strength will overpower them.
Although coffee at full strength is too rich, diluting it using a ratio of about 4 parts water to every 1 part of full strength coffee will work wonders for powering houseplants.
If you want to turn your old grounds into a tea, all you need to do is use the leftover grounds to make a “new” batch of very weak coffee. To make, simply keep the grounds from your first batch in place, and re-make an entire pot.
This time, the resulting liquid will be far weaker – and perfect for using on houseplants. Of course, you need to let it cool before using, but the weak tea-like solution will supply a gentle source of nutrients to your plants.
For how often to use either, as a general rule of thumb, you can use weak coffee tea to “water” houseplants every 7 to 10 days. Any more and you will risk over-fertilizing indoor plants with too many nutrients.
It’s important to note that not all coffee grounds are the same when it comes to fertilizing. Flavored coffees and coffees with artificial ingredients are not good to use on houseplants. Unfortunately, these brews can contain harsh chemicals that can harm plants.
And what about decaffeinated coffee? Both versions of coffee (caffeinated and decaffeinated) actually have the same nutrients. Unfortunately, quite often, chemicals are used in the decaffeinating process. And in some cases those chemical traces can harm plants.
Without knowing what might be or what might not be in it, it’s best to steer clear of them entirely unless the package says naturally decaffeinated.
Instead, when using coffee grounds, stick with the grounds from plain coffee. You can also safely use coffee blends made from several different bean types. These are simply regular coffee varieties that are mixed together to create a different flavor profile. The key is to avoid coffees with artificial additives.
And, whatever you do, don’t throw those grounds out once you have used them for making coffee tea! Even though you have taken some of their nutrition out, they are still wonderful for powering up your compost pile.
For more great ways to use coffee grounds, check out our article on how to use coffee grounds when planting tomatoes! And if you’re looking for the best houseplant to grow, check out this article: The Perfect Houseplant For Indoors Or Outdoors – Why You Need To Grow A Pothos Plant!
Follow Our Facebook Page For Great Gardening Tips And Advice! This Is My Garden Facebook Page
This Is My Garden is a garden website created by gardeners, for gardeners. Jim and Mary Competti have been writing gardening, DIY and recipe articles and books and speaking for over 15 years from their 46 acre Ohio farm. They publish three articles every week, 52 weeks a year. Sign up today to follow via email, or follow along!
Did you know that you can easily compost your tired, old, used potting soil from this year’s container plants and bring it back to life to use again next year?
Potting soil is one of the most expensive purchases each and every spring for gardeners. Especially for those who love to fill their porches, patios and decks with hanging baskets and big flowering containers. And unfortunately, depending on the size of your pots, and how many pots you fill – you can go through a lot of bags in a hurry!
But here’s the good news – you don’t have to buy all new potting soil every year. Not when you can simply save your old soil at the end of each growing season and recharge it by composting it. It’s fast, easy to do, and best of all, can save you a small fortune!

One thing is for sure, you can’t just save this year’s potting soil and use it again next year. That is, not without first re-supplying it with energy.
Whether you grow flowering annuals, vegetables, or herbs in your pots or containers, they all take their toll on the power of the potting soil inside. Container plants drain the life from soil. And they can do it quickly in a single growing season.
Even the most fertile of potting soils will lose most of their nutrient levels by the end of summer. But in addition to losing its power, the soil also loses a lot of its structure. And as you will see below, along with nutrient levels, soil structure is incredibly vital when it comes to growing plants in pots successfully.
So what is soil structure and why is it so important? The structure of a soil is what allows it to hold moisture and nutrients. And when a soil has no structure, no amount of watering or fertilizing can help the plants that are growing in it.
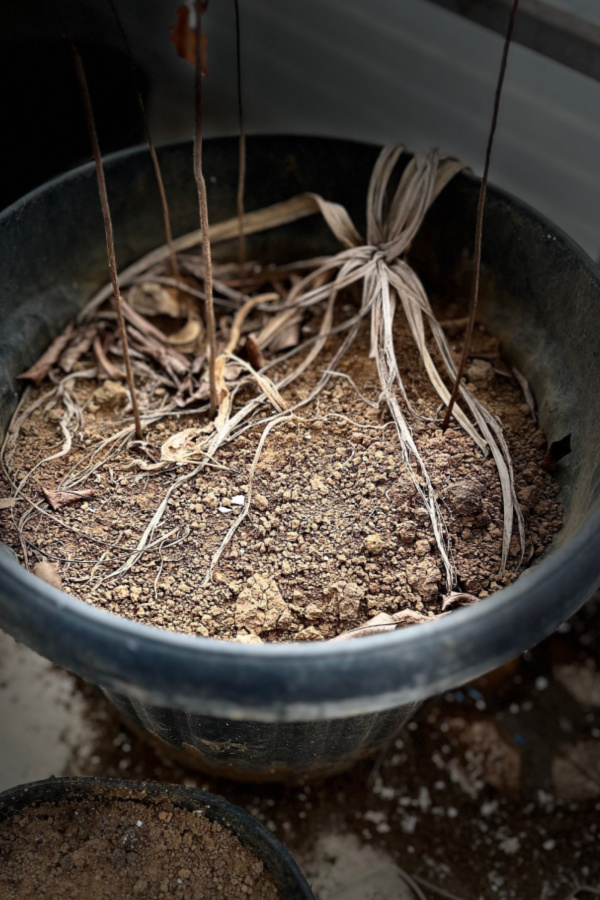

Ever notice that by the end of the growing season the soil in your pots seems dry and flaky? And that when you try to water or even fertilize it just runs right through. That is usually because of two major issues. The first is that the plant is root bound – and the second is because the soil has lost all of its structure.
Good potting soil is filled with humus. Humus is in its purest form rich, organic matter. And it’s what gives soil structure, or more importantly, the ability to absorb and hold water and nutrients. And once that humus begins to deteriorate from the soil, the soil will have trouble sustaining life.
But by composting your potting soil at the end of the growing season, you can help to build back humus levels – and not just that, but also refill and refuel the soil with incredible nutrients as well. And you won’t believe just how easy it is to do!
Although you can throw all of your old potting soil into your regular compost pile, it is far better to compost all of your potting soil separately – and for two very important reasons.

For starters, a traditional compost pile is going to leave you with only compost. And as amazing as pure compost is, you can’t simply fill your pots and hanging baskets with it to grow your plants next year. Unfortunately, pure compost is too rich and loose. Not only will it likely burn plants, it also wouldn’t hold them up without the help of added soil structure.
The second reason not to put your old potted plants into your regular compost pile is that the pile won’t break down fast enough with the other compost materials to be ready to reuse in the spring.
A traditional compost pile can take a long time to break down all of its various ingredients. Whole leaves, garden scraps, twigs and other yard waste simply can’t decompose fast enough to be ready by next spring to use. And so once again, you will be buying all new potting soil!
But by creating a stand-alone used potting soil compost pile you can change the game. Instead of adding anything and everything, you add only small ingredients that not only break down fast, but power up the soil fast too.
With this simple method, by early spring, you will be left with a pure potting soil mix that is full of life – and is perfect for planting up all of your pots, containers and hanging baskets!
You can create a potting soil compost pile anywhere. In a corner of your garden, in a flowerbed, or of course, in a traditional compost bin. Although you can simply pile the soil up, if you can contain the pile with a small screen, or fence it will help it heat up a bit faster. See: How To Create An Inexpensive Homemade Compost Bin
With a potting soil compost pile, you want to build it all at once. As you will see in a moment, you can still add some materials that break down quickly later on, but building the pile all at once is important to its overall success. This allows it plenty of time to break down and be ready for you next spring.
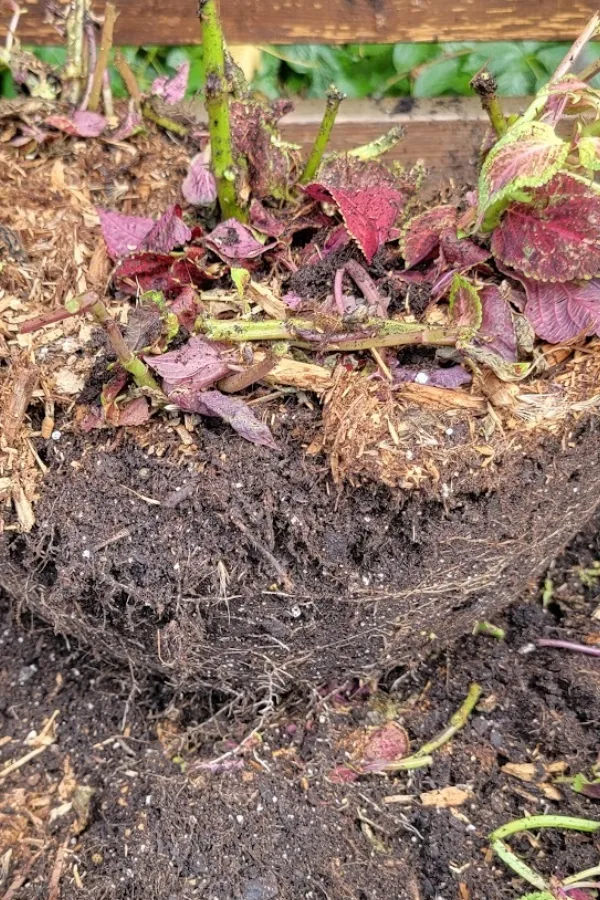
Begin by dumping all of your old potting soil into one single pile. It’s okay to put in the roots and plant materials that grew in the container, but chop them up first. The smaller the material, the faster it will decay.
Once your pile of used potting soil is in place, it’s time to add in materials that can recharge it. You will want to add enough new material to double the size of the pile.
This will provide enough energy to the pile as they all break down and decay to fill the old potting soil with nutrients, humus and structure. The good news? In the fall – finding those materials couldn’t be easier!

There are two keys to success when adding additional potting soil compost pile materials. The first is to only add materials that are full of nutrients and break down quickly. And the second is to make sure those materials are as finely chopped as possible.
Two of the best to add are green grass clippings and finely shredded leaves. If you have a bagging attachment, this makes collecting and shredding a breeze. Other great additions are finely shredded vegetable scraps, coffee grounds, and pulverized egg shells. Make sure the egg shells are completely ground to break down into the pile.
In addition to these materials, now is the time to add in a few shovels or a bucket full of compost – or a compost starter. Compost is teeming with bacteria that will help break down and heat up materials fast. If you can’t add compost, a compost starter will do the same trick. Product Affiliate Link : Jobe’s Organics 09926 Fast Acting Fertilizer Compost Starter
Now that your pile is in place, it is time to mix together all the ingredients. And keep on mixing! The more you can turn your pile (once or twice a week is great, daily is best of all), the more quickly it will break down. Turning adds oxygen which the pile uses to heat up. Keep turning until winter weather doesn’t allow.
If your pile becomes overly dry, water it and mix the water in. The moisture is needed along with the oxygen to get the pile as active as possible. You want the pile to be slightly damp.
Although you will not want to add big materials – continue adding in coffee grounds, pulverized egg shells and small scraps of vegetable peels. All of these will break down quickly and continue to help the pile heat up. Do this as long as you can until winter freezes the pile over.
When spring rolls around, your pile should be teeming with nutrients and ready to grow. And you will be more than happy to not have to buy all of the potting soil from scratch! As a side note, many add in worm castings or a bit of new potting soil in the spring to help recharge the soil even more before using.
Here is to making a used potting soil compost pile – and saving BIG!
Follow Our Facebook Page For Great Gardening Tips And Advice! This Is My Garden Facebook Page
This Is My Garden is a garden website created by gardeners, for gardeners. Jim and Mary Competti have been writing gardening, DIY and recipe articles and books and speaking for over 15 years from their 46 acre Ohio farm. They publish three articles every week, 52 weeks a year. Sign up today to follow via email, or follow along!