From how to plant, to fertilizing, pruning and staking – see all of our best tomato advice below!


From how to plant, to fertilizing, pruning and staking – see all of our best tomato advice below!
When it comes to getting your tomato plants to produce a great big crop of tomatoes – how and when you water your plants in the summer can make a huge difference for your crop!
There is little doubt that tomatoes are one of the neediest plants of all in a vegetable garden. Not only do they require a lot of nutrients from the soil in order to grow and produce, they also need a lot of protection from potential pests and disease.
But what can really make or break tomato plants when it comes to their health and productivity is water – or more to the point – how much, how little and how often they get water to fuel their growth, blooms and fruit.
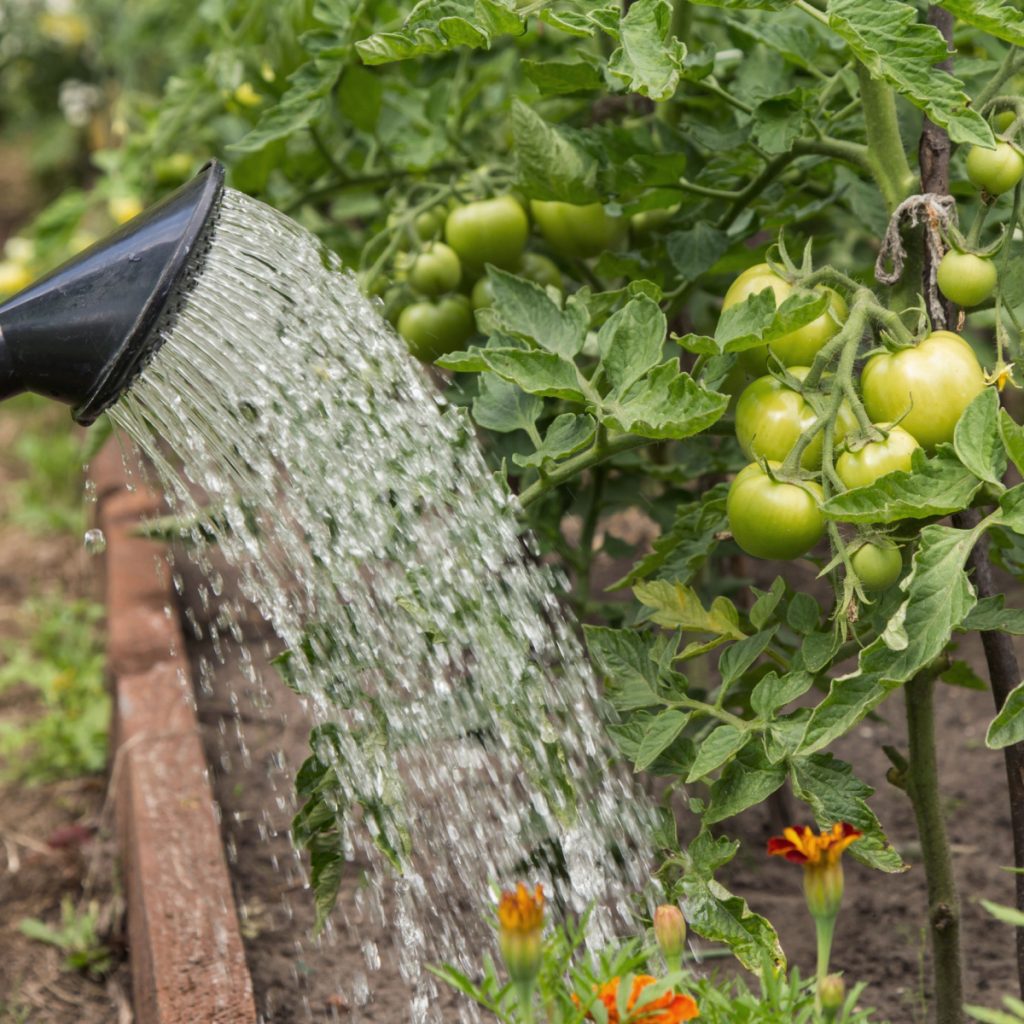

When you consider that tomatoes are made up of 95% water, it’s easy to see why water is so vital. But it’s not just the tomato fruits that need moisture to fill out. The branches, stems and roots of tomato plants are also made up of a tremendous amount of water too.
But, as you will see below, there is a fine line between plants getting too much water or too little. Which is exactly why watering them just right is so vital! With that in mind, here is a look at how and when to water tomato plants to perfection – whether you grow them in a traditional garden setting or in a container.
How you water your tomato plants first depends of how and where you grow your plants. When growing in the ground, whether it be in a traditional garden or raised bed space, your plants’ watering needs will be far different than if you grow your tomatoes in containers or grow bags.
With that in mind, we will take a look at how to water best with each growing method, starting with tomatoes growing in the ground.
For those that grow their tomatoes in the ground, the biggest mistake often made when watering is actually watering too often and too much.
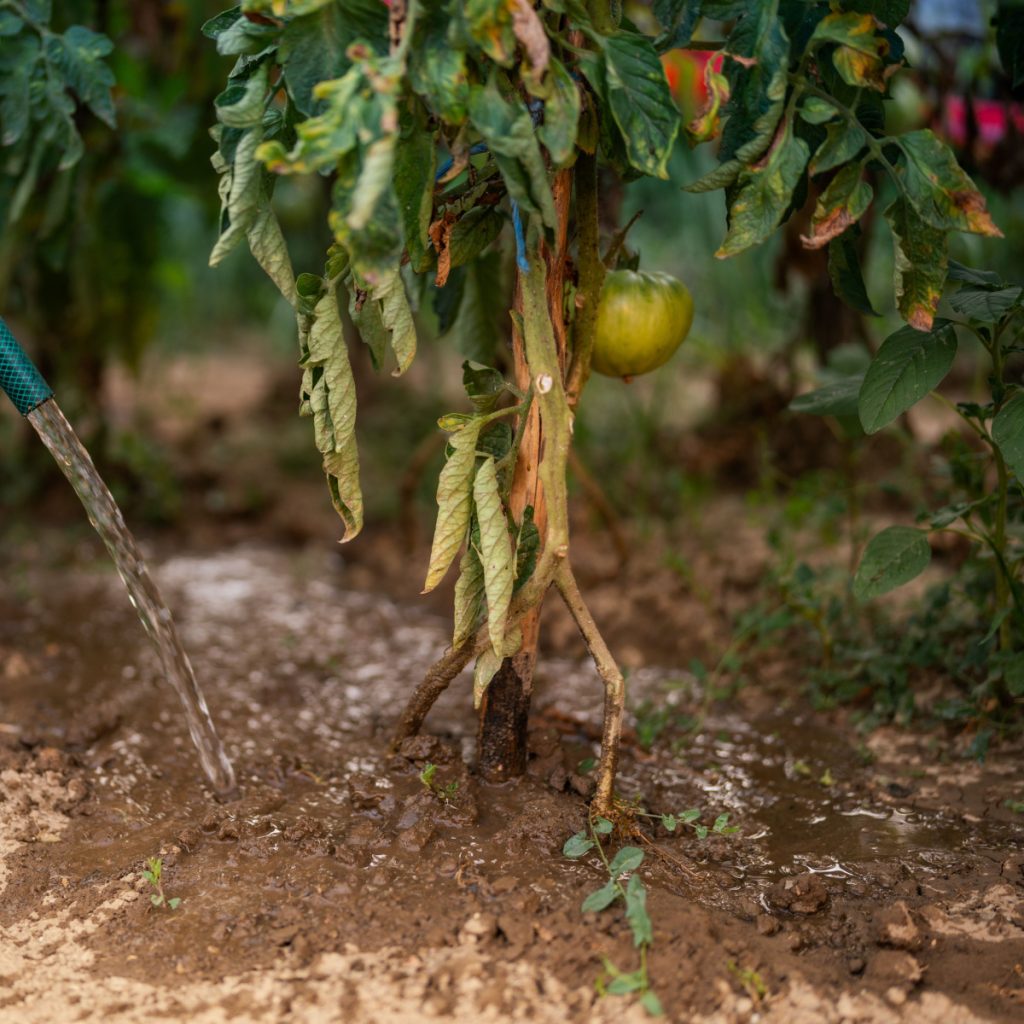
The secret to success when watering in-ground tomatoes is to water less often, but more thoroughly. Unfortunately, if you water your plants every day, the roots never drive deep into the soil. Instead, they stay up close to soak in the constant moisture.
This actually harms the tomato plant in several ways. First and foremost, the plants develop far fewer roots. That in turn, means there is less ability for the plant to soak in nutrients and moisture from the soil. But those shallow roots also allow the plant to dry out quickly in the hot summer sun. Even worse, it also makes the plant weak and vulnerable to toppling over in storms or when loaded with fruit.
But perhaps the biggest issue of all with overwatered plants is that the roots swell and become water-logged. When this occurs, they are unable to take in any nutrients or moisture. And the plant begins to weaken with yellowing or curling leaves.
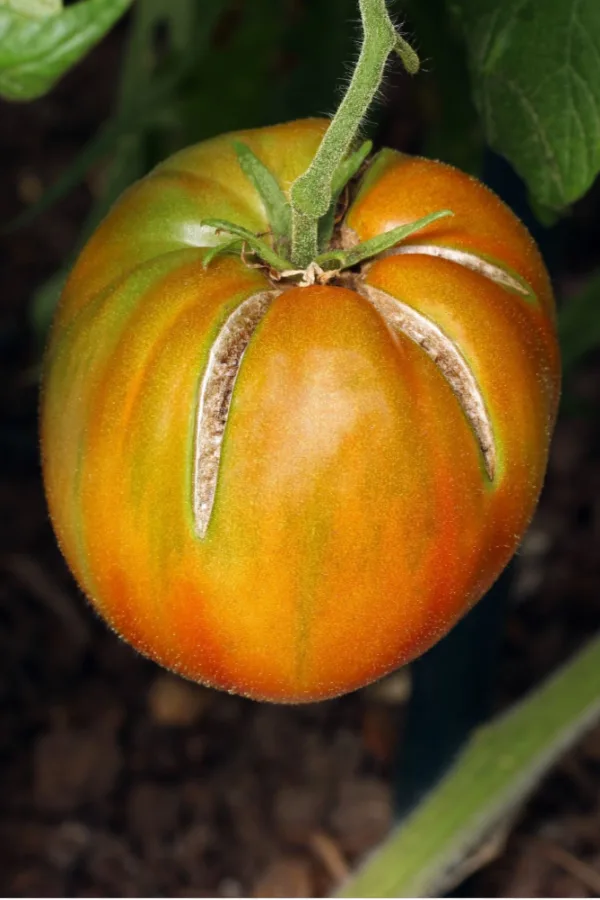
Unfortunately, many gardeners think at this point their plants must need more water. And as they water again, the plants suffer even more. If all of that wasn’t enough bad news for overwatering, it can also lead to cracked and split tomatoes on the vine. This is because the fruit has too much moisture, causing the skin to burst open.

Once plants are established (3 to 4 weeks old), unless you are living in a desert or in an extremely hot and arid climate, tomato plants in the ground should be watered only a few times a week. And that is only if no rain has fallen during the week.
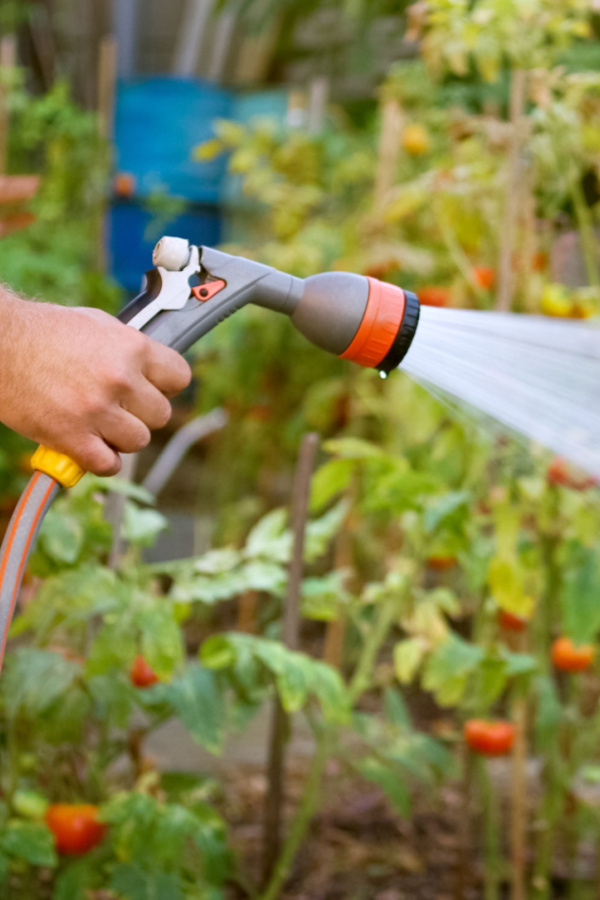
Through the summer, tomato plants need a total of about 1 to 1.5 inches of water per week. When you do water, it should be low and slow. Water with a slow or weak stream, letting the water penetrate down deep in the soil. This will allow the roots to grow down deep as well.
So what constitutes 1 to 1.5 inches of rain per week? If you water your plants a few times a week, that would be about 1/2 to 2/3rds of a gallon of water slowly watered into each plant per watering. This allows enough water to get down deep in the soil.
So what about tomatoes growing in containers or grow bags? Because of the limited soil space, these plants often need watering every day in the summer. In fact, sometimes twice a day depending on their size. But here again, you need to be careful not to overwater!


With container plants, the best method for success is to use an inexpensive soil moisture meter probe. These allow you to instantly read the soil moisture down at the root level. (These work great for in ground tomato checking too!) Affiliate Product Link: Soil Moisture Meter With Deep Probe
The moisture of the soil for tomato plants should range between 40% on the low end and 80% on the high end. Ideally, it’s best to keep it somewhere in the middle of that range. Only water when the moisture drops to near 40%. And never water when it is above or around 60%.
Last but not least, when growing in containers, make sure your pots or grow bags have good drainage holes. If the plant can’t shed excess water, it will suffer!
Last but not least, in addition to watering, don’t forget to keep your tomato plants powered up! Fertilizing tomato plants every ten to fourteen days with a light dose of liquid fertilizer will do wonders to keep plants both healthy and producing. See: How To Fertilize Tomato Plants In The Summer For A Bigger Harvest
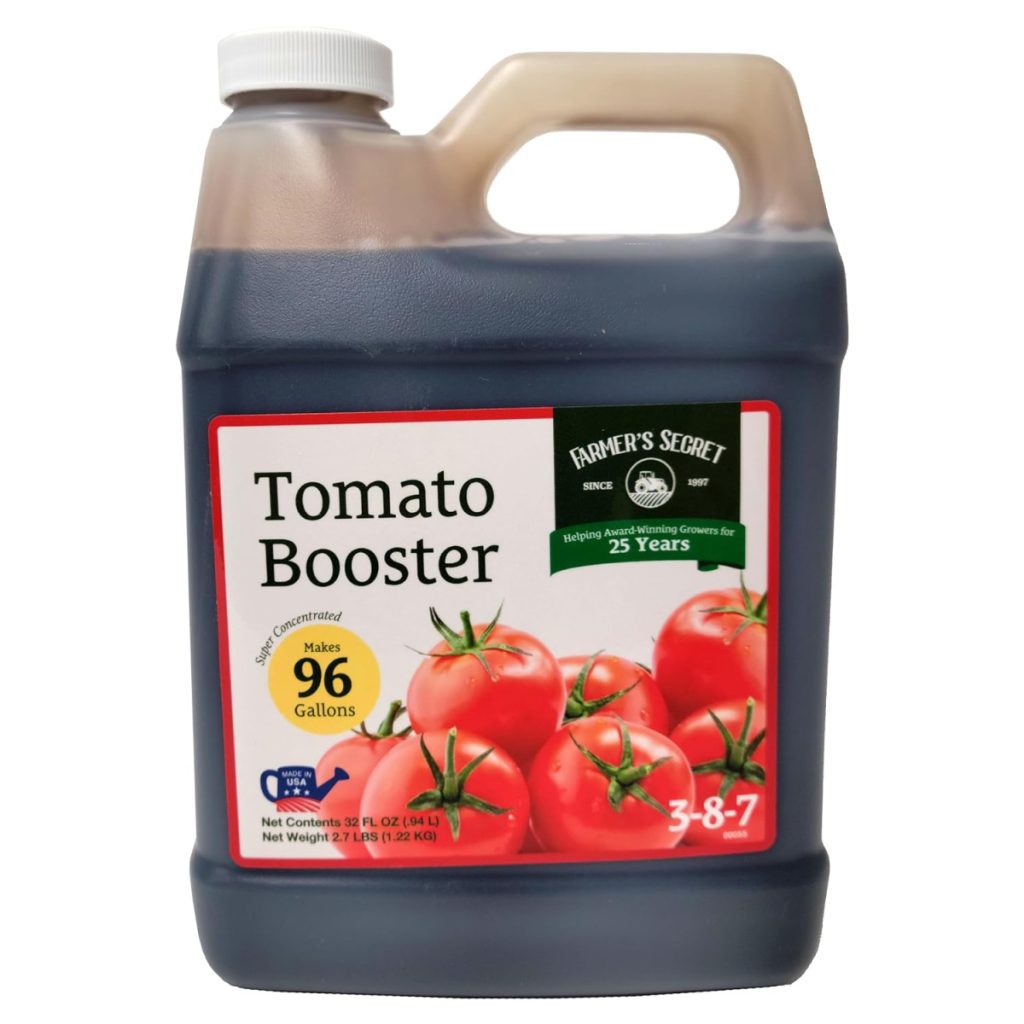

When fertilizing, select a liquid fertilizer that is loaded with phosphorous and potassium. These two nutrients are the key energy sources for producing blooms and developing fruit. Look for a fertilizer with two to three times the amount of each versus nitrogen. Affiliate Product Link: Tomato Booster Fertilizer
Use at about 1/2 of the recommended strength. This will allow for lighter but more consistent doses of energy to keep your tomatoes producing.
Here’s to watering your tomato plants for big success this year – and to your best harvest ever!
Follow Our Facebook Page For Great Gardening Tips And Advice! This Is My Garden Facebook Page
This Is My Garden is a garden website created by gardeners, for gardeners. Jim and Mary Competti have been writing gardening, DIY and recipe articles and books and speaking for over 15 years from their 46 acre Ohio farm. They publish three articles every week, 52 weeks a year. Sign up today to follow via email, or follow along!
Looking for a few simple tips and tricks to get your tomatoes to ripen a little faster this summer?
One of the toughest things for a gardener to do is to wait for their tomatoes to turn to their perfect shade of ripeness. Especially early in the season when it can seemingly take forever for the first fruits to finally begin to turn color!
All gardeners know the excitement of watching that first bloom on their plant turn into a tiny green tomato as late spring or early summer arrives. But then the waiting game ensues. And as the weeks go by – and those same first tomatoes are still green – you begin to wonder if you will ever get to taste a ripe tomato at all!

It’s certainly true that tomatoes take a long time to reach maturity. In fact, along with pepper plants, they have one of the longest seed-to-harvest time frames of any vegetable plant.
But here is the good news, no matter what type of tomato you grow, there are a few simple secrets that can help your plants and those delicious tomatoes they produce to get to the dinner table faster than ever. And as you will see below, it all starts with actually not letting the first few tomatoes ever ripen at all!
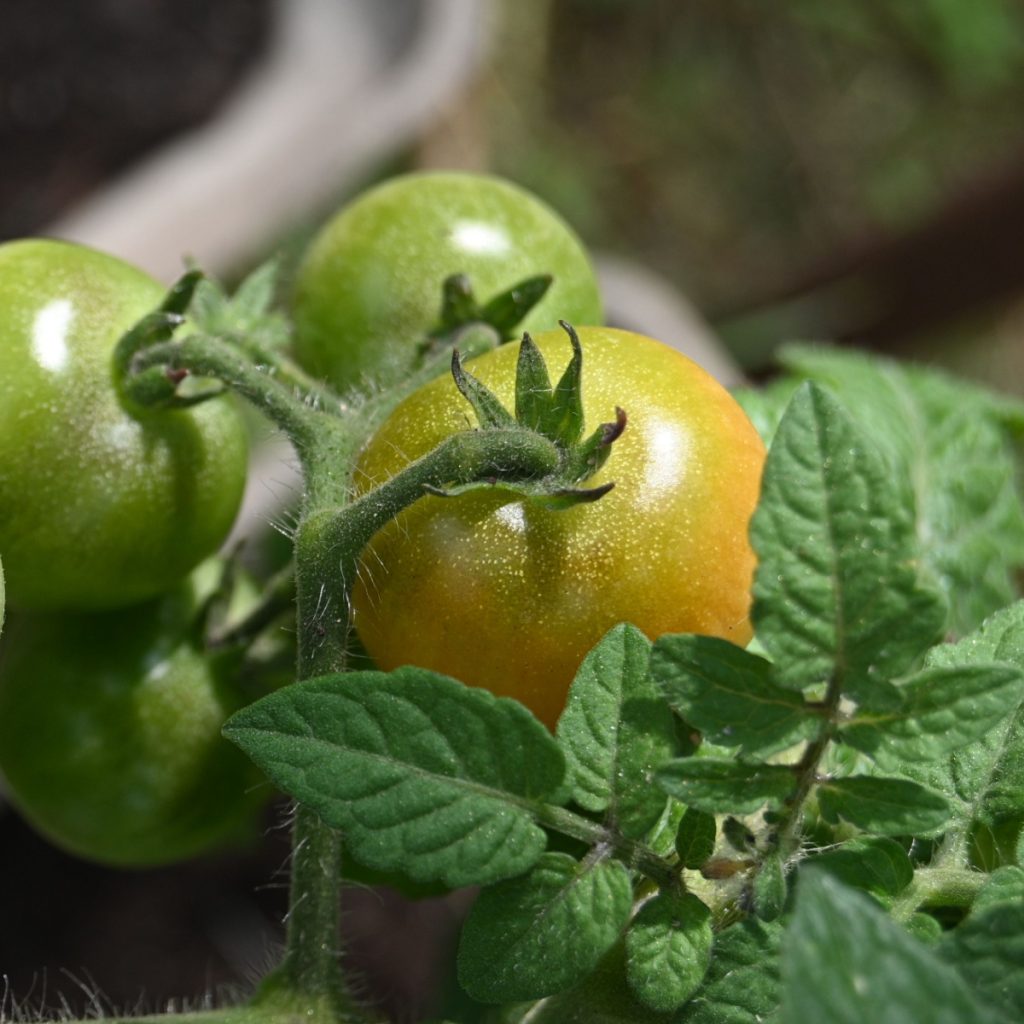
Tomatoes can certainly be finicky when it comes to ripening on the vine. Early in the season, it seems as though they can hang for weeks without the slightest change in color. And unfortunately, if it takes them too long, they often rot from within before ever completely maturing.
For that reason and more, it’s actually best to remove the first few tomatoes that form on your plants. Although it may seem a bit counterproductive, discarding the first few fruits will actually help your plants produce more tomatoes. And even better – ripen the new ones faster too.
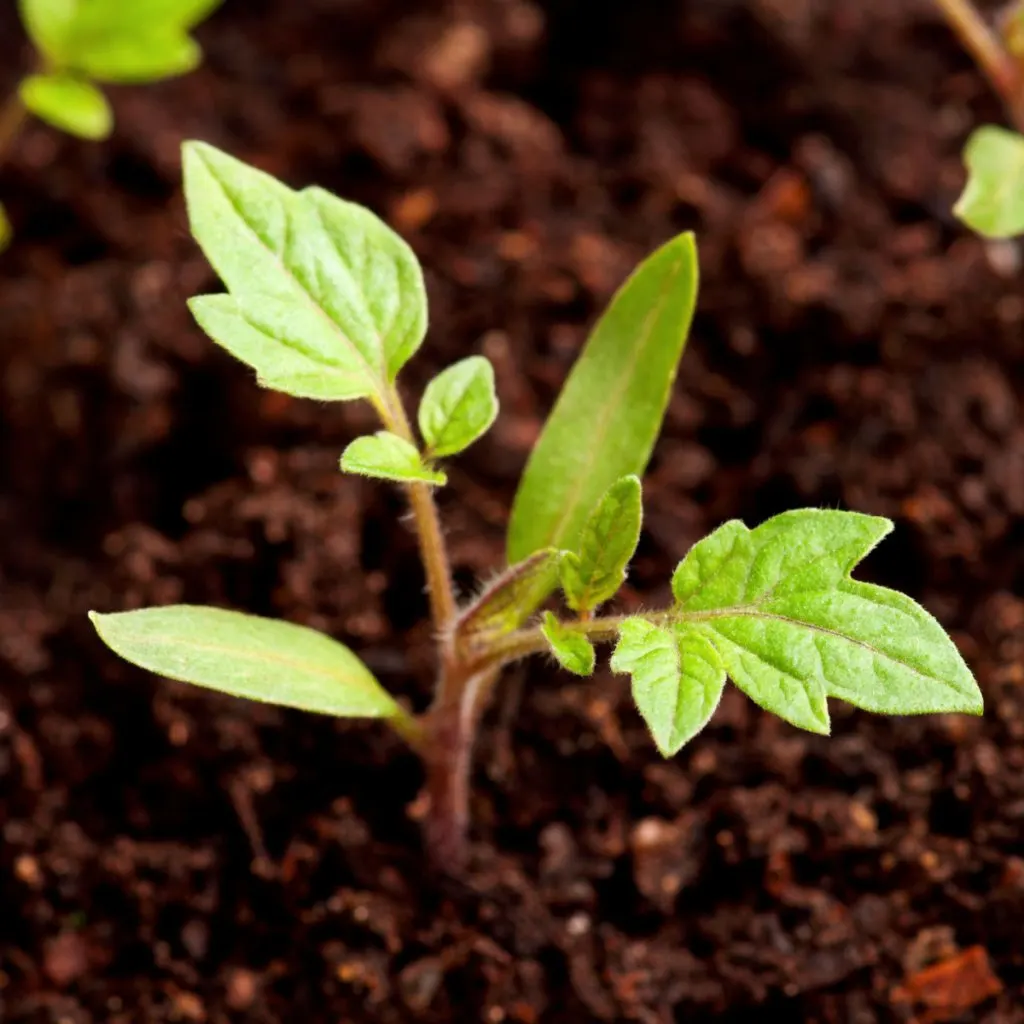
When tomato plants are first growing and establishing, they need energy. And a lot of it! Not only are they trying to establish larger roots, they are also growing a tremendous amount of stems, branches and foliage. And the more energy and nutrients they can have for that, the better.

Unfortunately, when a tomato plant starts to form early fruit, it takes away precious energy the plant needs to develop a strong root and branch system. And as long as those early fruits remain, it continues to divide its energy all over – which is exactly why it struggles to ripen the first tomatoes.
To help your plant grow first and produce later, remove those early fruits after they form. For best results, remove the first three to four clusters or tomatoes a plant forms. Then, once the plant is developed, it can produce new fruit more quickly – and dedicate most of its resources to the ripening process.
This little tips is a HUGE one! All too often, gardeners stop feeding their plants after spring. Or even worse, they feed them with nutrients that are designed for growing and not producing fruit. And when that happens, plants struggle to both produce tomatoes – and ripen the few that are hanging from the branches.
Tomato plants need phosphorous and potassium to produce blooms and ripen their fruit. Phosphorous is vital for helping plants set blooms and supply energy for blushing, which is the first stage of ripening. It also plays a critical role in helping develop young fruit as well.
Potassium helps tomatoes develop their sugars and meaty interior. When there is enough potassium available, the plant can quickly develop its fruit to make way for more. If there isn’t enough – the tomatoes will ripen more slowly.
Feed your tomato plants ever ten to fourteen days in the summer with a liquid fertilizer heavy on phosphorous and potassium – and not nitrogen. Nitrogen heavy fertilizers will grow large plants – but at the expense of blooms and fruit. Affiliate Product Link: Tomato Fertilizer – 3:8:7 Ratio Fortified with Humic Acid, Iron and Calcium
Liquid is the better fertilizer choice for summer feeding as it can supply plants quickly by feeding through the roots and foliage. Your plants will thank you with not just faster ripening, but also more fruit than ever!
Finally, when fertilizing in the summer, fertilize at half of the recommended strength. This will allow you to fertilize more often for a constant supply for plants – without the worry of giving the plant too much energy all at once.
Although it’s good to use a liquid fertilizer, you do want to be careful of how much water your plants are getting in the summer. In fact, one of the biggest reasons tomatoes fail to ripen in a timely fashion is that they are getting too much water. Tomato plants actually suffer far more health issues from overwatering than underwatering.

Tomatoes need about one inch of water per week to produce a healthy crop. Any more than that, and the plant’s roots become water-logged, resulting in the plant stopping most production, growth – and yes, the ripening process.
Only water your plants when the soil is completely dry. In addition, the later in the season you go, water less and less but more deeply when you do. This will keep plants concentrating their energy on ripening mature fruit.
Along with proper watering, good circulation is another big secret to success. Plants need oxygen to grow, produce fruit, and most importantly, help ripen it.
Remove the lower branches on your tomato plants to allow for better air flow. For smaller, more compact tomato plants, remove the bottom six to ten inches. For larger heirloom types, remove twelve to eighteen inches.
Giving the plants space at the bottom allows air to flow freely. Not only will this help your plants to ripen their fruit faster, it also keeps them healthier as well. Proper air flow helps prevent disease and mildew, and it also aids in increasing pollination rates.
In addition to the bottom of plants, don’t be afraid to remove a bit of middle growth as well. Contrary to popular belief, light does not play a key role in ripening fruit, but the added air flow through the middle of the plant will!

Last but not least, pick your tomatoes early! As it turns out, tomatoes ripen far better and faster off of the vine than on it. As crazy as it sounds, once a tomato begins to slightly turn or blush, you will have better luck picking it and ripening it off the vine.
Tomatoes do not need to be on the vine or plant to ripen. Once they begin to turn, leaving them on the vine will continue to use the plant’s resources. Resources that could and should be going to producing more flowers and more fruit. See: How to Know When to Pick Tomatoes – The Best Time To Pick A Tomato
So once you harvest your slightly turned tomatoes – where should you ripen them? A few places to avoid are sunny windowsills or in the refrigerator.
Once a tomato has started to ripen, it does not need sunlight to help it along. In fact, heat and sunlight can actually blister the fruit. A hot windowsill in direct sunlight will usually create too much heat. In the process, the tomato ripens unevenly and may even rot if left too long.
Refrigerators are a bad choice too. The chilling temperatures actually stop the ripening process all together. The only time tomatoes should go into a fridge is when you are trying to save a few for canning from becoming too ripe.

To ripen your tomatoes best, pick them and place them in a cool, shady location. The ideal temperature for ripening is actually around 70 degrees, with plenty of circulation to help as well.
Last but not least, the more tomatoes you leave on your plant, the harder time the plant will have handling trying to ripen it all. Pick your tomatoes early and often to keep plants producing and ripening. Once a plant has too many fruits hanging from it’s stems, the plant will begin to stop production of new blooms and fruit.
Here is to having your tomatoes ripen faster than ever this year!
Follow Our Facebook Page For Great Gardening Tips And Advice! This Is My Garden Facebook Page
This Is My Garden is a garden website created by gardeners, for gardeners. Jim and Mary Competti have been writing gardening, DIY and recipe articles and books and speaking for over 15 years from their 46 acre Ohio farm. They publish three articles every week, 52 weeks a year. Sign up today to follow via email, or follow along!
Did you know that one of the best ways to make sure your tomato plants stay healthy, strong and productive this summer is to prune them? And that the earlier you get started on this simple task, the better your plants will perform?
Believe it or not, pruning can pay huge dividends for tomato plants. Not just by pruning off suckers and unruly branches, but by also pruning up underneath your tomato plants as well. And yes, even when need be – topping them off as well!
Left to grow as they please, tomato plants will morph into a tangled mess of stems, shoots and leaves. And that mess is more than just an eyesore. It also robs the plant of the air, light and the nutrients it needs to produce more blooms – and ripen more fruit.

Tomato plants require a lot of nutrients to grow and produce. Unfortunately, there are a limited amount of resources in the soil available to feed a plant’s appetite for those nutrients. And when plants become overgrown with too many stems, branches and foliage, those resources are wasted on maintaining all of that growth. And more importantly, not on producing tomatoes!
Of even more importance, tomato plants need oxygen, light and water to thrive. And when a plant becomes overgrown, it can block all three of those crucial needs. Last but not least, an overgrown mass of foliage is also an open invitation to pests and disease.
All of that leaf growth allows insects to easily hide while foraging. And the thicker the foliage, the more moisture can collect and remain to harbor and spread mold, mildew and more.
The good news? Pruning can help eliminate all of the above issues and more – and all by simply pruning three key areas of a tomato plant. Pruning, as an added benefit, also helps make tying up your plants easier than ever! See our article: How To Tie Tomato Plants – The Secret To Tying Up Tomatoes

When it comes to pruning tomato plants, the most important task of all is to clear the stems and leaves from the very bottom of your tomato plants. Branches and foliage at the bottom can create a lot of issues for the plant, and the gardener as well.
For starters, many of the diseases that affect tomatoes, such as blight, come from the soil. And foliage that touches the ground or that is close to the ground can easily have the deadly spores splashed on to their surface directly from the soil.
But clearing away the bottom area of plants helps with other issues as well. It also allows air to more easily circulate throughout the plants, helping to keep plants from mold and mildew. All while promoting ripening of the fruit at a much faster pace.
In addition, removing bottom branches makes it harder for crawling garden pests to have an easy ride up onto plants. Even better, it gives a gardener room to easily water, weed, and maintain their plants right at the root zone.
So how much do you need to prune up from the soil level? For determinate varieties that tend to grow shorter and bushier, a good rule of thumb is to clear the bottom 10 to 12 inches of space by the time they reach full maturity.
For indeterminate and larger tomato plants, you can prune even more. These larger plants need more space to really allow air, light and circulation in. For that, prune as they grow to a final height of 12 to 18 inches of clearing underneath at full maturity.
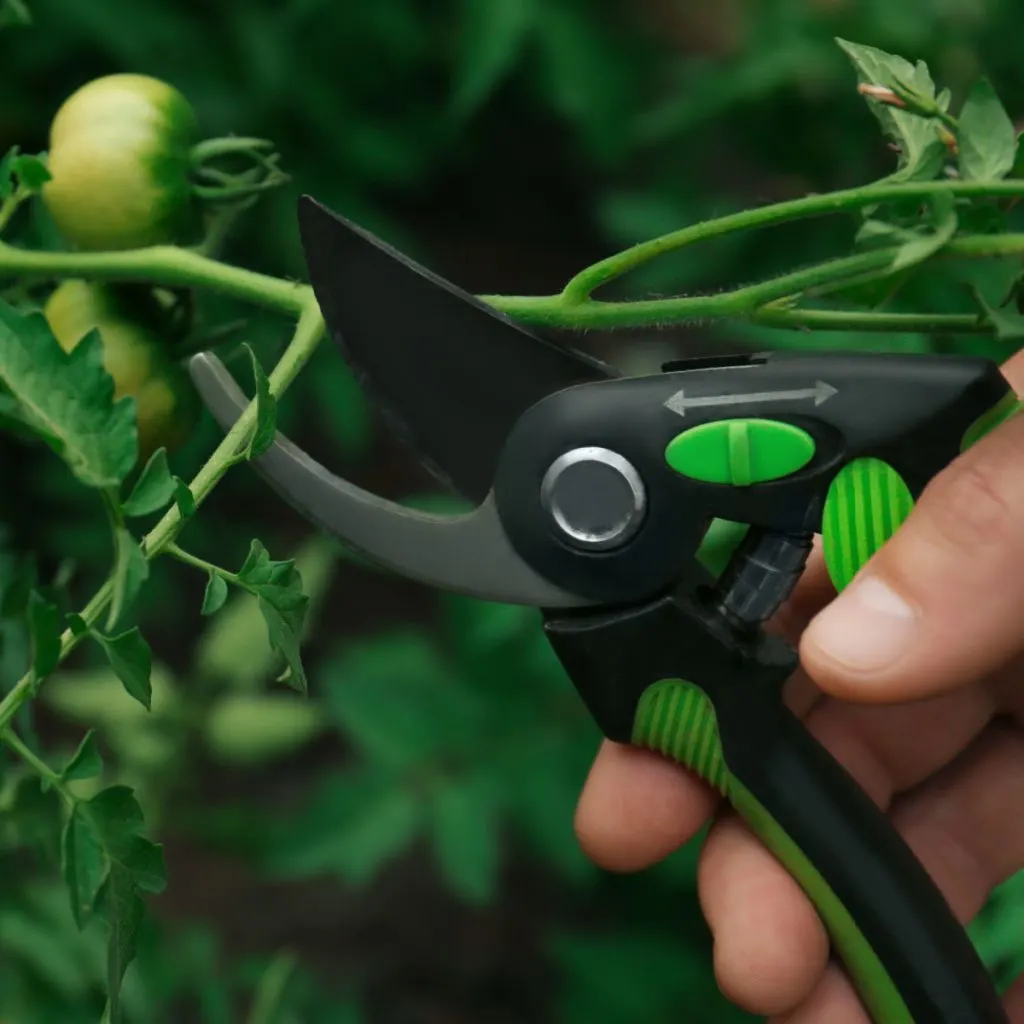
Now it’s time to tackle the subject of tomato suckers. Suckers are the small shoots that sprout from where a stem and branch connect. They form right at the “V” area between the two. So why prune these small starts off? Because they serve little purpose to the plant.
Suckers rarely produce good blooms or fruit. But they still use the same amount of energy from the plant as they grow. And that energy could and should be going toward more production instead. In addition, suckers also block air and light as they grow.
Because of this, it’s important to remove these renegade branches as soon as they appear. Most gardeners simply pinch off the small growths with their fingers or fingernails. In fact, that is exactly where the term “pinching off” comes from. If need be, the small branches can also be removed quite easily with sharp scissors or small pruners.
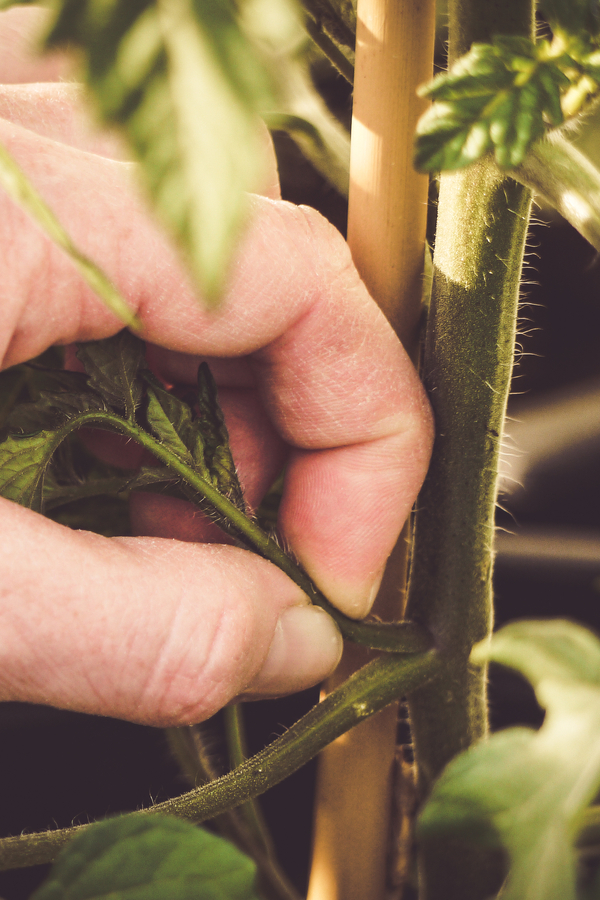

Be on the lookout for suckers in the early growing stages of your tomato plants. The quicker you remove them, the more resources your plant will have for bloom and flower production.
Beyond pruning up under plants and removing suckers, the last pruning chore is to remove a few select branches and foliage in the middle of your tomato plant. For this type of pruning, it’s all about clearing space to promote better air circulation, provide more light, and to keep pests and disease at bay.
As the season progresses, remove excess foliage from the middle of the plant to allow air and light to reach the middle of the plant. There is no need for massive pruning in the center section, just a branch or two to open up the middle.
Also, be sure to trim back and eliminate wild branches that shoot off to the side or grow into the next row. These branches use up a lot of the plant’s energy. They also are easily damaged and broken off in storms.
In addition, always remove any damaged branches as soon as possible. Plants use up a lot of valuable resources attempting to heal and mend these branches.
As for when to prune your tomato plants, it’s best to prune in the early morning or evening to avoid the heat of the day. Plants are at their highest stress level during the hottest portions of the day, and pruning during this period can cause unneeded stress to the plant.
Either way, pruning tomato plants early and pinching off suckers is a sure way to a healthier and more productive crop. So get out in the garden early this year and make sure your plants are in shape to grow your best crop ever!
Follow Our Facebook Page For Great Gardening Tips And Advice! This Is My Garden Facebook Page
This Is My Garden is a garden website created by gardeners, for gardeners. Jim and Mary Competti have been writing gardening, DIY and recipe articles and books and speaking for over 15 years from their 46 acre Ohio farm. They publish three articles every week, 52 weeks a year. Sign up today to follow via email, or follow along!
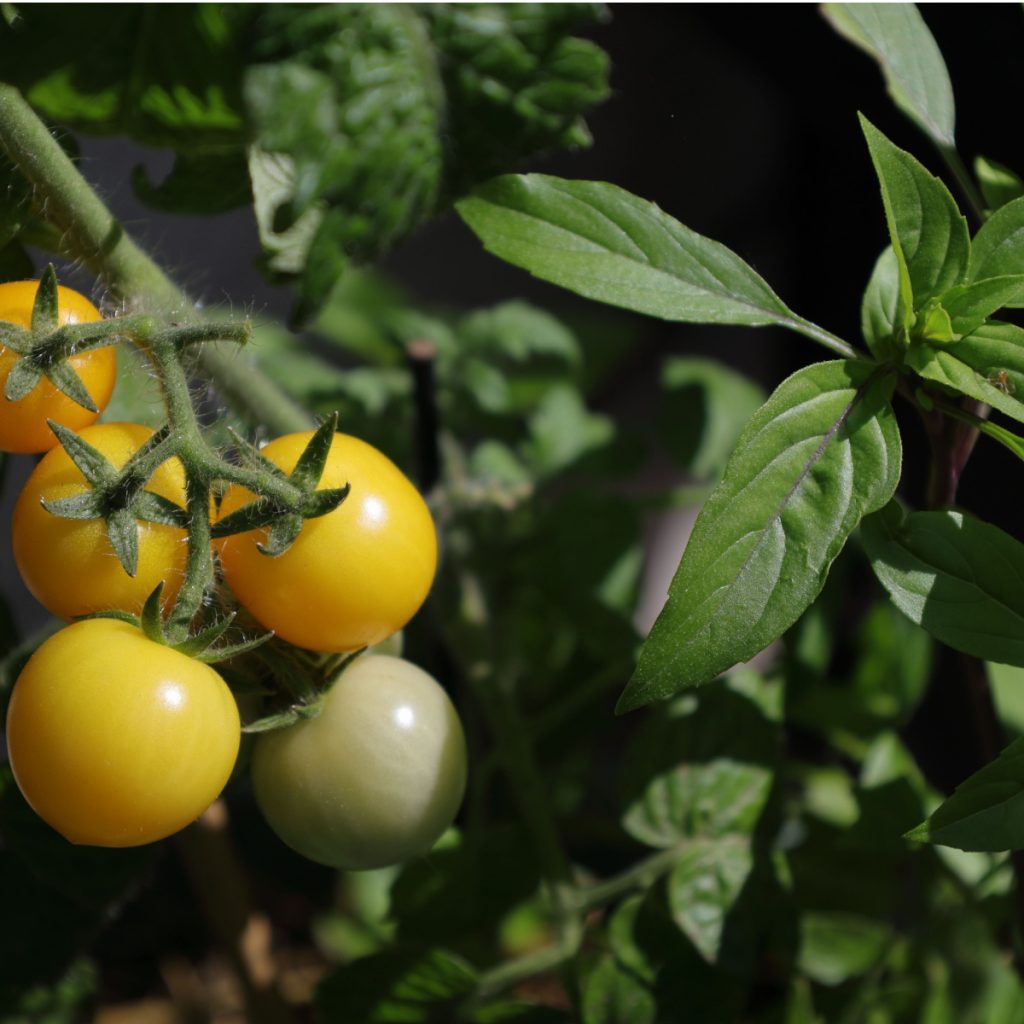
Did you know that planting basil with your tomato plants is one of the best kept secrets to keep your tomatoes healthy and strong – and grow better tasting tomatoes? And – that planting it is as simple as putting a few basil seeds in the ground right around your tomato plants?
Basil and tomatoes certainly are great partners in the kitchen. There are hundreds of incredible dishes, salads and appetizers that pair the two together when it comes to creating delicious foods – but as it turns out, tomato and basil plants also happen to be great partners in the garden as well.
In fact, when it comes to companion planting, they are one of the best examples of all for being perfect growing mates. Not only do tomato plants gain huge benefits from the basil – but the basil gets plenty of great things back from the tomato plants too!

Companion planting in a garden is one of the best ways to help protect and power plants. A great example of how companion planting can protect plants is with annual marigolds. The pungent smell of a marigold’s foliage and blooms repel a long list of pests. And when planted around vegetable plants and other flowers, they help to keep them safe. See our article: Why You Should Plant French Marigolds In Your Garden
But there can be other benefits to companion planting as well. Some plants can help increase yields for another plant by energizing the soil with nutrients. It is even said some companion plants can help improve another plant’s flavor when growing in close proximity.
So where does basil come into play concerning its beneficial relationship? Believe it or not, it can do all of the above and more for tomatoes!
But here is the real kicker – tomato plants also play a positive role in helping to grow healthier and stronger basil plants. Here is an in depth look at what each plant does for each other, and how to best plant them together no matter how or where you grow your tomatoes.


Basil actually rivals marigolds in the pest repelling category. It is extremely effective in repelling whiteflies, aphids and tomato hornworms. All of which can spell big trouble for a tomato plant’s health.
But basil happens to repel mosquitoes too. The mosquito benefit might not directly help your tomato plants, but it sure helps you when you are working in the garden around them!
Beyond repelling pests, basil is also known to help tomatoes to healthier, stronger growth. This occurs when nutrients from the basil’s roots enter the soil and help to energize tomato plants. But perhaps best of all, basil is also thought to improve the overall flavor profile of tomatoes when growing in close proximity.
So do tomatoes help basil grow better? The short answer is yes. The large, leafy foliage of tomato plants creates a perfect growing environment for basil. Especially when you plant basil by seed. And, as you will see below, the entire process is both easy and economical!
Basil prefers moist soil to germinate and grow. And the canopy of tomato leaves helps keep valuable moisture in the soil by shading it from the sun. This helps the seeds of basil germinate better and faster – and allows basil to mature more rapidly too.
Although you can certainly plant basil transplants with your tomatoes, growing straight from seed is a much easier and inexpensive method.
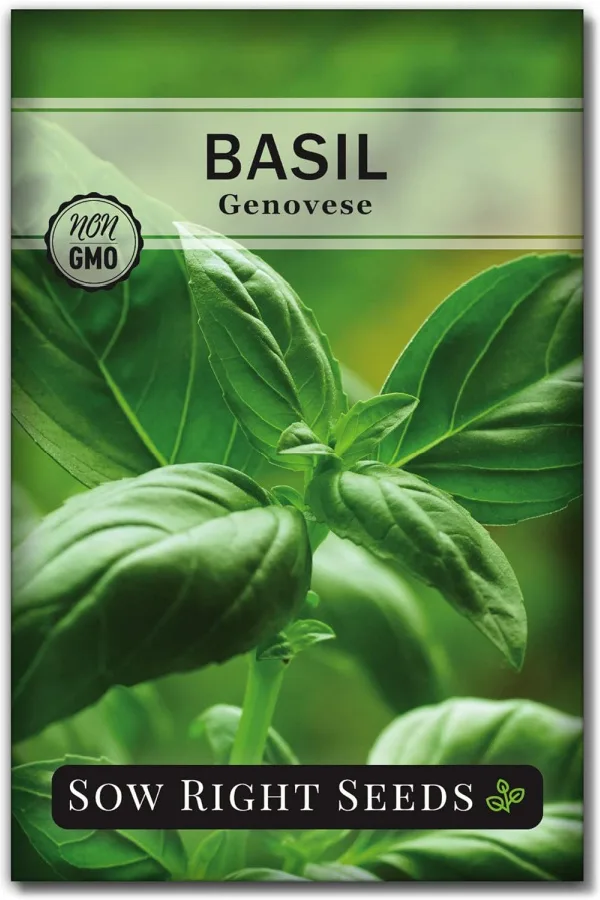
Since tomato transplants should not be planted in the garden until the soil has warmed to at least 60° Fahrenheit, that warm soil makes it perfect for basil seeds to germinate quickly. Seed Link: Sow Right Seeds – Genovese Sweet Basil Seed for Planting
Basil will usually germinate in seven to ten days. In warmer soil, it can pop through in as little as four to five days. With basil’s fast growing habits, if you simply plant basil seeds on the day you plant your tomatoes, it will be up and helping your tomato plants in just a few weeks!
Add in that a portion of your basil plant’s leaves can actually be ready for harvest (tender baby leaves) four to five weeks after planting, and it’s easy to see why planting seeds is the way to go. Especially if you are planting it around a lot of tomatoes.
So how much basil do you need to plant around your tomatoes? And just how close does it have to be to help?

In a traditional garden or raised bed growing space, a couple of plants around each plant is more than enough to do the job. To plant, sow four to five seeds about 12 inches away from the base of each tomato.
As seeds germinate and develop, thin to allow two basil plants for each tomato plant. When you thin, don’t forget that all of those young seedlings make for perfect transplants into pots or other garden spaces. Even better, you can pot them up and give them to friends and neighbors.
When growing basil in containers, you can either plant basil with the tomato or in its own pot close by. If you are growing in the actual pot, you will only need to grow one plant to get the benefits. If you plant more than that, it can take too much of the moisture tomatoes need. In addition, it can take valuable nutrients as well.
Seed two to three seeds per container at the time of planting, planting the seeds at the very edge of the container space. Once the seeds germinate and grow for a week or two, thin to the single strongest plant.
If you simply don’t have the room to grow in the same pot, you can plant and grow basil in a second pot and keep it right near your tomato plants. This will give you all of the benefits of pest protection, but will not help in any soil / nutrient transfer.
One thing is for sure, wherever you plant your basil, the plants will last. Basil is a prolific self seeder. Because of this, you will usually have new volunteer plants coming up all throughout the year.
Here is to using companion planting in your garden this year. And even more, to having your best tasting crop of tomatoes ever!
Follow Our Facebook Page For Great Gardening Tips And Advice! This Is My Garden Facebook Page
This Is My Garden is a garden website created by gardeners, for gardeners. Jim and Mary Competti have been writing gardening, DIY and recipe articles and books and speaking for over 15 years from their 46 acre Ohio farm. They publish three articles every week, 52 weeks a year. Sign up today to follow via email, or follow along!
Looking to give your newly planted tomato plants a big jump start to get them off and growing fast?
Whether you grow tomato plants in a traditional garden setting, raised beds, or in 5 gallon buckets, containers or tomato bags, the first six to eight weeks of their life outdoors is critical to their long term success.
It is absolutely vital that a tomato plant develops strong roots, a healthy stem structure, and thick, vibrant foliage during the first month or two. Unfortunately, without a strong root and stem structure, tomato plants can’t absorb the energy they need from the soil and sun. And the longer they lag behind in growth, the less likely it becomes your plants will produce a good harvest.

Strong roots help a tomato plant create a solid anchor in the soil. They allow it to withstand wind, rain, and many of the other perils that mother nature can bring. Even more, a good root system helps to soak in the nutrients and moisture needed for steady and strong growing habits.
Plain and simple, the more extensive and robust a tomato plant’s roots are, the more easily it can absorb the power it needs to make it grow even stronger.
Along those same lines, strong stems and thick canopy of leaves provide even more strength to the plant as is it matures. With a strong leaf structure, the plant can use the power of photosynthesis to its advantage, increasing its ability to turn the sun’s rays into energy for the plant. And that powers the blooms that eventually produce those amazing tomatoes!
So how do you help your tomato plants create stronger roots early in the growing season? It all comes down to providing three simple but very key needs for your plants during those critical first few weeks outdoors.

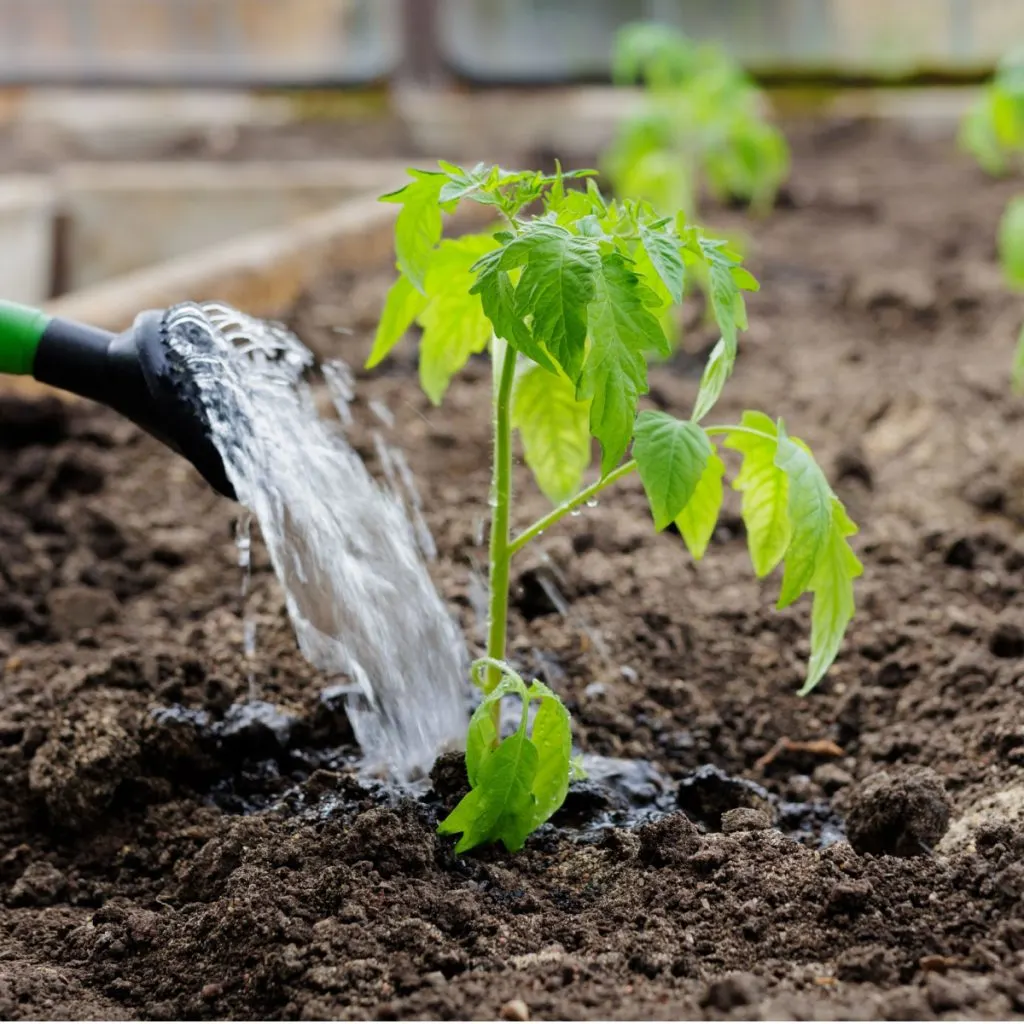
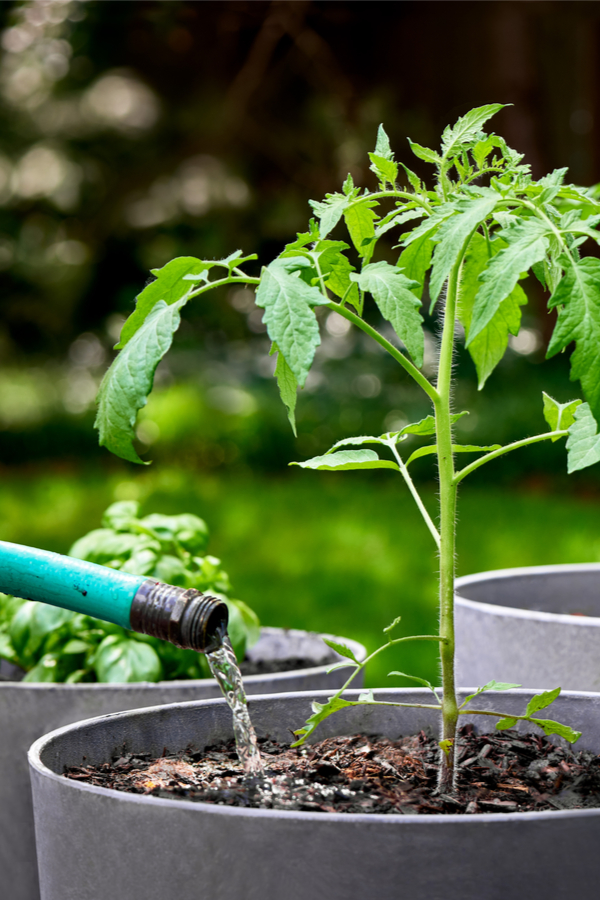
One of the biggest issues for young tomato plants is getting the proper amount of moisture they need for strong growth. And that can be not getting enough, or surprisingly, getting too much. In fact, more often than not, young tomato plants suffer from over watering more than under watering.
In late spring and early summer, the cooler temperatures and more frequent rains often leave tomato plants water-logged. Making matters worse, many gardeners still feel the need to water their plants on a daily basis.
Unfortunately, once roots become saturated, they have great difficulty absorbing nutrients from the soil. Unless you live in a desert-like environment, established tomato plants do not need to be watered every day. It actually harms them way more than helping them.
Only water your plants when the soil is beginning to dry out down by the roots. Always check the soil a few inches down for moisture before watering. Just because the surface is dry, it does not mean the root area is.
This is one time where having an inexpensive, instant-read moisture meter can be of great help. You can simply stick the probes down in the soil and instantly know the moisture level. Affiliate Product Link: XLUX Long Probe Deep Use Soil Moisture Meter
When you do water, it’s important to water deep. Frequent, shallow watering creates tomato plants with a weak root structure. The roots stay near the surface of the soil because they get used to the constant supply. Instead, water slow to allow the water to go deep in the soil.
This allows the roots to grow down looking for moisture. In the end, you develop stronger plants with a more extensive root structure. Not only do bigger roots absorb more nutrients, they also help anchor the plant against wind and storms.
This is also why when you plant, you always want to plant your tomatoes deep! See our article: How Deep To Plant Tomato Plants – The Simple Secret To Grow Your Best Tomato Crop Ever!
Young tomato plants need a lot of nutrients to grow strong roots, stems and foliage. Unfortunately, quite often, they struggle to obtain enough nutrition in the early phases of growth.
The biggest reason for the struggle is that they simply don’t have an extensive root system in place yet to gather the nutrients. And that is where helping plants out with a dose of fast-absorbing energy can make all the difference!
Tomato plants, as many vegetable plants do, often go through a bit of a lag in growth the first few weeks after going into the ground. But by giving them a nutrient boost in the form of a liquid fertilizer, you can jump start a good early growth spurt.
So why use liquid fertilizers in place of granular types? Because liquid fertilizers act fast! They absorb both through the roots and foliage of a tomato plant, and they provide nutrients quickly, helping struggling plants to perk up in a flash.
To help young or struggling tomato plants, apply a dose of liquid fertilizer every 7 days for two to three weeks. Compost tea, worm casting tea, or an all-purpose liquid organic fertilizer are all excellent choices.
Once your plants have begun to respond and green up, back off the feedings to every two weeks to prevent your plants from growing too much foliage in lieu of blooms and fruit. Affiliate Fertilizer Link: Farmer’s Secret Tomato Booster Fertilizer (32oz)
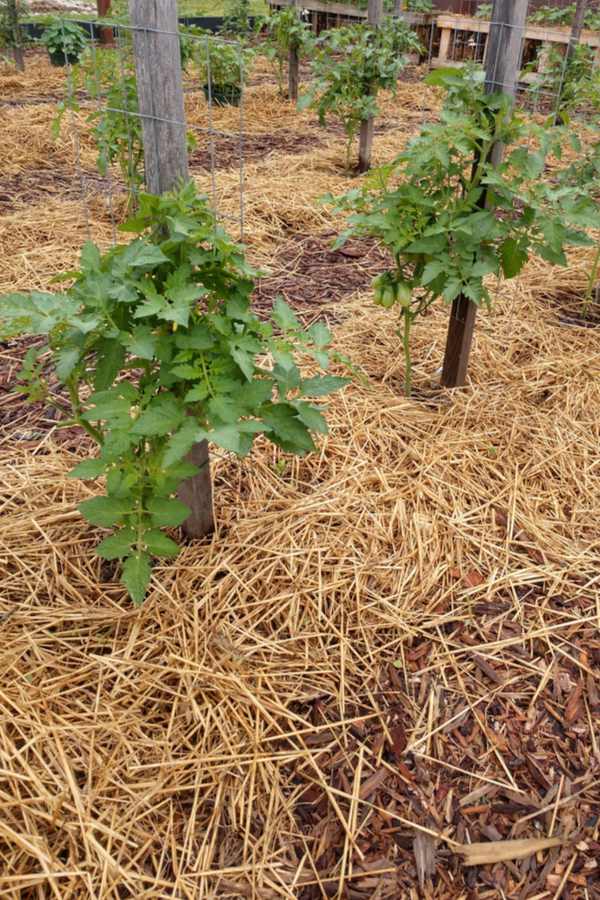
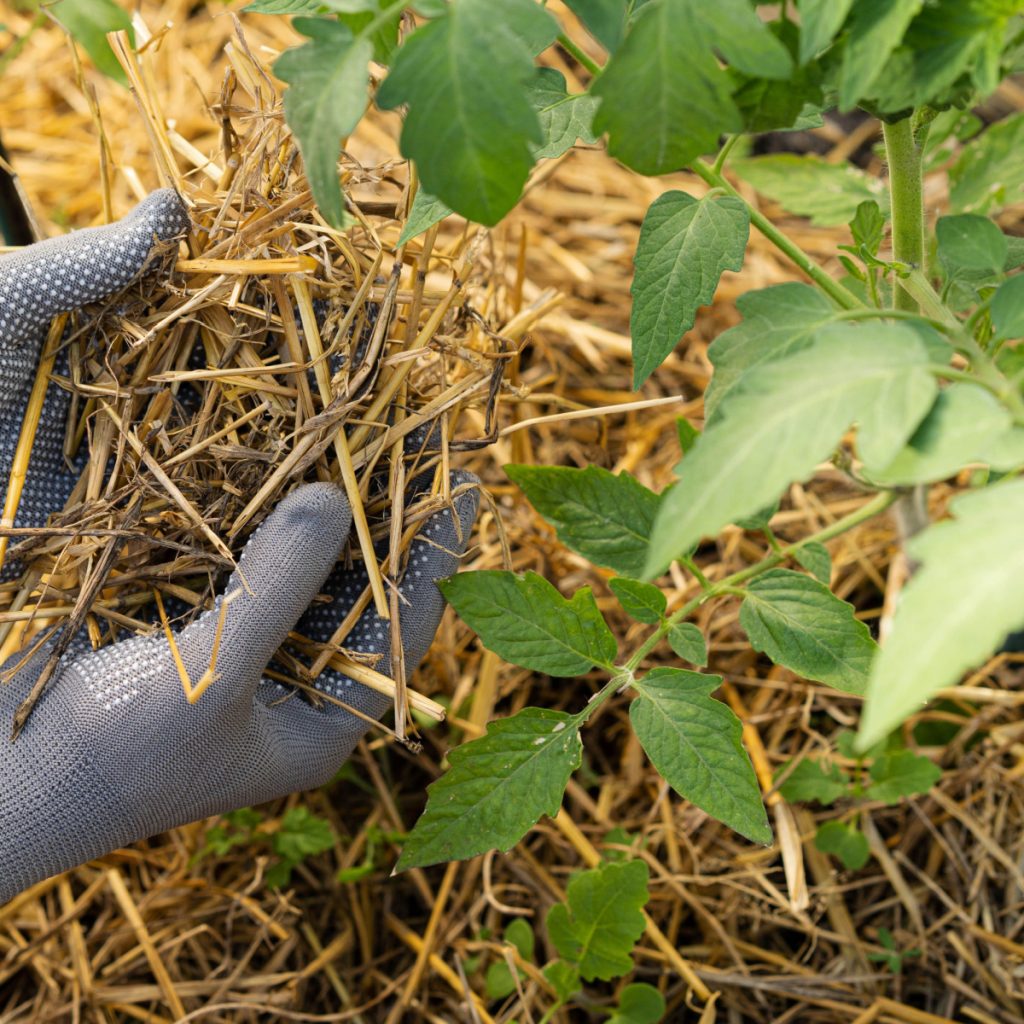
Finally, always mulch your plants right from the start! One of the best ways to help your plants stay healthy and strong is with a thick layer of organic mulch. Leaving the soil around your plants bare can cause all kinds of issues for tomato plants.
For starters, it allows the soil to dry out too quickly. That not only starves plants of the moisture they need, but creates the need for you to have to water more frequently.
Bare soil also allows weeds to take hold. Weeds that steal the same nutrients from the soil that your tomato plants need to grow and produce. That same layer of mulch also helps to keep the soil temperature regulated, keeping your plant’s roots from getting too cool or warm – both of which can stunt growth.
Finally, mulch helps to protect your tomato plants from soil borne disease. Soil borne diseases such as blight can infect plants when dirt splashes on plants. A thick layer of mulch keeps that from occurring, protecting your plants in the process.
For best results, mulch your plants with a thick four to six inch layer of organic material. For this, straw, grass clippings or shredded leaves all work great. It will protect your tomato plants and add nutrients to your soil as it breaks down.
For even more power, mulch your plants first with a few inches of compost around the plant’s surface. This will help leach even more nutrients into the soil whenever it rains or you water.
Here is to giving your tomato plants the jump start they need to big growth. And even more, a big harvest this summer! If you are wondering how to use wood ashes from your fireplace to help boost your plants, be sure to check out Planting Tomatoes With Wood Ashes – The Secret To Getting Tomatoes Off To A Fast Start!
Follow Our Facebook Page For Great Gardening Tips And Advice! This Is My Garden Facebook Page
This Is My Garden is a garden website created by gardeners, for gardeners. Jim and Mary Competti have been writing gardening, DIY and recipe articles and books and speaking for over 15 years from their 46 acre Ohio farm. They publish three articles every week, 52 weeks a year. Sign up today to follow via email, or follow along!
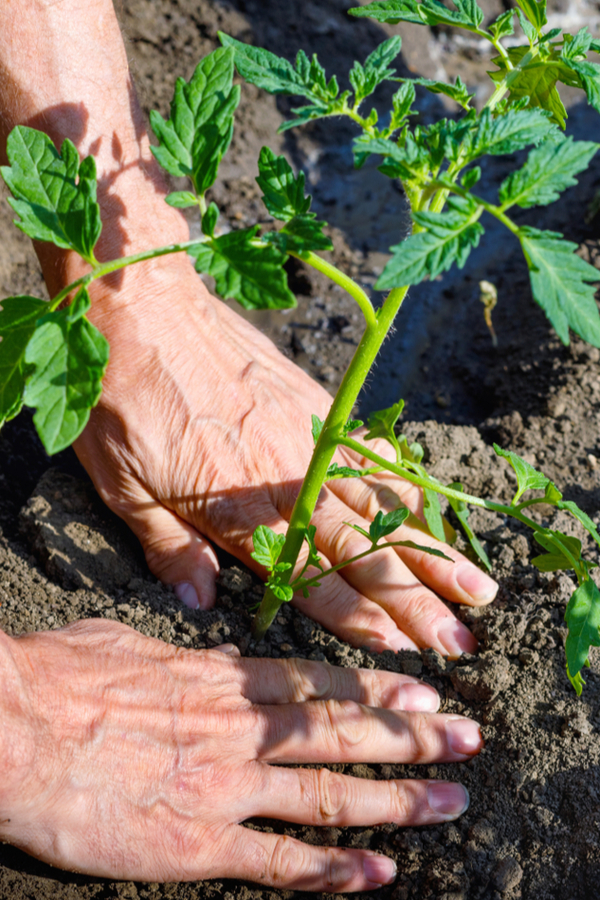
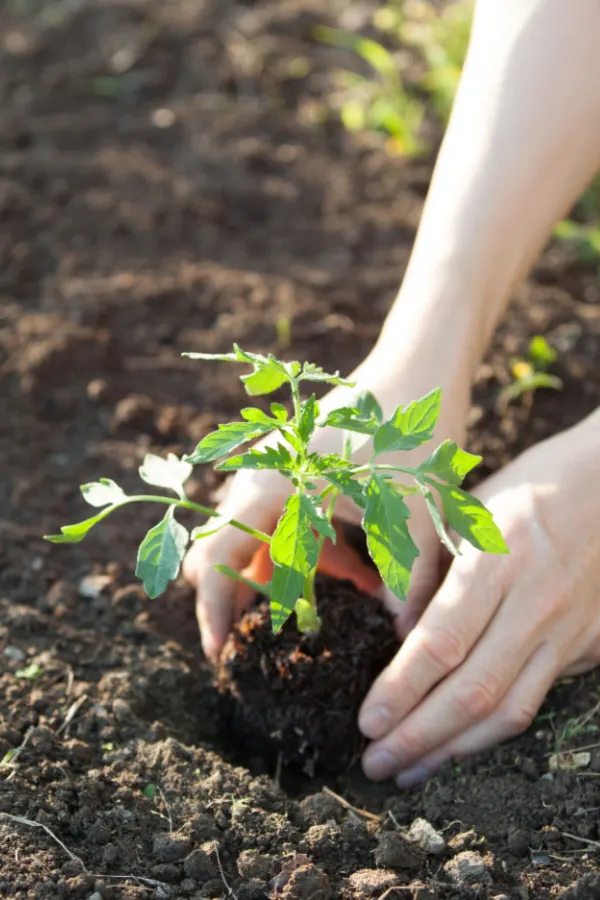
When it comes to how deep to plant your tomato plants – most gardeners are quite surprised to find out how far down their transplants should be placed into the ground on planting day – and just how much difference it can make in how well they perform!
One of the most important days of a tomato plant’s life – if not the most important day of its life – is the day it goes into the ground. Planting day sets the stage in so many important ways for how a tomato plant will grow and produce.
To mature into a healthy, productive plant, a tomato plant needs to get plenty of nutrients and water. That’s exactly why on planting day it’s so vital to fill your planting hole full of powerful food – and why it’s also critical to water it in as well. Just like it’s also important to mulch and support your plants on planting day too.
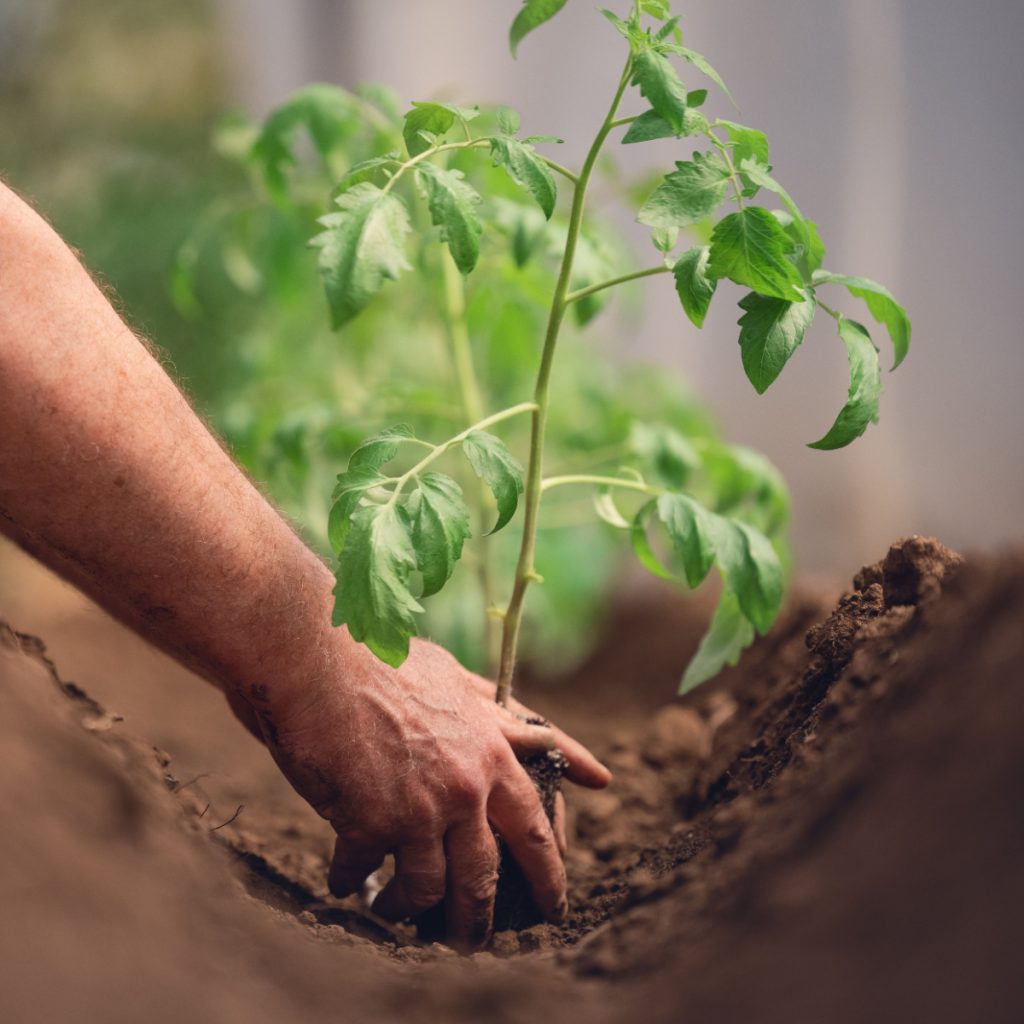

But as important as those chores are on planting day – there is one more that is even bigger – and that is to plant your tomato plants deep in the ground.
Why? Because as you will see below, planting deep gives your plants the absolute best chance to soak in everything they need – all while protecting them from many of the issues that can injure, harm or even kill of shallow planted tomatoes. And you might just be surprised how far down the root ball needs to go!
We will get to how deep to plant your tomatoes in just a moment, along with a few tips of what to put in your planting hole to get them off to a fast start – but let’s first cover all of the reasons why planting so far down in the soil is so important.
At the beginning of the article, we covered how crucial it is for a tomato plant to get consistent water and nutrients. A tomato plants absorbs most of the moisture and nutrients it needs through its root system. It can absorb some from it’s foliage, but the largest majority are taken in through its roots.
Because of that, the bigger a tomato plant’s root system can be, the better. Naturally, the more roots that grow in the soil, the more food and water a plant will be able to take in. And not just nutrients from the soil, but also fertilizer and other amendments you might give your plants throughout the season.

So how do you get more roots? The answer is simple – by planting your tomato plants deep! In fact, as it turns out, there are actually two great reasons planting far down in the soil helps to create more roots for your tomatoes.
The first way planting deep helps is fairly obvious. By simply placing the main root ball of your transplant deeper, it has a lot more room to expand.
Unfortunately, when you plant in a shallow hole, the roots tend to stay near the surface. Not only because the unworked soil underneath is hard for them to expand down into, but even more because they are close to where moisture arrives when it rains or you water.
That may sound like a good thing for tomato plants, but it’s not. Not in the least. Shallow roots at the surface may get water quickly when it rains, but they also dry out quickly in the hot sun. Even worse, without strong roots down deep, they also topple over easily with storms or a heavy fruit load.

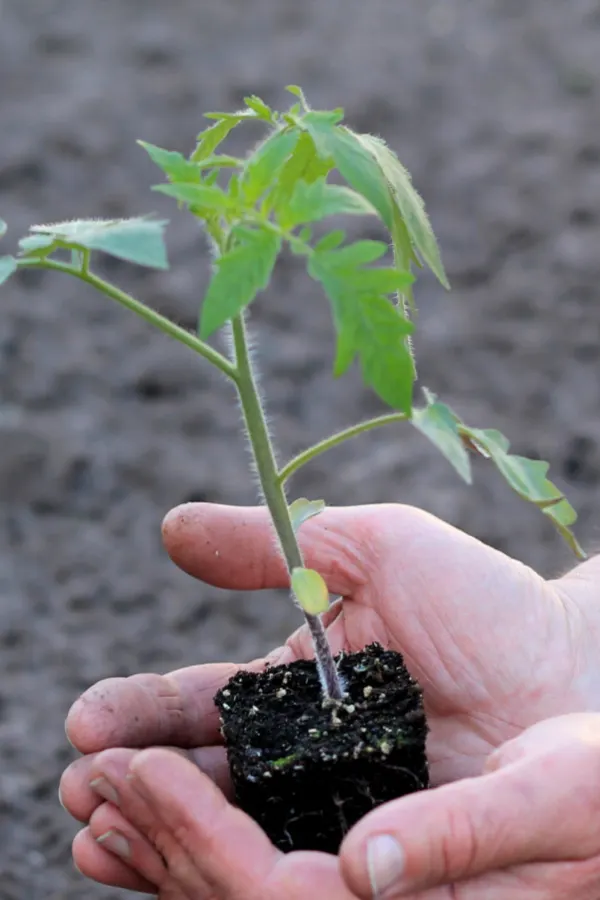
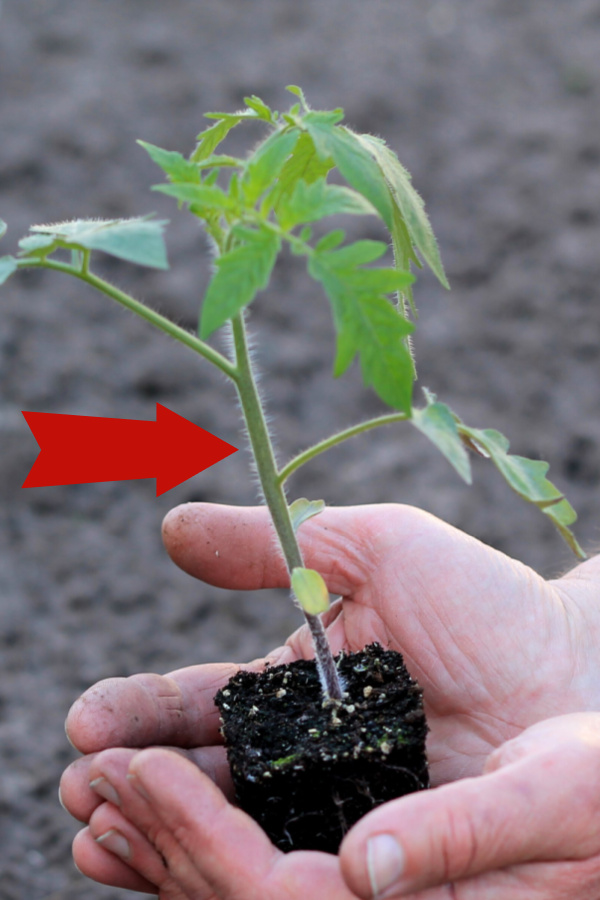
The second reason planting deep helps develop more roots has to do with the main stem of a tomato plant. If you look at the leading stem of a young tomato transplant, you will see hundreds of tiny white hairs.
Those “hairs” are actually mini-roots. If the hairs stay above soil, they simply stay as is, tiny white hairs. But when they are placed in the soil and covered, they grow into roots – and a lot of them. And the more roots your plant has, the more energy and moisture it can absorb all summer long!
So how deep should you plant? Believe it or not, you should be planting 2/3rds of your entire tomato transplant in the soil on planting day.
A typical tomato transplant measures somewhere between 12 and 18 inches from the bottom of the root ball to the top of the plant. That means that when planting, 8 to 12 inches of the plant should go in the ground. And don’t worry about any leaves you might bury, it won’t harm the plant in the least!

It may sound like a lot, but it’s actually the perfect way to set your plant up for success. Roots will quickly establish along the stem and deep in the hole. Down deep in the soil, moisture will not dry out nearly as quick as it does on the surface. And all of those extensive roots make it easy for the plant to soak up both water and energy to power the plant.
In addition to planting deep, it’s important to fill that planting hole with big power. One of the biggest things you can add to do just that are worm castings.
Worm castings have the perfect balance of nutrients to power young tomato plants. Even more, they help to absorb and hold moisture at nearly 10 times their weight! Affiliate Link: 100% Pure Organic Worm Castings Fertilizer, 15-Pounds
As you plant, add 1/2 to 3/4 cup of castings into the bottom of every planting hole. In addition, adding ground egg shells, compost and coffee grounds can help fill your planting hole with even power.
And speaking of that planting hole, always loosen the soil a few inches below from the bottom. This will allow the roots of your plant more loose soil to expand even deeper. See: 4 Must Add Ingredients To Put In Every Tomato Planting Hole!
Finally, don’t forget to put in your tomato supports the day you plant. This not only allows you to support tender young plants right from the start, but also prevents damaging growing roots if you wait until a few weeks later to put them in.
Here is to planting your tomatoes deep this year – and to having your best tomato harvest ever!
Follow Our Facebook Page For Great Gardening Tips And Advice! This Is My Garden Facebook Page
This Is My Garden is a garden website created by gardeners, for gardeners. Jim and Mary Competti have been writing gardening, DIY and recipe articles and books and speaking for over 15 years from their 46 acre Ohio farm. They publish three articles every week, 52 weeks a year. Sign up today to follow via email, or follow along!
Looking for a few simple solutions to keep tomato blight away and keep your tomato plants safe from damage – for good?
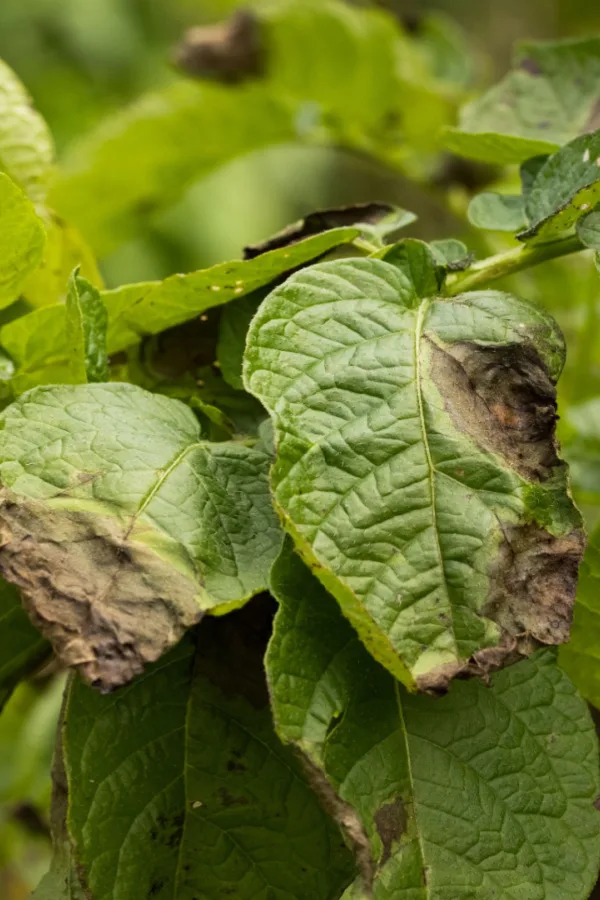
There is little doubt that tomato blight can all but ruin a tomato harvest. Although there are several types and versions of the disease, blight is a fungal condition that can devastate and destroy otherwise healthy plants.
Although blight can infect potato plants, egg plants and even pepper plants – it is most notorious for striking the beloved tomato plant. Unfortunately, once it does, it can be nearly impossible to keep it from eventually wiping out the plant.

It usually starts out with the browning of leaves. From there, it quickly spreads to all of the foliage on the stems and branches – eventually, damaging and ruining the fruit as well. If that wasn’t enough, once it appears, it also spreads easily to neighboring plants, wiping out an entire crop in the process.
Blight is spread via spores that live in the soil. The spores can get into the soil by several different means. They can be blown in from the wind, carried in and left by insects or animals, or dropped by infected plants down to the dirt below.
Blight can also more easily occur when conditions are overly wet and cool. In fact, it’s usually far more prevalent when garden seasons are filled with lower temperatures and more rain as it helps feed and fuel the pace of the spread. As you will see below, it can also be made worse by improper watering.
Beyond heavily damaging and/or destroying tomato plants, once blight occurs, it unfortunately damages the soil where the crops grew as well. And it does so for several years afterwards. That is because once the spores appear, they can live in the soil below for as many as four to five years.

As you can see, the best defense against blight is prevention. After all, if you can simply keep it away from your plants and soil – you can keep your tomato plants safe.
The good news is that armed with a few simple tips, you can all but ensure blight stays far away from your tomatoes. With that in mind, here is a look at the three types of blight that can infect plants, and how to keep it out of your garden and off of your plants.
There are actually three distinct types of tomato blight. Early blight, Leaf spot blight, and Late blight. Although they can all bring damage, it’s important to know the difference between the three and when and how they strike plants.
Early tomato blight will appear after the tomato plants have set fruit. This type of blight doesn’t directly damage the fruit. Unfortunately, it will destroy all of the foliage. When that occurs, the tomatoes that are left on the plant have to endure the scalding hot sun without protection. This usually leads to the majority of the fruit simply rotting away.
The second type of blight that can infect plants is Leaf spot blight. Leaf spot blight is by far the most common in the home garden and begins to appear in late June to early July.
Leaf spot starts with the lower leaves turning brown, then black, and they then finally rot away. It will steadily begin to destroy all of the foliage of the plant. Usually within 30 days of first appearing, the plant is gone, resulting in an entire loss of the harvest.
Last but not least, there is Late blight. Late blight starts as tiny, light-colored spots on the foliage of plants. It quickly progresses until the stems, leaves and tomatoes turn black.
Late blight is spurred on by cool, damp temperatures. It tends to be more of an issue in cooler climates, or in growing seasons that are extremely wet and rainy. Left to its own accord, Late blight will eventually spread to the fruit as well, ruining it in the process.
So now that we have covered the three types of blight that can harm your plants, let’s look at a few simple ways to stop it before it ever happens!
The bad news is once any of the above tomato blight symptoms arrive, it’s usually too late to help. There simply is no viable cure to stop or kill the spores or blight. Although you can remove the damaged leaves and fruit as soon as you see them, blight will almost always win out in the end.


The real key is prevention. And although there are actually quite a few extra things you can do that will help to avoid tomato blight – there are two must-do’s that are huge in preventing the deadly disease from ever showing up – rotating your crops, and protecting your plants from the soil below with a thick layer of mulch!
The number one way to keep tomato blight and disease from finding your tomato plants is by rotating your plants every year to a new location. Or, if you grow in containers, changing out the soil where you grow your plants each season.
Growing tomatoes in the same soil or garden space every year is an open invitation for blight. Tomatoes are highly susceptible to soil-borne disease. Especially spores. And when they grow in the same space year after year, it increases the likelihood spores might be lying in wait.
If growing in a traditional garden or raised bed space, rotate where you grow tomatoes each year for a minimum of 3 years. If you are growing tomatoes in containers, replace the soil each season with new potting soil.

Not only does this help to prevent blight, it also keeps a fresh supply of nutrients in the soil. Those fresh nutrients don’t only help propel strong growth, but they help the plant to better fight off disease as well.
When it comes to preventing blight, mulch also plays an extremely important role. As soon as you put your tomato plants in the ground, you need to mulch the area around your plants.
Spores that are alive in the soil can easily splash up onto the foliage. Especially if the soil is bare, making for an easy route for the spores to get to your plants. Every time a hard rain hits or when you water, your plants have the chance to become infected by the spores splashing up. But with a heavy application of mulch covering the soil, the dirt can’t splash.
In addition to applying mulch, it’s important to prune and remove the bottom 6 to 12 inches of your plant’s foliage for this same reason. Keeping the plants up off the ground will help to keep disease away by keeping the soil from directly touching the foliage.
Finally, don’t allow your plants to sprawl on the ground without support. Supporting plants with stakes or a tomato cage will help keep soil and the foliage from coming in contact. And the less the soil touches your plants, the better.
Beyond crop rotation and mulching your plants, there are a couple of other easy ways to help prevent blight from appearing. And believe it or not, how you water your tomatoes is one of them. See: The 3 Biggest Garden Watering Mistakes – And How To Avoid Them!
Watering is one of those mundane tasks that seems simple, but can cause immense damage if done incorrectly. For starters, don’t water your plants from overhead or with a heavy sprinkler or stream of water. Why? Because it can easily splash spores onto your plants!

It’s also important to water in the early morning so tomato plants have time to dry off. Wet and damp leaves are the ideal ingredient for spores to grow. Watering late in the day or at night will keep plants moist for extended periods. That can lead to heavier dew levels in the morning, making plants even more prone to disease.
Once planted, keep a careful eye on your tomatoes for any early signs of blight. If you do notice leaves or stems browning off, act fast to remove them to contain the spread.
By removing these fast, you may be able to save the plant. More importantly, you will keep the spores from dropping off the plant and infecting more soil and more plants. Always clean and disinfect your pruning blades before pruning a new plant to prevent cross-contamination.
Be careful not to place any of these trimmings in your compost pile. Instead wrap them in newspaper or a bag and put them in the trash. When placed in a compost pile, they can easily survive, infecting plants wherever the compost goes.
You may not be able to treat tomato blight effectively once it occurs, but you can definitely help prevent it! Here is to keeping tomato blight far away from your tomato plants this year!
Follow Our Facebook Page For Great Gardening Tips And Advice! This Is My Garden Facebook Page
This Is My Garden is a garden website created by gardeners, for gardeners. Jim and Mary Competti have been writing gardening, DIY and recipe articles and books and speaking for over 15 years from their 46 acre Ohio farm. They publish three articles every week, 52 weeks a year. Sign up today to follow via email, or follow along!
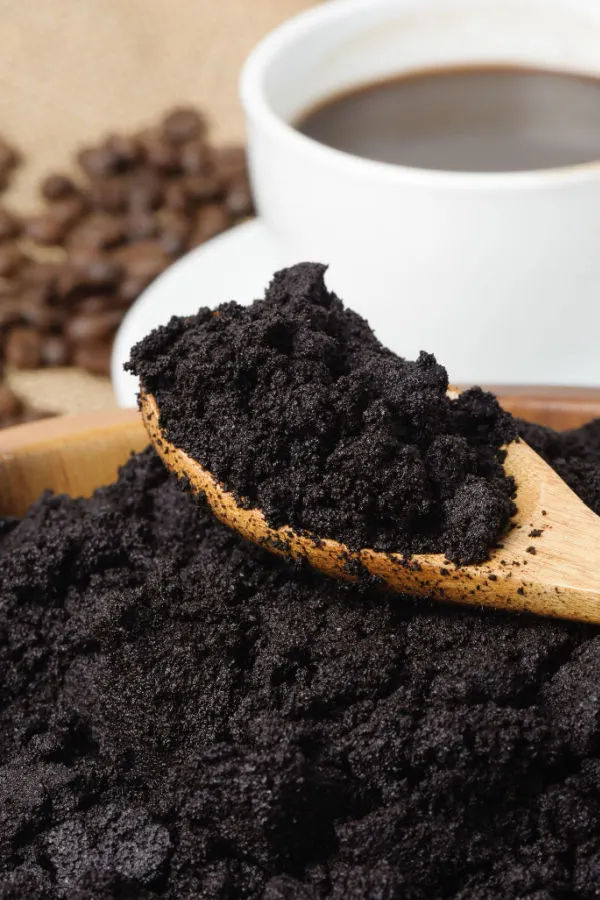
Looking for the easiest and best ways to use coffee grounds to power your tomato plants to a bigger and better harvest than ever this year?
Coffee grounds have all kinds of uses when it comes to improving soil and helping plants grow. From fertilizing houseplants to heating up compost piles, powering potting soil and more, there seems to be no limit to what the leftover grounds from a cup or pot of coffee can do for a gardener.
But as beneficial as spent grounds can be for all of the above situations, it’s perhaps with the beloved tomato plant where they truly take their powers to the next level. And not just with young tomato plants, but at nearly all points of a tomato plant’s lifecycle – from helping a tiny sprouting seed, to aiding a fully mature adult plant loaded with ripening tomatoes!

So why are coffee grounds so special for tomato plants? And how exactly do they help them grow better from start to finish? As it turns out, leftover grounds have two key attributes that are extremely beneficial for both tomato seedlings and adult tomato plants.
The first is that once run through the coffee making process, the grounds left behind contain 3 essential nutrients that tomato plants love – nitrogen, phosphorous and potassium. Even better, those nutrients happen to be in a form that when used in the soil around plants, they can absorb quickly into the roots of a tomato plant.
But the benefits of coffee grounds don’t stop with just giving tomato plants great energy. Spent coffee grounds also have the ability to retain a tremendous amount of moisture. And if there is one thing tomato plants need to survive and thrive – it’s water!
Tomato seeds need water to swell and sprout. Likewise, they need even more moisture to grow into tiny seedlings and spread roots under the soil. But the need for water continues as a tomato plant grows beyond a seedling. First, it needs water to grow healthy stems, roots and foliage. And finally, water is once again needed to form the plant’s fruit.

Believe it or not – tomatoes are made up of 95% water. And if there isn’t enough moisture in the soil to absorb into the plant – your plant and your harvest will suffer. The good news? As you will see below, coffee grounds can more than help with that issue!
Perhaps the best part of all for using coffee grounds is that you can get them for free. All by simply saving your leftover grounds each morning. And are they ever easy to save to use later. See our article: 2 Easy Ways To Save Coffee Grounds In Winter – Without Molding.
Now let’s take a look at three great ways to use all of those leftover coffee grounds (and coffee too) to help your tomato plants grow better than ever this year!
Coffee grounds can be tremendously helpful when starting seeds indoors. Especially when it comes to getting tomato seeds to germinate. And they are equally adept at helping young seedlings to develop strong roots and stems as well.
Mixing in a few tablespoons of spent coffee grounds into your seed starting soil is all it takes! The grounds help to hold moisture in around the seed, allowing it sprout quickly. But even better, the trace amounts of nitrogen, phosphorous and potassium power up tiny seedlings fast!
When mixing in coffee grounds with seed starting soil, mix two tablespoons for every 3 cups of seed starting soil. Your seeds and seedlings will thank you!
Coffee grounds can really help power young transplants on planting day! Once again, it’s that double combination of energy and water retention that are perfect for helping young plants establish outdoors.
When planting, mix in three to four tablespoons of coffee grounds into the soil in each planting hole. The grounds will blend with the soil to help it absorb and hold more moisture around the roots. At the same time, they will slowly release all of their nutrients to power strong, early root growth.
If you really want to load up on the power of grounds, finish by adding a few more tablespoons on top of the surface of each plant after planting. Every time it rains or you water, the nutrients will leach out of the grounds. And when they do, they go down into the roots of your tomato plants, continuing to power them in the process.
The practice of top dressing with grounds is actually great to use all season long. Every two to three weeks, simply spread out a few more tablespoons of grounds around the base of each tomato plant. It will give a continuous low-and-slow feeding to your plants, which can serve as a great boost to regular fertilizing.

Perhaps best of all, as the grounds break down and absorb into the soil over time, they add valuable structure and humus. With each succeeding garden season, you are left with richer, healthier soil.
Perhaps one of the easiest of all ways to use your spent coffee grounds, or even leftover coffee for that matter, is as a fertilizing tea on your tomato plants all spring and summer long. Just as the grounds contain nitrogen, phosphorous, potassium and other helpful trace nutrients, so does the water that runs through the grounds.
After brewing your morning coffee, simply run another pot of water through your spent grounds in the coffee maker. The weak coffee, once cool, makes for a great liquid fertilizers for plants.
Likewise, if you are left with some leftover morning coffee, add an equal amount of water to dilute, and water away. The liquid will give a trace boost of nutrients to your plants. Even better, it will help water them at the same time!
Here is to using coffee grounds to help grow your best tomato plants ever this year. Not only are they incredibly powerful and all natural – they also happen to be free!
Follow Our Facebook Page For Great Gardening Tips And Advice! This Is My Garden Facebook Page
This Is My Garden is a garden website created by gardeners, for gardeners. Jim and Mary Competti have been writing gardening, DIY and recipe articles and books and speaking for over 15 years from their 46 acre Ohio farm. They publish three articles every week, 52 weeks a year. Sign up today to follow via email, or follow along!
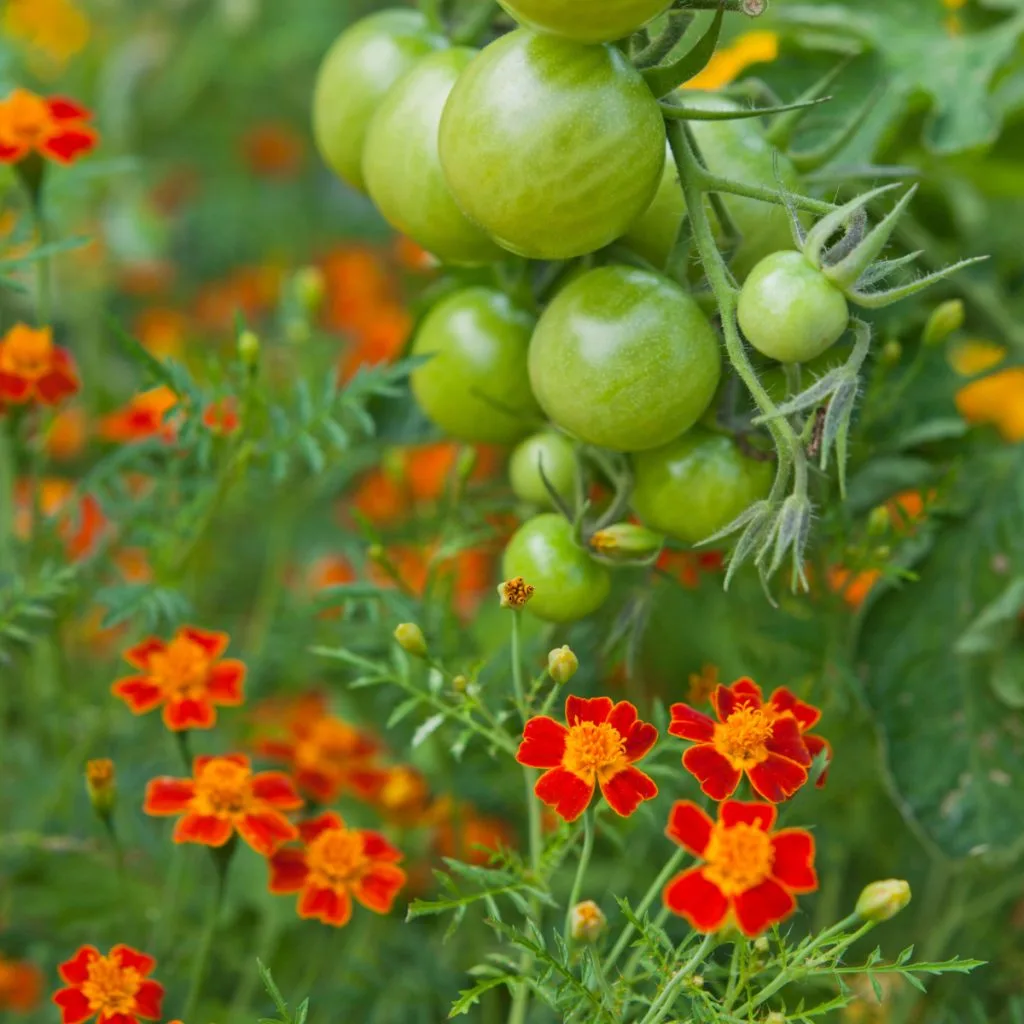
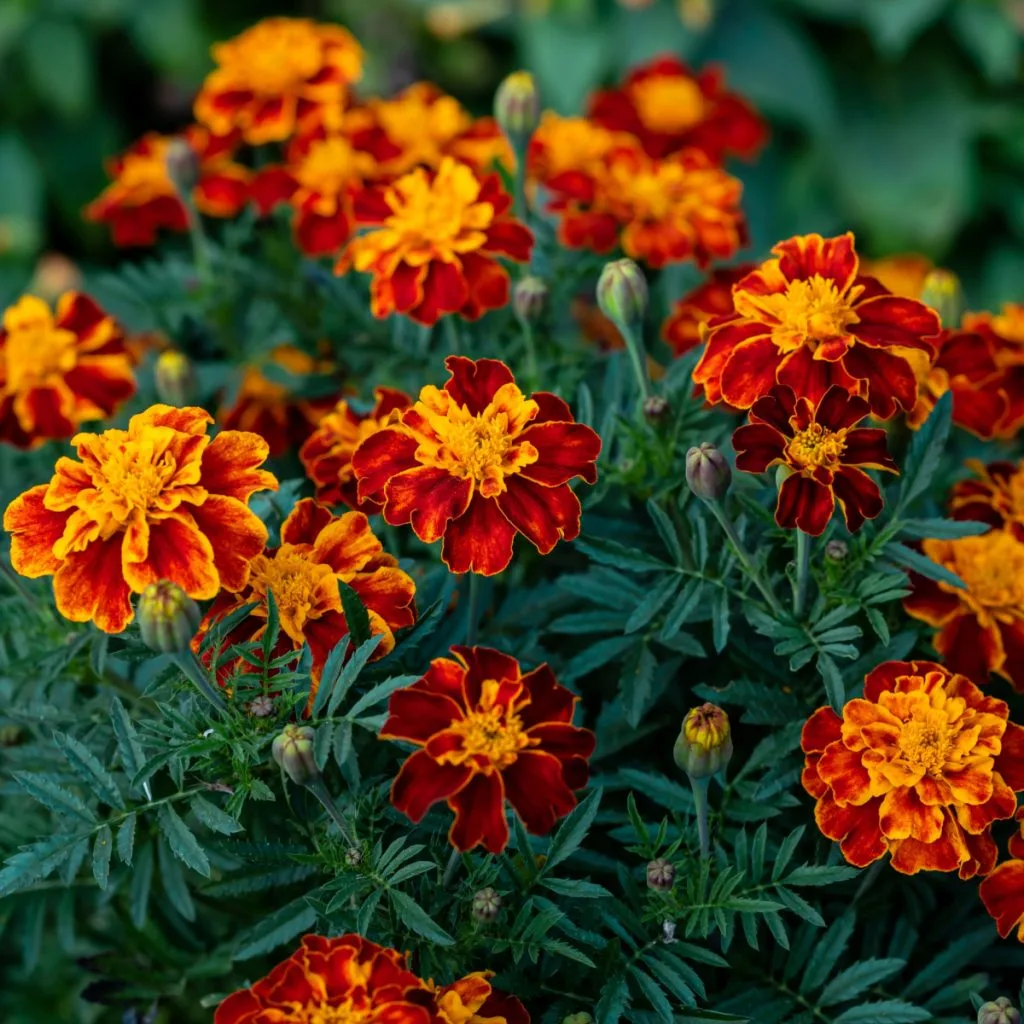
Did you know that planting and growing marigolds with your tomato plants can be one of the best ways to keep your tomatoes healthy, happy, and most of all, incredibly productive?
Believe it or not, one of the best examples of companion planting is growing marigolds right by your tomato plants. Not only do these prolific flowering annuals add big color wherever they grow, they also bring huge benefits along with them. And when it comes to helping tomatoes – they are pure gold!
Marigolds really are the rock star of annual flowers. For starters, the plant is one of the most drought, pest and heat resistant flowers you can grow. Unlike petunias, impatiens and other more vulnerable annuals, marigolds stand up strong to the most brutal of conditions.

The plant’s sturdy stems and foliage can take a lot of abuse before they ever begin to show signs of wear and tear. That includes intense sunlight, a lack of rain or watering, and even strong winds that easily damage other annuals.
But if that wasn’t enough, marigolds actually repel a long list of pests and animals as well. Both rabbits and deer are not fond of them in the least. Nor are squirrels and chipmunks. And as you will see below, they also have the same repelling effect on many damaging insects as well.
But plain and simple – where the benefits of growing marigolds really shine through is when you plant them with your tomato plants. And that is exactly what today’s article is all about!
So why are marigolds so incredible to plant around your tomato plants? The truth is, they actually help growing tomatoes in a whole slew of ways – and it all starts with attracting some of the most beneficial insects right to your tomato plants!
With their prolific blooms and brightly colored flowers, marigolds lure a long list of helpful insects near your tomato plants. And at the top of the list are honey bees, butterflies and wasps.


Although tomatoes are self fertile and can pollinate themselves, they need movement to move the pollen around to fertilize their flowers. As it just so happens, when bees, butterflies and wasps feed on the tomato plants nectar, all of that buzzing around is an excellent method to spread the plant’s pollen.
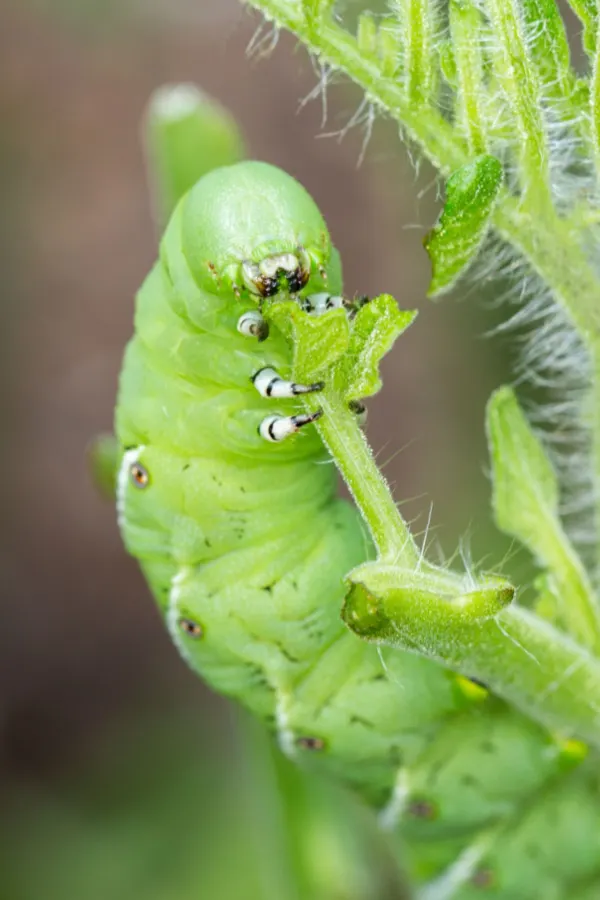
But attracting wasps also has an important additional side benefit for tomatoes. Paper wasps love to lay their eggs on tomato hornworms, which is a near mortal enemy of a tomato plant.
Hornworms usually appear in mid summer and can devour tomato plants quickly. Not just the foliage, but the fleshy meat of the fruits as well. But when parasitic wasps lay their eggs on the back of hornworms, they feed from the worm, killing it eventually in the process. See: How To Find Tomato Hornworms – And Save Your Tomato Plants!
But it doesn’t stop there for marigolds attracting helpful insects. Their bright flowers are also a major lure for ladybugs and lacewings. Both of these insects also happen to keep a watchful eye out for tomato plants as well protecting them from aphids and whiteflies.


Aphids and whiteflies are two pests that can decimate tomato plants. Especially when they go unchecked and begin to lay more and more eggs. Both pests multiply at an alarming rate and quickly take their toll on a tomato plant’s health. In fact, if an infestation is bad enough, they can kill tomato plants quite easily.
But when marigolds are growing nearby, rest assured, ladybugs and lacewings will be in the area as well. They visit the bright flowers of the marigolds often. When they do, they are more than happy to take care of the aphids and whiteflies on nearby tomato plants.
If it wasn’t enough that tomatoes bring in helpful insects for tomato plants, they also keep a few bad insects far away. The strong scent of marigolds are well known to repel whiteflies. Even better, they also repel mosquitoes – helping to keep you safe as well when working in the garden.
But perhaps the most important pest of all that marigolds help to repel is the tomato hornworm. Yes, marigolds not only attract the wasps that attacks the pest that attacks tomato plants, they also help repel the actual pest from getting near them in the first place!

One of the biggest pests in the soil that can cripple tomato plants are root-knot nematodes. The tiny creatures live in the soil and attack the roots of a tomato plant. In mild cases, it can yellow the leaves of a tomato plant and lower the plants ability to produce a full harvest. But in severe cases, it will kill the plant entirely.
The good news? Marigolds produce a compound that kills nematodes in the soil. And when you grow marigolds right near your tomatoes for the season, they will help keep this pest at bay with ease.
One of the best things about planting marigolds with tomato plants is how easy and inexpensive it can be to do. Although you can purchase transplants in local nurseries and stores, marigolds grow so easily from seed there is little need to.
Marigolds are fast growers. In fact, by simply planting seeds in the soil nearby when you plant your tomato plants in late spring, the annual will quickly germinate and be a few inches tall within a few weeks. Marigold seeds are also easy to save from spent blooms. That, of course, means you can save them to sow for free year after year!
As for the best varieties of marigolds to plant to help tomatoes, although all marigold types are useful, French marigolds seem to be the most effective when it comes to repelling bad insects and bringing in beneficial ones. Affiliate Seed Link: French Marigold Seeds
It is thought that the particular scent of this variety is especially helpful. Again, all varieties work to bring in pollinators and help with repelling some key pests, it’s just that the French marigold variety seems to be the best.
When planting any marigolds around your tomato plants, there are several options that work well. If you have a row of tomatoes you can plant them as a border on the outside of the row.

You can also grow a few plants around the perimeter of each plant. To do this, sow seeds about 18 inches from the main stem. As another alternative, many gardeners simply grow their marigolds in pots, then place them right near their tomato plants.
No matter how you plant them – the key is to get those marigolds as close as possible to your plants to maximize their benefits. Here is to planting marigolds with your tomato plants this year – and growing your best crop of tomatoes ever!
Follow Our Facebook Page For Great Gardening Tips And Advice! This Is My Garden Facebook Page
This Is My Garden is a garden website created by gardeners, for gardeners. Jim and Mary Competti have been writing gardening, DIY and recipe articles and books and speaking for over 15 years from their 46 acre Ohio farm. They publish three articles every week, 52 weeks a year. Sign up today to follow via email, or follow along!
One of the best and easiest ways to power up and energize your tomato plants is with egg shells – but how, when and where you use them to help grow your tomatoes is the real key to powering healthy plants and an amazing harvest!
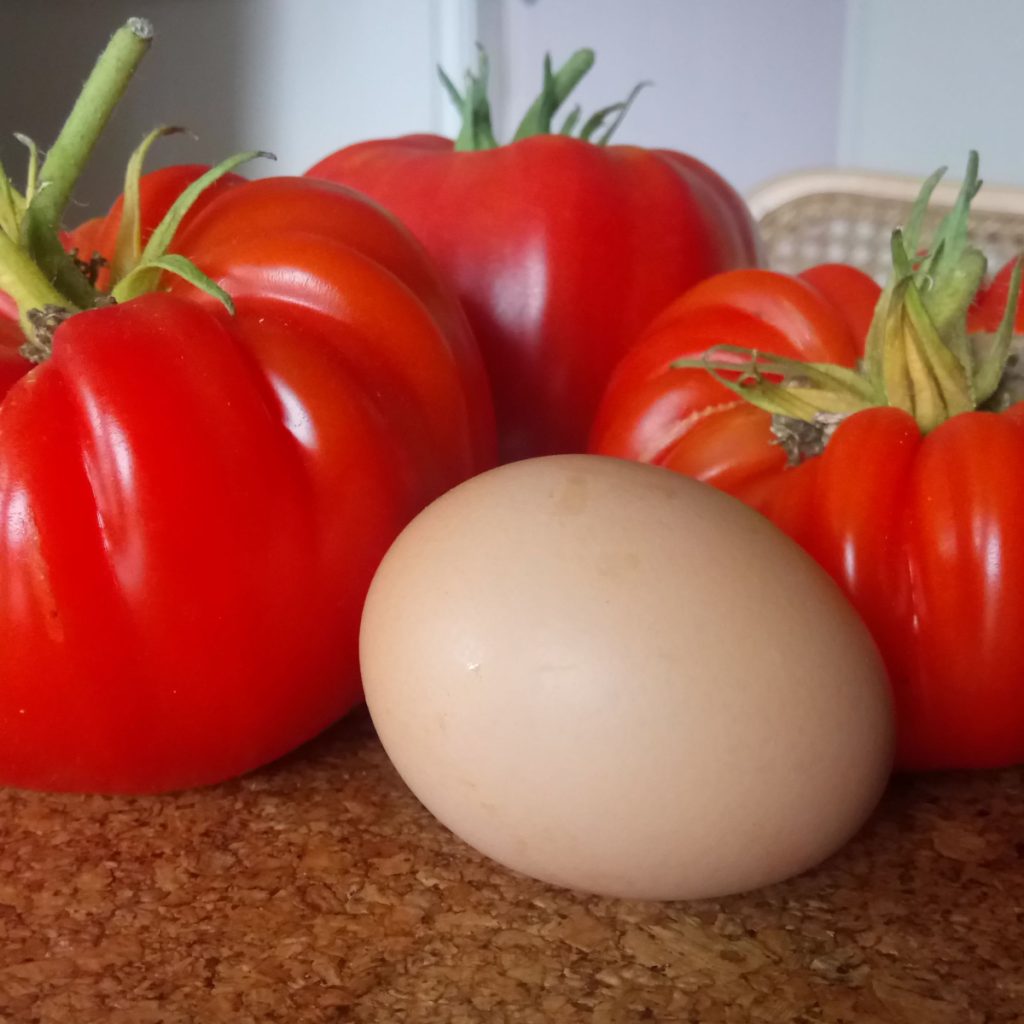
There are certainly a lot of great pairings when it comes to tomatoes and eggs. For instance, can it really get any better than a bacon, egg, lettuce and tomato sandwich? Or when the freshest of fresh tomatoes ends up in the perfect vegetable omelet?
But perhaps the greatest tomato and egg pairing of all is using the leftover shells of an egg to help power and energize tomato plants as they grow. Not only can egg shells provide tomato plants with amazing nutrients, but they also can keep the plants and fruits healthy.

Egg shells are teeming with the nutrients that tomato plants need most. Nutrients like calcium, phosphorous and magnesium. In addition, they also contain trace but key amounts of zinc, potassium, iron and zinc. All of which happen to help with tomato growth and productivity as well.
But as incredible as egg shells can be for tomatoes – they can only help growing plants with their nutrients when they are used in the right way. Unfortunately, all too often, they simply aren’t. So with tomato growing success in mind, here is a look at how to best use egg shells to help your tomato plants this year!
Let’s first take a look at how the nutrients in egg shells help tomato plants grow better. Then, we will cover exactly how you can use them to make the most of their power as your plants grow.
The lion’s share of the nutritional makeup of an egg shell consists of calcium. In fact, nearly 95% of an egg shell is made from calcium carbonate. And calcium is extremely important to both the health and productivity of a tomato plant.

When a tomato plant first begins to grow into a mature plant, it uses calcium to build the cell structure in its stems and branches. Quite simply, without enough calcium from the start, your tomato plant won’t reach its full growth potential.
But that is not the only time calcium plays a role in your tomato plant’s health. Tomato plants also need calcium to enhance their ability to pollinate and for good enzyme production. Again, without enough calcium in the soil, the plants simply won’t be able to produce as many tomatoes as they should.
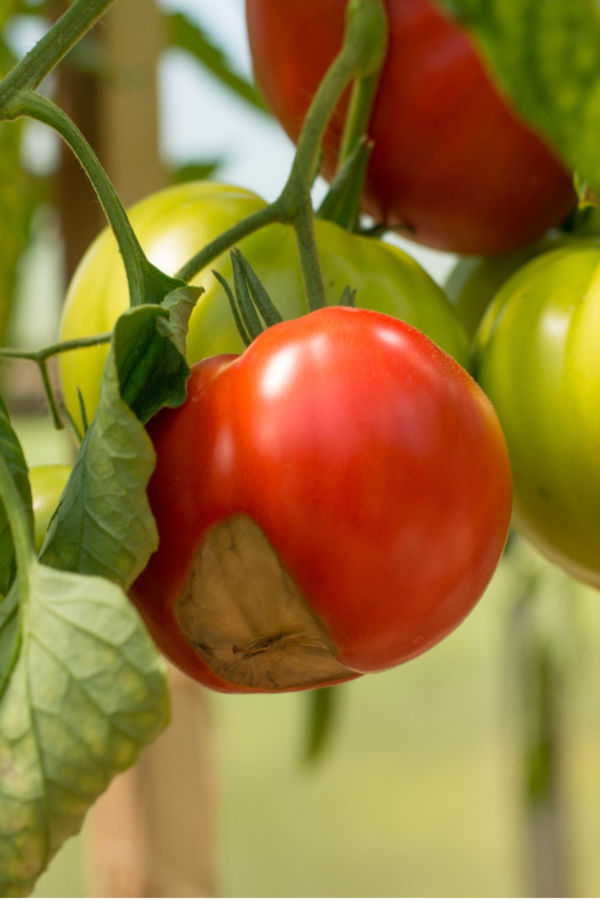
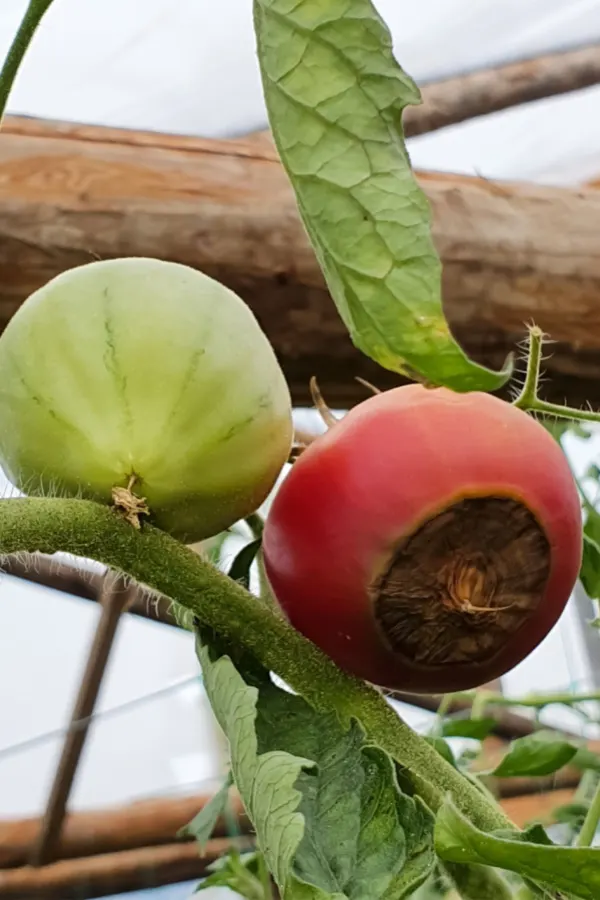
But perhaps the biggest area where calcium plays a role with tomato plants is in preventing blossom end rot. Blossom end rot is a common problem for many gardeners and can decimate a crop. Many think of blossom end rot as a disease, but it actually occurs when there is not enough calcium in the soil.
When this happens, the flowering end of a forming tomato cannot form properly. Because of this, it slowly turns brown on the end and rots. When it does, it ruins the fruit in the process. If severe enough, blossom end rot can ruin a plant’s entire crop.
Obviously, calcium is huge for tomato plants. But not to be lost are tomato plants’ need for phosphorous, magnesium, and other trace minerals that are in egg shells as well.
Magnesium powers a tomato plant’s photosynthesis process. Meanwhile, phosphorous is huge with helping bloom production. And all of the other trace elements in egg shells also help tomato plants with health, vitality, and the ability to absorb water and energy from the soil too.
It’s easy to see how much power egg shells have to give your tomato plants. But, and this is key, you need to unlock that power just right to get it to them quickly. And here is exactly how to do it with ease!
So how do you get the power of egg shells to help tomato plants and the soil they grow in right away?
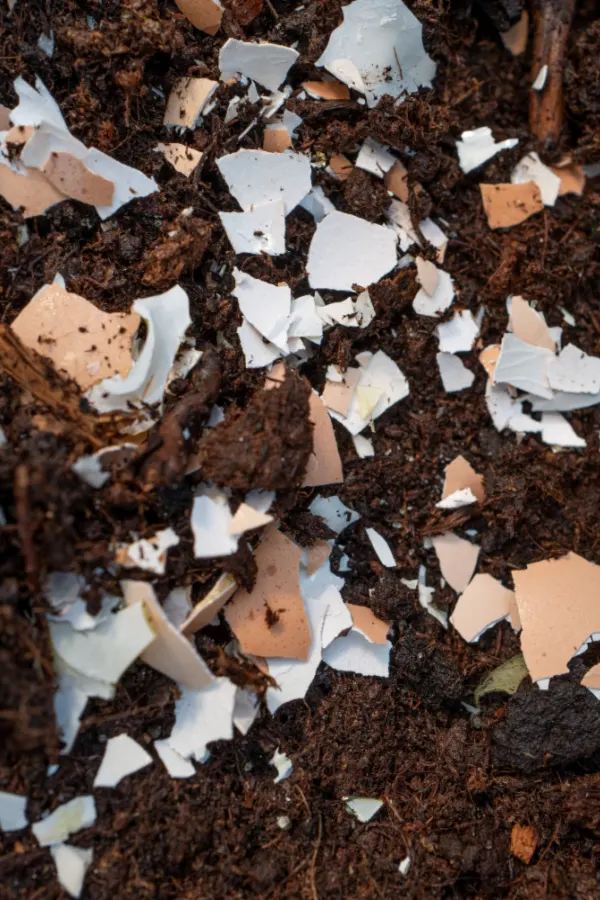
Unfortunately, egg shells take a long time to break down. Although they contain all kinds of mineral power, until the shells break down and leach out their nutrients, they are of little value for powering up soil or the plants that grow in it.
Simply crumbling up egg shells into small pieces and putting them in your planting hole, or crumbling them on top of the soil will not help this year’s plants very much – if at all.

As the egg shell pieces break down over the summer months, they will eventually add calcium to the soil. That might help next year’s plants, but it won’t do much for powering the plants growing now.
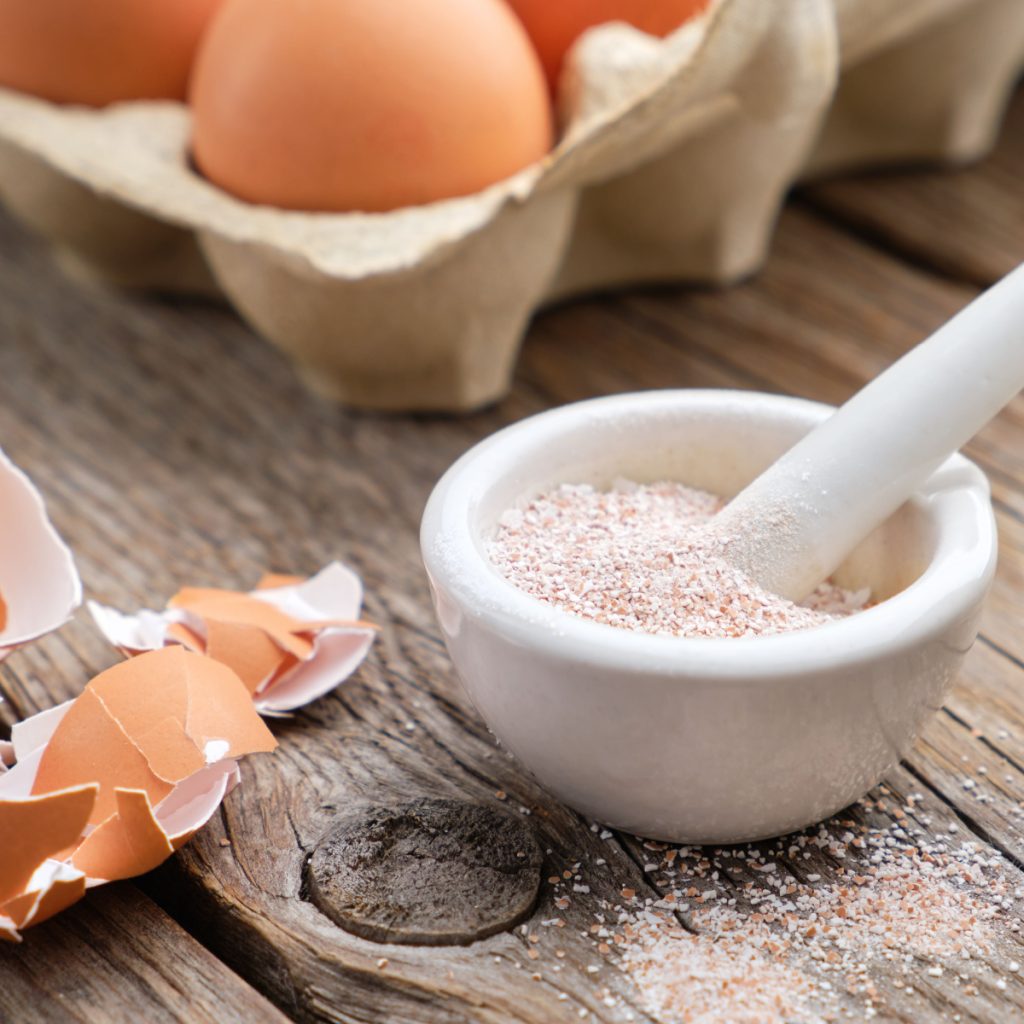
This is exactly why whenever and wherever you use egg shells, the secret is to first grind and pulverize them into a fine powder. By grinding the egg shells down, you help them release their power almost instantly into the soil.
The good news – it’s easy and effortless to do. All you need is an inexpensive coffee grinder. With a few minutes of grinding, you will be left with fine egg shell powder. And that powder is perfect for powering your tomato plants in 2 great ways! Affiliate Link: Basics Stainless Steel Electric Coffee Bean Grinder
There are two ways and times to use egg shell powder to power your plants. The first time is right when you plant your transplants. When planting, mix two to three tablespoons of egg shell powder into every planting hole.
This will put the power of egg shells right where your roots need it most. Of course, this is also the perfect time to mix in compost, worm castings and even coffee grounds as well to your planting hole. Together with the egg shell powder, it will provide a huge boost of power for your plants. See: How To Plant Tomatoes Right! 6 Simple Secrets To Grow Your Best Crop Of Tomatoes Ever.

The second time to use egg shell powder is right after you finish planting your tomatoes. Simply sprinkle a few more tablespoons of powder around each plant on top of the soil. Now, every time it rains or you water, the nutrients from the powder will leach down to the soil and roots.
This double dose of egg shell powder is the best way to get nutrients to your tomato plants fast. But with that said, there is still one more way to use egg shells for your tomatoes – and this time it is with egg shell pieces, and not powder!
Although egg shell pieces won’t release instant nutrients for your tomato plants, they can help protect them from slugs. A few crushed and broken egg shells circled in a ring around plants can keep slugs from getting to your stems.
The slug’s slimy body has a hard time crossing the jagged shells. When they do, the shells often slice through the skin of the slugs, killing them in the process. Even better, eventually, those egg shell pieces will also break down as well. Of course, when they do, they will give back their nutrients to the soil to help next year’s plants.
Here is to using egg shells to power your tomato plants this year. And to having your healthiest and most productive crop of tomatoes ever!
Follow Our Facebook Page For Great Gardening Tips And Advice! This Is My Garden Facebook Page
This Is My Garden is a garden website created by gardeners, for gardeners. Jim and Mary Competti have been writing gardening, DIY and recipe articles and books and speaking for over 15 years from their 46 acre Ohio farm. They publish three articles every week, 52 weeks a year. Sign up today to follow via email, or follow along!