Whether it be insects or animals, pests can cause big headaches in the garden. Check out our latest articles below on how to handle pests in your backyard!


Whether it be insects or animals, pests can cause big headaches in the garden. Check out our latest articles below on how to handle pests in your backyard!
Did you know that one of the best ways to protect your vegetable plants, flowers and flowering bushes from deer, rabbits and a long list of insects is to simply make and use your own homemade hot pepper spray?
As it turns out, hot pepper spray is one of the most effective organic solutions to keep insects and animals from damaging plants. Not only is it all natural, it can also be made quite easily from simple ingredients. And quite inexpensively too!
One thing is for sure, it is certainly a safer alternative than spraying chemical pesticides and repellents. Beyond the worry of using harsh products on plants that produce vegetables and fruit, commercial pesticides can also kill valuable pollinators like bees and butterflies. And that alone can leave you with less fruit and flowers.

But that is exactly where hot pepper spray can save the day! Not only is it safe for plants – it’s also safe for pets, pollinators and humans as well.
Hot pepper spray works as a natural deterrent by coating plants with a blistering and protective coating of heat. It is applied as a liquid spray to the foliage of plants in gardens and flowerbeds. Once the hot residue dries, it leaves behind a spicy hot layer of heat. One that pests simply don’t like in the least.
For most pests, hot pepper spray is a deterrent and not an insecticide. Deer, rabbits, chipmunks and even groundhogs all like to stay clear of the spicy taste. In fact, usually, with just a few nibbles of a plant that is coated in hot pepper spray – the animals will simply move on.
This is usually the case for most insects that are pests as well. The spray acts as a deterrent making the foliage far less consumable for them. However, there are a few insects that hot pepper spray will actually eliminate.
Two of the best examples of this are spider mites and cabbage worms. When applied to plants affected by these two pests, the heat in the pepper spray is more than enough to kill the pest. And in the process, keep your plants safe from damage!
So how do you go about making hot pepper spray? You can actually create a highly effective mix from either fresh hot peppers, dried hot peppers, or even hot pepper powder and flakes. And by simply adding in a bit of garlic to the spray, it makes the mix even stronger as a deterrent for pests.
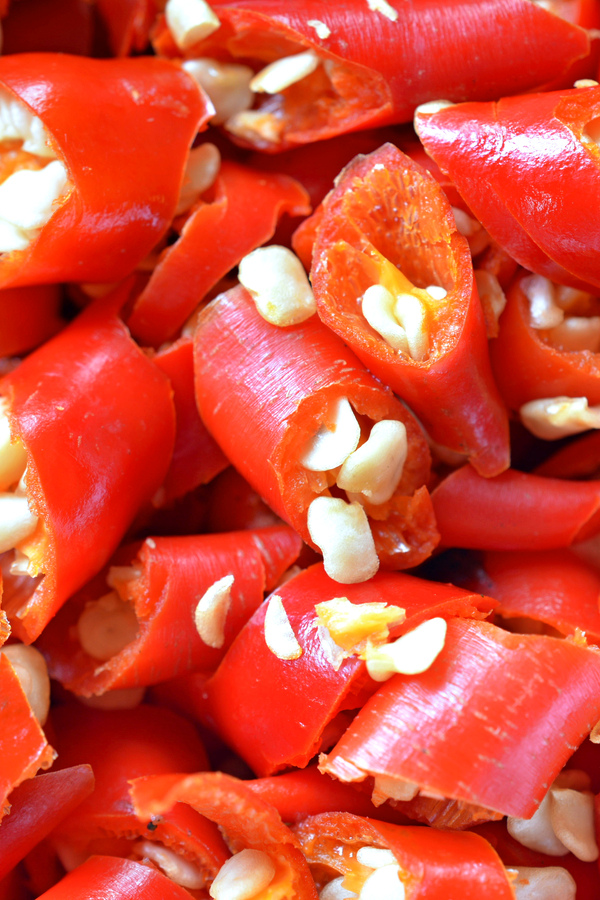

The recipe below calls for hot cayenne peppers, but jalapeno, habanero or even ghost peppers can be used. The key is to use hot, spicy peppers. And speaking of that, whenever working with fresh or dried peppers, always be sure to protect your eyes and hands!
The capsaicin that creates the heat can leave your hands in some serious pain. And if it gets in your eyes it can be both painful and dangerous.
Here are the three main ingredients you will need to make hot pepper spray:
If fresh peppers are not available, you can substitute with 5 tablespoons of hot pepper flakes or 2 tablespoons of powder. There are some high heat pepper powders on the market that are perfect for making homemade hot pepper spray instead of using fresh peppers.
When using garlic, crush or mince the cloves to allow it to absorb in the water better. The more finely it is crushed or chopped, the better. The easiest way is to just throw it in the food processor with the peppers.


To make, start by heating up the peppers and garlic in a pan for about 5 minutes on low heat. This helps release the oils from the skins and seeds of the peppers. This is good to do even with hot pepper powder. Warm it up enough to not burn it – but release the oil and heat. This, in turn, helps to create a more potent spray.
Next, add in the water and stir. Allow the mixture to simmer for about 30 to 45 minutes. Again, heating the water with the peppers helps to infuse the heat into the liquid. It does not need to boil, but a low simmer is ideal for really getting the peppers and garlic to absorb into the water.
Take off of the heat and allow the mixture to sit for at least 24 hours. The heat will continue to seep into the water during this time. Anytime after 24 hours, you can then strain the liquid through a colander or cloth. The mix can be stored at air temperature in a sealed container and will stay good for up to a month without issue.
As a side note, you can also purchase ready to go hot pepper spray if making your own is not an option. Affiliate Link: Bonide Go Away! Deer & Rabbit Repellent, 32 oz. Ready-to-Use Spray, Hot Peppers Deter Animals from Lawn & Garden
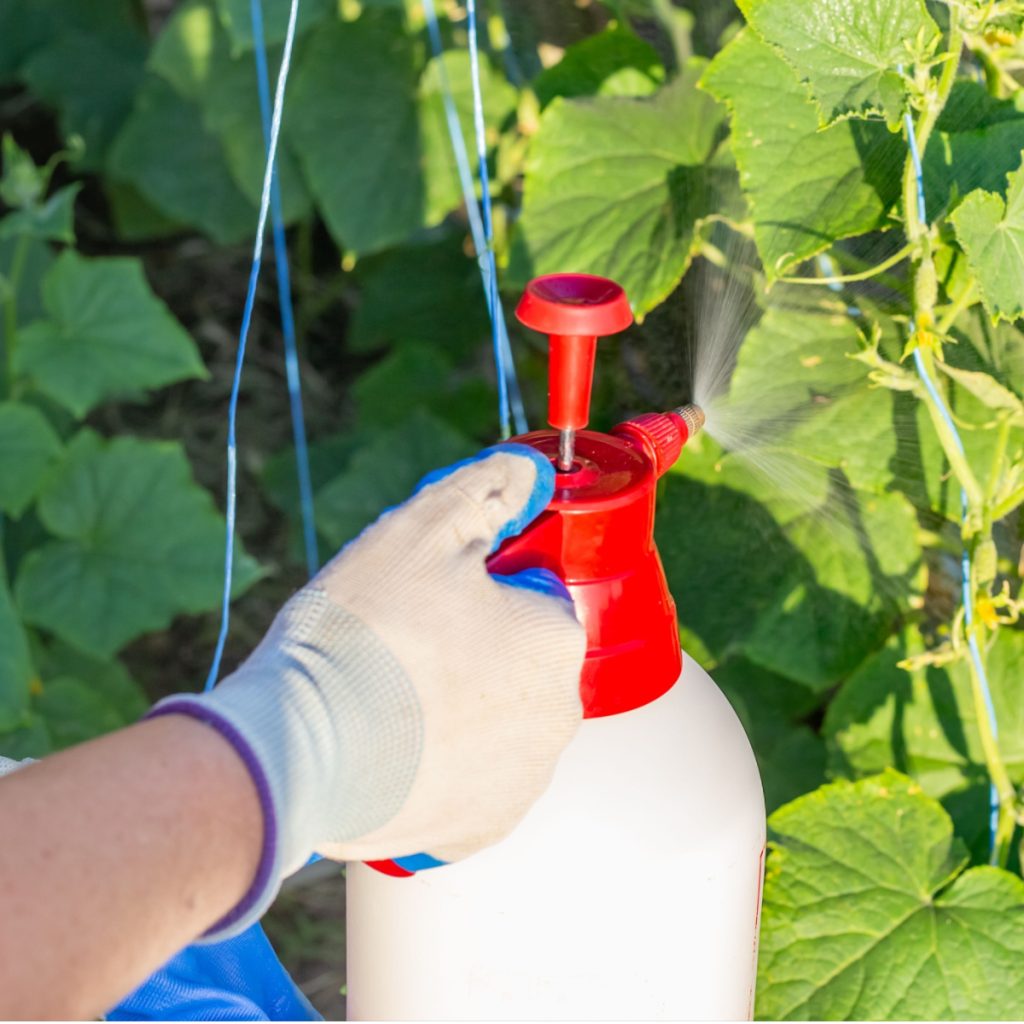
Hot pepper spray can be applied to specific plants or small areas with a simple hand-held spray bottle. For larger applications (entire gardens / large trees & shrubs) you can spray with a large tank or backpack sprayer. Affiliate Product Link: VIVOSUN 50 oz. Hand Held Garden Pump Sprayer

As you place the mix into the sprayer, add a few drops of natural biodegradable dish soap or olive oil to the liquid before spraying. The oil will help the mixture adhere to the foliage in a more consistent manner.
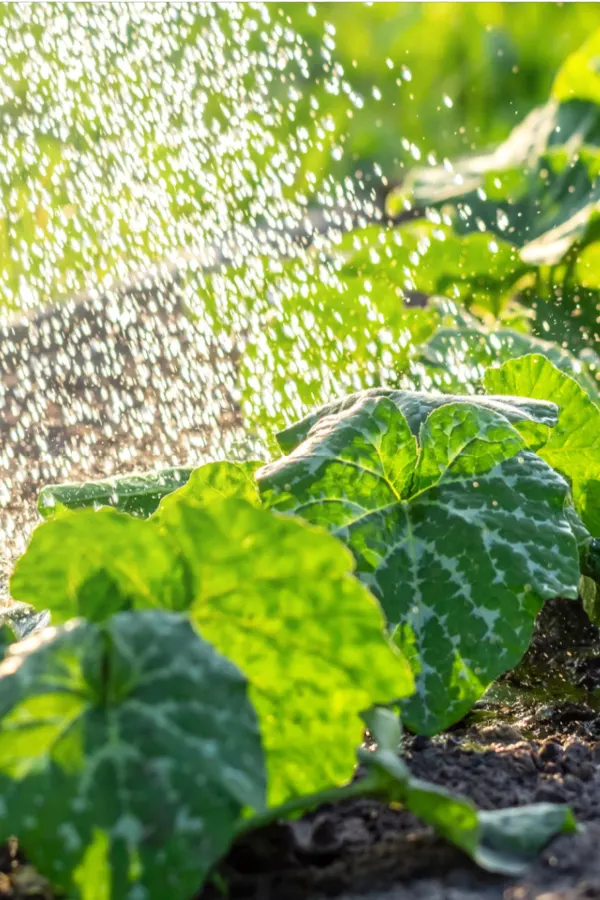
The key to using hot pepper spray is to keep the plants consistently covered in the spicy coating. Unfortunately, when it rains or when you water, it will lose its effectiveness.
The best time to apply is early in the evening. This way, the foliage is dry and easily absorbs the spray. In addition, most insects like to come out to eat in the overnight hours, so spraying later is more effective for control.
If you cannot spray early in the evening, mid-morning after the dew has dried is the next best time. Avoid spraying in the heat of the day because the mixture and sun can burn plant foliage.
To apply, simply spray an even coat of the mixture over the foliage. Be sure to spray as much of the underside of plants as possible too. It is here where smaller pests love to hang out.
In addition, heavy dew each morning can dilute and wash off the coating as well after a few days. That means you will need to re-apply every three to four days to protect plants. And of course, after every time it rains or you water.
Hot pepper spray will burn if you get it in your eyes or on your hands. Always spray with caution and when the wind is minimal. In addition, wear rubber gloves and eye protection when mixing and applying the solution.
When using on edible crops that are close to harvesting, always wash vegetables thoroughly with water to rinse off any of the hot pepper residue. If not, it can make for some hot produce!
Here is to protecting your flowers and vegetable plants this year with hot pepper spray – not only can it help keep insects away, but deer, rabbits, squirrels and more! For more on repelling pests, check out our article How To Use Diatomaceous Earth To Get Rid Of Pests On Plants – Naturally & Safely!
Follow Our Facebook Page For Great Gardening Tips And Advice! This Is My Garden Facebook Page
This Is My Garden is a garden website created by gardeners, for gardeners. Jim and Mary Competti have been writing gardening, DIY and recipe articles and books and speaking for over 15 years from their 46 acre Ohio farm. They publish three articles every week, 52 weeks a year. Sign up today to follow via email, or follow along!
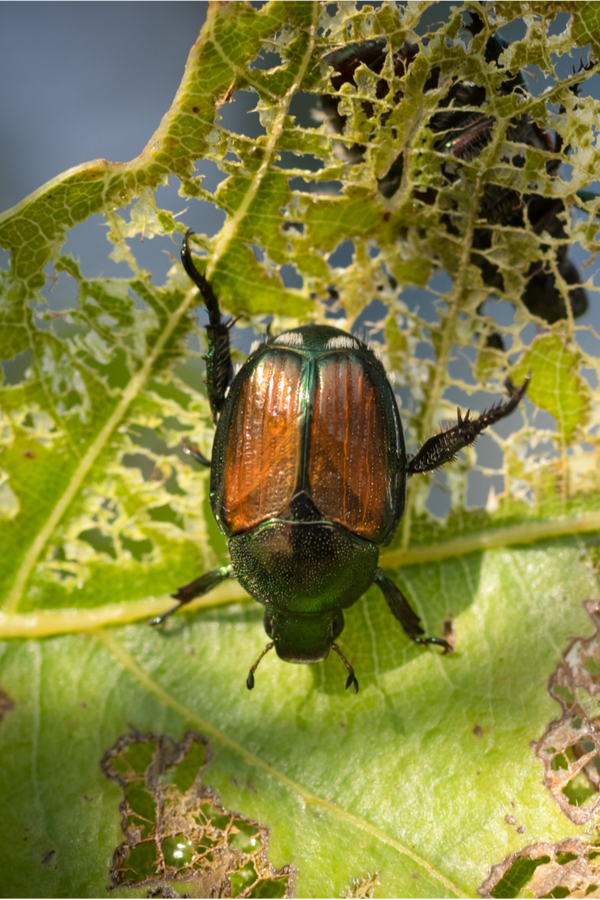
Are you looking for a fast and effective way to stop Japanese beetles from ruining the plants in your landscape, garden and flowerbeds this year?
Once the warm weather of summer begins to arrive – so do Japanese beetles. And do they ever love to dine on everything from roses, fragrant bushes and a long list of annuals and perennials – to fruit trees, grape vines and more!
One thing is for certain, Japanese beetles are voracious eaters. Unlike many pests that attack only specific plants, they chew and devour foliage from a wide variety of species. Unfortunately, unless you find a way to stop them early on, they can quickly decimate an entire landscape. In fact, they can do so in as little as two to three days!
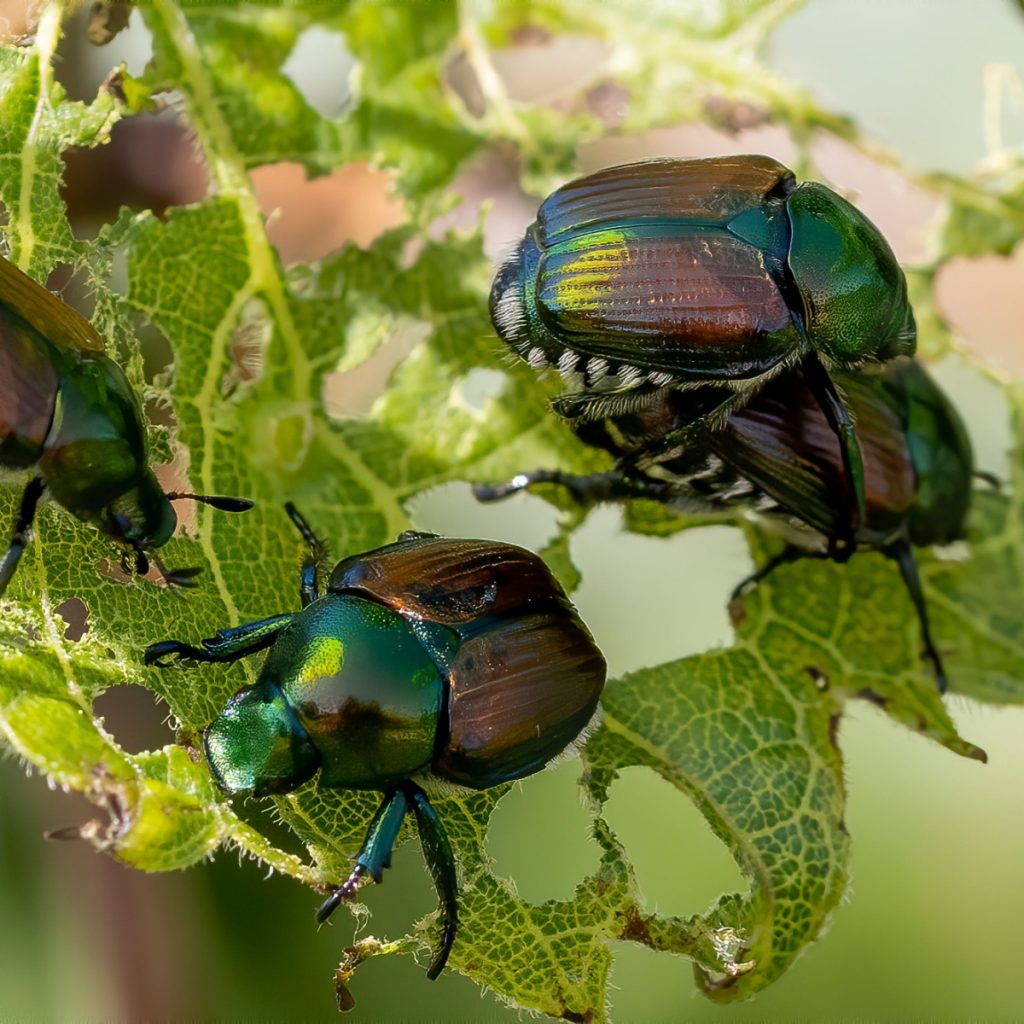
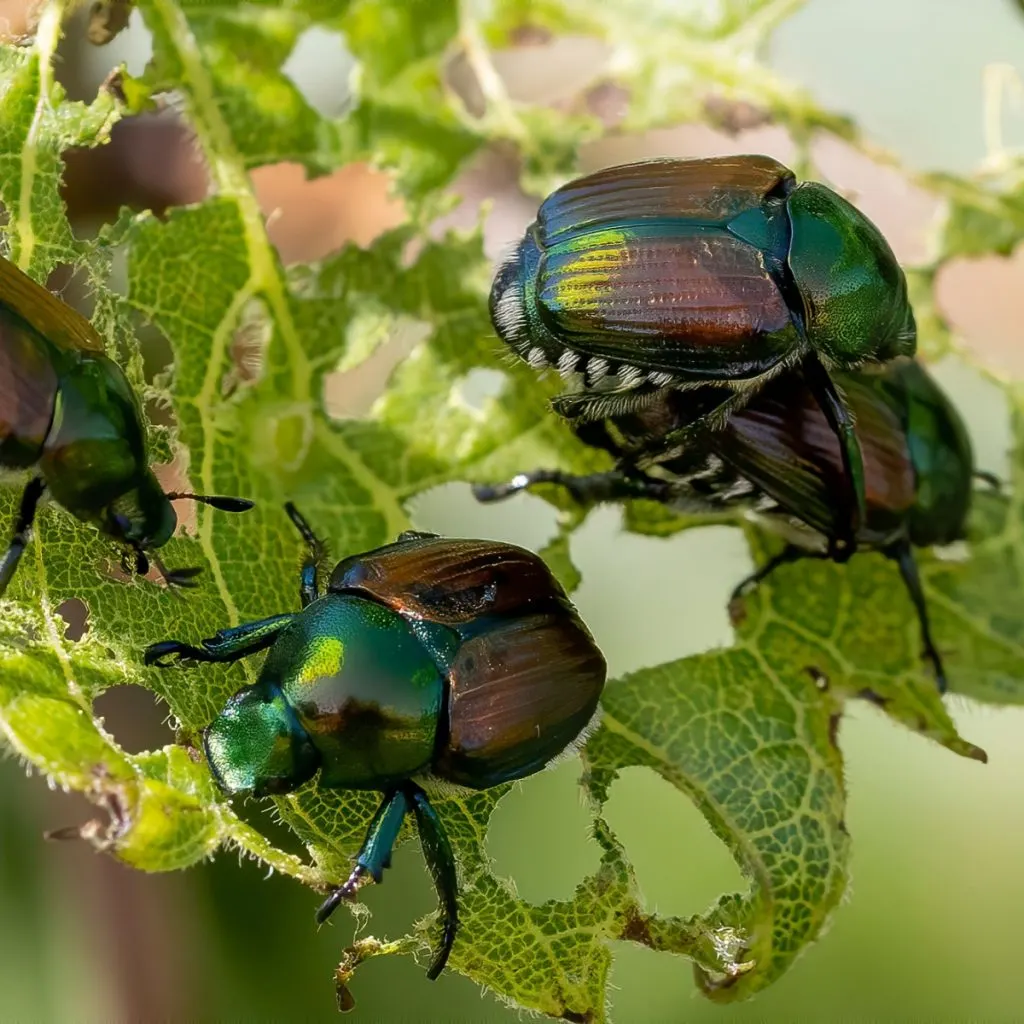
Japanese beetles will attack vegetable plants, flowers, bushes, trees – and even some ornamental grasses and shrubs as well. And once they find foliage to their liking, they bring hundreds if not thousands of other beetles right to the source with a scent trail.
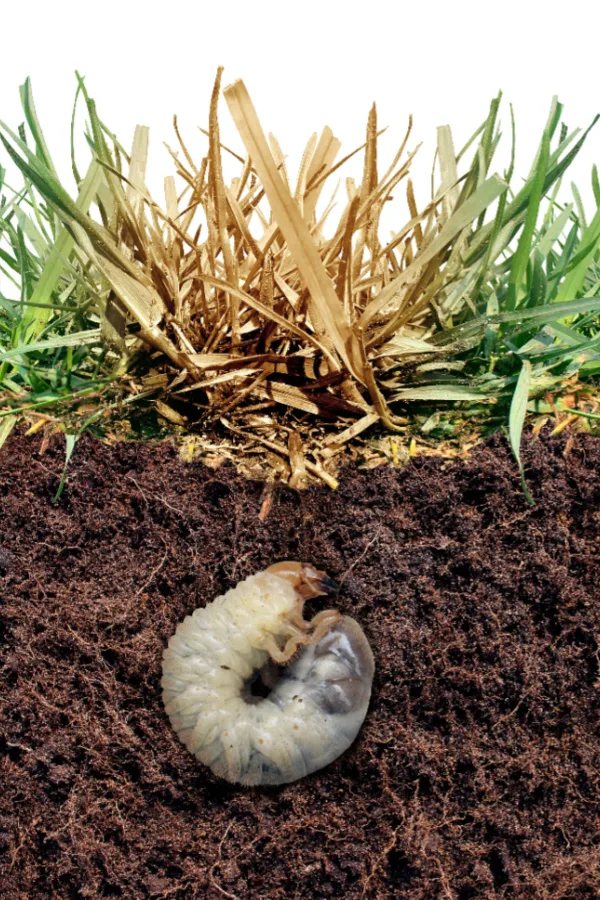
But it’s not just the adult beetles that cause problems for homeowners. Japanese Beetle grubs overwinter and live in the soil as well. In the early spring, before becoming an adult, they feed on the roots of lawns before emerging.
As they feed, they damage the turf, leaving behind brown, dying grass spots in their wake. But even worse, as the grubs work through the soil, they attract another pest too – ground moles! See our article: How To Eliminate Grubs In Your Yard
Of course, it isn’t long before the ground moles cause extensive damage to your lawn as well as they dig tunnels everywhere in search of the grubs.
But here’s the good news – with a few simple, safe and all-natural tips and tricks – you can keep Japanese beetles from ever becoming an issue. And in the process, keep your lawn and plants safe from damage all year round.

One of the biggest mistakes gardeners make when battling Japanese beetles is to use beetle bags, traps and lures. Why? Because unfortunately, all of these can create more of a beetle problem than less of one in your yard!
Beetle traps use a scented bag or liquid to lure beetles into a confined space in order to trap them. The scent works extremely well in attracting the beetles. Actually, it works too well, bringing more beetles in from even farther away!
Using traps usually results in multiplying your Japanese beetle population many times over. That’s because all of those extra beetles don’t always end up in the trap. Instead, they end up on the plants around the trap, destroying them in the process.
Making matters even worse, those same beetles are also mating and creating an even larger “next generation” of beetles for next year!
Now let’s take a look at how to get rid of the Japanese beetles once they arrive! One of the safest and most effective solutions to get rid of Japanese beetles fast is with neem oil. When it comes to organic sprays that stop Japanese beetles without harming other insects, this all natural solution is at the top of the list.
Neem oil is made by pressing the seeds from a neem tree. The resulting oil has long been known to be an incredible weapon against many pests. And when it comes to Japanese beetles, it is incredibly effective at stopping them at all points of their life cycle – as adults, larva and grubs.
When mixed with water and sprayed onto plant foliage, the solution is fatal to beetles. But here is the good thing, – it will not harm bees, butterflies, ladybugs and many other beneficial insects when applied properly. Affiliate Link: HARRIS Neem Oil Cold Pressed Water Soluble Concentrate
To make an effective spray against Japanese beetles, mix 4 teaspoons of neem oil with one gallon of water. Once you put the solution into your sprayer, add a few drops of liquid dish soap to the mix. The dish soap will help the spray adhere to the foliage of plants and to the beetles.


Apply the mixture with a sprayer to evenly coat the leaves of plants. This will not only eliminate the beetles on the leaves, but also act as a deterrent for new ones. Spray weekly to maintain effectiveness. You will also need to reapply after it rains or after watering your plants.
Last but not least, get out there and hand pick those beetles from your plants! Believe it or not, the most effective approach against Japanese beetles is to hand-pick beetles off of plants.
The majority of the beetle population emerges from the ground to feed and mate over a two to three week period. By simply being prepared and picking them off early, you can stop the damage fast. And it doesn’t cost a penny!
Even more, since they can’t complete the cycle by laying eggs back into the ground, you help control the following year’s population as well. A few years of hand picking can almost single-handedly get rid of Japanese beetles and the damage they bring.
All you need is a bucket or pail of soapy water and a pair of gloves. By brushing the Japanese beetles into the soapy water, you can quickly eliminate the beetles in mere seconds.

For best results, pick in late morning to mid afternoon, when beetles are most active. If you can, take time to go out during both time frames. You will be surprised at how in as little a week, the population will be under control.
Finally, it goes without saying that controlling Japanese beetle grubs is one of the best ways to stop adult Japanese beetle damage. After all, since beetles emerge as grubs from the soil, eliminating the grubs will eliminate the future beetles.
One of the best ways to kill grubs is with a simple solution of detergent and water spray. By mixing a few teaspoons of ordinary dish soap with a gallon of water, you can create a solution to spray directly on your lawn.
The soapy water forces grubs to come up out of the ground. And, when they do, they become easy targets for birds to feed on. This is great to do every few weeks from mid summer to early fall – before the grubs bury deep before winter.
Here is to controlling Japanese beetles in your landscape this year – and to stopping the damage they can cause before it ever happens!
Follow Our Facebook Page For Great Gardening Tips And Advice! This Is My Garden Facebook Page
This Is My Garden is a garden website created by gardeners, for gardeners. Jim and Mary Competti have been writing gardening, DIY and recipe articles and books and speaking for over 15 years from their 46 acre Ohio farm. They publish three articles every week, 52 weeks a year. Sign up today to follow via email, or follow along!
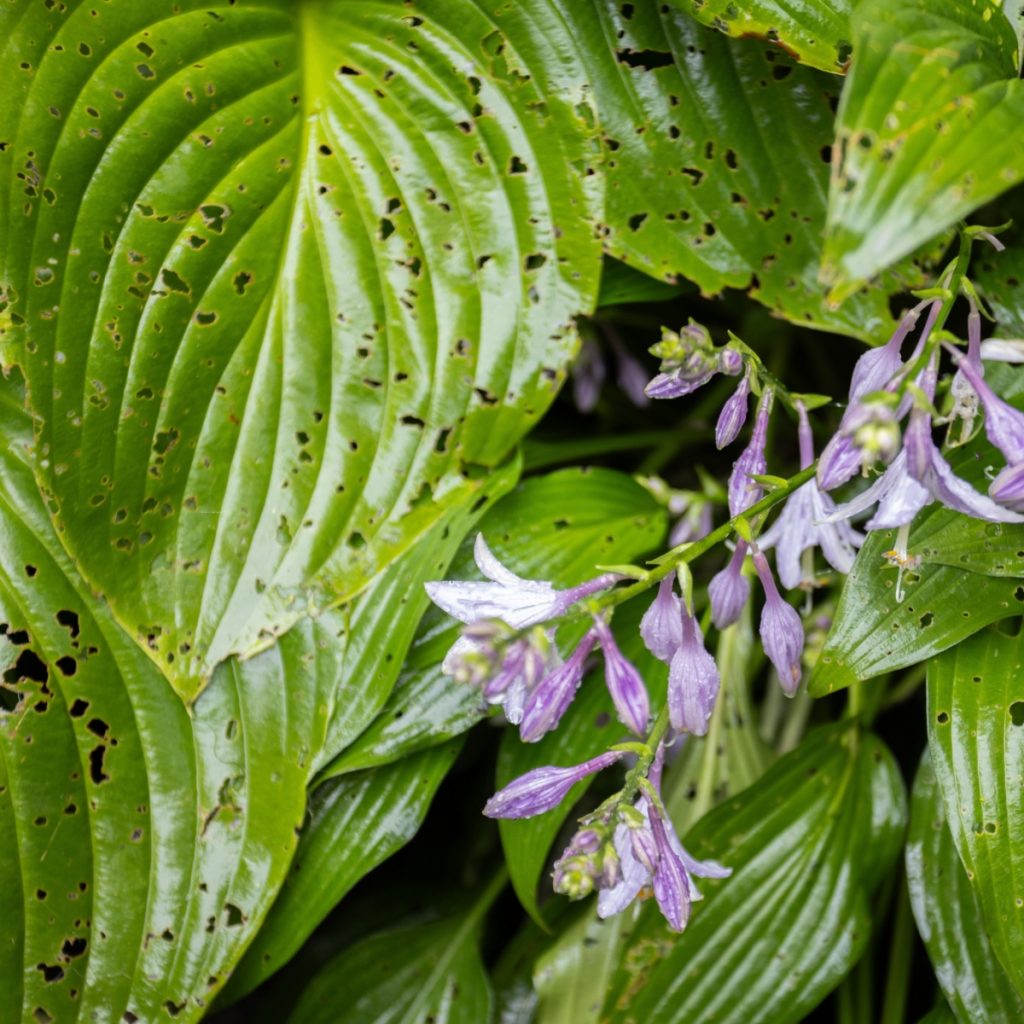
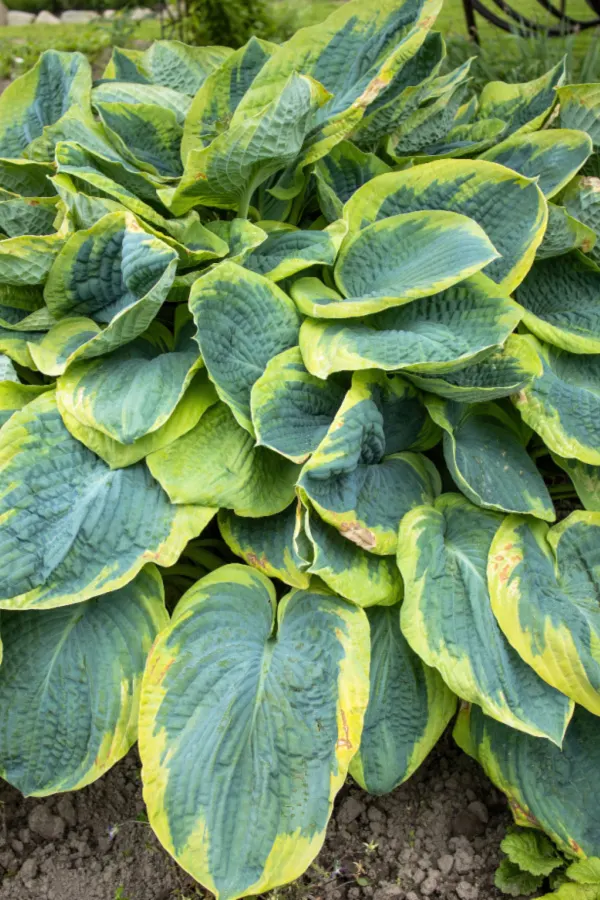
Looking for a few simple ways to keep your hostas safe from insects, deer, and other pests this summer – all without having to resort to using harsh chemicals and sprays?
Hostas are one of the most popular shade perennials around. The cold-hardy plants are available in a wide range of colors, sizes, and textures and don’t require much in the way of maintenance to keep them looking stunning from spring until the first frost. That is, if you can keep the pests away!
More so than many other perennial plants, hostas often become the victim of insect and animal pest damage. In fact, hostas are often known for being a great treat for roaming deer and rabbits. But even tinier pests like insects, slugs, snails, grasshoppers, and cutworms can quickly ruin otherwise healthy plants.

Thankfully, there are a few simple methods you can use to keep all of these pests from completely destroying your hostas. Some of these methods work great on their own, while others can be used together for a great all-around option for pest control.
When it comes to keeping hostas looking good, it’s best to start treating plants as soon as you first notice any damage. The longer you wait, the bigger your pest problem can quickly become. This is especially the case when you are dealing with insects that tend to reproduce rapidly during the summer months.
With chewing insects, you will often see holes in the leaves. On the other hand, if the leaves are almost completely gone down to the ground, you are likely looking at deer or rabbit damage. Wilted plants or foliage that is weak and doesn’t grow well is likely the result of an underground pest.
Depending on what pest or insect you are dealing with will determine what course of action you take below. Let’s first take a look at hot pepper spray, which is one of the best natural ways to keep the foliage of your hostas looking great from deer, rabbits and other hungry animals!

Making a homemade hot pepper spray works great for pests that eat the foliage. It is especially effective at preventing deer and rabbits from causing damage while not harming the plants themselves. You can also dump it around the root zone to discourage hungry voles.
To make a hot pepper spray, you will need just four ingredients: water, hot pepper, garlic and olive oil or liquid dish soap
Start by adding 5 to 6 chopped hot peppers and one half of a gallon of water to a large pan and bring it to a simmer. You can use any hot pepper such as cayenne, jalapeno or even habanero. If you don’t have fresh peppers, add in 3 tablespoons of hot pepper powder for this portion.
Next, add in 3 cloves of chopped garlic for extra heat and scent. Allow the mixture to simmer for about 15 minutes, stirring occasionally. Remove the mixture from the heat and allow it to seep for 24 hours. Then strain the solids from the liquid and add to a spray bottle. Product Link: Chapin Half Gallon Handheld Multi-Purpose Garden Pump Sprayer
To finish, add in a couple of drops of olive oil or liquid dish soap into the spray bottle before spraying. This will help the mixture cling to the foliage of the hostas for better protection.
Wearing gloves and eye protection, apply the solution to your hosta plants early in the morning or late at night. Reapply the solution every 3 to 5 days or after rain or hand watering. See: How To Make & Use Hot Pepper Spray
Dealing with small insects eating your plants? DE is a great way to stop them! DE, otherwise known as Diatomaceous earth, is a superfine substance that you can use to organically eliminate pests of all kinds. It is essentially fossilized remains of tiny aquatic creatures. Affiliate Link: Harris Diatomaceous Earth Food Grade
The best part is that food-grade DE does not work by poisoning creatures so they do not need to consume your hosta plants in order to be effective. Instead, DE has razor-like edges that cut into the body of slugs, snails, aphids, and other insects and dries them out.

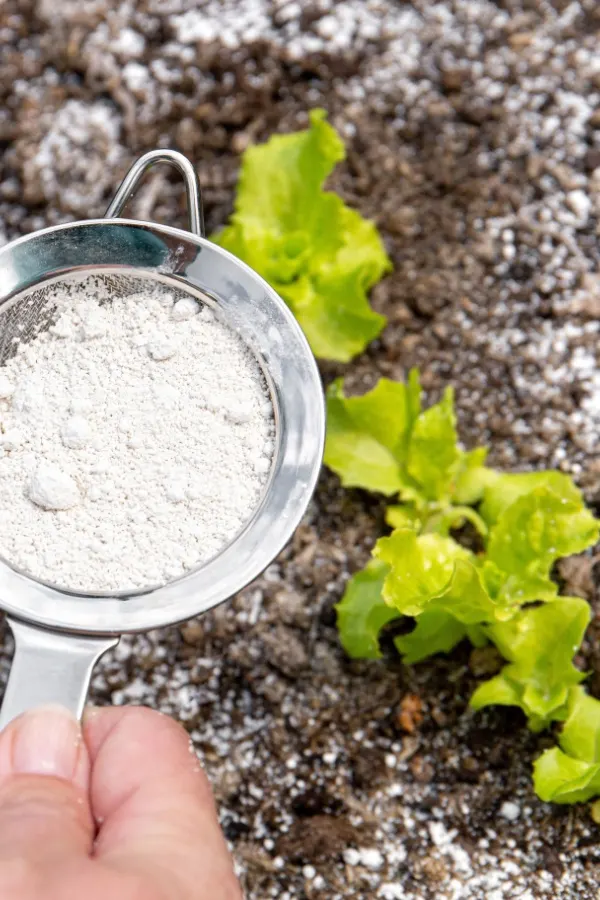
You can sprinkle DE directly onto the hostas themselves but it works better to create a path around your plants. When insects and pests travel across to get to your plants, they simply can’t make it there safely. Like the hot pepper spray, reapply DE after a moderate rain or watering of your flowerbeds.
Another great way to keep your hostas safe from insects is to use neem oil. This natural product is 100% organic and when used correctly, is safe for pollinators, your pets and your family. Affiliate Link: Harris Neem Oil Spray for Plants, Cold Pressed Ready to Use
You can purchase neem oil ready-to-use or you can create a simple spray using concentrated neem oil. All it takes is water and a few drops of liquid dish soap. Be sure to read the label to know exactly how to mix your specific solution. Once ready, you can spray neem oil all over your hosta plants.
It works to control insects in three unique ways. First, it eliminates many immature insects, eggs, and larvae immediately upon contact. Second, it also interferes with older insect’s ability to mate and reproduce. But it also keeps insects from eating the leaves that have been sprayed.
It might take a couple of applications, but in just a week or two, with neem oil, you will be able to keep your hostas safe from insects.
Here’s to keeping your hostas safe from damage this summer. And to keeping your hostas looking great right up until the first frost!
Follow Our Facebook Page For Great Gardening Tips And Advice! This Is My Garden Facebook Page
This Is My Garden is a garden website created by gardeners, for gardeners. Jim and Mary Competti have been writing gardening, DIY and recipe articles and books and speaking for over 15 years from their 46 acre Ohio farm. They publish three articles every week, 52 weeks a year. Sign up today to follow via email, or follow along!
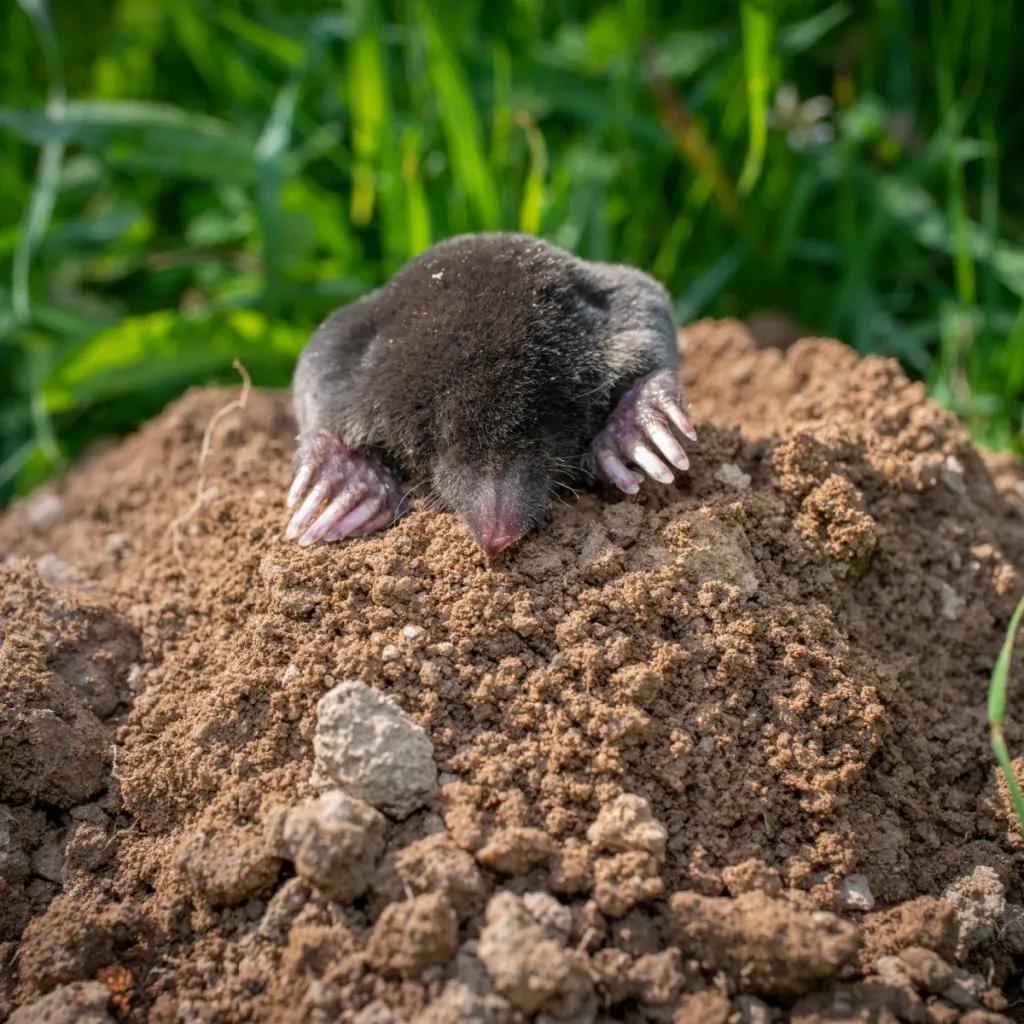
One of the most frustrating battles for gardeners in the spring, summer and fall is trying to stop ground moles from destroying their lawn, flowerbeds and garden.
Ground moles can certainly be a huge issue all throughout the landscape. Not only are their tunnels unsightly and damaging to a lawn, they also can seriously injure the plants growing in gardens and flowerbeds as well.
When moles create their tunnels with their incredibly adept “digging hands”, they expose the roots of grass and plants growing above the soil line. And when they do, they often damage them beyond repair. Sadly, it’s not even not the plant’s roots they are after. Instead, they are looking to feast on the grubs living below the soil.

Ground moles have voracious appetites. And one thing is for sure, they are always in search of their next meal. They love to feast on grubs, earthworms and other ground dwelling bugs and insects that live in the soil.
So what is the answer to keeping moles away? Well, the good news is there are a few effective and natural methods to first get rid of the grubs living below the soil. But there also happens to be a couple of great methods to scare off the moles as well – and by using a combination of the two, you can get moles out of your yard – and keep them out for good!
Plain and simple, the most effective way to get rid of ground moles for the long haul is to eliminate their food source. And the biggest food source of all for moles is of course grubs.
Although there are a few chemical products you can apply to your lawn to eliminate grubs – they can cause concern when using around pets, children and even adults. Even more, they are not good to use anywhere near your vegetable garden or near plants that grow food you consume.
But that is exactly where two all natural and very easy to apply products can save the day – neem oil and diatomaceous earth. Both are highly effective at eliminating grubs. And even better, both are organic and safe to use in your lawn and garden!

Here is a look at how to use both – along with a few ways to drive the moles out of your yard fast while you are in the process of getting rid of the grubs.
Neem oil is an organic pesticide made from the oil pressed from the seeds of a neem tree. Not only will it kill grubs in the lawn, but it is also highly effective against ticks and other pests as well. Best of all – it can easily be applied with a sprayer to your lawn and garden soil
The key when purchasing neem oil is to make sure it is pure. There are products out there that add other ingredients, but it is 100% neem oil that will be most effective and safe. Affiliate Product Link: HARRIS Neem Oil Cold Pressed Water Soluble Concentrate
For small lawns a small pump sprayer will work – for larger lawns a back pack or pull behind sprayer are best for the job. To make the mix, use eight tablespoons of neem oil for every one gallon of water. Adding a teaspoon of mild liquid soap to the mix will make the spray even more effective. This lets the spray stick better to the lawn and soil.
You will need to reapply monthly for three to four months to effectively take care of grubs. One final note on neem oil, it will not harm bees once dry, so apply in the early morning or late evening when they are not active to keep bees safe.
Another great weapon against grubs is diatomaceous earth. Diatomaceous earth is made from the fossilized remains of microscopic organisms from ancient times. It too is wonderful for eliminating all kinds of pests, including grubs and ticks.
The good news is that it is also completely natural and safe for pets and humans. Affiliate Product Link: Diatomaceous Earth
When the powder comes in contact with grubs it etches their outer coating. This then causes the grubs to dehydrate, killing them in the process. It is effective both if the powder lands on grubs or if they crawl over it later.
To use Diatomaceous Earth (DE) on grubs, you simply cover the lawn lightly using a spreader. See: How To Use Diatomaceous Earth To Get Rid Of Pests.
DE and neem oil work equally well to eliminate grubs. The choice really comes down to which method is easier for you to apply. But while you wait for those grubs to disappear from your lawn – it’s a great idea to drive the existing moles out to stop the damage. And for that, the following two methods work well:
Ground moles do not like vibration and sound. And where there is a lot of either they tend to flee. Because of this solar mole repellers are a good choice for putting in prime mole areas. The solar powered devices emit pulsing vibrations and sounds. And they do so in regular doses, keeping a constant supply of noise and movement in the soil.
When placed in strategic locations, the devices can help to drive moles from an area. One spike is usually not enough to keep them out of an area, but multiple solar spikes can work together to drive the moles out.
It may take a bit of experimenting with placement, but they can form an effective barrier. Best of all – they are 100% solar and require no cords or power to run!
Castor oil is another good option when it comes to driving ground moles from your property. The castor bean has long been known to be offensive to ground moles. In fact, many gardeners plant castor bean plants strategically in their garden to stop ground moles from entering.
If you don’t want to plant castor bean plants (they can be invasive), you can create a castor oil spray that is a highly effective ground treatment. Once applied to the soil, it can be a very effective natural deterrent. Affiliate Product Link: Castor Oil – Pure
To make, mix 6 ounces of castor oil with a gallon of water and a few drops of liquid dish soap. The dish soap will help the mixture stick to the foliage where it is sprayed. To apply, use a sprayer and cover the affected area with a light mist.
To increase effectiveness for stopping ground moles, spray the entrance and exit holes with the solution as well. The scent helps drive ground moles from working the treated areas. To keep its effectiveness, you will need to reapply the spray after a hard rain, watering, or a heavy dew.
Here is to getting rid of the grubs – and to stopping ground moles from damaging your lawn and garden areas for good!
Follow Our Facebook Page For Great Gardening Tips And Advice! This Is My Garden Facebook Page
This Is My Garden is a garden website created by gardeners, for gardeners. Jim and Mary Competti have been writing gardening, DIY and recipe articles and books and speaking for over 15 years from their 46 acre Ohio farm. They publish three articles every week, 52 weeks a year. Sign up today to follow via email, or follow along!
If there is one outdoor pest that drives both homeowners and gardeners crazy, it’s voles – but thankfully, there are a few simple ways to recognize their damage and stop them from taking over your lawn and garden space without having to resort to harsh poisons or chemicals.
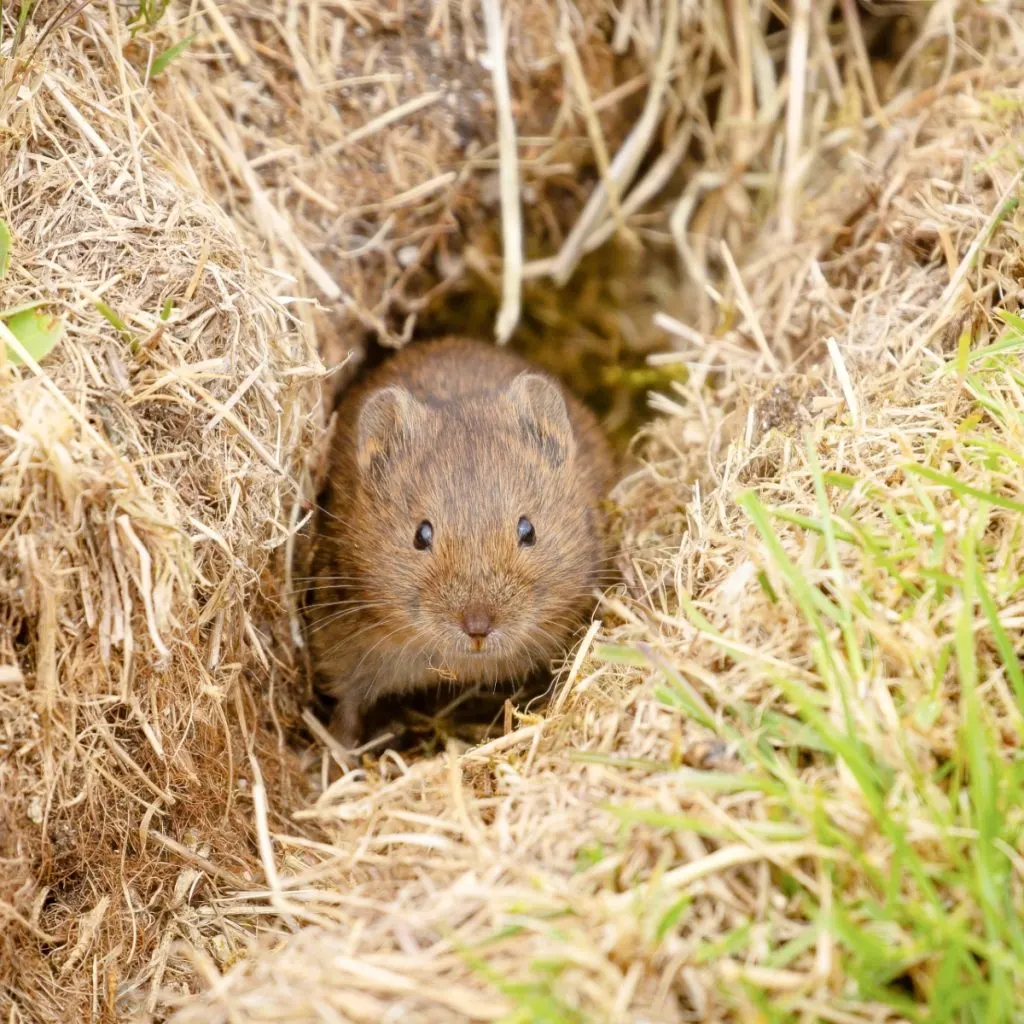
The mouse-like vole may appear cute at first glance – but they can quickly wreak havoc on all sorts of different vegetation around your property. Sometimes called meadow mice or field mice, voles feast on grasses, bulbs, tubers, bark, roots, seeds, and any herbaceous plants they can find.
Voles have relatively short lifespans. However, despite this, they quickly reproduce, often having multiple litters each year with 10 or more babies each time. And more voles equals more damage to your plants and yard!

While prevention is often the key to keeping voles away from your property, sometimes even the best attempts still fail. All you are left with are tiny trails all throughout your lawn and missing or damaged plants in your garden.
Thankfully, there are some safe and natural ways to help stop and prevent a vole population – without the need to resort to drastic poisons. Something that both your garden and your family can be thankful for!
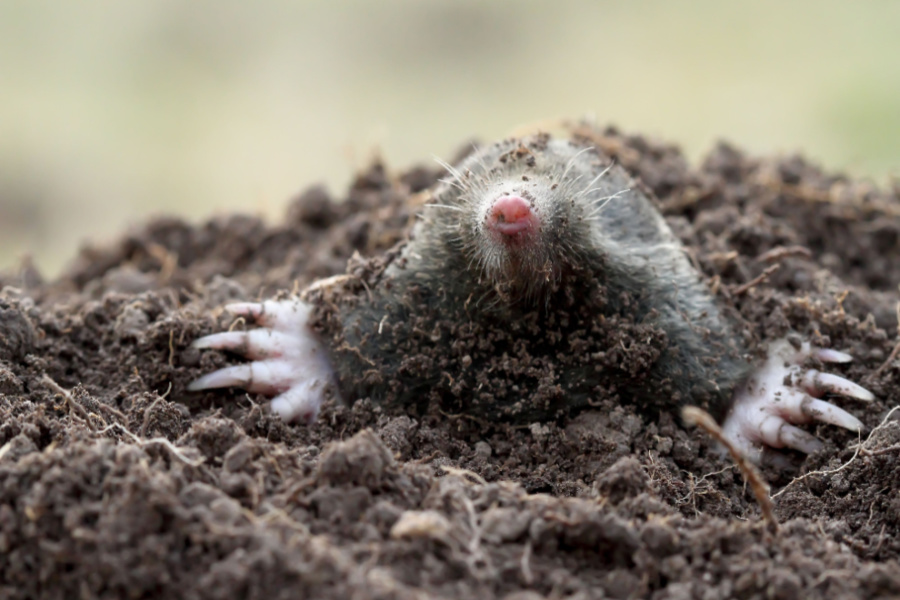
Voles are often mistaken for moles, another burrowing animal that can cause damage to lawns and plants. However, there are a few big differences between these two tiny creatures.
To start, voles look a lot like mice but have shorter tails, rounded ears, stubby noses, and stockier bodies. They range anywhere from 5 to 8 inches long (including the tail) and have thick fur that is usually gray or brown in color.
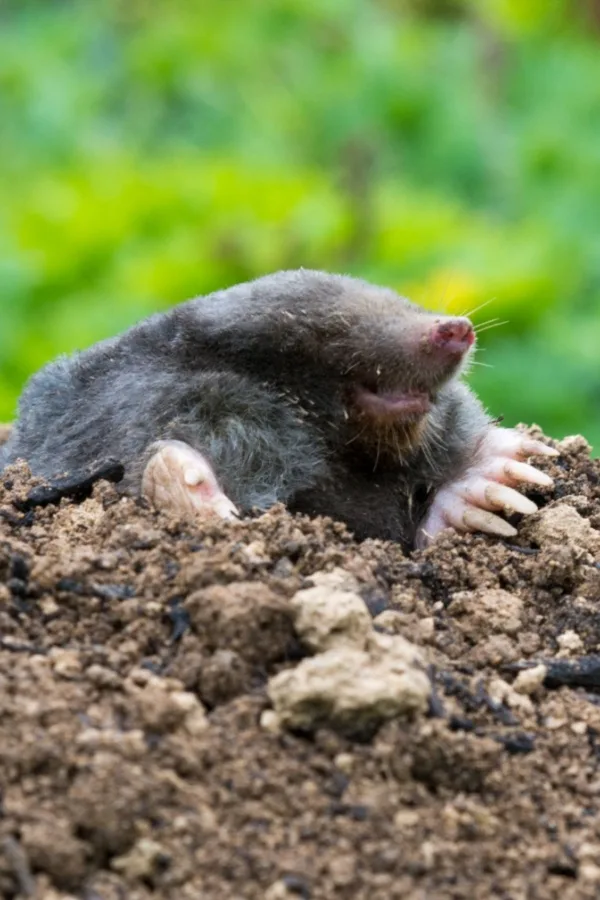
Moles, on the other hand, have slightly thinner bodies with large feet that are used for digging. They have no visible ears, tiny eyes, and an elongated snout. See: How To Get Rid Of Ground Moles.

Besides appearance, both animals have different diets. Moles are omnivores that tend to feed on insects, grubs, and earthworms, voles on the other hand primarily eat vegetation.
Their burrowing habits also vary slightly. Moles typically dig down deeper in the soil, creating long underground tunnels. You will also find mounds of soil shaped like little volcanoes randomly throughout your yard as well.
Voles, on the other hand, only burrow right below the surface, allowing them to easily feast on the roots and stems of plants. While moles tend to cause more damage to lawns, voles cause more damage and issues to vegetation and trees.
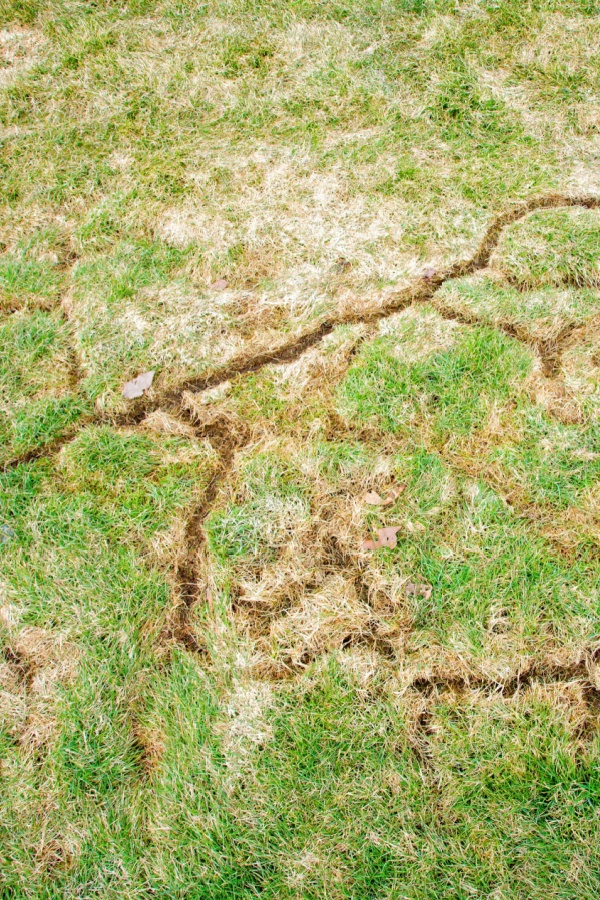
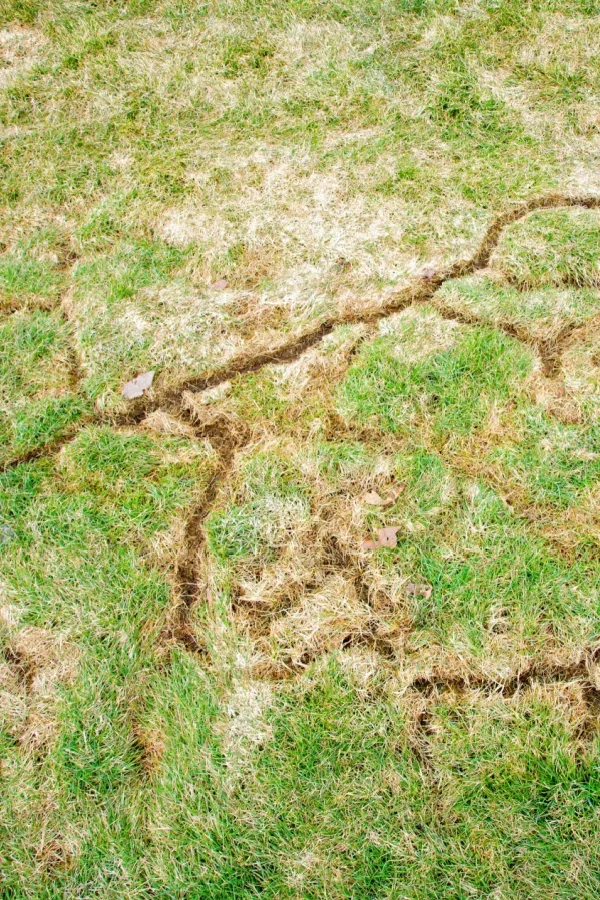
At the surface level, voles create tiny trails through grass and other vegetation. These trails are created by multiple little voles running back and forth, eventually wearing down the paths.
Just below the surface of the soil, voles create small underground tunnels that crisscross one another. The 2-inch wide paths are created as a result of the voles burrowing down to feast on the roots and tissues of shrubs, bushes, trees, bulbs, and other root crops.
Signs of root damage can be seen in leaning or droopy plants with yellowing leaves. If the damage is severe enough, the plants can end up dying out altogether.
You can also see vole damage on the bottom few inches of trees or shrubs. Their front teeth can leave behind gnaw marks as they chew on the bark of these plants. And then there’s the very telling pellet-shaped droppings that voles leave behind as they go about their business.
Keep in mind that there are a few different garden pests that can leave behind similar damage and destruction. It’s important that you recognize exactly which pest is causing the problem before you try to rectify it.
As with most issues, prevention is always better than trying to fix a problem that is beginning to get out of hand. The same is true for stopping voles.
One of the best ways to keep voles from making your garden their home is by keeping your property mowed and tidy. Voles like to bed down in taller grasses and dense ground covers. Without those around, there is no place for the voles to rest and recharge.
Unlike some rodents like mice and rats, voles do not usually seek shelter during the wintertime. In fact, their numbers can actually increase in locations with mild winters and significant snowfall.
Keep snow away from the base of trees, shrubs, and other plants during the winter. This prevents the voles from having easy access to these food sources.
Also, keep mulch away from the base of newly planted trees and shrubs. Voles like to burrow down into thick mulches. Using trunk guards can also help to protect young trees and shrubs. Product Link: EasyFlex Tree Trunk Protector
Adding chicken wire or welded wire under newly constructed raised beds will help to deter these digging rodents from stealing crops in your raised beds. Use a metal wire to prevent the voles from chewing through plastics and thinner materials.
Voles are not good climbers. Add a fence of welded wire cloth around garden spaces to keep them out. Bury the wire at least 6 to 8 inches underground to prevent them from tunneling underneath.

Last but not least, voles do not like coming into contact with coarse gravel or rocks. When planting bulbs or perennials, add a layer of gravel to surround the planting hole. You can also place bulbs in wire baskets for additional protection.
Voles have a very sensitive sense of smell. Adding plants that voles do not like coming into contact with can be an effective way to stop them from enjoying more desirable plants.
Plants like allium, garlic, thyme, mint, daffodils, snowdrops, hyacinths, and irises are all plants voles do not like, and you can use them as deterrents. Many of these crops are actually great for keeping a whole host of different garden pests away as well.
Voles also dislike the smell of spicy peppers. To use this to your advantage, you can create a homemade spray using chopped hot peppers, water, and biodegradable dish soap. Spray the mixture on plants the voles tend to dine on or around vole tunnel entrances.
The smell and the hot taste will usually keep them far away from the plants. To keep effective, you will need to be reapply after you water or it rains.
Here’s to taking steps to prevent voles from ruining your garden and lawn naturally and safely!
Follow Our Facebook Page For Great Gardening Tips And Advice! This Is My Garden Facebook Page
This Is My Garden is a garden website created by gardeners, for gardeners. Jim and Mary Competti have been writing gardening, DIY and recipe articles and books and speaking for over 15 years from their 46 acre Ohio farm. They publish three articles every week, 52 weeks a year. Sign up today to follow via email, or follow along!
Looking for a few tips and secrets to protect your home and outdoor structures from carpenter bees – and stop the damage they cause to the wood surfaces on them?
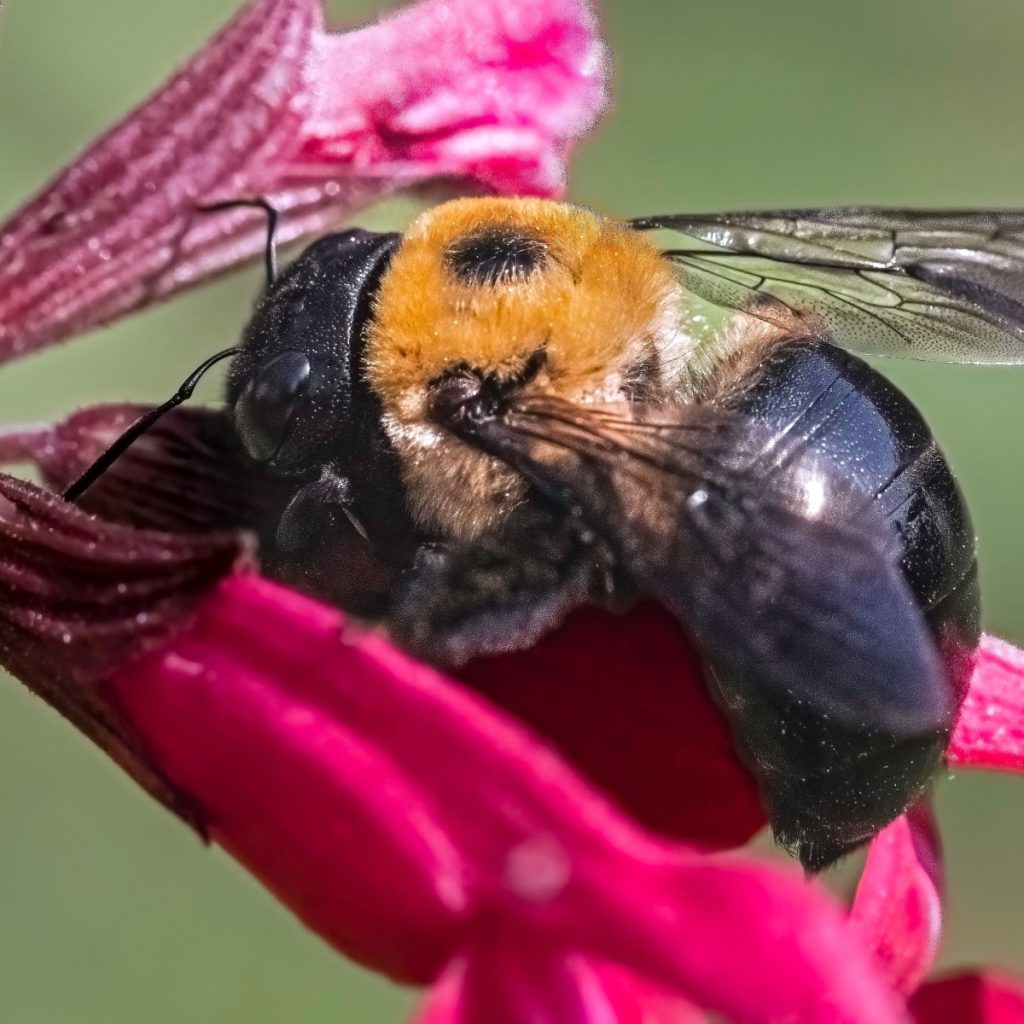
As spring arrives, so do carpenter bees. And can they ever destroy the wood on your home, garage, shed or barn. If that wasn’t enough, they also have little trouble drilling into the wood and damaging fences, swing sets, gazebos or pergolas. One thing is for certain, if it’s made of wood and outdoors – it’s fair game as far as carpenter bees are concerned.
Unlike many insects that might only affect a certain climate or specific location, carpenter bees exist almost everywhere. In fact, there are hundreds of varieties that together inhabit nearly every corner of the globe. And wherever they are, they cause damage!
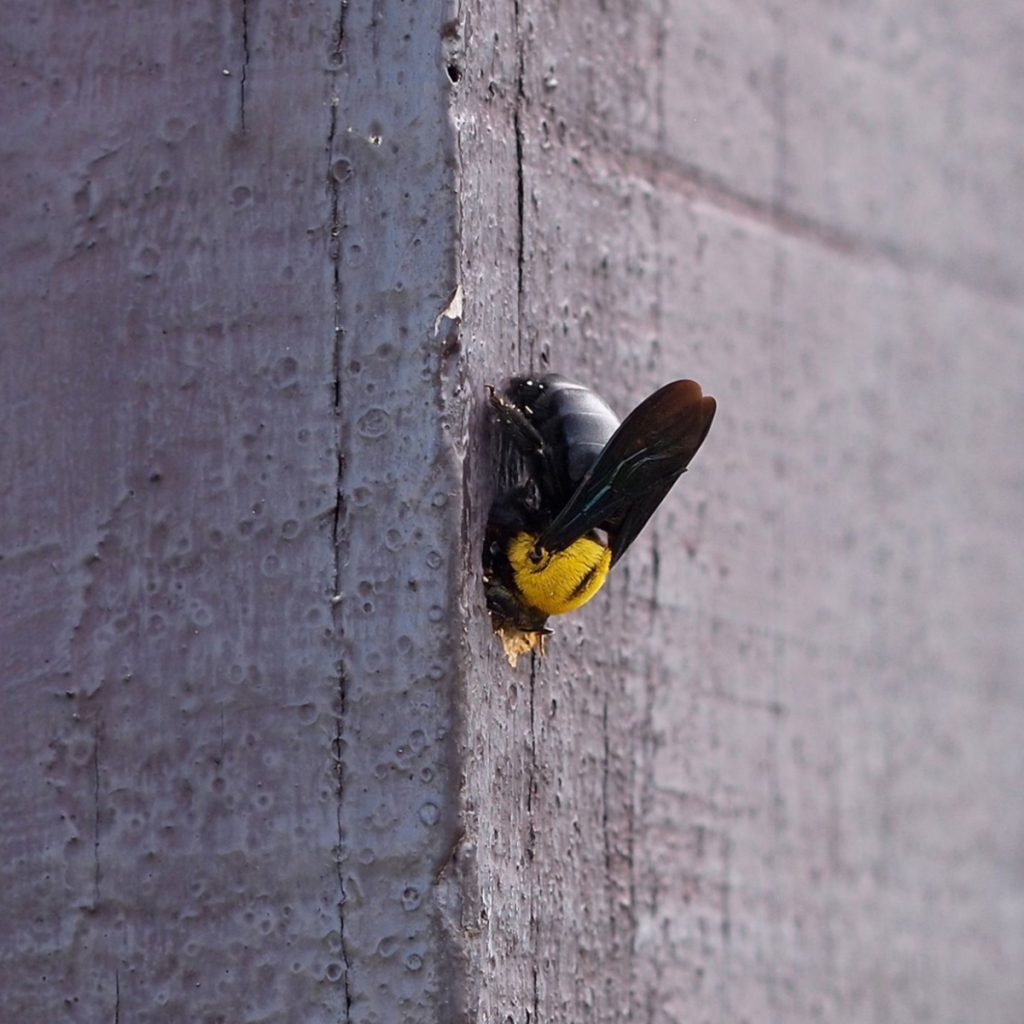
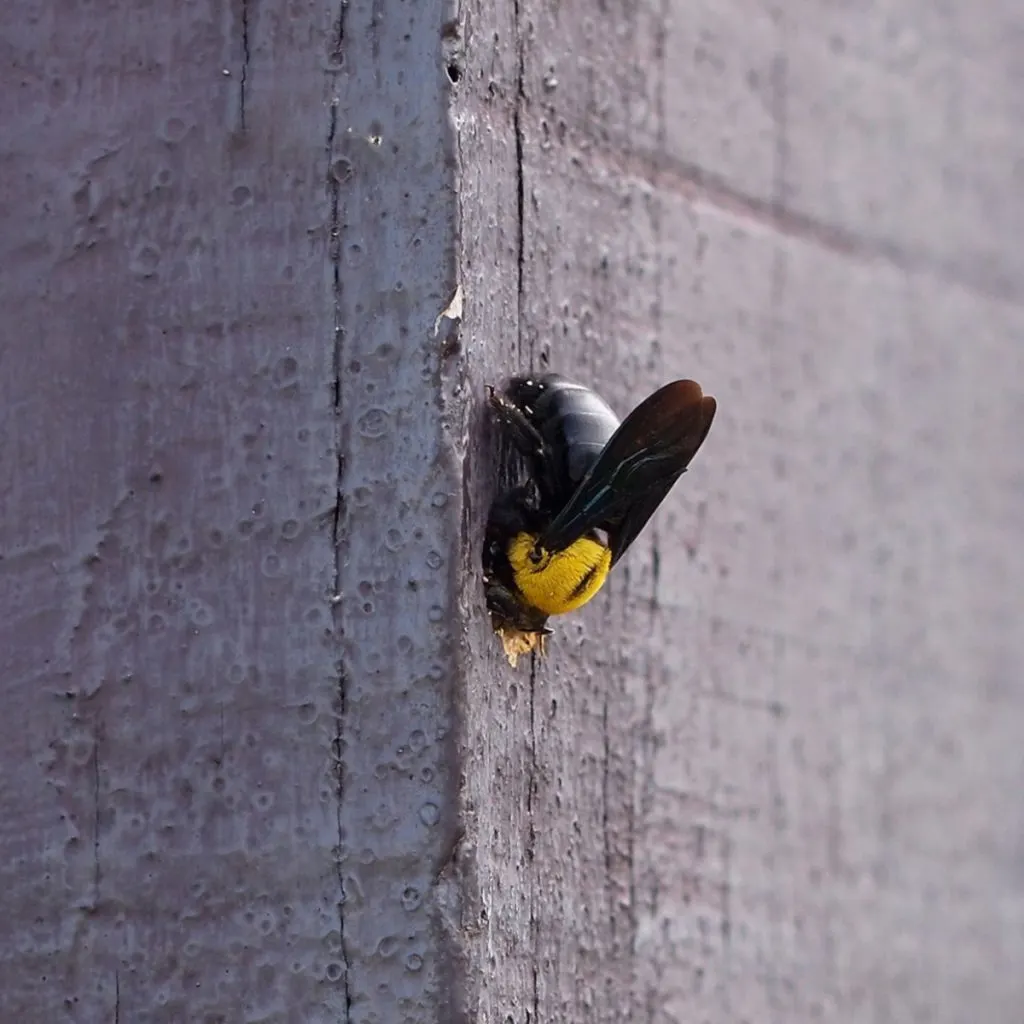
Carpenter bees are in the same family as the honeybees and ground bees. But unlike honeybees, carpenter bees do not live in hives – nor do they live in the soil like ground bees do. Instead, carpenter bees live and nest in small holes that they drill into wood. Holes so perfect you would swear they were made with a precision power drill and drill bit.
It is the female carpenter bee that does the damage to wood. And she drills the holes to make a nest to rear the next generation of bees. The male’s job, meanwhile, is to protect the nest. Although neither the male or female has stingers and cannot sting, the male will hover around the nest area and dive bomb anyone that gets close to the nest.
The real issue with carpenter bees is they will keep drilling bigger and farther each year. Once they appear and make their nest, they will continue to excavate more wood in the nest to lay more larvae. In fact, if enough years go by unnoticed, it can even be severe enough to make wood beams structurally insecure.
There is some good news – carpenter bees are really only active in the early to mid spring time period. That means if you can protect your wood surfaces through late spring – you are in good shape for the remainder of the season.

But when it comes to protecting, one thing is for certain, it’s far better to get carpenter bees to find suitable homes nearby in dead wood and trees than to kill them. Why? Because they are one of nature’s most active and helpful pollinators. So keeping them around is incredibly helpful for your garden, flowers and more.
Luckily, with the 3 simple and all natural methods below – you can keep your wood and structures safe – along with carpenter bees!
When it comes to predators that strike fear into carpenter bees, paper wasps and hornets both are at the top of the list.
Wasps are extremely fond of the larva of carpenter bees. They will often attack and rob carpenter bee nests of the larva. Because of this, carpenter bees try to avoid building nests anywhere near wasp or hornet nests.
Of course, no one wants to deal with wasps flying around – but by simply installing a few fake paper wasp and/or hornet nests, you can keep carpenter bees away. Almost without fail, when they fly in to build and see a nest – they simply move on.
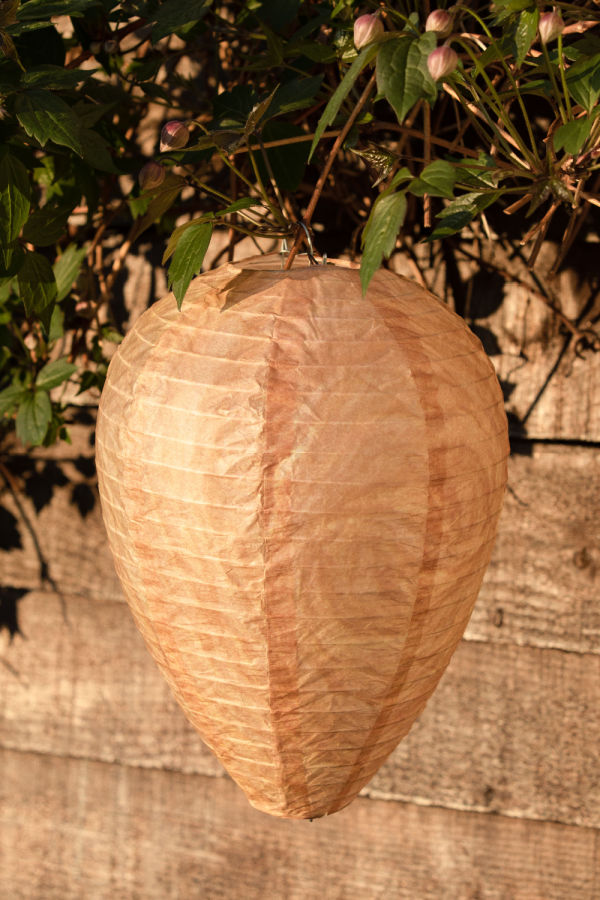

The good news is you can readily purchase some pretty realistic fake nests – and relatively inexpensively. Even better, they can be reused for multiple years to provide protection. Product Affiliate Link: Wasp Nest Decoy – 4 Pack – Hanging Fake Wasp Nest
Beyond using a fake wasp nest, you can also spray exterior wood surfaces with either orange oil or eucalyptus oil. Carpenter bees are not fond of the smell of either in the least. And if a surface has either scent on it, they are highly unlikely to drill into it or anywhere near it.
In addition to protecting the wood surfaces, the oils are also great to spray on any new holes that the bees have started to drill – or in existing nests to help clear them until you can plug them.
To use, mix 20 to 25 drops of essential orange or eucalyptus oil for every two ounces of water. You can then either spray directly on surfaces or use a cloth to wipe down surfaces to protect them. As always, test a small area first to make sure the spray does not discolor the surface.
When using this method, you will need to reapply regularly to keep the scent’s effectiveness. For best protection, spray weekly during the early spring when carpenter bees are most active.
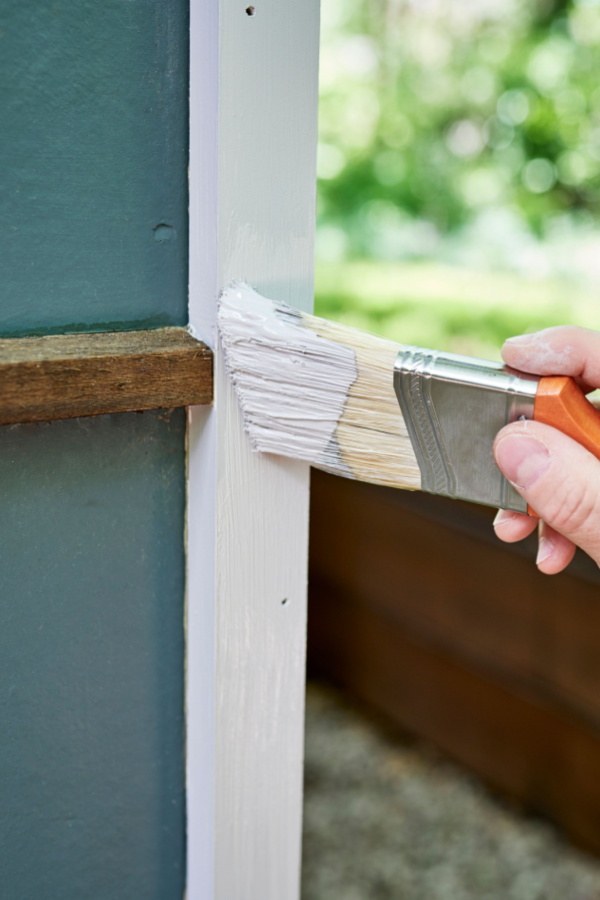
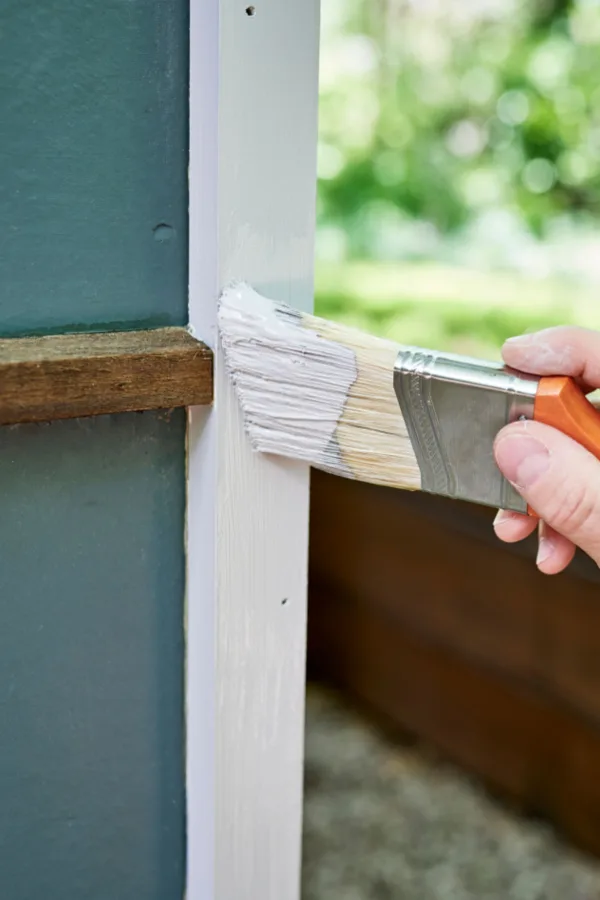
Last but not least, one of the best ways of all to protect your home, garage and outbuildings from carpenter bees is to put a fresh coat of paint or sealer on any and all wood surfaces. Wood that has been painted within the last few years is usually safe – but anything more weathered can often be drilled into by carpenter bees.
Carpenter bees prefer untreated and unfinished wood. This is exactly why they gravitate to fences, barns and other areas where wood is often not protected. But they are also much more likely to drill into highly worn painted or stained surfaces.
It’s not that carpenter bees won’t drill into painted wood – but they are highly unlikely too. Especially if the painted surface is relatively recent in the last few years. The biggest reason for this is that the paints contain ingredients that both offend and harm the bees while drilling.
The stronger the sheen, the better. High gloss, gloss and semi-gloss paints are all highly resistant to carpenter bees. Satin and flatter paints still have good resistance to carpenter bees – but slightly less than the harder coatings.
What about stained wood? Although stain is still much better than bare wood, it is not as effective as paint. If you do have stained wood, putting on a fresh coat of clear sealer will make it much more resistant to carpenter bees.
Sealer is also a great option to protect any unpainted surfaces as well that may be outside of your home. Again – apply at least every two to three years to maintain effectiveness.
One final note, it is important to repair and fill any old holes as soon as possible. Before doing so, be sure to remove any larva. By plugging the holes with a wood filler, you will keep carpenter bees from creating a condominium in your wood!
There you have it – 3 great ways to help stop carpenter bees – and protect your home from their damage in the process! For more on controlling common pests, be sure to check out our article How To Eliminate Grubs With Ease!
Follow Our Facebook Page For Great Gardening Tips And Advice! This Is My Garden Facebook Page
This Is My Garden is a garden website created by gardeners, for gardeners. Jim and Mary Competti have been writing gardening, DIY and recipe articles and books and speaking for over 15 years from their 46 acre Ohio farm. They publish three articles every week, 52 weeks a year. Sign up today to follow via email, or follow along!
When you plant French marigolds along with vegetable plants in your garden – great things happen. Not only do you fill your garden with the beauty and color of flowering annuals, you also can help protect and power your vegetable plants!
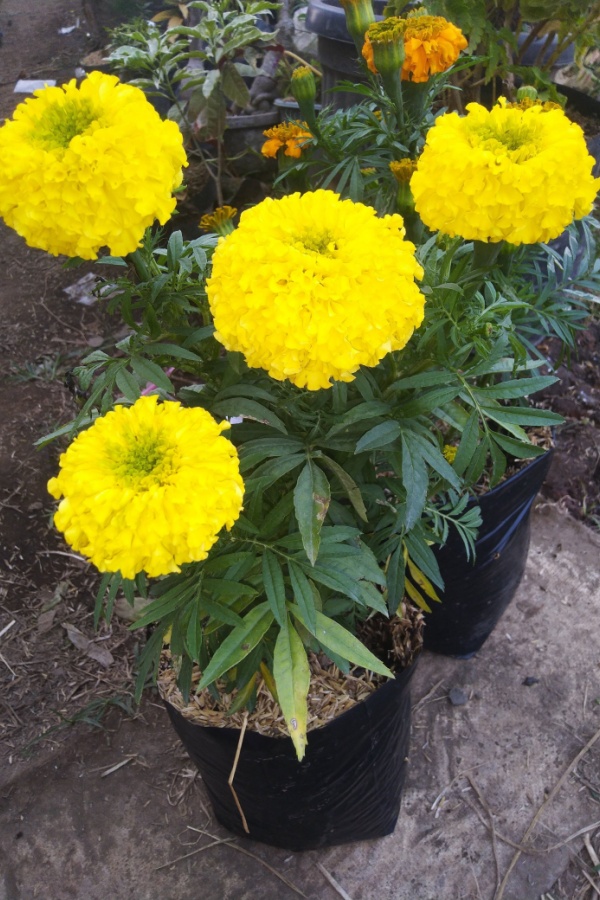
Marigolds are one of the most popular annual flowers to grow in backyard gardens – and for good reason. The big blooming flower grows easily from seed and can quickly fill garden spaces with beautiful blooms in all kinds of fiery shades of red, orange, and yellow.
Marigolds are also incredibly durable plants, being both drought and heat resistant. But their benefits go beyond just being tough and adding stunning color to your vegetable garden. As it turns out, they can not only help your vegetable plants perform better, they can help keep them safe too!

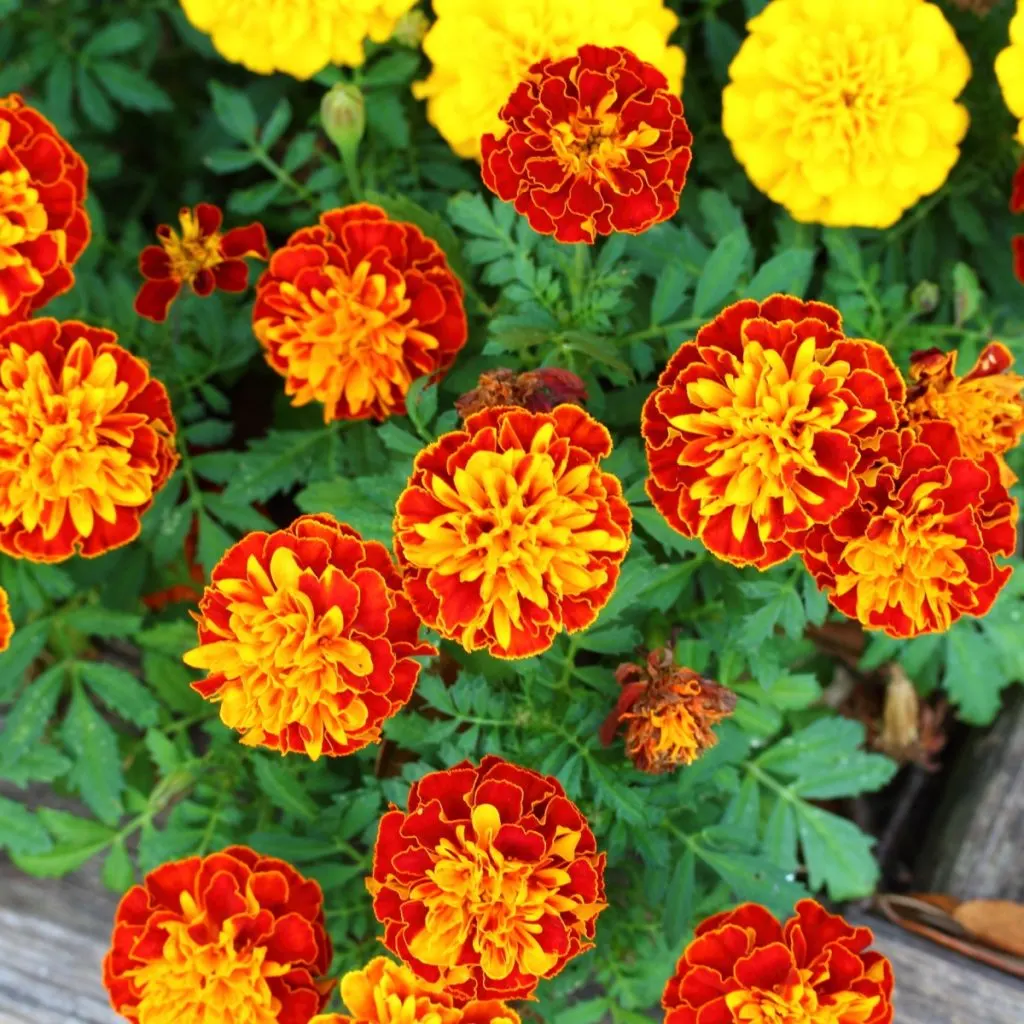
Marigolds truly are one of the best companion plants you can grow in a vegetable garden. With their multiple bright blooms, they draw pollinators in droves. And those same blooms are also perfect for repelling pests and insects – which happen to be the same ones that can quickly decimate a garden.
But as you will see below, even though all marigold varieties can help in a vegetable garden, there is one variety, the French marigold, that stands heads and shoulders above all other marigold types!
There are three main types of marigolds – African marigolds, Signet marigolds and French marigolds. Of the three, African marigolds are the largest type, reaching a massive 3 to 4 feet in height.
African marigolds produce multiple blooms that can measure around 5 inches each. But due to their larger sizes, they don’t work as well for growing in vegetable garden spaces. All too often, they can shade vegetable plants from getting the sun they need.
Signet marigolds, on the other hand, are probably the least well-known of the marigold varieties. They have more of a mounding habit, growing only around 6 inches or shorter. The advantage of signet marigolds is that the petals are edible – but their small stature does not attract as many beneficial pests.
French marigolds, meanwhile, steal the show for helping out in a vegetable garden. Not only are they a near perfect size at ten to twelve inches of height at maturity, their two inch blooms are big enough to bring a whole slew of pollinators and beneficial insects, without being too big to shade out vegetable plants. And, they have gorgeous flowers!

But more than anything else, these plants are a powerhouse of goodness in the garden. They are at the top of the list for ease of planting – and when it comes to repelling pests and bringing in pollinators, their pungent blooms and foliage can simply outwork any other companion plant around – all while looking stunningly beautiful.
Here is a look at just how incredible French marigolds are – and why you need to plant them in your vegetable garden this year!
One of the best reasons to plant French marigolds in your vegetable garden is their amazing ability to repel all sorts of different pests and insects.
The oils and aroma from French Marigolds are extremely strong. It certainly isn’t the pleasant, floral scent you get from smelling a rose or another fragrant flower. It’s so strong that many insects simply can’t stand them – including cabbage bugs, whiteflies, nematodes, tomato hornworms, squash bugs and mosquitoes.
But in addition to insects, French marigolds have also been known to repel bigger pests like rabbits, squirrel and deer. Again, the animals, much like the insects, are completely put off by the scent the flower gives off.
To make the most of their strong scent, plant several French Marigolds all along the border of your vegetable garden. Be sure to include them among typically sought-after favorites like tomatoes, squash, cucumbers, and cabbages. The more marigolds you can plant, the better protection your vegetables will have!
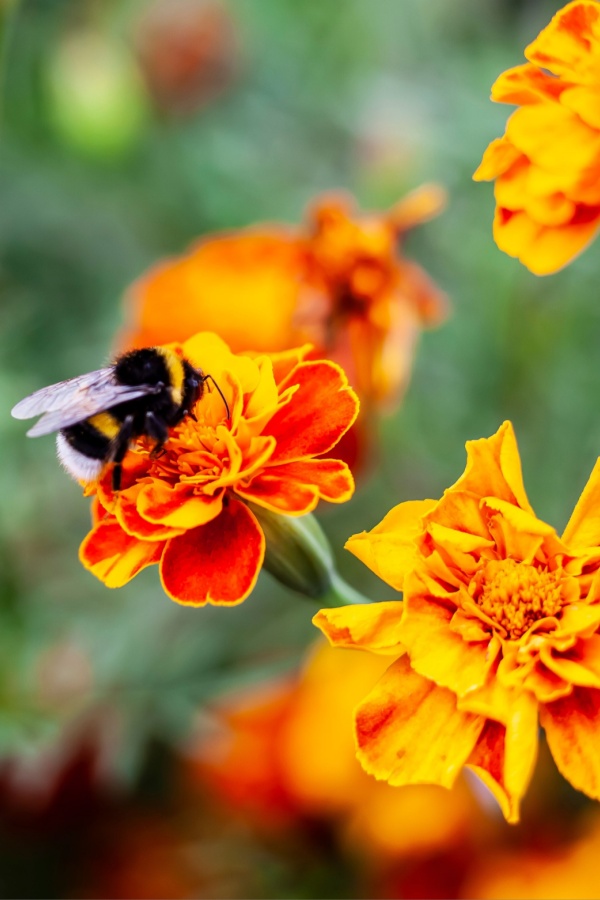
While French marigolds are great for repelling insects and other pests, they also happen to be perfect for attracting loads of beneficial pollinators to your property.
Honeybees, wasps, and butterflies are all highly attracted to the multiple colorful blooms that marigolds produce. These same pollinators then travel from bloom to bloom, pollinating the vegetable crops in your garden as well .
Each marigold plant can produce hundreds of blooms throughout the growing season. In fact, once marigolds start blooming, they will continue to do so until the first frost, long after other annuals stop.

This steady supply of blooms is great for attracting pollinators to your garden well into late summer and early fall. That can be key for late season crops that sometimes struggle to be pollinated.
One of the most obvious reasons for planting French Marigolds in your vegetable garden is that they add beauty and interest to your space. There’s nothing better than looking out into your garden to see a whole host of fiery red, yellow and orange blooms pop out against the green foliage of your vegetable plants.
Vegetable gardens are notorious for being a little less than colorful. But when marigolds are part of the planting scheme – that all changes. Especially with the two French marigold varieties below that grow easily from seed.
Unlike some annual flowers, French marigolds are incredibly easy to plant and grow from seed. Due to their more compact size, French marigolds can be planted directly in the soil when your other garden vegetables go into the ground.
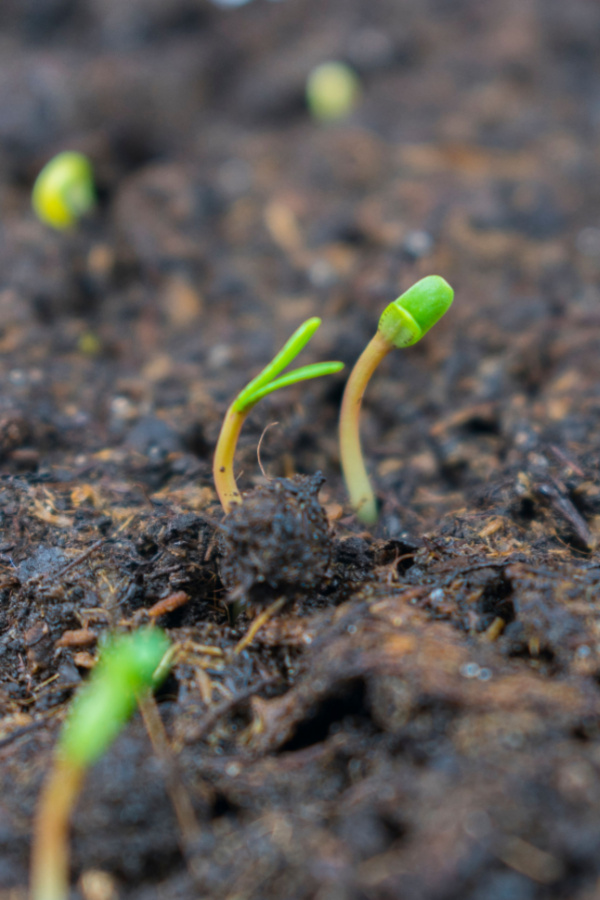
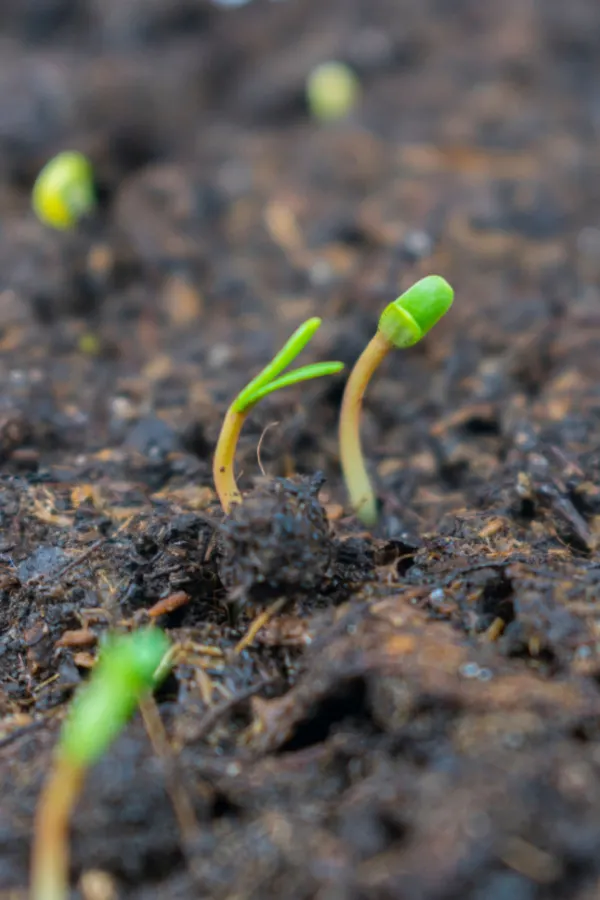
Sow French marigold seeds in well-draining, fertile soil. Choose spots in your garden that receive full sun for the best bloom output. Cover seeds with a light ⅛ inch of soil and then water in. The seeds should germinate in just one to two weeks, however, some can sprout in as little as three days.
When planting seeds outside, wait until the soil reaches a temperature of around 65º Fahrenheit or warmer. The warmer soil will allow the seeds to germinate and become established more quickly. And the sooner the plants can grow and produce blooms, the quicker they can go to work attracting pollinators and repelling pests!
French marigolds also thrive when grown in pots and containers. A 12-inch pot can easily grow two to three marigold plants. Growing in containers also has the additional advantage of allowing you to easily move the goodness of marigolds anywhere you need!
Last but not least, marigolds are so inexpensive to grow! Not only are marigolds fairly inexpensive to purchase from seed, their seeds can also easily be saved from year to year.
In fact, due to their multiple bloom sets throughout the entire growing season, French marigolds are one of the easiest flowers to save seeds from. One single flower can produce nearly a hundred seeds.
To save French marigold seeds, allow a couple of blooms to completely dry out on the plant. The seed head should be completely brown and shriveled up. Once you see this, cut the seed head off. Next, separate the individual seeds and spread them out to dry on a paper towel or plate. When the seeds are completely dry, you can store them for the following season.

French Marigolds are either open-pollinated or hybrids. Open-pollinated seeds will grow into exact copies of the parent plant. While you can still save the seeds of hybrid varieties, you will likely end up with a different looking marigold than the plant you saved the seeds from.
To read more in-depth about saving marigold seeds, see our article: “How To Save Marigold Seeds From Your Marigolds!”
Here’s to protecting your vegetable garden naturally while attracting pollinators and adding beauty to your space this growing season – with French marigolds!
Follow Our Facebook Page For Great Gardening Tips And Advice! This Is My Garden Facebook Page
This Is My Garden is a garden website created by gardeners, for gardeners. Jim and Mary Competti have been writing gardening, DIY and recipe articles and books and speaking for over 15 years from their 46 acre Ohio farm. They publish three articles every week, 52 weeks a year. Sign up today to follow via email, or follow along!
One of the best ways to stop ground moles from destroying your lawn and landscape every year is to eliminate the grubs in your yard – and as it just so happens, early spring is the best time to do it!
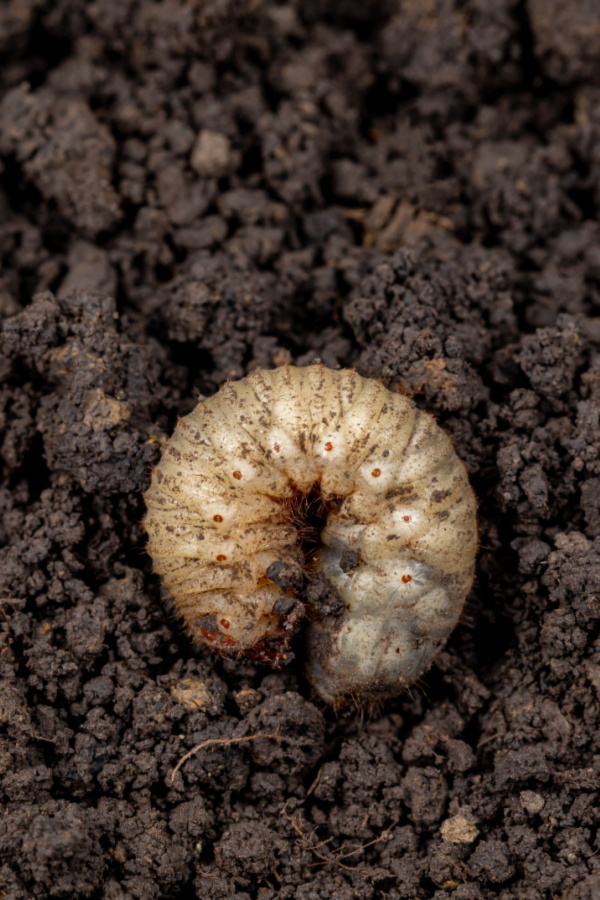
Grubs are the larvae of beetles, the most common of which are Japanese beetles. Grubs can also take the form of June beetles, chafer beetles, dung beetles and a host of other beetle species as well. But no matter the beetle, they can all do serious damage to your lawn and landscape. And in all kinds of ways!
In the ground, as larvae, grubs feed on the roots of grass and organic matter in the soil. Unfortunately, when they do, they can damage lawns severely. When in large enough numbers, they feed on roots so heavily that it will cause the grass above the soil to turn brown.


If you have ever noticed big brown patches of grass in your yard, more than likely, the culprit is grubs. But if that wasn’t enough, the beetle larvae pose an even bigger threat to the well being of your lawn – and that is that they happen to attract ground moles in droves.
To say that ground moles love to eat grubs would be the understatement of the year. It is actually their favorite food source of all. And when you have grubs in your lawn, you are almost guaranteed to have ground moles as well.
Unfortunately, even though grubs can cause brown spots and turf damage, ground moles digging tunnels through your yard will cause even more. As they dig and burrow looking for grubs, they destroy the roots of grass. So much so that it can completely kill the sod along their tunnel lines.
If all of that wasn’t enough damage from grubs, there is also the destruction they bring once they come out of the soil. For those grubs that survive an attack from ground moles, they emerge to become adult beetles. Beetles that then attack the plants growing in your garden and landscape!
Japanese beetles will feed on the foliage and blooms of roses, fruit trees, grapes and a host of other plants, bushes and shrubs. Not only can the damage be unsightly, if severe enough, it will kill plants. And many of the other beetle species that emerge create similar damage as well.
One thing is for sure, it’s easy to see how much trouble grubs cause. And even more, how important it can be to keep them out of your yard! After all – if you eliminate the grubs, you eliminate all of the issues they bring, including ground moles! See: How To Eliminate Ground Moles For Good
The best time to get control of grubs is in early spring. Getting after them at this point helps you not only stop them before grubs can emerge, it also helps keep your lawn safe from mole attacks early in the season!
In the cold winter months, grubs go far down in the soil to stay safe from freezing. But in the spring, they come back near the surface to feed and prepare for emerging. When they do this, a simple and easy to apply application of beneficial nematodes can put a huge dent in their population. And even better, a long lasting one!
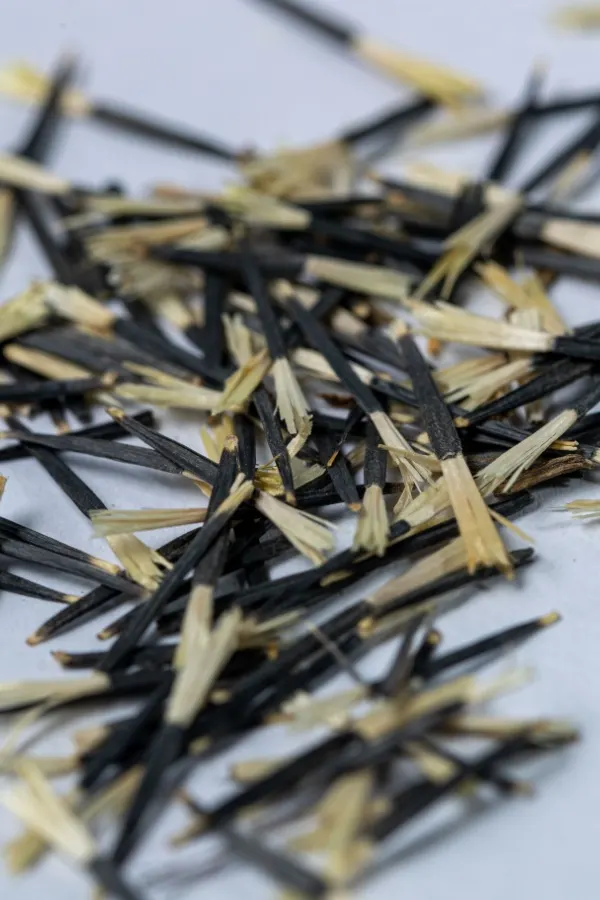
So what are beneficial nematodes? Nematodes are tiny microscopic worms that cannot be seen by the human eye. They live in the upper layers of moist soil and they are amazing at attacking grubs, caterpillars, cutworms and more.
Beneficial nematodes work down through the soil to find slugs and other pests. When they find them, they drill in and enter the back mantle of the slug or pest. There they infect it with bacteria that ultimately kills it.
But even more, they reproduce as well in the host pest. When they do, they eventually release even more nematodes that search out more slugs and pests. Talk about a natural predator!
So how do you apply beneficial nematodes to your lawn? And are they really safe? Let’s first cover the safety issue. Yes, beneficial nematodes are safe for humans, pets, children. They are even safe for earthworms too!
Beneficial nematodes live in the soil and the bacteria that they inject into slugs and caterpillars will not harm other living organisms. There are harmful nematodes that can injure tomato and other plants – but these nematodes are not the same.
So how exactly do you get beneficial nematode into the soil of your lawn? It’s actually quite easy. You simply mix them with water and spray them on it!
To do this, you can use a backpack sprayer, a hand held sprayer, or even a simple watering can to apply them over the surface of the soil. How you put them on really depends on how big of an area you need to cover.

Remember that these nematodes are microscopic. Because of that, they can be mixed into water and sprayed to cover the soil quite easily – whether a large lawn or a small backyard lot. Wherever you spray them, they root down in and go looking for slugs!
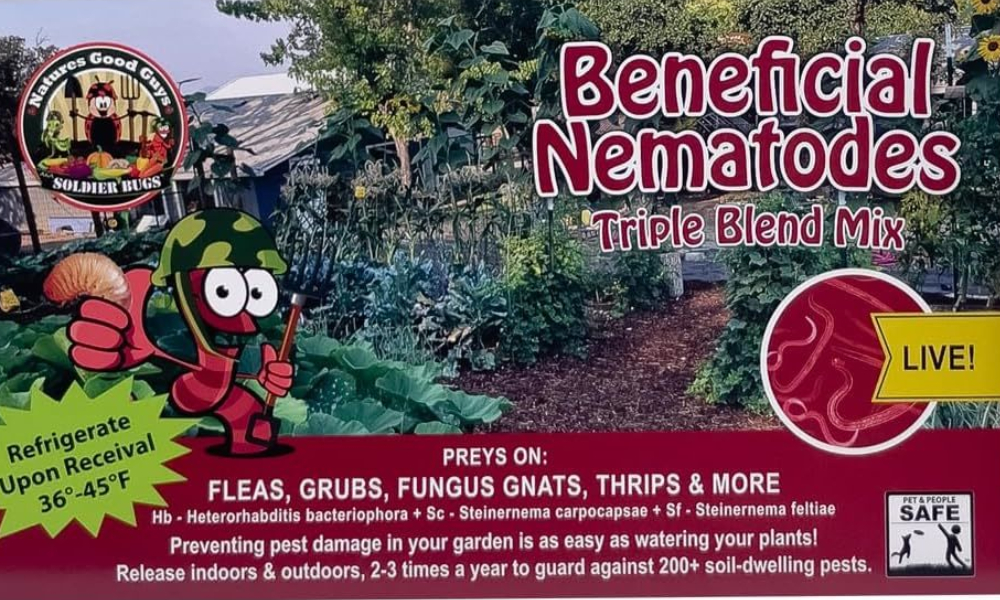
You can purchase nematodes by the millions per package. The good news is that they are not terribly expensive in the least. In fact, you can purchase anywhere from 5 to 50 million nematodes for less than $30. As a reference point, about 10 million nematodes will cover an acre of land! Affiliate Link: Natures Good Guys – Triple Blend Beneficial Nematodes HB+SC+SF (50 Million)
You can actually spray on nematodes in the early spring or fall. With that said, spring is the best time of all because it gives you a jump on the grubs and stops their cycle of breeding and laying more larva for the next season.
When applying in early spring, it’s important to spray your lawn and garden for grubs in early – but not too early. In order for beneficial nematodes to be effective and for the grubs to be near the surface, it’s best to wait until daytime temperatures are above 50° (F) and the soil is above 45° (F).

This is great in early spring and fall, but you should avoid spraying in summer. When temperatures rise above 80° (F), the nematodes begin to lose their ability to enter the host grub. Unfortunately, in the hot summer months, it’s just not effective to knock them out.
For detailed instructions on spraying, it’s always best to read the package thoroughly from where you purchase your nematodes. One thing to note is when they ship to you, they will need to be kept cool in a refrigerator until you use them to keep them alive.
In addition to the spring application, it is a great idea to follow up in the first year with a second spraying in the fall. This can be a great one-two combination to get rid of any grubs that have been deposited by beetles after mating.
One thing is for sure, after a few applications, your lawn should be more than free of a grub infestation – and along with it, the ground moles should have moved on as well. Here is to eliminating grubs in the early spring this year!
Follow Our Facebook Page For Great Gardening Tips And Advice! This Is My Garden Facebook Page
This Is My Garden is a garden website created by gardeners, for gardeners. Jim and Mary Competti have been writing gardening, DIY and recipe articles and books and speaking for over 15 years from their 46 acre Ohio farm. They publish three articles every week, 52 weeks a year. Sign up today to follow via email, or follow along!
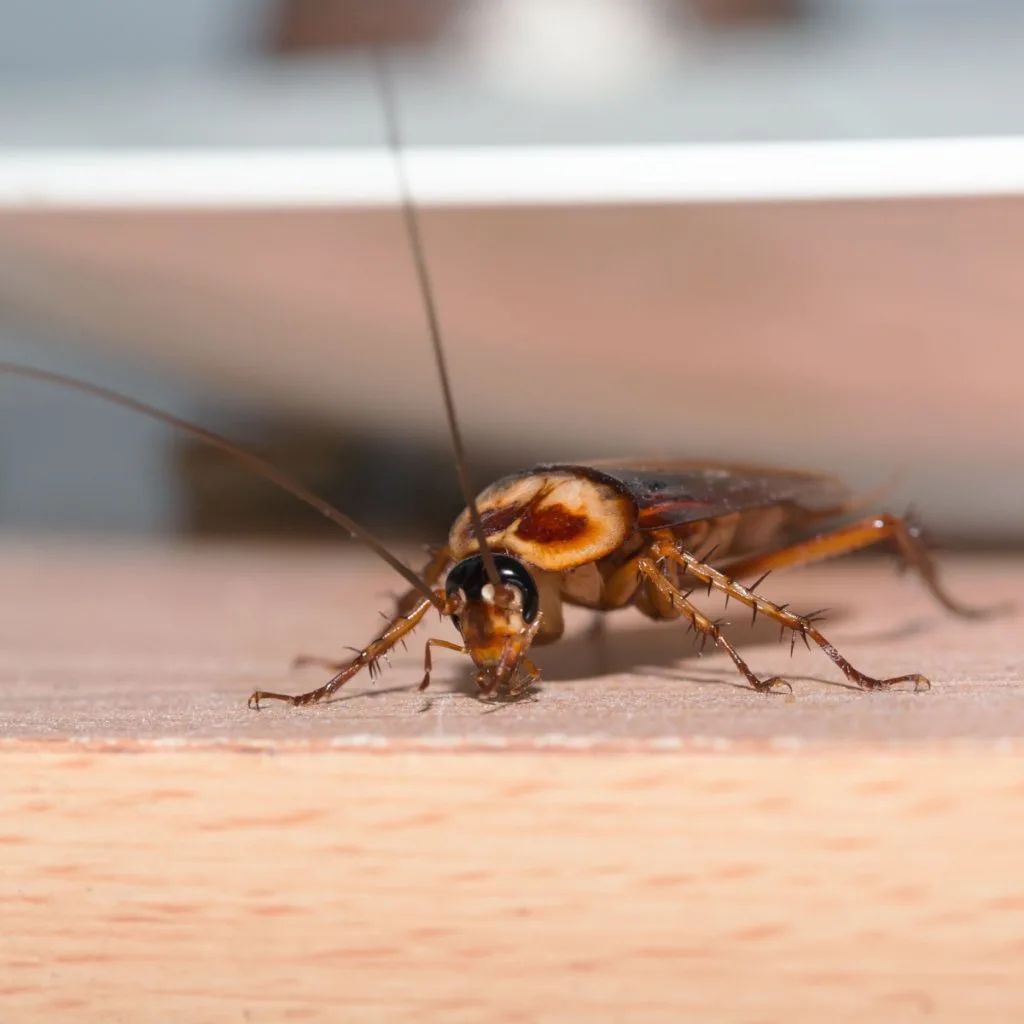
Looking for a way to get rid of cockroaches and keep them out of your pantry, kitchen and house for good – all without having to resort to harsh sprays or chemicals?
It’s hard to find anything that can be more unnerving than to see a big cockroach scurrying across your kitchen floor. Or even worse, finding one in your pantry or cupboards crawling over and around food items.
One thing is for sure, cockroaches are everywhere – well almost. There is only one continent in the world where roaches do not live, and that’s in Antarctica. But everywhere else, they are one of the most adaptive species of all, finding ways to survive wherever they live.

Cockroaches are drawn to the indoors for food, moisture, and a warmer environment. And once they find those favorable conditions, they can multiply incredibly fast. Not only can cockroaches live to be 6 months or older, during that time they can reproduce and lay eggs monthly. In a very short time – they can infest a house and become a long term problem.
So how do you keep cockroaches out? And how do you get rid of cockroaches that might already be inside? There are certainly chemical sprays that can kill roaches. But for many, the thought of spraying chemicals all over their kitchen and pantry and around the food they consume is a bit unsettling.
The good news is there are actually a few effective natural solutions to both get rid of the roaches already in your home and keep any more from ever coming inside. And as you will see below, success all starts with one important task – eliminating their sources of food!
Before we cover a few natural remedies for eliminating existing roaches and repelling future ones from coming indoors, it’s vital to know that unless you first eliminate a cockroach’s source of food, your issue will never truly go away.
Cockroaches have an incredible sense of smell. In fact, it’s over the top. They can detect food sources from far away and are amazingly adept at making their way to it quickly. Because of that, priority number one is to start storing your food so they can’t smell it!
First and foremost, residue on the floor, on plates in the sink – and even in garbage cans will attract them quickly. As will little flour spills in a cabinet or crumbs from crackers or bread.
If you really want to eliminate the issue of roaches for good, the best course of action is to seal all food items in hard plastic, sealable containers. In addition, clean up liquid spills immediately and thoroughly. Finally, keep trash cans emptied frequently as well. And if your issue is bad enough, keep the trash container out of the kitchen entirely.
Remember that if you eliminate their source of food, they simply can’t survive to breed. Nor will they have any reason to stick around! Now let’s take a look at a few natural remedies that will eliminate the roaches you have – and a few more that can keep them from wanting to come back in the future.
One way or another, if you have roaches already present, you need to eliminate them in order to stop them from breeding and continuing the cycle. Thankfully, there are a few all-natural products that can do the trick both quickly and safely.
Baking Soda – One of the best is a product probably already in your pantry or kitchen – baking soda! Baking soda naturally kills roaches when they ingest it. Although they will not readily eat baking soda by itself, they will when you mix 1/4 granular sugar with 3/4 baking soda.
Place this mix under kitchen sinks, in cupboards, and at key entry points. It is the safest and most effective way to eliminate roaches. You will often see that you can use sugar with borax. Unfortunately, borax can be highly toxic to children and pets. It’s simply not a good choice to use when it comes to safety.
Diatomaceous Earth – Diatomaceous Earth, or DE as it is commonly referred to, is also an all-natural insecticide that will kill roaches. DE is basically the fossilized remains of tiny long-ago microscopic creatures.


You can place DE down as a barrier at entry points – sprinkle it in cupboards – or in a line under cabinets. When roaches come in contact with DE, it dries out their protective skin coating, killing them in the process.
As long as you use food grade diatomaceous earth, it is not harmful to pets or children. DE is extremely effective as a natural control method for roaches – and if baking soda can’t eliminate them – it is the way to go. Affiliate link: Diatomaceous Earth Food Grade 10 Lb
Remember that amazing sense of smell roaches have? It can also be used against them to repel them as well! There are certain scents that roaches despise, and you can use them quite easily and safely to keep cockroaches far away. One of the best happens to be peppermint!
Perhaps the most powerful of all scents against roaches is peppermint. Roaches simply do not like the smell and find it quite offensive. Although you can certainly place fresh peppermint leaves around to help – the best and most effective way to use it is to use the concentrated oil of peppermint as a spray.
You can make your own spray with pure peppermint essential oil and water, or use ready-to-go natural products to spray entry points, cupboards, and other spaces where you have recurring issues with cockroaches. Affiliate Link: Mighty Mint 16oz Cockroach Repellent Natural Peppermint Oil Spray

Garlic Oil – Believe it or not, garlic oil is also another scent that roaches will avoid. It too can be used as a spray, taking the essential oil of garlic and mixing it with water. Some prefer the scent of peppermint over garlic – but it does work equally well!
One thing is for sure, by using a combination of solutions that can kill existing roaches and then repel them, you can keep your home free of this annoying pest for good. Here is to eliminating cockroaches from your home – and to keeping it safe from them forever – naturally!
Follow Our Facebook Page For Great Gardening Tips And Advice! This Is My Garden Facebook Page
This Is My Garden is a garden website created by gardeners, for gardeners. Jim and Mary Competti have been writing gardening, DIY and recipe articles and books and speaking for over 15 years from their 46 acre Ohio farm. They publish three articles every week, 52 weeks a year. Sign up today to follow via email, or follow along!
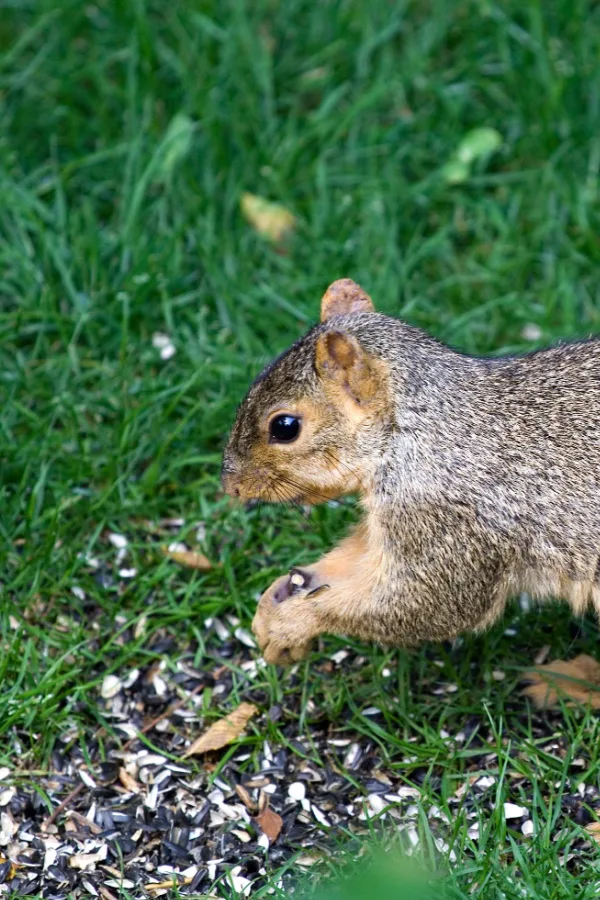
Did you know that with just a few simple tips and tricks, you can keep squirrels away from your bird feeders with ease – and make feeding birds fun once again. Especially in the fall and winter when birds need the feed the most!
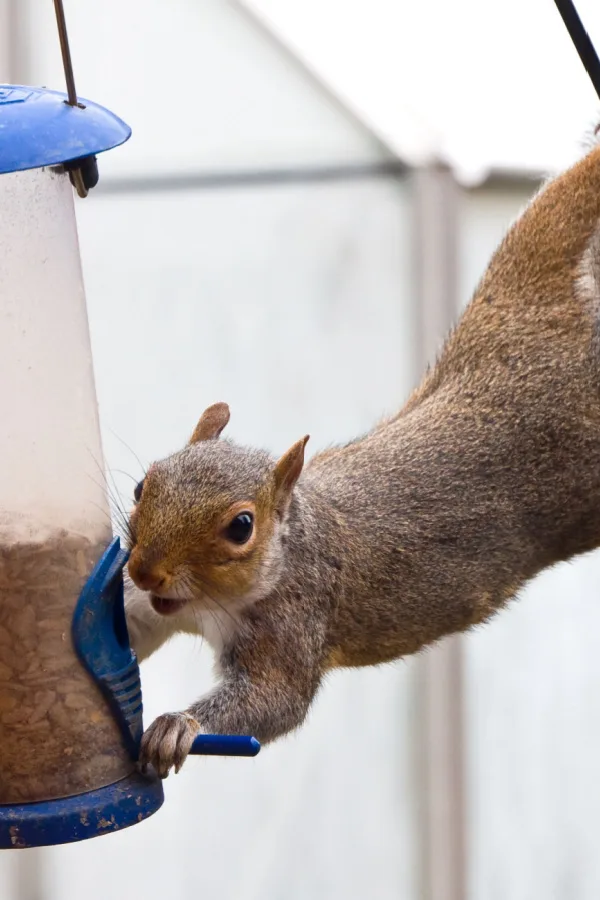
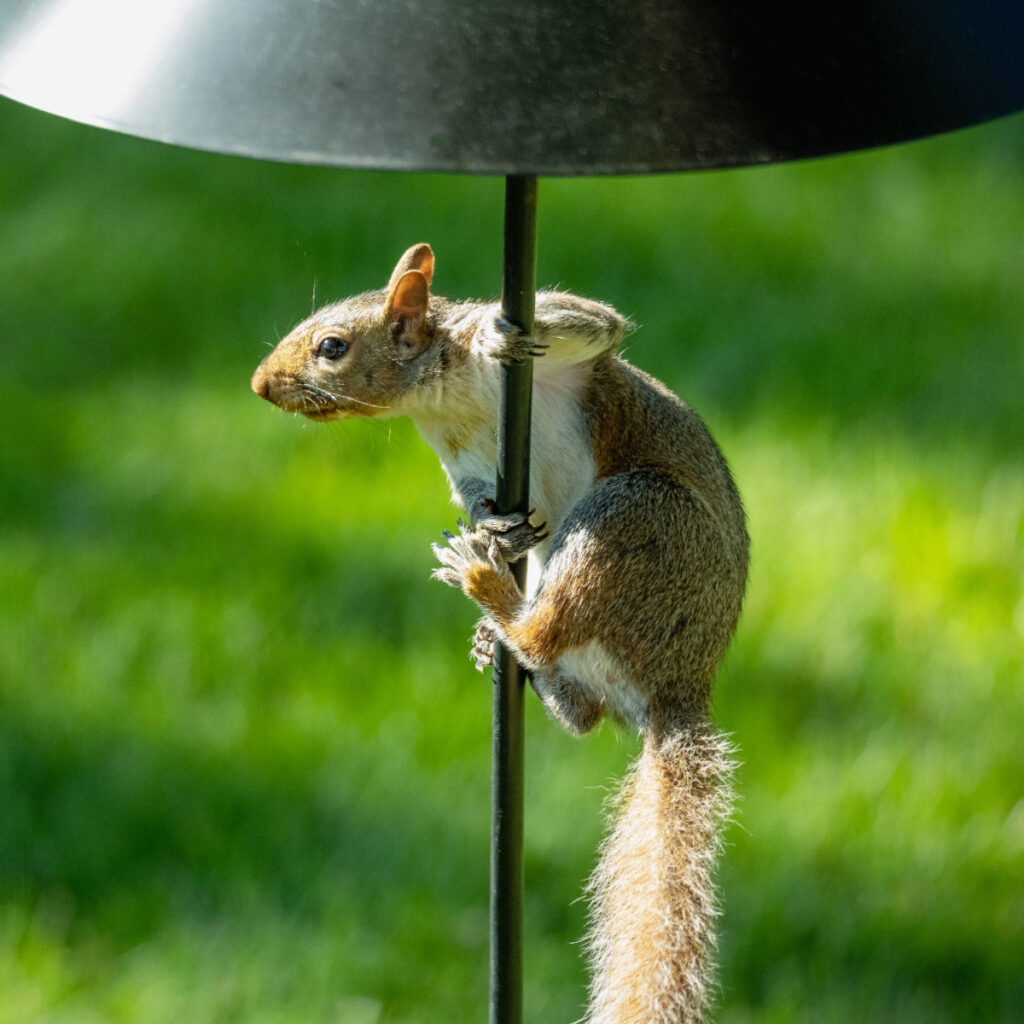
There is nothing more frustrating than watching a squirrel quickly empty your just-filled bird feeder. Squirrels can be quite a nuisance when it comes to those who love to feed birds. They have an uncanny ability to find and locate feeders, seemingly as soon as they are filled!
Unfortunately, once they find it, the squirrels will continue to come back time and time again. And they will continue enjoying the all-you-can-eat feast until it’s gone. Squirrels will even go as far as breaking a feeder if it means they can have easy access to a tasty treat.


What’s more, squirrels are hardly ever fazed from their eating by anything – and especially not visiting birds. In fact, squirrels most often scare away the very birds you are hoping to attract and feed. Even worse, it seems no matter where you place your feeder, they can engineer a way to get to it!
One thing is for sure, bird seed is not cheap! And it can get quite expensive when you have to constantly replace your supply due to squirrels. But luckily, with a few simple tricks, you can indeed safely keep squirrels away without injuring them in the least – and feed your birds safely at the same time!
Stopping squirrels from getting to feeders really comes down to implementing not one but several strategies. When used together, these hints and tricks can send squirrels looking elsewhere for easier meals – and for good.
Without a doubt, the first and most effective method of keeping squirrels away is to begin by locating your feeders in a place that is hard for them to get to in the first place!
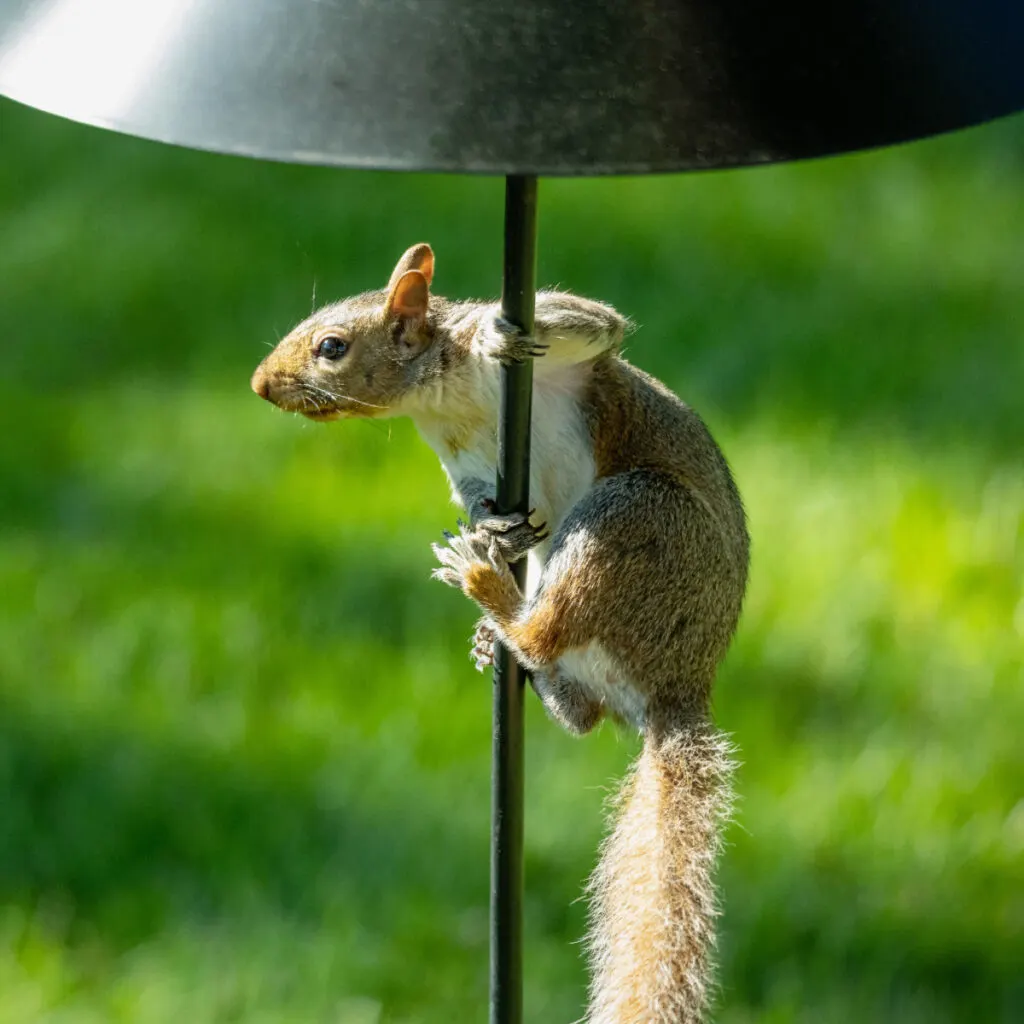
Squirrels can reach places you never imagine. In fact, believe it or not, squirrels are capable of jumping up to 5 feet high and 7 feet across. That means if there is something nearby or overhead of your feeder, squirrels can reach it.
Because of this, avoid placing bird feeders directly in a tree or underneath buildings or structures. Even placing the feeder a few feet away from these objects will still give the squirrels easy access with a simple jump.

Squirrels are actually quite the little acrobats. They are no stranger to dangling upside down or holding on with two feet just to grab a bite. In fact, it is amazing how resourceful they can be to jump, hop and fly to get to a feeder!
The best way to hang a bird feeder is to place it on the top of a tall pole or post. Put the post in a location that is out in the open, away from structures and trees. This eliminate an aerial assault from squirrels – which is a huge help as a first line of defense.
Now that you have your feeder out in the open, the next line of defense is to protect the pole. As in making it impossible for squirrels to climb up it! And one of the easiest ways to do that is to use squirrel baffles.
Squirrel baffles are inexpensive and easy to install on most bird feeders and birdhouse poles. Baffles are essentially large, dome-shaped metal covers that attach to the top and/or bottom of bird feeders.
Their slippery dome shape prevents squirrels from being able to grip the sides. Instead, they simply slip off and have no choice but to jump away. When installed on top, they protect flying squirrels from coming from above. And on the bottom, the dome keeps them from getting above to the feeder.
It’s important when using baffles to still make sure your feeder is high up off of the ground. This will prevent the squirrels from jumping from the ground, bypassing the baffles altogether. Install it no lower than five feet off of the ground for best results. (Affiliate Product Link: Predator Guard Squirrel Baffle)
While it sounds a bit silly, a metal slinky can also go a long way in stopping squirrels from visiting your bird feeders as well. Similar to how a baffle works, a slinky makes it extremely difficult for squirrels to get to the feeder.
Simply slide a slinky over the top of the bird feeder post and allow it to extend down. Use zip ties to secure it to the bottom of the feeder. Ensure that the slinky is made of metal. The cheap plastic slinkies can’t hold up to cold weather conditions or to chewing squirrels.
As long as the feeder is up at least 5 feet high, the squirrels will attempt to grab the post to climb up but grab the slinky instead. The slinky will send them right back to the ground. Eventually, the squirrels will give up. Using a slinky below a baffle can make for a quite a dual squirrel defeating combination!
In addition to installing baffles or slinkies, you can also help the cause by doctoring your feed to make it less desirable for squirrels. This can be done in a couple of different ways, with the first being to add bird feed the squirrels simply don’t like.
Squirrels prefer peanuts, dried fruit, and sunflower seeds. Unfortunately, these items are often preferred by some of the most beloved winter birds as well. (See, “How To Feed Chickadees In The Fall & Winter”)
So what can you do? Since excluding these bird feeding staples isn’t always an option, you can actually introduce feeds to the mix that they do not want to eat.
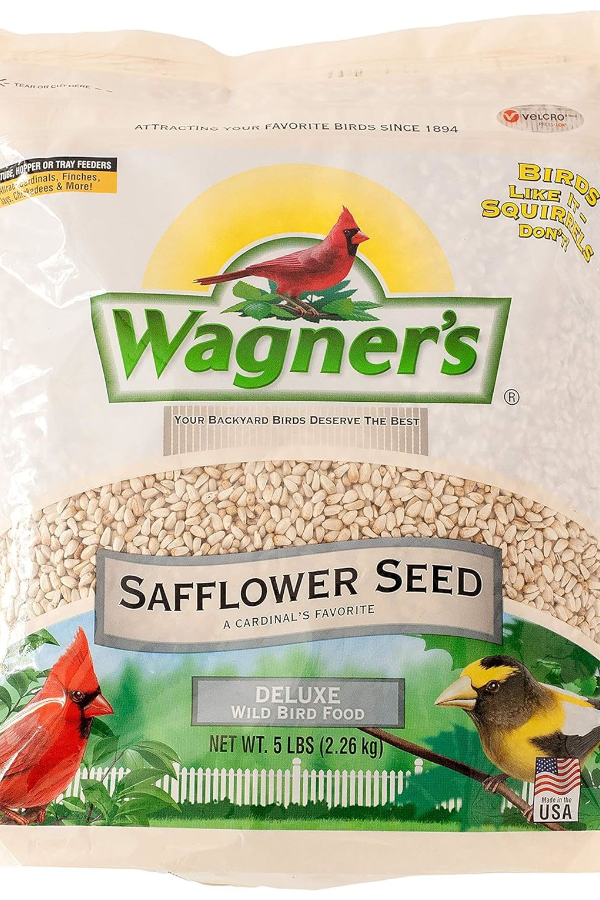
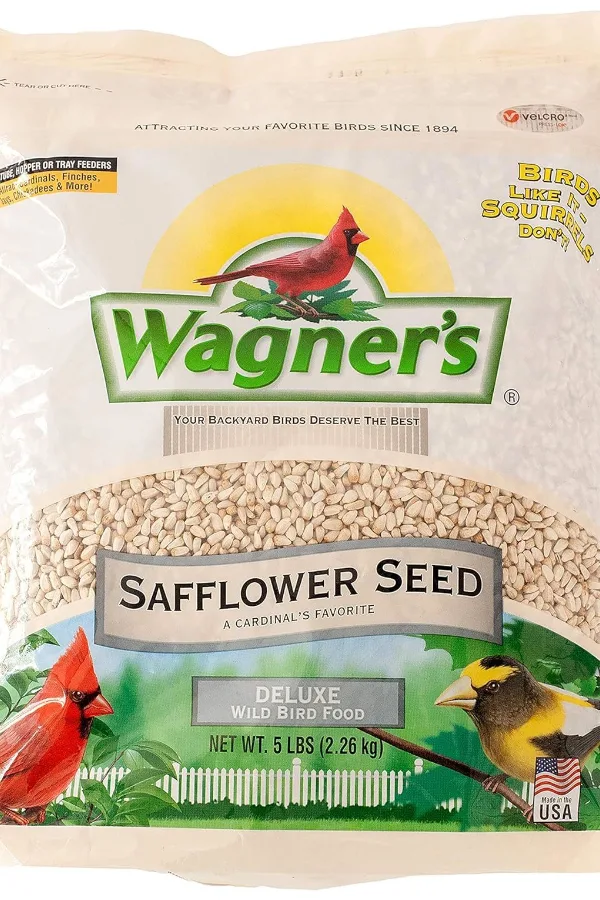
One of the best to add is safflower seeds. Squirrels don’t like them in the least. But most birds do. And when they are included in the mix- squirrels aren’t quite as fond to come visit. Affiliate Link: Safflower Bird Seed
The second way to make bird feed less desirable to squirrels is by adding hot pepper spice to the mix. While your taste buds might notice the heat from hot peppers, birds don’t seem to be affected by it.
Both mammals and humans are very sensitive to capsaicin, the ingredient found in hot peppers. Capsaicin is what causes peppers to be spicy. And by adding a little bit of hot pepper to your birdseed mix, with one taste of the spicy mixture, the squirrels will be well on their way looking for much less spicy treats!
Simply sprinkle a little bit of hot pepper flakes, cayenne pepper, or any other type of hot pepper powder on your seed mixture. You don’t need to go overboard – with this, a little bit goes a long way.
If you don’t want to make your own spicy bird feed, you can purchase ready-made bird feed with the spice already added. Whether you purchase the spicy bird seed or make it yourself, be careful with the product around kids and other pets. (Affiliate Product Link: Wild Delight Sizzle N’ Heat Bird Food)
Last but not least, try to keep areas under bird feeders as clean as possible. Birds can be rather messy when they eat from bird feeders. They often use their beaks to push the seeds out of the feeder, forcing it to the ground below.
Large amounts of fallen seed will attract not only hungry squirrels but also raccoons and other hungry pests. Unfortunately, when there is no longer any seed on the ground for the squirrels to eat, the squirrels will go right to the source – the feeder.

You can either clean up the mess every couple of days or you can add a seed tray to the bottom of your feeder. This will help collect the seeds and mess and prevent it from going onto the ground. While this tip alone isn’t foolproof, it will help from attracting squirrels to your property – and to your feeders.
Here is to keeping squirrels away from your bird feeders – and to enjoying bird watching all year around!
Follow Our Facebook Page For Great Gardening Tips And Advice! This Is My Garden Facebook Page
This Is My Garden is a garden website created by gardeners, for gardeners. Jim and Mary Competti have been writing gardening, DIY and recipe articles and books and speaking for over 15 years from their 46 acre Ohio farm. They publish three articles every week, 52 weeks a year. Sign up today to follow via email, or follow along!