
Wondering what to do with your daylilies as their blooms begin to fade and their foliage starts to decline in early fall?
By late summer and early fall, daylilies can certainly start to show their age. Their once-colorful blooms have usually disappeared, and the long, green foliage begins to yellow and brown. Once this process starts, there is no stopping it. The plant is simply beginning its natural transition into dormancy for the winter months ahead.
Unfortunately, that transition isn’t always pretty. As the foliage continues to die back, daylilies can quickly go from being a beautiful focal point to looking tired, messy and overgrown. Add in the tall, woody seed stalks and seed pods that often remain above the plants, and they can make an entire flowerbed look a bit neglected.
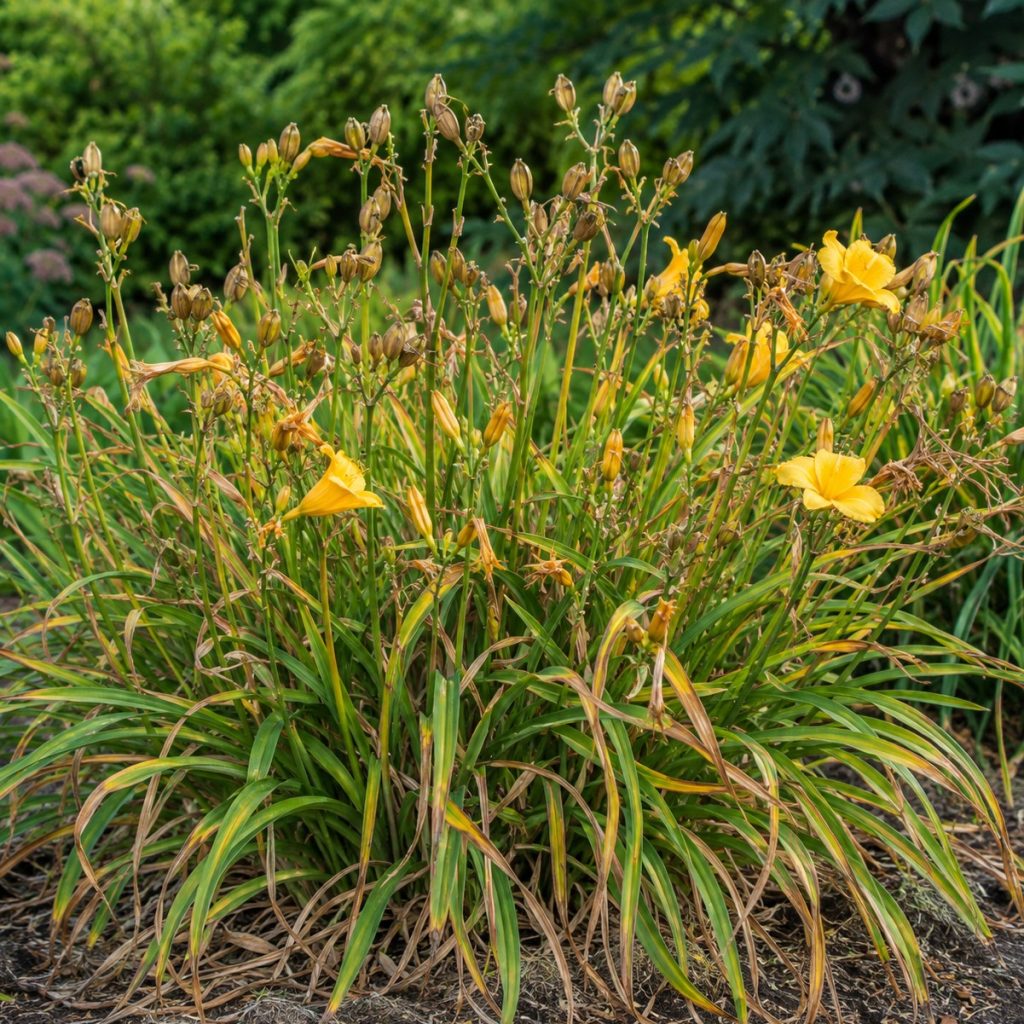
But the good news is that you don’t have to leave your daylilies looking less than their best. As it turns out, early fall is actually the perfect time for a little daylily maintenance – including cutting back unsightly foliage – and splitting and dividing overgrown plants as well!
What To Do With Your Daylilies In Early Fall
Cutting Back Daylilies In Early Fall
Fall daylily care all starts with taking care of the plants decaying foliage. Although cutting back your daylilies is not necessary for the plant’s survival through winter, there are several advantages to removing the dying foliage in the fall.
First and foremost, it keeps your beds looking fresh and clean. Nothing will draw your eye more to a bed than decaying foliage. But even more, by removing it, you also help prevent insects, mice and other pests from overwintering in bed spaces. Simply put, decaying foliage is an easy place for small creatures to both hide and nest.
In addition, removing all of the decaying plant matter in the fall helps the plants as well. With the old foliage gone, plants have an easier time sprouting through the surface in the spring. Even better, all of that dying organic matter is perfect for building a great fall compost pile. And cutting back couldn’t be easier!
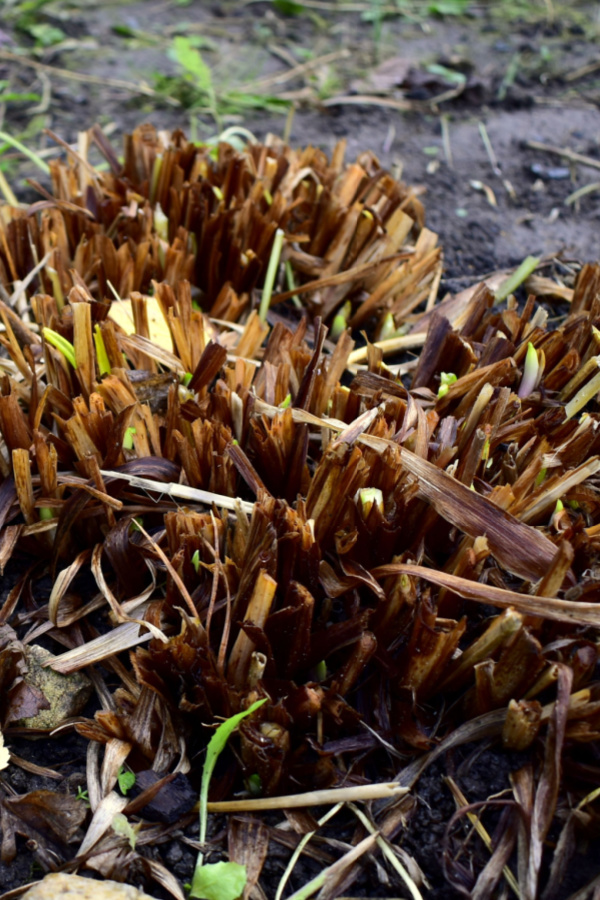
When cutting back daylilies, it’s best to use a sharp pair of hedge shears or trimmers. Simply move the blades under the plant and cut the foliage back a few inches above the ground. If you have a lot of daylilies, a cordless electric hedge trimmer can make quick work of this task! Affiliate Link: WORX Cordless Hedge Trimmer, 20V 22″ Bush Trimmer
Once you have your daylilies cut back – it’s the perfect time to see if your plants need divided and split!
Dividing Overgrown Plants
Once cut back, it’s easy to see how large the plant has truly become. And this makes it perfect for deciding whether or not you need to divide.
If your plants are still on the smaller size and do not require dividing, you can finish your fall clean up quickly with a little bit of compost and mulch. Once the daylilies have been cut back, apply a few inches of mulch around the plant and an inch or so of compost on top of the cut blades.
The mulch will help protect the plant through winter – all while keeping out competing weeds. And by putting some compost on top and letting it work down, it will give a gentle source of energy to the plant and surrounding soil for next year.
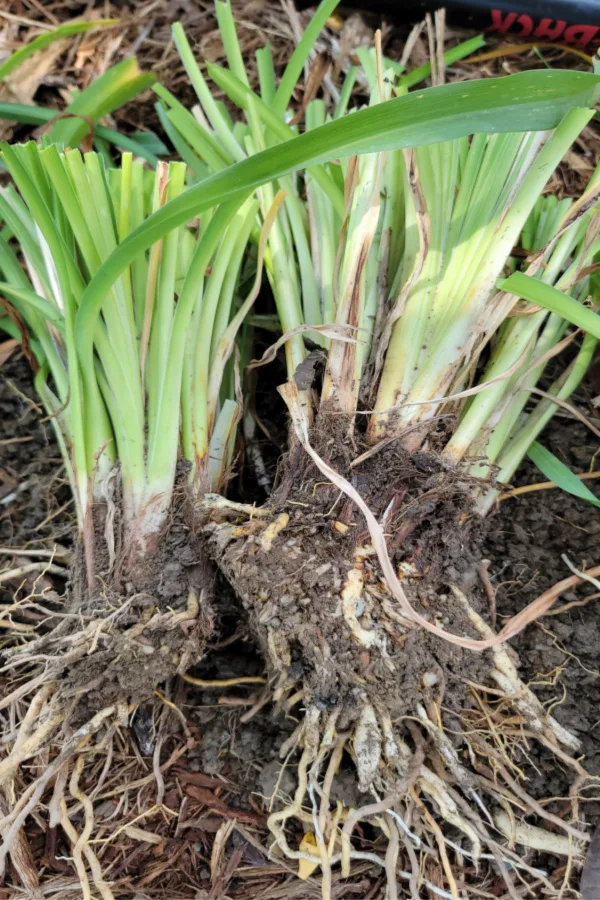
If your daylilies are becoming a bit too large, however, it’s time to divide them. As daylilies age and grow, their roots can begin to become a tangled mess and grow together. As they do, the plants have a harder time absorbing moisture and nutrients. Both of which they need to grow and bloom.
If your daylilies have stopped blooming or are blooming far less, overgrowth is usually the culprit. To keep daylilies healthy and strong, it’s best to divide their root clumps every three to five years. This keeps roots from becoming overgrown and allows for more prolific blooming.
Listen In Below To Our Latest Garden Podcast


How To Divide Overgrown Daylilies In Early Fall
Fall is the perfect time to dig up and divide daylilies. Especially since you have already cut the plant back and can easily see and get to the roots. Early fall dividing gives the plants a chance to re-establish in the soil before winter arrives. Then, next spring, they are ready for quick growth!
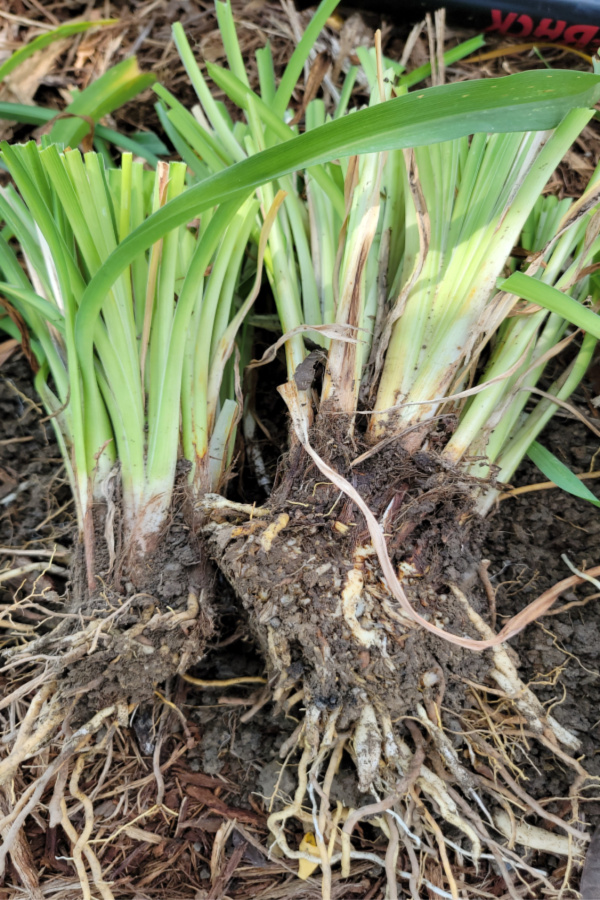
To divide plants, use a sharp shovel and dig around the outer edges of the plant. Set the blade back about an inch from the edge of the plant. Next, slice down into the soil three to four inches deep. Daylilies do not have excessively large roots, so once you have dug around the edges, the plant should lift out of the soil fairly easily.
Now that the plant is out, turn the root ball over. Slicing from the underside of the daylily will make creating divisions a breeze. Once turned over, it’s much easier to see the true size of the roots and make accurate cuts.
To cut, simply use your shovel and slice down through the plants. It goes without saying that the size of the transplant you create will directly correspond with how large the plant will grow next year. For an average clump that is around a foot in diameter, quartering the plant will create four new plants that will grow to around 6 inches in diameter the first season.
Transplanting New Divisions
Transplanting daylilies in early fall couldn’t be easier. Simply dig your new planting holes to about twice the diameter of the new transplant’s root section and a few inches deeper.
To plant, fill the bottom of your planting hole with a few inches of compost. Next, fill in around the plant with a 50/50 mix of soil and compost. This will not only provide quick nutrients to your daylily, but also make it easy for the roots to set into the soil.
Finish by watering the new transplants in and adding a few inches of mulch for winter protection. Depending on how early in the fall you transplant, you may see new green growth appear. It will eventually die back with a frost, but the plant will not suffer at all from this.
Once spring arrives, your new transplants will be ready to hit the ground growing and should bloom during their first growing season! For more caring for perennials in the fall, check out our article: How To Divide & Transplant Perennials In The Fall – Fill Your Flowerbeds With Plants For Free!
This Is My Garden
In addition, removing all of the decaying plant matter in the fall helps the plants as well. With the old foliage gone, plants have an easier time sprouting through the surface in the spring. Even better, all of that dying organic matter is perfect for building a great fall compost pile. And cutting back couldn’t be easier!
When cutting back daylilies, it’s best to use a sharp pair of hedge shears or trimmers. Simply move the blades under the plant and cut the foliage back a few inches above the ground. If you have a lot of daylilies, a cordless electric hedge trimmer can make quick work of this task!