Everything you need to know about fertilizing – all in one page! From making your own organic compost tea, to using worm castings, compost and more – here are all of our best articles on using fertilizers effectively in your gardens, flowerbeds and landscapes.
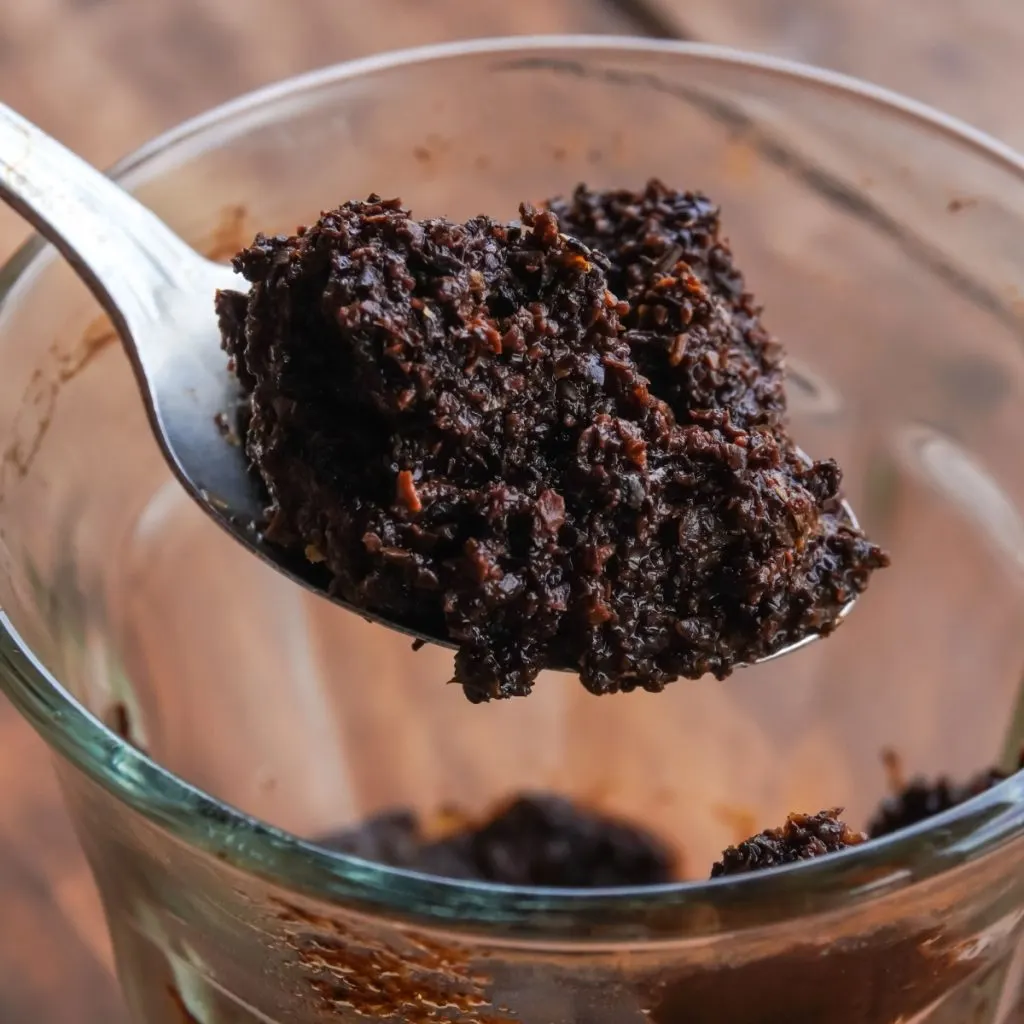
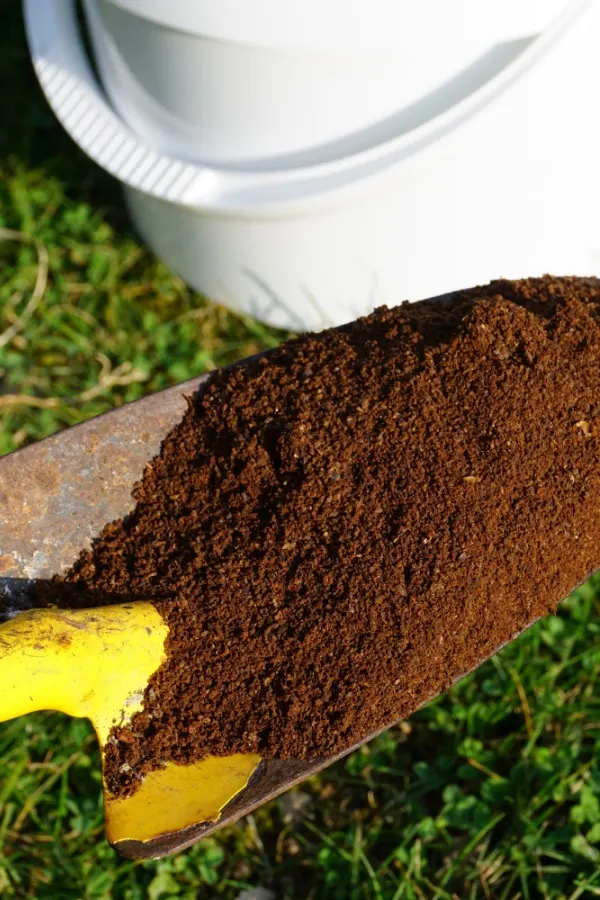
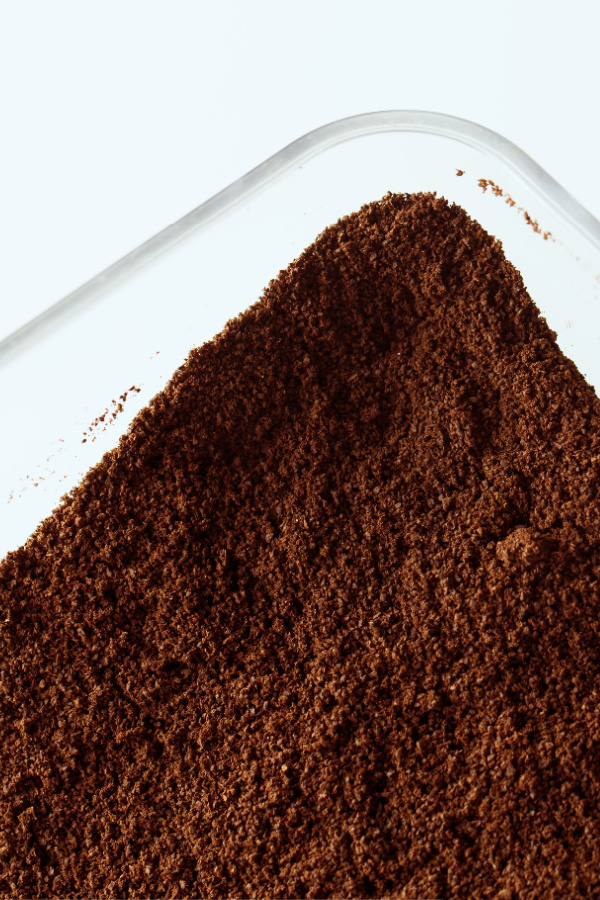
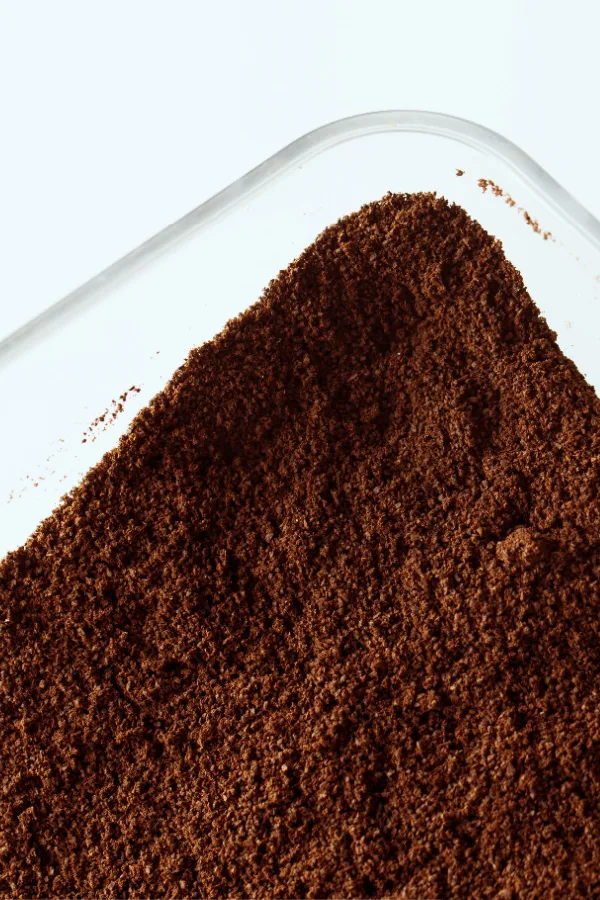
Looking for few ways to use all of those spent coffee grounds to good use during the cooler fall months? Believe it or not, instead of simply tossing the grounds into the trash, you can use them to power your soil, improve your lawn, and keep pests away!
Coffee is definitely an important morning staple for many people. This is especially the case during fall months when the iced coffees from summer are starting to fade to the background as warm, steaming cups of brew help combat the cooler mornings.
But all of those grounds that come from that coffee are valuable to gardeners. And in so many ways! And with an overabundance of coffee being made as the weather turns cooler – it’s time to put all of those grounds to great use!
Spent coffee grounds are perfect for helping to recharge your raised bed soil, improve your lawn, power your compost, and even help keep pesky insects away!
Only Use Spent Grounds
Before we get started with the list, it’s important to note that these suggestions only work with spent coffee grounds. You never want to use fresh coffee grounds for a couple of reasons.
First, it would be a waste of good coffee! Second, it can get rather expensive to purchase coffee grounds just for the sole benefit of using them around your property. But most importantly of all, fresh grounds contain a higher acidity level compared to spent grounds – and that acidity can overpower or damage plants if you aren’t careful.
And even if you aren’t a coffee drinker – don’t let that stop you from getting your hands on some powerful grounds. Consider asking friends or family members who are if they will collect their used grounds for you. Most likely, they will be more than willing – if they aren’t already using them themselves!
You can also visit local coffee shops and restaurants to see if you can have their used grounds as well. Many local and chain coffee shops save grounds for those who ask – and it’s a great way to get your hands on a larger amount of grounds all at once.
4 Great Ways To Use Coffee Grounds This Fall
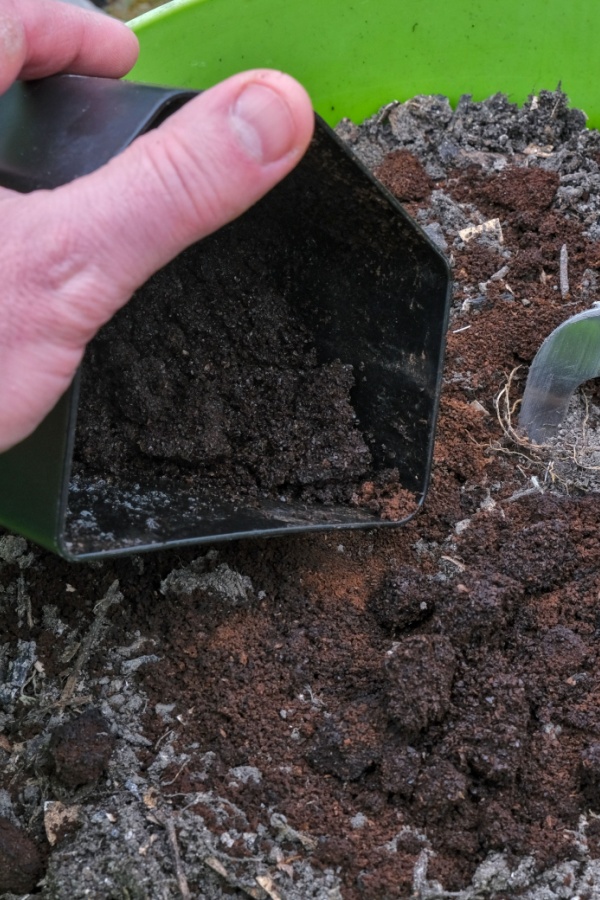
#1 Recharge Raised Bed Soil
An entire season of growing vegetables and flowers can really take a toll on the soil in raised beds. Not only have the plants likely depleted it completely of nutrients and resources, but the overall texture and structure of the soil has changed too.
This can make raised bed soil dry, crumbly and unable to support growing plants another season. The best way to fix this is by adding soil supplements, and spent coffee grounds are a great one!
Coffee grounds help to recharge and fertilize the soil by adding trace nutrients. At the same time, the grounds work to also help loosen the soil and improve its structure. Coffee grounds are also great for absorbing moisture which will really come in handy in the spring to keep the soil moist.
Even old container soil can benefit from being re-energized with spent coffee grounds.
To use, simply sprinkle the grounds right on top of the soil. If you have a filter, you can bury it with the grounds a few inches down and all will decompose to help regenerate the soil. As for how much you can use, 2 to 3 of grounds per square foot is ideal – but even lesser amounts will help!
#2 Heat Up Compost Piles – How To Use Coffee Grounds In The Fall
Compost piles need a good mixture of both brown and green materials. Brown materials help to add carbon to home piles as well as plenty of organic materials and all kinds of nutrients.
Green materials, on the other hand, are full of nitrogen. Their job is to help heat compost piles up quickly so the materials can be broken down faster. As it turns out, coffee grounds are an excellent source of “green materials” – and they can power up the heat in a compost pile quickly.
Simply add your spent coffee grounds to your home compost pile. Be sure to mix the pile at least weekly if not twice a week to speed up the decomposition process.
#3 Fertilize Lawns And Improve Soil – How To Use Coffee Grounds In The Fall
Coffee grounds are not just great for raised bed soil. They are also perfect for raking into lawns to help fertilize the grass and add organic matter to the top layer of the soil.
You can use spent coffee grounds to fertilize your lawn. It also adds loads of organic matter to the soil.
Spent grounds are filled with phosphorus, nitrogen, and other trace minerals. These minerals are vital for healthy, lush lawns. When raked into lawns, the grounds slowly break down, leeching these nutrients into the soil – much like a synthetic fertilizer would be but without all the chemicals.
Coffee grounds are also great for earthworms. As the worms travel through the soil, they consume the easily digestible grounds. In return, they create worm castings while also working to aerate the soil at the same time. See: How To Use Worm Castings – The Best Fertilizer For Flowers & Veggies!
#4 Mosquito Repellent – Use Coffee Grounds In The Fall
Lastly, did you know that you can use spent coffee grounds as an excellent mosquito repellent? Even though the temperatures are dropping, mosquitoes are still out in full force this time of year.
While there are several commercial repellents on the market today, they all come with their own risks. Not only that, but they can get rather expensive as well! But instead, you can use coffee grounds to keep mosquitoes away and other pests like bees and wasps. This is mainly due to the fact that these pests are all repelled by the strong scent of coffee.
Allowing coffee grounds to smolder is a great way to keep mosquitoes from ruining your outdoor gathering this fall.
While spent grounds can work by themselves, their scent is even more potent when you burn them. The scent combined with the smoke produced helps to keep mosquitoes away from you and the surrounding area.
To burn coffee grounds, start with dry grounds. After making your coffee, place the grounds in a covered shallow bowl or plate to cool and dry. Once dry, burn the grounds much like you would incense on a heat-resistant plate or bowl.
Here’s to putting your spent coffee grounds to use this fall to power and protect your home instead of simply adding them to landfills!
This Is My Garden is a garden website created by gardeners, for gardeners. Jim and Mary Competti have been writing gardening, DIY and recipe articles and books and speaking for over 15 years from their 46 acre Ohio farm. They publish three articles every week, 52 weeks a year. Sign up today to follow via email, or follow along!
Fertilizer
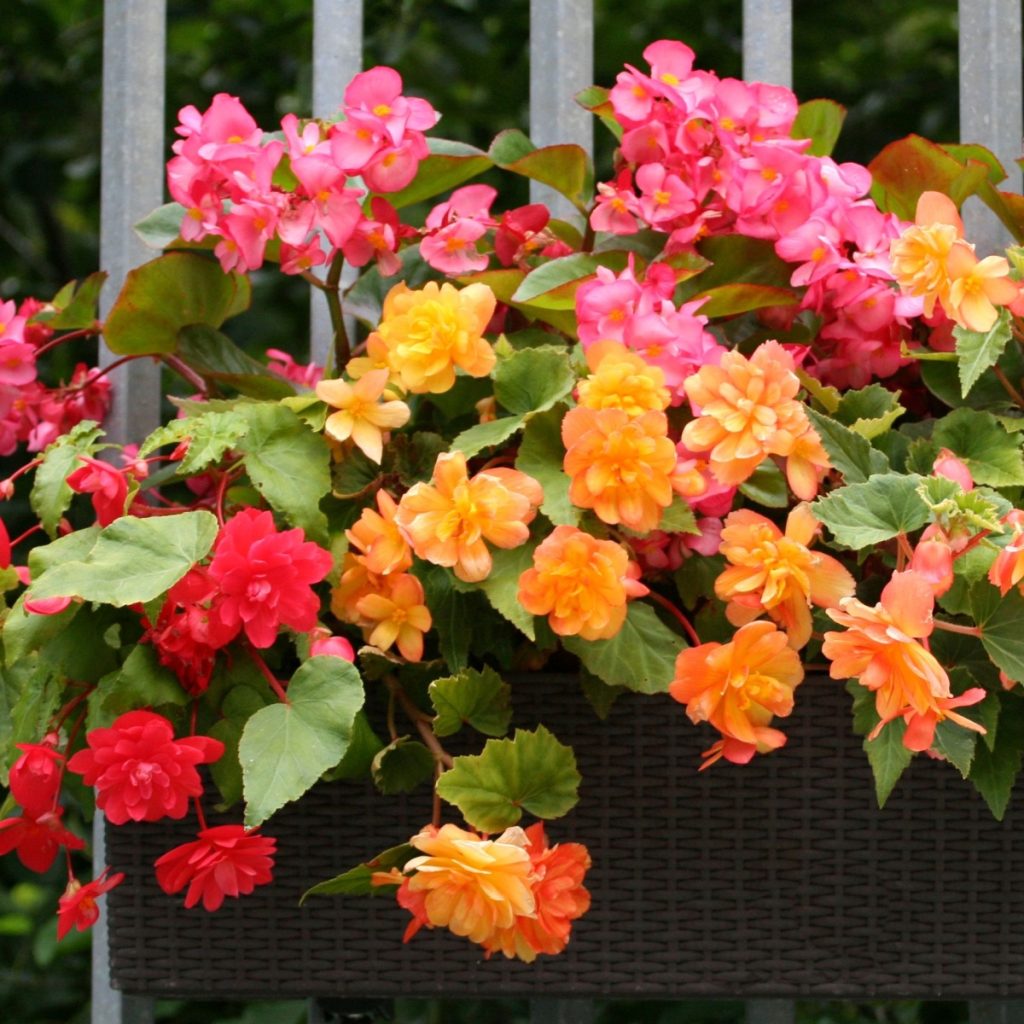
Looking for a few quick tips and tricks on how to best fertilize your begonias this summer to keep them full of life and loaded with big blooms all the way to late fall?
Begonias are a classic flowering annual that are often grown for their colorful foliage and ultra-bright blooms. In recent years, they have seen a new interest in popularity, especially with all of the new foliage and blooming varieties that are now on the market.
What makes begonias even better is that they can really take the heat – literally! Begonias thrive in warmer locations and will continue to push out blooms in both sunny or shady locations – as long of course as they get the energy and moisture they need for flowering. And that is exactly what today’s article is all about!
If you want to enjoy stunning begonia blooms all summer long, it’s important that you water and fertilize them correctly.
How To Fertilize Begonias In The Summer For Big Blooms
Giving Your Begonias The Flower Power They Need
No matter whether you grow begonias in your flowerbeds, containers or in hanging baskets – they are going to use up the nutrients in the soil. And without replenishing those nutrients, eventually, the plants will start to suffer.
Often, the first part of a begonia plant to show signs of a struggle are the blooms. Begonias, as with most flowering annuals, require a lot of special nutrients in order to set and maintain blooms. And if the plants get stressed or there is a reduction of available energy, the blooms are the first to go.
This is exactly where fertilizing your begonias on a regular schedule can save the day. But when it comes to powering more blooms, that fertilizer needs to contain the specific nutrients begonias need most for flowering.
What To Use To Fertilize Begonias – Getting Begonias To Bloom Big
To produce the most begonia blooms possible, the trick is to use a low dose of fertilizer but apply it more frequently. The time between applications depends on whether you are growing them in pots and containers – or if they are in flowerbeds.
For hanging baskets, pots, and containers, provide plants with a low dose every seven to ten days. For those in flowerbeds, you can stretch the dosing out to once every two to three weeks.
Without proper nutrients in the soil, plants will focus on surviving and will slow their production of blooms down quickly.
For begonias, it’s best to use an all-purpose granular fertilizer. Why granular? Because begonias can suffer from getting too many nutrients too fast. A slow release granular type will avoid that issue. In addition, the foliage of begonias is more easily damaged by liquid fertilizer than most other annuals.
Finally, when looking for a granular fertilizer, select one with a higher percentage of phosphorus than nitrogen or potassium. This helps to promote bloom production as opposed to foliage growth. Affiliate Product Link: Schultz KNOX High Phosphorous Granule Plant Food
In addition, applying worm castings around the base of each plant monthly can really help begonias stay energized over the long haul. Worm castings are an excellent, 100% organic, and natural fertilizer.
When placed around the stem of plants, each time it rains or you water plants, the nutrients are leached down into the soil. The roots can easily absorb the extra boost of nutrients and convert it into energy.
When using castings, it’s important to still provide plants with a low dose of liquid fertilizer as well. The castings will help greatly with overall health, but not specifically blooming. Affiliate Product Link: 100% Worm Castings
Proper Watering – How To Fertilize Begonias For More Blooms
In order for begonias to be able to absorb the fertilizers properly, they also need moist soil. While roots that are too dry are a big cause for concern, overwatered plants will end up with swollen roots that will struggle to take in nutrients as well. The key is to get the perfect balance.
Begonias grow tuberous roots that need about an inch of rainwater or hand watering in order to stay healthy. This usually winds up being about one to two good rainfalls each week.
For begonias growing in containers or hanging baskets, allow the soil to dry out in between waterings. This helps prevent roots from being over-saturated and rotting. To check the moisture levels, use an index finger and reach down deep into the soil. If it is dry to the touch, it’s time to water.
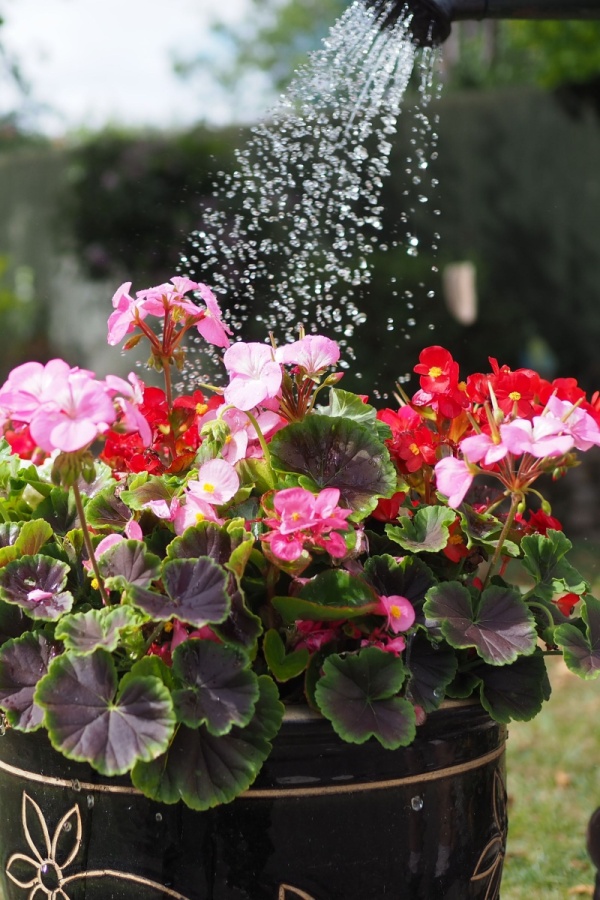
Watering begonias overhead (like above) is not a good idea. Not only can it knock off or break the delicate stems, but it can also cause issues like mildew.
Don’t be surprised if you have to water container begonias every day. This is especially the case during particularly hot and dry spells. Waiting too long between waterings will result in a large reduction of blooms.
For both container plants and those growing in flowerbeds, water plants early in the morning for best results. This helps the plants dry out a bit before the worst heat of the day arrives. Avoid watering overhead when possible to help prevent mildew issues.
Deadhead And Prune For More Blooms – Fertilize Begonias
Begonias have a tendency to become leggy over time. To help maintain their shape and keep plants healthier, pruning back every four to six weeks is ideal. Pruning will also encourage plants to produce new growth at the point of the cut. Additional growth equals even more blooms per plant.
Deadheading – which is removing spent or dead blooms – will also help immensely to promote additional blooms. Even though the spent blooms are on their way out, the plant will continue to spend its energy and resources attempting to “fix” the blooms.
Pruning begonias can help create fuller plants with hundreds of additional blooms.
If too many blooms are left on the plant, it will slow down its production of new blooms. Removing them allows the plants to focus that energy instead on producing new blooms. See: How To Deadhead Annual & Perennial Flowers
You do not need pruners or special tools to do this task as the stems break off quite easily. Just use your fingers to snap off the spent blooms or stems. Between providing plants with the proper fertilizer, watering them often and keeping plants pruned and deadheaded, you will be able to enjoy stunning begonia blooms all summer long!
This Is My Garden is a garden website created by gardeners, for gardeners. Jim and Mary Competti have been writing gardening, DIY and recipe articles and books and speaking for over 15 years from their 46 acre Ohio farm. They publish three articles every week, 52 weeks a year. Sign up today to follow via email, or follow along!
Fertilizer
Wondering how to fertilize your impatiens this summer to get them to bloom bigger and brighter than ever?
Impatiens have long been a favorite annual choice for growing in the shade. Whether planted in baskets and containers on a porch or patio, or in shaded flowerbeds around the home, they add a burst of color that is hard to beat. Although there are other perennials and annuals that perform well in the shade, most provide more greenery than the big, bright color that impatiens bring.
But to really get your impatiens to flower with gusto – they need nutrients. And on a regular basis. The good news is that impatiens are actually a fairly low-maintenance, easy-care annual plant. And beyond feeding them and watering them consistently, you can have them blooming big all summer long.
To get your impatiens to bloom big – it’s all about giving them the right nutrients!
How To Fertilize Impatiens – Get Your Impatiens To Bloom Big!
Healthy, thriving impatiens will produce hundreds of blooms per plant. And all of those blooms require and use a lot of nutrients from the soil. Nutrients that need to be replaced on a regular basis to keep plants flowering all season long.
Without giving plants an additional source of power, they will simply run out of steam before the end of the growing season. But how, when, and what you feed them is vital in keeping them blooming strong.
As with all annuals, liquid fertilizers really are the best choice for the job. Liquid fertilizers absorb quickly into the plants via the roots and foliage. This allows the plant to send plenty of resources to fire up new blooms and flowers.
But just as important is to feed your impatiens that liquid power in a lighter but more regular dose. Quite simply, impatiens respond much better to a lighter dose of fertilizer given frequently as opposed to a large, heavy dose far apart.
By giving the plants a reduced amount of fertilizer but supplying it more often, it will keep them on a steady growing pace. Unfortunately, too much power all at once can create more foliage and root growth than blooms.
Selecting a liquid fertilizer with a high phosphorous percentage is the secret to impatiens blooming big.
Even worse, for impatiens growing in containers, pots and baskets – over fertilizing can lead to plants outgrowing their space and becoming root bound quickly. See our article: How To Fertilize Hanging Baskets.
What & How To Feed Your Impatiens – How To Fertilize Impatiens
When it comes to fertilizing impatiens, phosphorous is the secret to success. Impatiens use and need phosphorous to both create new buds and develop blooms. That is exactly why when looking for a liquid fertilizer, it’s best to select a fertilizer with a high phosphorous percentage versus nitrogen and potassium.
Nitrogen helps with overall growth, while potassium helps with health and moisture distribution throughout the plant. Because of that, having a little of each in your fertilizer is important. But having a large phosphorous number will set the stage for massive blooms.
Here’s another little fertilizing secret: When feeding your plants, to keep the mix light, always dilute the recommended dose in half. This will allow you to feed every seven to ten days. That, of course, will not overpower your plants, but instead keep the nutrients flowing steady and strong for constant blooming!
Watering – How To Fertilize Impatiens & Keep Them Blooming Big!
In addition to fertilizing, another big key for keeping your impatiens blooming strong is proper watering. Impatiens require a fair amount of water to perform at their peak. With that said though, you have to be careful not to over-water.
If impatiens roots become water logged, it will quickly result in plant failure. If your finger can be placed down in the soil to a depth of about an inch and come up dry, it’s time to water. On the other hand, if it is wet and holds moisture, hold off with the water.
It is important to never let plants dry out for too long between watering. When allowed to dry out, it damages the cell walls of plants and will result in weaker plants over time. Impatiens love to have consistent water, but if the soil becomes overly damp or cannot drain away excess moisture, that is when trouble can begin.
If you struggle with watering, a useful and inexpensive tool to use is an instant water moisture meter. With a simple stick of the probe down in the soil, you can instantly find out if you need to water – or not! Affiliate Product Link: XLUX Soil Moisture Meter – Plant Water Monitor
Providing The Right Light – How To Fertilize Impatiens & Keep Them Blooming Big!
Growing beautiful impatiens requires selecting a location that protects them from too much sun, while still allowing enough light to the plants for them to flourish. This applies to both bedding plants, and to baskets, pots and containers.
New Guinea impatiens can handle a bit more sun than traditional impatiens.
One of the most common reasons impatiens fail is that they are placed in a location that they simply cannot handle. It’s either too hot and sunny, or way too dark and shady. (This does not apply to New Guinea Impatiens or Sunpatiens, which can handle full sun)
So what is the ideal lighting for impatiens? For best results, select a location that receives no more than 1 to 2 hours of full-on, direct sunlight each day. In addition, make sure that sunlight is never middle-of-the-day sun.
Afternoon sunlight is simply too hot for standard impatiens to handle on a daily basis. It dries out too much moisture from within the stems, and leads to unhealthy and struggling plants. Instead, select locations that receive full sun early in the morning, or late in the evening as the sun sets.
Here is to fertilizing your impatiens this year for big blooms!
This Is My Garden is a garden website created by gardeners, for gardeners. Jim and Mary Competti have been writing gardening, DIY and recipe articles and books and speaking for over 15 years from their 46 acre Ohio farm. They publish three articles every week, 52 weeks a year. Sign up today to follow via email, or follow along!
Fertilizer
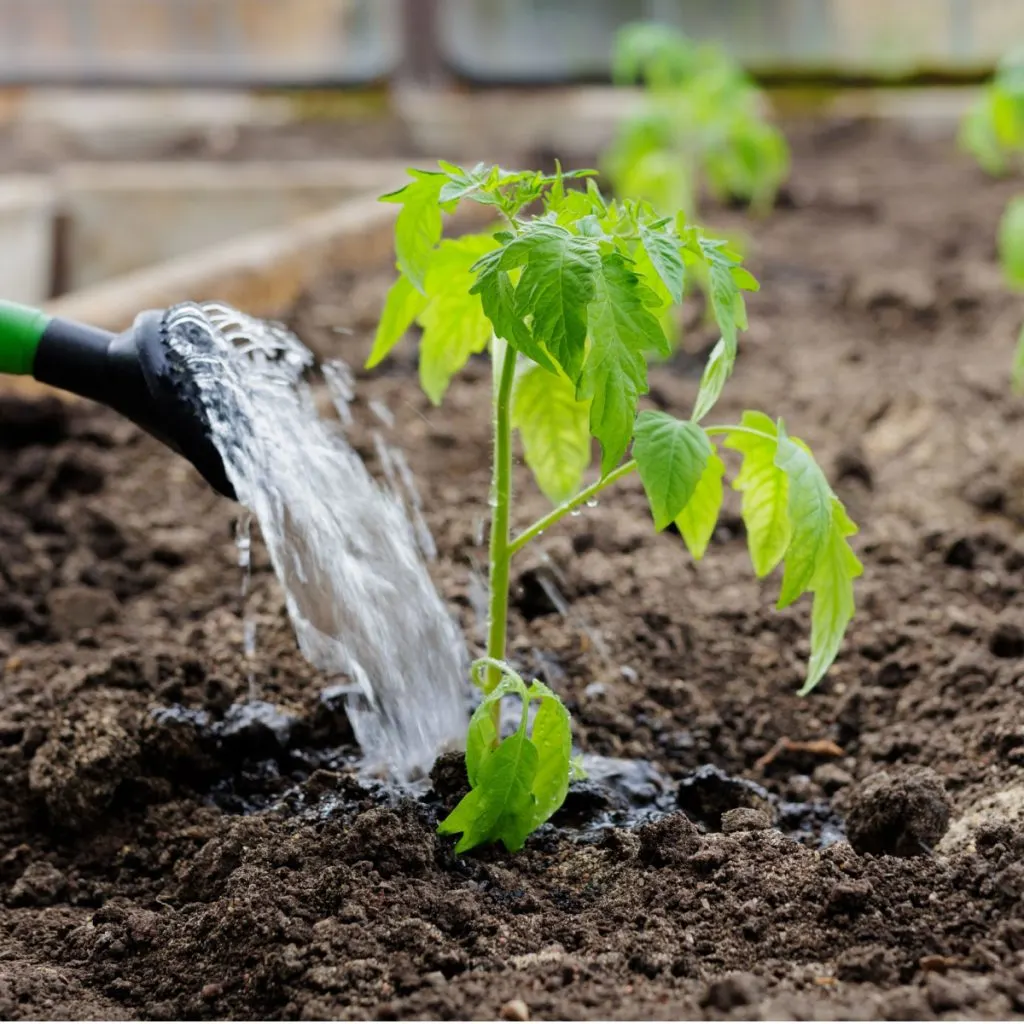
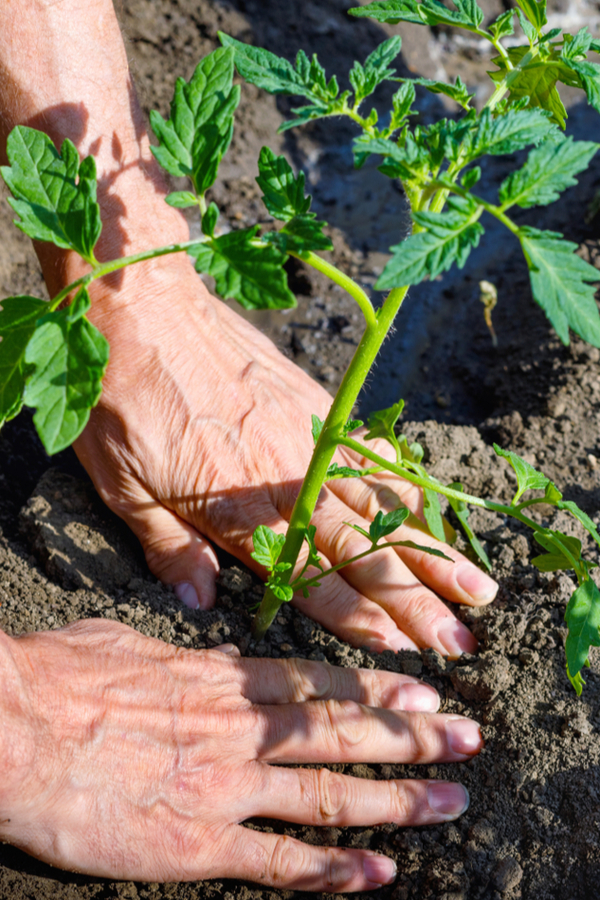
Looking to give your newly planted tomato plants a big jump start to get them off and growing fast?
Whether you grow tomato plants in a traditional garden setting, raised beds, or in 5 gallon buckets, containers or tomato bags, the first six to eight weeks of their life outdoors is critical to their long term success.
It is absolutely vital that a tomato plant develops strong roots, a healthy stem structure, and thick, vibrant foliage during the first month or two. Unfortunately, without a strong root and stem structure, tomato plants can’t absorb the energy they need from the soil and sun. And the longer they lag behind in growth, the less likely it becomes your plants will produce a good harvest.
Getting your tomato plants off to a fast start is a big key to getting a big harvest of tomatoes later this summer!
The Importance Of Strong Roots & Foliage – How To Jump Start Young Tomato Plants
Strong roots help a tomato plant create a solid anchor in the soil. They allow it to withstand wind, rain, and many of the other perils that mother nature can bring. Even more, a good root system helps to soak in the nutrients and moisture needed for steady and strong growing habits.
Plain and simple, the more extensive and robust a tomato plant’s roots are, the more easily it can absorb the power it needs to make it grow even stronger.
Along those same lines, strong stems and thick canopy of leaves provide even more strength to the plant as is it matures. With a strong leaf structure, the plant can use the power of photosynthesis to its advantage, increasing its ability to turn the sun’s rays into energy for the plant. And that powers the blooms that eventually produce those amazing tomatoes!
So how do you help your tomato plants create stronger roots early in the growing season? It all comes down to providing three simple but very key needs for your plants during those critical first few weeks outdoors.
As soon as you plant – it’s time to give your plants the attention they need to grow fast!
3 Simple Secrets To Jump Start Tomato Plants!
#1 Water For Success!
One of the biggest issues for young tomato plants is getting the proper amount of moisture they need for strong growth. And that can be not getting enough, or surprisingly, getting too much. In fact, more often than not, young tomato plants suffer from over watering more than under watering.
In late spring and early summer, the cooler temperatures and more frequent rains often leave tomato plants water-logged. Making matters worse, many gardeners still feel the need to water their plants on a daily basis.
Unfortunately, once roots become saturated, they have great difficulty absorbing nutrients from the soil. Unless you live in a desert-like environment, established tomato plants do not need to be watered every day. It actually harms them way more than helping them.
Only water your plants when the soil is beginning to dry out down by the roots. Always check the soil a few inches down for moisture before watering. Just because the surface is dry, it does not mean the root area is.
This is one time where having an inexpensive, instant-read moisture meter can be of great help. You can simply stick the probes down in the soil and instantly know the moisture level. Affiliate Product Link: XLUX Long Probe Deep Use Soil Moisture Meter
Listen In Below To Our Podcast On How To Get Young Tomato Plants Growing Fast!
Water Deep When Watering
When you do water, it’s important to water deep. Frequent, shallow watering creates tomato plants with a weak root structure. The roots stay near the surface of the soil because they get used to the constant supply. Instead, water slow to allow the water to go deep in the soil.
This allows the roots to grow down looking for moisture. In the end, you develop stronger plants with a more extensive root structure. Not only do bigger roots absorb more nutrients, they also help anchor the plant against wind and storms.
#2 Fertilizing Your Plants With Perfect Power – 3 Secrets To Jump Start Young Tomato Plants
Young tomato plants need a lot of nutrients to grow strong roots, stems and foliage. Unfortunately, quite often, they struggle to obtain enough nutrition in the early phases of growth.
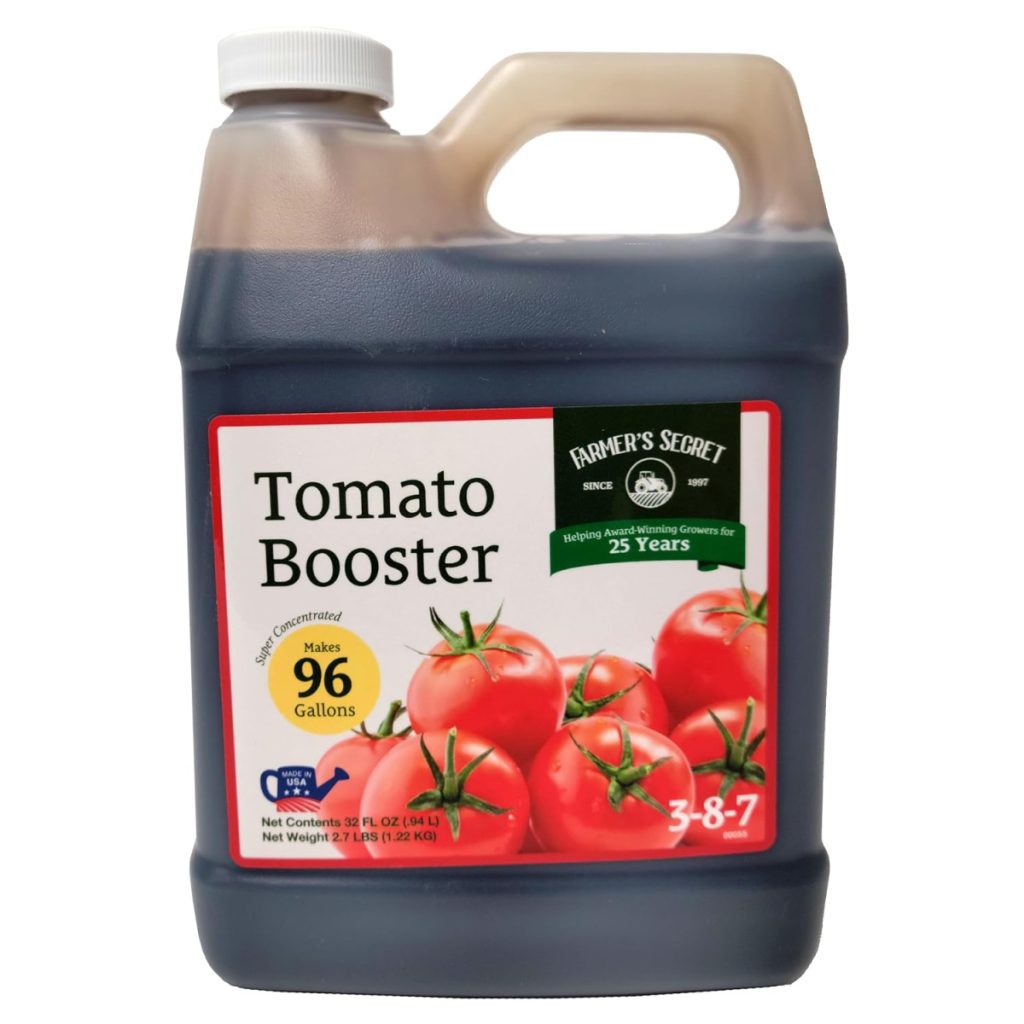
Liquid fertilizers geared toward tomato plants are the way to go to power young plants!
The biggest reason for the struggle is that they simply don’t have an extensive root system in place yet to gather the nutrients. And that is where helping plants out with a dose of fast-absorbing energy can make all the difference!
Tomato plants, as many vegetable plants do, often go through a bit of a lag in growth the first few weeks after going into the ground. But by giving them a nutrient boost in the form of a liquid fertilizer, you can jump start a good early growth spurt.
Why Liquid Fertilizers Are Best For Tomatoes – 3 Secrets To Jump Start Young Tomato Plants
So why use liquid fertilizers in place of granular types? Because liquid fertilizers act fast! They absorb both through the roots and foliage of a tomato plant, and they provide nutrients quickly, helping struggling plants to perk up in a flash.
To help young or struggling tomato plants, apply a dose of liquid fertilizer every 7 days for two to three weeks. Compost tea, worm casting tea, or an all-purpose liquid organic fertilizer are all excellent choices.
Once your plants have begun to respond and green up, back off the feedings to every two weeks to prevent your plants from growing too much foliage in lieu of blooms and fruit. Affiliate Fertilizer Link: Farmer’s Secret Tomato Booster Fertilizer (32oz)
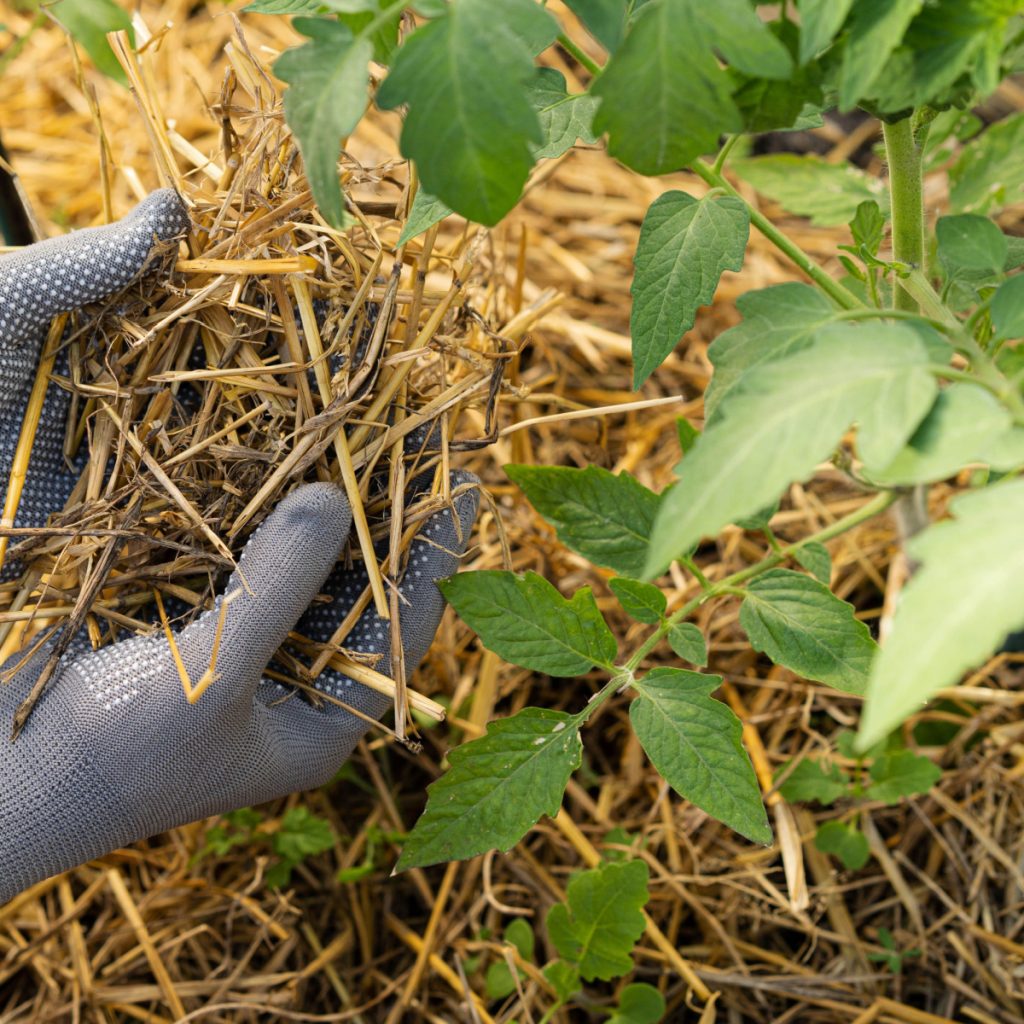
#3 Mulch Your Plants! 3 Secrets To Jump Start Young Tomato Plants
Finally, always mulch your plants right from the start! One of the best ways to help your plants stay healthy and strong is with a thick layer of organic mulch. Leaving the soil around your plants bare can cause all kinds of issues for tomato plants.
Mulching the soil underneath tomato plants has a long list of big benefits!
For starters, it allows the soil to dry out too quickly. That not only starves plants of the moisture they need, but creates the need for you to have to water more frequently.
Bare soil also allows weeds to take hold. Weeds that steal the same nutrients from the soil that your tomato plants need to grow and produce. That same layer of mulch also helps to keep the soil temperature regulated, keeping your plant’s roots from getting too cool or warm – both of which can stunt growth.
Finally, mulch helps to protect your tomato plants from soil borne disease. Soil borne diseases such as blight can infect plants when dirt splashes on plants. A thick layer of mulch keeps that from occurring, protecting your plants in the process.
For best results, mulch your plants with a thick four to six inch layer of organic material. For this, straw, grass clippings or shredded leaves all work great. It will protect your tomato plants and add nutrients to your soil as it breaks down.
For even more power, mulch your plants first with a few inches of compost around the plant’s surface. This will help leach even more nutrients into the soil whenever it rains or you water.
This Is My Garden is a garden website created by gardeners, for gardeners. Jim and Mary Competti have been writing gardening, DIY and recipe articles and books and speaking for over 15 years from their 46 acre Ohio farm. They publish three articles every week, 52 weeks a year. Sign up today to follow via email, or follow along!
Fertilizer
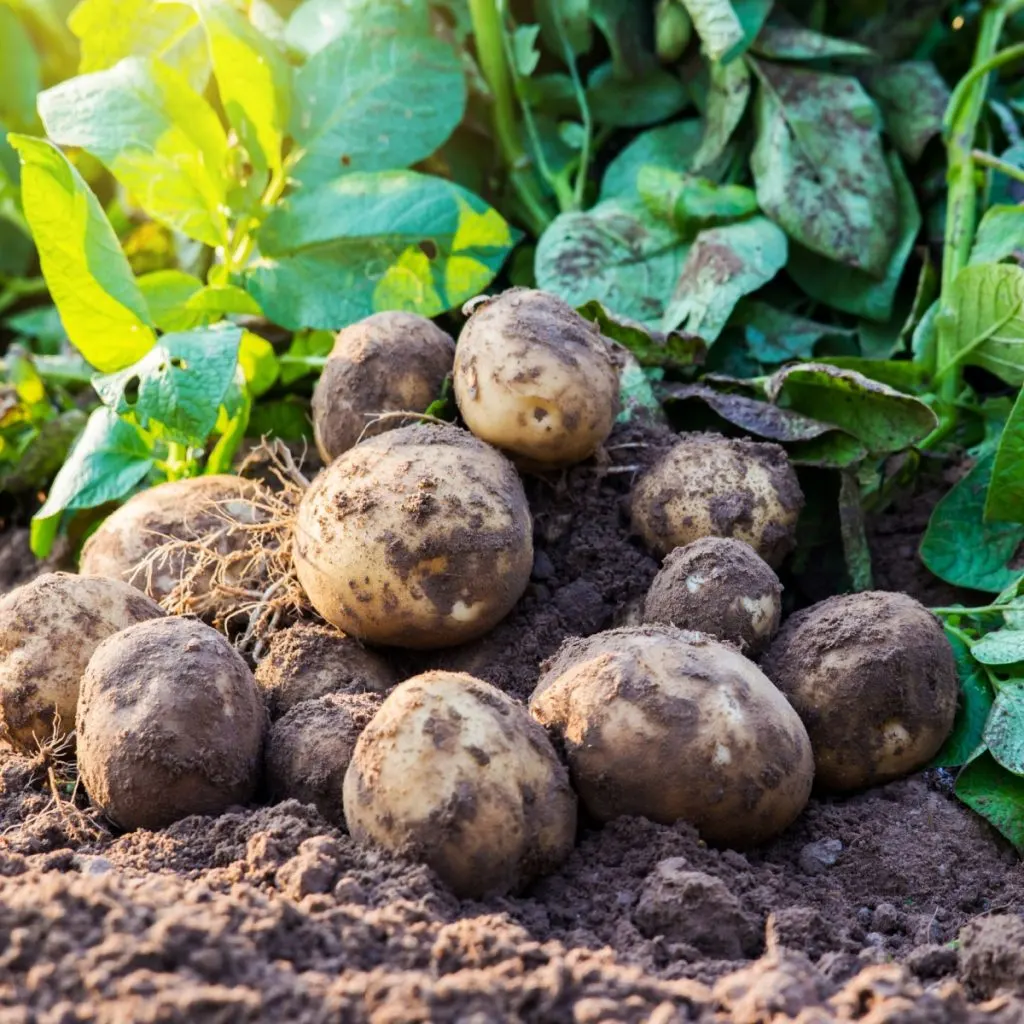
One of the biggest secrets of all to grow a large, healthy potato crop with loads of foliage and plenty of potatoes to harvest is knowing when and how to properly fertilize them – and when to stop!
Potatoes are heavy feeders that require plenty of nutrients throughout the growing season. Failing to provide plants with additional nutrients can cause plants to struggle to push out a strong leaf set – let alone produce enough potatoes for a sizable harvest.
Fertilizing potatoes is a task that many gardeners often forget or fail to do. And even when they do provide plants with additional power, the timing and amount of fertilizer often don’t match what the plants require.
In order to have a successful harvest, potato plants need additional power with the help of fertilizers throughout the growing season.
A lack of nutrients is especially an issue if you are growing potatoes in containers or raised beds. The limited amount of soil and lack of space often means plants deplete the available nutrients long before the growing season is over.
With the inability to see the “harvest” until digging the potatoes up, it’s simply difficult to know exactly how the plants are doing. But that is exactly where fertilizing can ensure success. And the good news? It’s easy to do!
How To Fertilize Potatoes
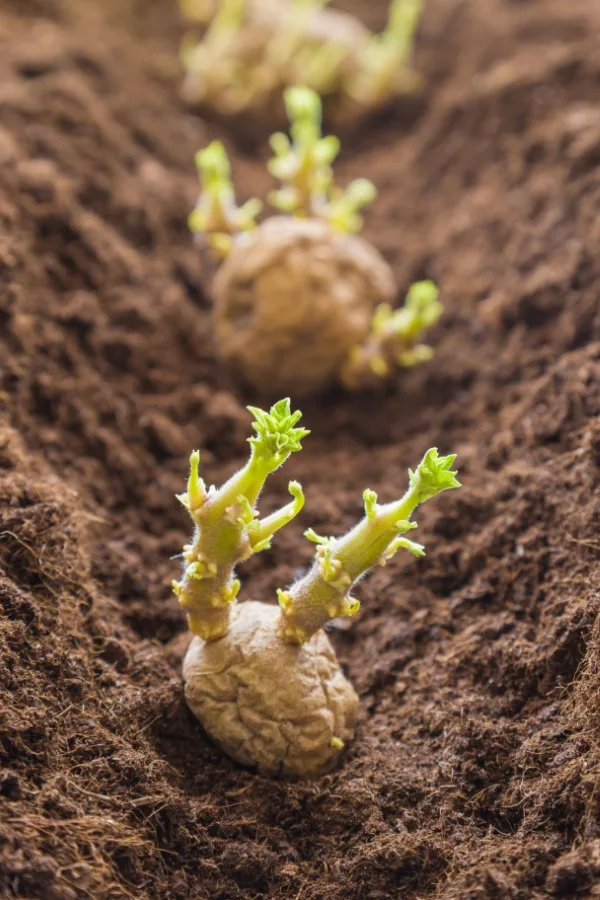
Before Planting
Before you even go to put a seed potato into the soil, you need to amend the soil with plenty of aged compost. Whether you plant potatoes in containers or in rows in the ground, a couple of inches of compost will help give them a great boost of nutrients right from the start.
These additional nutrients will allow the seed potatoes to easily sprout and start establishing root systems. In addition to adding nutrients, compost will also help to add organic matter to the soil. This creates looser soil that allows potatoes to expand and grow easily in.
When planting seed potatoes, amend the soil with plenty of aged compost. Not only will the compost improve the soil conditions, but it will add initial power to the plants, helping them to sprout and produce roots much faster.
You can also apply a slow-release fertilizer before planting as an alternative to the compost. While it won’t help the soil composition, it will still help provide seed potatoes with plenty of nutrients to sprout and start the growing process. Either way – it’s important to give your crop energy right from the start!
Powering Potatoes During The Season – How To Fertilize Potatoes!
The initial dose of compost or slow-release fertilizer will be enough to get plants through the first part of sprouting. In the meantime, keep plants well watered. Proper moisture early on is a big key to bigger potato growth. With that said – always avoid overwatering as standing water can rot potatoes out.
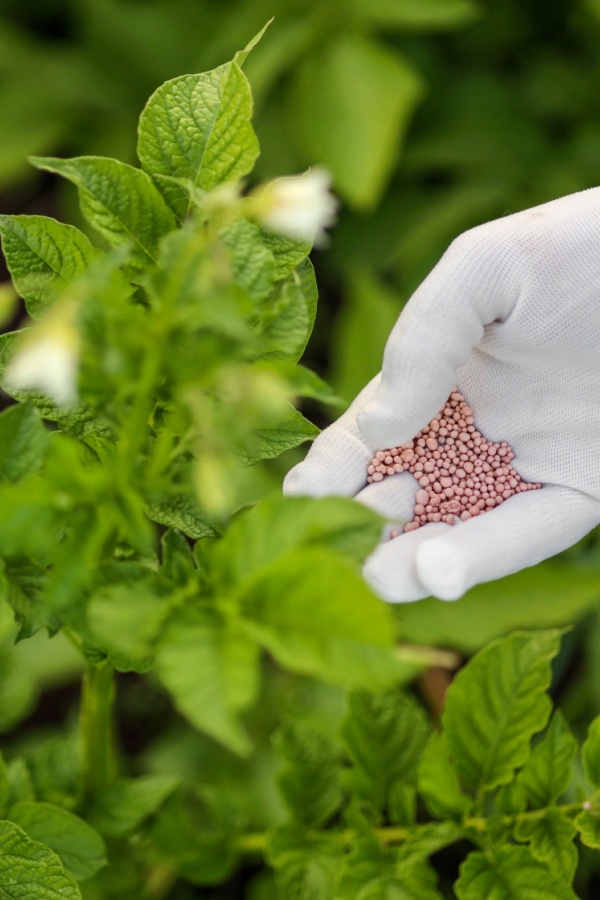
Once plants are about six inches tall, it’s time to start hilling plants and begin regular fertilizing. Hilling is the process of adding additional soil on top of growing plants. This helps to protect the growing tubers as well as encourages additional growth.
Mixing compost into the soil as you hill plants is a great way to provide additional nutrients as the plants grow. However, it’s also a good idea to start using granular or liquid fertilizers in addition to the compost.
What To Use To Fertilize Potatoes
Fertilizers all contain a specific mixture of nutrients. They are labeled with a different ratio of N-P-K amounts: N is for nitrogen, P is for phosphorus, and K is for potassium. Each of these nutrients performs a different job when it comes to powering potato plants.
Nitrogen is vital for good foliage growth and can help decrease the chance of early potato blight. While it is important for potatoes, too much can limit both yields and the quality of the tubers produced.
Phosphorus and potassium, on the other hand, are more important for improving strong root growth and healthy tubers. Since potatoes are a root crop, these two nutrients are much more vital for a successful potato crop and harvest.
Choosing A Fertilizer
When fertilizing potatoes, it’s important to select an all-purpose fertilizer that has a higher ratio of phosphorus and potassium. A ratio of 5-10-10 is an ideal choice for potato crops. Product link: 5-10-10 Tomato & Vegetable Fertilizer
The reduced nitrogen number allows plants to push out plenty of lush, green foliage without overpowering plants. The increased phosphorus and potassium rates encourage excellent growth under the soil.
Granular fertilizers are a great option to use with potato plants. The granules can be used to side-dress plants throughout the growing season. As for the rate, always refer to the directions on the package for the specific amount and frequency of application.
Granular fertilizers are perfect for side dressing plants as they grow bigger.
One key with granular fertilizer is to never allow the granules to come into contact with any plant foliage. This can burn tender plant tissues. When fertilizing, if possible, water your crop after to wash any fertilizer off plants.
Liquid fertilizers can be used as an alternative choice. You will likely need to apply them a bit more often than slow-release granules, typically once every two weeks. Again, select a liquid fertilizer with a larger dose of phosphorous and potassium compared to nitrogen.
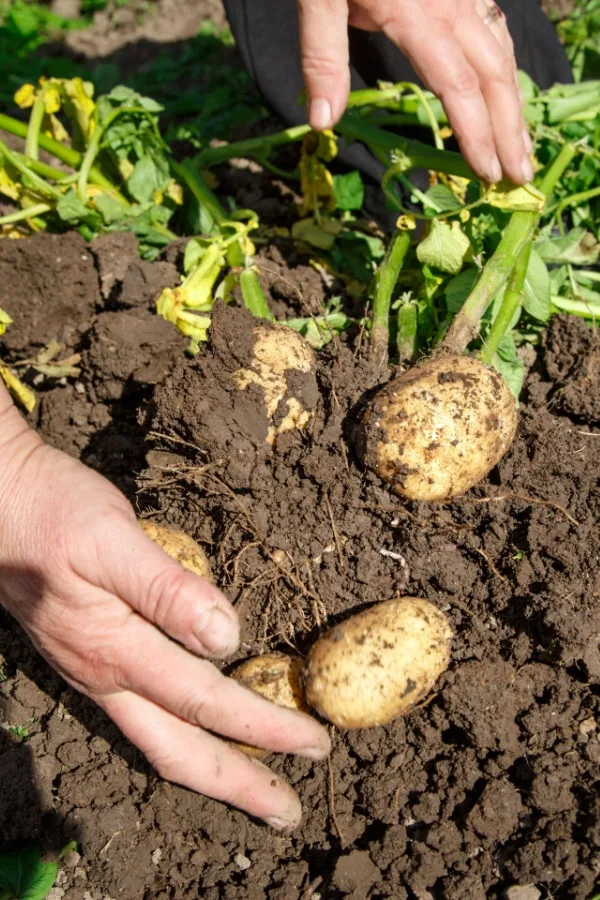
When To Stop Fertilizing
Just as important as knowing when and what to fertilize with is knowing when to stop fertilizing potato plants. Giving nutrients too late in the season can cause premature rotting of the crop. For best results stop powering your plant about two to three weeks before you expect to harvest.
In addition, it’s also a good idea to stop watering your potatoes about two weeks before harvest. Potatoes are much easier to harvest when the soil is dry – and again, it will help prevent the crop from rotting in the soil late in the season.
Before harvesting potatoes, stop applying fertilizers at least two weeks prior.
Potatoes can actually be harvested at different times throughout the summer. If you are looking to harvest new or baby potatoes, harvest about two weeks after the foliage stops growing.
For mature potatoes, harvest after the foliage has completely died back. Mature potatoes have a much better storage life and can often be kept over an entire winter season to be enjoyed. See: How To Harvest, Cure And Store Potatoes For Long-Term Storage
Here’s to properly powering your potato plants with fertilizers and additional nutrients this year – and to your biggest potato harvest ever!
This Is My Garden is a garden website created by gardeners, for gardeners. Jim and Mary Competti have been writing gardening, DIY and recipe articles and books and speaking for over 15 years from their 46 acre Ohio farm. They publish three articles every week, 52 weeks a year. Sign up today to follow via email, or follow along!
Fertilizer
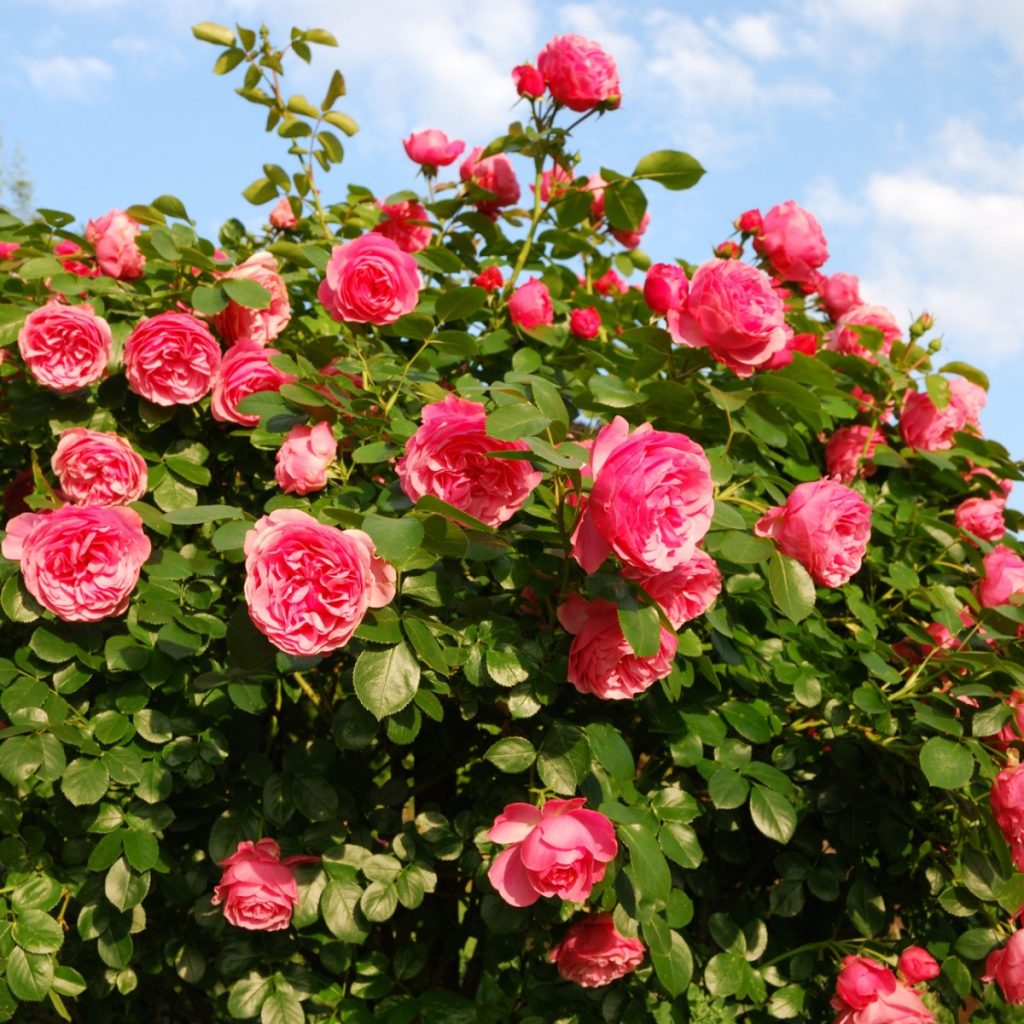
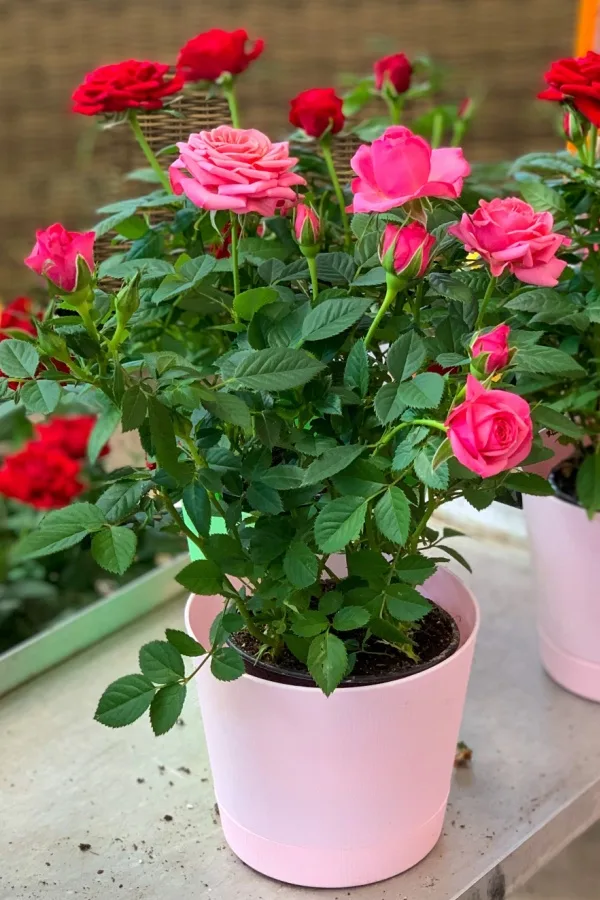
If you want to grow healthier, bigger, brighter roses that produce loads of blooms longer than ever, then it’s vital to fertilize your rose bushes with the perfect dose of power – and it all starts with powering them up in the early spring just as your roses come out!
Roses are heavy-blooming plants that are also heavy feeders from the soil. They continually drain nutrients and resources as they grow. Not only to produce their beautiful blooms, but to also grow thick foliage and new shoots as well.
Unfortunately, it doesn’t take long for those vital nutrients and resources to disappear. And if they aren’t replenished, you can quickly be left with weak foliage and fewer blooms. Even worse, it also leaves your roses more susceptible to disease, pests, and winter damage.
By keeping your roses fed, you can keep them healthy and blooming strong, year after year!
The good news is that keeping your roses and the soil around them full of power isn’t difficult. In fact, by simply using the right type of fertilizers at a few key times of the year, you can have your rose bushes looking healthy and producing stunning blooms all summer long!
Giving Roses The Nutrients They Need
So what are the key nutrients roses need for optimum growth and blooming? In addition to the mainstays of nitrogen, phosphorus, and potassium (N-P-K), roses also need other important nutrients. Roses also require small doses of calcium, sulfur, copper, manganese, and a host of other micro-nutrients. And to have great roses, it’s critical to give them all of these when feeding.
How much additional power a rose bush will need depends on the type of rose you are growing. For instance, Grandiflora and miniature roses require more constant feeding. As do tea rose varieties and roses growing in pots or in confined spaces.
However, with more stable climbing and shrub roses, the need for constant feeding is not as vital. These roses still need to be fed, but just not as often. But no matter what type of rose you grow – giving them power in the spring is vital to set them up for a strong blooming season!
How & When To Fertilize Rose Bushes
The Best Fertilizers For Roses
Before we cover how to fertilize your roses, it’s important to cover how to select the best type of fertilizer to power your bushes.
There are two types of fertilizer that work for roses. Granular are good for spring feeding, and liquid (above) are great for regular summer feeding.
There are two main types of fertilizers you can use for roses – slow release granular types, and liquid fertilizers, which deliver their nutrients much more quickly. Both types of fertilizers have their place when powering rose bushes.
In general, you want to use a slow release fertilizing option for early spring. This will allow nutrients to slowly soak into the soil and give roses the energy they need over time as they come out of dormancy. Later, as your roses near blooming, liquid fertilizing is the better option.
Here is a look at how each type works, and how and when to use them to power your rose bushes to a better year than ever!
Early Spring Fertilizing – Using Slow Release Fertilizers
All roses types need early spring fertilizing. This dose of power helps roses to wake up and not only produce their foliage, but begin to store energy for their blooms later in the season. And for spring fertilizing, it’s all about using a slow release option!
There are several great options for slow release early spring fertilizing. The first is to use a commercial granular fertilizer that is geared especially for roses.
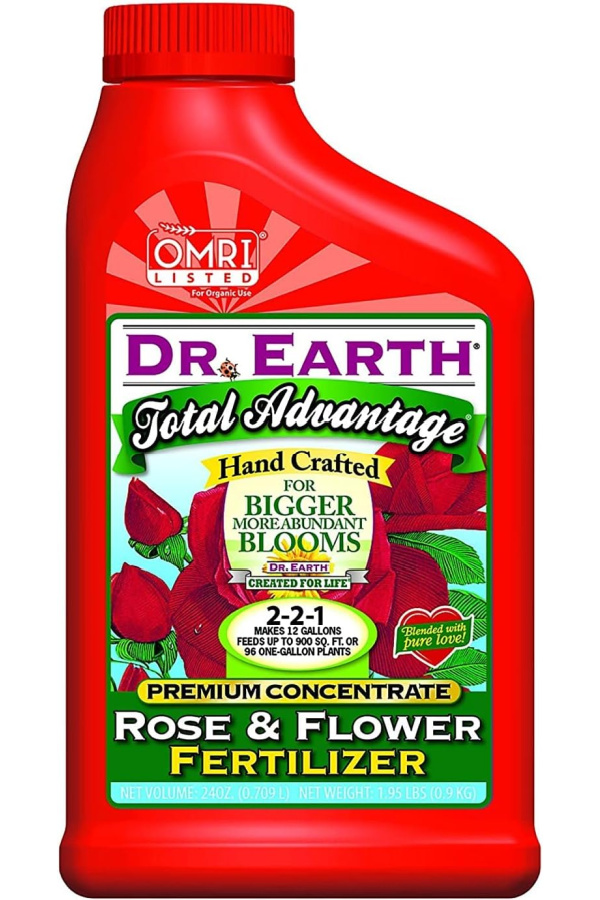
These fertilizers not only contain the right ratio of the key ingredients of nitrogen, phosphorous and potassium roses need, but also the calcium, soluble potash and magnesium as well. Affiliate Link: Jobe’s Organics Granular Fertilizer for Rose & Flower
When it comes to other good options for slow release fertilizers, two of the best are worm castings and compost. When used together, they can provide a steady supply of readily available early spring power. Power that can keep rose bushes healthy and blooming strong all season long.
When you combine compost and worm castings, they create a wonderful fertilizer for roses in the spring.
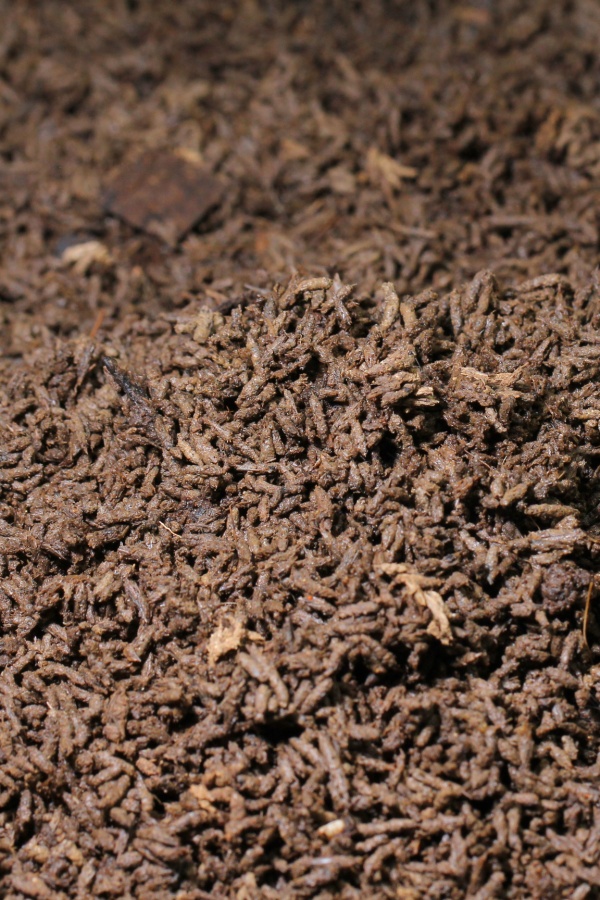
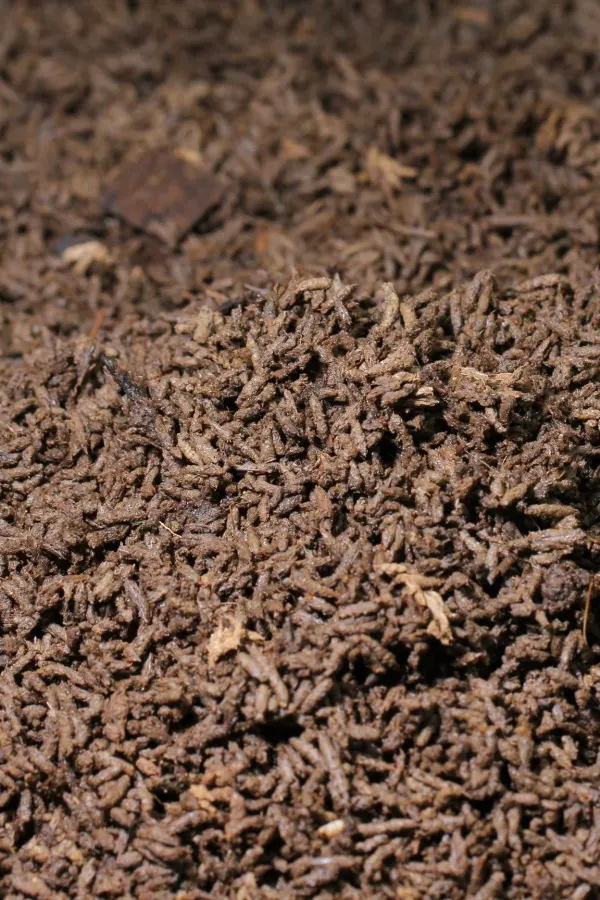
Worm castings work as the perfect slow release fertilizer when they are applied to the soil around rose bushes. Simply mix 1/2 cup to a full cup of castings in the soil early in the season to provide plenty of steady power. Product Link: Worm Castings
Because castings can be slightly alkaline and roses prefer slightly acidic soil, applying a few cups of compost to the base of plants when feeding with castings will help counterbalance that. Compost is 100% organic and its nutrients are easily absorbed by roses. These two can be used in place of granular fertilizers if desired.
Late Spring / Summer Fertilizing – Using Liquid Fertilizers To Fertilize Rose Bushes
Liquid fertilizing is the perfect complement to slow release fertilizing once plants are ready to bloom. Again, all rose bush types need and will benefit from a slow release granular feeding in the spring. But then it’s time to use a liquid option for blooms.
Liquid fertilizers can be used throughout the late spring and summer on all types as well – but how and when you use them will depend on the type of rose bush. We will cover each of those types below and when and how to fertilize, but let’s first cover the options for liquid rose fertilizer.
If you want a homemade option, you can create a powerful fertilizing tea from either compost or worm castings. The tea can easily absorb through the roots and leaves of roses. Worm casting tea can also help with disease resistance for issues such as black spot. See: How To Use Worm Castings – The Best Fertilizer For Flowers & Veggies!
Now let’s take a look at each rose type and how to fertilize in late spring and summer with a liquid option.
When To Fertilize Your Rose Bushes With Liquid Fertilizer
Shrubs and Climbing Roses
For more hardy and established shrub and climbing roses, you will only need to fertilize twice. The first is in early spring with the granular option. And the second is with a liquid fertilizer as soon as the blooms begin to appear. These types of roses do not require more that just two doses.
Tea Roses & Standard Roses
For tea and other standard rose bushes, a bit more frequent liquid fertilizing during the season will help for more prolific blooming. After the initial feeding in early spring of granular fertilizer, apply additional doses of liquid fertilizer every 3 to 4 weeks during the growing season.
If you are growing your roses in a confined space such as a container or pot, apply the liquid fertilizer every two to three weeks to keep the soil productive. Potted plants tend to run out of nutrients at a quicker pace due to the limited soil.
When growing roses in containers, provide them with a liquid fertilizer every couple of weeks.
When using any liquid fertilizer, always apply it in the early morning or evening. At these two times, the sun’s rays are less intense and will not burn the foliage when applied.
When To Stop Fertilizing Rose Bushes
One of the biggest mistakes gardeners make with roses is to fertilize them too late in the growing season. Giving any type of rose bush additional nutrients in late summer or early fall can actually harm plants way more than help them.
Fertilizing roses late in the fall can leave plants susceptible to damage from frost and winter elements.
Unfortunately, that new growth is extremely vulnerable to damage from harsh winter conditions. Even more, the resources the plant uses to produce the new growth can take energy from the roots. This can leave the entire rose bush in jeopardy of freezing out during a rough winter. It also leaves it with fewer nutrients for blooms next year.
Know Your Soil’s PH Level
One final note on roses and fertilizing. It’s important to understand that in addition to having plenty of nutrients in the soil, rose bushes prefer growing in slightly acidic soil.
If you are fertilizing your bushes properly and still having blooming issues, it’s a good time to check your soil’s pH. In general, rose bushes prefer to grow in soil with a PH of 6 to 6.5. You can use a handheld pH meter to quickly test your soil’s levels. Affiliate Link: 4-in-1 Soil pH Meter
If it’s too acidic, you can add lime to raise the pH. If it is on the alkaline side, you can add an acid enhancer or sulfur to lower it. Here is to fertilizing for success, and growing bigger and better roses this year! For more rose care tips, see: How To Fertilize & Deadhead Rose Bushes – The 2 Big Secrets To More Blooms!
This Is My Garden is a garden website created by gardeners, for gardeners. Jim and Mary Competti have been writing gardening, DIY and recipe articles and books and speaking for over 15 years from their 46 acre Ohio farm. They publish three articles every week, 52 weeks a year. Sign up today to follow via email, or follow along!
Fertilizer
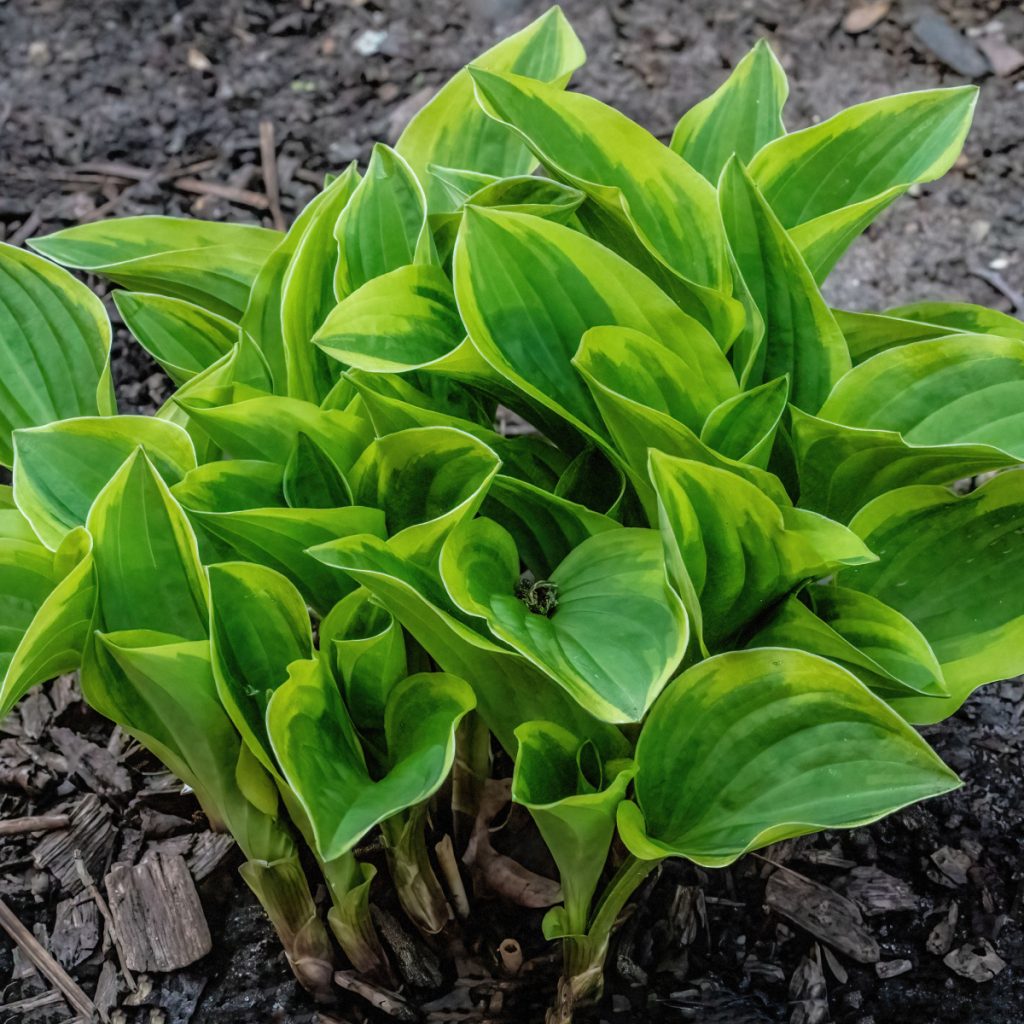
Did you know that early spring is the perfect time to fertilize your hostas to power them up and get them ready for big, healthy growth all season long?
Hostas are a staple when it comes to filling home flowerbeds and landscapes with interest and color. With their huge canopy of foliage and tall, wispy, blooms that appear in mid to late summer, the perennial can be quite the showstopper.
But if there is one drawback to hosta plants, it’s that the plant’s foliage often fails to stay strong and healthy all season long. And once those big leaves begin to fail, it can make for quite the unsightly look for your flowerbeds.
The good news is that with just a little bit of spring care and fertilizing, you can all but ensure your hostas have everything they need to maintain strong growth from spring until fall – and keep their leaves looking great all year too. And the best part of all, providing that care and fertilizer is one of the easiest garden chores of all!
How To Fertilize & Care For Hostas In The Spring
Spring Hosta Maintenance
Beyond just fertilizing, late winter or early spring is the perfect time to perform a few key pre-season hosta maintenance chores. And doing these before your hostas begin to sprout can really set the stage for their long term success.
One of the first early tasks is to remove any dead foliage that remains on the plant. It’s actually best to do this in the fall, but if you haven’t, now is the time. Simply pull any decaying leaves and bloom stems from the plant. It’s usually easy enough that clippers are not even necessary.
This not only clears the way for plants to sprout fast, it also help keep pests and disease at bay. All of that old foliage is the perfect place for pests to not only hide but lay eggs and larva. It’s also ideal for mold and mildew to form in the cool, wet weather of spring.
Last but not least, once all of that foliage is cleared away, this is also time to divide any of your hosta clumps that may have become too large for their space. And this needs to be done before fertilizing takes place.
When hosta clumps grow for too many years in the same space, they can become overcrowded. When that happens, the plant usually can’t stay strong all summer.
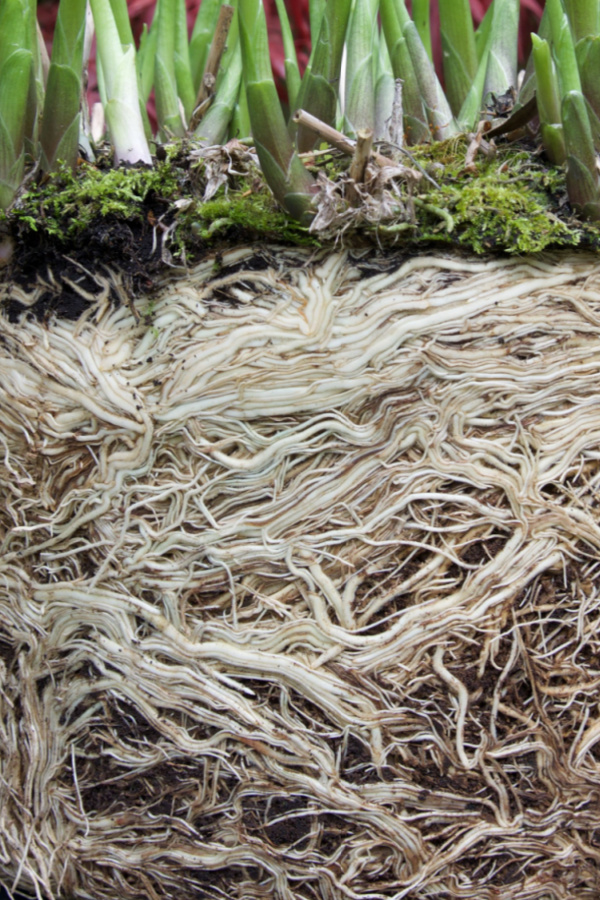
Dividing Overgrown Hostas – How To Fertilize Hostas In Spring
If your hostas have only been in the ground for a few years, you can skip straight to the fertilizing section below. If, however, they have been growing in the same space for five or more years – it’s most likely time to help them out by dividing them. Not only will it help your hostas, it will give you more plants for free too!
One of the biggest reasons hostas become weak or struggle to make it through the growing season is that their root structure has simply grown too large. When this happens, the roots become overcrowded and grow together. And when that occurs, the plant can’t absorb the water or nutrients it needs for good health.
Overcrowded plants usually still sprout well and leaf out strong in the first few weeks. But by late spring and early summer, the plants will start to fail. There just isn’t enough energy in the roots to keep the leaves from struggling. And that lack of energy can also keep the plant from blooming as well.
Listen In To Our Podcast Below On How To Divide Perennials With Ease In The Spring!
The good news is that dividing them in early spring couldn’t be easier. To divide, start by digging a few inches down around the edge of the hosta clump. The roots of hostas are not overly deep, and in the soft spring soil, they come out with ease.
To cut into divisions, first turn the plant over to expose the root clump. Next, use a garden knife or sharp shovel and slice into equal sections. The size of your new plants will be determined by the size of the portion you slice off.
All that is left is to replant. For that, simply dig a hole slightly larger than the clump. To finish, add a bit of compost to the bottom, and set the start down in the planting hole. Cover with soil, making sure the top of the crown is level with the soil. It really is that easy!
Hostas are extremely tough and hardy, and within a few weeks, new shoots will grow and sprout. Best of all, the roots now have plenty of space to grow and absorb nutrients. Now it’s finally time to give all of your hostas a little fertilizer. Fertilizer that will help to power strong growth all spring, summer and fall.
How To Fertilize Hostas In Spring
Hosta plants do not require massive amounts of nutrients, but they do benefit from a low and slow feeding. One that can power both strong foliage and a great bloom set.
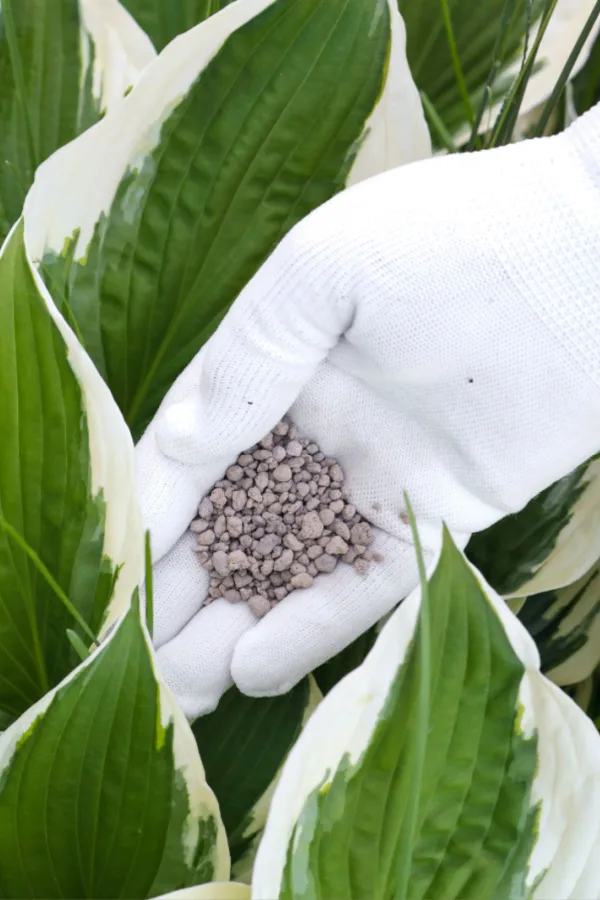
A balanced, granular fertilizer such as this 10-10-10 product is ideal for hostas.
For hostas, the best fertilizer of all is a slow release, all-purpose granular fertilizer. All purpose fertilizers contain equal amounts of Nitrogen, Phosphorous and Potassium (N-P-K) along with other key trace nutrients. And that balance is key. Affiliate Product Link: Southern Ag All Purpose Granular Fertilizer 10-10-10
Not only will it not overfeed your hostas, it more importantly gives them the simple, long term energy they need to stay strong and healthy from spring – right up until the first frost in late fall!
The actual task of fertilizing is simple. As with any fertilizer, always wear gloves to protect your hands. To apply, sprinkle about 1/4 cup around the base of each hosta. For overly large hostas, 1/3rd cup will be sufficient. To finish, water in the fertilizer to set it in place. Watering also help to activate the fertilizer as well.
Summer Fertilizing – How To Fertilize Hostas In Spring
Hostas can actually benefit from a second light feeding in mid-summer. This will help to keep the plant’s foliage green, especially after it blooms. For this feeding, apply the same amount as in spring, and apply right after the bloom set finishes.
When fertilizing in the summer, pull back the leaves to allow the fertilizer to hit the soil below and not the foliage.
When applying in mid-summer, it’s important to pull back the leaves and allow the granular fertilizer to hit the soil around the plants – and not the leaves. Applying it right to the foliage can burn the leaves. As in the spring, finish by watering the fertilizer in around the plants.
The one time you do not want to fertilize is in the fall. Fertilizing hostas at this point can cause unwanted late season growth. Growth that can put the root structure in danger of overwintering. Once summer passes, simply allow your hostas to grow until the first frost puts them into dormancy. For more spring hosta care tips, be sure to check out How To Split Overgrown Hostas In The Spring – Keep Hostas Healthy & Get Free Plants!
Here is to fertilizing your hostas this spring and summer, and to keeping your plants looking great all season long!
This Is My Garden is a garden website created by gardeners, for gardeners. Jim and Mary Competti have been writing gardening, DIY and recipe articles and books and speaking for over 15 years from their 46 acre Ohio farm. They publish three articles every week, 52 weeks a year. Sign up today to follow via email, or follow along!
Fertilizer
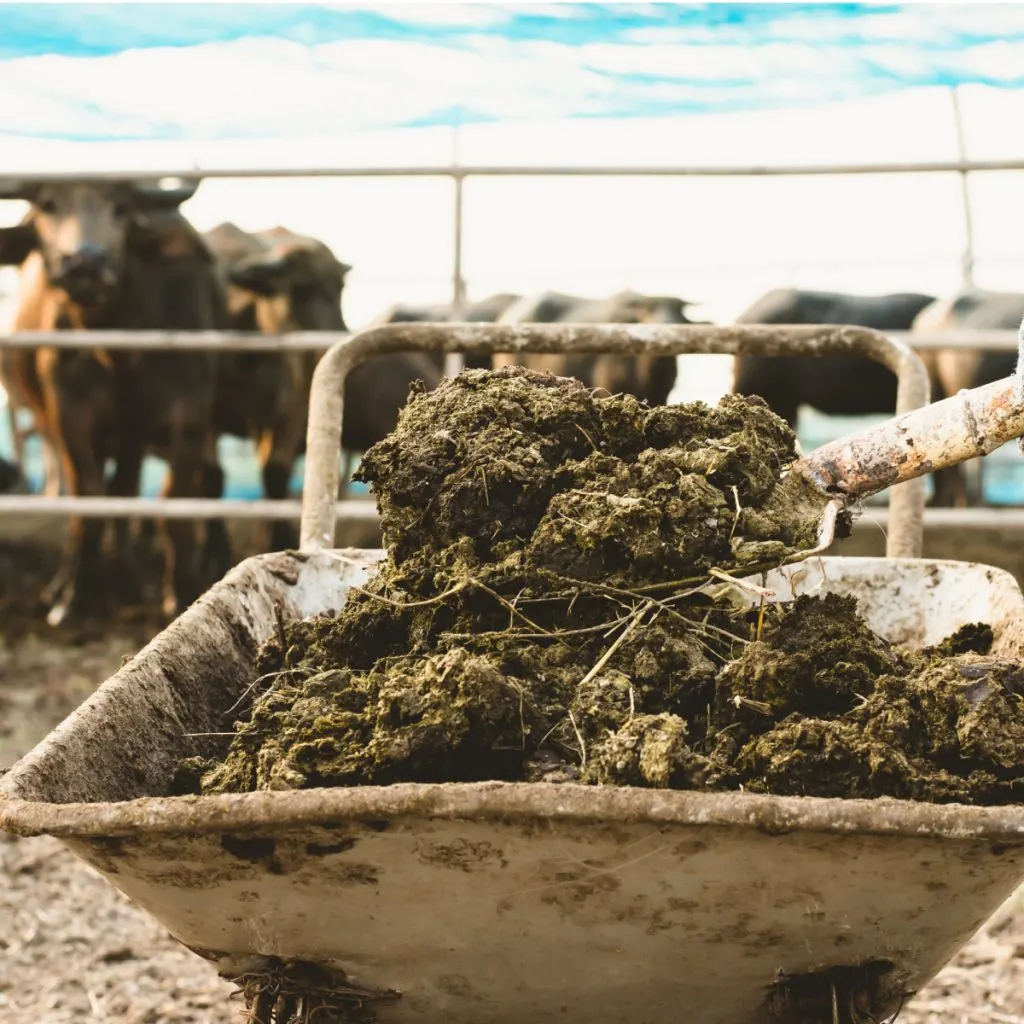
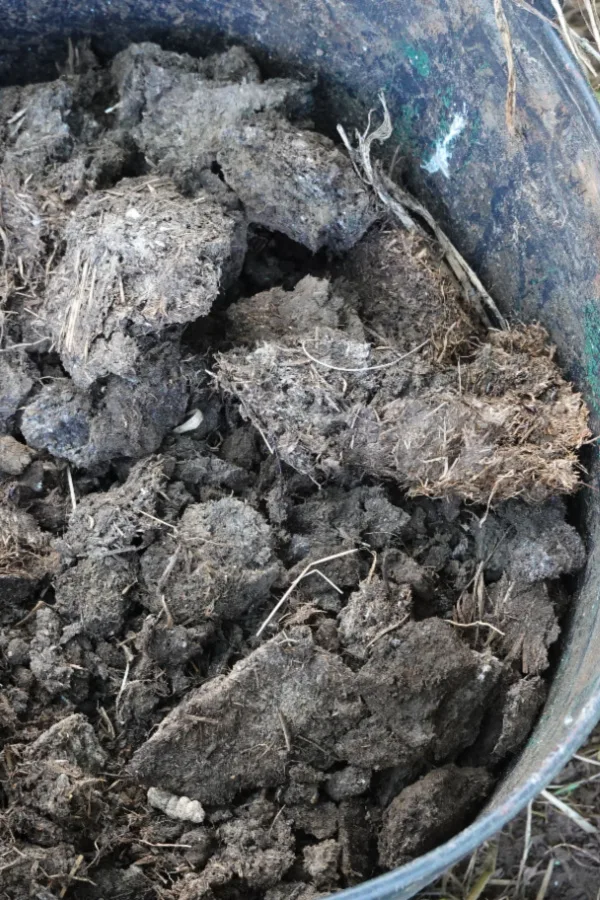
One of the easiest and least expensive ways to recharge and power up the soil in your garden is to use animal manure. Not only can you almost always find it for free, it also happens to be full of the nutrients and minerals that plants need most!
Manure has been used for centuries by al kinds of civilizations to recharge soil and help energize crops. In fact, some estimates date its use as far back as 8000 years or more. Animal manure is teeming with all kinds of life. Beyond its high nutrient value, it also contains helpful enzymes and bacteria that help soil as well.
But when talking about using manure in a garden, it’s important to know that not all animal manures are the same. Especially when it comes to the power they contain – and using them to help safely power your garden and the plants growing in it.
Animal manure has been used since ancient times to re-energize soil. The key to success when using it is to know which manures are best, and how and when to apply them to your soil and crops.
Manures To Avoid – How To Use Animal Manure In A Garden
Plain and simple, the manure from a few animals should never be put in a garden or near vegetable crops. At the top of this list is the manure from family pets such as dogs and cats. These can carry harmful pathogens that even home compost piles can’t kill.
It’s also best to always avoid manure that comes from large commercial farms. Big farm operations usually treat their animals with an array of supplements, antibiotics and more. Unfortunately, there is no way of knowing what might pass through their manure and then into your soil.
So what animals can you use for manure and how is it best used? With answers to those two important questions, here is a look at some of the best choices to use for animal manure in your garden – and how to best apply them to help your soil and plants come alive with power!
How To Use Animal Manure In A Garden
The Best Manures For A Garden
We will cover how to use manure in various ways later in the article, but let’s start with a few of the best choices of animal manures that can help recharge and power a home garden.
If you happen to raise chickens in your backyard – you have access to one of the best animal manures of all. Chicken manure is loaded with nitrogen that can help power strong growth.
Chicken Manure
More and more people are raising their own chickens in their backyard. And does doing so ever give those who garden a great resource for energizing their soil and plants!
When it comes to powering soil, plants and compost piles, chicken manure is one of the best choices of all. It is overflowing with all kinds of amazing nutrients and minerals that you can use in so many different ways for soil and plants.
Chicken manure is high in organic matter. In fact, nearly a third of its entire makeup is made up of organic materials. As chickens scratch and feed on everything from grass, bugs, seeds and more, they consume a diet rich in organic material.
In addition chicken manure contains high levels of nitrogen, phosphorous and potassium. These, of course, are the trilogy of nutrients most vegetable plants and flowers need most to thrive.
A word of caution with chicken manure – they produce a very hot manure. It should always be allowed to age or be composted before using. In addition, it’s more alkaline in nature and not good to use around acid loving plants as it can change the soil’s pH.
Horse Manure – How To Use Animal Manure In A Garden
Horse manure is another manure that can usually be easy to source. It has a makeup of about 25% organic matter, making it another fine choice for adding lots of humus to the soil. It does not quite have the nitrogen makeup of chicken manure, but it still adds plenty of nutrients.
Aged horse manure is great for top dressing gardens in the fall. The horse dung breaks down quickly over the winter months, adding structure, nutrients and organic mass to the soil.
Adding it to home compost piles can also help add moisture and increase internal temperatures of your pile. With a high moisture content of nearly 75%, it also helps provide moisture and oxygen to the core of a compost pile to speed up decomposition.
Cow Manure – How To Use Animal Manure In A Garden
One of the most available and easily sourced of all manures is that which comes from cows. Although it has the least amount of organic matter and nitrogen of the five featured today, it still brings plenty of benefits to your soil and plants.
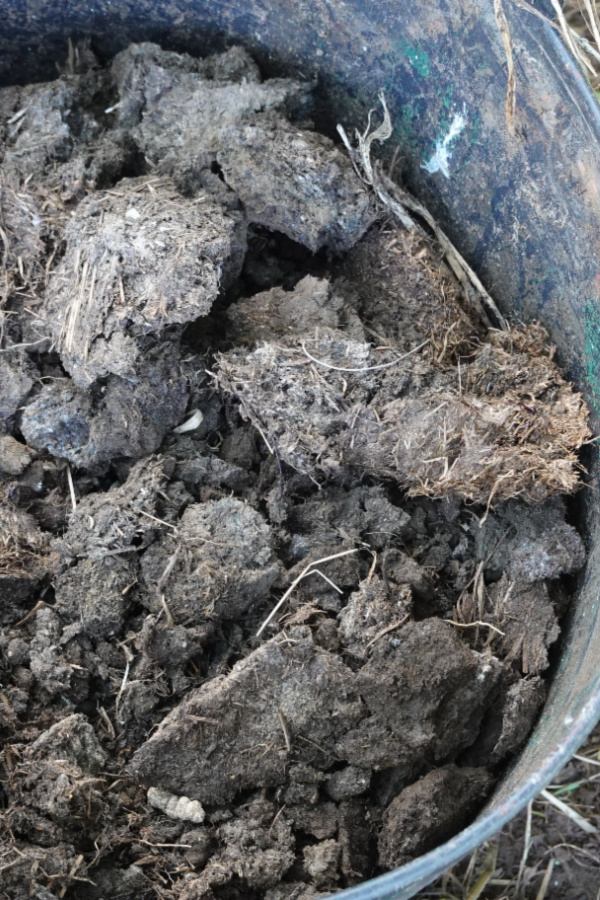
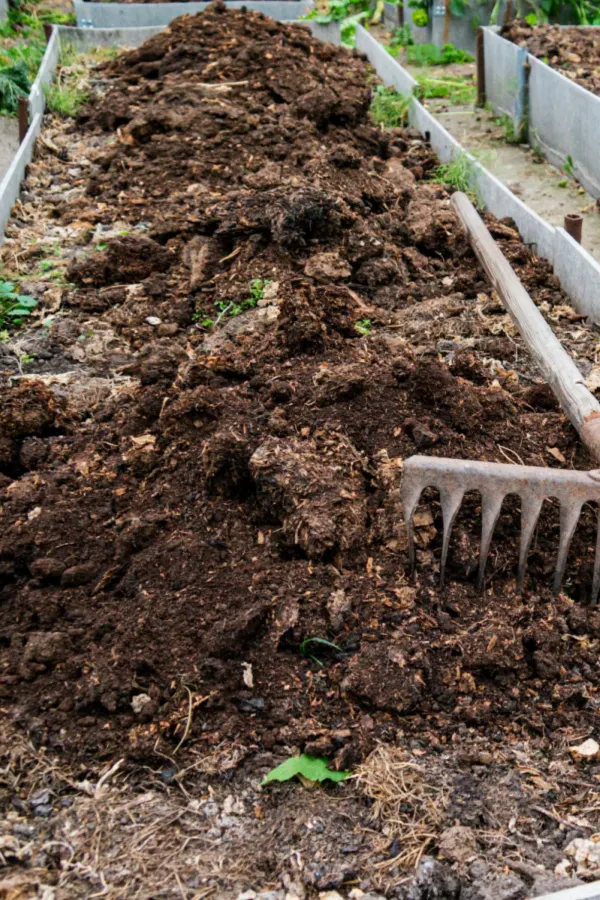
Whether it’s cow manure or chicken manure (pictured above), you need to first let the manure age before using it around plants.
Because it’s a larger size of manure, the sheer mass allows for a huge amount of organic matter to go into your garden or compost pile all at once. Cow manure is actually one of the best manures to use for top dressing gardens in the fall.
Just like horse manure, it decomposes quickly and by spring, it has broken down and is ready to power plants. Because it is so plentiful, you can usually get enough to do your whole garden too!
Fresh cow manure does have a lot of moisture within its core. That can be extremely beneficial for helping compost piles to both heat up and activate. Another great use for cow manure in the fall is for adding to shredded leaves to make a fast decomposing leaf pile.
The two ingredients help to break each other down quickly. In fact, quick enough that a fall pile can be ready to use for finished compost in the garden by spring.
Rabbit Manure – How To Use Animal Manure In A Garden
Fresh rabbit manure is a close second to chicken manure when it comes to nutrient levels. With nearly a quarter of its makeup consisting of organic matter, it provides plenty of structure and substance to soil as well.
Manure is great for adding to raised beds in the fall. It can break down over winter and leach powerful nutrients into the soil below.
Just like chicken manure, it also has a fair amount of nutrients, including a high level of nitrogen. Rabbit manure is also extremely easy to work with when compared to most other manures. The small, round droppings are easy to scoop up from cages and work into a compost pile or fall garden soil.
Like all manures, it’s best to age or compost rabbit manure before using. Left to age, it can usually break down and be ready for use within 3 to 4 months if outside temperatures remain above freezing.
Mixing it with shredded leaves while it composts will help speed up the process. It’s also an excellent addition to add to traditional compost piles. The high moisture content and nitrogen levels help it to heat up a pile incredibly fast!
Goat Manure – How To Use Animal Manure In A Garden
With the ever increasing popularity of home goat ownership, access to goat manure has never been better. Even more, goat manure is extremely balanced. When composted and aged, it can re-energize soil and plants in quick fashion after its applied to the soil.
Goat manure is another great choice for powering garden soil and compost piles.
Goat manure has a fairly high organic makeup and moisture content. When aging, the manure breaks down quickly, especially when added into a traditional compost bin or pile. Best of all, goat manure has one of the least odorous smells of all when it comes to fresh manure!
How To Best Use Animal Manure In A Garden
Now that we have covered the best choices for manure, how can it best be used for your garden? As noted above, fresh manure is overflowing with energy. For this reason, fresh manure is considered “hot” – meaning it will burn plants easily.
So what can you do with fresh manure? The simple answer is to let it compost and break down first. The good news is that you can do this in your compost pile or by letting it age by itself in its own pile.
Fresh manure is actually one of the best ingredients of all to place in a home compost pile. Its “hot” properties allow it to heat up and decompose all of the pile’s ingredients fast. Once composting completes, you can use it safely everywhere – from top dressing raised beds and flowerbeds, to using it in planting holes.
You can also use composted manure for making a powerful tea to use on plants. Again, it’s important to make sure the manure has completely aged to not burn plants with the liquid tea. See: How To Make Homemade Compost Tea – Power Your Plants Naturally!
Creating A Manure-Only Compost Pile – How To Use Animal Manure In A Garden
If you don’t happen to have a traditional compost pile, you can still compost or “age” manure on its own. This process simply involves giving the manure plenty of time to break down. This can take as little as three months, or up to a year or more.
A manure only pile will heat up quickly. By turning it once or twice a week, you can speed up the aging process and use it much sooner than if you simply let it sit and decompose.
To do this, place the manure (and straw or bedding) into a pile at least 3′ wide x 3′ high and deep. By piling it up, it allows the manure to heat up quickly. Turn the pile every five to seven days to speed the process.
If you turn your manure pile a few times each week, it will usually age and be ready in just a few months. Here is to using animal manure in your vegetable garden this year. And to powering your soil and plants naturally – and inexpensively too!
This Is My Garden is a garden website created by gardeners, for gardeners. Jim and Mary Competti have been writing gardening, DIY and recipe articles and books and speaking for over 15 years from their 46 acre Ohio farm. They publish three articles every week, 52 weeks a year. Sign up today to follow via email, or follow along!
Fertilizer
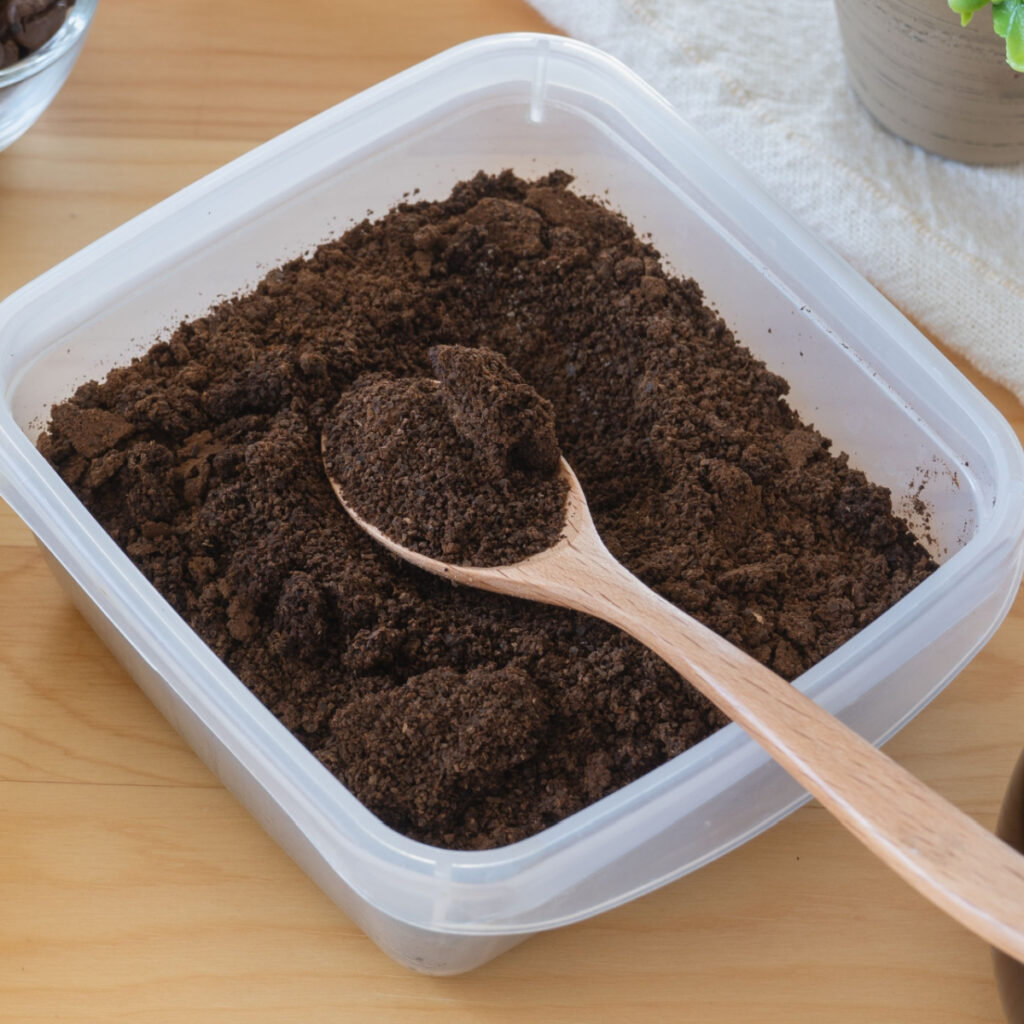
Looking for a few simple and easy ways to save your old coffee grounds this winter to use in your garden next spring and summer – all without having to worry about them molding?
There is little doubt that coffee grounds are one of the most beneficial (and free!) byproducts around for bringing life to soil and plants. The trace minerals and nutrients that spent grounds contain are perfect for not only powering up plants, but for improving the soil as well.
Coffee grounds are great for mixing in with potting and seed starting soils to provide a light dose of nutrients and help seedlings and plants retain moisture. They also provide the same powerful benefits when used in the planting holes of vegetable and flower transplants. And the list goes on and on!
Saving coffee grounds all winter long will have you ready to power your spring planting like never before.
In fact, when it comes to gardening, there are so many great uses for old coffee grounds that it’s almost impossible to ever have enough on hand. Which is exactly why saving them all winter long can be a huge help. That is, as long as you can save them without molding before you need them!
2 Easy Ways To Save Coffee Grounds In Winter
Saving Coffee Grounds
Unfortunately, for many, saving coffee grounds in the winter can bring some challenges. Especially when you are trying to keep them all the way through winter to use the following spring.
One thing is for sure, left to their own accord, spent coffee grounds will mold quickly. The very thing that makes them so great for using in soil – their ability to hold moisture – also makes it difficult for them to dry out.
Because of that, when simply placed into a container or plastic bag at room temperature, the moisture and minerals within the grounds combine quickly to develop algae and mold. Adding to the problem, once the grounds mold, they can smell nothing short of awful.
For many gardeners, the hassle is simply too much. Instead of saving their grounds for spring planting, they either place them in their compost pile or even worse, toss them away.
Spent coffee grounds are full of moisture. When kept indoors at room temperature, all of that moisture will quickly lead to mold.
But here’s some good news – you can save coffee grounds all winter long without mold ever being an issue. In fact, as it turns out, there are actually two very easy ways to collect and save your old coffee grounds all year around – and without a single bit of worry of them molding or smelling!
Method 1 – Freezing
By far, the best, quickest and easiest method for saving your coffee grounds is to freeze them. As it turns out, the physical makeup of coffee grounds actually makes them perfect for freezing.
First and foremost, once frozen, any chance of mold, mildew or smell from the grounds disappear. Even better, because coffee grounds will not freeze together completely, it’s easy to manage and continually add more every day or two – and take out what you need when you need it.
When freezing, just place a plastic container or freezer bag in your freezer and fill it as you go. There is no need to dry out the grounds first. Just scoop them into the bag each morning straight from the coffee filter.
A resealable freezer bag is perfect for saving coffee grounds all winter long.
Storing Grounds With Ease
This method actually lets you store an amazingly large amount of grounds in a small space. We especially like the freezer bag option. The frozen grounds can be squeezed in and crushed in the bag as you go, and fit into small spaces in the freezer with ease.
In fact, with this method, a single gallon freezer bag will hold a month or more’s worth of daily coffee grounds. The best part of all, frozen grounds are easy to use and mix as you need once spring rolls around.
They break apart fast and can be divided with ease. Simply take out what you need when you need it – and the rest can stay safe and frozen. As for the paper filter – you can recycle it right in your compost pile if you wish!
One place you do not want to store old coffee grounds is in your refrigerator. The cool, damp air in a refrigerated environment actually makes it easier for mold to form and bloom.
Method 2: Storing Your Grounds Dry
If you simply have no room to store your grounds in your freezer, there is another great option for saving them without the concern of mold – and for that, you simply have to dry them out first. Once grounds are completely dry, they will not mold – but they key to success is to make sure they are completely dry!
Listen In To Our Podcast Below On Using Coffee Grounds!
This can be accomplished with a couple of different methods. It really all comes down to how quickly you want to dry them out, and how much effort you want to put into it.
The fastest method is to place your grounds on a cookie sheet and then “bake” them on low heat in your oven. The good news is you can usually fit a weeks worth of grounds on a single baking sheet – and in that short amount of time, there is little chance of the grounds molding before you bake them off.
To use this method, start by spreading out the grounds on the cookie sheet into a thin layer. Next, set your oven on 175° to 200° Fahrenheit.
Place the cookie sheet or baking pan on the middle rack, and let the heat do its work. Most grounds will dry out within an hour or two. Once dry, allow the grounds to cool, and then store in an airtight container. Once completely dry, there is zero chance of them molding.
Air Drying
You can also dry out your grounds naturally without the help of an oven. If you have a warm room of the house that is not overly humid (basements do not work well for this) it allows the grounds to dry out over time.
Start by placing a paper towel down on a baking or cookie pan. The paper towel underneath will help to wick away moisture while they air dry from above. Next spread out the grounds to a fine single layer.
Once dry, coffee grounds can be stored without worry of mold.
Let the grounds sit for about a week or two, occasionally stirring them up to allow the air to circulate. If they are not drying out fast enough, you can place a fresh paper towel down to finish the job. This method takes a bit longer to dry out completely, but saves the use of an oven.
Other Uses For Winter Coffee Grounds – How To Save Coffee Grounds In The Winter
Last but not least, if you can’t freeze or dry your grounds, whatever you do, don’t throw them away! There are actually a couple of great options to use them – the first being to help power and fertilize your houseplants. See: How To Use Coffee Grounds On Houseplants
You can also use the coffee grounds in your compost pile. The nitrogen in coffee grounds works to heat up a pile, helping to break down carbon materials quickly. This can be especially helpful in the winter months.
Although the grounds might mold indoors in the winter, an outside compost pile is a perfect alternative. If it’s too cold, the grounds will simply freeze until it warms. If you are trying to save grounds indoors and they do mold, do not throw them away.
Just take them outside and place them in your compost pile. They will break down in the pile over time and still add their nutrients, and the mold will disappear as well. All without worry of ever harming your pile.
Here is to saving your coffee grounds this winter without having them mold. And, to having plenty of grounds on hand next spring to power all of your plants and soil!
This Is My Garden is a garden website created by gardeners, for gardeners. Jim and Mary Competti have been writing gardening, DIY and recipe articles and books and speaking for over 15 years from their 46 acre Ohio farm. They publish three articles every week, 52 weeks a year. Sign up today to follow via email, or follow along!
Fertilizer
Although most gardeners have heard about the amazing benefits of using spent coffee grounds to power annual flowers and vegetable plants outdoors – did you know that you can also coffee grounds to help fertilize and energize your houseplants too?
Spent coffee grounds are teeming with all kinds of helpful trace nutrients. So is the leftover coffee that remains in your pot after your morning cup of Joe. And as it turns out, both can do wonders to help perk up many of the houseplants you have growing indoors – and all for free!
Both spent coffee grounds and brewed coffee contain a long list of nutrients, including phosphorous, magnesium, potassium, calcium, zinc, and copper. But they but also contain a fair amount nitrogen. And nitrogen just happens to be one of the biggest nutrients that plants need for strong growth.
Spent coffee grounds are full of trace nutrients that can power plants – both outdoors and indoors!
Nitrogen is vital for several critical needs when it comes to plant growth. For starters, it helps to provide the energy plants need to produce new stems and foliage. But nitrogen is also important for powering the process of photosynthesis, helping convert light into valuable energy for plants.
Using Coffee To Power Houseplants
With all of that goodness, it’s easy to see how coffee grounds can help plants grow – especially when you use them in just the right way. But when it comes to successfully powering houseplants, you need to know when and where to use coffee grounds and leftover coffee – and how much to use!
With that in mind, let’s take a look at how to use both on houseplants, and dispel a common myth about the acidity of spent coffee grounds – one that unfortunately leads to a lot of confusion about how safe they are to use on plants.
How To Fertilize Houseplants With Coffee Grounds
Coffee Grounds & Acidity
Let’s start with the myth that spent coffee grounds (and leftover coffee) are highly acidic. And – that if you use them around plants it will turn the soil acidic. This is simply not true!
Fresh coffee grounds are acidic. Spent grounds are actually very close to neutral.
Although fresh coffee grounds are more acidic, used coffee grounds are not. In fact, once hot water has run through the grounds, nearly all of the acidity is gone. Enough that used coffee grounds and leftover coffee usually have a pH of around 6.7 to 6.8 – with seven being neutral.
One thing is for sure, unless used in massive quantities (which it shouldn’t be), it will not turn the soil highly acidic.
With that said, when it comes to using grounds or old coffee on houseplants, moderation is the key. Not because of the acidity, but because it contains a good source of nutrients. And just as with any living plant, giving it too much power at once will actually harm the plant more than help it.
Coffee Grounds & Moisture – How To Fertilize Houseplants With Coffee Grounds
In addition to being filled with nutrients, coffee grounds also happen to retain a tremendous amount of moisture. Although that might sound like a positive, it can actually be very detrimental to house plants. Coffee grounds are so good at retaining moisture that when placed directly on the soil surface, they over-saturate a plant’s root system.
When using grounds on houseplants, they need to be mixed into the soil in small quantities. If left on top, they can actually be a barrier to water getting to the roots.
When this occurs, the roots of the plant swell excessively and become unable to take in nutrients. The end result is a houseplant that turns yellow from a lack of nourishment, and a root system that slowly rots and dies.
So exactly how can you use coffee grounds and leftover coffee to help plants and not harm them? By turning them into a weak tea that will power them low and slow. One that will have your houseplants growing like crazy!
Making A Fertilizer Tea With Coffee – How To Fertilize Houseplants With Coffee Grounds
There are a couple of ways to make fertilizing tea. You can actually make it with leftover coffee – or leftover coffee grounds. But when using leftover coffee, you will need to dilute it first.
Why can’t you water your plants with regular coffee straight from the pot? Unfortunately, fresh brewed coffee is too strong in the nutrient category. And for nearly all houseplants, using it at full strength will overpower them.
Although coffee at full strength is too rich, diluting it using a ratio of about 4 parts water to every 1 part of full strength coffee will work wonders for powering houseplants.
Leftover coffee is great to turn into a weaker version to use on plants. At full strength, it can actually burn plants with too much energy.
If you want to turn your old grounds into a tea, all you need to do is use the leftover grounds to make a “new” batch of very weak coffee. To make, simply keep the grounds from your first batch in place, and re-make an entire pot.
This time, the resulting liquid will be far weaker – and perfect for using on houseplants. Of course, you need to let it cool before using, but the weak tea-like solution will supply a gentle source of nutrients to your plants.
For how often to use either, as a general rule of thumb, you can use weak coffee tea to “water” houseplants every 7 to 10 days. Any more and you will risk over-fertilizing indoor plants with too many nutrients.
Using The Right Coffee – How To Fertilize Houseplants With Coffee Grounds
It’s important to note that not all coffee grounds are the same when it comes to fertilizing. Flavored coffees and coffees with artificial ingredients are not good to use on houseplants. Unfortunately, these brews can contain harsh chemicals that can harm plants.
And what about decaffeinated coffee? Both versions of coffee (caffeinated and decaffeinated) actually have the same nutrients. Unfortunately, quite often, chemicals are used in the decaffeinating process. And in some cases those chemical traces can harm plants.
Without knowing what might be or what might not be in it, it’s best to steer clear of them entirely unless the package says naturally decaffeinated.
Listen In To Our Podcast Below On Using Coffee Grounds & Egg Shells
Instead, when using coffee grounds, stick with the grounds from plain coffee. You can also safely use coffee blends made from several different bean types. These are simply regular coffee varieties that are mixed together to create a different flavor profile. The key is to avoid coffees with artificial additives.
And, whatever you do, don’t throw those grounds out once you have used them for making coffee tea! Even though you have taken some of their nutrition out, they are still wonderful for powering up your compost pile.
This Is My Garden is a garden website created by gardeners, for gardeners. Jim and Mary Competti have been writing gardening, DIY and recipe articles and books and speaking for over 15 years from their 46 acre Ohio farm. They publish three articles every week, 52 weeks a year. Sign up today to follow via email, or follow along!