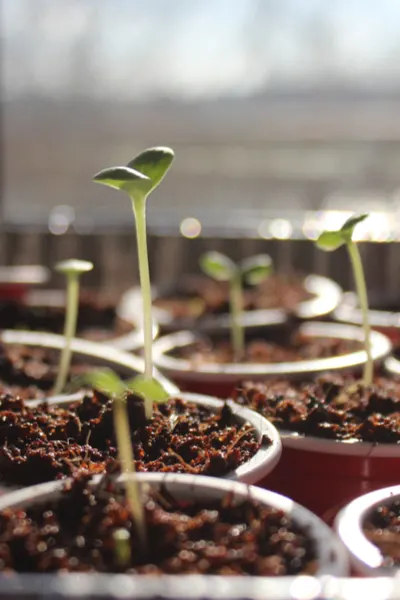
Starting your flower and vegetable plants from seed is a great way to save money, and grow all kinds of new varieties of plants that can’t be found in traditional stores. And everything you need to get started is right here on this page!


Starting your flower and vegetable plants from seed is a great way to save money, and grow all kinds of new varieties of plants that can’t be found in traditional stores. And everything you need to get started is right here on this page!
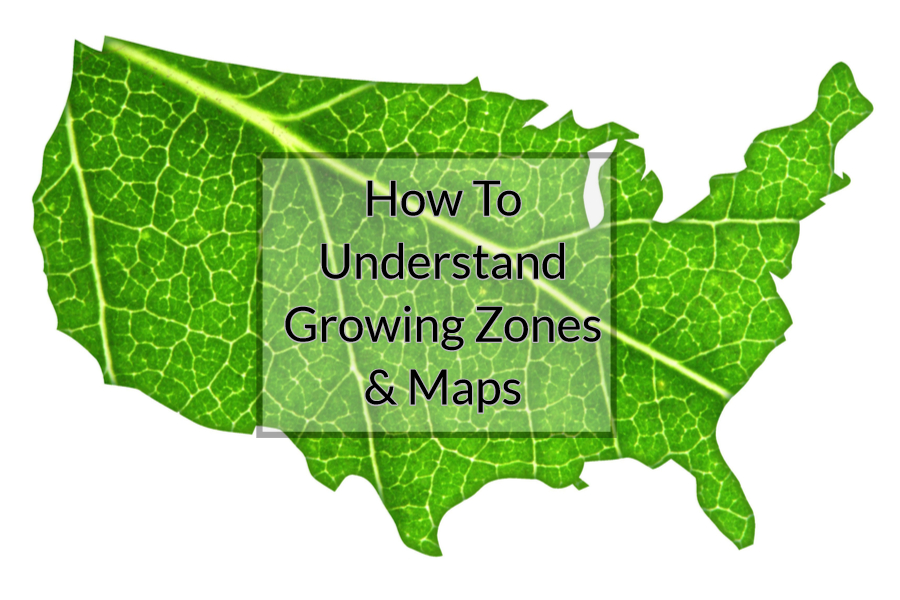
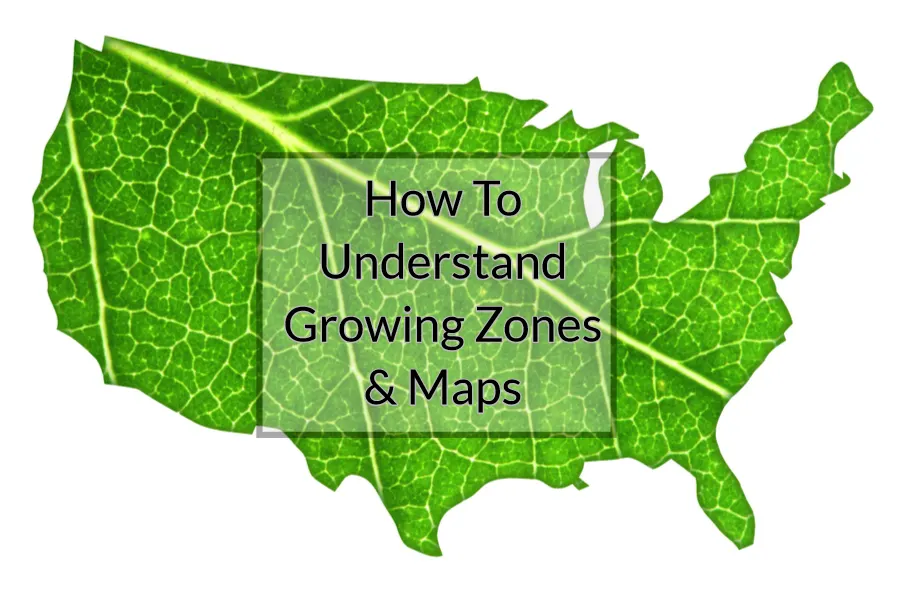
One of the most confusing aspects of gardening is understanding just how growing zones and frost dates work – and how to use them to plant smart for your specific location and landscape.
When it comes to growing zones, it is certainly understandable how and why they can be so puzzling. In some growing zones a specific plant will grow without issue as a perennial, while in others, that same plant can only grow as an annual.
Adding to the confusion is the subject of frost dates and freeze dates. Not only do frost and freeze dates vary drastically from location to location, there is a lot of misunderstanding on what they actually mean. Is it truly a hard-fast planting guide, or just an estimate?

One thing is for sure, each year, gardeners lose millions of dollars due to their plants dying out. Everything from annuals and perennials – to shrubs, bushes and trees. Sometimes it’s due to planting too early. Other times because plants went in the ground too late in the growing year. And quite often, it is simply because the variety or plant chosen is not designed for the specific growing area.
Hopefully today’s article can answer all of the above questions – and shed light on how to use both a growing zone map and your area’s frost and freeze dates to plant better than ever!
Knowing your specific area’s growing zone is extremely important for all types of garden situations. That includes vegetable plants, annual flowers, perennials and container gardening, as well as planting larger species such as shrubs, bushes and trees into your landscape.
So what are growing zones and how are they established? Long ago, the USDA (United States Department of Agriculture) began publishing a Hardiness Zone Map. The map features different growing zones throughout regions and swaths of the country – all of which help relate to which plants can survive and thrive in specific climatic areas.

Within the map, individual growing zones are separated by 10 degree Fahrenheit increments for each area. These zones then correlate to which plants can survive in each climate area. Or more precisely, which plants can survive the harsh range of low temperatures throughout winter.
The zones on the U.S map range from 1 to 13, with 13 being the warmest winters of all, and 1 being the coldest. Each zone is given a number relating to the average coldest temperature in that specific zone.
In some cases, zones separate out even more with a sub-zone. These zones will have an “a” or “b” beside the zone number. Sub-zones help when there is an even slighter variation within a specific zone’s temperature range.
For instance, if you live in growing zone 5a, your plants need to be able to weather temperatures that can get to -15 to -20 Fahrenheit. 5b is slightly warmer with a range of -15 to -10 Fahrenheit.
So how does the USDA comes up with the temperatures for the separation of zones? They create their zone hardiness map based on the averages of extreme minimum temperatures over a thirty year period.


By using an average of the extreme minimums over a lengthy period, they can then create maps that show the most likely issues plants will face from freezing temperatures. It is very important to realize it is an average over a long period of time – and not from just a single season.
Armed with this information, a gardener can then select plants suited for his or her growing zone. But, of course, it is not a perfect science for sure. It’s important for a gardener to realize that the zones on the map are not exact. Instead, they are guidelines to grow what is most likely to succeed in your area.
Extreme cold can hit any area beyond the norm. And without some protection, plants can and will freeze out. That is exactly why when choosing plants, sticking with plants that are well within your growing range is always a best practice!
The good news is that finding your hardiness zone is simple! As a free resource, the USDA publishes a USDA Zone Hardiness Zone Finder on their website. Even better, it’s interactive. Just put in your zip code, and you will instantly find your exact growing zone.
Not to be confused with growing zones and hardiness maps, frost and freeze dates are meant to help gardeners and growers determine when a damaging frost or freeze could affect their plants in their specific area.

Frost and freeze dates are not so much for perennials, shrubs, bushes and trees, but instead for more tender annual flowers and vegetable plants. More importantly, the dates are meant to help a gardener know when the best time for planting is for early spring and late fall gardening.
A frost date is the average date when the temperature will go to 36° Fahrenheit or below. It is important to note that a frost needs moisture to occur. That means it can get to that temperature and frost might not occur, but it can when moisture is present.
Frost dates are set to help in planting and are created for each end of the growing season. Each area will have an average last frost date for spring, and an average first frost date for fall.
Freeze dates, like frost dates occur at both ends of the season as well. A freeze date is the average date when the temperature will fall below 32° or below. One is set for the average time the last freeze will usually occur in the spring, and another for when the average first time a freeze will occur in late fall.
Here is the important part for both frost and freeze dates – they are based on averages. They are simply guidelines to help in planting. Just because the average last frost date in your area passes, it does not mean you can plant tender vegetables or flowers without worry. Again, good practice is to wait beyond these dates a week or two.
These dates are not just vital for knowing when to plant your flowers and vegetable transplants outdoors, but also for figuring out when to start seeds indoors for future planting. See : How To Know When To Start Your Seeds Inside – At Just The Right Time!
For that very reason, when planting your garden, flowerbeds or containers – allowing extra time in the spring past the average dates is always a good idea. For starters, the warmer temps help your plants grow better. In addition, it will also save you from having to worry about covering them up!
With tender annual plants, how cold it gets will really determine the type of injury your plants might suffer. That is why there are four types of warnings that are issued in the spring or fall for plants:
You can usually protect plants with plant covers for frosts and even light freezes down to 29° (F). The best way to do this is with a frost blanket or cover. They can be found in large sizes that can be draped over entire gardens, or cut down to cover specific plants. Best of all, they can be reused again and again. Affiliate Link: Frost Cover For Plants
Unfortunately, once the temperature drops to 28 degrees or lower, most annuals will have heavy damage. Moderate to severe freezes are extremely hard to protect plants from without drastic measures.
One interesting note on warnings is that after a hard freeze occurs in the fall for a specific area, no more warnings go out. Why? Because after a hard freeze, they already consider tender plants to have found their end!
Here is to knowing more about your growing zone and frost and freeze dates, and using that information to plant better than ever!
Follow Our Facebook Page For Great Gardening Tips And Advice! This Is My Garden Facebook Page
This Is My Garden is a garden website created by gardeners, for gardeners. Jim and Mary Competti have been writing gardening, DIY and recipe articles and books and speaking for over 15 years from their 46 acre Ohio farm. They publish three articles every week, 52 weeks a year. Sign up today to follow via email, or follow along!


Looking to start your own vegetable and flower seeds indoors this year? There is no better way to save money and produce amazing vegetables, flowers and herbs than by starting your own plants from seed!
Like everything else these days, purchasing plants at your local nursery or garden center is getting more and more expensive with each passing year. In addition, the selection of plants at local stores is often limited to only the most common of plants.
But when you grow your own plants from seed, both of those issues are solved in an instant. Quite often, you can purchase multiple seed packets and varieties for far less than the cost of a single store-bought plant. Even better, the sky is the limit when it comes to the variety of seeds that can be found and grown.
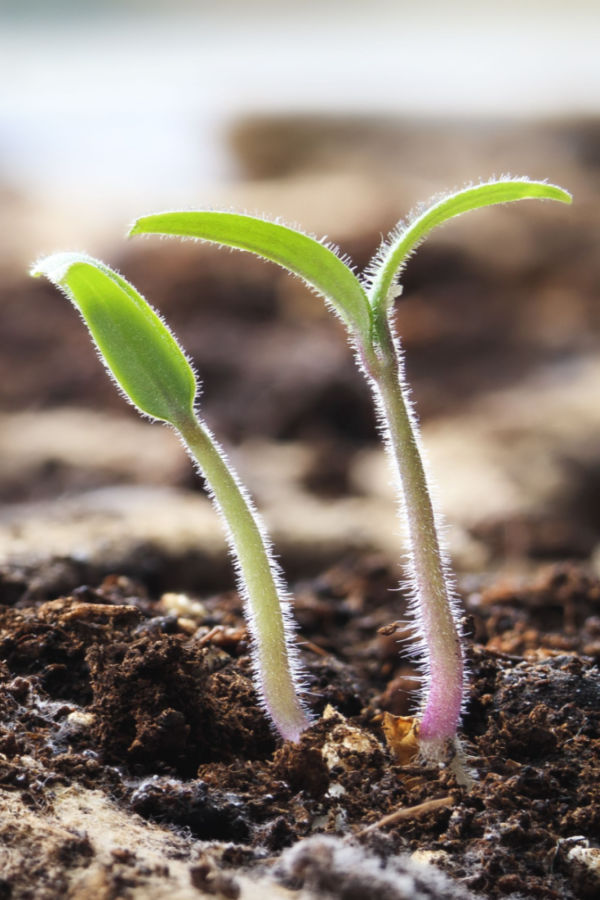
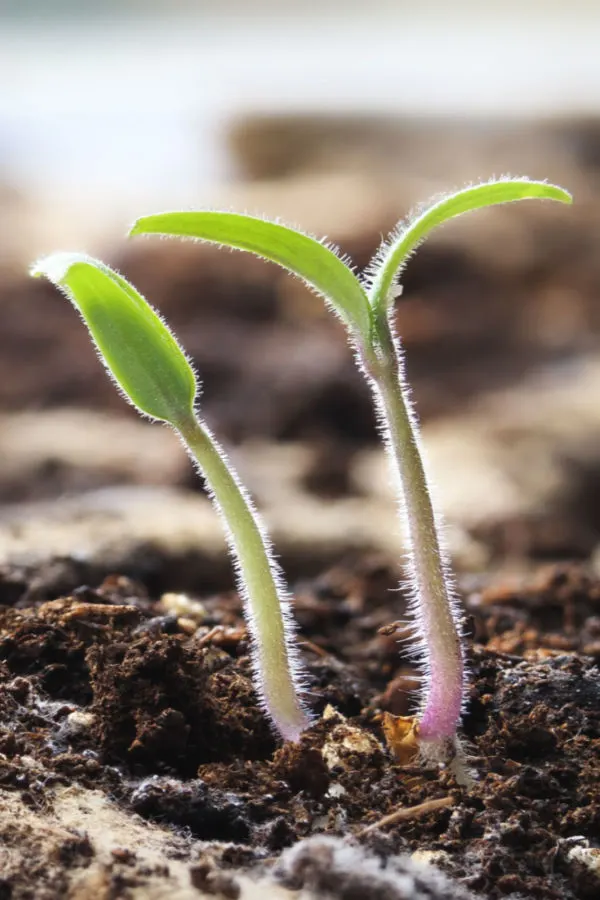
But best of all, growing your own plants couldn’t be easier! Contrary to popular belief, starting plants from seed isn’t complicated. Nor does it have to be expensive, time-consuming or require unique equipment.
One of the biggest misconceptions about starting your own seeds indoors is that you need to have special lights and equipment to have success. As you will see below, that couldn’t be further from the truth!
In fact, all it really takes is a few basic supplies and more importantly, proper planning to make sure you have everything you need in place when the time for planting arrives.
How and when you prepare for starting your vegetable and flower seeds indoors can make all the difference between great success – or frustrating disappointment. The earlier you prepare the better. Especially with how hard it can be these days to find supplies.

Being prepared means ordering seeds early. That not only gives you the best selection of available seeds, but allows plenty of time for delivery as well. In addition, it’s important to have seed containers, seed-starting soil, and a few inexpensive lights at the ready.
With that in mind – here is a look at the 4 key seed starting supplies you will need, along with a few extra tips to start seeds like a pro this year!
It is extremely important when preparing your indoor seed starting supplies to think about lighting. Unfortunately, a sunny windowsill is not the answer!
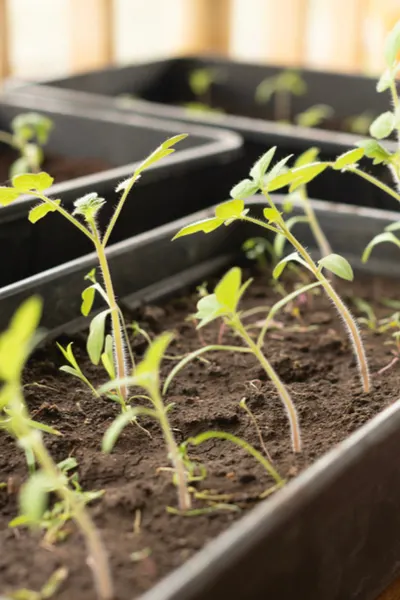
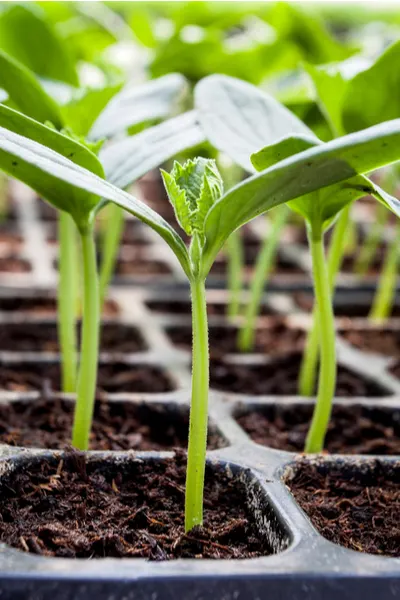
Starting and growing young seedlings in a sunny windowsill is a recipe for seedling disaster. The light coming through a window from the sun is simply too far away to grow strong plants. Once seeds sprout, they spend their time constantly reaching for the far away light of the sun.
Plants that grow in a sunny window end up weak and spindly. Instead of filling out slowly, they grow tall and thin in quick fashion. In fact, so quickly they usually end up falling over in their container in just a few weeks.
Many times, they struggle to survive indoors. And even if they do make it to planting day outdoors, they are often so weak and fragile they can’t handle the stress of transplanting.
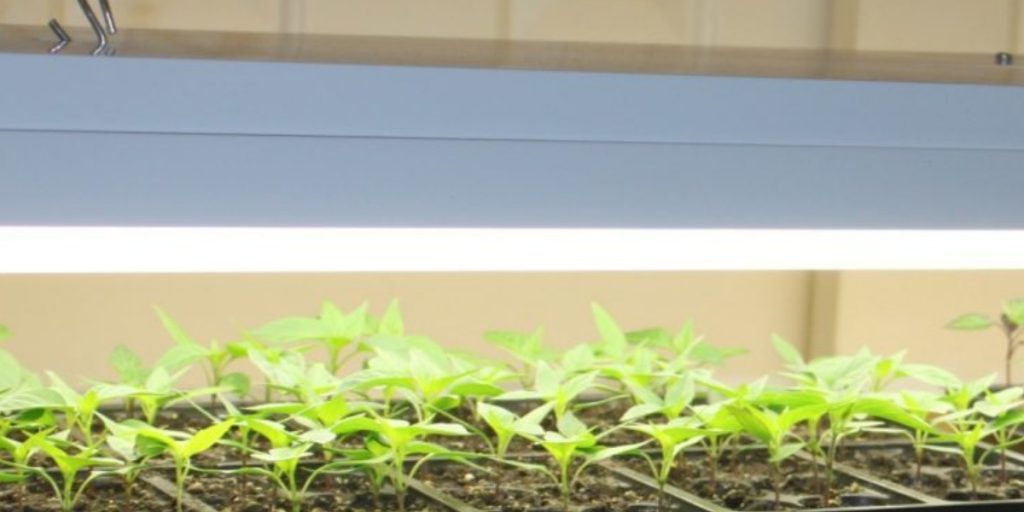
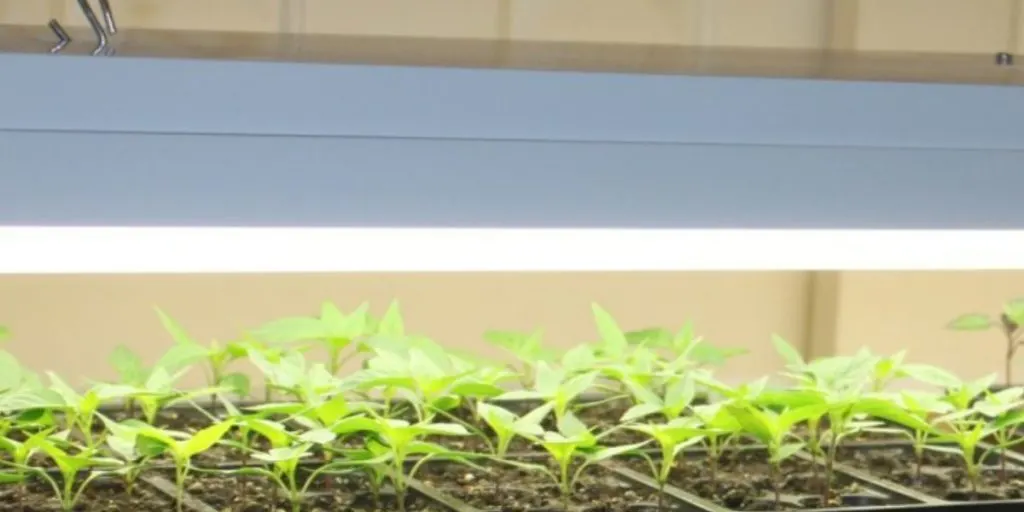
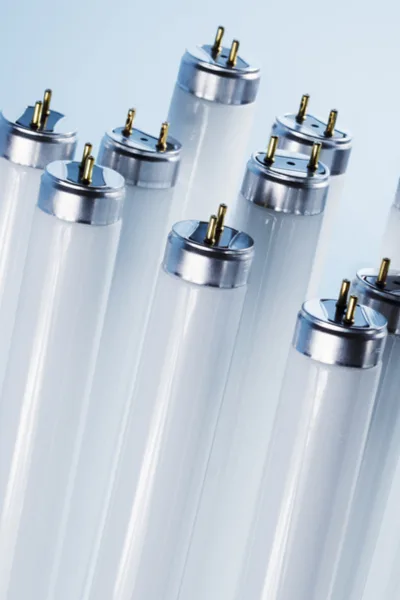
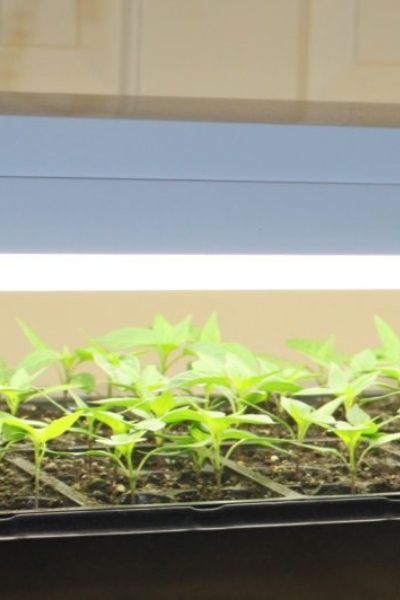
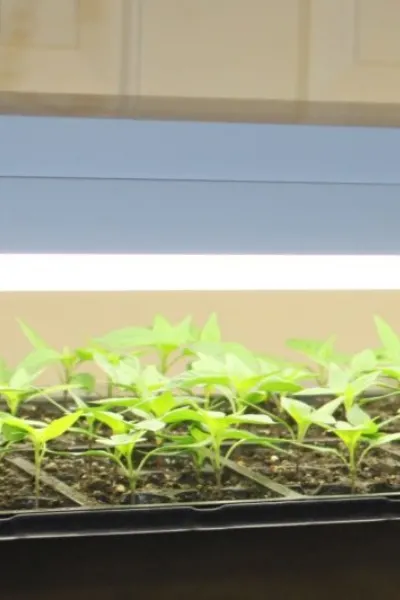
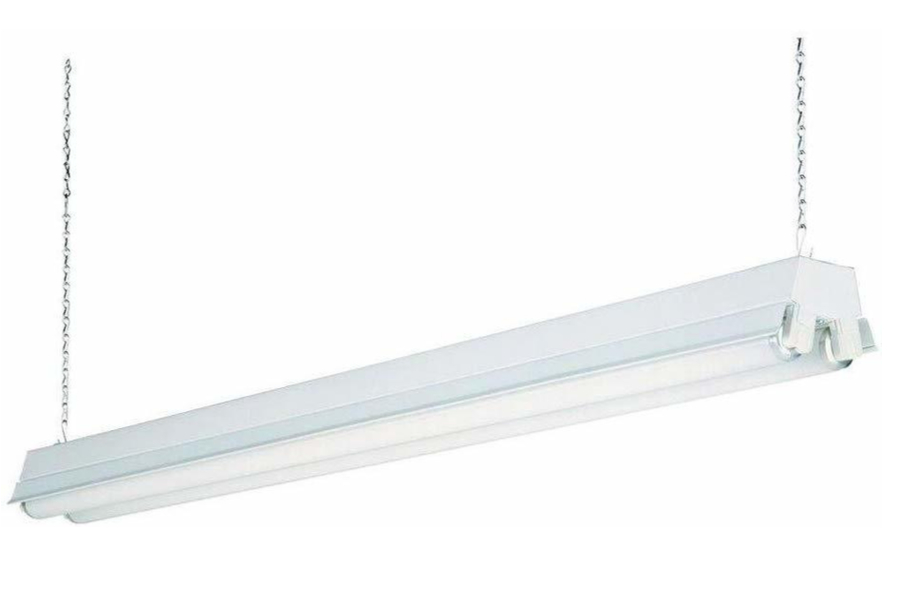
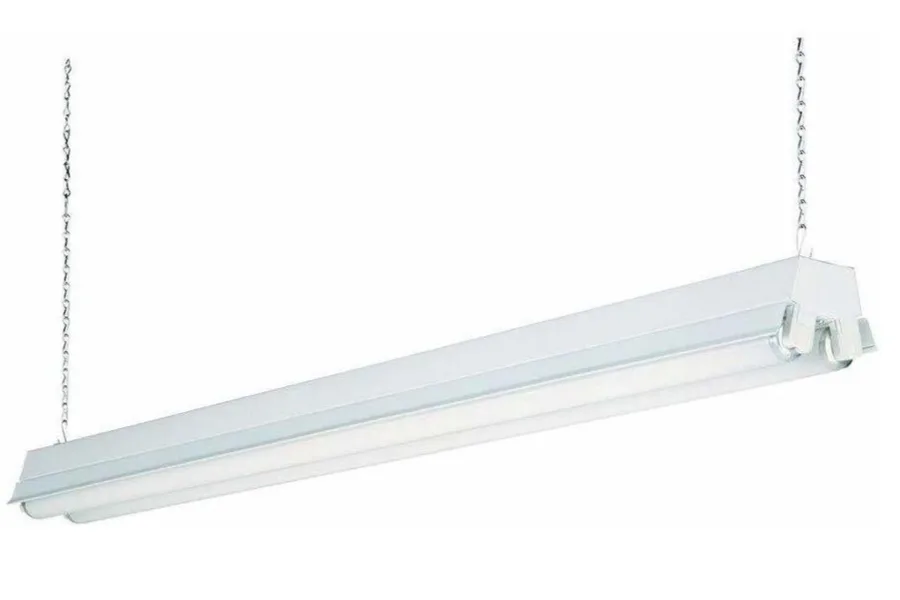
Here’s the good news – you don’t need expensive grow lights to grow seedlings! Standard, inexpensive fluorescent or LED shop lights actually work great for raising vegetable and flower seedlings.
One thing is for sure, it is an inexpensive solution to high-priced growing lights. When it comes to starting vegetable and flower seeds, fancy grow lights are simply not needed. The basic white light coming from the shop lights is more than enough for big success. See : Starting Seeds With Inexpensive Shop Lights
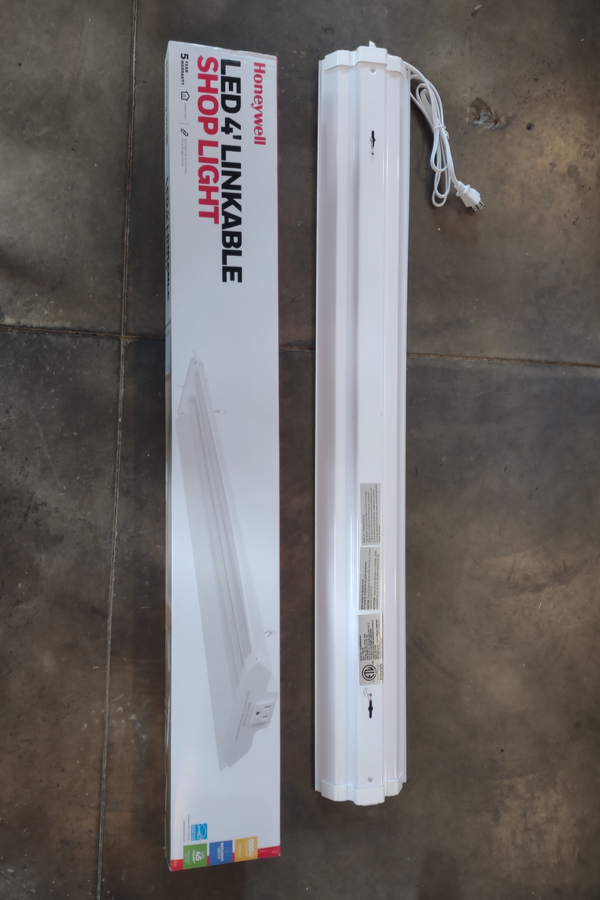
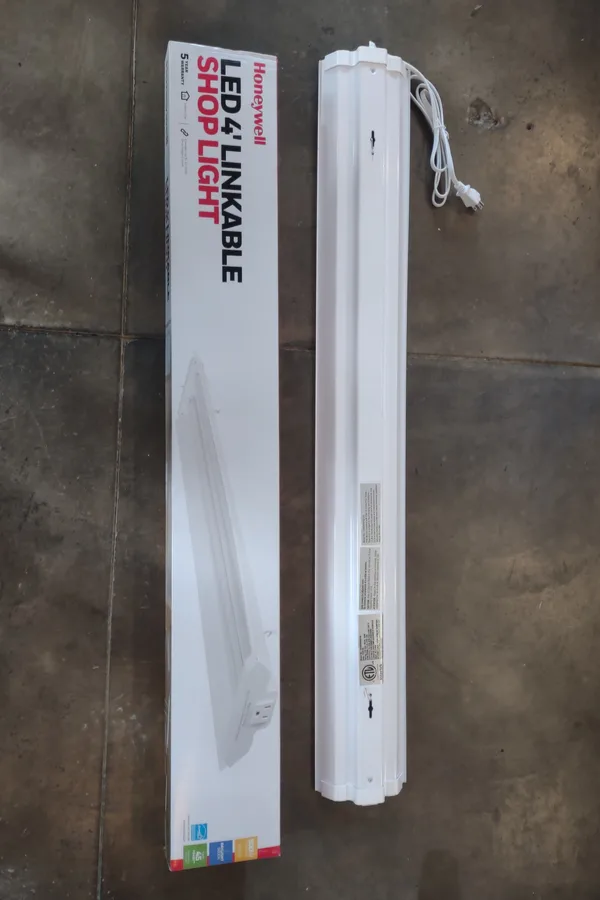
The cool bright lights of these bulbs placed an inch or so above the tops of the plants work wonders for growing strong and healthy plants. And you don’t have to have a fancy plant stand to use them. Simply hang the lights or prop them up over plants and watch your seedlings thrive! Affiliate Product Link : (4) 4′ LED Shop Lights
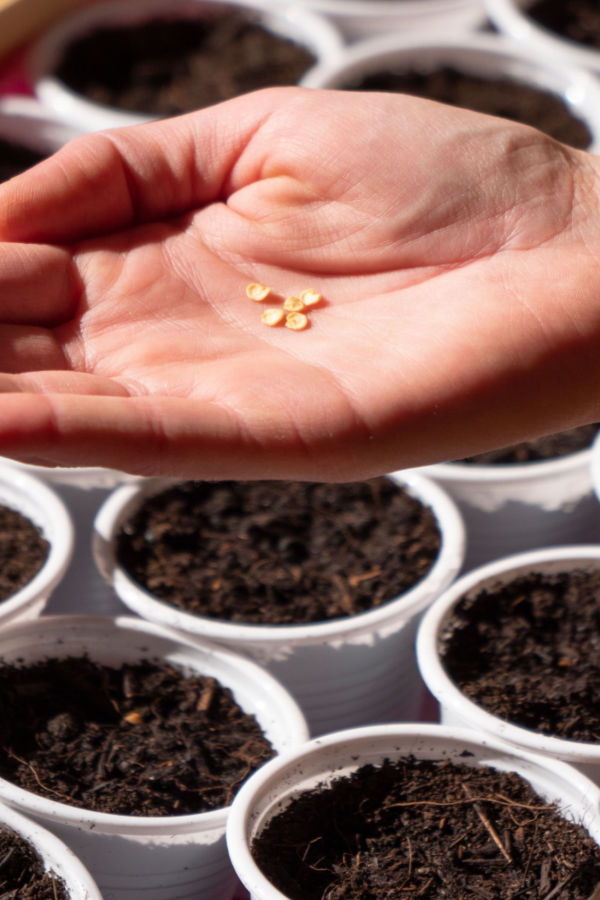
Whatever you do, order the seeds of the plants you want to grow early! Ordering seeds will ensure you get the quantities and varieties of seed you want. But more importantly, it means you will have them on hand in plenty of time to get your plants started.
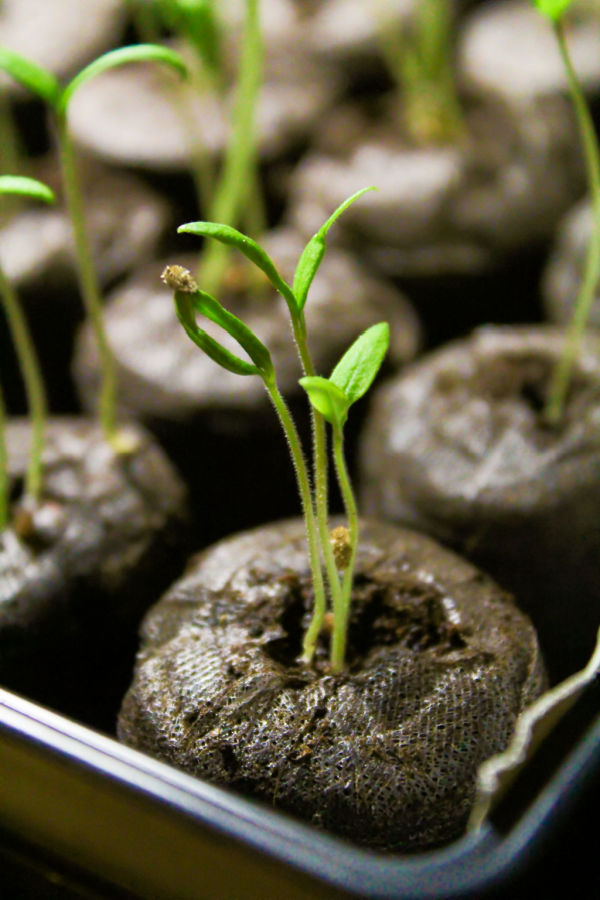
Vegetable and flower seedlings need anywhere from 8 to 10 weeks of growth before they are ready to transplant outdoors. And that doesn’t include the 7 to 14 days they need to germinate and sprout. Start now by planning your garden in advance.
This allows you to know what you want to grow and where you will grow each plant. Equally important, it will let you know what seeds you need to purchase to bring your planting plan to life. A simple plan can save you on seed purchasing costs, and have you ready to grow when the time comes! Affiliate Seed Link: Eden Brothers Seed Co.
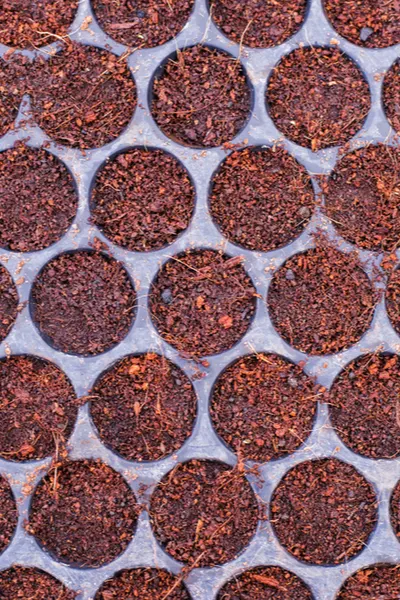
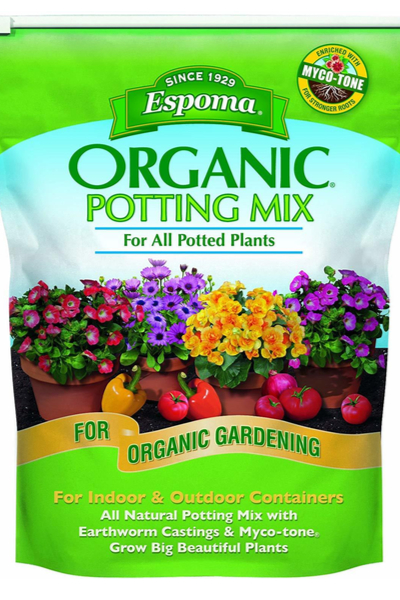
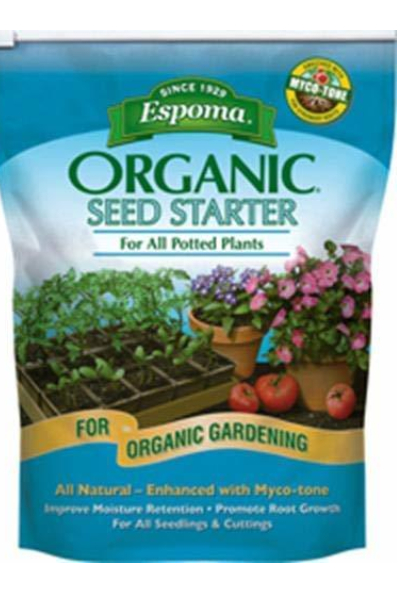
One of the biggest mistakes new gardeners make when starting their own seeds is selecting the wrong soil mix. Having a quality seed starting mix is vital to growing strong, healthy vegetable and flower plants.
A great seed starting mix should be light, airy, and contain plenty of nutrients to feed young seedlings. Avoid using straight potting soil. It is simply too heavy for seeds to germinate and grow. Instead, purchase a soil mix specifically designed for starting seeds, or create your own.
A seed starting mix, as opposed to straight potting soil, is much lighter in its make-up. This makes it easier for seeds to germinate, establish strong roots, and absorb nutrients quickly.
When purchasing a commercial seed-starting mix, look to see if it contains soil-aerating ingredients such as perlite or vermiculite. These ingredients help to lighten the soil, and allow young roots to grow easily and absorb moisture.
In addition, look for mixes that contain pulverized compost or organic fertilizers. These will help to power young seedlings with a slow trickle of nutrients that encourage slow but steady growth. Espoma Organic Seed Starter Premium Potting Soil Mix
You can also create a great seed starting mix quite easily at home. To make, use 2 cups of potting soil, and mix with 1 cup each of perlite and worm castings or pulverized compost.
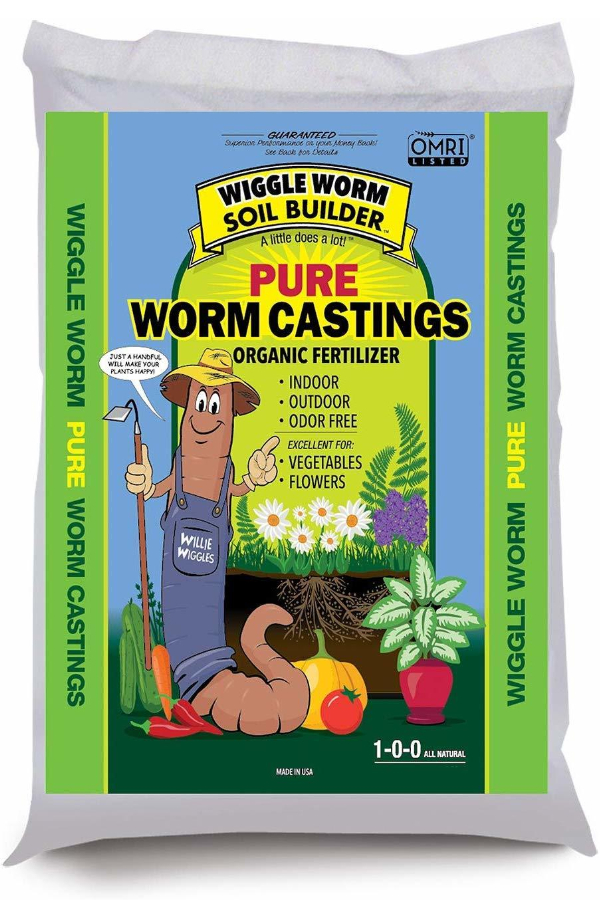
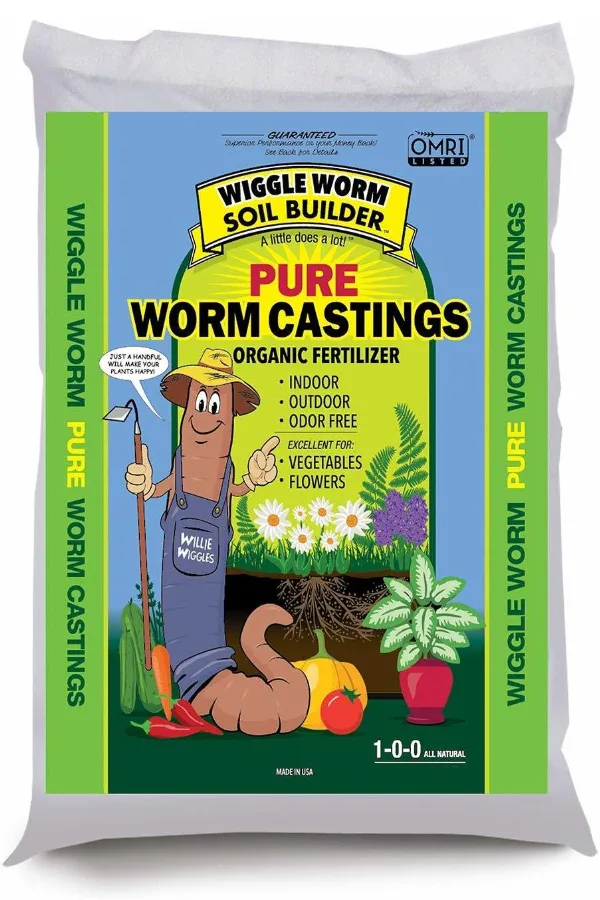
Worm castings are excellent additions to seed starting soil mixes. Not only do they provide a source of nutrients for young seedlings, they also help to conserve moisture in the soil. They are great for adding to store bought seed starting soil too!
Finally, in addition to having lighting, soil and seeds at the ready, you will also need to have plenty of containers on hand for starting and growing your seeds.
Although there are a lot of options for both commercial and homemade seed starting trays and containers, some are certainly better choices than others. Especially when it comes to giving your plants the best chance of success.
When purchasing seed trays and packets, look for seed starting trays that grow 36 plants or less. Although you can find trays that can start up to as many as 72 plants, the individual spaces are so small they almost guarantee you will need to transplant your plants before being able to plant them outdoors.
By selecting trays with larger cells, you can eliminate this time consuming and costly step. The same goes when using homemade or recycled containers. Although cardboard egg cartons, egg shells, and toilet paper rolls are good for starting seeds, they aren’t big enough to sustain growth for long.
Instead, opt for larger containers like individual yogurt cups or larger plastic cups that can allow for bigger root development and growth. And even more, keep you from having to repot your transplants! Here is to getting your seed starting supplies early, and to growing your own vegetable and flower plants this year!
Looking for more info on starting seeds? Check out our article: The Best Way To Start Tomato Plants From Seed Indoors – 4 Tips To Grow Great Transplants!
Follow Our Facebook Page For Great Gardening Tips And Advice! This Is My Garden Facebook Page
This Is My Garden is a garden website created by gardeners, for gardeners. Jim and Mary Competti have been writing gardening, DIY and recipe articles and books and speaking for over 15 years from their 46 acre Ohio farm. They publish three articles every week, 52 weeks a year. Sign up today to follow via email, or follow along!
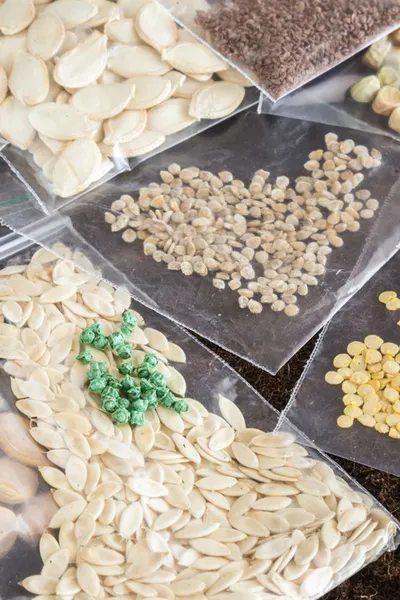
When it comes to storing vegetable and flower seeds safely through winter, a few simple tips go a long way in keeping them fresh and viable.
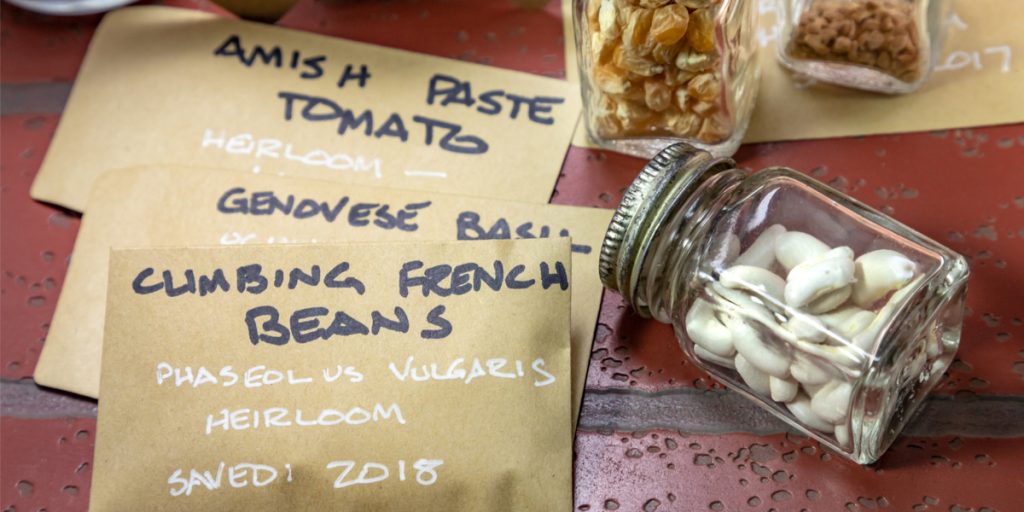
Let’s face it, buying seeds every year is expensive. Moreover, it can be difficult finding the seeds you love most. And that is exactly why saving seeds, or holding on to extra seeds you have purchased is so important.
But just like vegetables and flowers, seeds have a shelf life. And how you store them will make a huge difference in how long they last, and how well they germinate and grow next year.
Without proper storing, seeds and seed packets can easily lose their vitality over the winter months. With that in mind, here is a look at the best methods for storing seeds, and a few key places to avoid keeping them over the winter months.
There are two key factors that play an important role in how long seeds will last in storage. The first is heat, and the second is humidity.
Control both, and your seeds can actually remain healthy and viable for multiple years. But let one or the other get to them, and they can quickly become lifeless.
Of the two detrimental forces to saving vegetable and flower seeds, humidity is far more damaging than heat to their long term vitality. Seeds kept in moist environments will go bad in short fashion.
That is because humidity tricks the seeds into thinking it is about to germinate. When seeds become moist, they begin to use the available resources within their seed coat to attempt to germinate.
But without soil and adequate light, it simply can’t happen. And in the end, the seed loses strength and nutrients.
Although it won’t destroy seeds as quickly as high humidity, excessive or prolonged exposure to heat will impact seeds negatively as well. Warmth not only creates an opportunity for higher humidity, it also saps energy from seeds.
High heat can dehydrate seeds, and damage the outer protective layer of their seed coat. The bottom line, when seeds are exposed to warm or hot temperatures for an extended period, they become far less likely to germinate.
Storing seeds on top of a refrigerator, near a furnace or stove, or heating ducts and vents can seriously impact their shelf life. As can storing them in rooms with excessive heat build up.
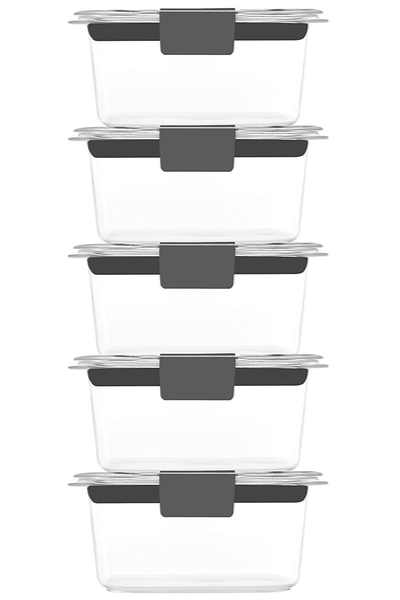
So then what is the best place for storing? Well, it all starts with what you store your seeds in. Vegetable and flower seeds should be stored in airtight containers that keep moisture out.
Zip lock bags, as long as they are freezer proof are excellent choices. Glass jars with tight lids are another great option as well. One of the best storing options is a plastic container that can be locked or sealed. Product Link : Rubbermaid Airtight Storage Containers
In addition, make sure seeds are completely dry before storing. This is most important when saving seeds from your own vegetables.
Seeds from stores and nurseries are almost always dry from the start. However, seeds plucked from fresh vegetables need time to air out before storing. If not, the moisture releases from the seeds as they sit, damaging all of the seeds.
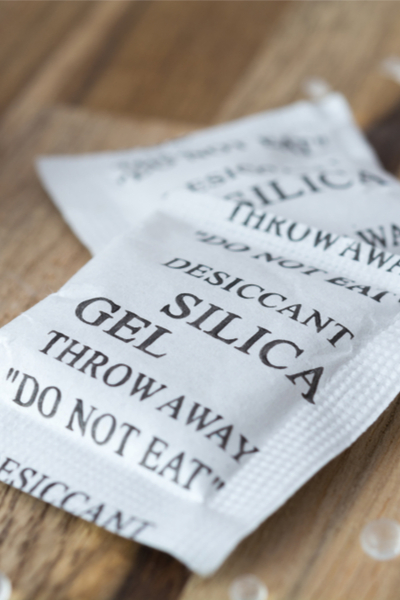
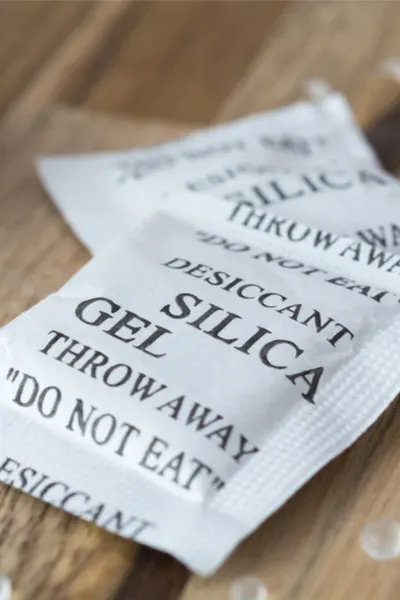
One way to help this process along is by storing your seeds with a few left over silica gel packets. The packets you find in shoes and other items can help remove excess moisture from seeds.
Once dry and sealed, select a cool place for storing. The darker the better. An unheated garage, a basement, or even the freezer all work well.
One of the great myths of seed storing is that a refrigerator is an ideal place for seed storage. The issue with refrigerating seeds is that the inside contains too much moisture.

In addition, avoid storing in wet basements or cellars, especially if you have not sealed the seeds in an airtight container. Once again, the humidity will simply damage the seeds to much.
Freezers, unlike refrigerators work well to store seeds. The low humidity will keeps seeds viable and fresh for multiple years.
For more on how to save seeds from your garden, check out our article How To Save Seeds From The Garden. Here to safely saving and storing your vegetable and flower seeds – and to saving on your garden budget too!
This Is My Garden is a website dedicated to spreading the love and knowledge of gardening around the world. We publish two new garden articles each week. This article may contain affiliate links.
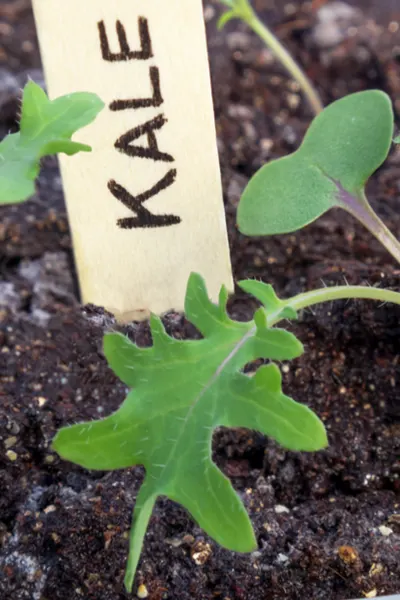
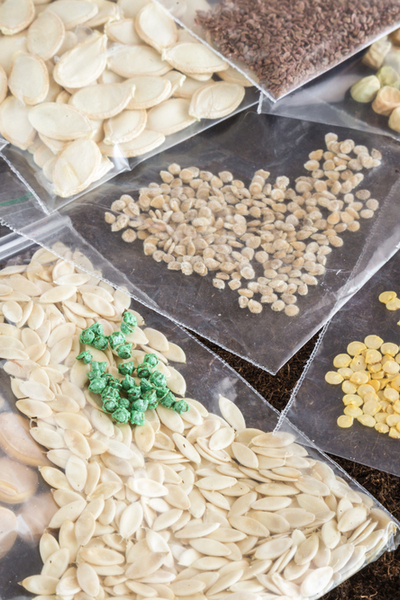
Saving seeds from lettuce, kale, radishes, peas and other spring crops isn’t just easy, it’s also a great way to save big money.
Let’s face it, buying seed to grow your own food can be expensive. Heirloom seeds often run $2 to $3 or more for just a small quantity of seed. But by saving a portion of seed from plants growing in your garden, you can create your own home-grown seed store. And all for free!

But the benefits of saving seed go beyond simply saving money. When you save seed from your best plants, you create a stronger, healthier seed stock. And that in turn leads to more productive plants, year after year.
And one of the easiest ways of all to save seeds is from your spring crops. Here is a look at what seeds to save, and how to save them from some of the more common spring crops.
Before saving any seed, it is important to make sure your plants are an heirloom, or open-pollinated variety. Heirloom varieties will produce the same seed for the same variety year after year.
Unfortunately, the seed of hybrid plants do not replicate into the same plant. In fact, in many cases, they won’t germinate or produce any flowers or produce at all.
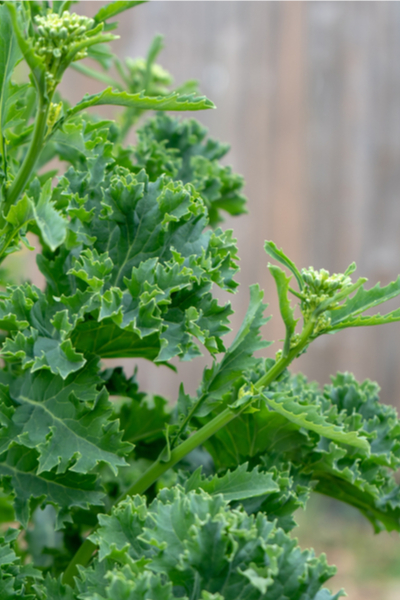
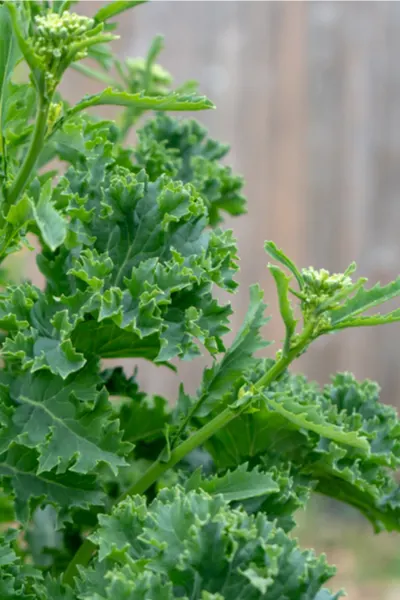
Whether it’s leaf lettuce, kale, arugula or spinach, saving seed in the spring from the “greens” family is a snap. And since you can grow these crops in both the cool of the spring and fall, always having seed on hand is a must! (See: Growing Lettuce – Experiencing Real Fresh Flavor)
As these crops begin to age, the plants go through a process known as bolting. Although bolting causes vegetables to become bitter in taste, it also forces seed production.
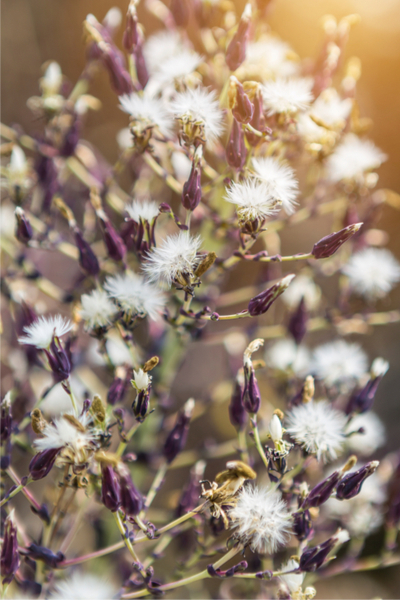

When a plant bolts, it begins the process of flowering. With most greens, a stem shoots up and a seed-head forms. For lettuce, it almost appears like a dandelion. While for kale, spinach and arugula, it is more of a wispy flower.
To save the seed from these spring crops, all you need to do is let the seed head dry, and them brush the seeds into a container.
To maintain freshness, store in a bag or closed container and keep in a cool dry place. You can also freeze seeds as well if you are trying to preserve for more than a single year.
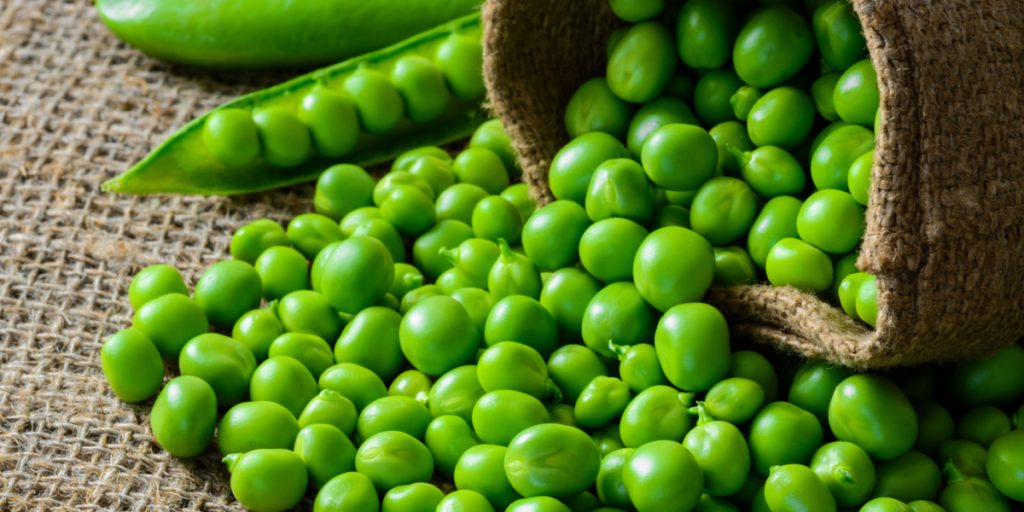
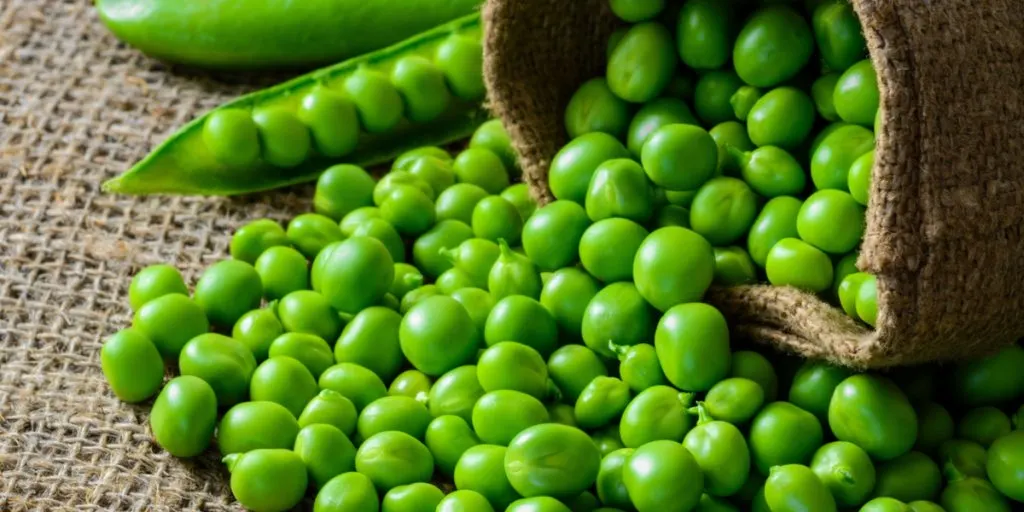
Of all spring seed crops, snap peas may be the easiest of all when it comes to saving seeds. All it takes is a little patience. In fact, Mother Nature will do most of the work for you!
As the crop begins to mature, select a few plants that performed well for seed saving. Leave the pods on the plant, and allow them to dry completely as the plant dies off.
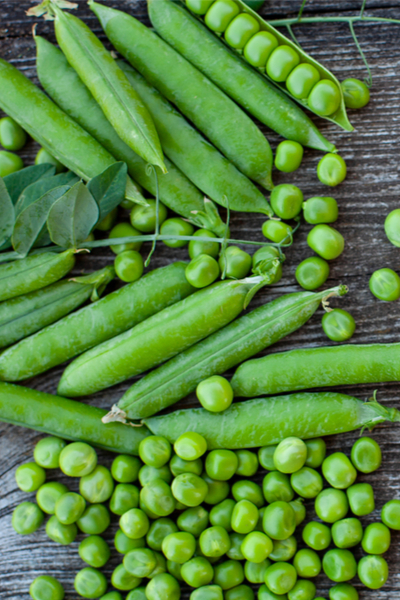
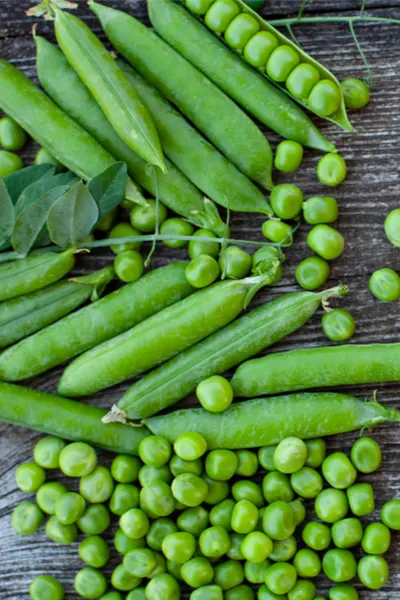
Then, simply shell the peas, and store in a cool, dry location for planting again. It doesn’t get any easier than that!
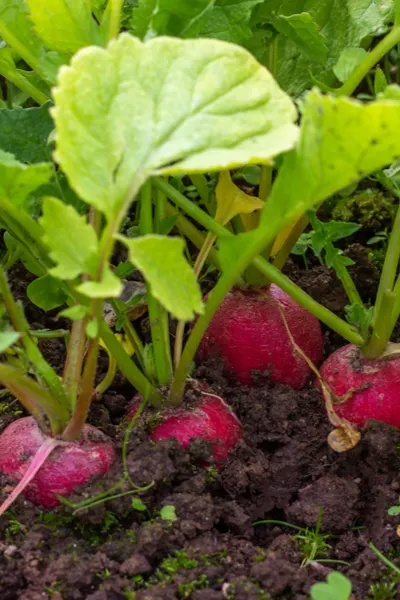
Radishes are one of the fastest growing spring crops of all, and saving their seed is quite easy too. As radishes age and begin to bolt, they produce pods. And it is inside of these pods, much like with peas, where the seed lies.

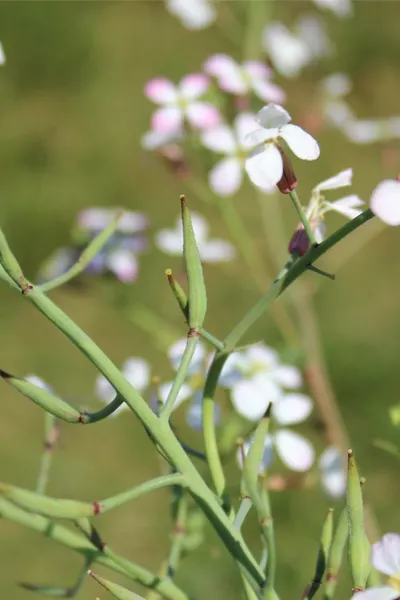
The key to success is to allow the pod to dry while still on the vine. Select a few of your best looking plants, and allow to bolt. As soon as the pods have dried out, pick, shell, and store for seed.
Although it is possible to save seed from carrots, the method is a bit more involved. Carrots are a biennial plant, producing seed in their second year of growth.
That means if you really want to save those carrot seeds, you will need to overwinter plants for a second year. For many, it is simply too difficult, and purchasing fresh seed is best option. But if yo
Finally, if you are growing more than one variety of an heirloom vegetable (i.e. 2 different pea varieties), the crops should be grown apart from one another to keep from crossing into a new seed.

Looking for more information on starting seeds? Take a look at our article: The Best Seed Crops To Sow In Early Spring – Get Your Garden Off To A Fast Start!
Here is to saving seeds from your spring crops, and to saving big money on your gardening budget! For more information on saving seeds from vegetable plants, see our article: How To Save Seeds From The Garden.
This Is My Garden is a website dedicated to spreading the love and knowledge of gardening around the world. We publish two new garden articles each week. This article may contain affiliate links.
You might be surprised just how easy and inexpensive it is to start and grow vegetable and flower plants from seed – all by using simple fluorescent shop lights!
Contrary to popular belief, it doesn’t require fancy or expensive equipment to start seeds indoors. Especially when it comes to needing ultra expensive grow lights. They simply aren’t necessary at all.

As it turns out, both vegetable and flower seedlings grow easily with simple, inexpensive fluorescent lights. Unlike tropical or unique plants that require special lighting to survive indoors, annual garden and flower plants grow with ease under ordinary fluorescent lighting.
In fact, they thrive growing underneath them! And because of it, starting seeds indoors couldn’t be easier and more affordable.

Here is a look at the keys to using fluorescent shop lights to start and grow all of your vegetable & flowers plants indoors from seed.
When growing seeds indoors with fluorescent lights, it’s all about low and slow. As in keeping the lights low to the plants to encourage slow, steady growth.
Fluorescent lights are cool lighting, meaning they won’t burn the tender leaves of plants as they grow. Even when placed above the foliage at just 1″ to 2 inches!
And that low, steady light turns out to be the perfect height for allowing plants to grow slow and steady.
Starting seeds in a sunny windowsill may sound like a great plan, but it has quite a few shortcomings.
For one, seeds have a difficult time germinating with the constant change in temperature from a window. Daytime in the sun can be plenty warm, but many windows are quite cold in the overnight hours.

But far worse, the seeds that do germinate in windowsills struggle to maintain proper growth. They are drawn to the sun, and try to grow as quickly as they can to the far away light source. It results in spindly, weak plants that struggle to survive.
And that is where fluorescent lights work like a charm. And here is exactly why:
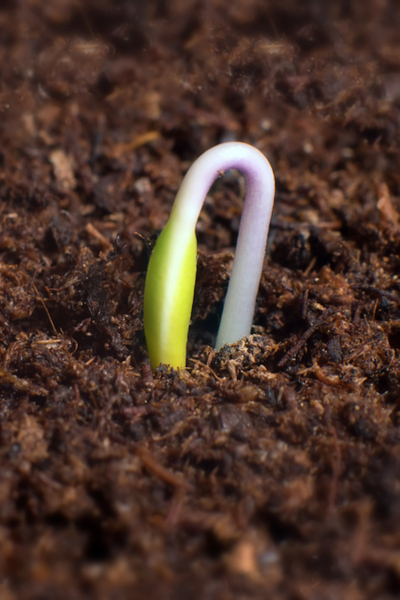
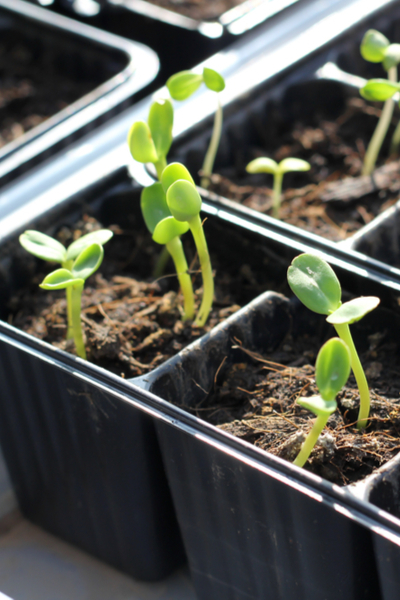
When seeds are first planted into their cells, there is no need for lights to be used. In fact, the light only serves to dry out the soil.
Instead, place a clear lid or even a bit of plastic wrap loosely over them to help keep moisture in place until the first seeds begin to germinate.
Once the first seeds germinate, it’s time for the lights! The easiest way to use fluorescent lighting is with ordinary shop lights with (2) 4′ T-8 or T-25 bulbs. Two, double-light fixtures can be easily used to start up to 4 large flats. Product Link : T-8 Double Light Fixture
By suspending the bulbs over the plants at 1 to 2 inches above the top of the leaves, plants grow slow and steady. As plants continue to grow, simply adjust the lights as needed.
It all helps to develop strong stems and more compact foliage. Both perfect when it comes to success when transplanting.
The lights can easily be hung over lights using cement blocks, bricks, or blocks of woods on the end. You can also easily create a stand from simple 2×4’s to hang and adjust the lights with a chain. (See : DIY Seed Starting Stand)
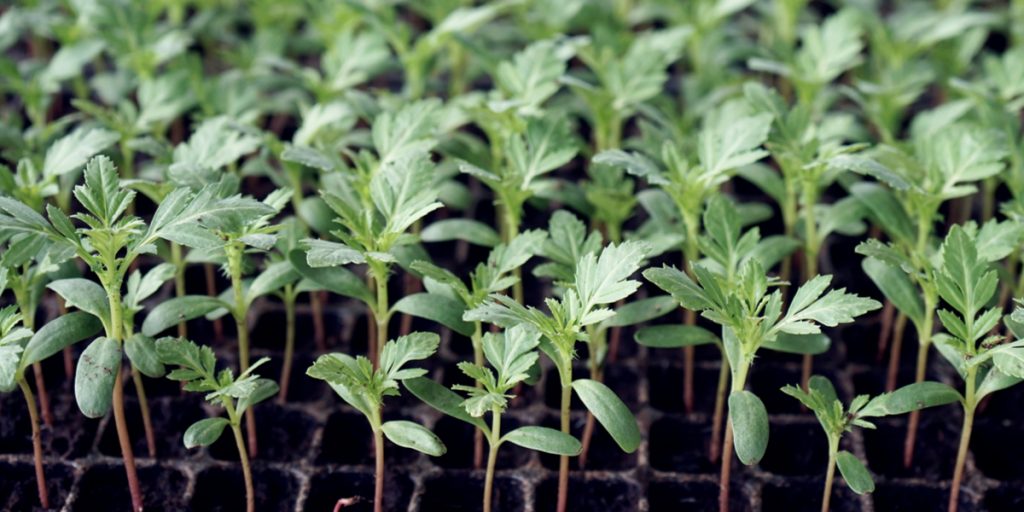
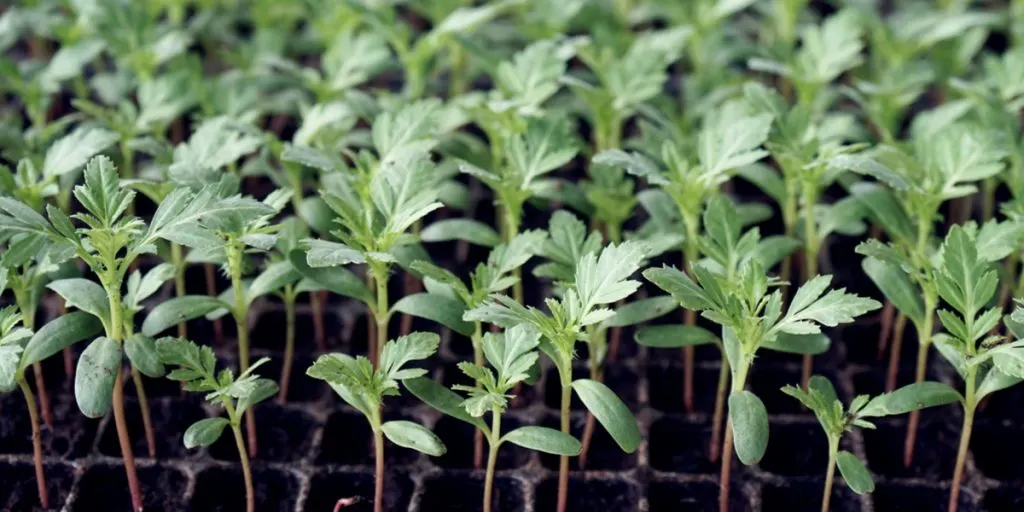
When using fluorescent lights, it is a misconception that they need to be left on around the clock. In fact, leaving the lights on for just 10 to 12 hours is more than enough to grow strong, healthy transplants.

Use the lights to continue growing plants (usually 4 to 6 weeks) until they are large and strong enough to begin the process of hardening off before transplanting. (See: How & Why To Harden Off Plants)
Here is to growing your own plants this year with ordinary fluorescent shop lights!
This Is My Garden is a website dedicated to spreading the love and knowledge of gardening around the world. We publish two new garden articles each week. This article may contain affiliate links.
Starting your own vegetable and flowers from seeds is a great way to save money, especially when you can make free seed starting containers with easy to find recycled materials!
Plastic seed starting cells and trays can be expensive, not to mention difficult to re-use. And unfortunately, the biodegradable options available are even more costly.

But there is a simple solution. Homemade seed trays are easy to make by recycling commonly used items around the house. Not only is it a great way to save on seed starting costs, but it helps out the environment too.
Here are 3 great options for making homemade seed starting containers using recycled materials, all for free!
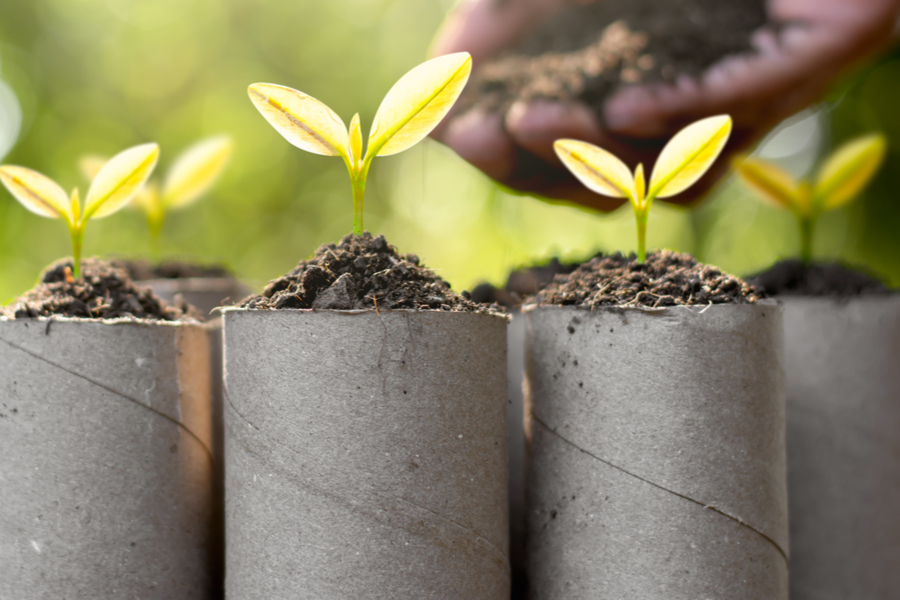
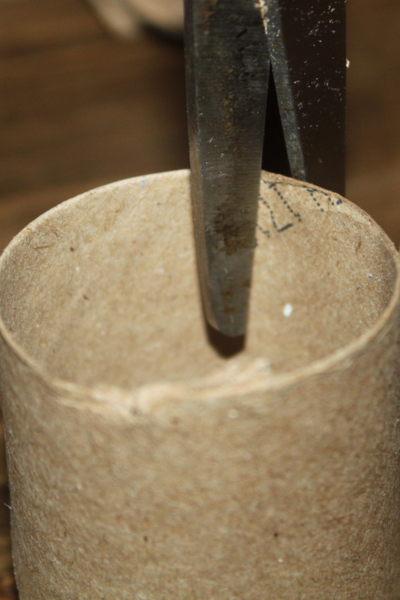
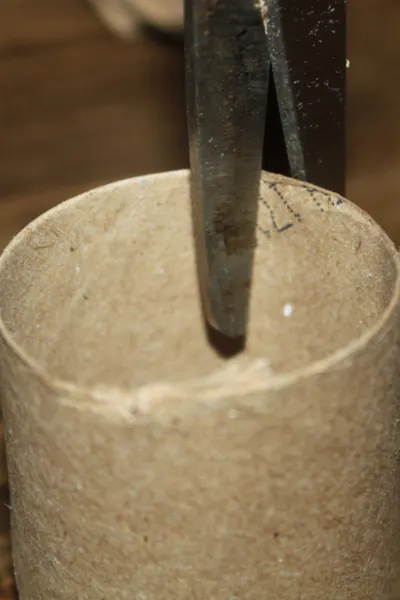
Cardboard paper towel and toilet paper rolls make incredible seed starting cells. And they are certainly easy to come by!
To use, begin by cutting the cardboard rolls into 2″ sections. Next, cut four ½” slits into the bottom of the 2″ roll, and overlap the strips to make a small container. (See : How To Make Trays From TP / Paper Towel Rolls)
All that is left is to fill with a quality seed starting mix, and plant with seed. You can use square or rectangular baking pans as trays to hold the cells upright as they grow.
The best of part of all, cardboard is biodegradable. That means you can plant the entire seed and cardboard sleeve together!
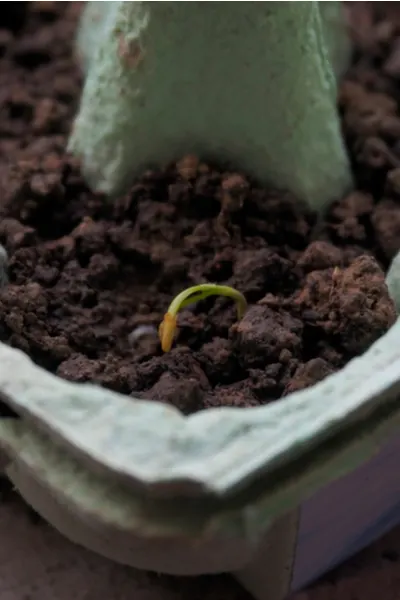
Egg cartons are a great way to start a large number of seedlings, all in one single container.
Simply cut the top cover half off of the carton, keeping only the egg cell side. Next, poke a small hole with a pen tip or large nail into the bottom of each cell. This allows cells to drain off any excess moisture when watered.
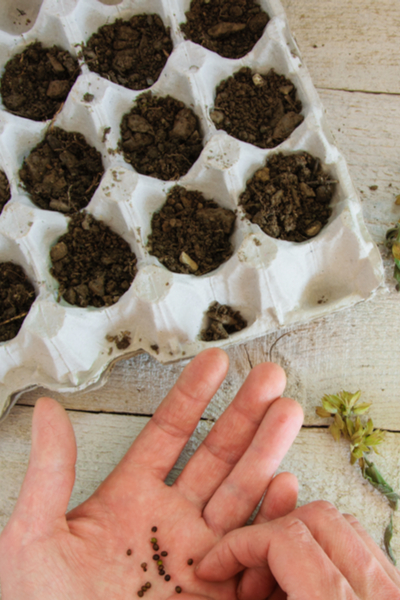

Next, fill the individual cells with a high quality seed starting mix, and plant with seed.
Cardboard trays work better than foam or plastic, as they allow moisture to escape and wick out. And since cardboard is biodegradable, the entire cell can be planted right into the soil.
Simply cut each cell away with a pair of scissors and plant directly into the soil.
Yogurt cups are great for creating larger, more spacious individual seed starting cells. Plants can develop larger roots before being transplanted outdoors.
To use, always begin by cleaning and rinsing out the yogurt cups with dish soap and water. Next, poke a few small holes in the bottom to allow for drainage.

All that is left is to fill and plant, and watch your plants grow!
The larger yogurt cups are usually big enough to allow for a lot of growth indoors. This makes for a larger plant that is ready to take off when transplanted outdoors.
Yogurt cups are also a great choice for replanting seedlings that have outgrown smaller cells.

And remember, whatever you use to grow your seeds in, take time to label them as you plant or transplant! It is easy to get plants confused as they grow if they are not labeled.
A fine tip sharpie works best, and won’t be wiped off by the frequent watering. Here is to making your own seed starting containers this year!
For more on how to start seeds indoors, check out (How To Start Vegetable & Flowers Seeds Indoors With Ease)
This Is My Garden is a website dedicated to spreading the love and knowledge of gardening around the world. We publish two new garden articles each week. This article may contain affiliate links.
When it comes to starting seeds inside, success is all about being prepared, and keeping it simple!
Contrary to what many think, growing flowers and vegetables from seed is not difficult. Nor does it require special lights or fancy equipment.
In fact, the biggest key of all is to be prepared, And that means getting ready during the early winter months, and not waiting until the last minute.

One thing is for sure. Not only can starting seeds indoors be fun, it can also save big on the budget!
If you are looking to start seeds indoors, here are our top tips for success:
What ever you do, be prepared! Don’t wait to order seeds and supplies. Ordering early insures you have the best chance of selection, and, are ready when it comes time to plant.
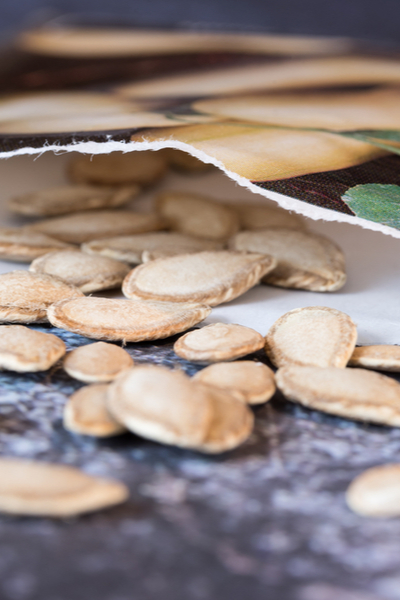
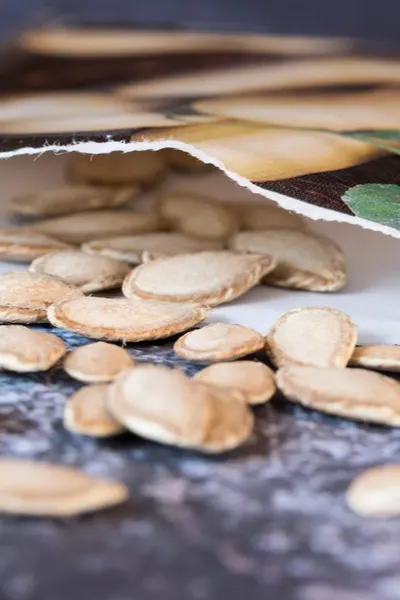
One of the biggest mistakes gardeners make when starting seeds inside is using stale seeds. Fresh seeds not only germinate at a higher rate, they perform better when it comes to early growth.
Always check seed packets for the packing dates. Seeds should be no older than a year to ensure best results.
And if you happen to be saving seeds from the previous growing season, be sure to always store in dry, cool & dark space. Refrigerators are an excellent choice to keep stored seeds viable.
Starting seeds is not the time for using ordinary soil from the garden. Or every day potting soil. Always select high quality, loose, fertile, and well-draining soil mixes. (See: Espoma Organic Seed Starting Mix)

For those that want to save even more, you can also mix your own. A simple seed starting soil made of equal parts of sand, potting soil, and vermiculite works well.
To make even better, add in an equal part of worm castings or pulverized compost to the mix. It will help give seedlings an outstanding slow-release organic fertilizer for early growth.
One of the most important steps off all is to start your seeds indoors at the right time.
Plant too early, and they become large and unmanageable before its time to move to the garden. But plant them too late, and they may never mature enough to handle the shock of transplanting.
To start seeds indoors at the correct time, use a simple method to count backwards from your safe planting date.


A safe planting date is known as your areas last frost date. This refers to the last typical day each spring when the threat of a frost could occur in your area.
Next, check the recommended growing time on the back of each seed packet. Then, simply count backwards from your last frost date to know when to start your seeds. (See : Picking The Right Time To Start Seeds Inside)
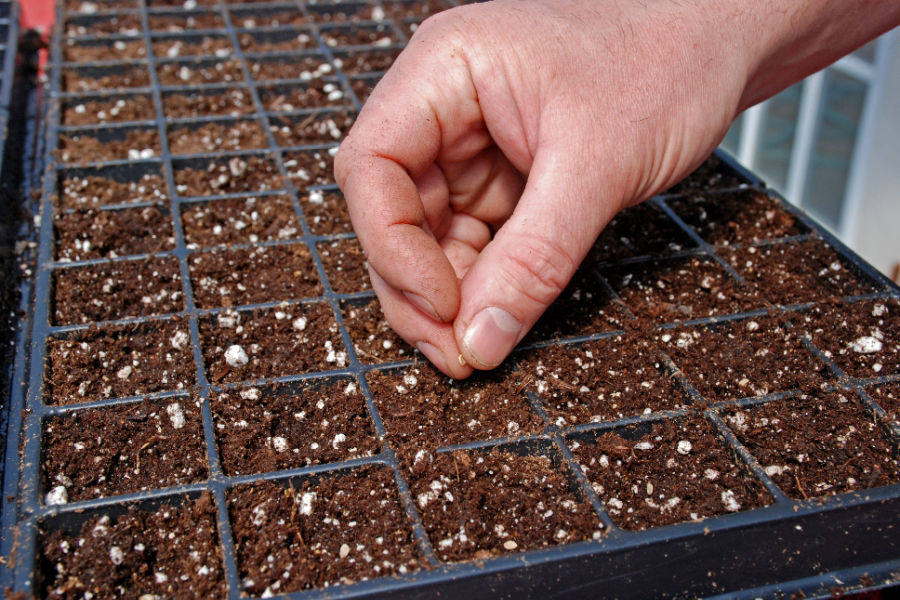
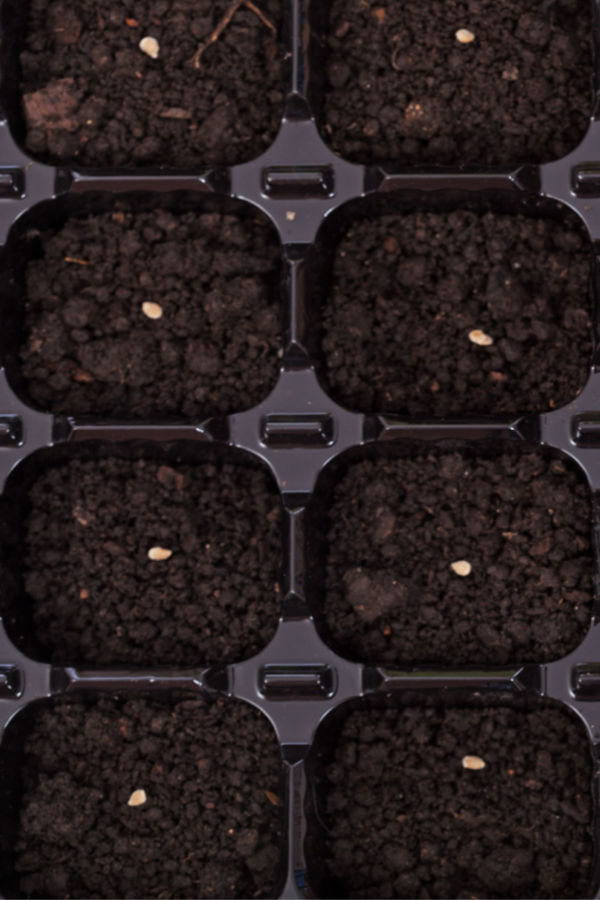
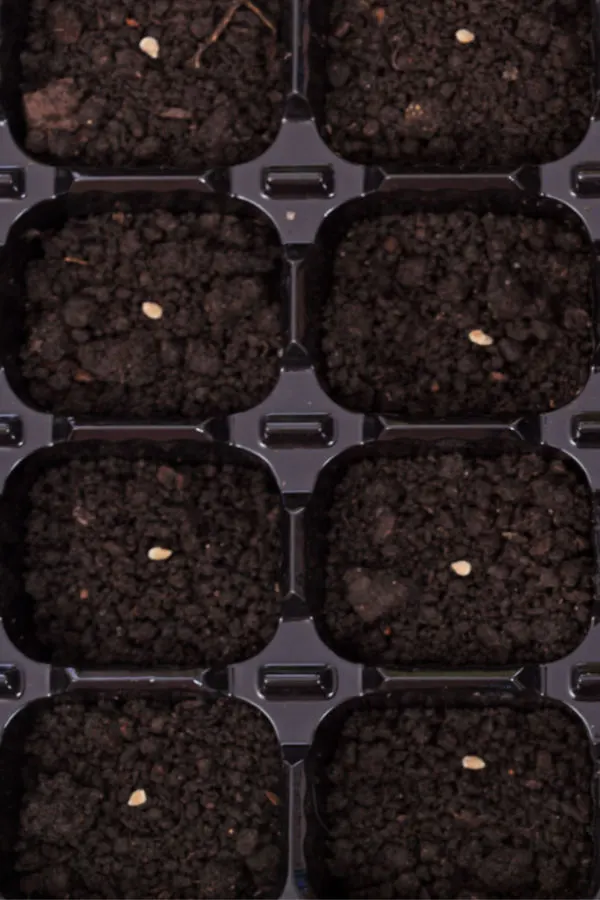
When starting seeds inside, always plant two seeds in each cell. Planting two helps to ensure all seed cells are filled with seedlings. If both sprout, thin to one after a few days by choosing the strongest of the two.
Once planted, lightly water, or mist with a spray bottle to dampen the soil.

Cover trays with a plastic top or saran wrap to help hold in moisture until the first plants sprout.
Vegetable seeds do not require light to germinate. In fact, the only thing light will do is dry out the soil quicker.
Place seed trays in a dark warm place until they begin to germinate. Check on the seeds every few days. Water or mist when necessary to keep the soil slightly damp.
Once the first few seeds sprout, it is time for light.
As much as a sunny windowsill sounds like a perfect place to start seeds inside, it’s not.
The ever-changing angles and distance of sun’s light source make it hard for seedlings to grow well.


Even with constant turning, plants are often leggy and weak when grown in window light.
But don’t rush out to buy those ultra expensive grow lights. Standard, inexpensive T8 or T25 fluorescent shop lights work perfectly fine.
With shop lights, simply place the lights about an inch and a half above the tops of the plants develop strong, slow-growing plants. Move the lights up as they grow to keep the 1-1/2″ distance
Once seeds germinate, their water needs will continue to grow each week. And making sure they get the right kind of watering is extremely important.
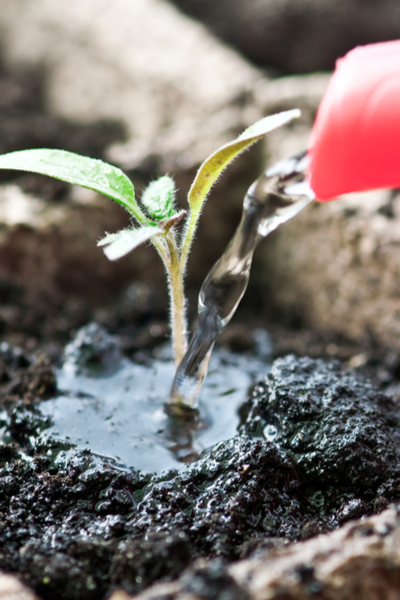

Check the soil with the touch of your fingertip every day. If it is dry to the touch, lightly water again. Soil should be damp, but not soggy. If the soil is too wet, it can easily rot seeds and drown seedlings.
So get those supplies prepared, and get ready to start your seeds inside this year!
This Is My Garden is a website dedicated to spreading the love and knowledge of gardening around the world. We publish two new garden articles each week. This article may contain affiliate links.