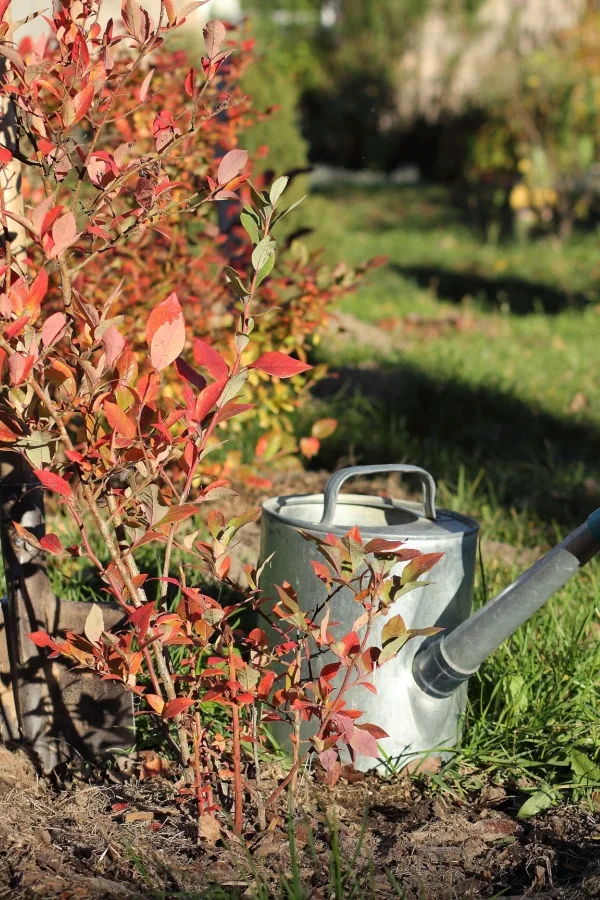
Nothing brings a landscape to life more than beautiful trees, shrubs and bushes. Here are all of our how-to articles on planting and maintaining these lasting beauties in the landscape:


Nothing brings a landscape to life more than beautiful trees, shrubs and bushes. Here are all of our how-to articles on planting and maintaining these lasting beauties in the landscape:
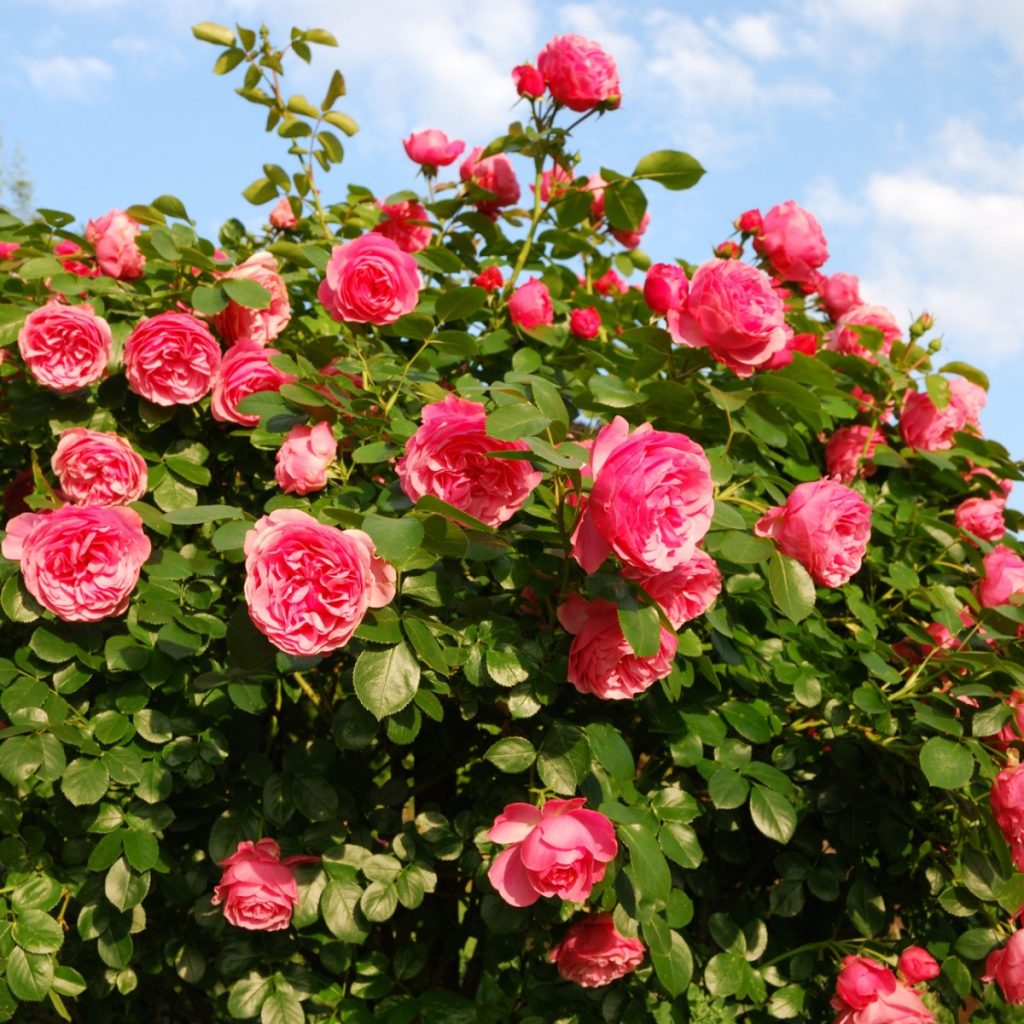
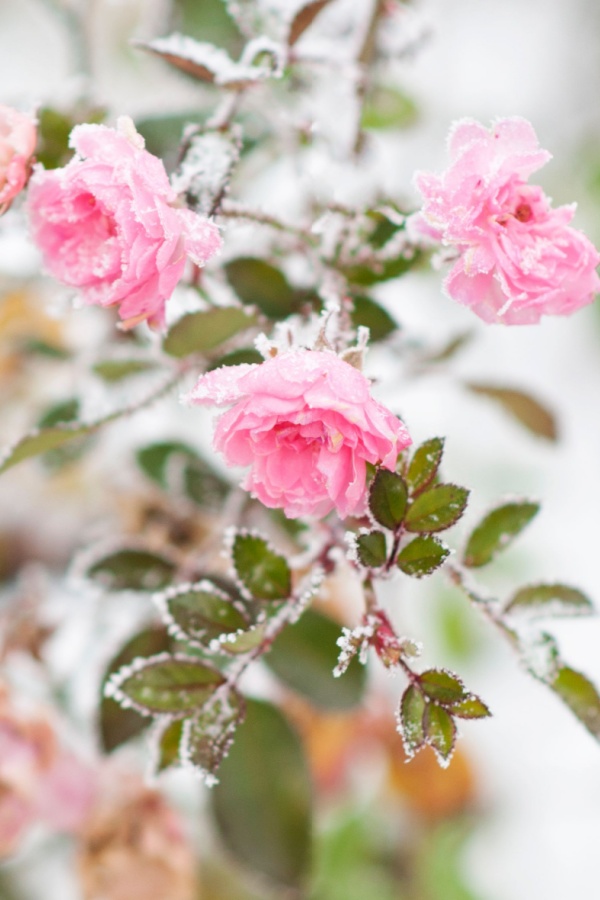
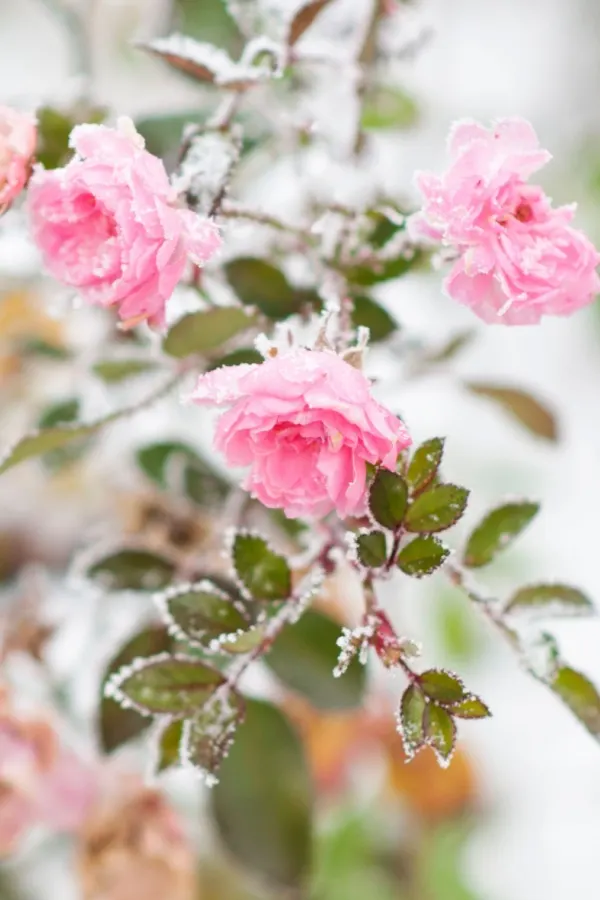
If you are looking for a few simple tips and tricks to get your rose bushes blooming more than ever this summer – then make this the year you fertilize and deadhead your roses like a pro!
Rose bushes are wonderful for adding elegance, beauty and interest to the landscape, especially when they are loaded with buds and blooms. But for many gardeners, keeping their rose bushes healthy and flowering strong can be challenging.
Weather, pests and disease and fungal issues can certainly all affect a rose bush’s performance. But more often than not, the reason a rose bush struggles to bloom and rebloom comes down to 2 simple and very controllable aspects of care – fertilizing and removing old blooms. The good news is that all both are not only simple to do, but also take little time to perform!

Plain and simple – rose bushes need energy and nutrients to bloom. And that is exactly why fertilizing is a must.
Because rose bushes require a tremendous amount of nutrients from the soil to bloom, they can often deplete the resources they need over time. Especially if your roses have been growing in the same location for multiple years. Fertilizing plays a huge role in getting the plant to produce additional blooms and flowers. It does this by replacing the energy the plant lost from its previous blooming cycle.
Unlike shrub and climbing roses that can be fertilized in the spring, more traditional roses such as Tea roses, Grandiflora, Floribunda and miniature roses all require more frequent energy boosts to power blooms. For these roses, you should be fertilizing every 3 to 4 weeks throughout the spring and summer.
There are several great options for powering your roses. Organically speaking, compost tea and worm casting tea are two of the best liquid fertilizing options. They tend to be less potent, so if using these options, fertilize every two weeks. See: An Easy Way To Make Compost Tea – How To Fertilize Plants Naturally With Perfect Power!

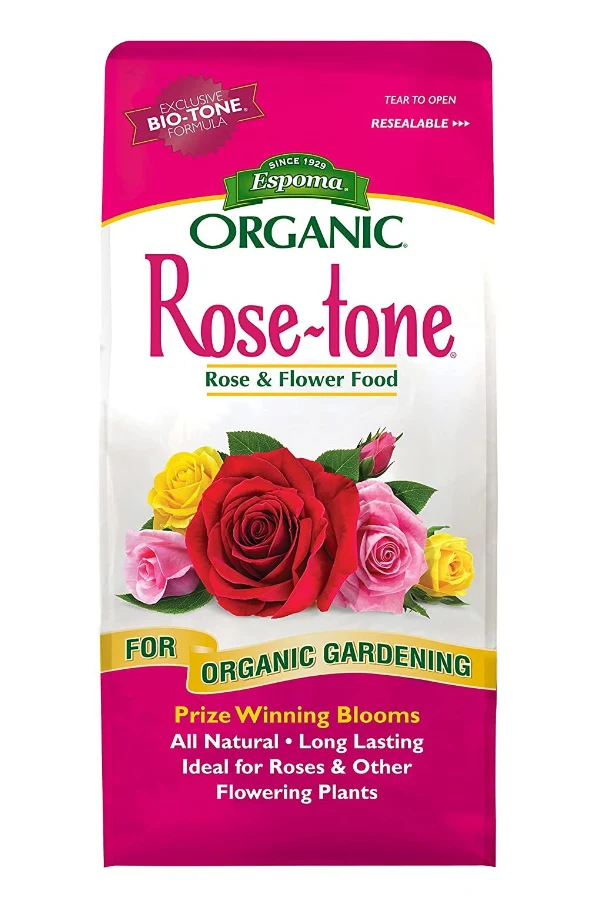
If you are looking for a commercial granular fertilizer option, it’s best to select a product specifically designed for roses. Rose Tone is one of our favorites for this. It has just a bit more nitrogen, which roses love, but not too much to overpower the bush. Product Affiliate Link: Espoma Organic Rose-Tone 4-3-2 Organic Fertilizer
This should be applied every three to four weeks to keep your roses full of energy. In addition to regular fertilizer feedings, spent coffee grounds can be a secret weapon for powering more blooms. Spent coffee grounds contain nitrogen along with other trace minerals that are highly beneficial to roses. Simply scatter three to four tablespoons of spent grounds once a month around each rose bush.
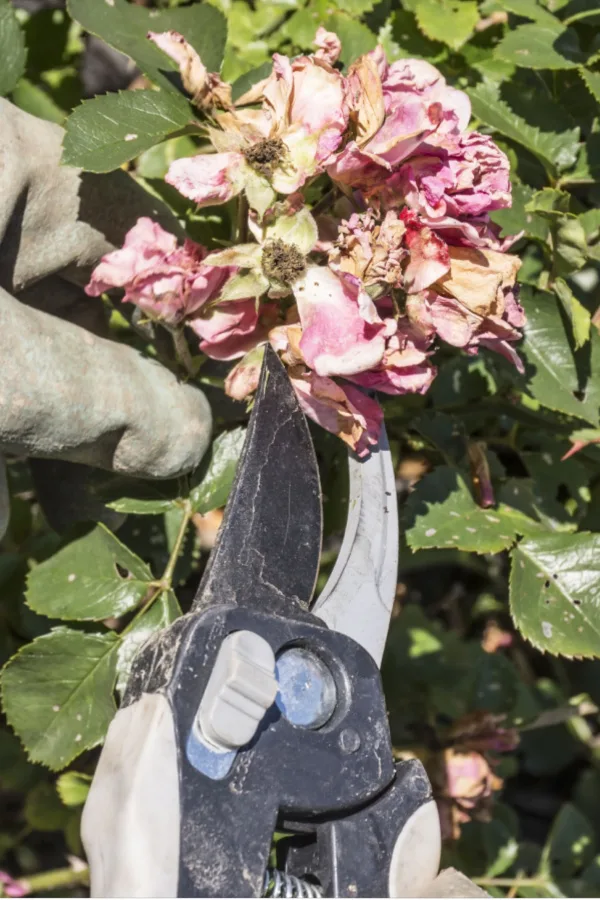
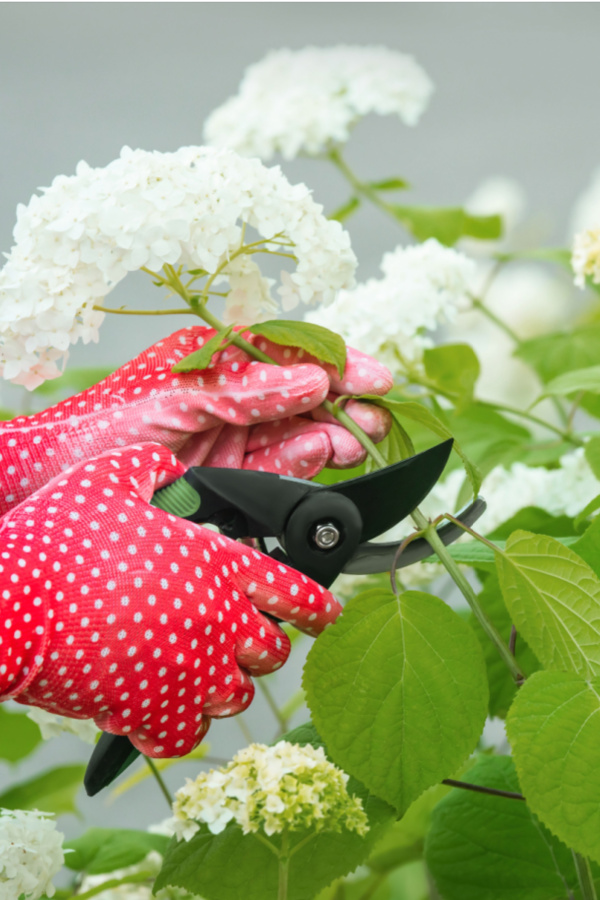
If there is one big mistake many rose growers make with their roses, it’s not removing old, decaying blooms quickly. By leaving old blooms in place, it can slow down and even stop the bush from blooming more. Even if you are giving your roses the perfect amount of fertilizer!
Deadheading, which is the practice of removing dying or dead blooms from a plant, is important for better blooming for many annuals and perennials. But it’s even more important than ever for rose bushes and their ability to bloom more.
When rose blooms are allowed to stay on the bush beyond their prime, it causes the plant to burn valuable energy. Energy that should be going to creating new blooms.

As long as old blooms remain attached to the plant, they continue to use and burn nutrients. The bush will continue to send additional power to the fading bloom in hopes of repairing it.
Unfortunately, no amount of energy will ever fix a dying bloom – so the effort simply wastes resources and takes energy away from the bush. And for a rose bush, that loss of power is critical when it comes to trying to create new blooms.
To remove a dying bloom correctly from a rose bush, cut the bloom off right below where it attaches to the main stem or branch. This will stop any and all energy the plant is burning to try to heal the old bloom. Once that occurs, the plant will then refocus on producing new blooms.
You can also lightly prune rose bushes during the summer months. This helps keep the plant in shape, and allows it more energy for blooming by removing excess stems and foliage. As with any plant, also take time to cut and remove any damaged leaves or stems – or any that show early signs of black spot, rust or other disease and mold issues.


As Autumn settles in, about three to four weeks before your typical first fall frost date, you will want to stop deadheading any spent blooms from your rose bush.
This will actually help protect the bush and prepare it for the upcoming winter. By allowing the roses to remain on the plant in the fall, it forces the plant to start heading into dormancy instead of trying to still create more new blooms.
Unfortunately, deadheading too late in the season leaves the plant vulnerable to winter damage. Deadheading will make the plant try to keep producing new stems and blooms. Not only is that new tender growth highly susceptible to freezing out, it also takes energy away from the plant it needs for winter.
Beyond taking the time to deadhead and fertilize rose bushes, they also need and use water to keep their stems and foliage healthy. But more importantly, they also need water to produce buds and blooms.
Without enough moisture in the soil during the hot and dry summer months, they will start to slow bloom production. And if they get dry enough, they will stop it altogether.
For proper health and flower production, your roses need to be getting one to two inches of water per week. If you are not getting that in rainfall, hand watering is a must.

Water slowly so that it can soak down into the soil eight to twelve inches deep. Unfortunately, when you dump a half-gallon or a full gallon of water on your plant all at once, most of it will run off and away from the root zone. But by watering slowly and intermittently, it can soak down in.
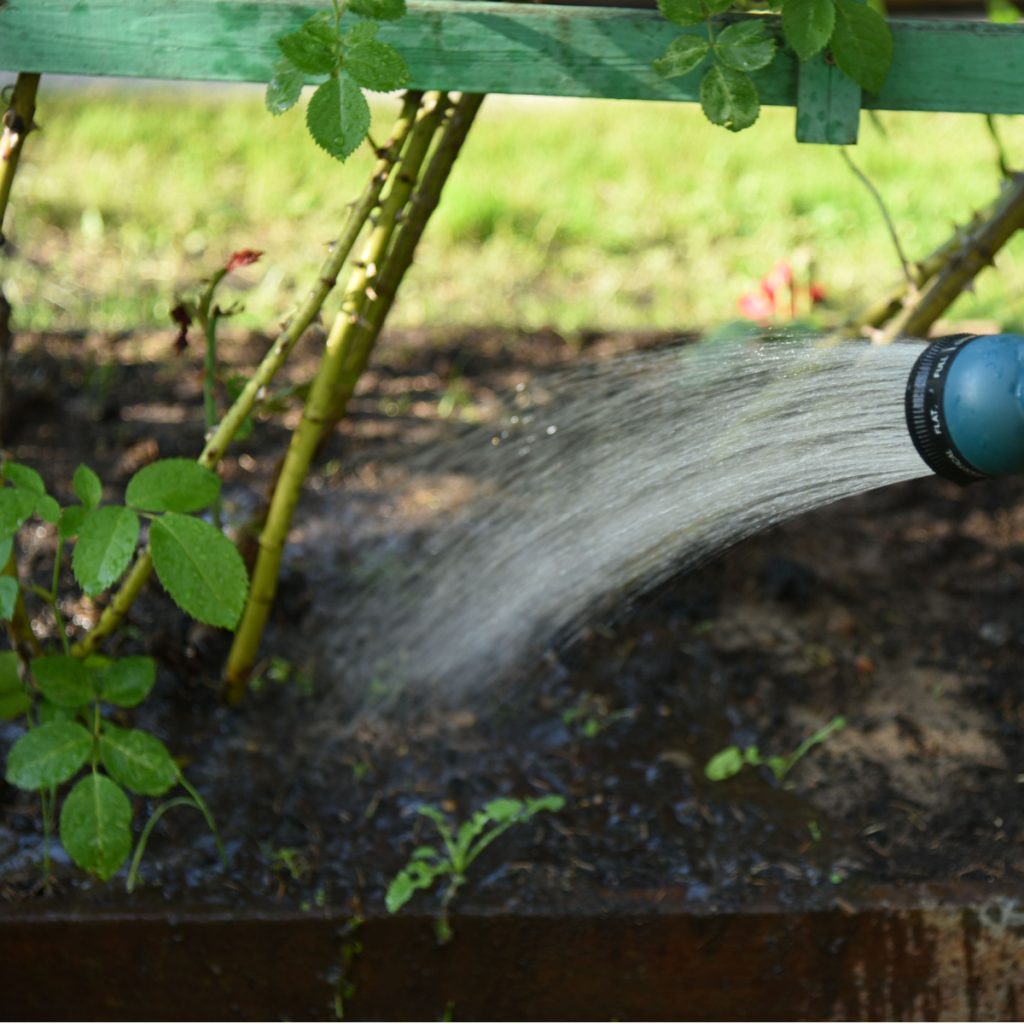
One thing you don’t want to do is water your rose bushes from overhead. When water hits and remains on foliage and blooms, it can leave the plants more susceptible to disease and mold. Spraying from overhead can also knock off future buds and young blooms.
Instead, water low at the base of your bush. With roses, it is better to water less frequently, but with deeper watering rather than daily shallow watering. Watering every day will keep roots near the surface, and not get them to drive deeper where they are more protected and have more nutrients to power them.
Here is taking the time this year to fertilize and deadhead your rose bushes on a regular basis. And – to getting more blooms than ever!
Follow Our Facebook Page For Great Gardening Tips And Advice! This Is My Garden Facebook Page
This Is My Garden is a garden website created by gardeners, for gardeners. Jim and Mary Competti have been writing gardening, DIY and recipe articles and books and speaking for over 15 years from their 46 acre Ohio farm. They publish three articles every week, 52 weeks a year. Sign up today to follow via email, or follow along!
Looking for some of the best deer resistant bushes to plant in your yard this year to finally put an end to deer damage?
Deer are notorious for wreaking havoc on gardens, flowerbeds – or any area with vegetation they find appealing. Especially once winter arrives and fresh leaves, berries, and fruits become more and more scarce.
Watching deer damage the plants and shrubs around your home can be both disheartening and costly. It hits home even harder when you find yourself repeatedly replacing expensive perennial bushes and shrubs. But is there really anything you can do?
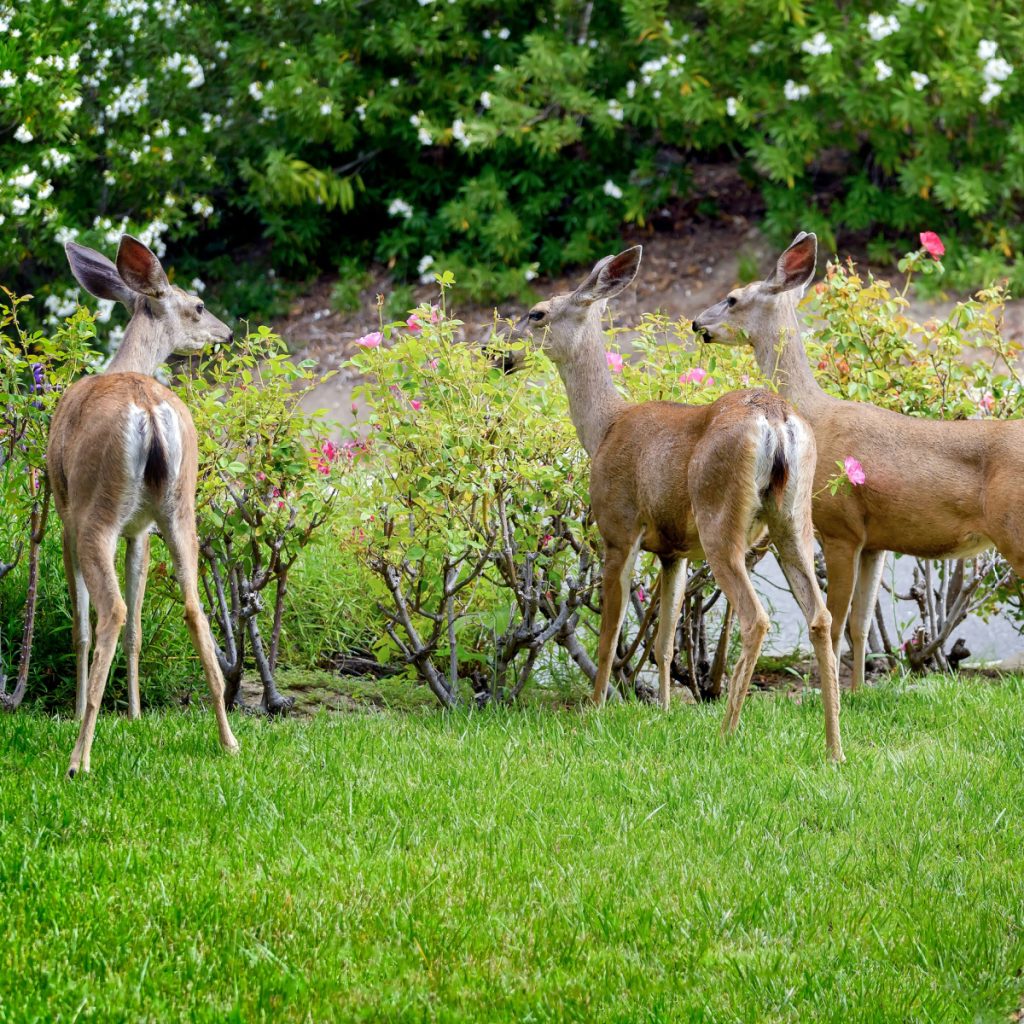

Sadly, even the most reliable deer proofing deterrents aren’t foolproof. While homemade sprays made with ingredients like hot peppers, garlic or eggs can provide some protection, they can lose their effectiveness if not reapplied regularly. And the same goes for commercially available repellents and sprays as well.
That leaves fencing as the only real option to stop deer in their tracks. And to work against deer, fencing has to be both high and strong enough to work – and that can come with a hefty price tag. But believe it or not, there is another option – to simply to plant and grow bushes and shrubs that deer don’t find appealing in the first place!
Adding deer-resistant plants to your landscape not only protects those specific bushes – but it can also help safeguard nearby plants that deer might typically enjoy. And by making your yard a less inviting food source overall, deer are more likely to move on to other areas.
It’s important to note that deer resistant does not mean deer proof. But planting varieties that deer don’t find to their liking will certainly lead to keeping plants far safer than if you don’t!
Even better, choosing deer-resistant shrubs doesn’t mean sacrificing beauty. In fact, there are actually quite a few deer resistant bushes that offer incredible beauty, texture and color to your yard. And with that in mind – here is a look at some of the best of the best choices to keep deer out!


If you’re searching for a deer-resistant shrub that adds vibrant early season color to your yard, forsythia is an excellent option. The hardy bush blooms in striking golden hues, well before its leaves ever appear in the spring. And can it ever bring life to the landscape!
Not only is it attractive in bloom, it’s also a big favorite among pollinators like bees and butterflies. Birds, too, are drawn to its dense foliage, which offers excellent cover. But when it comes to being a food source for deer – they simply do not like the bitter taste of the plant. Because of this, they usually steer clear of it. Affiliate Plant Link: Brighter Blooms – Lynwood Gold Forsythia Shrub, 1 Gal.
Forsythia works well as a standalone plant or when planted in a row to create a thick, long hedge. The hedges can work quite well as a natural “deer barrier,” offering extra protection for other plants in your garden. Forsythia thrives best in moist, fertile soil for optimal growth.
There are actually several reasons deer are not fond of boxwoods. For starters, the bush contains alkaloids that are toxic to deer. But if that wasn’t enough, the aroma of boxwoods also keeps deer far away as well. Together – the two features make them highly unattractive to deer.
Boxwoods require very little upkeep and offer incredible flexibility for growing almost anywhere in the landscape. Whether planted alone or in clusters, they work well for lining walkways and entrances. They’re also among the easiest shrubs to trim into different shapes. But best of all, they are very unattractive to deer!
With many varieties available, there’s a boxwood for every need. Some types even do well in pots, making them perfect for patios and porches. Since they tolerate both full sun and partial shade, and are also drought-resistant – they’re a great choice for almost anywhere in your yard!
Barberry bushes are another excellent choice for keeping deer at bay, thanks in part to their sharp, thorny branches. Deer typically avoid plants with spines or tough textures, and most barberry varieties have them. It certainly makes them the perfect natural deterrent in the landscape.
In addition to their prickly defense, barberry bushes have a slightly bitter taste, which deer prefer not to eat. The hardy shrubs thrive in a variety of conditions and can grow well in growing zones four through eight. Making them ever more desirable, they can be found in reds, greens and even yellow foliage colors.
Barberry bushes prefer well-drained soil and can tolerate both full sun and partial shade, though they produce the best color and growth in sunnier locations. Once established, it is also highly drought-resistant bush, making it a great choice for low-maintenance landscaping.


Whether used as a hedge, border plant, or accent shrub, barberry offers both beauty and protection for your outdoor space and for nearby plants that deer might find to their liking.
No deer resistant list would be complete without mentioning lilacs. Lilac bushes are among the most aromatic plants, especially when they’re in full bloom. Their strong, sweet scent is overwhelming for deer, and usually keeps them at a distance.
They can also grow quite large and serve as a shield for other plants that deer typically enjoy. Their powerful fragrance is so strong that it can help to keep deer from wondering in to check out other plants that are growing nearby.
One of the best things about lilacs is just how low-maintenance they are. Suitable for growing in zones three all the way to seven, they thrive in full sun and with well-draining, nutrient-rich soil. Once planted – they require very little care at all!
In addition to the top four bushes highlighted today, if you are looking for a few more excellent shrubs that deer don’t prefer to eat – you can also try Viburnum & Butterfly bushes. Both are also highly deer resistant and also quite easy to care for.
Here is to filling your landscape with beauty and color – and not deer! And for more great deer stopping info, check out our article: How To Keep Plants Safe From Deer In The Fall & Winter – 5 Great Ways To Stop Deer!
Follow Our Facebook Page For Great Gardening Tips And Advice! This Is My Garden Facebook Page
This Is My Garden is a garden website created by gardeners, for gardeners. Jim and Mary Competti have been writing gardening, DIY and recipe articles and books and speaking for over 15 years from their 46 acre Ohio farm. They publish three articles every week, 52 weeks a year. Sign up today to follow via email, or follow along!
Looking for a few of the best evergreen shrubs to plant and grow in your landscape this year? Evergreens are one of the easiest ways to keep color and texture in your landscape. And more importantly, color that will last all year round!
In the spring, summer and fall, bringing a bit of pizazz to your landscape is easy. All it takes is a few annuals, hanging baskets, or flowering perennials to do the trick. But in the cold, grey days of winter, all of that beauty disappears – and it is exactly where evergreens can save the day.
Evergreens, unlike deciduous trees and shrubs, keep their foliage all year long. But planting a few here and there can be more advantageous than just adding a splash of color and texture. It also provides excellent cover, protection and even food for many birds and wildlife.

So with bringing a little four season life to your yard this year in mind – here is a look at six excellent choices for year round greenery – and even a little flower power to boot!
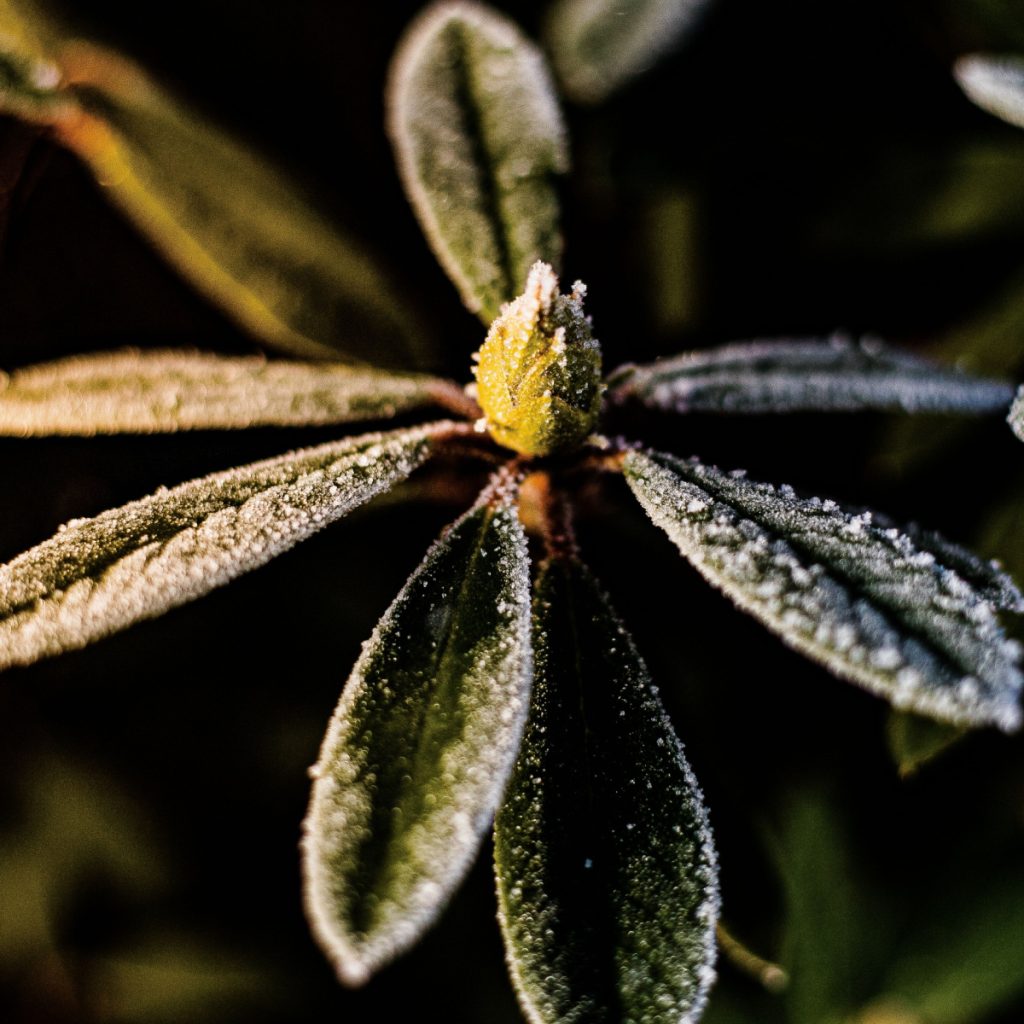
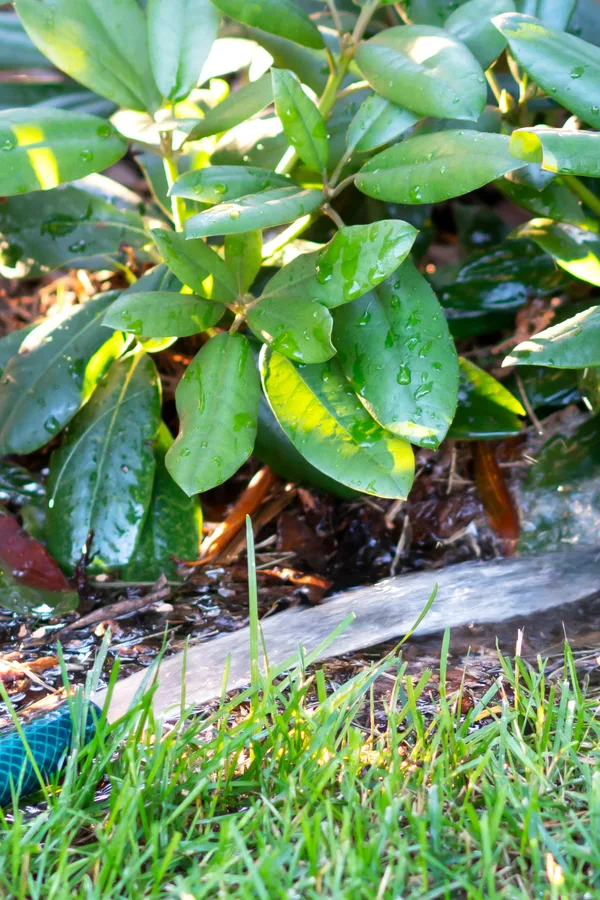
With their lush, evergreen foliage and vibrant seasonal blooms, rhododendrons (pictured at the top of the article) are one of the best choices of all for adding year-round interest to your landscape
The shrubs are well known for their stunning flowers, which come in shades of pink, purple, red, white, and yellow. The blooms typically appear in late spring to early summer, but long after the blooms fade, their large, glossy leaves still provide a lush, green backdrop anywhere they grow.
Rhododendrons thrive in partial shade and need well-draining, acidic soil for good growth and flowering. In nature, these bushes grow in and near wooded areas, so they will perform best when planted around taller trees or alongside other shade-loving plants.
When planting, be sure to dig a wider hole. Rhododendrons roots grow shallow but out far and wide. That means loosening a large surface area around their roots will help them develop more easily. Always be sure to mulch year round as well to help retain moisture and protect the roots from extreme temperatures.
Rhododendrons are actually quite easy to maintain. Once established, they rarely need watering – and only need occasional light pruning to remove spent blooms or shape the plant. Affiliate Plant Link: Brighter Blooms White Rhododendron – Flowering Plant, 1 Gallon.
There are more than 350+ varieties of boxwoods to choose from, with foliage ranging in all sizes and shapes. Boxwoods are extremely easy to keep pruned, and are excellent choices for evergreen shrubs to use as hedges along walkways and fences.
Their leaves can range from waxy dark green, to variegated shades of light green and white. And do they ever hold their shape beautifully! In fact, it’s one of the reasons they are a top choice for topiary artists.
In the home landscape, they are an excellent selection for those looking for a low maintenance, easy care evergreen. They also happen to perform very well in pots too as long as they get a bit of protection from severe winters. See: How To Protect Potted Evergreens In The Winter
Boxwoods prefer a slightly acidic soil that is well draining. They can grow in full sun but prefer to be in partial sun/shade. If they get too much sunlight, they can suffer leaf scald. Affiliate Plant Link: Winter Green Korean Boxwood
Holly bushes are loved for their glossy evergreen foliage, bright berries, and wide range of growing habits. Hollies are available in a variety of species and sizes, making them suitable for hedges, foundation plantings, or as a single focal point in a flowerbed.
The vibrant red berries of hollies that come on in the fall can really add a punch of color against the winter landscape. The berries also serve as a very valuable food source for birds during the colder months.
When planting hollies, if you want berries, it’s important to know that you must plant both male and female holly shrubs. Without that, they will be sterile for berry production.
Holly will grow best in full to partial sunlight, but it does need well draining soil. The plant will struggle to do well in overly hard or wet soils. When planting, it’s essential to space them properly to accommodate their mature size and ensure good air circulation.
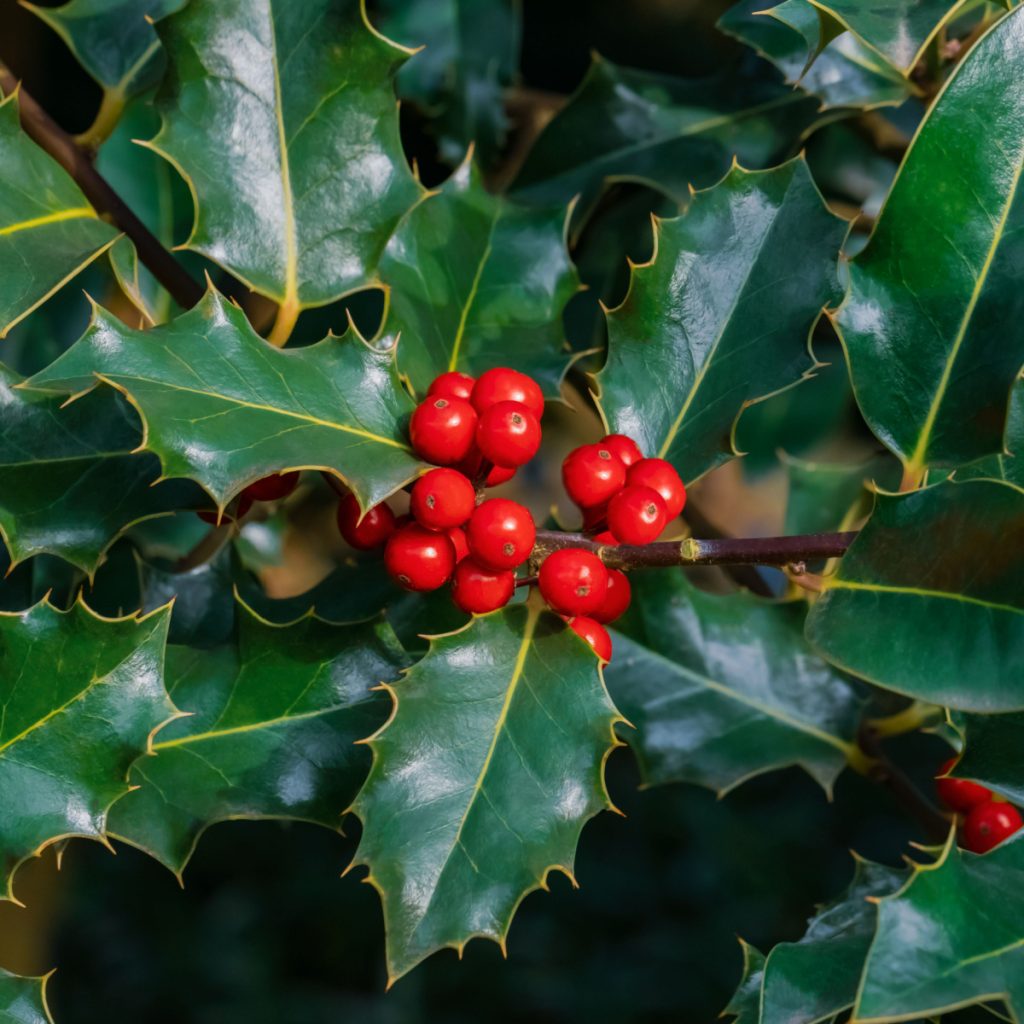

Once established, holly shrubs are drought-tolerant and relatively resistant to pests, making them a low-maintenance addition to any garden. They also are great for planting if deer are around – as they do not like touching the sharp foliage.
Wintercreeper is an excellent choice to add solid year-round color to the landscape. With its shapely mounds, it fits nicely into almost any setting. Many varieties have variegated leaf patterns to add additional interest. And in the winter, that foliage turns to a pinkish/reddish color to stand out even more.
Wintercreeper performs well in shady locations, and is hardy in zones 5 through 8. One of the traits that make it so attractive is that it can grow in conditions that range from partial shade all the way to full sun.
This shrub can grow fast. In fact, fast enough that in some locations it is considered invasive. With that in mind, it is best to check with your local extension agent before planting.
Tthe Arborvitae is an evergreen shrub that can fit almost any need. The shrubs have a conical or pyramid shape and can be found in sizes from just a foot tall to over 35 feet! They can make for an excellent hedge, as their foliage is thick and dense.
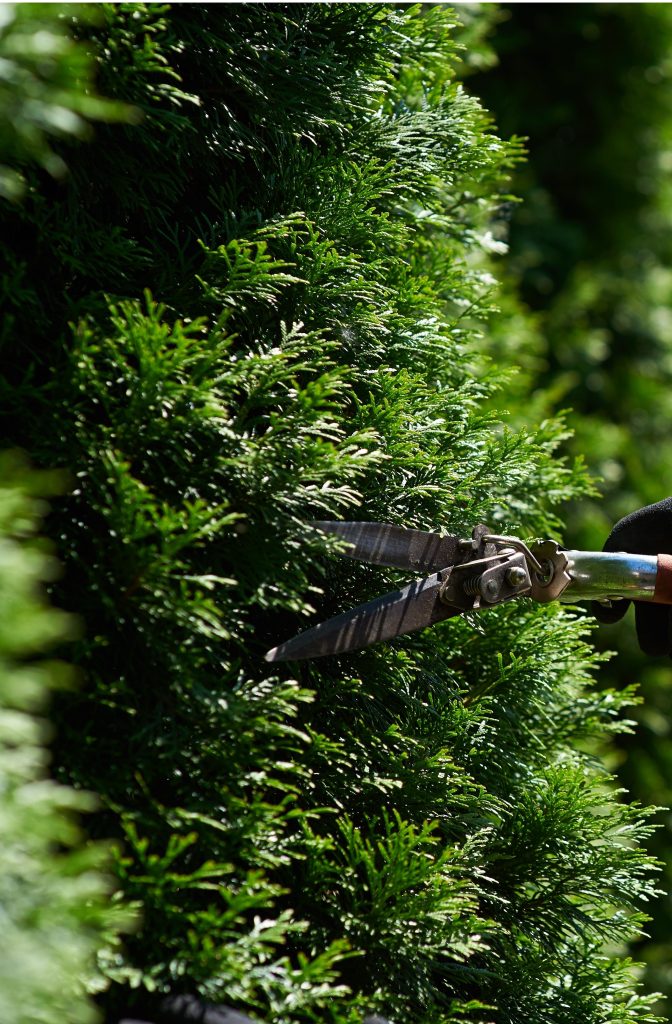

Even better, they are quick growers, and require little maintenance. Arborvitae holds their shape well, and require little pruning or shearing. They are hardy in zones 5 through 8 and will perform best when located in full sun. Affiliate Link : Spring Grove 1 Gal. Arborvitae
Looking for an excellent evergreen shrub for the shadier locations of your yard? Mountain Laurel is the answer! Even better – not only do they perform well in heavily shaded areas, they can also be planted in mostly sunny locations too.
Mountain laurel plants will thrive in zones 5 through 9, and mature to about 6′ to 8′ high and wide. The dark green glossy foliage is beautiful the whole year round. Even better, its bark tends to become twisted and gnarled, adding an extra layer of visual interest.
If that wasn’t enough, Mountain Laurels also produce a gorgeous 1″ style cup flower in the early months of May and June that are simply stunning. It’s just one more evergreen shrub that can keep your yard more lively twelve months of the year.
Here is to planting a few evergreens into your landscape – and bringing a little life to it all four seasons!
Follow Our Facebook Page For Great Gardening Tips And Advice! This Is My Garden Facebook Page
This Is My Garden is a garden website created by gardeners, for gardeners. Jim and Mary Competti have been writing gardening, DIY and recipe articles and books and speaking for over 15 years from their 46 acre Ohio farm. They publish three articles every week, 52 weeks a year. Sign up today to follow via email, or follow along!
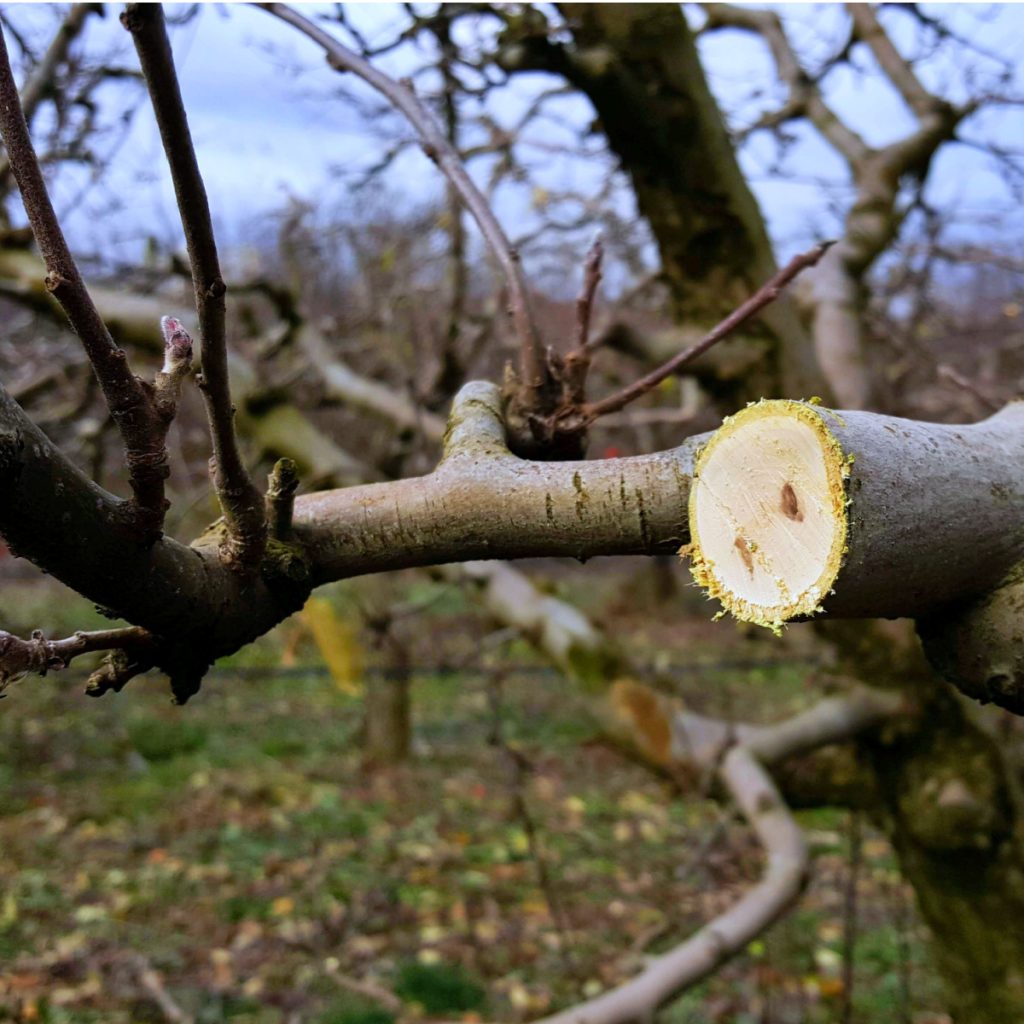
Whether you have apple trees, plum trees, cherry trees or any other variety of fruit trees – the ideal time to prune them is right in the middle of winter – when they are completely dormant and resting up for next year!
Many gardeners struggle when it comes to knowing when they should prune their fruit trees. For most perennial plants, bushes and trees, fall is a great time for cutting back before winter sets in. And for many other plants, spring is the better choice. But for fruit trees, winter is actually the time to take action!
Pruning in the winter not only helps create a healthier tree, it also can lead to bigger and better fruiting for your trees. Unfortunately, trees that are left to grow unchecked are not just unsightly, they will also bear smaller fruit. And over time, less of it.

Why is fall bad for trimming back fruit trees? Because the act of pruning stimulates new growth. And as trees prepare for winter and head into dormancy, new growth can be quite detrimental to their health. This is actually true for quite a few perennial bushes too. See: 3 Perennials You Should Leave Alone In The Fall
With fall fruit tree pruning, new growth shoots don’t have adequate time to harden off before winter’s freezing temperatures settle in. In addition, the cuts from pruning don’t have adequate time to heal either. Both can and will leave a tree susceptible to the harsh conditions winter can bring.
So why prune in the winter versus spring or summer? In the spring, when a fruit tree first comes out, it is concentrating all of its energy on filling out a canopy of foliage – and unfurling its blooms for future fruit. But if you prune as that occurs, all of that energy is then diverted to healing and re-growth.
Summer pruning presents the same stressful issues as well for fruit trees. At this point, the energy that should be going to filling out fruit once again goes to healing and re-growth.
In winter, because fruit trees are dormant, there is little stress to a tree when it is cut back. In fact, in full dormancy, there is no stress at all. And that allows the tree to conserve and store more energy for flowering and fruiting once spring and summer arrive.

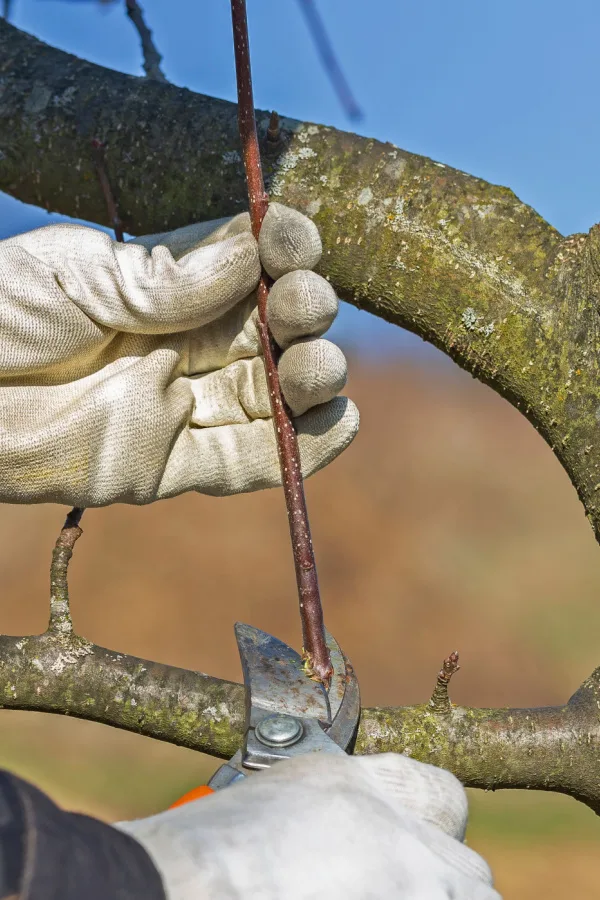
Last but not least, because all of a fruit tree’s leaves are gone for the season in the winter, branches are easy to see and cut. That is certainly not the case when trying to prune back a full canopy of leaves in spring or summer!
So now that we have established why winter is the optimum time for pruning, here is a look at how to go about it this winter to get your trees in shape for big production next year!
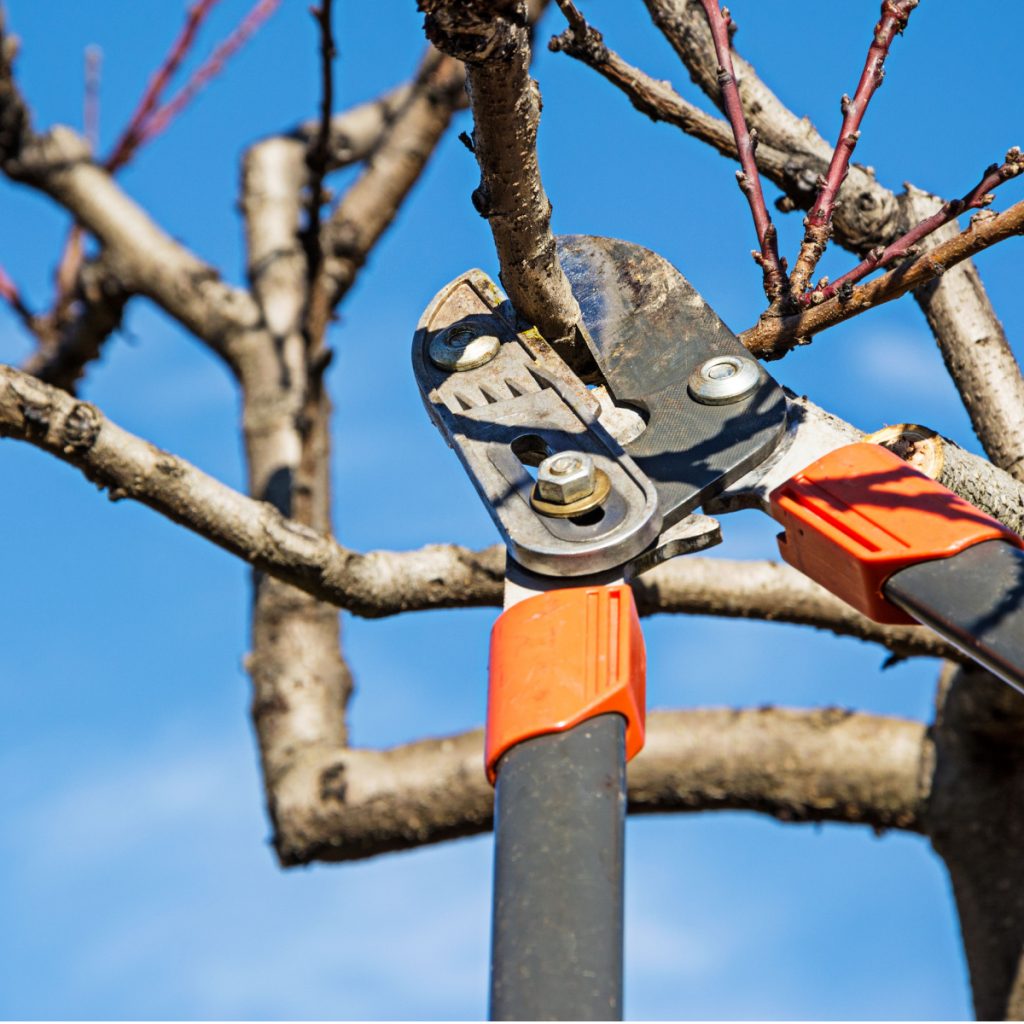
Success with pruning all begins with having the proper tools for the job. For pruning fruit trees, 3 basic tools are all you need – a pruning saw or mini hand held chain saw, a pair of pruning loppers, and a good pair of hand held pruners.
A pruning saw or mini chain saw is perfect for removing large limbs and branches quickly. Mini chain saws really make this task easy – and with the advent of battery operated units that are lightweight and easy to operate – they are certainly a great option to avoid all of that hand sawing! Affiliate Link: Saker Mini Chainsaw,6 Inch Portable Electric Chainsaw Cordless


Loppers are good for removing most small to mid size branches up to a few inches in diameter. The hand pruners, meanwhile, are ideal for easily clearing away the smaller shoots and starts. As for the loppers and hand held pruners, investing in a ratcheting tool versus traditional pruners can be extremely helpful.
Ratcheting pruners use a gear and ratchet to make pruning thick or tough limbs far easier. Instead of traditional models that use just hand pressure to cut, the gear allows you to cut bigger with far less pressure. Affiliate Link: Garden Guru Ratchet Hand Pruning Shears
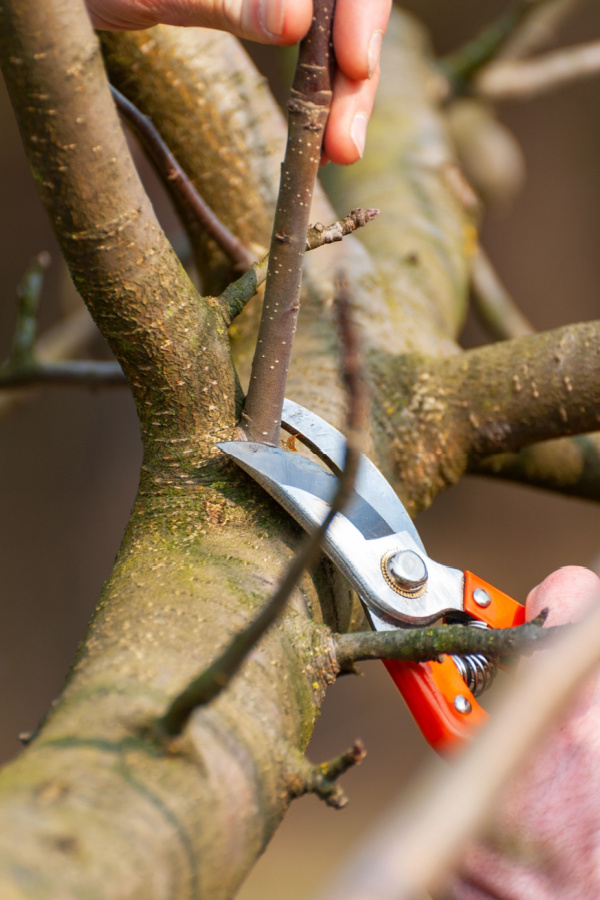
Now that you have the tools you need – here’s how to prune like a pro!
When it comes to pruning fruit trees, no matter the tree variety, you can complete the process in three easy steps – and the first step is always starting with clearing away any wood that has damage.
Begin pruning your fruit trees by removing any wood that is dead, diseased or damaged. The last thing you want is a tree spending energy attempting to heal damaged limbs, so your first cuts should concentrate on eliminating any wood that is less than ideal.
When making cuts, always trim back any limbs flush to the trunk or limb. Keeping all cuts flush keeps the tree from having tiny stubs. Not only are they unsightly, they will often produce new, unwanted growth from the stub.
Next, it’s time to begin to thin out the tree. This is the one pruning task that often causes more angst than any other. The good news is, keeping it simple is the key to success. For thinning out, think of pruning as opening a blind or window shade for the tree.
Trees, much like vegetable plants and flowers, need light and air to survive and thrive. Thinning is an important step that opens up the tree canopy to let air and light in. By doing this, it allows the fruit to form and ripen better. It also helps to improve the overall health of the tree.
To thin, begin by removing branches that cross each other’s path. Remove the smallest or least healthy of the two crossing. Repeat this process until the branches within the core of the tree are not touching. This will allow the necessary light into the tree.
Next, remove branches with horizontal or downward growth. These branches struggle to hold mature fruit. Branches that grow upwards or at an upward angle are the best to leave. They naturally hold fruit more securely.
Finally, the very last step is to trim back a portion of last year’s growth. This process helps to strengthen the tree, and conserve vital nutrients from being spent on too much overgrowth.

When trimming back tree growth, a good rule of thumb is to take off about a quarter (25%) of last year’s growth. This will help to shape the tree into a nice form, and keep it manageable. That is not only good for the tree, but for harvesting as well!
One thing you always want to do when pruning any bush or tree is to make sure your pruners are sharp before you begin to cut. Dull blades will tear limbs, branches and bark. This causes both stress and injury to the tree.
Having a clean blade is equally important. The metal blades and teeth on pruners and saws can easily carry disease from tree to tree. Before cutting, wipe down blades with rubbing alcohol, or a 5/1 solution of water and bleach. It’s also important to clean the blades between whenever you move to a new tree.
Once you finish cutting back last year’s growth, all that is left is to pick up the trimmings from around your trees. Cleaning up any branches not only keeps your landscape tidy, it will keep your mowing blades safe and sharp next spring too. Here is to pruning your fruit trees this winter for bigger and better fruit next summer! Winter also happens to be the ideal time for pruning grape vines as well – see Why You Need To Prune Your Grapevines In The Winter – And How To Do It!
Follow Our Facebook Page For Great Gardening Tips And Advice! This Is My Garden Facebook Page
This Is My Garden is a garden website created by gardeners, for gardeners. Jim and Mary Competti have been writing gardening, DIY and recipe articles and books and speaking for over 15 years from their 46 acre Ohio farm. They publish three articles every week, 52 weeks a year. Sign up today to follow via email, or follow along!
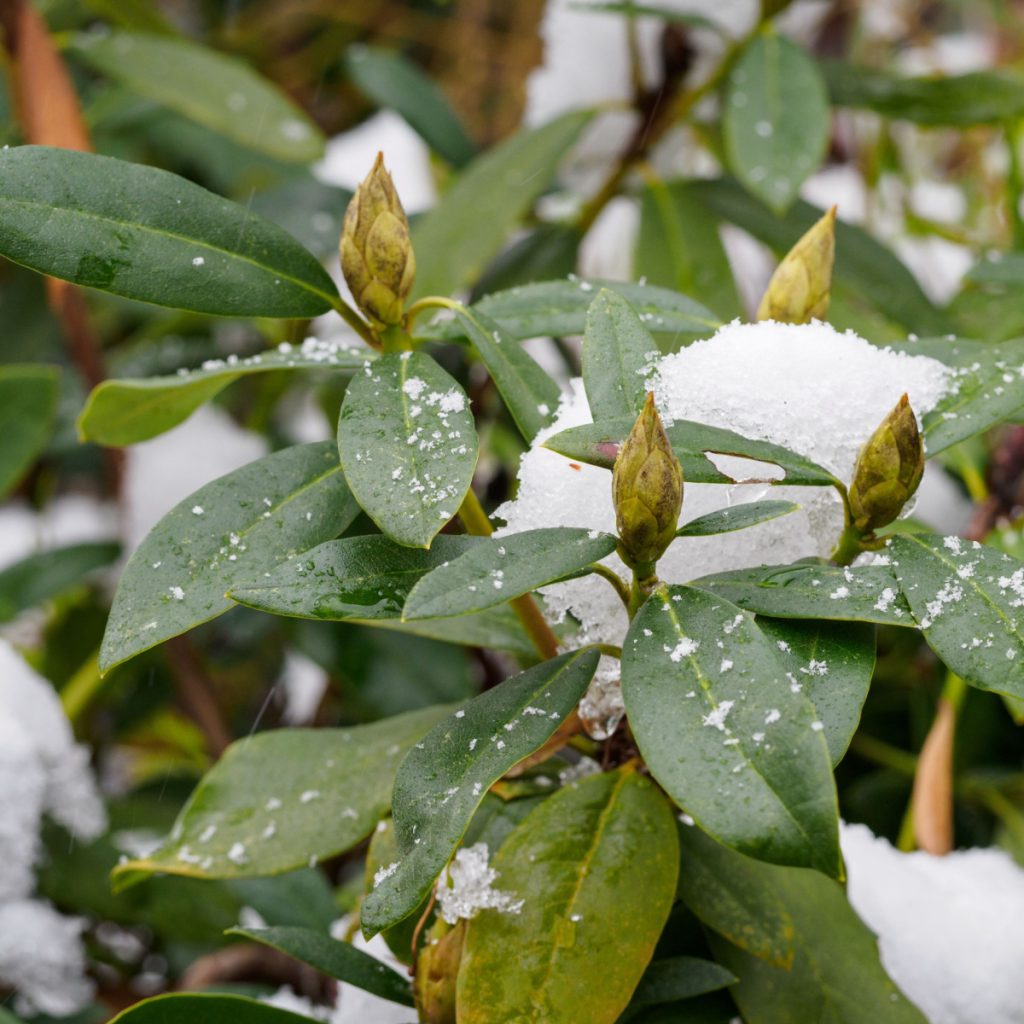
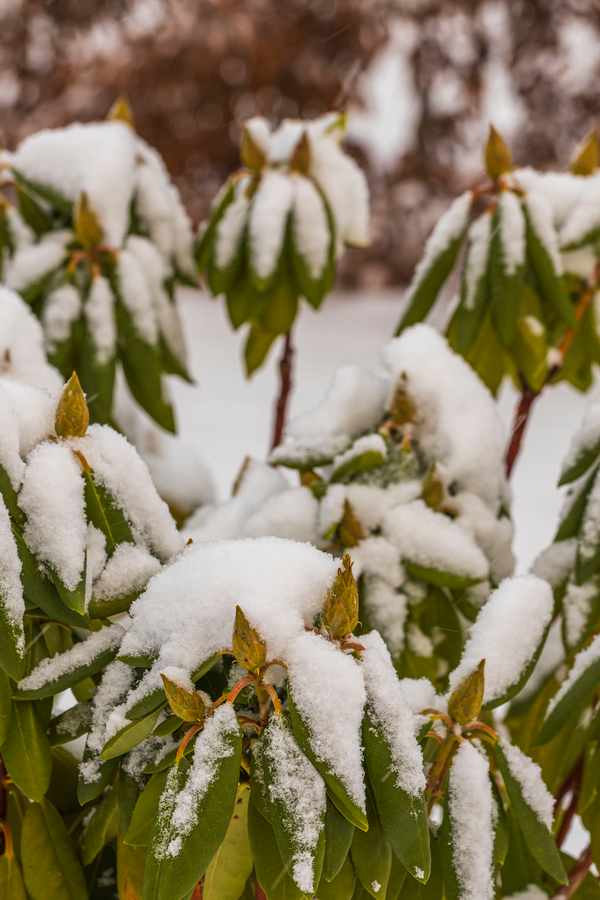
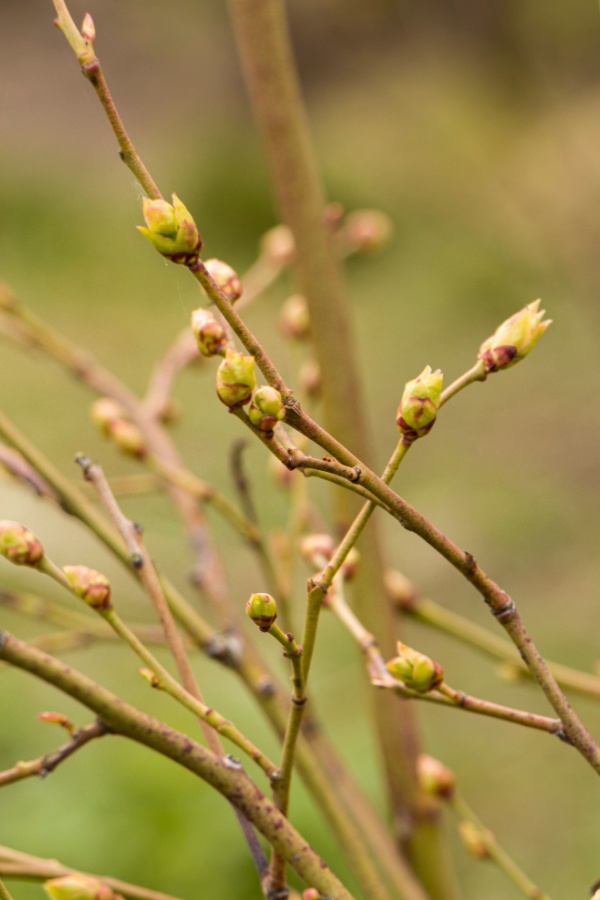
Did you know the care you give your rhododendrons in the fall can have a huge impact on their health – and how well they bloom next year? And even more importantly, if they even bloom at all!
Rhododendrons provide amazing beauty and elegance to the landscape all year round. Although some rhododendrons are deciduous and drop their leaves in the cold winter months, many varieties keep their greenery all winter long to provide interest and color through the stark and dreary months. And when spring arrives, can they ever explode with blooms and color!
But when it comes to getting those blooms to be brighter and more plentiful than ever – how you prepare your rhododendron for winter this fall really can play a big part in their long term overall health and vitality.

As you will see below, sometimes, when issues arise with plant health or blooming, it’s not from a lack of care in the fall – but quite often, too much care!
Before we take a look at what you need to be doing for your rhododendrons in the fall – let’s cover a few things you shouldn’t be doing – the first of which is fertilizing!
Although it may seem like a good idea, rhododendrons should not be fertilized in the fall. For starters, fertilizing right before the winter months can promote weak, tender, late season growth. Unfortunately, that late growth is highly susceptible to damage from hard frosts or a freeze.
In much the same fashion, late fertilizing can also encourage root growth that is just as vulnerable. Instead, fertilizer should be applied in the early spring, just as the bush begins to form its buds. Use a high quality fertilizer that is geared for acidic loving plants.
Fertilizers that are specifically labeled for use with azaleas, rhododendrons and camellias are the best choices. Product Affiliate Link: Schultz SPF48340 Slow-Release Rhododendron Fertilizer

In general, when it comes to rhododendrons, pruning should always center more around general shaping and maintenance – and not around cutting the bush back on a regular basis. Less is definitely more when it comes to pruning these bushes.
Rhododendrons simply do not require regular or massive pruning to continue flowering. But with that said, there are certain times that are better than others for shaping and maintaining the look of your rhododendron – and fall is not one of them.
The only thing to prune back in the fall is any spent flowers that remain on the bush. Beyond that, all pruning beyond that should cease for the year. Unfortunately, late summer and fall pruning creates tender late season growth that is susceptible to winter freeze and damage.
Instead, prune in late winter or early spring, when the bush is dormant, or just beginning to come out of dormancy. In the case of rhododendrons that have become overly large, heavy pruning will not kill the plant, however, it may take a full season to regrow and regain its strength for blooming.
If you are going to undertake a heavy prune, early spring or just before the bush begins to leaf out coming out of winter is the best time. Know that heavy pruning may delay blooms for a year as well.
So what should you be doing for your rhododendrons in the fall? Actually, there are several key chores that will help them, and the first is making sure they are getting enough water.
More than anything else, rhododendrons suffer from a lack of moisture over the winter months. Winter winds whip branches and foliage and dry them out quickly. And as the ground freezes over, it makes it hard for moisture to make it down to the roots.
One of the best ways to help combat these two issues is to make sure your rhododendron receives plenty of hydration in the fall. Water bushes regularly in the fall until the ground freezes over, especially if rains are inconsistent.
A good soaking once a week is more than enough to provide the necessary water to the roots. Not only does it help to hydrate the plant’s roots, but it also allows the plant to take in nutrients more easily.
When watering, place the hose at the root zone of the plant near the soil. Avoid spraying the leaves or using a sprinkler when watering. Not only is much of the water lost through evaporation when spraying, the wet leaves can also make it easy for disease to develop in the cool fall temperatures.

Nothing can beat a good layer of mulch to help conserve moisture, control weeds, and help protect your rhododendron through the long winter months.
Wood chips, straw, shredded leaves and pine needles are all good for mulching. Pine needles, if available, are one of the best choices of all. As an added benefit, as they break down, they can help to create a more acidic soil, which rhododendrons prefer. Especially if you use some green needles when mulching. (For more tips on ways to use pine needles to power your plants and soil, see: The Best Way To Use Pine Needles To Mulch Acid Loving Bushes & Plants – Before Winter Arrives!)
Mulch the bottom of your shrub to include the entire root zone of the plant. The best way to ensure this is to mulch out to the edge of the leaf canopy. A three to five inch thick layer of mulch should be more than enough to do the trick.
One final note on mulching, do not pile an excessive amount of mulch right up around the main base or trunk. In fact, leave your mulch a few inches back from this area. See: How To Mulch Fall Flowerbeds – Stop Next Year’s Weeds Now, For Good!
If piled too thick around the base, it can actually encourage rot if the soil receives too much moisture. By backing the mulch off a few inches from the base, it can allow the air to flow through to the main trunk area.
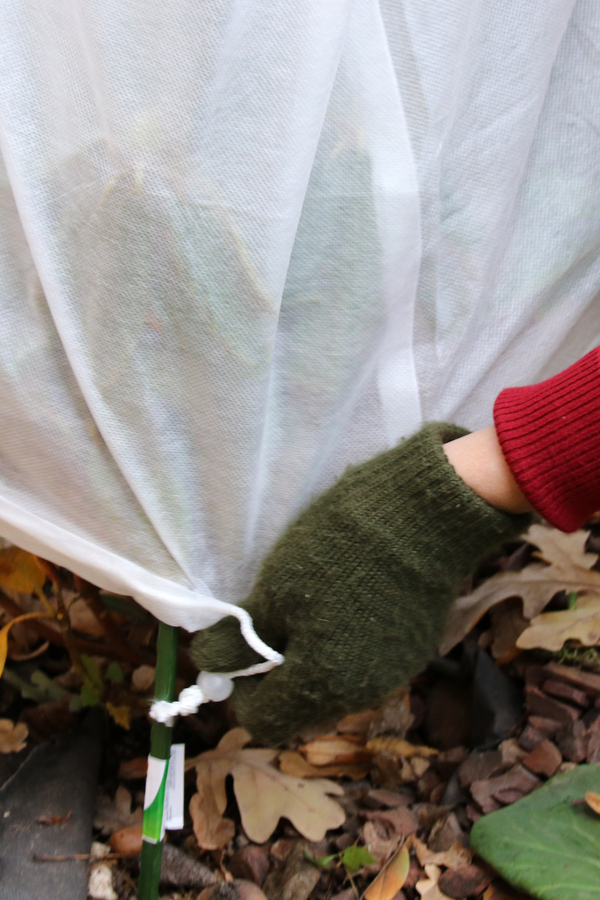

Beyond fall watering and mulch, rhododendrons can benefit greatly from a bit of wind protection through the winter. Especially if they are located in a part of the landscape that has no natural wind blocks in place. Affiliate Link: 47″×40″ Reusable Warm Burlap Winter Plant Cover Bags
For bushes located in vulnerable locations, a burlap or mesh plant cover works best. Both of these allow air, water and light through, but keep winds from whipping the leaves, which can both dry out the plant and damage the foliage.
Here is to getting your rhododendrons ready for winter this fall – and to bigger and better blooms next year! For more fall perennial care tips, see: 4 Common Mistakes Gardeners Make With Hydrangeas In The Fall – And How To Avoid Them!
Follow Our Facebook Page For Great Gardening Tips And Advice! This Is My Garden Facebook Page
This Is My Garden is a garden website created by gardeners, for gardeners. Jim and Mary Competti have been writing gardening, DIY and recipe articles and books and speaking for over 15 years from their 46 acre Ohio farm. They publish three articles every week, 52 weeks a year. Sign up today to follow via email, or follow along!
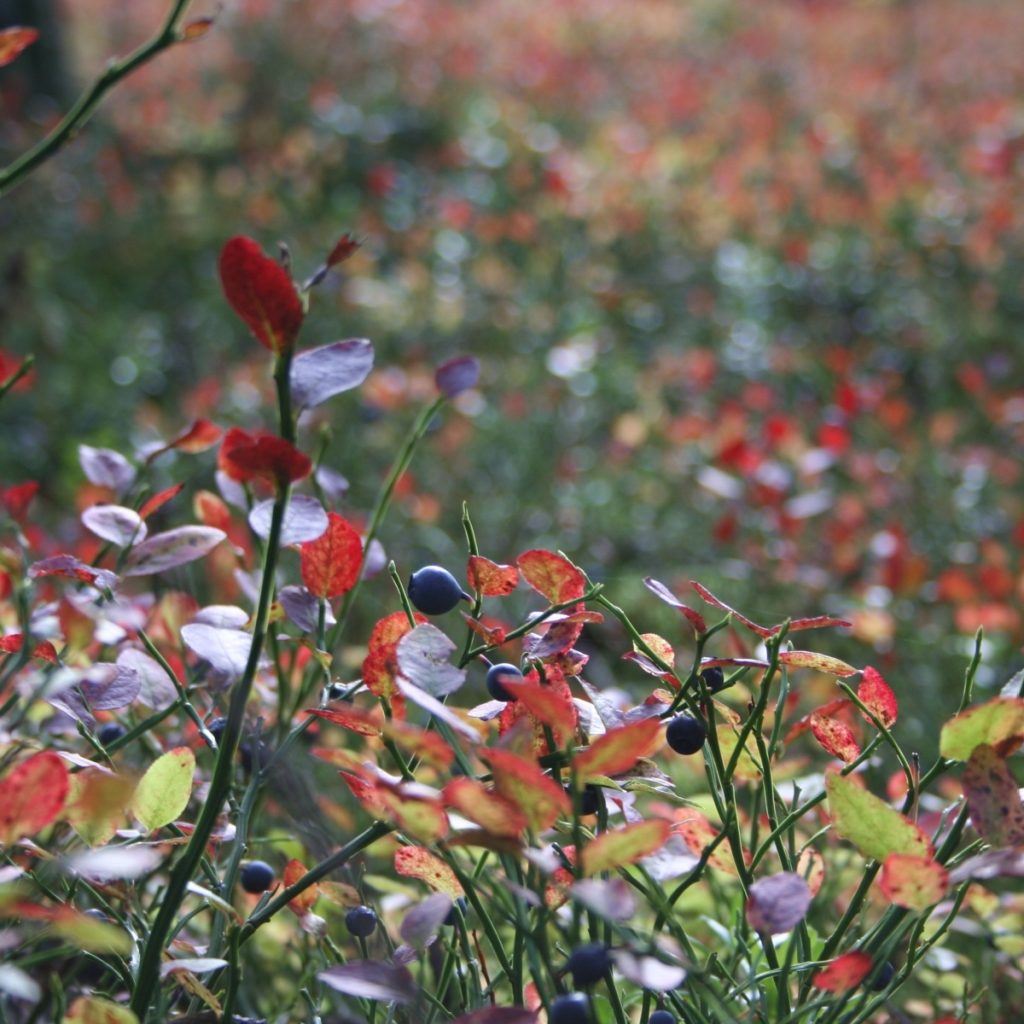
Wondering what to do with your blueberry bushes this fall before winter arrives?
Believe it or not, fall is an extremely important time for blueberry bushes. Unfortunately, all too often, once blueberry bushes stop producing in late summer, they are all but forgotten. But as it turns out, how you care for them right before winter arrives can actually make a huge difference in the health of your bushes. And even more – how well they perform and produce next year!
From mulching and pruning, to making sure your blueberry bushes are getting the proper watering they need to store up for good fruiting, one thing is for sure – a little fall care now can pay off big when it comes to your your harvest next year.
Blueberry bushes have very shallow root systems. And there is no better way to help protect those shallow roots through winter than by adding a thick layer of mulch in the fall.
By the time fall rolls around, any mulch that was put down in the spring has likely broken down a bit. Which is exactly why it’s time to add more before the cold of winter arrives! It’s best to always try to keep the mulch between 4 to 6 inches thick all around the root system of your blueberry bushes.
This thick layer will help protect the plants from the thawing and freezing cycles that tend to occur during the winter months.
You can use all sorts of different materials to mulch blueberry bushes. Pine needles, wood chips and pine bark are all great options. Using pine-based materials are perfect for blueberry bushes because they release a bit of acid while they break down – especially green needles! See: How To Use Pine Needles In Gardens & Flowerbeds – And Where Not To!
One final note – when mulching, always be sure to keep the mulch a bit back from the main stems to prevent rot from occurring.
Even though blueberry bushes are done producing berries late in the season, the plants still require moisture in order to stay healthy and alive. This means that you will likely still need to regularly water plants, even when they first go dormant.

During the growing season, blueberry bushes require at least one inch of rainfall or hand watering weekly. The same amount still applies during the fall months as well. In fact, water at this point is crucial for helping the plant store energy for fruiting next year.
It’s best to try to water plants early in the morning or late at night. Water at the base of the plant and avoid watering overhead when possible. This slows evaporation and keeps moisture from sticking to the leaves where mildew and mold can occur. Once the ground freezes, stop watering and resume again in early spring.
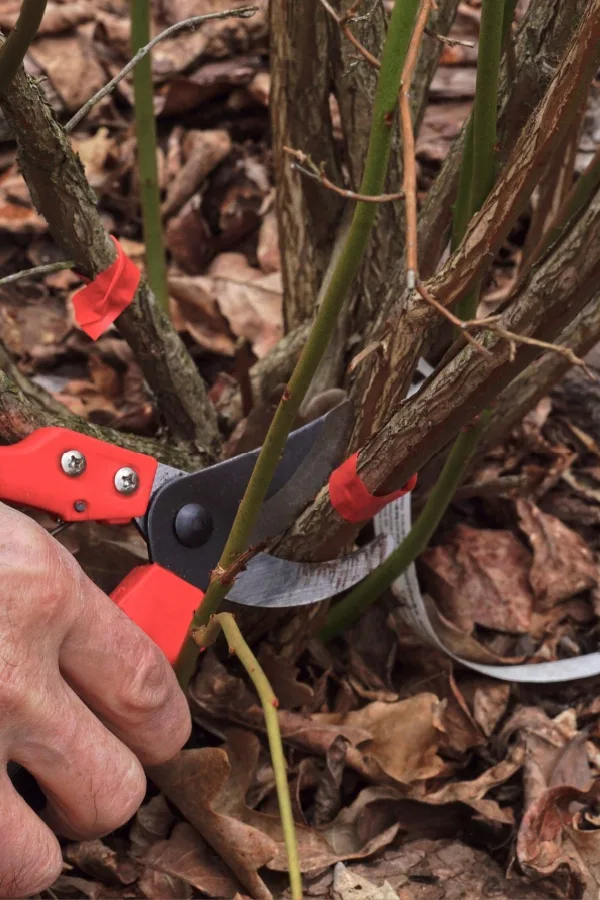
One of the biggest ways you can help your blueberry bushes in late fall or early winter is to prune them. Pruning not only keeps plants looking tidy, but it helps with the overall health of the plant as well. And to keep your bushes at their best, it needs to be done each and every year once they are a few years old.
When pruning blueberry bushes, you want to wait until the plants are dormant. This doesn’t happen until late fall or even early winter in some climates. You will know that plants are dormant once they have lost all of their leaves.
When you remove a bit of excessive growth along with damaged, diseased, or dead limbs and canes (the fruiting branches of blueberry bushes), you allow the plant to focus its resources and energy on producing new growth once spring rolls around.

Proper pruning also helps to improve air circulation throughout the entire plant, reducing the chances of disease and pest issues. Even more, it keeps blueberry bushes from growing more canes than they can support. While additional canes might sound like a good thing, it often results in smaller fruit and fewer berries.
When it comes to proper pruning, you want to avoid pruning blueberry bushes the first couple of years after planting. This allows the plant to fill out and produce plenty of healthy canes as it establishes in the soil. But after the first couple of years have passed, once it goes dormant, it’s time to get pruning!
With the leaves gone, it’s easy to see which branches need to be cut or removed. Start by looking for any canes that are broken or dead – or weak limbs that might not be able to support the weight of fruit. Use a pair of sharp, clean pruners or loppers and trim these canes all the way back to the ground. Affiliate Link: Fiskars 28″ Steel Blade Garden Bypass Lopper and Tree Trimmer
Next, remove any shoots that are rubbing against one another. This can cause cuts in the wood which might then become affected by diseases or pests. It will also open the bush up a bit more for better air circulation.
Last but not least, look for canes that are drooping and touching the ground, trimming them up to keep the bush’s shape. The overall goal when pruning is to remove about 20% of the older canes, only keeping the healthiest and strongest branches for better fruiting next year.
Blueberry bushes can benefit from fertilizer in the early spring months to help promote new growth and full foliage. You can also fertilize in late summer around June or July after the plants finish producing.
However, it’s important that you don’t fertilize plants during the fall months. Providing plants with nutrients during the fall will prevent them from entering dormancy. And without proper dormancy, the plants will struggle to stay healthy and protected during the winter months.

Fertilizing too late in the season can also cause new growth to appear on plants. And unfortunately, just in time for the cold weather to arrive. Any new growth at this point has a high probability of winter damage from frost and freezes. And even worse, this can actually put the entire bush at risk of survival.
Instead, hold off on fertilizing until the ground thaws out and new growth starts to appear on plants in the spring. Before you know it, your blueberry bushes will be thriving once again thanks in part to the care you gave it during the fall months!
Follow Our Facebook Page For Great Gardening Tips And Advice! This Is My Garden Facebook Page
This Is My Garden is a garden website created by gardeners, for gardeners. Jim and Mary Competti have been writing gardening, DIY and recipe articles and books and speaking for over 15 years from their 46 acre Ohio farm. They publish three articles every week, 52 weeks a year. Sign up today to follow via email, or follow along!
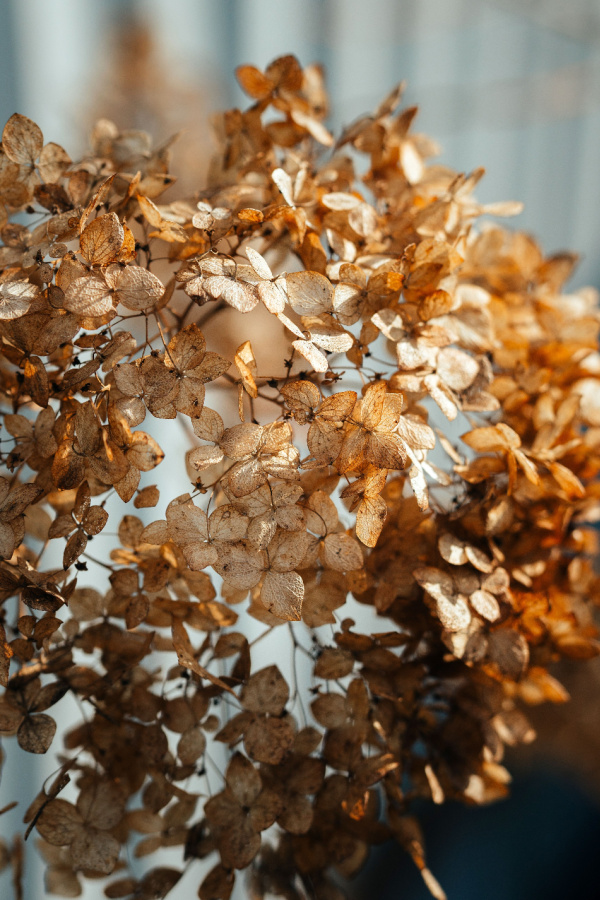
Wondering what to do with your hydrangeas after they bloom this summer? Or wondering why they didn’t flower this year?
Believe it or not, what you do with your hydrangeas after they finish flowering can have a huge impact on just how healthy they remain through summer. And even more importantly, how well they bloom next year – or if they even bloom at all!
Although there are several distinct types of hydrangeas that can flower at different points of the growing season, the large majority of hydrangeas that grow in home landscapes fall within the summer blooming category. And how summer hydrangeas are cared for while they are blooming and right after they complete their blooming cycle really does play a major role in next year’s blooming potential.


The good news? Caring for them isn’t difficult. In fact, by following just three simple tips – you can all but ensure your hydrangeas will not only stay strong and healthy – but will flower with more gusto than ever next year!
One of the most important things you can do for your hydrangeas in the summer is to deadhead them. And, on a fairly regular basis of at least once a week.
Deadheading is the practice of removing or cutting off fading blooms. This little task is extremely important for all kinds of annuals and perennials. Not only does it help to keep plants looking neat and tidy, it also helps them conserve massive amounts of energy. And for hydrangeas, that energy conservation is critical to re-power the plant to bloom again next year.
As long as an aging flower and bloom stem remain on your hydrangea, they use power. The plant, in an attempt to fix the dying flower, will continually expend energy on it. Unfortunately, no amount of nutrients or water will help an old bloom recover. But the plant continues to try anyway in vain.

Even worse, if the bloom continues to remain, then the plant uses even more energy to help the bloom then form a seed head. Why is all of this energy loss so important? For starters, the more nutrients a hydrangea saves, the healthier its foliage and roots will stay for the remainder of summer.
But even more vital, late summer and early fall is when hydrangeas begin to store up power for next year’s blooms. And the more the plant wastes on this year’s fading blooms – the less it will have to form flowers for next year!
Hydrangeas are actually one of the easiest of all perennials to deadhead. All you need to do to stop the power loss is cut below the head of the flower. When pruning flowers back, always cut to above the first or second set of leaves below the bloom.
This instantly stops the loss of nutrients to the bloom. Not only is this great for conserving power, but if you start deadheading early as the first flowers start to fade, it also gives the plant more strength to power the remainder of its blooms this year as well!

For maximum benefit, try to deadhead your hydrangeas at least once a week as they flower. Then, once the final flowers begin to fade, it’s time for a little light pruning. And as you will see below, for summer hydrangeas, this is the only critical time to prune!
One of the biggest mistakes gardeners make with their summer blooming hydrangeas is to prune them at the wrong time. Why? Because summer blooming hydrangeas bloom on old wood. Old wood is simply the growth that occurs from the time blooming ends until the end of fall when it goes dormant for winter.
For summer blooming hydrangeas, that is the growth that will hold and produce next summer’s blooms. Unfortunately, when gardeners prune summer flowering hydrangeas in the early spring or late fall, they remove the wood that holds the blooms.
But if you prune these types right after they finish flowering, new wood can grow until fall. And, of course, big blooms will follow next summer!
So the simple rule of thumb for summer blooming hydrangeas is to simply do all of your pruning and shaping right after they finish blooming in summer. And then – leave them alone!
One final note on pruning – always be sure to use sharp, clean pruners. The less damage and tearing of the stems and wood means a faster recovery time for the bush. Once again, saving energy. Affiliate Product Link: Haus & Garten ClassicPRO 8.5″ Professional Premium Titanium Bypass Pruning Shears
The last and final task is the easiest of all. The task? Simply don’t fertilize your hydrangeas in the summer! The only time you should fertilize hydrangeas is in the early spring and before they bloom. See our article: The Best Way To Fertilize Hydrangeas – When & How To Fertilize In Early Spring For Big Blooms!
Doing this right before or as they come out gives the bush a boost of energy for summer blooming. But if you fertilize in mid to late summer, it can cause too much unwanted late growth. That can lead to weaker wood and far less blooms on your stems for the following year.
Once you have deadheaded the old blooms and pruned and shaped your bush, all that is left is to sit back and wait until next year. Here is to caring for your hydrangeas after they bloom, and to big flowers next summer! For even more tips on growing hydrangeas, see our article: What To Do With Your Hydrangeas In Late Summer – And What Not To Do!
Follow Our Facebook Page For Great Gardening Tips And Advice! This Is My Garden Facebook Page
This Is My Garden is a garden website created by gardeners, for gardeners. Jim and Mary Competti have been writing gardening, DIY and recipe articles and books and speaking for over 15 years from their 46 acre Ohio farm. They publish three articles every week, 52 weeks a year. Sign up today to follow via email, or follow along!
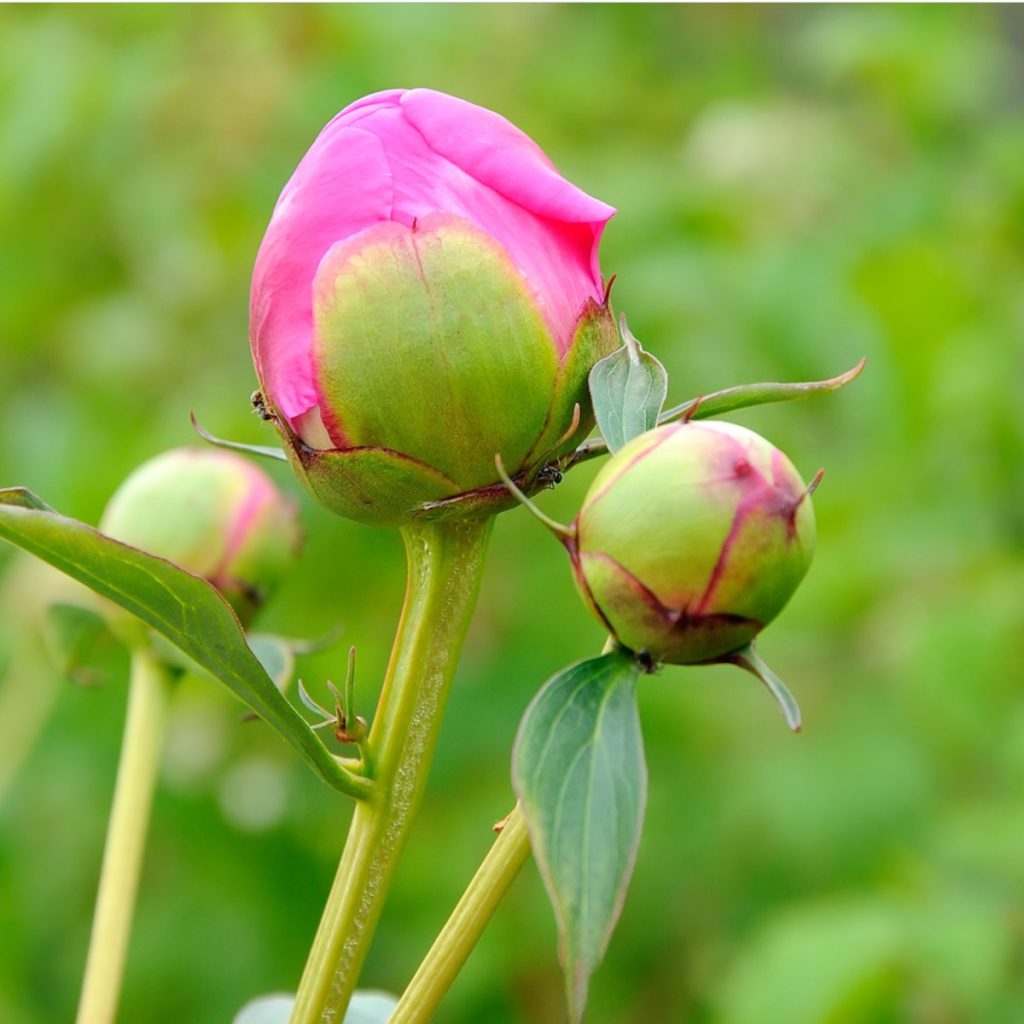
Wondering what to do with your peony bushes after they finish blooming late this spring?
Believe it or not, what you do with your peonies after they stop flowering can make a huge difference in just how healthy they will stay for the remainder of the summer. And even more – in just how well they will bloom next year!
Peonies grow in a wide range of climates, which makes them quite a popular choice popular for gardeners looking for big spring blooms. In fact, they are actually winter hardy from growing zones 3 all the way up to zone 8, providing big flower power in a wide range of areas.

But even with their massive popularity, there is a lot of confusion about how to care for peonies after they complete their blooming cycle. Should they be cut back? Is it okay to prune them back? And do they need to be fertilized or not?
All of the above questions are certainly great ones. And the answers to them really can make a huge difference for the health and well being of your peony bushes – even more so when it comes to getting them to flower bigger than ever next spring!
With late spring peony care in mind, here is a look what to do with these gorgeous bushes once their flowers start to fade.
There are actually two distinct varieties of peonies – peony bushes, and peony trees. Tree peonies are a larger, woody perennial that continue to grow and produce each season from the previous year’s growth.
Peony bushes, on the other hand, are a herbaceous bush that dies back each year all the way to the ground. They are by far the most popular of all peonies, and the focus of today’s article.

On average, peony bushes bloom heavily for a four to six week period in late spring. The blooms of a peony bush are some of the longest lasting of any perennial. In fact, each individual flower can last as long as 10 to 12 days in full glory.
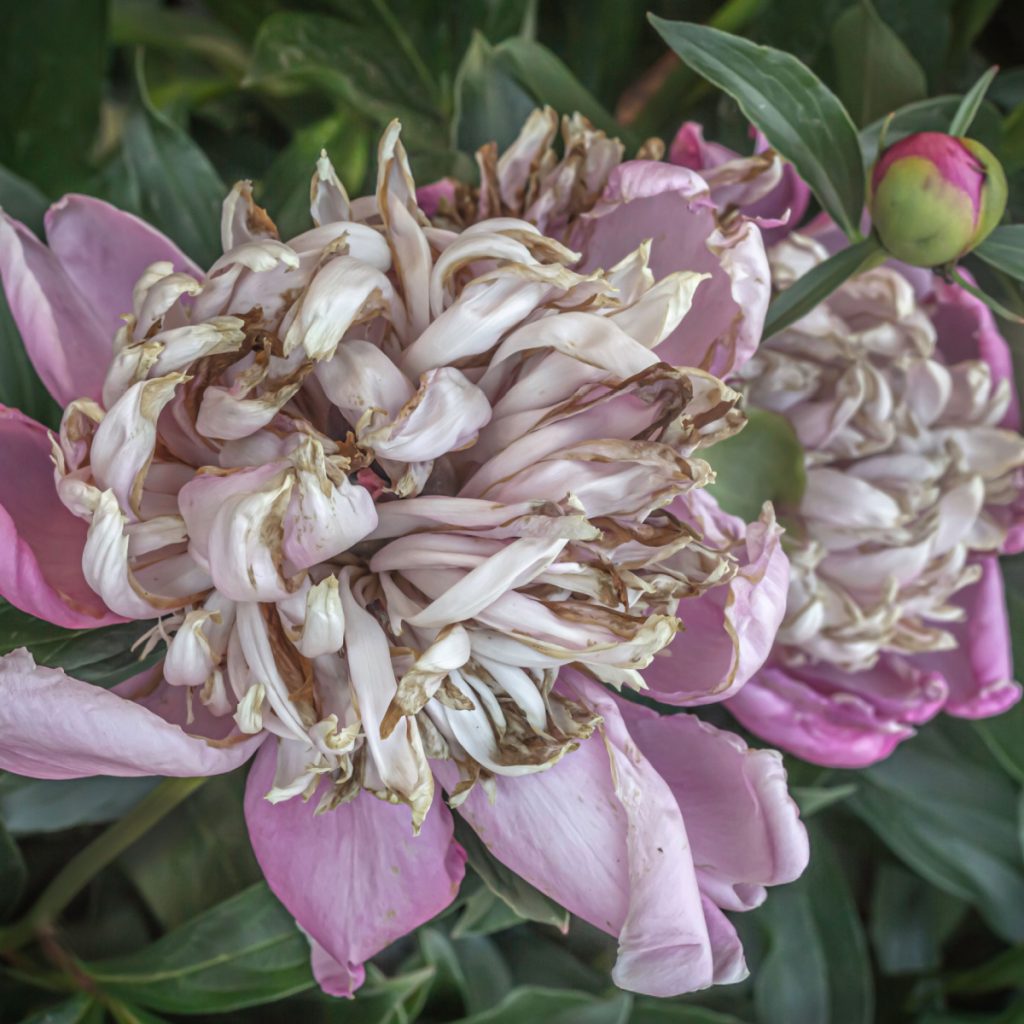
But it’s what you do with those blooms as they begin to fade that really makes a difference in the plant’s overall performance the following year. And it all starts with the practice of not allowing those dying blooms to stick around for long!
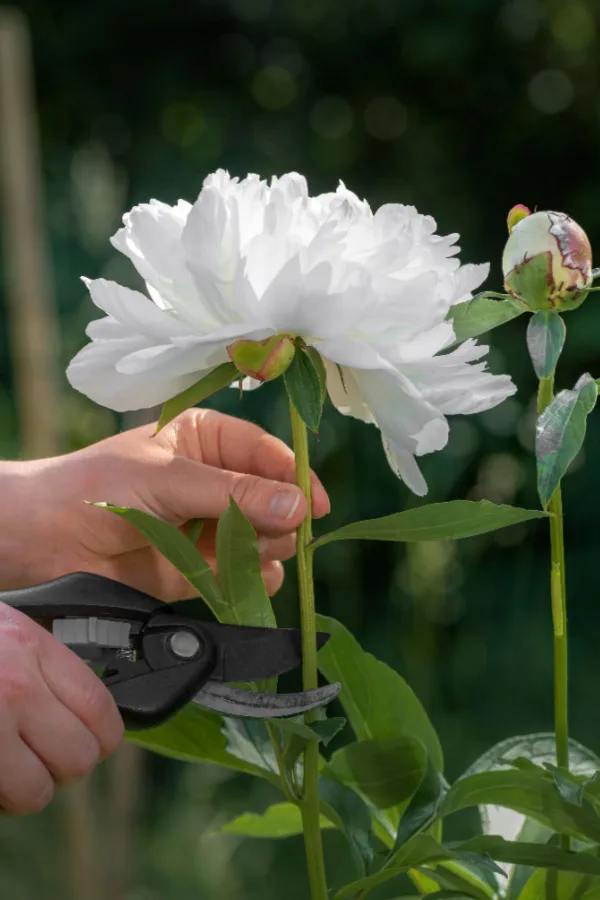
As soon as a peony bloom begins to fade, it should be removed from the plant. Removing the dying bloom not only keeps the bush neat and tidy, but also helps preserve the plant’s power for next year’s bloom set.
Unfortunately, when a decaying bloom is left on the plant, it continues to milk precious resources. Why? Because as odd as it sounds, even though there is no ability to save the flower as it fades, the plant will continue to send nutrients to it in hopes of repairing it.
But as soon as those old flowers are removed, instead of wasting energy on the decaying flowers, the resources are instead re-directed to other important areas – like growing thicker foliage and sending nutrients to the roots to begin storing up energy for next year’s bloom set.
One thing is for sure, how you remove old peony blooms is important. The best way to remove spent blooms is to cut the flower’s stem back to the first full set of leaves.
Try not to take any more from the stem than back to the first leaf set. This helps to keep as much foliage on the plant as possible. And the more foliage the plant has for the summer the better. Why? Because it helps draw in even more nutrients and energy through photosynthesis for the plant to use next year.
One final note on deadheading the top stem portion and flower – make sure to always use clean, sharp pruning shears or scissors when removing. Clean cuts are easier for the plant to heal, and require less resources from the plant.
Once the flowers are off the plant, it’s time for a little fertilizer. Peony bushes respond well to fertilizing as it provides extra nutrients for larger growth and blooms. But not just in the early spring before they bloom – but after they finish blooming as well.
Early spring fertilizing provides a boost for the upcoming bloom cycle. It should be applied early in the season right before or as soon as the plant begins to emerge from the ground. But as soon as your peony bush finishes flowering, it’s important to give it another boost.
Fertilizing after it completes its bloom cycle helps the plant recover quickly. Even more, it also helps it grow better foliage for strong summer growth, once again giving it more nutrients to store for next year’s cycle.


As for the best choice to fertilize peony bushes – it’s bone meal! Bone meal helps to re-energize the roots of the plant in an almost perfect fashion. Even better, it’s ideal for using on the bush both before and after it flowers. Product Affiliate Link: Burpee Bone Meal Fertilizer
One of the things you should never do with peonies after they bloom is move or transplant them. Fall is actually the best time for planting peony bushes. And that includes digging up and moving existing bushes, as well as splitting them into additional plants if they have become too large.
Although you can plant peonies in early spring, the bushes will struggle to develop and establish through the hot summer. Spring planted bushes will lag far behind in first year growth. In fact, most peonies that go into the ground in the spring or late spring will take an additional year to develop their blooms.
But by planting or dividing in the fall, the roots have plenty of time to settle in and establish in the cool weather before going dormant through winter. That leaves them more than ready to hit the ground running come the following spring.
For herbaceous peonies, the foliage will completely die off once a few hard frosts or a hard freeze hits them. Once this occurs, it’s time to cut your plant back to the ground. See our article: Fall Peony Care – What To Do With Peony Bushes Before Winter!

Leaving decaying foliage, stems and branches in place is an open invitation to pest and disease. Simply cut the plant down within 1/2″ of the soil level. Finish by applying a few inches of mulch, and get ready for more blooms next spring!
Here is to taking care of your peonies perfectly this spring after they finish blooming. And more importantly, to an even bigger bloom set next spring!
Follow Our Facebook Page For Great Gardening Tips And Advice! This Is My Garden Facebook Page
This Is My Garden is a garden website created by gardeners, for gardeners. Jim and Mary Competti have been writing gardening, DIY and recipe articles and books and speaking for over 15 years from their 46 acre Ohio farm. They publish three articles every week, 52 weeks a year. Sign up today to follow via email, or follow along!
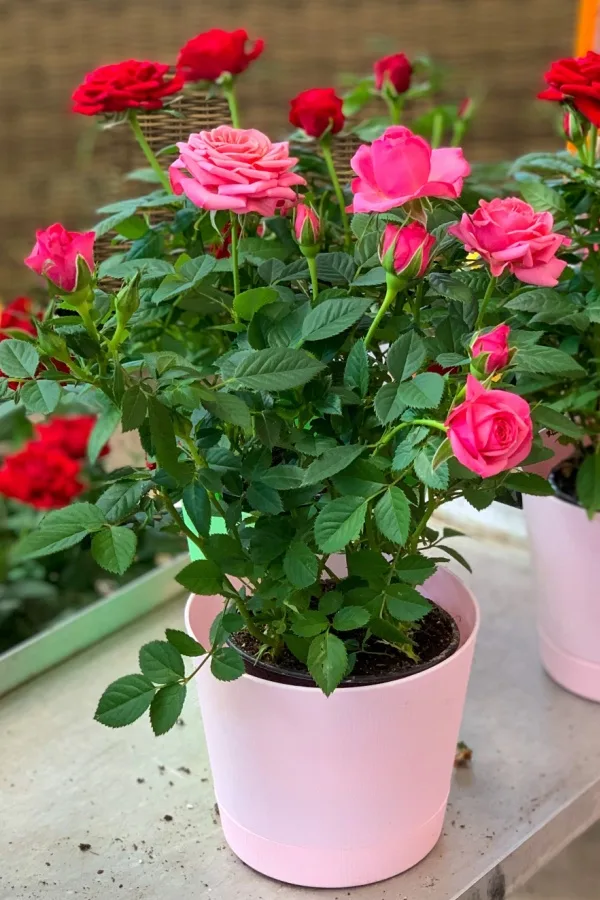
If you want to grow healthier, bigger, brighter roses that produce loads of blooms longer than ever, then it’s vital to fertilize your rose bushes with the perfect dose of power – and it all starts with powering them up in the early spring just as your roses come out!
Roses are heavy-blooming plants that are also heavy feeders from the soil. They continually drain nutrients and resources as they grow. Not only to produce their beautiful blooms, but to also grow thick foliage and new shoots as well.
Unfortunately, it doesn’t take long for those vital nutrients and resources to disappear. And if they aren’t replenished, you can quickly be left with weak foliage and fewer blooms. Even worse, it also leaves your roses more susceptible to disease, pests, and winter damage.

The good news is that keeping your roses and the soil around them full of power isn’t difficult. In fact, by simply using the right type of fertilizers at a few key times of the year, you can have your rose bushes looking healthy and producing stunning blooms all summer long!
So what are the key nutrients roses need for optimum growth and blooming? In addition to the mainstays of nitrogen, phosphorus, and potassium (N-P-K), roses also need other important nutrients. Roses also require small doses of calcium, sulfur, copper, manganese, and a host of other micro-nutrients. And to have great roses, it’s critical to give them all of these when feeding.
How much additional power a rose bush will need depends on the type of rose you are growing. For instance, Grandiflora and miniature roses require more constant feeding. As do tea rose varieties and roses growing in pots or in confined spaces.
However, with more stable climbing and shrub roses, the need for constant feeding is not as vital. These roses still need to be fed, but just not as often. But no matter what type of rose you grow – giving them power in the spring is vital to set them up for a strong blooming season!
Before we cover how to fertilize your roses, it’s important to cover how to select the best type of fertilizer to power your bushes.


There are two main types of fertilizers you can use for roses – slow release granular types, and liquid fertilizers, which deliver their nutrients much more quickly. Both types of fertilizers have their place when powering rose bushes.
In general, you want to use a slow release fertilizing option for early spring. This will allow nutrients to slowly soak into the soil and give roses the energy they need over time as they come out of dormancy. Later, as your roses near blooming, liquid fertilizing is the better option.
Here is a look at how each type works, and how and when to use them to power your rose bushes to a better year than ever!
All roses types need early spring fertilizing. This dose of power helps roses to wake up and not only produce their foliage, but begin to store energy for their blooms later in the season. And for spring fertilizing, it’s all about using a slow release option!
There are several great options for slow release early spring fertilizing. The first is to use a commercial granular fertilizer that is geared especially for roses.
These fertilizers not only contain the right ratio of the key ingredients of nitrogen, phosphorous and potassium roses need, but also the calcium, soluble potash and magnesium as well. Affiliate Link: Jobe’s Organics Granular Fertilizer for Rose & Flower
When it comes to other good options for slow release fertilizers, two of the best are worm castings and compost. When used together, they can provide a steady supply of readily available early spring power. Power that can keep rose bushes healthy and blooming strong all season long.
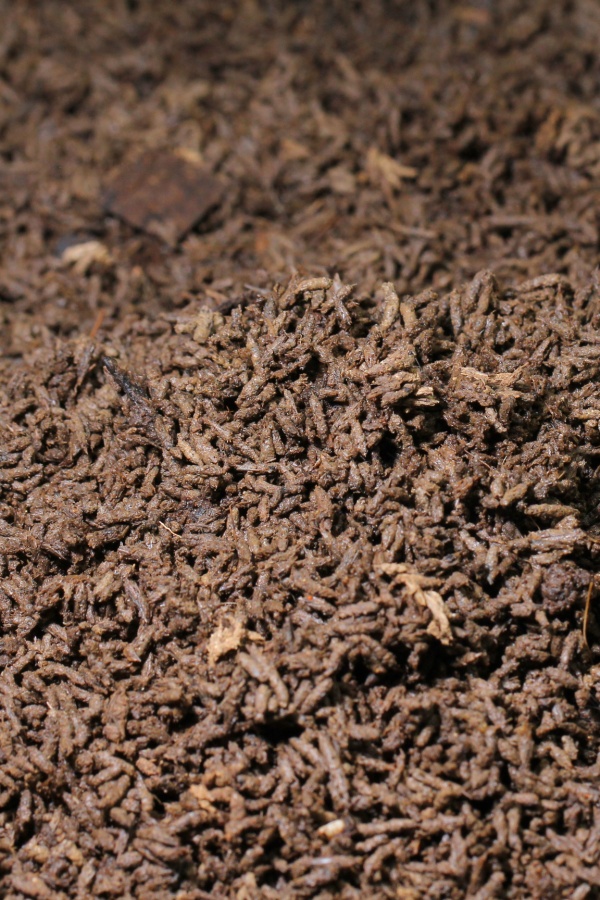
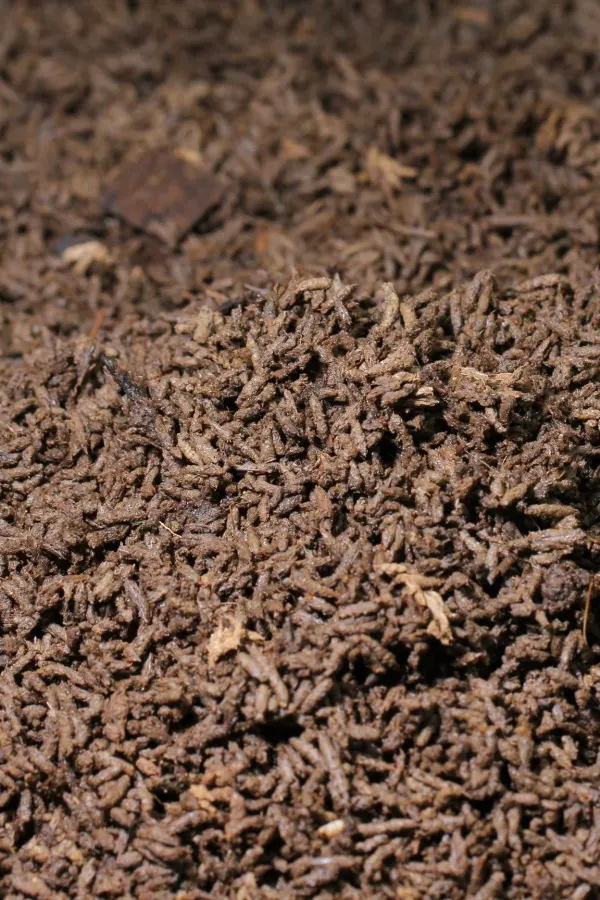
Worm castings work as the perfect slow release fertilizer when they are applied to the soil around rose bushes. Simply mix 1/2 cup to a full cup of castings in the soil early in the season to provide plenty of steady power. Product Link: Worm Castings
Because castings can be slightly alkaline and roses prefer slightly acidic soil, applying a few cups of compost to the base of plants when feeding with castings will help counterbalance that. Compost is 100% organic and its nutrients are easily absorbed by roses. These two can be used in place of granular fertilizers if desired.
Liquid fertilizing is the perfect complement to slow release fertilizing once plants are ready to bloom. Again, all rose bush types need and will benefit from a slow release granular feeding in the spring. But then it’s time to use a liquid option for blooms.
Liquid fertilizers can be used throughout the late spring and summer on all types as well – but how and when you use them will depend on the type of rose bush. We will cover each of those types below and when and how to fertilize, but let’s first cover the options for liquid rose fertilizer.
If using a commercial fertilizer, select one that is specifically geared to roses. Commercial liquid fertilizers can be easily diluted with water to the recommended dose rate. Affiliate Link: Dr. Earth Total Advantage Rose and Flower Liquid Fertilizer Concentrate
If you want a homemade option, you can create a powerful fertilizing tea from either compost or worm castings. The tea can easily absorb through the roots and leaves of roses. Worm casting tea can also help with disease resistance for issues such as black spot. See: How To Use Worm Castings – The Best Fertilizer For Flowers & Veggies!
Now let’s take a look at each rose type and how to fertilize in late spring and summer with a liquid option.
For more hardy and established shrub and climbing roses, you will only need to fertilize twice. The first is in early spring with the granular option. And the second is with a liquid fertilizer as soon as the blooms begin to appear. These types of roses do not require more that just two doses.
For tea and other standard rose bushes, a bit more frequent liquid fertilizing during the season will help for more prolific blooming. After the initial feeding in early spring of granular fertilizer, apply additional doses of liquid fertilizer every 3 to 4 weeks during the growing season.
If you are growing your roses in a confined space such as a container or pot, apply the liquid fertilizer every two to three weeks to keep the soil productive. Potted plants tend to run out of nutrients at a quicker pace due to the limited soil.

When using any liquid fertilizer, always apply it in the early morning or evening. At these two times, the sun’s rays are less intense and will not burn the foliage when applied.
One of the biggest mistakes gardeners make with roses is to fertilize them too late in the growing season. Giving any type of rose bush additional nutrients in late summer or early fall can actually harm plants way more than help them.
All fertilizing should cease around eight weeks before the average first frost date in your area. Fertilizing after this point will cause your bushes to produce tender new growth too late in the year. See: How To Prepare Rose Bushes For Winter – The Secrets To Fall Rose Care!
Unfortunately, that new growth is extremely vulnerable to damage from harsh winter conditions. Even more, the resources the plant uses to produce the new growth can take energy from the roots. This can leave the entire rose bush in jeopardy of freezing out during a rough winter. It also leaves it with fewer nutrients for blooms next year.
One final note on roses and fertilizing. It’s important to understand that in addition to having plenty of nutrients in the soil, rose bushes prefer growing in slightly acidic soil.
If you are fertilizing your bushes properly and still having blooming issues, it’s a good time to check your soil’s pH. In general, rose bushes prefer to grow in soil with a PH of 6 to 6.5. You can use a handheld pH meter to quickly test your soil’s levels. Affiliate Link: 4-in-1 Soil pH Meter
If it’s too acidic, you can add lime to raise the pH. If it is on the alkaline side, you can add an acid enhancer or sulfur to lower it. Here is to fertilizing for success, and growing bigger and better roses this year! For more rose care tips, see: How To Fertilize & Deadhead Rose Bushes – The 2 Big Secrets To More Blooms!
Follow Our Facebook Page For Great Gardening Tips And Advice! This Is My Garden Facebook Page
This Is My Garden is a garden website created by gardeners, for gardeners. Jim and Mary Competti have been writing gardening, DIY and recipe articles and books and speaking for over 15 years from their 46 acre Ohio farm. They publish three articles every week, 52 weeks a year. Sign up today to follow via email, or follow along!
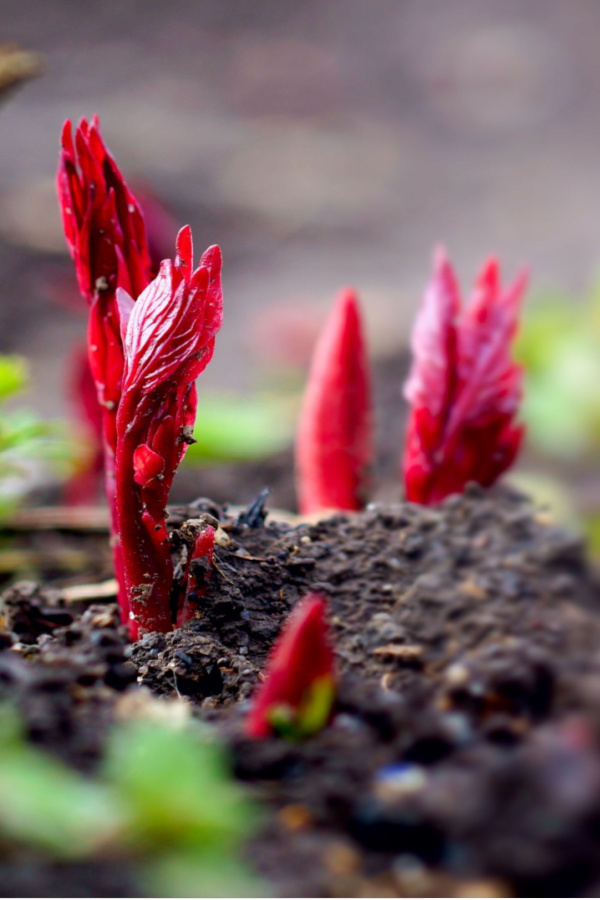
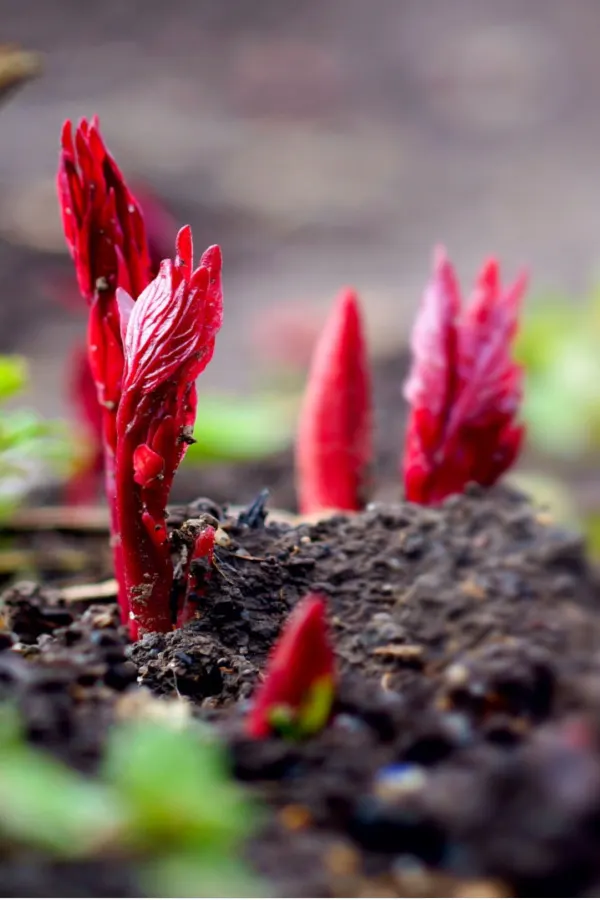
Looking for the best way to fertilize your peony bushes early this spring to get them to bloom bigger and brighter than ever?
Peonies are one of the first perennial bushes of all to come into bloom in the spring. And one thing is for sure – their fragrant, colorful flowers are a welcome sight after enduring a long, dreary winter. Especially when you consider just how much color their huge blooms can bring to a landscape!
But when it comes to getting peonies to bloom big year after year – there are a few key chores than can make a big difference between flowering success, or a lackluster blooming performance. And as it turns out, one of the most important of all is to fertilize them at just the right time – with just the right dose of nutrients!
As you will see below, there are actually two separate key times to fertilize your peonies. The first is in late winter to early spring right before or just as peonies sprout from the soil. The second critical time to fertilize is right after they bloom.
Both are important, but for very different reasons. Of the two, the first helps more with storing energy for the upcoming spring’s flower set. Meanwhile, the second application is vital for helping the bush recover after using loads of energy to flower.
Sound complicated? It’s actually not! With easy blooming success in mind, here is a look at how, when and what to use to fertilize peonies – and how to get the most blooms possible from them as well!
Without a doubt, fertilizing your peonies before or right as they begin to sprout is vital for helping the bush push out big spring blooms. To be most helpful for blooming, it’s important to get this feeding down before the peony leafs out.
By giving your peony bush an early dose of nutrients, it allows it to store energy specifically for producing flowers. At this point, with no leaves out, the nutrients absorb into the plants roots to specifically help develop buds.
Unfortunately, if the dose of fertilizer is given too late in the spring after the foliage is completely out, it will instead use that energy to maintain its leaves and branch structure. It’s not that late power will harm your peony, it just won’t help in the least with this year’s flowering.
Now that we know when to fertilize, what is the best choice of product to give your peonies the power they need?
For strong blooming, peonies need calcium and phosphorous more than anything else. They also require a bit of nitrogen to help power strong plant growth, but for the actual flowering process – it’s calcium and phosphorous that are front and center.
Although you could use a standard granular fertilizer to feed your peonies, the best choice of all to energize them for blooming is bone meal. Bone meal not only contains nitrogen, it also happens to be overflowing with phosphorous and calcium. Affiliate Link: Organic Bone Meal Fertilizer
Beyond having the right nutrient mix to fertilize peony bushes, bone meal also happens to be extremely easy for peonies to soak into their root structure. And that quick absorption is critical to absorb into the bush in time to help with the upcoming bloom.
As for how much bone meal to use, a good rule of thumb is to apply 1 cup of bone meal for an average size peony bush. If your peonies happen to be extremely large, a second cup may be necessary. To apply, first pull back any mulch that may be around or over the crowns of your plant. Next, simply sprinkle the bone meal around the clump of the crown.
Once the bone meal is down, water your plant to allow the fertilizer to start soaking in fast. Once you have watered it in, you can then replace the mulch back over top. Spring feeding really is that simple!
As soon as your peonies complete their flowering show in late spring, it’s time to power them up one last time. This feeding may not help this year’s blooms, but it will help the plant recover valuable energy – and help it to have strong foliage growth for the remainder of the year.
Not only is that important to keep your peonies looking their best, that strong foliage growth also allows the plant to use photosynthesis to start storing energy back into its roots as well. This helps the plant prepare for winter, and for blooming again next year.

Before fertilizing again, it’s best to first deadhead all of the spent and dying blooms and stems from your peony bush. These are not only unsightly, but drain unnecessary energy from the plant. In fact, as long as they remain, they steal nutrients from the bush as it keeps trying to heal them.
Of course, once a peony bloom is finished blooming, no amount of nutrients can help it. And that is exactly why it’s important to prune the old blooms from the plant quickly. The minute you do, you stop the plant from wasting any energy on attempting to care or heal for the dying and decaying blooms.
Once you have deadheaded the blooms, it’s time to once again turn to bone meal. This time, the feeding can be a bit lighter. For the 2nd feeding, use 1/2 cup for an average size peony and a full cup for large bushes.
Again, pull back any existing mulch before fertilizing. Apply the fertilizer around the base of the plant and water in. Put the protective mulch layer back in place and your peonies are powered for the year. All that is left is to cut your peonies back after they die off in late fall. See: Fall Peony Care – What To Do With Peony Bushes Before Winter!
Here is to fertilizing your peony bushes for big blooms – year after year!
Follow Our Facebook Page For Great Gardening Tips And Advice! This Is My Garden Facebook Page
This Is My Garden is a garden website created by gardeners, for gardeners. Jim and Mary Competti have been writing gardening, DIY and recipe articles and books and speaking for over 15 years from their 46 acre Ohio farm. They publish three articles every week, 52 weeks a year. Sign up today to follow via email, or follow along!