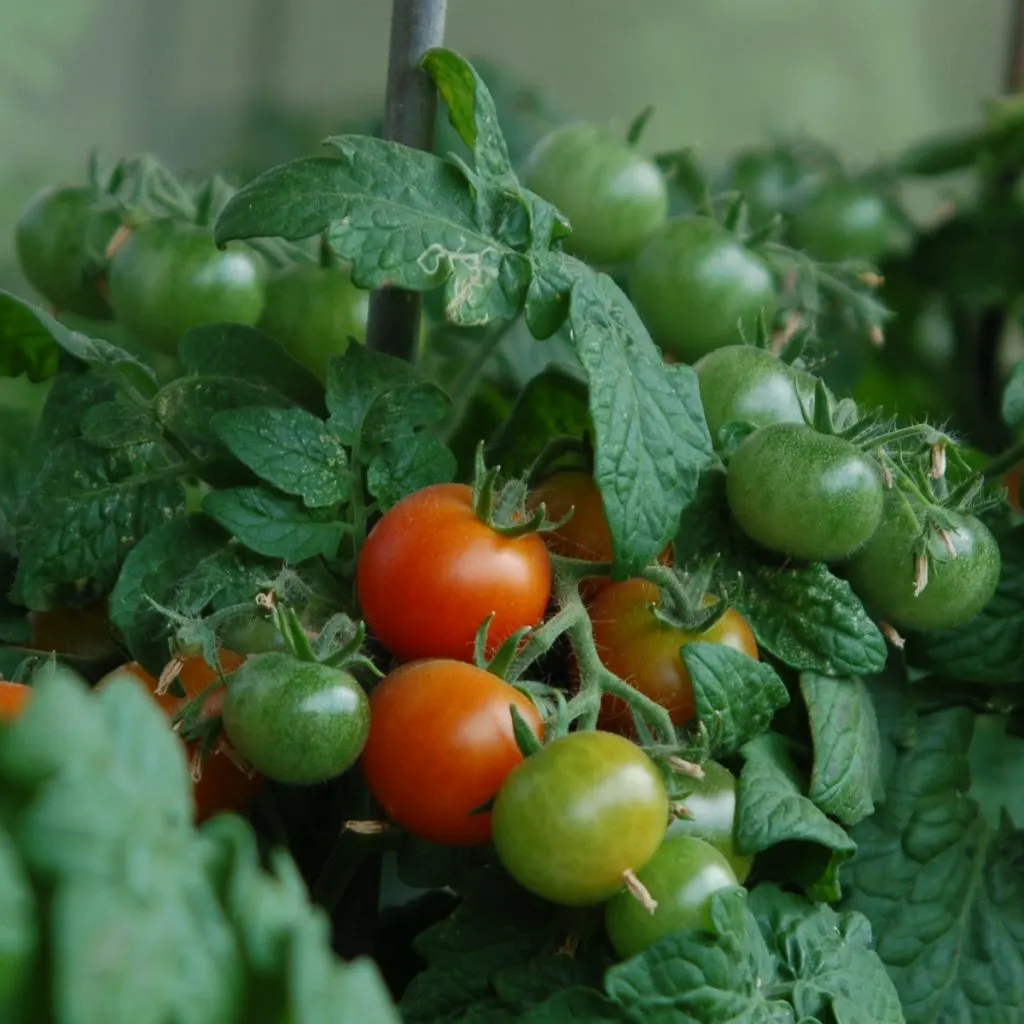
From how to plant, to fertilizing, pruning and staking – see all of our best tomato advice below!


From how to plant, to fertilizing, pruning and staking – see all of our best tomato advice below!
Did you know that what you put in a tomato planting hole when you plant can make a huge difference in how quickly your plant grows – and how well it produces this year?
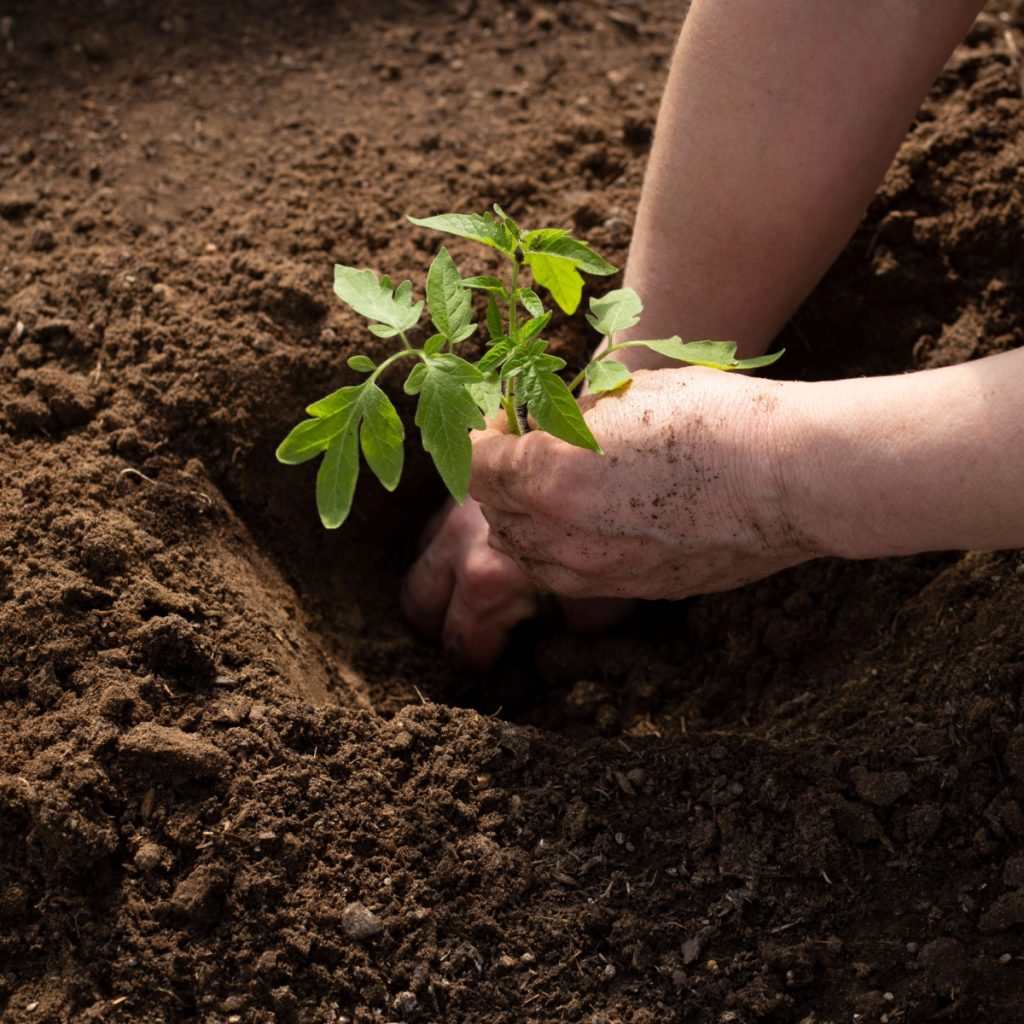
Getting your tomato plants off to a great start is one of the biggest keys to growing a big harvest of juicy tomatoes in the summer – and there is no better way to jump start your crop than putting a big dose of power in your tomato planting hole with four simple but powerful ingredients!
Tomato plants are one of the heaviest feeders of all vegetable plants. They need a lot of nutrients. Not only to produce delicious tomatoes, but to power all-important early growth. And strong, early growth is the key to setting the stage for a bumper crop of tomatoes.

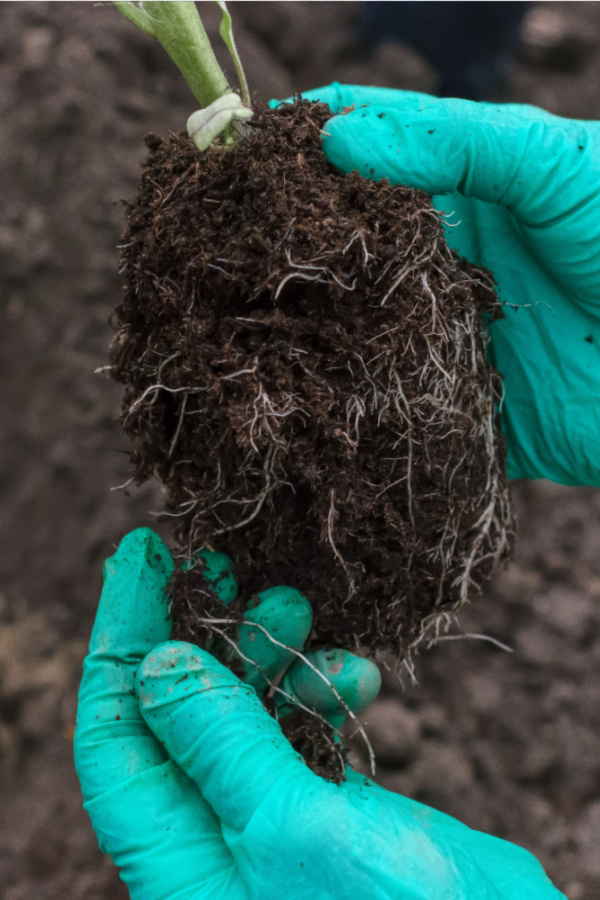
The roots of a tomato plant are extremely important to its overall success. The bigger and more robust a tomato plant’s root system can grow, the more it can easily and readily absorb the nutrients and moisture it needs to grow and produce.
So how do you get the roots of your tomato plant to grow big and strong? It all begins, of course, with planting healthy transplants. But from there, it all comes down to making sure you are planting your tomatoes in the finest soil possible – and not just right into ordinary garden soil.
Tomatoes grow best in fertile, well-draining soil. And that soil need to be loose enough to allow for strong, fast root growth. But because tomatoes require such a large supply of nutrients, even the richest soil can use a boost. Especially at planting time!
When tomato transplants first go in the ground, they go through a bit of shock. Up until that point, they have been protected, growing indoors or under cover for most of their life. Even more, the roots have been growing in fertile, seed starting soil that is rich and loose.
Now they find themselves in a big planting hole outdoors. And it takes the roots time to learn to expand to find more food and moisture. This time period is absolutely critical for the plant’s short and long term success.

If they can’t quickly find the nutrients they need, or if the soil around them is hard and tough to grow through, it will stall and delay early growth. But if they can easily find an overload of nutrients, and have loose, easy-to grow through soil, they will quickly take off and begin to expand rapidly.
The less transplant shock a tomato plant can have the better. And the quicker the root system grows, the more rapidly it will gain the nutrients it needs to power even more growth and strong bloom sets. That is exactly why it is so important to stack the deck in your favor by filling your planting hole with pure power. And to do that – all it takes is adding 4 simple ingredients into every single hole!
Compost is a must-add to every single tomato planting hole. It is full of energy and nutrients. Even better, its nutrients are in a form that are easy for the roots of tomato plants to absorb. That means they can get the food they need right from the start!
The benefits of compost do not end there. Compost can absorb water and hold moisture nearly ten times more than plain soil. For tomato plants, that means they can have the moisture they need to grow foliage, blooms and fruit. Affiliate Product Link: Charlies Bagged Compost
Finally, compost helps to loosen the soil with its light and airy makeup. Loose soil allows the roots to expand easily and without issue. Remember, the more root structure a plant can have below, the more it will feed the plant above!
Listen In Below On Our Podcast On How To Fertilize Tomato Plants All Summer For A Big Harvest!
How much compost should go into each planting hole? At minimum, mix at least two to three cups of compost into each hole. And for an added benefit, put a few more cups around the base of your plant after planting. Those nutrients will leach down to the roots every time it rains or you water.
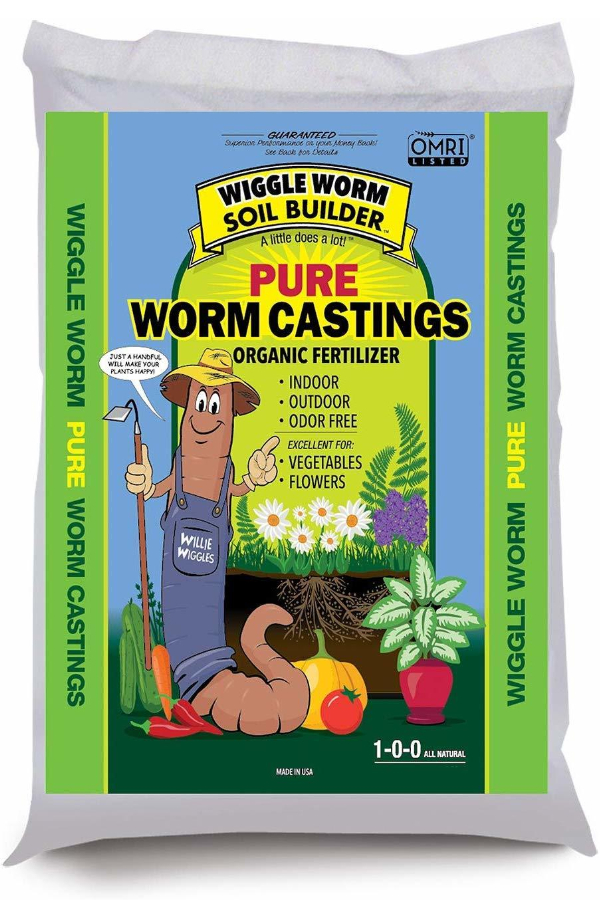
Worm castings are a must for tomato planting holes! They are perhaps natures finest slow and low release fertilizer. Castings are the manure of earthworms. As they chew through the soil, earthworms leave behind castings, which are loaded with a perfect mix of energy. Even better, it’s easy for plants to absorb.
For the roots of tomatoes, the castings provide instant energy. But what makes them so special is that the energy is delivered low and slow to keep the plant growing at the perfect rate – not too slow, and not too fast.
In each planting hole, mix in a quarter to a half-cup of worm castings for best results. This is actually a great practice for all of your vegetable plants. Once you use worm castings and see the results, you won’t ever stop using them! Affiliate Product Link : Pure Worm Castings
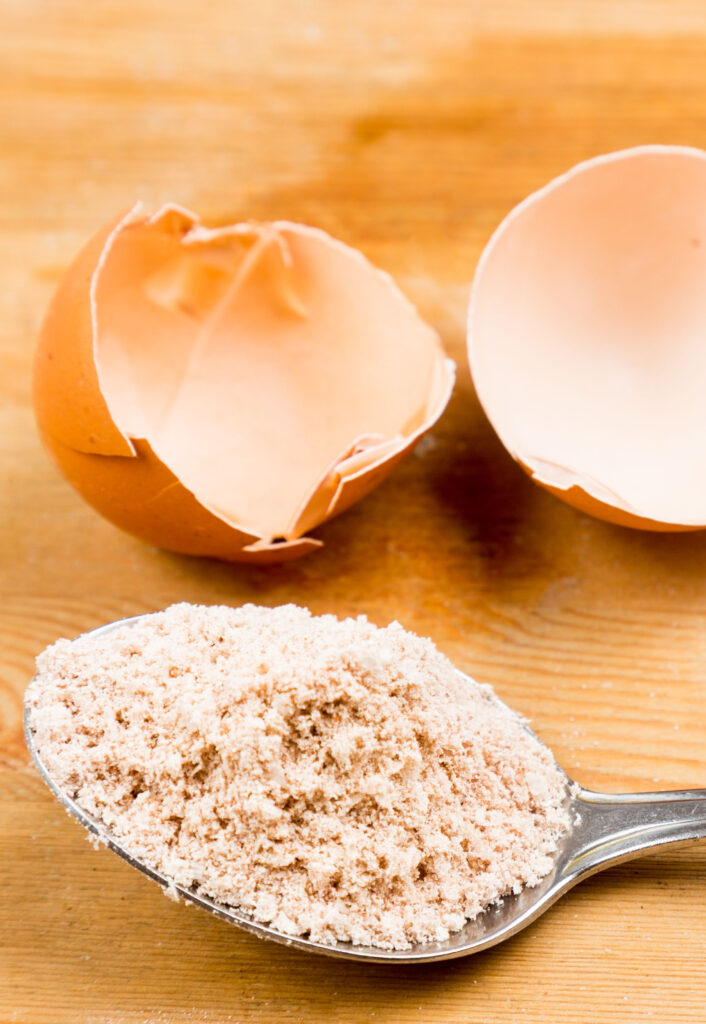
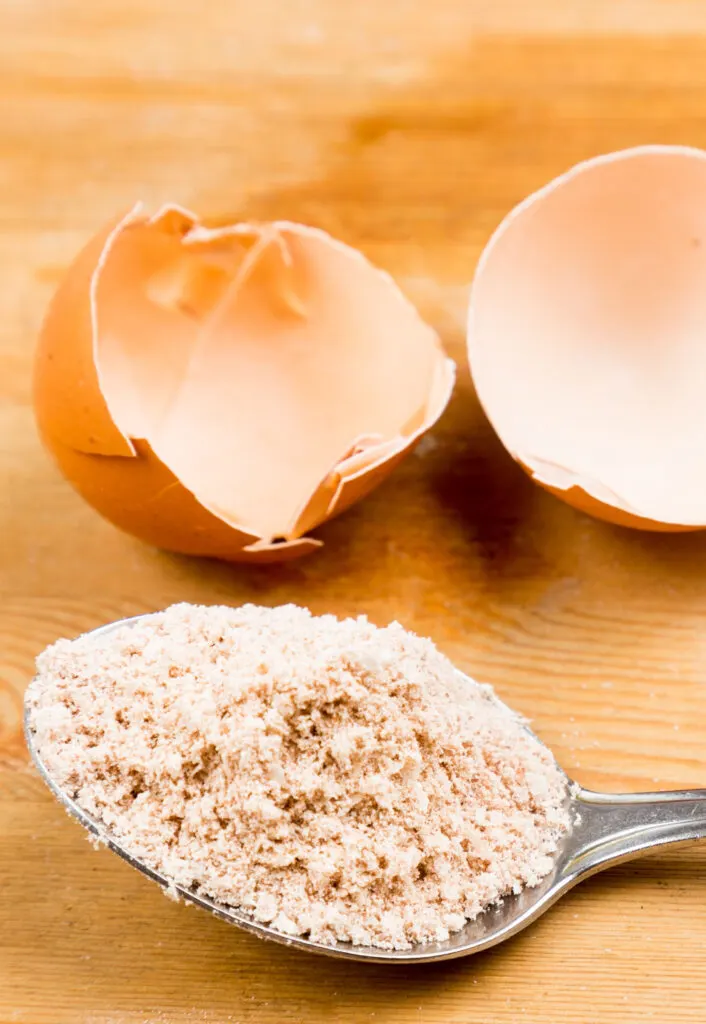
Another big ingredient that is at the top of the list to put in your tomato planting hole are egg shells. Or more importantly, pulverized egg shells. See our article: The Best Way To Use Egg Shells In Your Garden.
One of the most important nutrients tomato plants need is calcium. Early on, it helps the plant build strong stems and roots. But more importantly, calcium is critical for helping tomato fruit to form without issue.
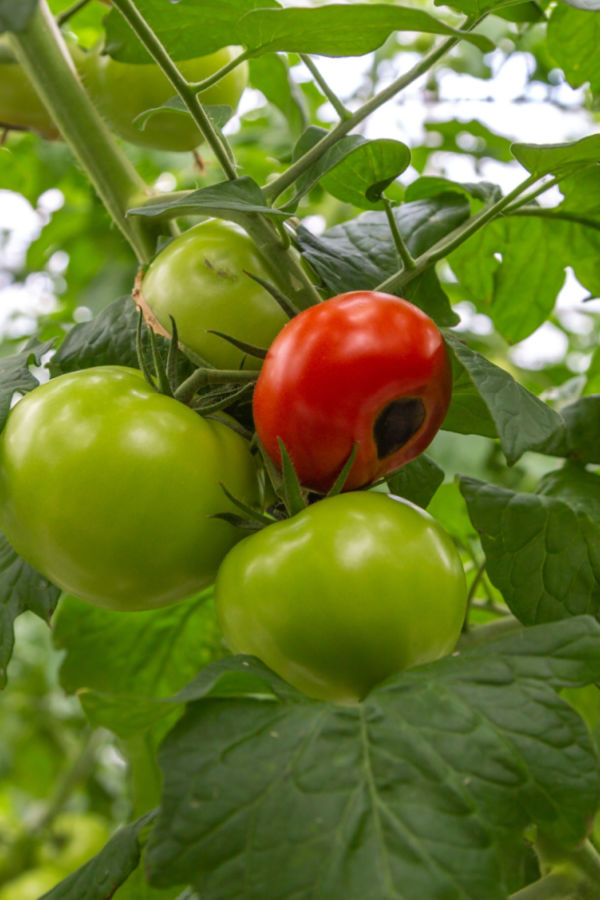
Tomato blossom (black end) rot is caused when the plant cannot take in enough calcium. Without enough, the blossom end of the tomato turns soft and dark. If bad enough, blossom end rot can ruin an entire crop of tomatoes.
The good news is that egg shells happen to be full of calcium. In fact, an egg shells makeup consists of nearly 95% calcium carbonate. By putting pulverized egg shells in your planting hole, the calcium within them can then be absorbed into your plants.
Why pulverized? The more your can break down the egg shells, the sooner they can decompose and allow their calcium to be absorbed. Large pieces of egg shells will eventually decompose, but not quickly. By pulverizing the shells down to a near powder, it will speed up the process and the absorption rate.
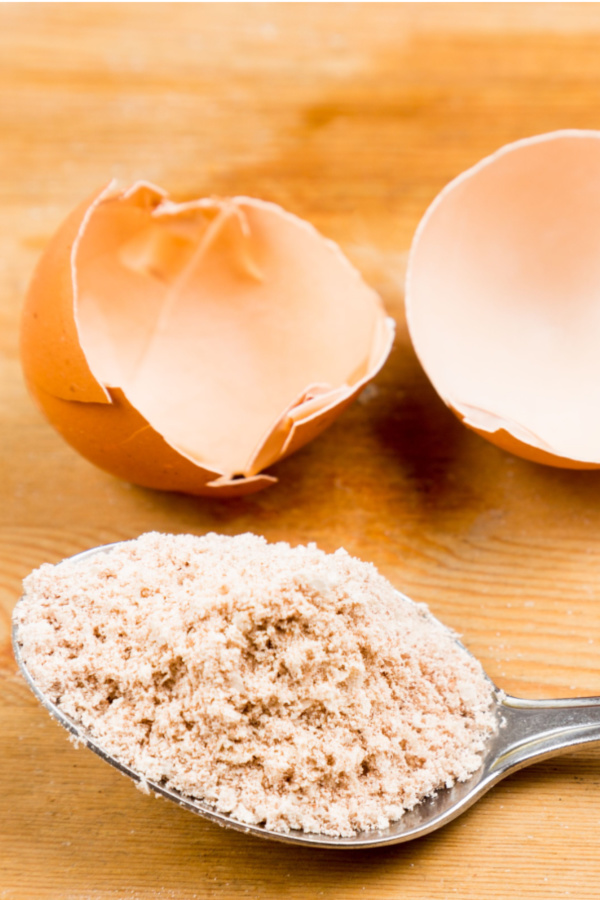

To be effective, use the egg shells from four to six eggs in each planting hole, or about two tablespoons of egg shell powder. If you happen to have a small electric coffee grinder – it makes fast work of grinding up the shells! Affiliate Link: BLACK+DECKER One Touch Coffee Grinder
Finally, while you are mixing all of that goodness into your planting hole, don’t forget spent coffee grounds. Yes, as it turns out, just like many humans, tomato plants enjoy a little jolt of energy from coffee grounds too!
Coffee grounds contain nitrogen and other trace elements. Nitrogen is a key factor for tomato plants when it comes to growing strong foliage and roots. But even more, like compost and worm castings, spent coffee grounds help to retain moisture and loosen the soil makeup.
Mix two to three tablespoons of spent coffee grounds into each planting hole. It’s important to use only the spent grounds and not fresh grounds. Fresh grounds are acidic and can affect the soil’s pH. Spent grounds, because they are run through a steaming hot water rinse, lose the acidity and are perfect for powering your plants. Once your tomato plants get planted and it’s time to give them a little boost, be sure to check out our article Fertilizing Young Tomatoes – 3 Simple Tips To Power Up Your Newly Planted Tomatoes Fast!
Here is to knowing what to put in your tomato planting hole this year – and to growing your best crop of tomato plants ever!
Follow Our Facebook Page For Great Gardening Tips And Advice! This Is My Garden Facebook Page
This Is My Garden is a garden website created by gardeners, for gardeners. Jim and Mary Competti have been writing gardening, DIY and recipe articles and books and speaking for over 15 years from their 46 acre Ohio farm. They publish three articles every week, 52 weeks a year. Sign up today to follow via email, or follow along!
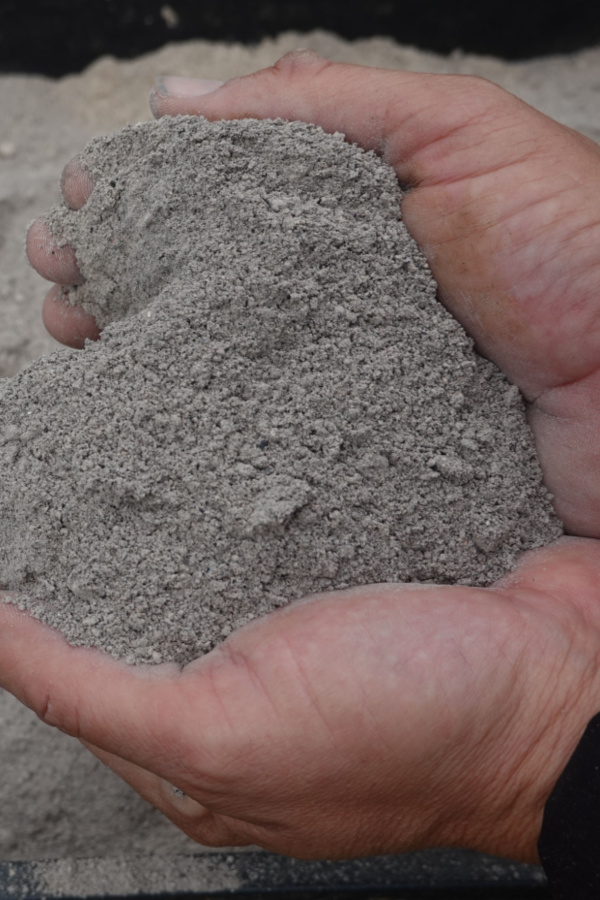
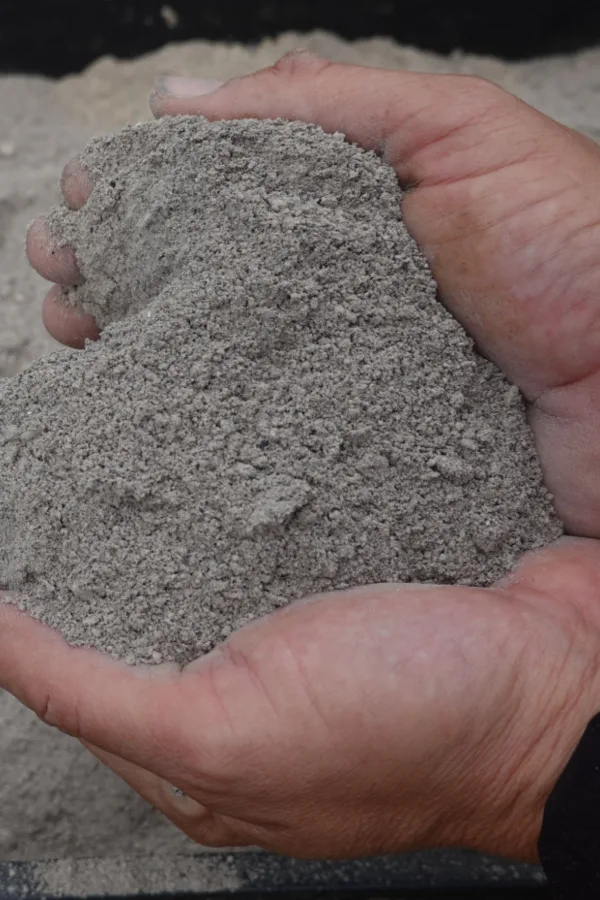
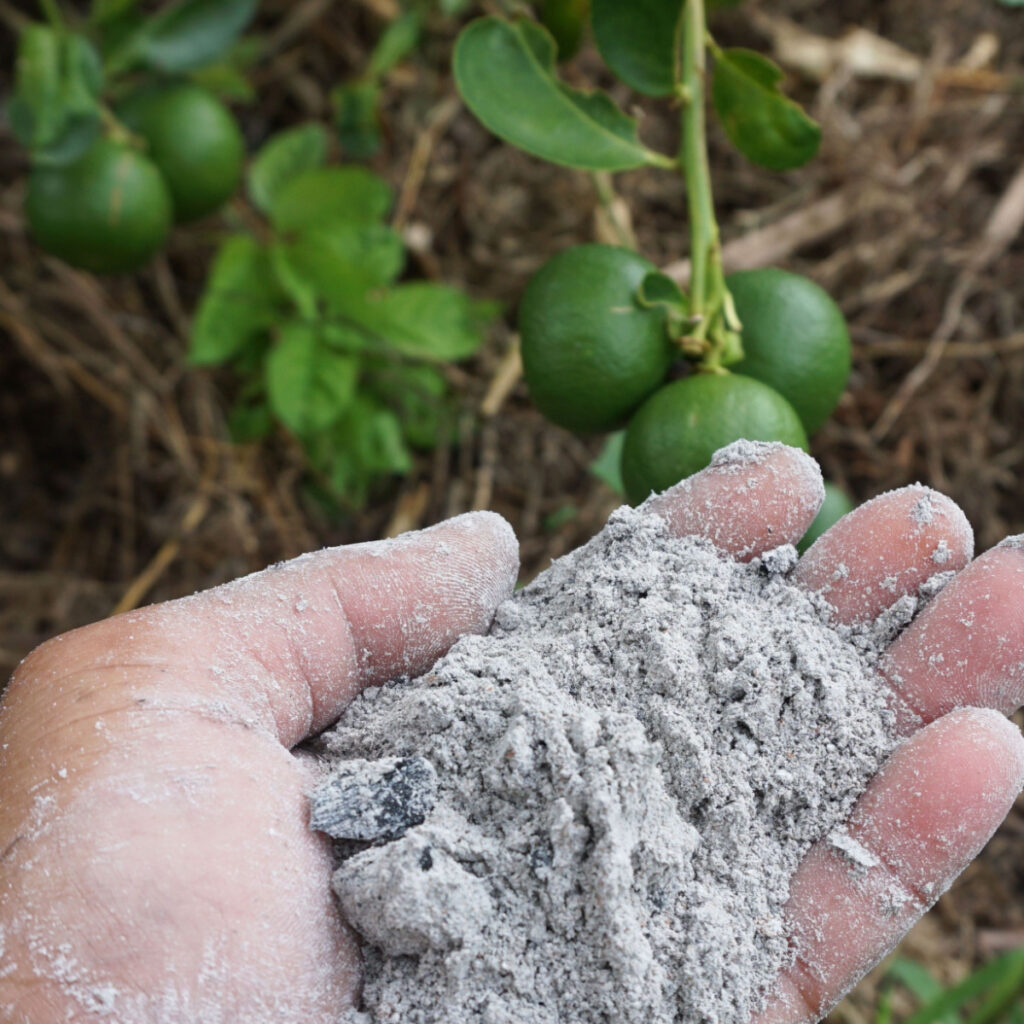
One of the best ways to get your tomatoes off to a great start – and help them grow bigger, better, and more productive than ever is by planting them with wood ashes. And is it ever easy to do!
As it turns out, wood ashes can be extremely beneficial all over the vegetable garden. From helping to raise the pH level in overly acidic soils, to recharging tired soil with a multitude of nutrients and minerals.
But when it comes to growing the most popular plant of all in the vegetable garden – the beloved tomato – ashes are truly unbelievable. Not only they can they help keep your plants healthier and safe from blossom end rot and more – they can also be a huge help in delivering a bigger harvest.

So why are ashes so incredible for tomato plants? For starters, when wood burns down, the nutrients left behind in the ash are some of the most important of all when it comes to growing healthy, strong, and highly productive tomato plants.
At the very top of the list of those nutrients is calcium. Calcium is absolutely crucial for tomato plants. Not only does it help young tomato plants develop healthy cells and wall structure for strong stems and branches, it also assists the plant in the successful germination of its blooms.
But as important as those are to a tomato plant’s growth, calcium is even more critical when it comes to a tomato plant forming healthy fruit.
Without enough calcium, tomato plants are highly prone to blossom end rot. Blossom end rot is a disorder that occurs when a tomato plant is calcium deficient. As the tomatoes form on the plant, the blossom end begins to rot. Ultimately, the fruit rots away before it can mature.

The good news is that wood ashes happen to contain a large amount of calcium. In fact, nearly 20% of a pile of ashes is made up of calcium. Even better, those same ashes also contain a fair amount of potassium as well – which just happens to be another key nutrient tomatoes need.
Potassium, or potash as it is often called, is used by tomato plants to help absorb water. And because a tomato consists of nearly of 95% water – the ability to take in more water can certainly be a huge key in developing larger and more juicy tomatoes on your plants.
Potassium also helps power photosynthesis, which helps tomato plants turn light into energy. Energy that then powers strong, healthy growth and more blooms. Wood ash also happens to contain magnesium, phosphorous and other trace nutrients that tomato plants need as well.
If all of that wasn’t enough reason to use wood ashes on your tomato plants, when mixed into the soil around plants, ashes also increase the soil’s ability to retain moisture. That means every time it rains or you water, the plants stay hydrated longer than ever.
Now that we know the benefits ashes can bring to tomato plants, let’s take a look at a simple two-prong approach for how to best use them for great tomato plants.


The secret to success when using ashes to power tomato plants all comes down to knowing when to apply ashes to the soil and plants – and in what quantity.
Just as with fertilizer and water, too much of a good thing can be harmful to plants. If too little ash is used, your tomato plants can’t get the critical nutrients they need. And if too much is applied, it can change the soil’s pH and negatively affect growth.
So when and how much wood ash should you apply to your plants? There are actually two great ways to use ash on your plants, and you can do both easily and quickly on planting day.
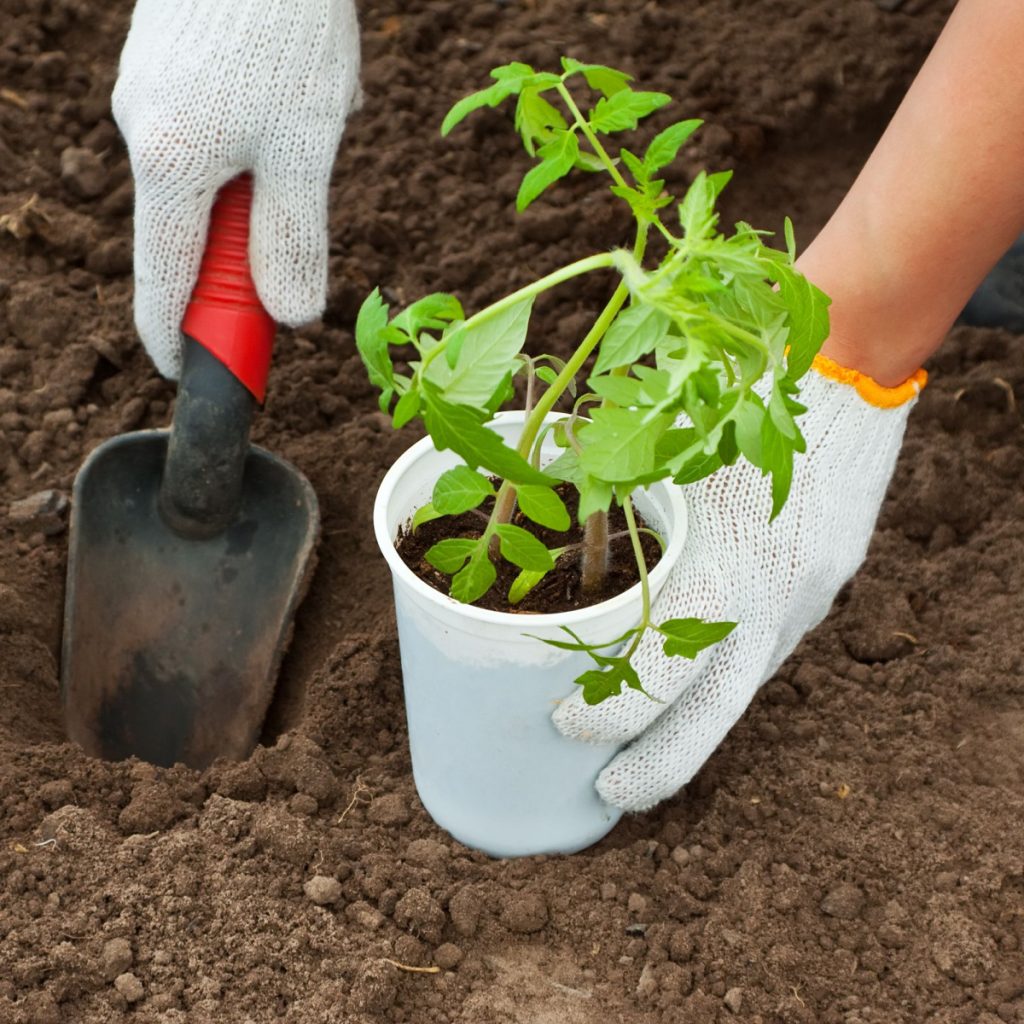
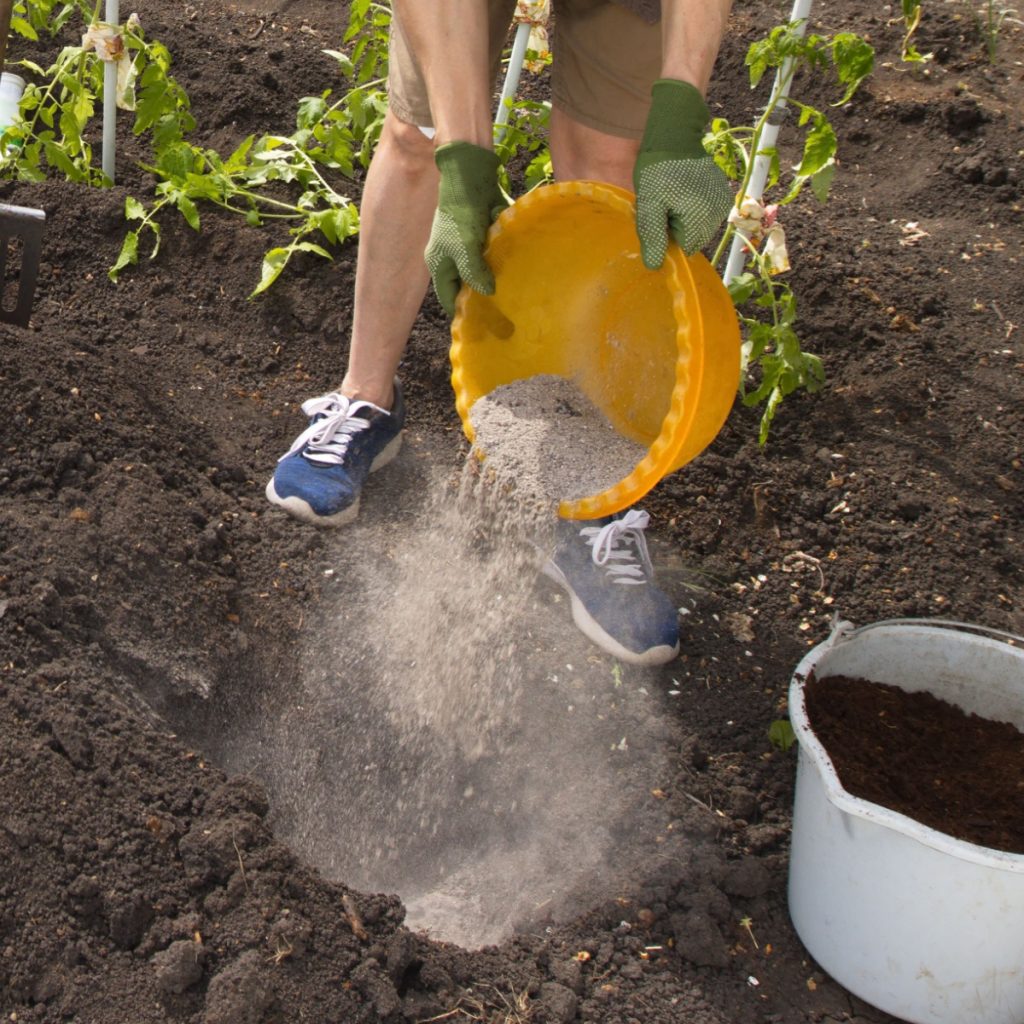
One of the most important times to use ashes on your tomato plants is on planting day. Putting ashes directly into your planting holes can give young transplants a big dose of the nutrients they need most early on.
For best results, start by digging your tomato planting hole deep. The deeper you plant your tomatoes the better. This will allow roots to develop all along the stem. This, in turn, provides a strong anchor and the ability to absorb nutrients more quickly. A deep hole also allows you to add in plenty of wood ash as well. See: How Deep To Plant Tomato Plants.
For each plant, mix in about 1.5 cups of wood ash with the existing soil. This is also a great time to add in worm castings, coffee grounds, compost and egg shells. Together, all of these natural ingredients will fill your planting hole with serious power. Affiliate Link: 100% Worm Castings
Once your transplant has been planted, lightly tamp the soil on the surface to set it in place. Now it’s time to add a bit more ash as a topdressing before you mulch your plants.
A top dressing of ash on the soil’s surface will allow even more of its nutrients to leach down into the soil every time it rains or you water. The ash on the soil surface will also help to hold that moisture in place longer as well.
To top dress, scatter about 1/2 cup of ashes lightly around the base of each plant. Finish by mulching your tomato plants as you normally would with straw, shredded leaves or grass clippings. By putting the ash under the mulch, it will stay in place and do its job perfectly.
One ingredient wood ashes do not contain is nitrogen. Because of that, it’s still important to fertilize your plants as usual on a regular basis throughout the season. When fertilizing, apply a liquid fertilizer every ten to fourteen days at half of the recommended strength. Affiliate Link: Farmer’s Secret Tomato Booster Fertilizer (32oz).
By giving your plants more frequent but lighter doses of power, it keeps your plants consistently energized without overpowering them. If given too many nutrients at once, tomato plants will simply grow bigger. All at the expense of producing new blooms and fruit.
Together, the fertilizer and the ash will give your tomato plants all of the nutrients they will need to give you your best crop of tomatoes ever! For more information on getting the most from your tomato plants, be sure to read our article: The 4 Best Companion Plants For Tomatoes – How To Get Tomato Plants To Grow Better!
Follow Our Facebook Page For Great Gardening Tips And Advice! This Is My Garden Facebook Page
This Is My Garden is a garden website created by gardeners, for gardeners. Jim and Mary Competti have been writing gardening, DIY and recipe articles and books and speaking for over 15 years from their 46 acre Ohio farm. They publish three articles every week, 52 weeks a year. Sign up today to follow via email, or follow along!
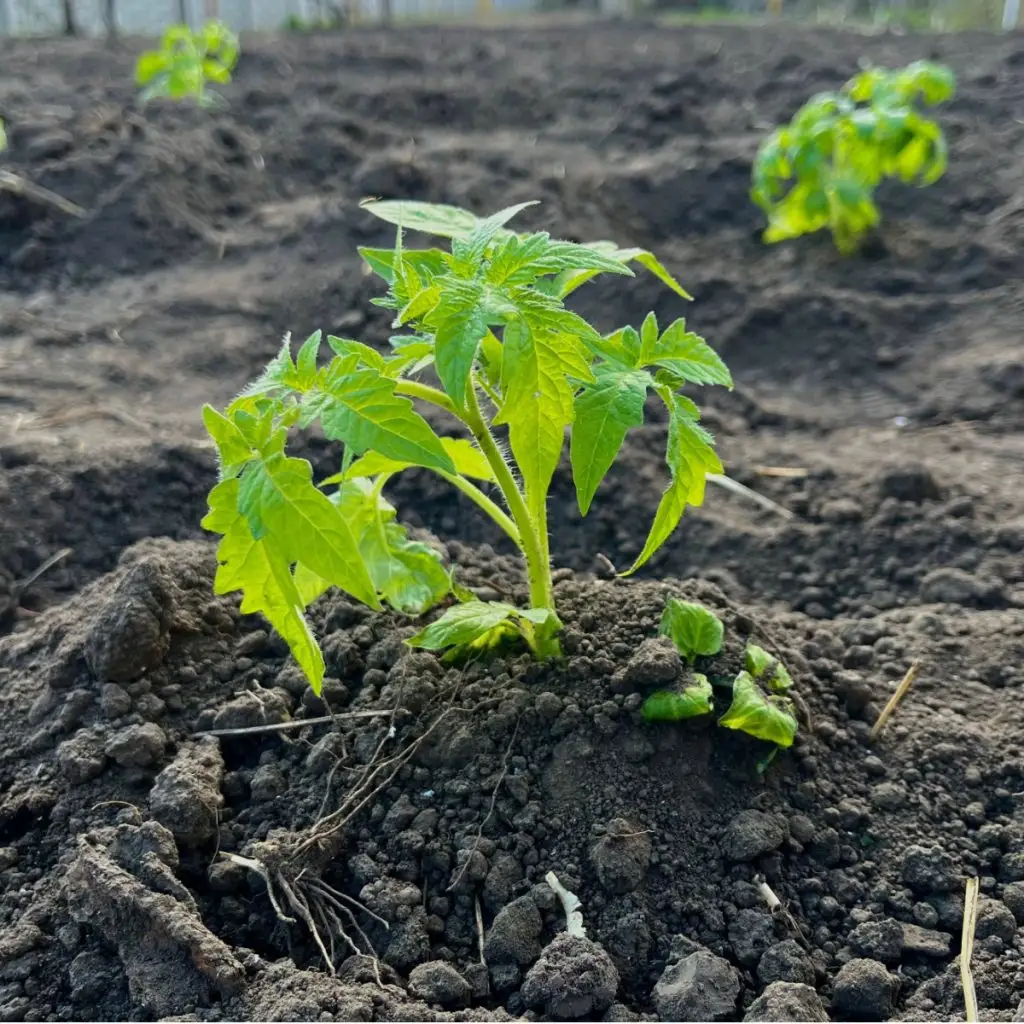
Without a doubt, the most important day in a tomato plant’s life is the day it’s planted outdoors – which is exactly why it’s so important to avoid 5 of the most common and costly planting mistakes often made when gardeners plant their tomatoes in the ground!
Whether you grow tomatoes in a traditional garden, raised beds or in containers – how and when you put your tomato plants into the soil on planting day can make all the difference between starting your plants down the road to success – or putting them at risk of failure right from the start.
One thing is for sure, putting transplants into their permanent home is quite stressful on the entire plant. Not just for the roots below the soil surface as they try to adjust – but also for the stems and foliage above the ground dealing with direct sunlight, fluctuating temperatures, wind and rain. But all too often, that stress is made far worse by how the plant is planted.

But here’s the good news. By simply avoiding 5 all-too-common pitfalls – and instead providing your tomato plants with the right space and soil conditions from day one, nearly all of that stress can be greatly reduced. And because of that – you can have your transplants growing stronger and faster than ever!
One of the biggest mistakes made in vegetable gardens as a whole is not rotating crops from year to year. And that mistake is amplified when growing tomatoes!
Tomato plants use a tremendous amount of resources from the soil. Unfortunately, if you keep planting your tomatoes in the same space or soil each year, the nutrients they need most are all but depleted from the soil.
But the news gets worse when planting tomatoes in the same space. Beyond a lack of available nutrients, planting in the same soil leaves tomato plants vulnerable to two of the biggest ailments that affect tomato plants, blossom-end rot and tomato blight.
Blossom rot is due to a deficiency of calcium in the soil. And if tomatoes grow in the same exact soil year after year, the calcium in the soil can be lacking or completely gone. Tomato blight on the other hand, is caused by spores. And once the spores are present in the soil, they can stick around to destroy crops for multiple years.

By simply rotating where you plant tomatoes each year, they can find the nutrients they need. They can also grow in spore free soil to keep disease at bay. This includes changing the soil in containers every single year. See: How To Prevent Blossom End Rot.
Another big mistake is jumping the gun and putting your tomato plants in the ground too early. Tomatoes are a warm weather and warm soil crop.
Planting too early can cause a long list of issues for tender, young tomato plants. Both early on – and as the plants mature into mid and late summer. When the soil is still cold, the roots of tomato plants do not act or perform to the best of their abilities.
Because of this, they do not absorb nutrients or water from the soil well. And as they sit and lag in the soil, they also become extremely vulnerable to rot, mold and other disease.
Worse yet, planting too early can leave your plants susceptible to a late frost or even a possible killing freeze. Frosts can injure tender foliage and impact future growth by stunting the plant. If the frost is hard enough or if a freeze occurs, it can actually kill off the entire plant in short order.
A big key to success is to avoid the temptation of planting too early simply because you have had a few warm days. Allow warmer weather to settle in so that soil temperatures can heat up as well. It can take a full week to ten days of 70 to 80 degree daytime temperatures to warm the soil adequately. And it’s vital to wait until that happens before planting.
For best results, soil temperatures need to be at 60 to 65° before planting. An inexpensive soil thermometer is a great way to check the soil to see if it’s ready. Simply put the probe in the soil to instantly to see the temperature. Affiliate Link : AcuRite Soil Thermometer Probe
As simple as this sounds, planting when the soil is warm will pay huge dividends. A smaller plant planted in warm temperatures will easily outgrow transplants twice its size that were planted in cool soil. Whatever you do, wait until that temperature warms!
All too often, gardeners plant their tomatoes far too shallow. When you plant your tomatoes, you need to plant them deep! The deeper your roots can grow, the more easily they will develop strong, healthy, and resilient roots. Planting deep also allows plants to have less chance of drying out and more ability to absorb nutrients.
Forget shallow three to four inch holes that barely cover the top soil level of your tomato transplants! Instead, dig down eight to ten inches to create your planting holes. A post hole digger can be perfect for this, creating a nice, wide deep hole in seconds. Affiliate Link: Post Hole Digger
Finally, before you plant your tomatoes in the hole, it’s important not to commit the next common planting mistake on our list – failing to fill your planting hole with power!

As mentioned earlier, tomato plants consume a lot of nutrients from the soil. And that is exactly why it is vital to give them a big dose of power right as you plant them!
Fill your planting hole with compost, worm castings, crushed egg shells and coffee grounds to accomplish this. A cup or two of compost will help provide energy and help plants absorb moisture. A half cup of worm castings will do the same and release their energy slowly as the plant grows. Affiliate Product Link: Worm Castings
Three to four crushed egg shells will help provide calcium to your tomato plant as it grows. This is pivotal for eliminating blossom rot. Calcium also helps develop strong cell structure in the stems. Be sure to pulverize the egg shells with a grinder to get them to work fast for your plants.
And how about the coffee grounds? A few tablespoons of coffee grounds can help power your tomato plants with a low dose of nitrogen and other trace minerals. They also help retain moisture, helping keep plants hydrated.
Mix all of those powerful materials with the soil in the planting hole as you plant your transplants. Plant them down far enough that you cover the first two sets of leaves. All along the buried stem, new roots will grow off to absorb even more energy and water from the soil.
Last but not least, don’t forget to mulch your tomato plants! And not just with a couple inches of mulch, but with a thick, protective layer four to six inches deep.
Leaving soil bare around your plants will cause all types of serious issues for your plants. For one, it dries the soil and roots of the plants out at a rapid rate. And tomato roots need their moisture. Mulch also regulates the soil temperature, keeping it from soaring or plummeting on cold or hot days.
Failing to mulch also allows competing weeds to easily move in. As weeds take hold, they steal moisture and nutrients from the soil, and away from your tomato plants.
Mulch tomato plants with a thick coating of straw, shredded leaves or compost to help insulate and protect plants as they grow. A few inches on container tomato plants is equally important to help insulate plants. Here is to planting your tomato plant with success – and to a big harvest this year as well!
Follow Our Facebook Page For Great Gardening Tips And Advice! This Is My Garden Facebook Page
This Is My Garden is a garden website created by gardeners, for gardeners. Jim and Mary Competti have been writing gardening, DIY and recipe articles and books and speaking for over 15 years from their 46 acre Ohio farm. They publish three articles every week, 52 weeks a year. Sign up today to follow via email, or follow along!
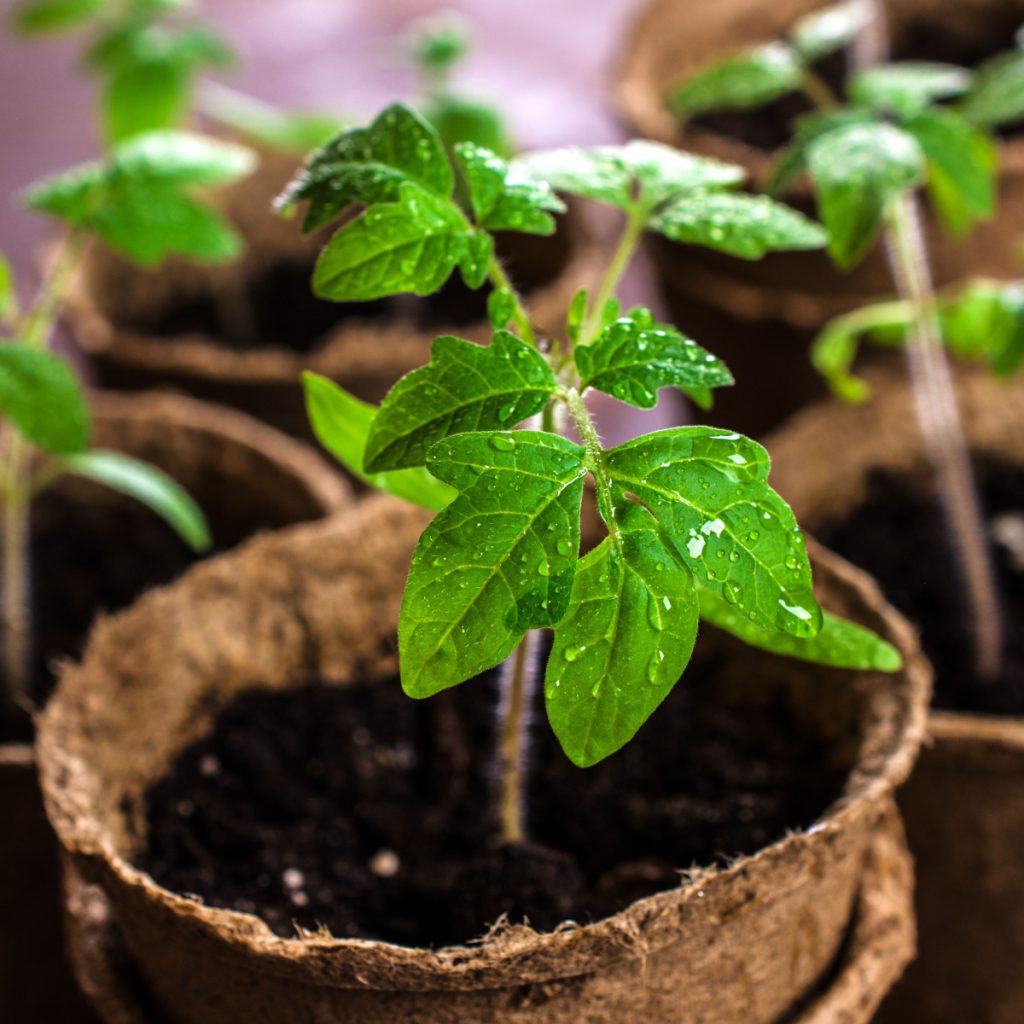
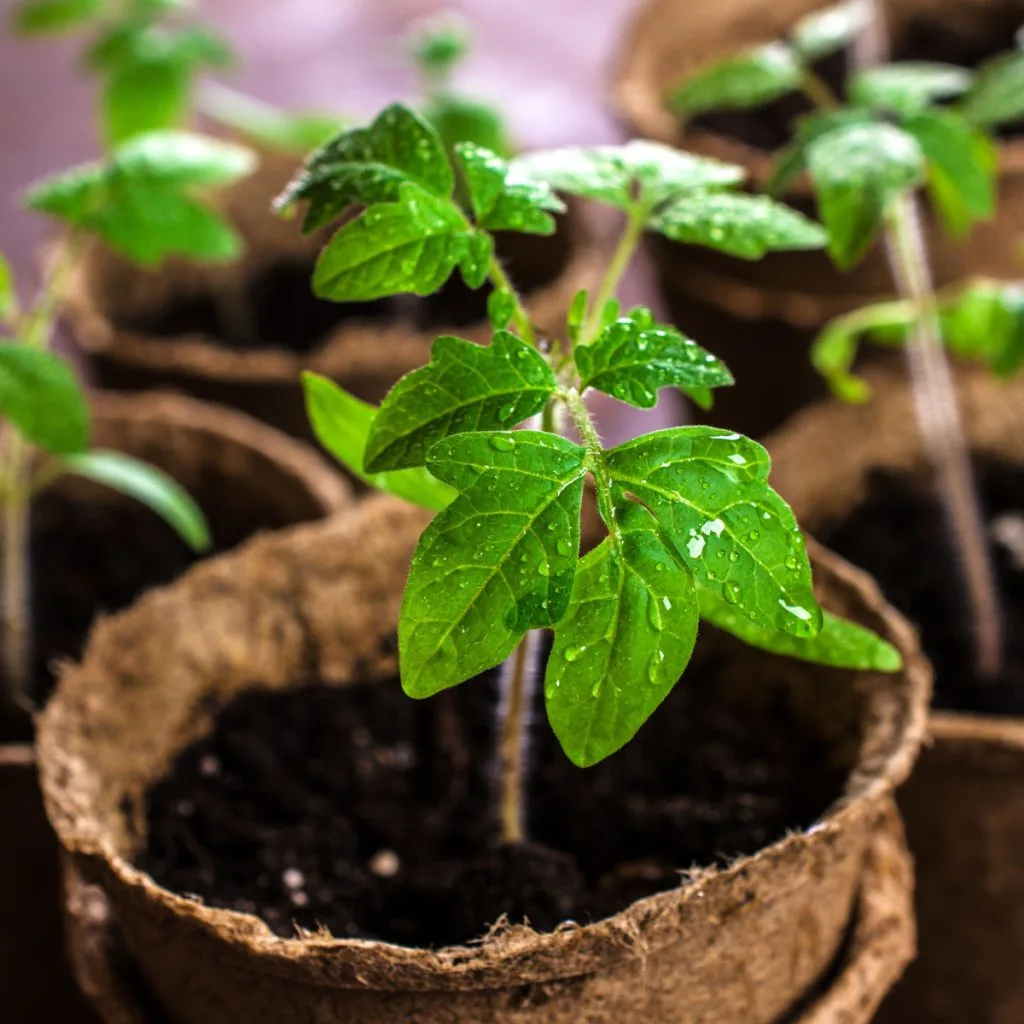
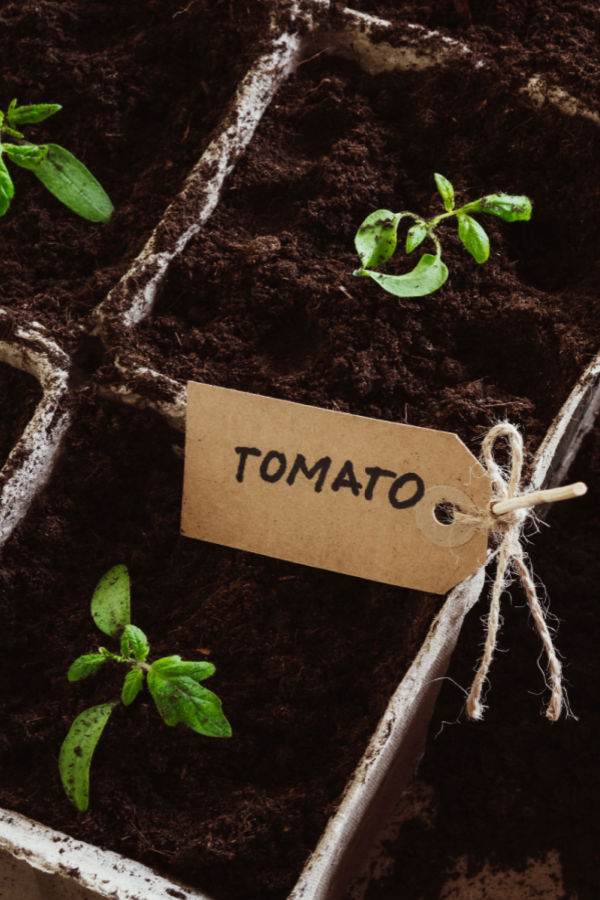
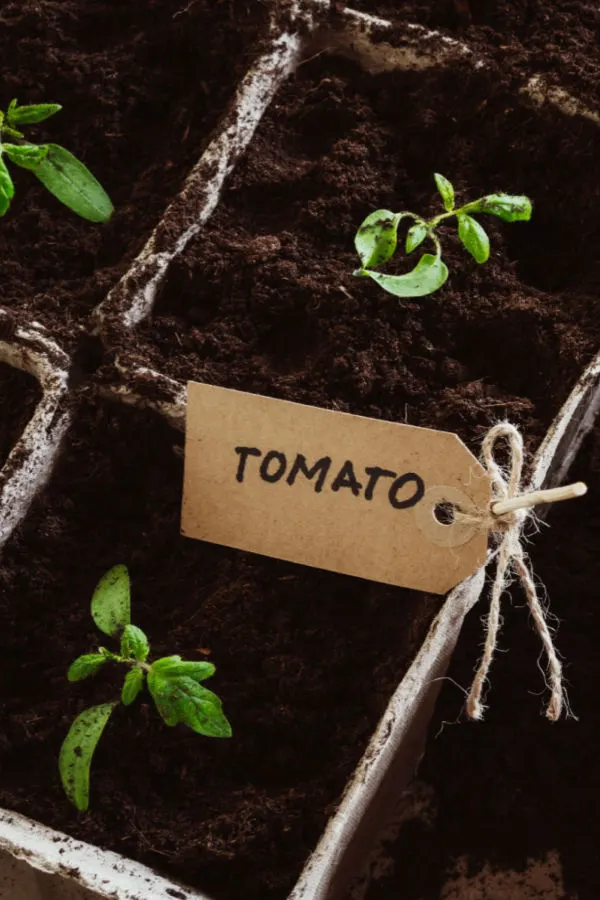
Looking for the best way to start your tomato plants from seed indoors – and have amazing transplants ready in time for your raised beds or garden this year?
Not only is the process of growing your own plants from seed fun and extremely rewarding, it can lead to stronger plants and far better results than when using store bought transplants. And contrary to what many may think – the process can be quite economical and easy.
But even more, growing from seed lets you have control of your plants right from the start! You have the opportunity to give your plants exactly what they need all along the way – and make sure they get the exact care they need before they go in the ground on planting day.
Even better – growing your own plants from seed can help save big on a gardening budget. Let’s face it, tomato plants can be expensive to purchase each and every spring. But seeds are far less expensive. Especially when you save them for multiple years.
But here is the best news of all – growing tomatoes from seed couldn’t be easier. As you will see below, it doesn’t require fancy lights or equipment. Nor does it have to be time consuming. In fact, by following four simple secrets – anyone can start and grow amazing tomato transplants in their home with ease!
Just like tomato plants, tomato seeds need great soil to grow healthy and strong. If you plant your seeds in less than ideal soil, you will get less than ideal results.
Instead of starting seeds in garden soil, top soil or basic potting soil, it’s important to use soil specifically created for starting seeds. A good seed starting soil is light, airy, well draining and full of the nutrients seeds need.
Seed starting soil allows seeds to germinate quickly and easily. More importantly, the loose soil allows roots to expand freely and quickly. That same looseness also allows excess water to flow through and not rot out tender young seedlings. Affiliate Product Link: Espoma Organic Seed Starter Premium Potting Soil Mix

Heavier soil can make root growth difficult. It also simply doesn’t have enough nutrients in it to help seeds take off quickly. Without a doubt, great transplants really do start by planting your seeds in a quality seed starting soil.
Last but not least, while on the subject of starting seeds in soil – it’s best to use larger seed cells to grow your plants in. Small cells may hold a lot of plants – but it will severely restrict early growth.
Using larger 2 to 3 inch wide and deep seed starting cells instead of smaller 1 inch versions can pay off with far better results . Larger cells allow for more root growth. Even better, they prevent you from having to transplant seedlings more than once – which can temporarily slow growth. Affiliate Link: Seed Starter Trays 300 DEEP Extra Large Cells
Plain and simple – you can’t grow good tomato transplants in a sunny windowsill! The plants will certainly sprout, but they will grow long and skinny. And the result will be a “leggy” plant that eventually struggle to grow outdoors.
The key to growing strong and healthy transplants is to let them grow low and slow. And the only way to do that is with artificial lighting. Unfortunately, when tomato plants grow in a sunny windowsill, they reach for the sun. And because it’s far away, they develop weak and skinny long stems that bend and lean.
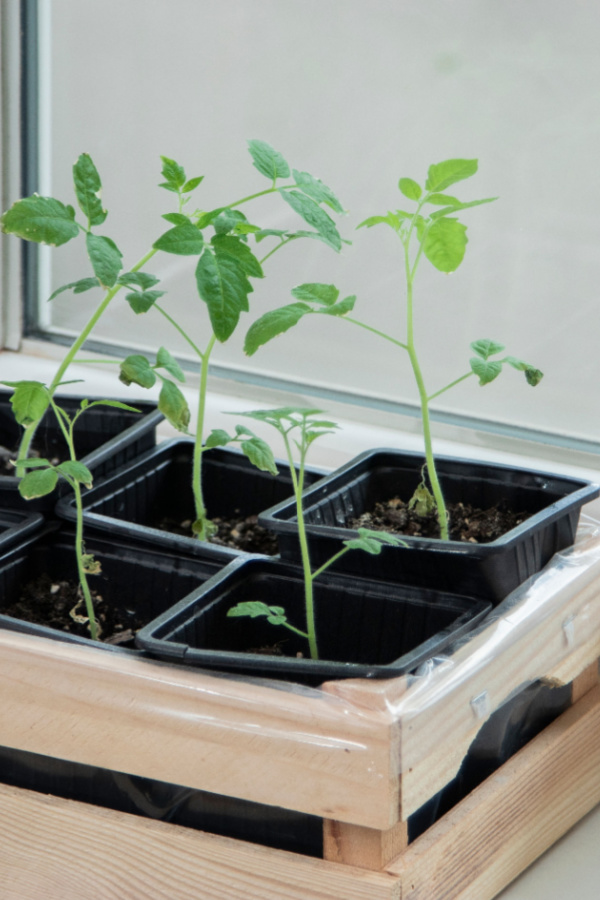
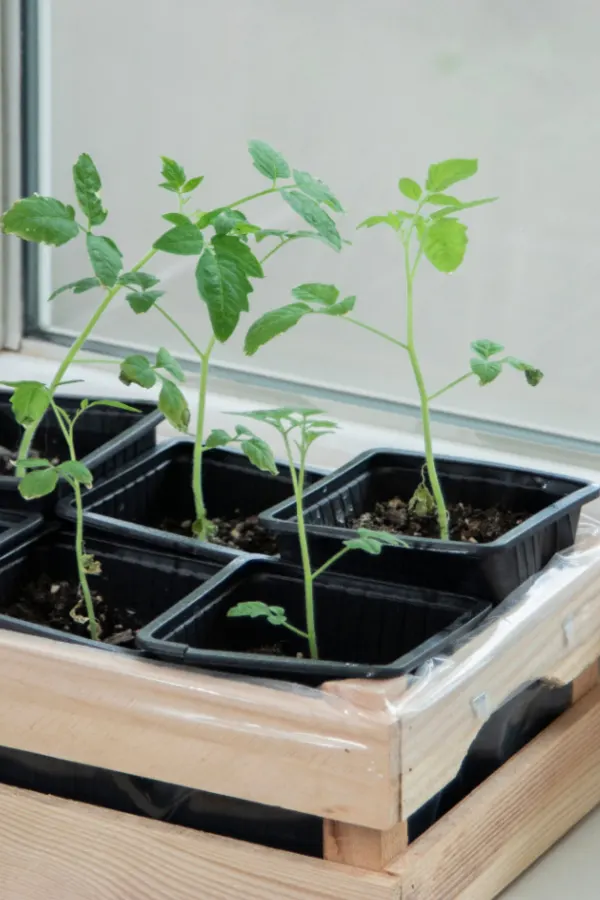
The good news? It doesn’t take fancy or expensive lights to grow tomato plants. Vegetable plants do not require special grow lights to develop. In fact, an ordinary fluorescent or LED shop light is perfect for giving young plants everything they need to develop.
Simply place these lights directly over top of your seedlings once they sprout. Keep the bulbs about 1 to 1.5 inches above the tops of your plants and leave on for 12 to 14 hours each day.
The cool, bright light will allow the plants to grow with ease. Even better, because it is right over top, they will develop strong, slow growth. See our article: How To Give Indoor Seedlings The Right Light – With Inexpensive LED Shop Lights!
If there is one mistake gardeners make more than any other when growing their own plants from seed, it’s failing to fertilize plants when they are young. Fertilizing young seedlings with a light dose of liquid fertilizer every few weeks is crucial to developing strong, healthy plants.
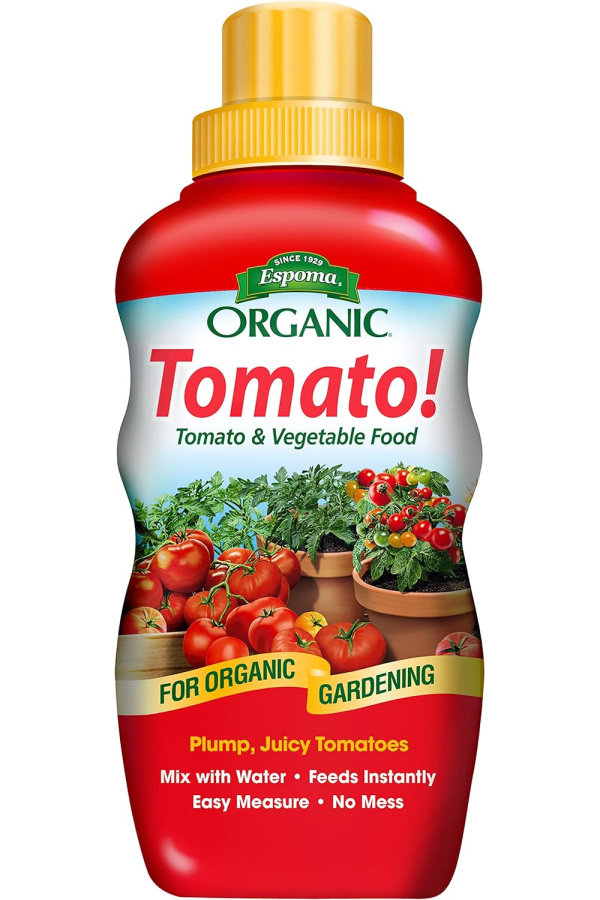
Once plants have sprouted and have been up for about 14 days, it’s time to start fertilizing. But the key here is to fertilize lightly. For this, you can also use an all purpose organic liquid fertilizer. However, you will need to use it at 1/4 to 1/5th of its recommended strength for seedlings. Affiliate Link: Espoma Organic 8 Ounce Concentrated Tomato! Plant Food
Give your plants a regular feeding every ten to fourteen days until planting day. The extra nutrients will go a long way to helping give you transplants that are sizable, healthy, and most importantly, ready for planting day outdoors!
Last but not least, be careful not to over or under water your young tomato plants. When growing indoors, plants will usually need to be watered every day or two. The real key to success is to never let the soil get too dry – or stay too wet.
Allowing plants to dry out too much between waterings will lead to poor root and stem development. When roots dry out, they shrivel. And when they shrivel, they are unable to take in nutrients from the soil. Infrequent watering also causes stress on the plant that can stunt future growth as well.
On the other side, when the soil stays too wet, the tender roots of plants swell up. And when they do this, it also leaves the roots unable to take in needed nutrients from the soil. This can often lead to the tomato plant’s leaves turning yellow and even falling off the plant.
All in all, with good seed starting soil, proper light and a bit of fertilizer and regular water, your plants will reward you with amazing growth. Once planting day rolls around, be sure to check out How To Avoid The 5 Most Common Tomato Planting Mistakes – And Grow Great Tomatoes! Here is to growing your own tomato plants from seed this year. And, to having your biggest tomato harvest ever!
Follow Our Facebook Page For Great Gardening Tips And Advice! This Is My Garden Facebook Page
This Is My Garden is a garden website created by gardeners, for gardeners. Jim and Mary Competti have been writing gardening, DIY and recipe articles and books and speaking for over 15 years from their 46 acre Ohio farm. They publish three articles every week, 52 weeks a year. Sign up today to follow via email, or follow along!
Looking for a few simple ways to keep your tomatoes from getting blossom end rot this year?
There is nothing more discouraging than watching a perfectly healthy tomato plant produce tomatoes that suddenly begin to brown off on one end – and then slowly see those tomatoes rot away!
Blossom end rot occurs at the end of fruits as they develop and ripen. In essence, the tissue on the flowering end of the fruit rots away. In the process, it leaves behind an ugly brown scar. One that severely impacts the health and vitality of the tomato, and the plant’s overall yield. It can be frustrating for sure, but the good news is that this issue can usually be prevented – and all with just a little bit of extra care.

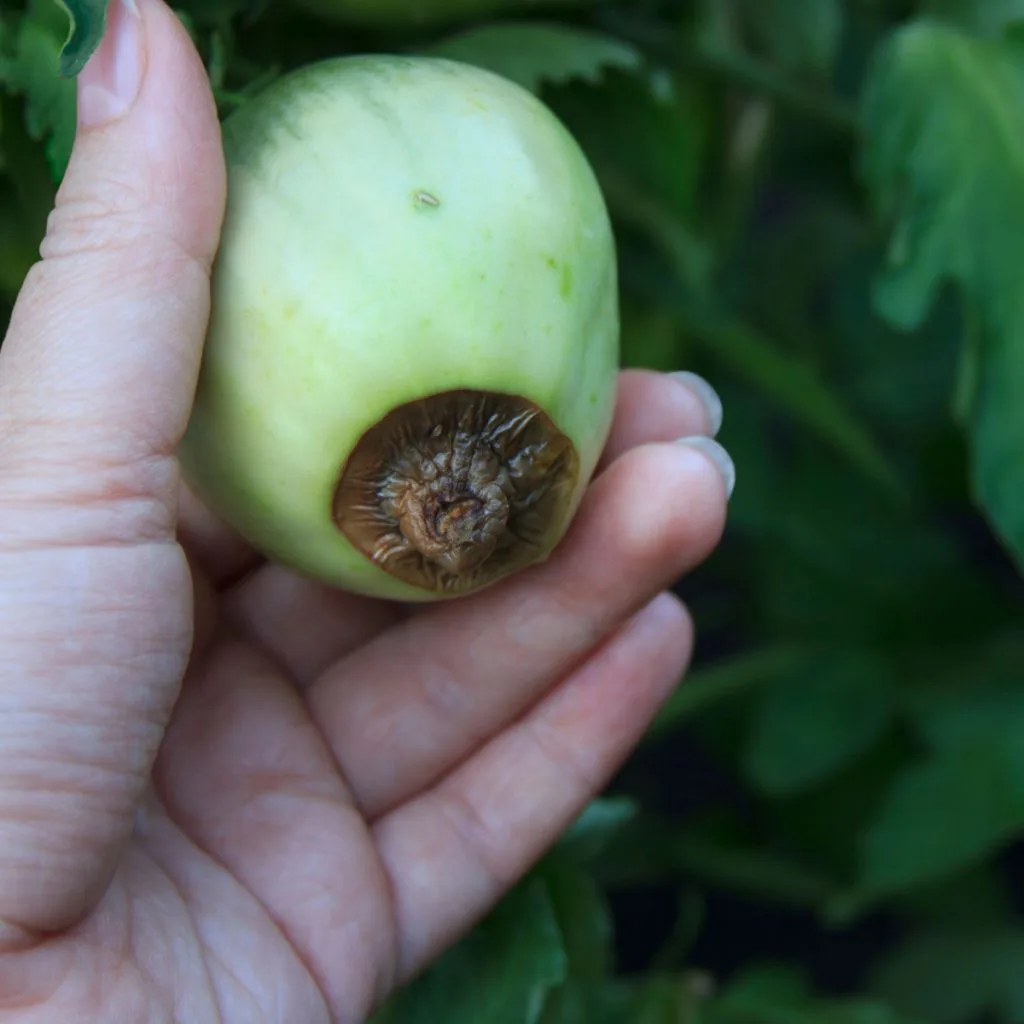
Blossom end rot is not a disease or an infection that spreads from plant to plant. Nor is it a soil borne issue like tomato blight that lies in wait to return year after year. Instead, it is caused by one simple problem – a lack of calcium being absorbed by the plants.
Unfortunately, although it’s notorious for ruining tomato plants, it can also affect zucchini, squash, pepper and eggplant as well. Many who deal with blossom end rot assume the issue all stems from lack of calcium in the soil. And many times, that is indeed exactly the case.
But it’s important to note that in addition to a lack of available calcium, there can also be other underlying conditions or issues that can prevent your vegetable plants from absorbing the vital mineral. Even when there is plenty of calcium already in the soil!
The real key to success in preventing the issue is to cover both bases. First – making sure your soil is supplied with enough calcium. And second – making sure the soil doesn’t have any issues getting that calcium up into your plants.
To be sure, most issues surrounding blossom end rot have to do purely because the soil does not have enough calcium in it. Luckily, that is a very easy issue to overcome!
First and foremost, the practice of crop rotation is vital in keeping calcium at the ready for plants. In fact, crop rotation is extremely important for keeping all of the nutrients plants need for strong, healthy growth in good supply.
Vegetable plants feed from the soil as they grow and develop. And whether it is corn, beans, lettuce or tomatoes, each vegetable uses a different set of nutrients to thrive. But by moving these crops around, the soil has a chance to replenish what might have been taken from the plants that grew in the space previously.
The simple fact of the matter is if you plant the same plant variety in the same soil space year after year, the soil will eventually run out of nutrients that specific plant needs. Case in point, calcium for tomatoes.
But by rotating your tomato crop each year, you can help alleviate the issue. For best results, rotate your tomatoes so that they never grow in the space for at least three full seasons. And for potted tomatoes, changing out the soil ever year is a must.
Beyond crop rotation, it’s also important to routinely replenish the calcium levels in garden soil. One of the quickest and easiest ways to do this is by adding pulverized egg shell powder into the soil – right as you plant!
Egg shells contain over 90% calcium carbonate. And by using a few tablespoons of finely crushed egg shells into each planting hole as you plant – you can allow the soil and the plant’s roots to be able to have quick access to it. But the key is to grind the egg shells as finely as possible. See our article: How To Use Egg Shells To Grow Incredible Tomatoes!
Whole shells or partial shells can take months and months to decompose. And they won’t help this year’s plants. But by powderizing the shells, the nutrients can quickly absorb.
In addition to adding crushed egg shell powder, you can also add, wood ashes, bone meal or lime to the soil to help increase calcium levels. Affiliate Link: Jobe’s Organics Garden Lime
As mentioned before, many times, there can actually be plenty of calcium present in the soil, but the plants simply can’t take it in. When it comes to this issue, there are usually 3 main culprits: improper watering, over-fertilizing, or having a compacted root system for your tomato plant.
Both over and under-watering play a huge factor in causing blossom rot. When a plant receives too much water, the roots are unable to take in nutrients. As they swell with water, they lose their ability to absorb. The same goes for when the roots shrivel from drought-like conditions. That is why proper watering is vital!
Tomatoes should receive around an inch of water per week to help develop healthy root systems. If your plants begin to turn yellow, it’s a sign that over-watering is occurring. Likewise, if plants are wilted and the leaves are curling up, there is not enough water in the soil for the plants to grow and develop.
When you water, it’s more important to water deeply than more frequently. Frequent, shallow watering does not allow the roots to grow deep into the soil. Not only does it lead to the roots drying out too quickly, it also means the roots are not deep enough to get to more of the calcium in the soil.
Another way tomato plants have difficulty absorbing calcium is when their roots are compacted in the soil. Packed soil suffocates the tiny intakes within the root nodules. When this happens, the tomato plants can’t absorb water or nutrients.
To keep soil from getting crushed down, keep foot traffic around plants to an absolute minimum. Especially within 12 to 18 inches in diameter around each plant. This allows the soil to remain loose and free for easy nutrient intake.Over Fertilizing
As the old saying goes, too much of a good thing can be a bad thing. And that is certainly the case when tomato plants are over-fertilized.
When tomatoes receive too heavy of a dose of nitrogen magnesium and phosphorous, they can crowd out the intake of calcium. The result is heavy top growth and a mess of tomatoes with blossom end rot! Fertilize low and slow with tomatoes to keep growth steady and strong.

One final note about blossom end rot. In the early spring, it’s quite common for the first few tomatoes on a plant to show some signs of blossom end rot. This is actually from the initial stress of fruit production, and not always a sign of a calcium deficiency.
Simply pick these first few tomatoes off the vine and allow the plant to settle into normal production. If the problem persists into the second or third week, then it’s time to consider a calcium issue being the problem. Here is to stopping tomato blossom end rot, and to a great tomato harvest this year! For more information keeping your tomato plants healthy and producing big, be sure to check out: Why Your Tomato Leaves Are Turning Yellow – And How To Fix The Problem!
Follow Our Facebook Page For Great Gardening Tips And Advice! This Is My Garden Facebook Page
This Is My Garden is a garden website created by gardeners, for gardeners. Jim and Mary Competti have been writing gardening, DIY and recipe articles and books and speaking for over 15 years from their 46 acre Ohio farm. They publish three articles every week, 52 weeks a year. Sign up today to follow via email, or follow along!
Looking for few unique and unusual tomato plants to grow in your garden, raised beds or containers this year? Ones that can not only add big color and interest – but also incredible flavor too?
When it comes to growing vegetables, tomatoes are certainly at the top of the list for most gardeners. Whether growing classic slicing, cherry, or salsa and sauce making paste varieties, tomatoes provide endless possibilities for both the gardener and the taste buds.
But when growing tomatoes, you don’t have to settle for the same old boring typical “red” types you see in supermarkets. Over the last decade or two, there has been nothing short of an explosion in tomato varieties. Many old heirloom tomato types have been brought back to life by growers – and many more continue to be developed by tomato growing enthusiasts.
One thing is for sure, the entire resurgence has been incredible for backyard gardeners. No longer do tomato loving growers have to limit themselves to planting and harvesting traditional red tomatoes with less than spectacular flavor. To prove that point, today’s article features 4 of the most unique and flavorful tomatoes around, and they are just waiting for you to try them out this year!
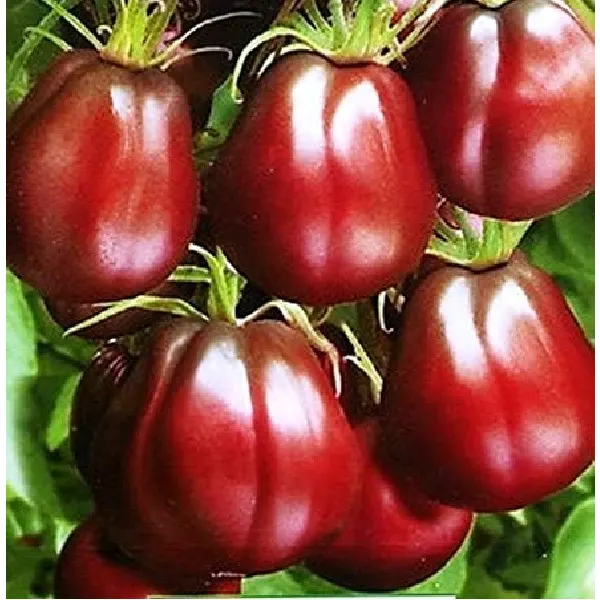
True to its name, the Black Truffle heirloom tomato gets its name from its unique pear shape that closely resembles a truffle. And when it comes to flavor, it’s every bit as special as truffles!
Originally from Russia, the tomato features a deep mahogany-brown color with hints of purple, red, and green on top. It makes for quite the beautiful fruit when hanging from the vine – or on a plate. But even better, the flesh of this tomato is dense and meaty with very few seeds, making it an excellent choice for slicing, cooking, and preserving.
As for flavor, the Black Truffle tomato is known for its deep, rich, smoky taste. It also has the perfect balance of sweetness and acidity, making it ideal for fresh salads, sandwiches, and sauces. And that meaty interior holds up well in roasted dishes too!

Black Truffle is easy and straightforward to grow from seed. Even better, as an heirloom variety, you can save seeds from year to year to grow for free. Affiliate Seed Link: Black Truffle Seeds
The plant thrives in full sun, well-draining soil, and needs to a stake or cage to help hold its heavy fruit load. As for production – you will get plenty of fresh tomatoes all season long. As an indeterminate plant, it’s highly productive, continuing to push out fruit right up until the first frost.
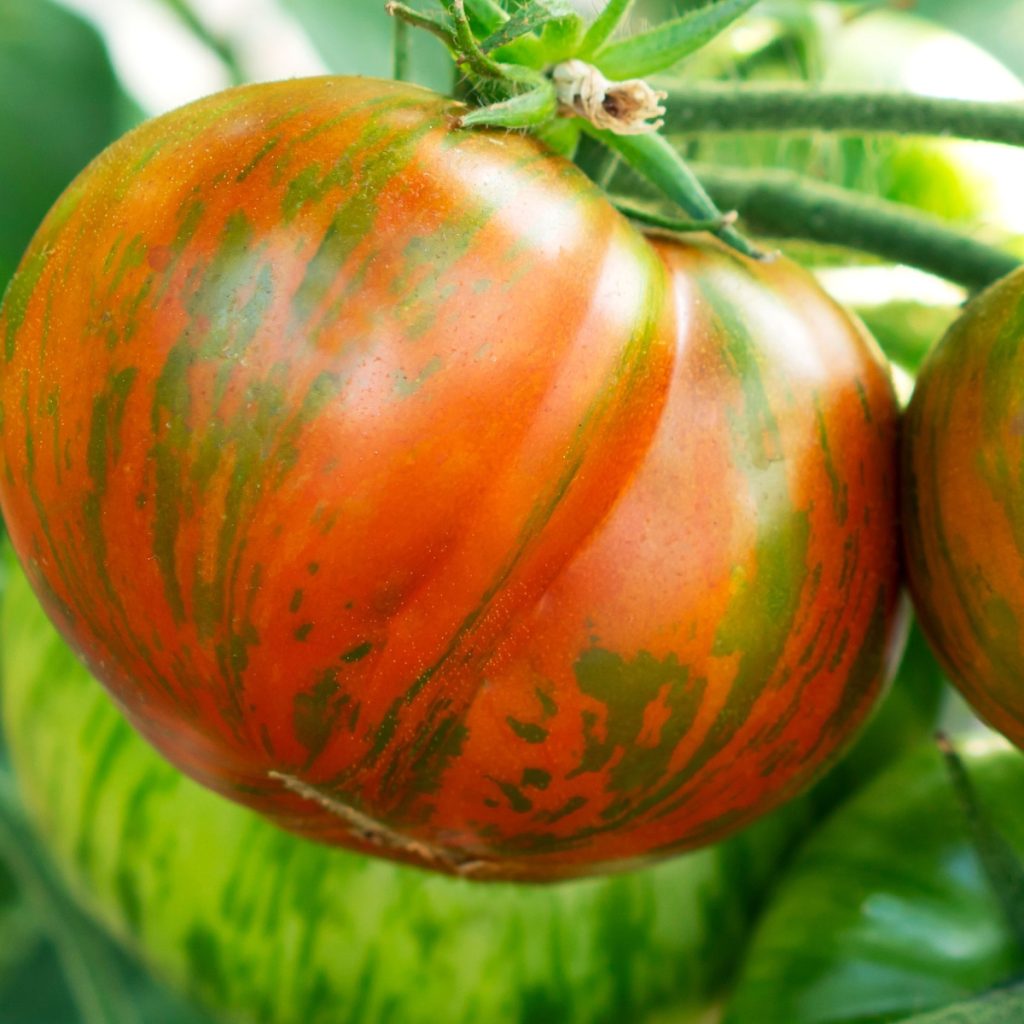
Talk about color, the Berkeley Tie Dye tomato has an incredibly vibrant, multicolored skin. The tomato ripens with a gorgeous mix of green, red, orange, and yellow streaks, giving it its tie-dye namesake.
But as beautiful as the tomato is outside when growing in the garden, when sliced open, its beefy interior has a marbled coloring of pink, red and green that is simply stunning.The beefsteak tomato grows to a nice mid-size fruit, perfect for topping sandwiches, hamburgers – or simply eating fresh.
Another heirloom tomato, the seeds of Berkeley can also be saved from a harvest to grow again. The tomato thrives in full sun and fertile soil, and will usually go from seed to harvest in about 80 days. As an intermediate, it will produce until frost takes it out late in the season Affiliate Link: Pink Berkeley Tye Dye Heirloom Tomato Premium Seeds

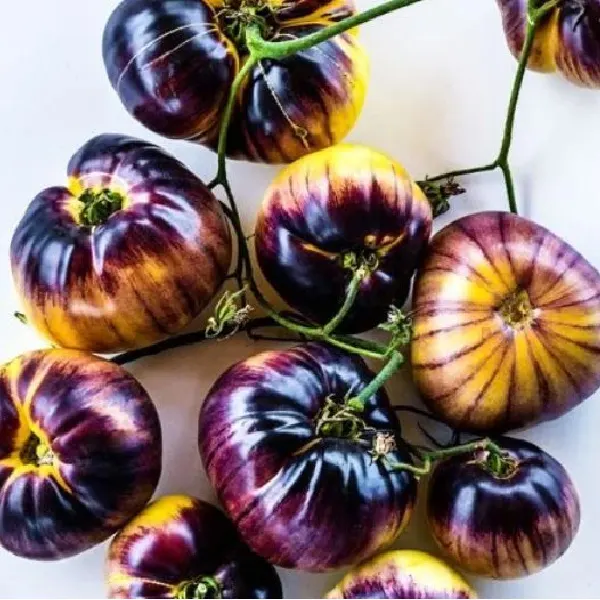
In terms of sheer beauty in the garden – it is hard to beat the Sart Roliose tomato. Originally bred in Belgium, this variety has been gaining in popularity among heirloom gardeners all over the world.
When ripe, the medium sized tomato boasts an alluring blend of yellow, pink, gold and orange coloring. The marbling on the tomato is simply beautiful. But it gets even better when you slice it open to find a red marbled flesh filled with gold and yellow streaks.
With all of those accolades, it’s hard to believe the taste is even better. The variety has very few seeds, and much like the Black Truffle, it has a great balance of sweetness and acidity. The flesh is juicy and tender and wondrous for fresh eating or in salads.
As with most tomatoes, it thrives in full sun. It also needs well-draining soil and consistent watering to stay healthy and robust. This variety is highly productive as an intermediate. It will typically begin to produce and ripen fruit around the 80 day mark, so starting from seed indoors early is a must. See: How To Start Tomato Plants Indoors From Seed – 3 Secrets To Grow Great Transplants!

The seeds are quite rare to find. The good news is as an heirloom, once you grow it, you can save the seeds from year to year. Baker Creek Seed Link: Sart Roloise Seeds
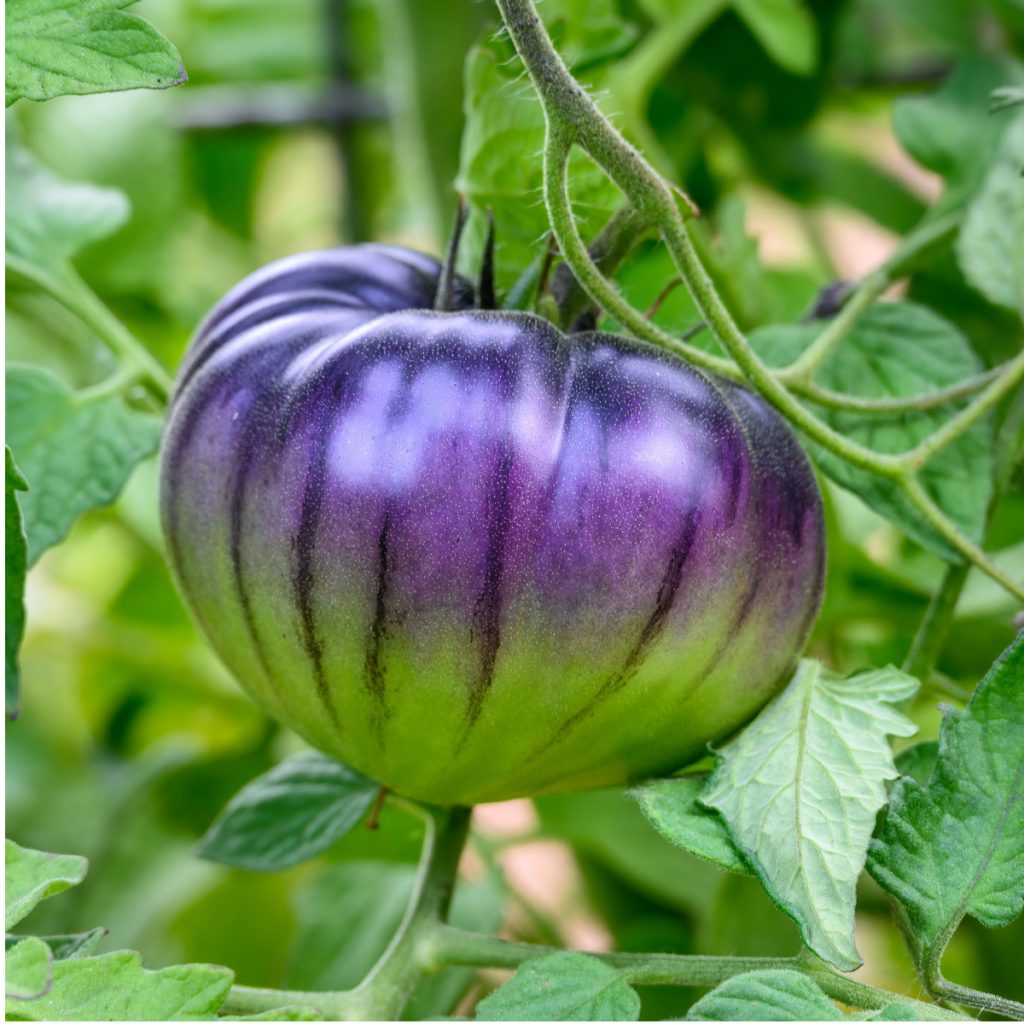
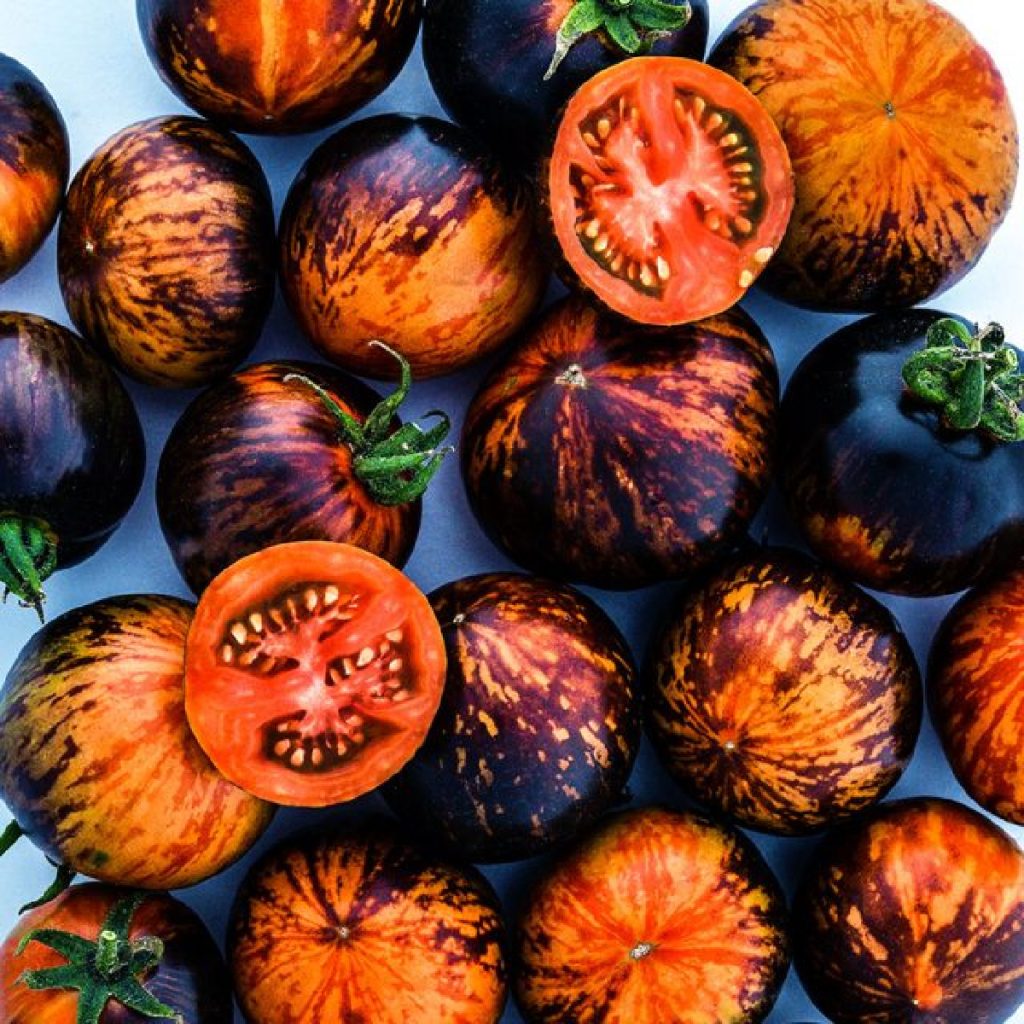
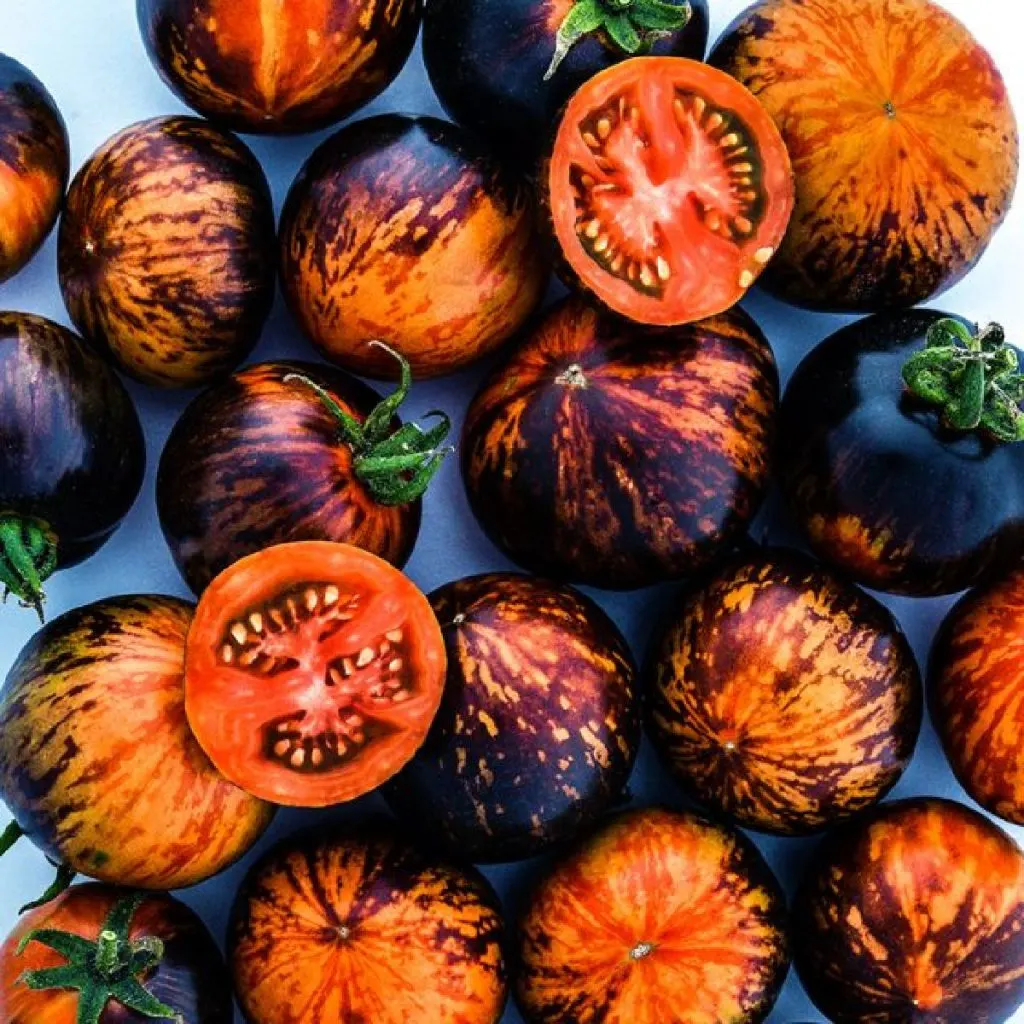
Last but not least, there is the Queen Of The Night tomato variety! This tomato (pictured at the top of the article), hails from the Rhine region of Germany and is it ever a showpiece! The plant produces large amounts of round, three-to-four ounce fruits in a with black, crimson and orange coloring. Seed Link: Queen Of The Night Tomato Seeds
When you cut into the fruit, you will find a stunning reddish-orange color. And the taste? It’s best described as both sweet, and loaded with deep rich tomato taste! The plant has a bit smaller growth pattern, topping out around 5 feet in height.
It too is an indeterminate and will produce all season long. And as an heirloom – its seeds can be saved from year to year quite successfully. Seed Link: Queen of The Night Tomato Premium Seeds
Here is to adding a little flair, flavor and uniqueness to your garden this year by growing a few unusual tomatoes!
Follow Our Facebook Page For Great Gardening Tips And Advice! This Is My Garden Facebook Page
This Is My Garden is a garden website created by gardeners, for gardeners. Jim and Mary Competti have been writing gardening, DIY and recipe articles and books and speaking for over 15 years from their 46 acre Ohio farm. They publish three articles every week, 52 weeks a year. Sign up today to follow via email, or follow along!
If you are missing that delicious taste of garden fresh tomatoes this winter – you need to try your hand at growing a Red Robin Dwarf tomato plant indoors – it really is the perfect tomato plant to keep on enjoying home grown tomatoes all winter long – right in your windowsill!
Let’s face it, for gardeners, wintertime can be tough. Not only are the days colder and the daylight hours shorter – it’s also a bit depressing heading to your local grocery store and finding less than desirable fruit and vegetables. And spring can seem a long way off in the middle of December or January!
But that’s exactly where growing a few fresh tomatoes can help. And yes, although growing tomatoes indoors during the middle of winter might seem like more than a simple challenge, it doesn’t have to be. Especially when you grow a dwarf tomato variety like Red Robin.

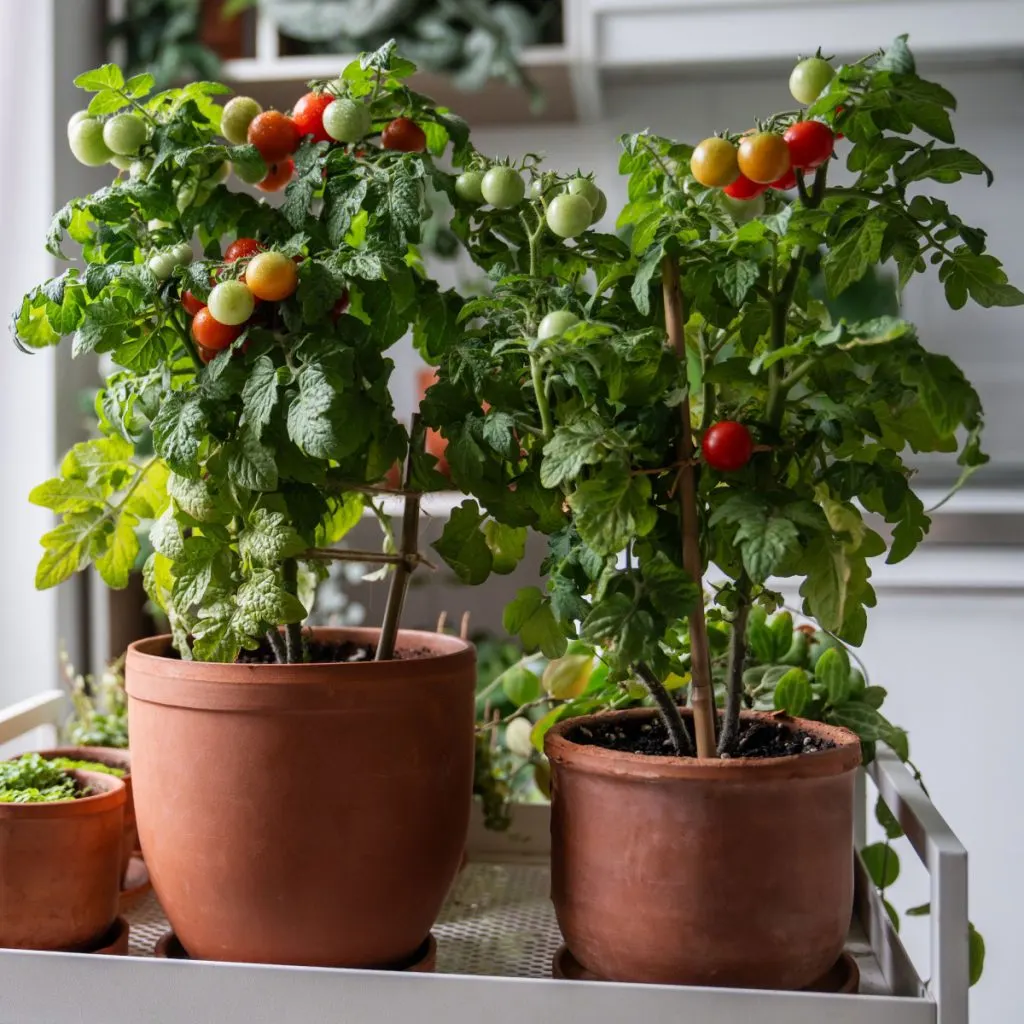
Red Robin dwarf is an easy to grow tomato variety that is small enough to fit in a sunny windowsill – or can grow just as happily under a small, tabletop LED grow light. The plant grows to reach only about 12 inches tall, making it a perfect fit for small spaces, countertops, or anywhere it can get a little light.
The seeds are easy to start, germinating and growing quickly in the warmth of the indoors. But perhaps best of all, although it may be small in size, this sturdy little plant can produce a big crop of small, bright red cherry tomatoes. Tomatoes that are sweet, juicy, and perfect for salads and snacking.
Here is an in-depth look at how to plant and care for a Red Robin dwarf tomato plant indoors this winter – from seed to harvest!
Although you can occasionally find dwarf tomato plants for sale at a local nursery or garden center, in the middle of winter, the easiest method is to simply start your own plants from seed. Affiliate Seed Link: Dwarf Red Robin Tomato Seeds, Heirloom Non-GMO, Sweet, Low Acid, Determinate

One thing to note about the Red Robin variety is that it is a determinate plant. That means it will grows to a set height and produce its fruit all at once over a two to three week period.
Growing a determinate plant makes it even easier to manage indoors. You don’t have to worry about excessive growth or branches sprawling everywhere. It also allows you to plant a couple of plants a few weeks apart to have plenty of fresh tomatoes coming on all winter long.
As for what you will need in the way of supplies, success all starts with a good quality pot. It’s best to avoid shallow containers. Select pots that are at least 6 to 8 inches deep. This will allow for plenty of root growth to power the plant. In addition, be sure that it has plenty of good drainage holes to let excess moisture escape.
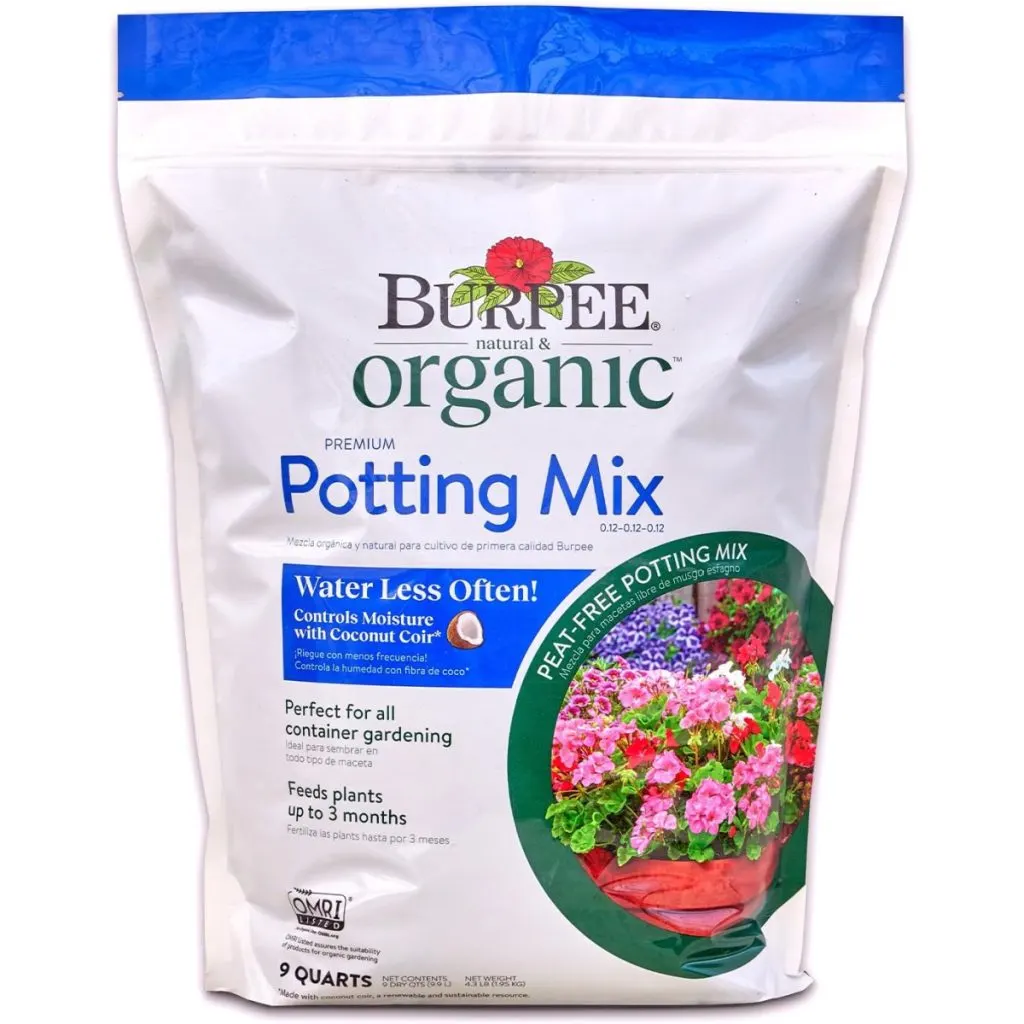
It’s also important to start with a quality, fertile potting soil mix. Like all tomato plants, even though it’s a dwarf variety, Red Robin needs a lot of nutrients to grow, flower and fruit. Affiliate Link: Burpee, 9 Quarts | Premium Organic Potting Natural Soil Mix Food Ideal for Containers
Plant 2 to 3 seeds directly in your pot about 1/4 inch deep in the soil. Planting more than one seed ensures you will have at least one germinate. There is no need to start these as transplants and replant them later since they will stay indoors.

Cover your seeds gently with a thin 1/8th layer of potting mix. Lightly mist the soil to make it moist but not soggy. Place the pot in the warmest location in the house. Contrary to popular belief, the seeds do not need light to sprout – only warmth.
Water the seeds gently using a spray bottle or small watering can whenever the top layer of soil feels dry. Avoid overwatering, as soggy soil can lead to problems like mold or root rot.
Within 5 to 10 days, you should see tiny green sprouts popping up. Once the seedlings are about 2 inches tall, thin them out by snipping the weaker ones with scissors, leaving the strongest seedling in the pot. You can also lightly lift the extra seedlings from the pot and transplant to have more than one plant.
Once the seeds germinate, place the pot in a sunny, south-facing window where the seeds can get at least 6 to 8 hours of light daily. If you don’t have enough natural light, you can use a small LED grow light. Position the light 6-12 inches above the soil and keep it on for about 12 hours a day.
Like most tomato plants, Red Robin tomatoes like their soil to be consistently moist, but not soaking wet. Check the soil regularly by touching the top inch. If it feels dry, water the plant until water just starts to drain from the bottom of the pot.
During winter, indoor plants typically don’t dry out as quickly, so you won’t need to water as often as you would in summer. Be careful not to let the soil stay waterlogged, as this can harm roots.
The Red Robin tomato grows best in temperatures between 65-75°F (18-24°C). If growing with a grow light away from a sunny window, be sure to keep the plant in a warm spot away from drafts or cold windows. If the air in your home is very dry, you can use a small humidifier near the plant or misting the leaves with water occasionally.
Tomato plants are heavy feeders, even small ones like the Red Robin. About 3 weeks after the plant has sprouted, start feeding it with a balanced liquid fertilizer every 2 weeks. Look for a fertilizer that’s labeled for tomatoes or vegetables. Follow the instructions on the label for mixing and applying. Affiliate Fertilizer Link: Espoma Organic 8 Ounce Concentrated Tomato Plant Food

If you notice yellowing leaves or slow growth, it might be a sign the plant needs more nutrients. Always be aware of the soil’s moisture level as well – yellowing leaves can also be a sign of overwatering.
One of the best parts about growing Red Robin tomatoes indoors is watching the plant produce its bright, juicy tomatoes. With proper care, you can expect your plant to start flowering and producing fruit about 55 to 65 days after planting.
The small cherry tomatoes will turn a deep, bright red when they’re fully ripe. The fruit should be firm but slightly soft to the touch. To pick, gently twist the tomatoes off the vine, or use small scissors to snip them off. Be careful not to damage the plant as you harvest.
Because it is a determinate plant, Red Robin will produce all of its tomatoes over a two to three week period. Once that occurs, no amount of fertilizer or watering will bring it back. This is exactly why many gardeners choose to grow a few plants a few weeks apart to always have fresh tomatoes at their disposal.
Here is to growing your own perfect tomatoes indoors this year! For more varieties of tomatoes you can grow indoors, check out our article: How To Grow Cherry Tomatoes Indoors.
Follow Our Facebook Page For Great Gardening Tips And Advice! This Is My Garden Facebook Page
This Is My Garden is a garden website created by gardeners, for gardeners. Jim and Mary Competti have been writing gardening, DIY and recipe articles and books and speaking for over 15 years from their 46 acre Ohio farm. They publish three articles every week, 52 weeks a year. Sign up today to follow via email, or follow along!
Not only is it easy to save seeds from your tomato plants this summer – it can also help you grow your best tomato plants ever next year!
Saving seeds is certainly one of the best ways to save on your gardening budget. Let’s face it, seeds are only getting more and more expensive with each passing year. But there is more reason than ever to save seeds from your tomato plants – and it goes far beyond saving money!
By simply selecting seeds from the best tomatoes growing on your best plants this summer, you can greatly improve the quality of your seed stock. That can lead to stronger, healthier plants and a much larger harvest next year as well. And even better, tomatoes with more flavor than ever!

There is little doubt that by continuing to save seeds from your best tomatoes year after year, you can have a big impact on improving your tomato plants. With each passing year, the seeds and plants develop more and learn to adapt to the soil and conditions far better. And by selecting seeds from your top performers, you are saving seeds that are already performing well.
But when it comes to saving seeds, there are a few simple but key steps you must take to make sure your seeds are ready to sprout and grow next year. Here is a look at which tomato seeds you can save, along with how to collect, dry and store them successfully to plant again next year like a pro!
When it comes to saving seeds from tomatoes, it’s important to first know that there are some varieties that will work- and some that won’t. And knowing the difference is critical to planting and growing the tomatoes you want to grow.
The seeds of open-pollinated tomatoes (heirloom tomatoes) can be saved. Hybrid tomato varieties on the other hand should not be saved. Why? Because heirloom tomato seeds are pure. This means the seeds you save from an open pollinated plant will grow to be the exact same plant – and more importantly, produce the exact same fruit.
Hybrid tomatoes do not work in the same way. Hybrids are a cross of two or more tomato plants. They are bred to create a unique and new tomato plant and tomato.
Because of this, the seeds from a hybrid tomato will not replicate the hybrid when re-planted. Instead, they usually will revert back to one of the original tomato plants that were crossed to create it – or sometimes to a new mutation of it.
It often results in a plant that will not bear fruit or creates a completely different tomato. And that is not a good thing when you want to grow the same great-tasting tomato from year to year!
So how do you know if your seeds are heirloom or hybrid? The easiest way of course is to check the seed packet. They will almost always tell you if the variety is a hybrid or not. If that is not possible, you can always look up the variety on-line. Almost all seed companies list the particulars of each variety, including if it is an heirloom variety or not.
The tomato seed saving process is unique when compared to saving seeds from other vegetables. Tomato seeds have a protective gelatin coating on their outer skin.
When this coating stays intact, it makes it very difficult for the seed to germinate the following year. When a tomato plant grows uninterrupted in the wild, the fruit opens up and then falls to the ground. In doing this, the tomato slowly rots and decomposes.
As the tomato decomposes, the protective outer coat of the seed breaks down. This process of rotting actually helps prepare the seeds that fall for growing the following year. Once this layer is gone, it then allows for easy germination of the seed.
When saving your own tomato seeds, all you need to do is follow the same process. That means allowing the seeds to break down enough to have the protective coat removed. It might sound difficult to do, but the process is quite simple.
When saving tomato seeds, always begin by selecting a healthy, ripe tomato from your best plant. Whether saving seeds from a tomato, a pepper, or any vegetable, it’s best to save seeds from the healthiest vegetable on the best looking plant.
By selecting from the best stock, you ensure the best chance for good growth, health and success. It all comes down to good genetics. By selecting the best tomatoes, it strengthens the odds for the best traits to carry on.
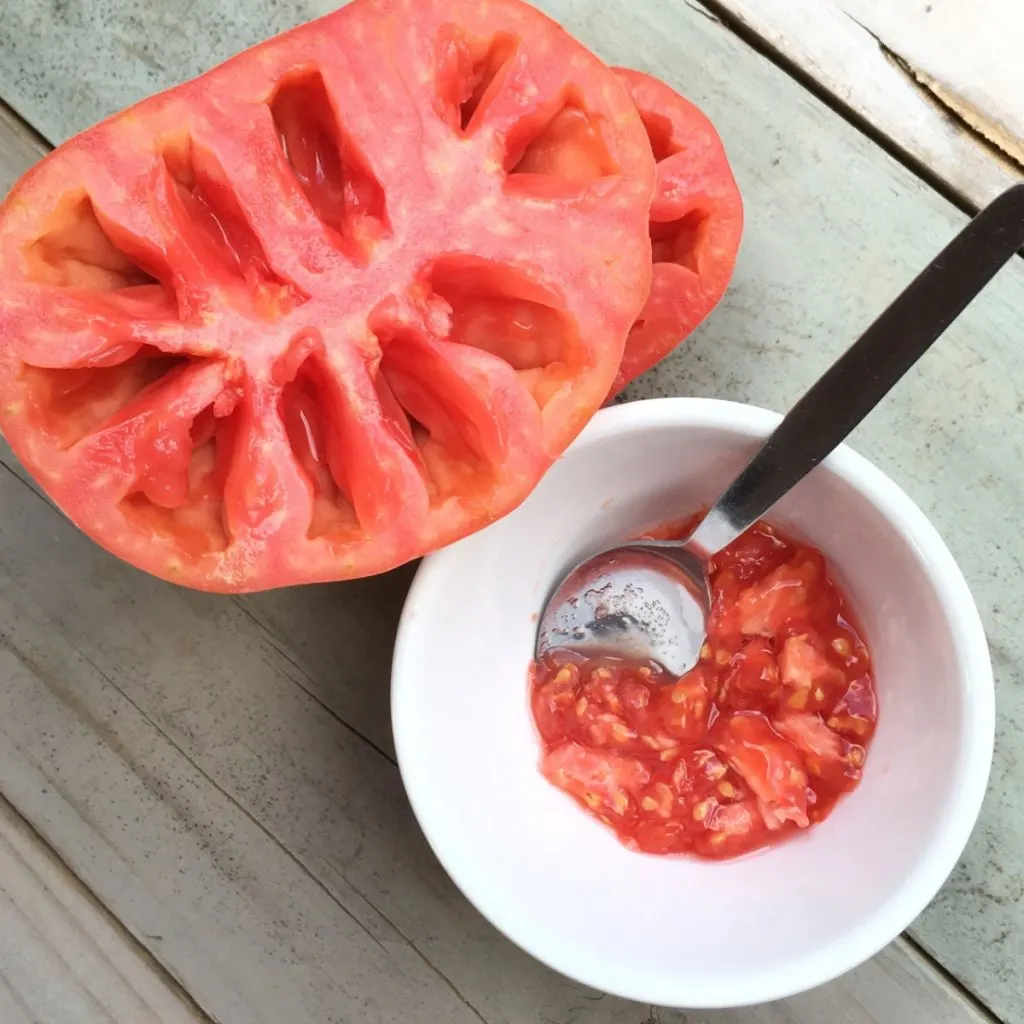
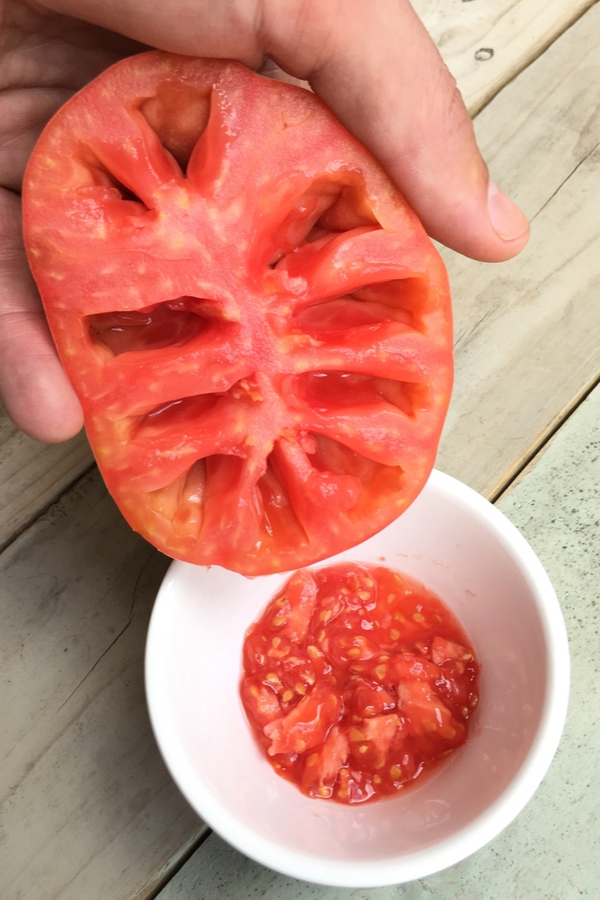
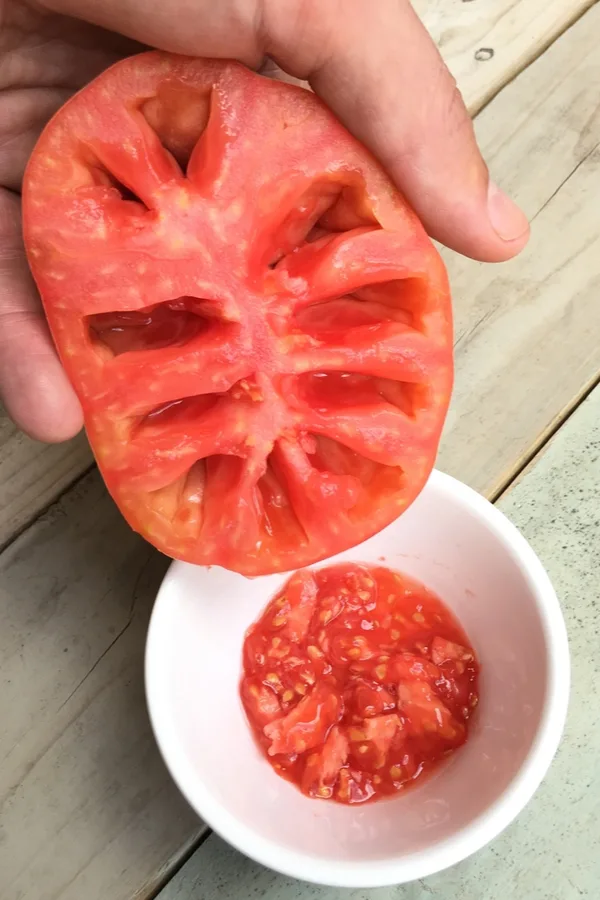
Once you have your tomato, start by cutting it in half. Next, scoop out the pulp and seeds into a clean mason jar. There is no need to add any water or a lid, you need only the pulp and seeds.
Now it’s time to place the jar in a warm, humid location that is out of the way of everyday traffic. The goal here is to let the tomato rot for a few days. By placing it out of the way, you can also avoid the smell of a rotting tomato. One that usually isn’t too pleasant!
In a few days, the tomato pulp will begin to decompose. Usually, within five days, the pulp will start to display a white or green fuzzy mold. It can take a bit longer in some instances, but a little less than a week is usually a good rule of thumb for getting your seeds and pulp to begin molding.
Once the tomato pulp and seeds have mold covering most of the pulp, it’s time to take action. Begin by pouring water into the jar and wash off the mold. Repeat the process a few times until the seeds are clean.
Once clean, fill the jar one more time with water. The good seeds will sink to the bottom, allowing you to skim off the pulp and bad seeds. Once you skim off any remaining pulp and floating seeds, pour the water out. The seeds left are now ready to dry and save.
To dry, place the seeds out on a paper towel or newspaper for a few days. It’s very important to let tomato seeds dry completely before storing. This helps to maintain the seed’s vitality and allows it to store longer as well.
Once dry, put the seeds in a sealed plastic baggie or mason jar with a covered lid. Store in a cool, dry and dark location. If you have room, the refrigerator makes an excellent storage location for seeds.
Once garden season roll around – you’ll be ready to grow your best tomato plants ever! See our article: How To Know When To Start Tomato Plants Indoors – A Simple Formula For Perfect Timing!
Follow Our Facebook Page For Great Gardening Tips And Advice! This Is My Garden Facebook Page
This Is My Garden is a garden website created by gardeners, for gardeners. Jim and Mary Competti have been writing gardening, DIY and recipe articles and books and speaking for over 15 years from their 46 acre Ohio farm. They publish three articles every week, 52 weeks a year. Sign up today to follow via email, or follow along!
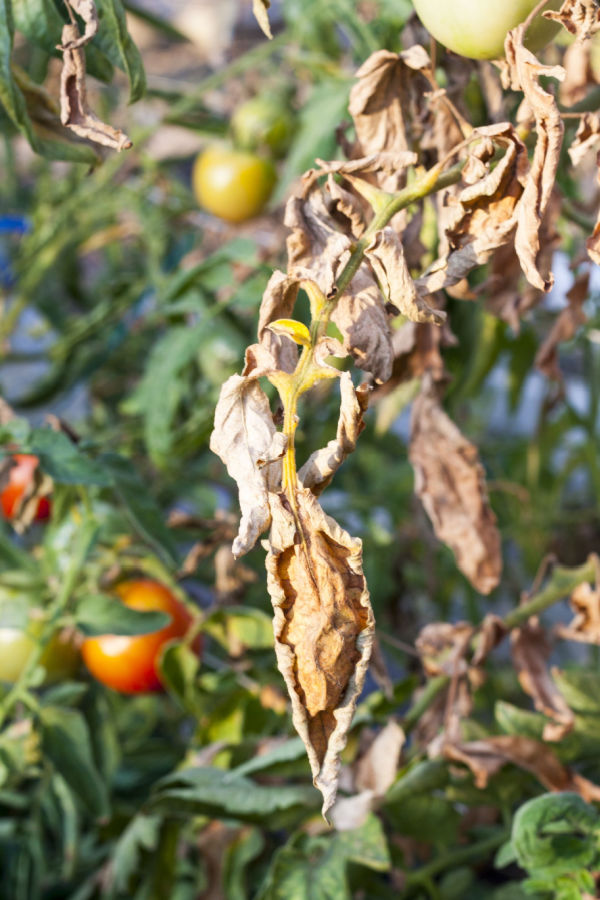
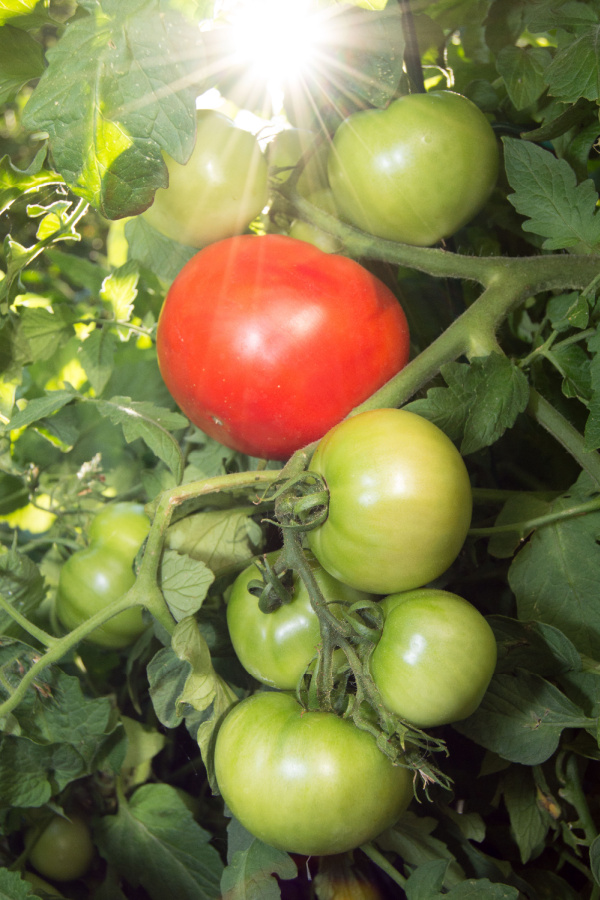
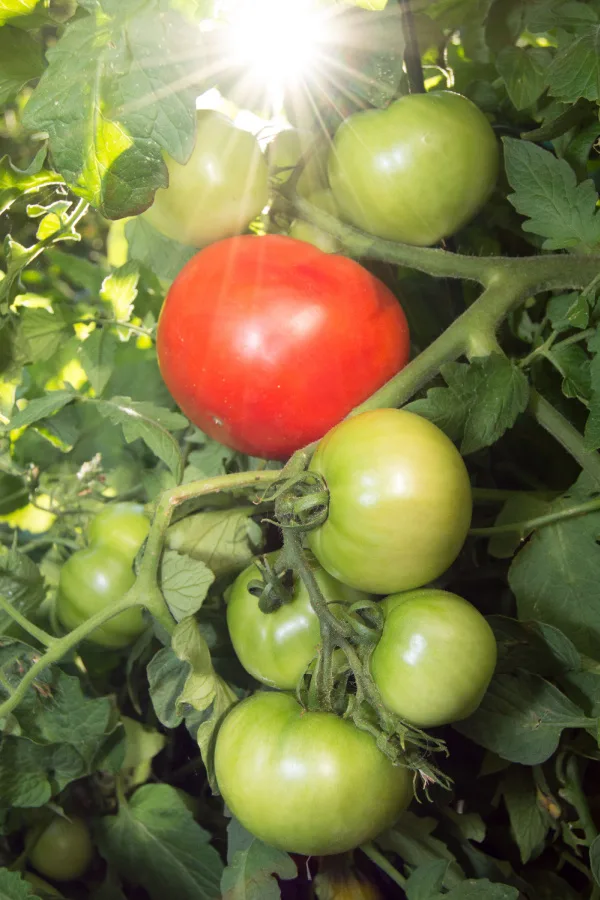
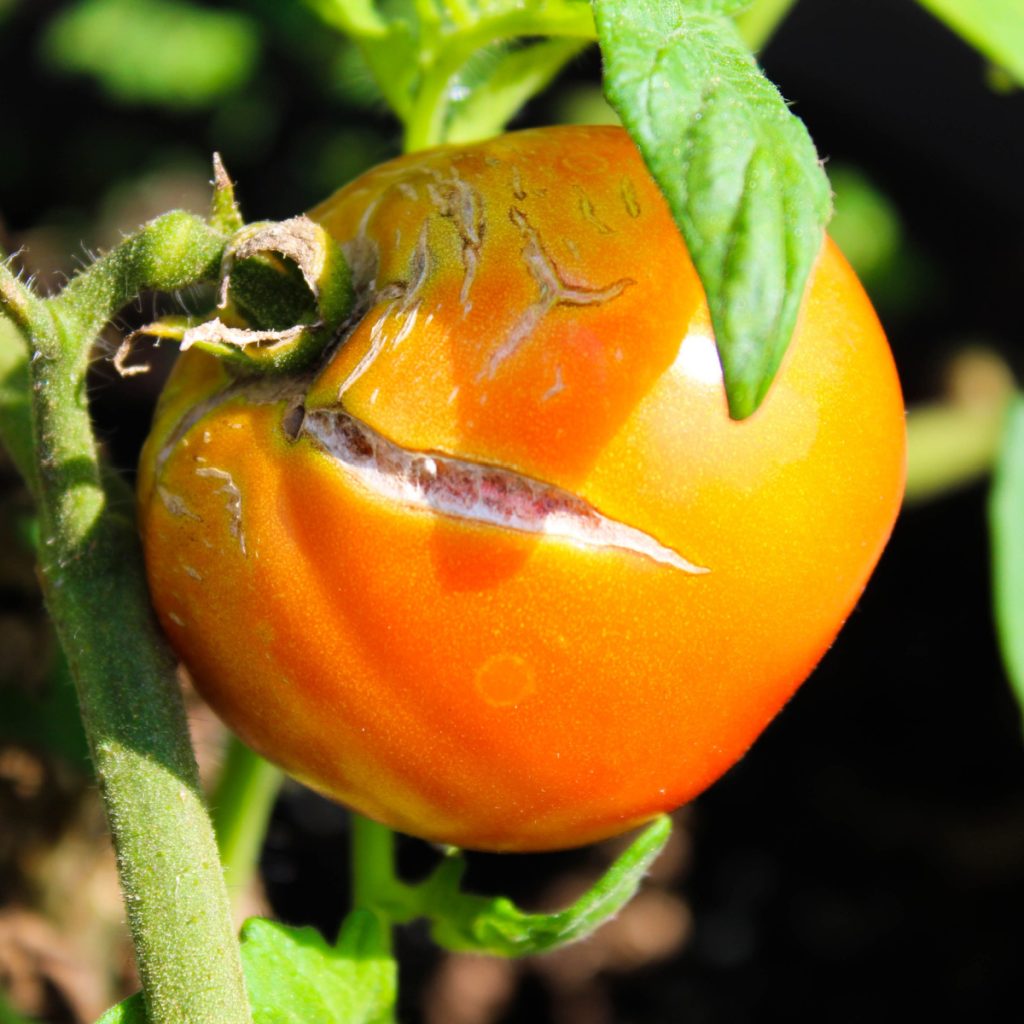
Wondering how to stop your tomatoes from splitting and cracking as they ripen on your plants this summer?
For a gardener, it can be all but defeating to see a beautiful crop of developing tomatoes suddenly begin to blister, crack and split. Not only does it make for an unsightly tomato, it also damages the fruit in the process. In fact, quite often, it can ruin a tomato entirely!
When a tomato splits open on the vine, the tender flesh begins to ooze out moisture. Unfortunately, when that happens, a portion of the flavor exits as well. But even worse, all of that moisture can also attract a whole host of pests who enjoy feeding on the juice.

So what causes tomatoes to crack and split? Contrary to popular belief, it has nothing to do with a lack of nutrients in the soil. In fact, applying more fertilizer and nutrients will not help them stop cracking in the least. Cracking and splitting is also not the result of a pest or disease issue.
Instead, the issue is a direct result of large swings or fluctuations in the moisture a tomato plant receives. As in plants getting too much water all at once – or far too little over an extended period of time.
Although you certainly can’t control what nature brings to your tomato crop in the form of rain or drought, there are a few simple tips that can go a long way in helping to prevent moisture issues from blistering and ruining your tomato crop. And as you will see below, the real key to success is to jump into action as soon as you see the first signs of your tomatoes starting to blister!
Without a doubt, how and when you water your plants is one of the biggest factors in keeping them safe from blistering.

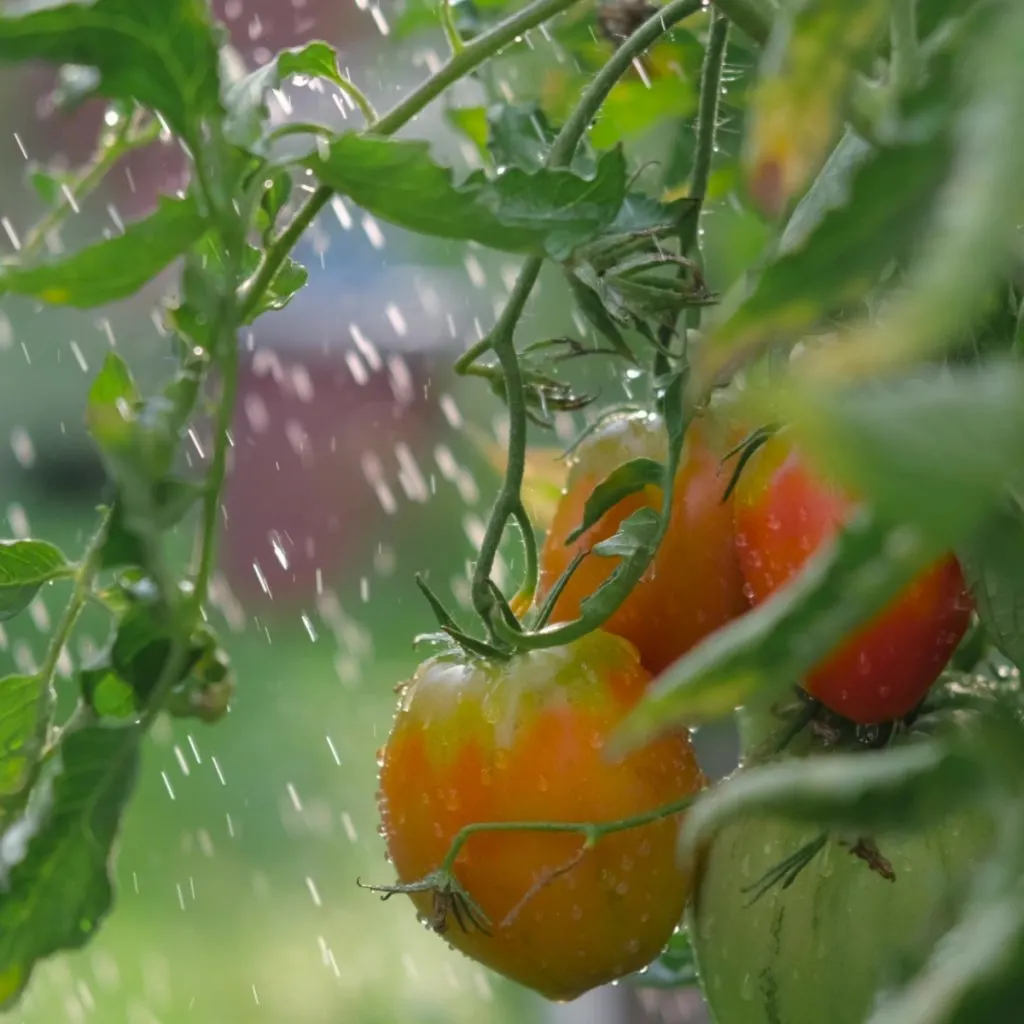
When it comes to proper moisture for tomato plants, on average, a plant should receive between 1 to 1.25 inches of rain per week. That is enough water to keep the roots of your plants moist, allowing them to easily absorb the moisture and nutrients they need.
So how do you know if your plants need water? The best way is to check the soil down about three to four inches in depth. To do this, you can use a wooden skewer or an inexpensive soil moisture meter.
If the skewer comes up with a bit of soil sticking to it, it is a good indication that there is still moisture around the roots. The moisture meter, of course, is far more accurate. It can give you an instant reading of exactly how much moisture is right at the root level. Affiliate Product Link: Soil Moisture Meter Probe
The moisture level around the roots of tomato plants should be somewhere between 40% and 70%. Any more or less for an extended time can lead to tomatoes starting to crack and blister. So what is the best way to water your plants to make sure you give them exactly what they need? It all starts by watering less often – but deeper into the soil!
One of the biggest mistakes gardeners often make it to water their plants too often and too shallow. Watering just a little every day may keep the plants supplied with water, but it causes long term issues for the plant.
Shallow watering keeps the roots of tomato plants near the surface. When that happens, it leaves them more vulnerable to drying out too quick, or becoming overly soggy when too much rain occurs.
When watering, water deep. Allow enough water to get down farther into the soil to develop strong, deep roots. This is also one more reason to plant your tomatoes deep in the soil. The deeper you plant, the more roots develop down in the soil where they are less vulnerable to watering issues.
One of the best ways to help your watering efforts is by always mulching your tomato plants. A thick layer of organic mulch (straw, grass clippings, etc.) will do wonders for your tomato plants. Especially when it comes to preventing them from splitting.

Mulch helps to regulate the soil temperature and moisture levels. It keeps the soil from drying out too fast, which is excellent during drought-like conditions. But it also helps shed away excess water during hard storms or heavy rains.
With a more balanced soil temperature and moisture level, the plants do not suffer the stress that can lead to the fruit blistering.
So how much mulch is enough? It’s best to apply at least 4 inches around the plant, making sure to mulch wide enough enough to cover the root zone. Not only will it help to keep them from splitting, it will also keep away competing weeds too!
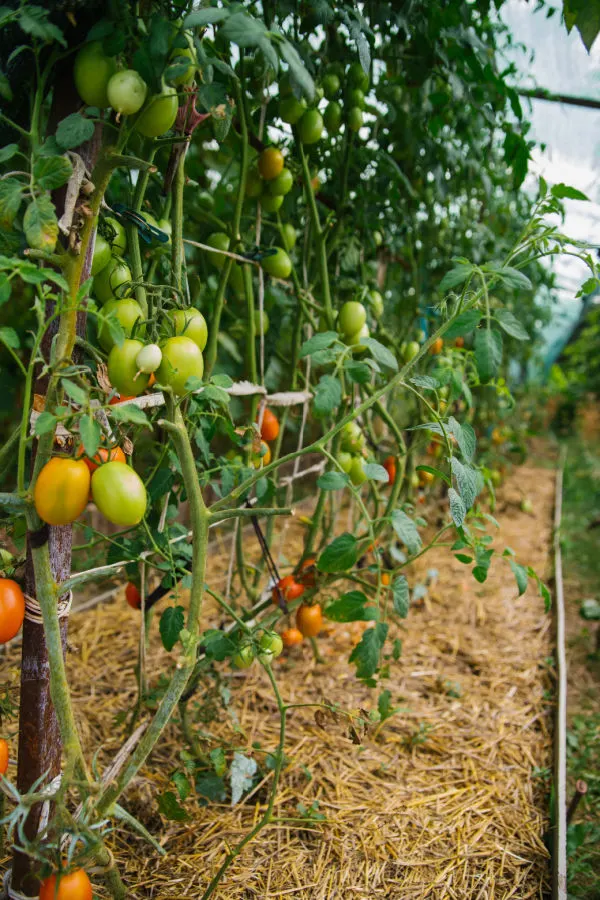
Last but not least, always, always, always pick your tomatoes early off of your plants! Picking tomatoes when they first start to turn and letting them ripen off the vine is a great way to prevent cracking. And no – it will not affect the flavor or taste. In fact, it can often improve it! See: How To Get Your Tomatoes To Ripen Faster – 4 Simple Secrets To Speed Up Ripening!

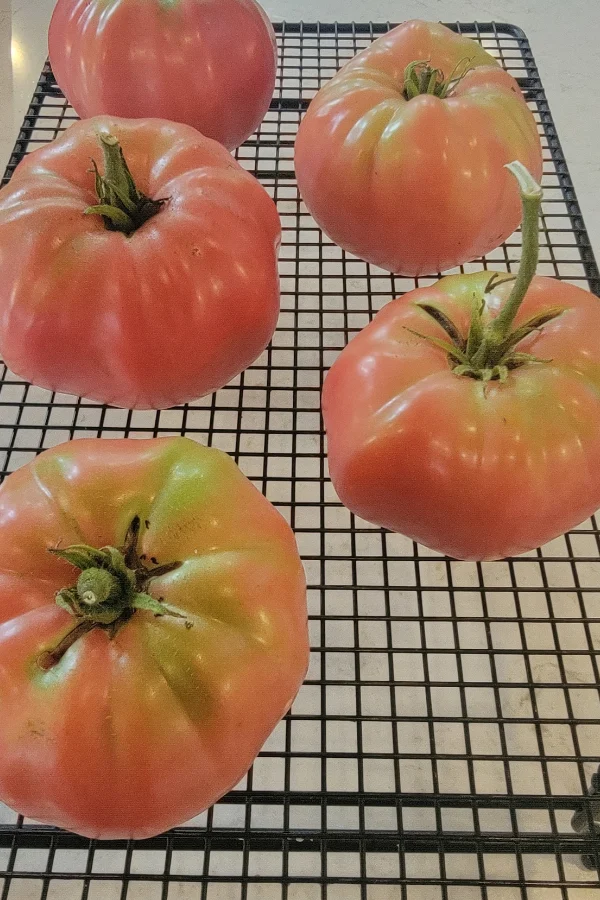
Once tomatoes slightly start to turn from the unripe, solid green stage, the ripening process has begun. And once this happens, they do not need to stay on the plant to complete the ripening process.
The good news is that once you take them off the plant – the stress of moisture or heat is gone. And as long as you ripen them in a cooler place out of the sun, there is no worry of splitting or cracking!
Follow Our Facebook Page For Great Gardening Tips And Advice! This Is My Garden Facebook Page
This Is My Garden is a garden website created by gardeners, for gardeners. Jim and Mary Competti have been writing gardening, DIY and recipe articles and books and speaking for over 15 years from their 46 acre Ohio farm. They publish three articles every week, 52 weeks a year. Sign up today to follow via email, or follow along!
There is no faster way to preserve a portion of your tomato harvest this year than to freeze your tomatoes – and is it ever easy to do!
One thing is for sure, although it seems like forever for your first tomatoes to finally begin to ripen, once they do, the floodgates seem to open. Before you know it, you can have bushels of tomatoes sitting on the counter – and if you don’t act fast – they can start to go to waste quickly.
For many, canning is the first thing that comes to mind. It’s certainly true that you can preserve a tremendous amount of tomato products by canning, but for some gardeners, the time it takes to do so can seem impossible to find. But that is exactly where freezing can save the day!

Freezing some of your tomato crop can be a fast and efficient solution for preserving a harvest for later use. And best of all – there are 3 easy and simple solutions to do just that – all without ever having to heat that kitchen up once with hot, boiling water, jars and lids.
For many recipes, it’s best if the skins of the tomatoes are removed. And for this reason, freezing them without the skins can make using them later much easier.
The most traditional method is to place the tomatoes in scalding hot water, and quickly place into an ice bath. That process works, but it can be difficult. Even more, it can be hard and quite hot on your hands to peel the skins off. But there is an easier way. And better yet, it involves no scalding hot water at all!
To begin, wash the tomatoes in cool water and then slice off the top stem. Dry off the tomatoes and place in the freezer on a shallow pan. Baking pans work best for this but any shallow pan will do.
All you have to do then is wait. Allow the tomatoes to freeze for two to three hours. Remove them from the freezer and run under cold water over them. It’s quite amazing but the skins will separate and slip off easily from the tomato!
All that is left is to pack and freeze the now-peeled tomatoes in an air tight container or freezer bag. Again, it’s best to save some smaller and larger bags for small or large dishes so there is little waste later on. Product Link : Gallon Freezer Bags
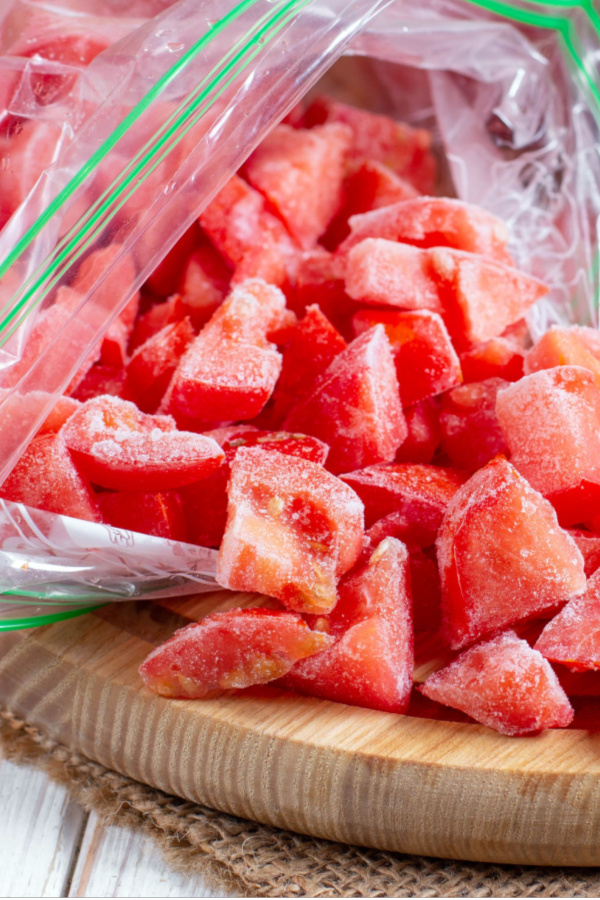
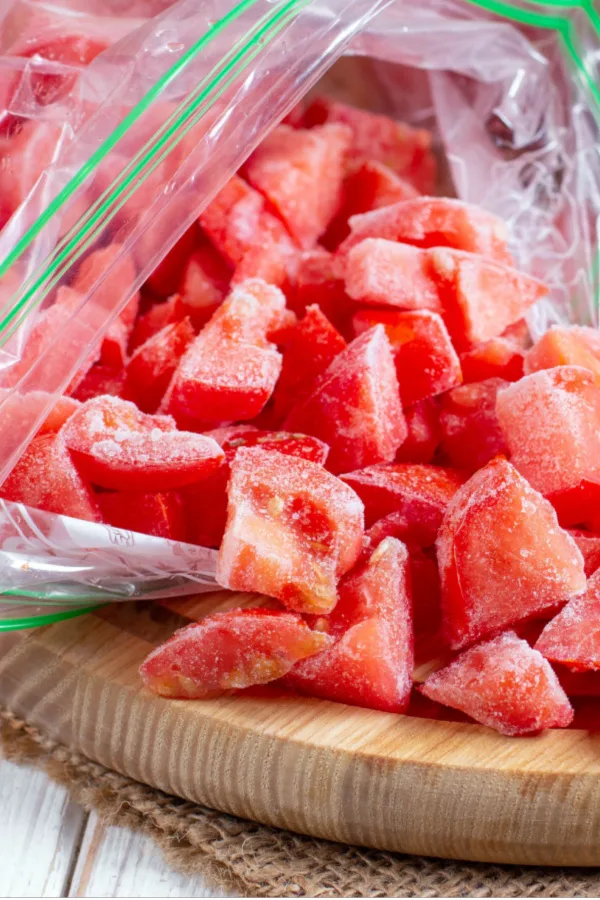
If you love growing, harvesting and preserving paste tomatoes, this method is an excellent choice for freezing! It works great with Roma, Amish Paste, San Marzano, and other paste-style tomatoes.
Paste tomatoes are the choice when it comes to making sauces, salsa and marinara. And this quick and easy method can help you preserve plenty for having ready-made sauce tomatoes on hand anytime you need.
Simply wash tomatoes in cool water and slice in half. Next, take a spoon, scoop out the inner seed core and discard. Then, using the method from above, place the half-tomatoes on a baking pan and freeze for two to three hours. Pop out of the freezer, remove the skins under cold water, and freeze!

You are left with ready-to-use sauce tomatoes that can be perfect for a quick sauce, a fast batch of salsa, or a ready to go marinara sauce that tastes like it just came from the garden. By slicing the tomatoes in half, you can also stack more together to save valuable freezer space as well.
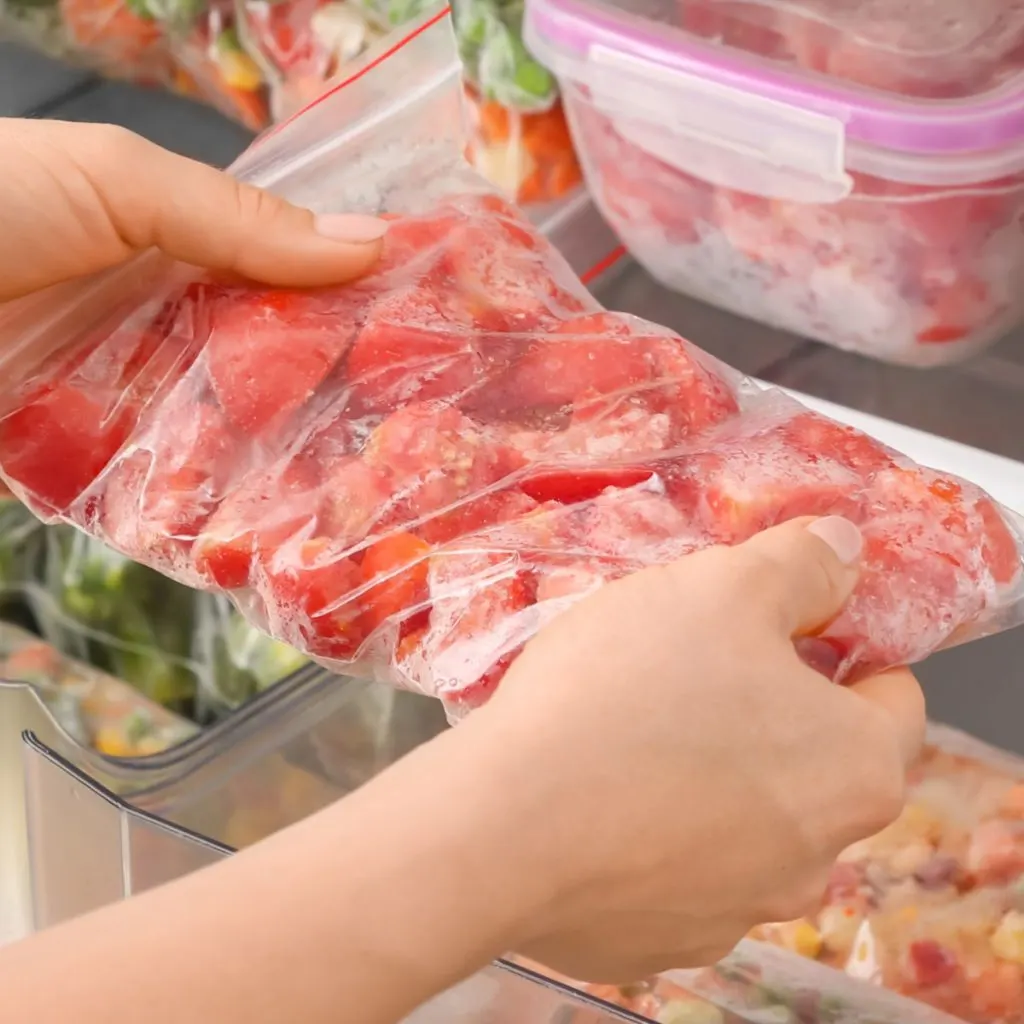
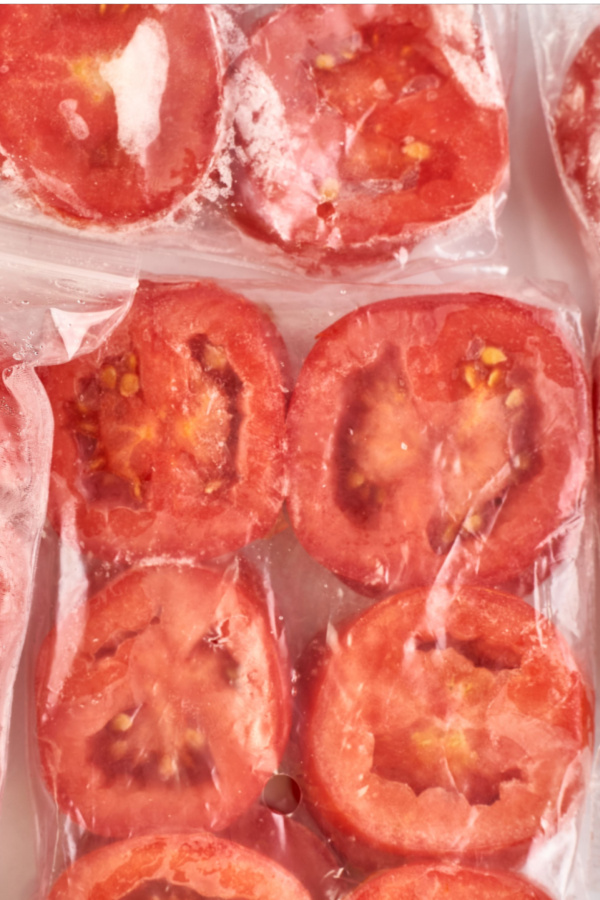
So what if you are really overwhelmed with a big harvest and need to freeze lots of tomatoes fast? Then freezing them whole with the skins on is the answer!
One of the easiest ways to preserve a tomato harvest without canning is to simply freeze them whole – skins and all. It’s truly as simple as harvesting, washing, drying and freezing!
As with preserving any vegetables from the garden, it’s important to start by selecting only firm, blemish-free fruit for freezing. Even a small blemish or soft spot can quickly go bad when preserving a whole tomato, so always start with tomatoes that are fresh and free of any defects.
Wash in cool water and allow the tomatoes to dry thoroughly. Drying the tomatoes is critical before freezing to help avoid freezer burn. In addition, it keeps them from freezing and sticking together when you go to use them later.
Once dry, seal the tomatoes in an air tight freezer bag or container. Freeze in different size quantities to use as needed throughout the year. Freeze a few bags with just a few tomatoes for small dishes, and a few larger ones for family meals.
When storing, vacuum sealers work best. They remove the excess air and protect the tomatoes better for long term storage. Traditional zip up freezer bags will work, but the tomatoes will not keep as well or as long. Product Affiliate Link: FoodSaver Vacuum Sealer Machine, Automatic Bag Detection
If you are still looking for other ways to preserve without canning, give sun drying your tomatoes a try. Although you can truly use the sun for the entire process, it’s also quite easy to use a low setting on your oven to accomplish the same result.
For more on the exact method, check out our article How To Make Sun Dried Tomatoes In The Oven – With Ease! It’s just one more way to preserve the amazing taste of fresh, homegrown tomatoes – without having to fire up that canner!
Follow Our Facebook Page For Great Gardening Tips And Advice! This Is My Garden Facebook Page
This Is My Garden is a garden website created by gardeners, for gardeners. Jim and Mary Competti have been writing gardening, DIY and recipe articles and books and speaking for over 15 years from their 46 acre Ohio farm. They publish three articles every week, 52 weeks a year. Sign up today to follow via email, or follow along!