Have the best hanging baskets on the block! Want to know what the best plants for hanging baskets are? Or the best soil to grow them in? We have you covered below with all of our best articles on hanging basket care!


Have the best hanging baskets on the block! Want to know what the best plants for hanging baskets are? Or the best soil to grow them in? We have you covered below with all of our best articles on hanging basket care!
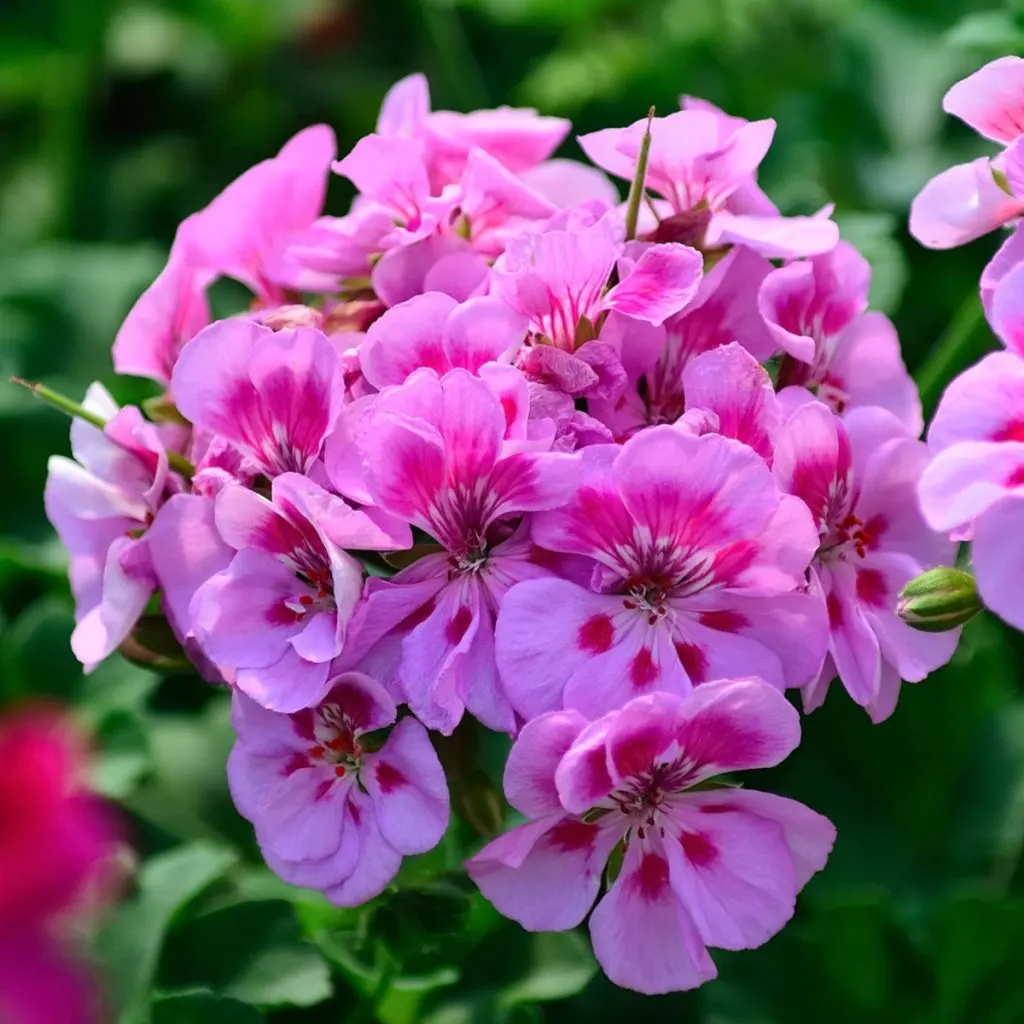
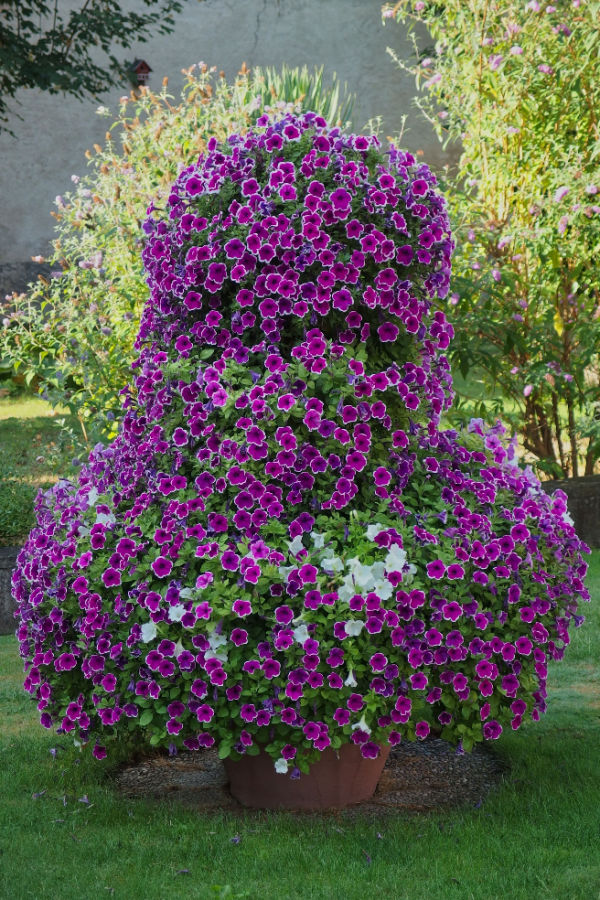
Looking for a few simple tips and secrets to keep your geraniums healthy, strong – and most importantly – blooming big and bright all summer long?
Not only are geraniums perfect for growing in baskets and containers, they also look right at home when directly planted into flowerbeds as well. And in addition to providing big color with their bright blooms – they also happen to be one of the few flowering plants to rarely be bothered by insects or animals.
But if there is one thing gardeners struggle with when it comes to geraniums, it’s keeping them strong, healthy and full of blooms deep into summer. Unfortunately, all too often, by mid summer, geraniums become leggy and weak – with fewer and fewer blooms as well.

But the good news? It doesn’t have to be that way! In fact, with just a few simple tips, you can have your geraniums flowering strong in a flash – and staying that way all the way into late fall. Here is a look at 2 of the biggest secrets of all to keep your geraniums flowering big this year!
If there is one aspect of geranium care that can make a huge difference in plant health and bloom performance, it’s fertilizing. Not just with feeding your plants with a fertilizer, but with what type of fertilizer you give them.
Although they are not tremendous feeders from the soil, geraniums can benefit greatly from a regular dose of energy. Especially for those growing in containers and baskets where they can quickly deplete the nutrients available.
Slow and steady fertilizing is the best course of action when feeding geraniums. Consistent but light feedings are far better than large single doses of nutrients given far apart. This helps to keeps growth on an even pace, allowing the plant to use the extra energy for blooms and not large foliage growth.
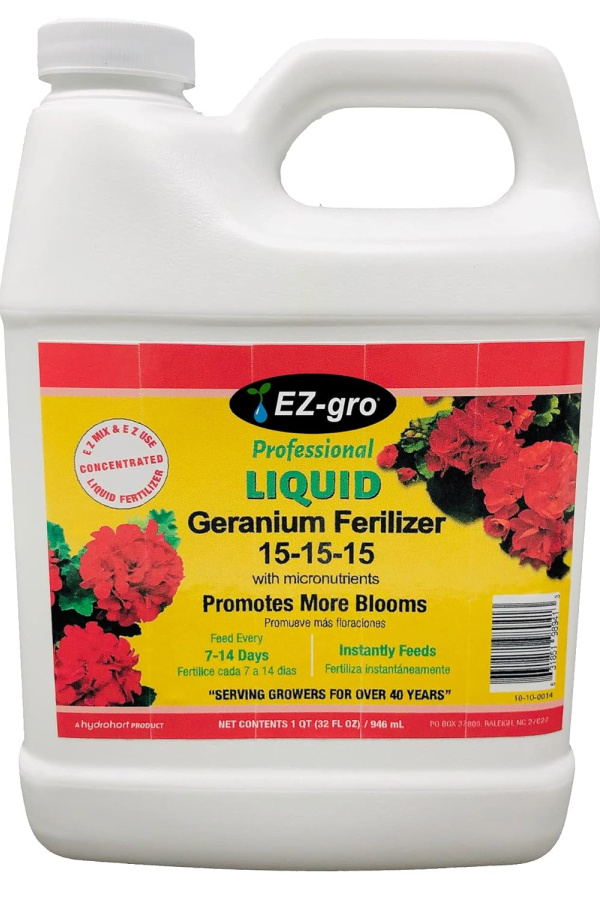
With that said, the type of fertilizer is very important as well. For geraniums, it’s all about balance. That means keeping the nitrogen, phosphorous and potassium (N-P-K) levels all the same. For best results, use a liquid fertilizer that has an N-P-K ratio in the range of 15-15-15.
Why a liquid fertilizer? Because liquid fertilizers work fast to supply nutrients. They absorb both through the roots and leaves of the plant. Affiliate Product Link: Geranium Fertilizer by EZ-GRO | 15-15-15

The last little secret is to keep the dose on the light side. Mix at about half of the recommended rate when diluting with water. This will allow you to fertilize more often for regular feeding. With geraniums, apply the dose of fertilizer every seven to fourteen days and your plants will thank you with strong growth and big blooms all summer long!
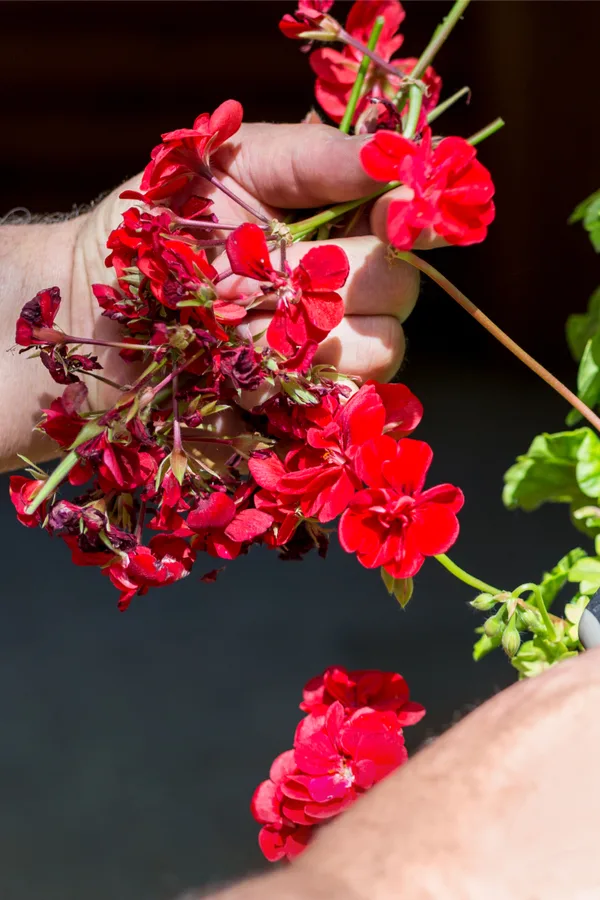
Beyond fertilizing on a light and regular schedule – deadheading, which is the process of removing dying blooms, is absolutely vital to keep your geraniums blooming strong. In fact, when it comes to geraniums, it’s usually the single biggest factor in keeping plants from blooming strong all season.
Without removing the old blooms and stems, the plant continues to burn valuable resources and energy on the failing flowers. Energy that it needs to be available to produce new blooms, shoots and flowers.
As soon as a bloom stem begins to fade and die off, it’s time to cut it off. Be careful not only cut the flower head, but the entire bloom stem back to the base of the plant. This stops the plant from using any energy on the old bloom and stem, and re-directs resources to growing new blooms.
In addition to deadheading, always cut away any fading or damaged foliage from the plant as well. Just as with old blooms, plants use a tremendous amount of energy trying to heal damaged foliage.
But if you really want to keep your geraniums lush and blooming, you can also practice another type of pruning beyond deadheading which is called pinching back.
Although most gardeners think of geraniums as an annual, they are actually a perennial plant. That is, if you live in the warmer, tropical climates of zones 10 and 11, where winters never see a hard frost or freeze.
But because they have the roots of a perennial, there are a few key aspects to getting them to bloom more profusely when growing as an annual – and that all begins with pinching these fast growing plants back occasionally to create a more compact, robust growth pattern.
Geraniums tend to become quite leggy and sparse if left to grow on their own accord. Especially when they are growing in pots, containers or hanging baskets. With limited soil space, the plants tend to grow outward as fast as they can. For this reason, it’s important to pinch back stem growth to force growth that is more dense and thick.
It is best to start early in the season by pinching back all of the growth on stems back 1/2 to 3/4 of a inch. This can be done easily with a pair of scissors, garden pruners, or even with sharp fingernails.

Pinching back encourages the plant to grow multiple shoots from the pruned stems. Even more mature plants in mid-summer can benefit from a bit of pinching back. It results in a much bushier and healthier plant. And, a plant that can produce many more blooms and flowers.
As a final tip – always make sure to give your geraniums the water they need when they need it! As with all plants, watering plays a key role in helping plants to form blooms and flower. A plant stressing from too little or too much water will slow or even stop production of new blooms.
You will need to water baskets and containers more frequently than geraniums growing in flowerbeds. This is due simply to the fact they tend to dry out at a faster rate. But it’s important to not allow the roots of geraniums to sit for long periods in water in either setting.
Check the soil prior to watering using the tip of your index finger. Place your fingertip down a few inches into the soil, if you feel moisture, allow the soil to dry out before watering. You can also use an inexpensive instant soil meter to check for moisture down at root level. Affiliate Product Link: Instant 4 In 1 Soil Meter
Here is to keeping your geraniums healthy and strong – and blooming all summer long this year! For more information on geraniums, see our article on how to save them at the end of the season for next year! See: How To Save Your Geraniums This Fall!
Follow Our Facebook Page For Great Gardening Tips And Advice! This Is My Garden Facebook Page
This Is My Garden is a garden website created by gardeners, for gardeners. Jim and Mary Competti have been writing gardening, DIY and recipe articles and books and speaking for over 15 years from their 46 acre Ohio farm. They publish three articles every week, 52 weeks a year. Sign up today to follow via email, or follow along!
If you are looking to make the perfect potting soil this year to power your hanging baskets and potted plants to grow like never before, today’s simple recipe using six all-natural ingredients is just the ticket!
When it comes to finding the best potting soil for growing gorgeous flowers and vegetables in containers, the easiest method is to simply make your own. By creating your own mix, you can all but ensure your plants will have the healthy, loose, fertile soil they need for strong growth. And, perhaps even more importantly, know exactly what’s in that soil!
Although there are hundreds of commercial mixes available, it’s hard to always know what the actual ingredients inside the package are. Are they organic? Do they contain fillers? And exactly where did the ingredients come from?

Unfortunately, many commercial potting soil bags contain inert fillers that serve no benefit to plants at all. Others, meanwhile, can include a whole list of fertilizers and additives. Additives you might not want in your mix. Especially if you happen to be growing vegetables you will be consuming.
That’s not to say there aren’t some incredible potting mixes on the market. But not only can finding them be difficult, paying for them can be quite painful too. In fact, some soil mixes can be almost prohibitively expensive. But that is exactly where creating your own simple but powerful mix can save the day!
You actually might be surprised at just how easy it is to make the perfect homemade potting soil. When it comes right down to it, great potting soil requires four basic but extremely important elements.
The first, of course, is that it has to be full of nutrients. With limited soil, plants growing in containers need all the power and energy they can get. Unlike annuals and perennials planted in the ground, potted plants are stuck with the soil in their container all season long.
In the ground, a plant’s roots can expand and search for more nutrients. That just isn’t the case for plants growing in a container or in hanging baskets.

The second important feature of a great potting soil is that it has to drain well. The soil mix needs to be able to hold moisture for the plant’s roots – but not so much that it will saturate the roots and rot them out.
Great potting soil also needs to be lightweight. If the soil in your pots or hanging baskets is too heavy, it can cause all kinds of issues. Not only do heavy soils make it hard for roots to expand, they also make for containers that are hard to move and even harder to hang.
Finally, the soil has to have good structure. A dry or thin soil mix will allow water to run right through it. But if the soil is too thick and heavy, water will sit on top and never filter down to the roots. To be ideal, potting soil needs to have just enough structure to trap the water it needs, and enough filtering qualities to shed any excess moisture.
The good news is that the potting soil recipe featured today is absolutely perfect for creating soil with all four of those must-have positive qualities – and then some!
Using the simple list of ingredients below, you can create 100% organic homemade potting soil to power your plants beautifully all summer long. And even more, know the materials in it are safe and all natural.

Whether you only need soil for a few pots, or you need to fill a large quantity of containers and hanging baskets – as long as you stick with the ratios below, you can scale the mix to fit your needs. The ingredients for the mix are as follows:
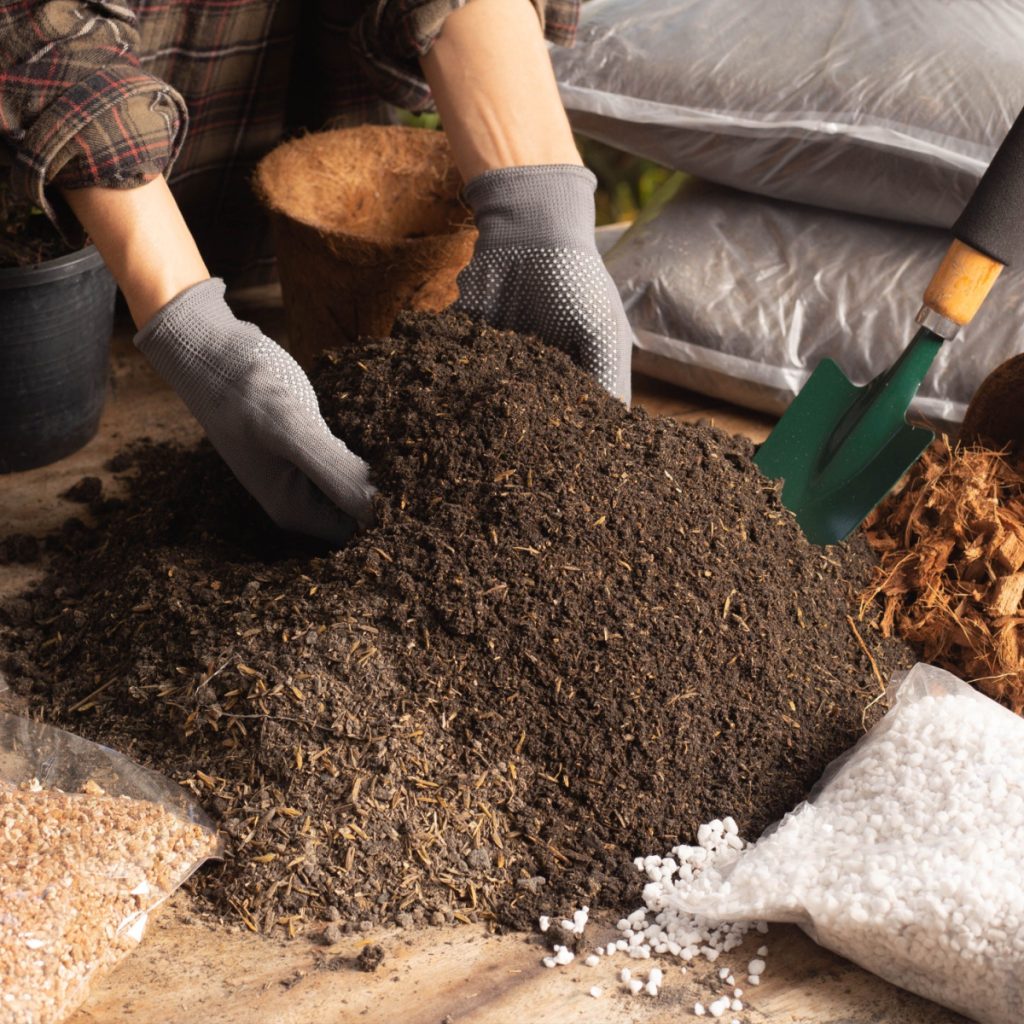
So what does each ingredient do for the mix? Each of the above all natural ingredients help in giving the potting soil mix the perfect structure, weight, drainage and power. Here is an in-depth look at each and how it helps to create the perfect potting soil.
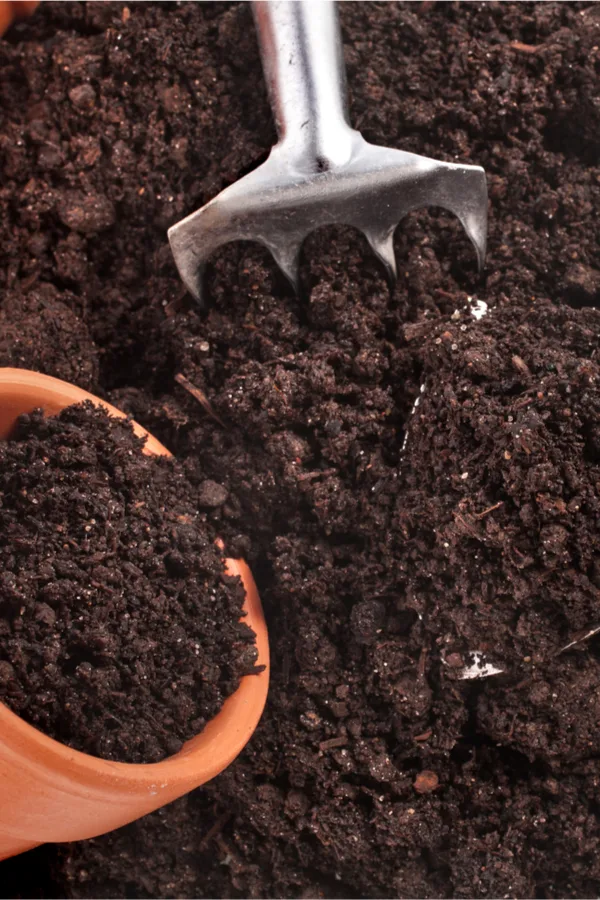
Top soil and or garden soil gives this potting soil its structure. Without it, the mix would be too lightweight and unable to hold water or nutrients.
You can certainly use good, loose soil from your garden. But you can also purchase topsoil or garden soil in bags. The key is that it must be loose and fine. If you are purchasing bagged top soil or garden soil, you can usually find it in bulk or in bags at most home and garden stores.
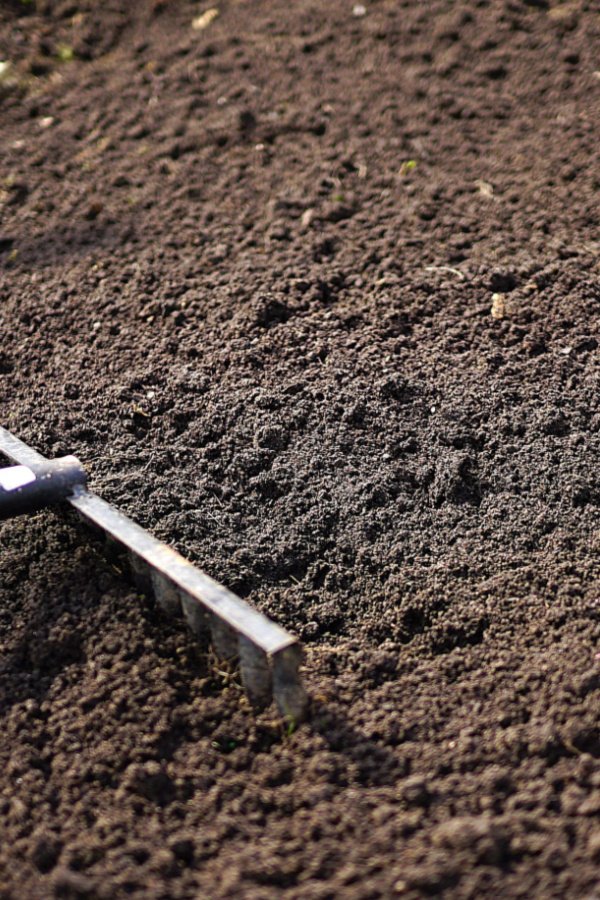
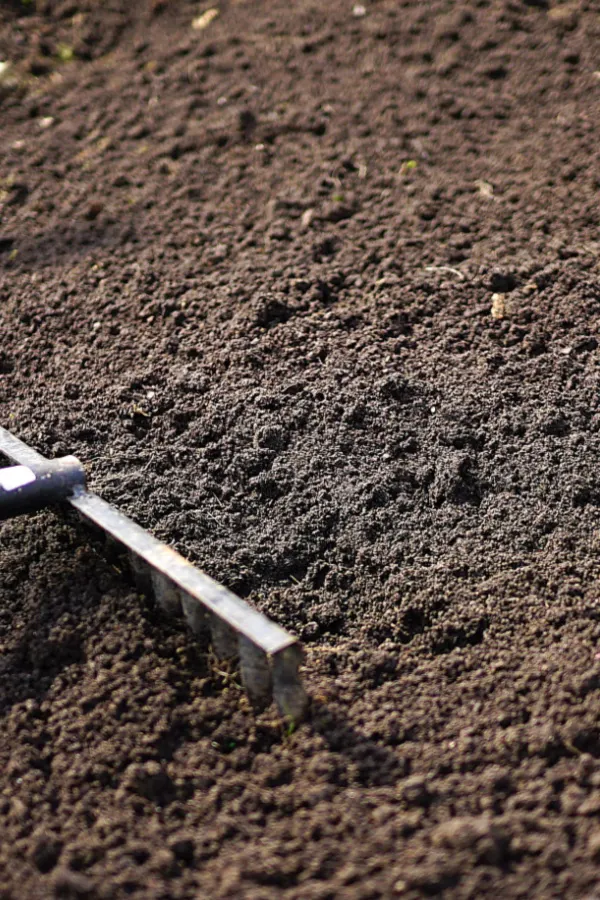
Often, the label will say sifted or pulverized, which means it has been screened to be loose. Pulverized top soil should crumble easily when squeezed in your hand. This is exactly what to look for as it means they will be loose and easy to mix. Avoid any top soil that uses fillers such as saw dust or ground mulch as additives.
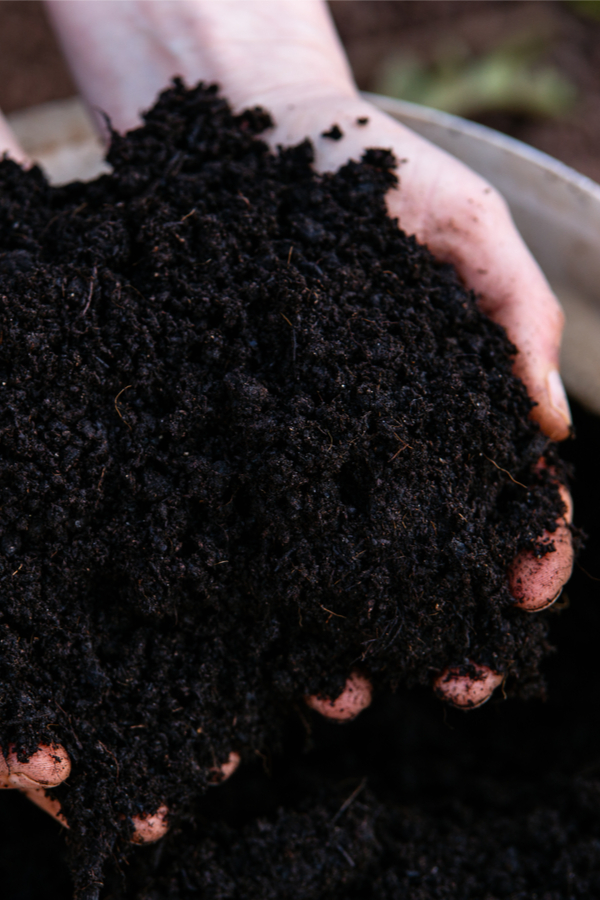
Compost truly is the perfect ingredient to help power and energize potting soil. For starters, it is full of the nutrients and microorganisms that plants love most. Even better, it’s in a form that is easy for plants to absorb into their roots.
Compost is extremely lightweight. And its ability to absorb and hold water is simply amazing. In fact, it can hold as much as 10 times its own weight in water. Best of all, this ingredient is free if you make your own compost! See: How To Create A Hot Spring Compost Pile – Make Great Compost Fast This Year!
When mixed in with pulverized top soil in equal amounts, it creates an incredible source of soil and humus that is the perfect base for an outstanding potting soil. If you are using your own compost, use a screen to remove large pieces for a super fine mix. If purchasing compost in bags, look for a finely shredded mix.
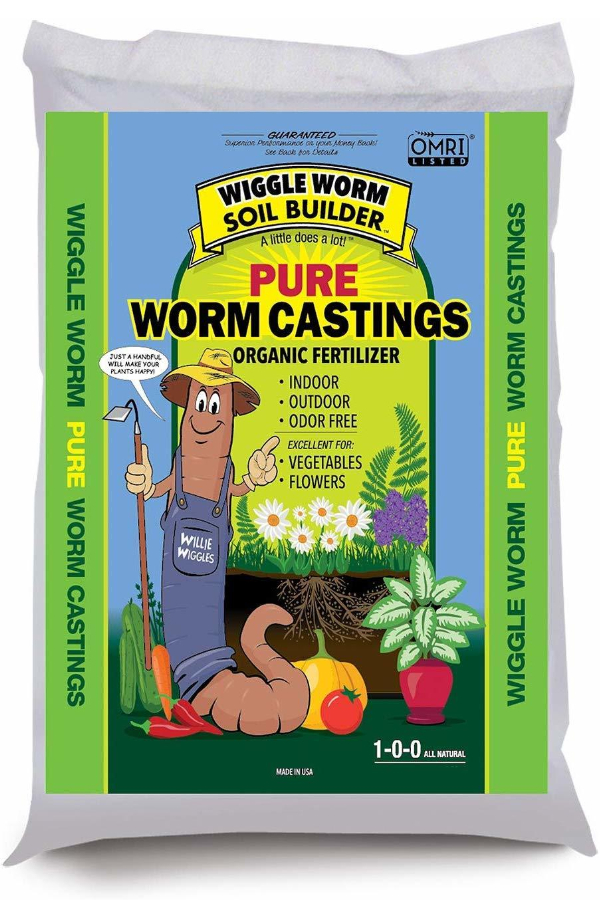
Worm castings are one of the most incredible, all-natural slow release fertilizers around. In recent years, they have become one of the most popular all-natural ways to power plants – and of course, potting soils. They are truly a secret weapon to energize plants in the perfect way!

Just like compost, worm castings are lightweight and absorb water. They also help give excellent structure to the soil as well. But even more, they contain an incredible balance of nutrients that are readily available to power plants. Affiliate Link: Pure 100% Worm Castings
In addition to using them in your potting soil, they can be used throughout the season. Simply sprinkle a few tablespoons on top of your hanging baskets and containers as a fertilizer. They slowly release their nutrients to plants every time the plants are watered and produce amazing results.
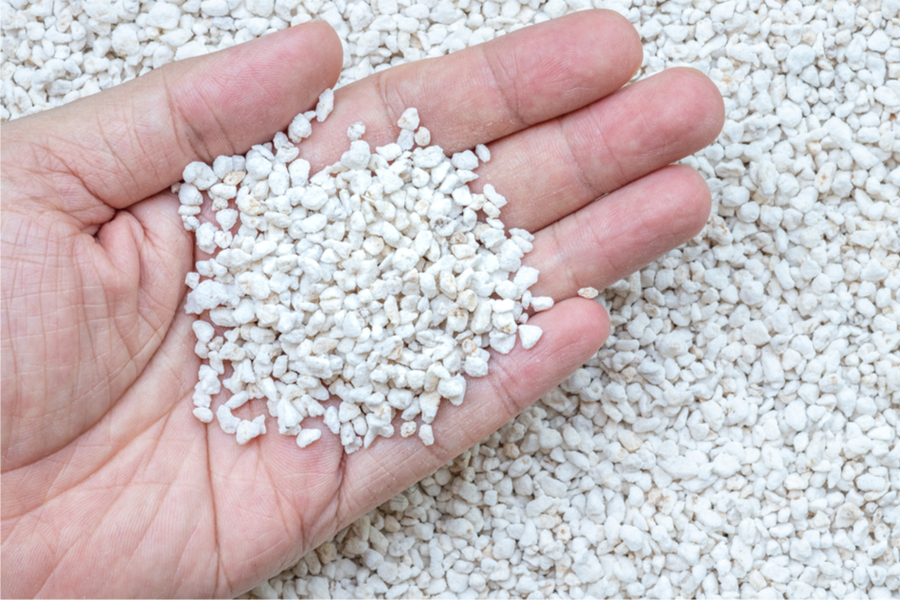
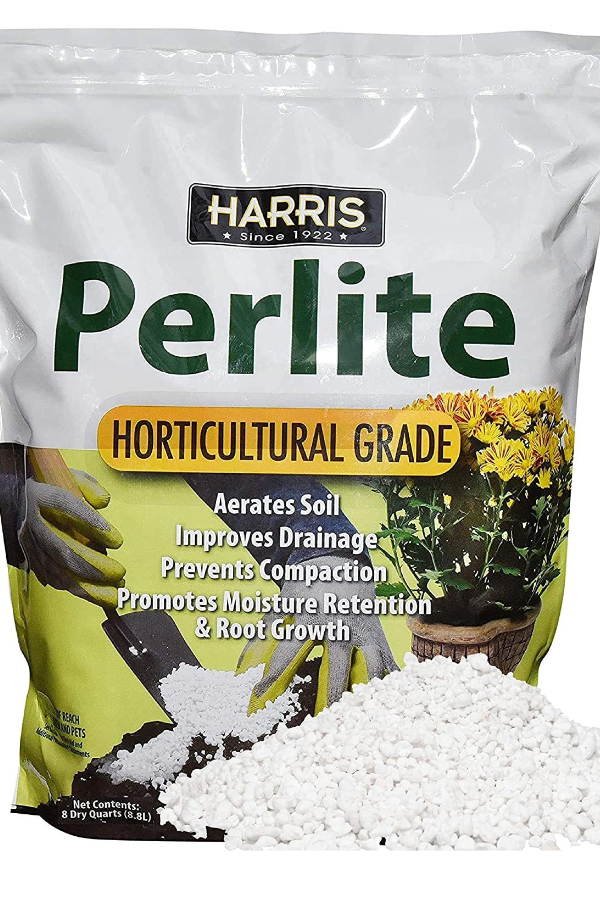
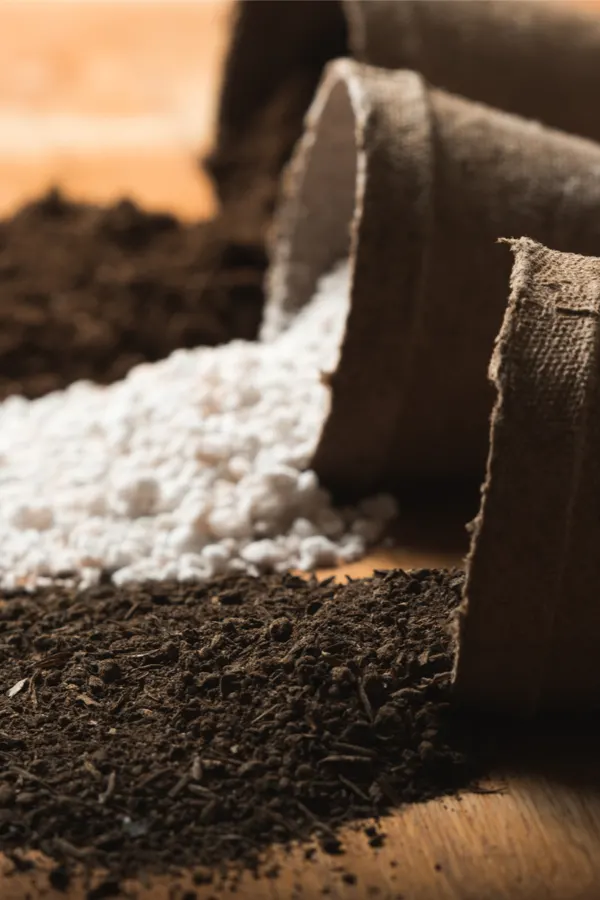
Perlite is the ultimate “lightener” of heavy soil. It is a 100% organic substance that is nothing more than volcanic glass that is heated until it pops.
When perlite is heated, it pops and puffs out to create a super lightweight material with open pores. And those pores hold and retain water at a stunningly high rate. Product Link: Harris Premium Horticultural Perlite for Plants and Gardening

Perlite aids greatly in keeping a potting mix lightweight. All while providing for excellent drainage and better water retention. Even better, it has a perfectly neutral PH of 7, so it won’t affect soil balance in the least.
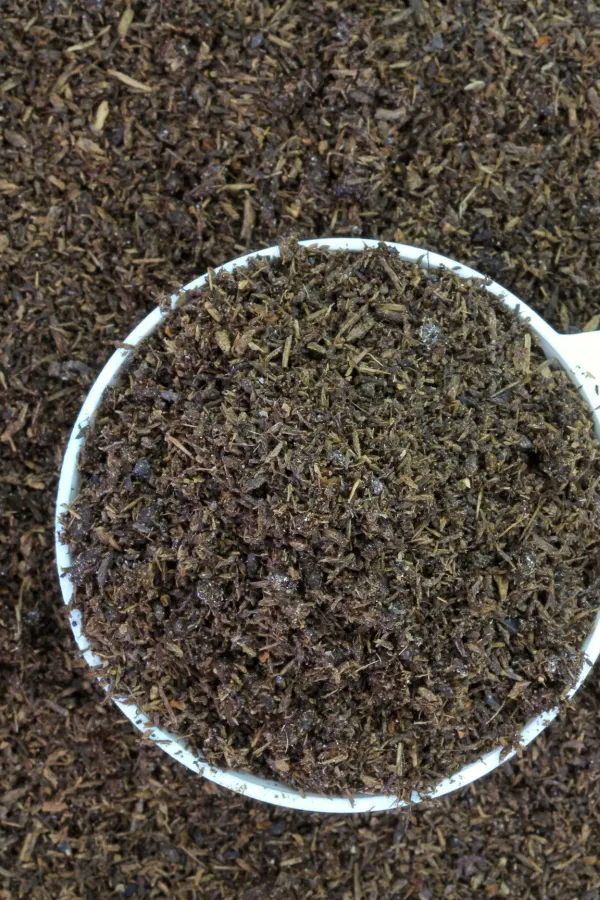
Last but not least – don’t forget to add spent coffee grounds! They are another secret ingredient that are absolutely essential for making potting soil great.
Coffee grounds are actually an excellent slow-release source of nitrogen for plants. And their rich mineral make-up adds even more long-lasting nutrients to potting soil as well. But even more, they are great at absorbing water, and can help hold moisture to the roots of your plants.
To clarify, we are talking here about spent coffee grounds and not fresh grounds. Fresh grounds can be acidic and change the soil PH. Spent coffee grounds lose nearly all of their acidity in the brewing process. Because of this, they are perfect for adding to the potting soil mix.
Here is to creating your very own potting soil this year – and having the healthiest, most productive containers and hanging basket plants on the block!
Follow Our Facebook Page For Great Gardening Tips And Advice! This Is My Garden Facebook Page
This Is My Garden is a garden website created by gardeners, for gardeners. Jim and Mary Competti have been writing gardening, DIY and recipe articles and books and speaking for over 15 years from their 46 acre Ohio farm. They publish three articles every week, 52 weeks a year. Sign up today to follow via email, or follow along!
One of the best ways to keep your hanging baskets blooming strong from spring all the way through summer is learning the secrets of how to fertilize them in just the right way, at just the right time – and with the just the right fertilizer!
Petunias, geraniums, marigolds and other big flowering annuals can produce hundreds of flowers at a time on top of their foliage. But to do so, they use a tremendous amount of nutrients from the soil as they grow.
Unfortunately, even if you use the most fertile potting soil in the largest hanging basket you can find, the soil inside simply can’t contain enough energy to sustain quality plant life for an entire season. But that is exactly where fertilizing saves the day!

By supplying your baskets with fertilizer throughout the spring and summer months, you can keep the soil energized – and of course – your plants flowering stronger than ever. But here’s the real key – that energy from the fertilizer has to be consistent – and in the right form and dose!
The most important secret of all to fertilizing hanging baskets or any container for long lasting blooms is to always power them with a slow, steady and consistent amount of energy.
Plants that receive inadequate or infrequent energy will struggle not just to bloom, but to survive. Without consistent power, stems and foliage weaken, and the plant’s roots can’t store enough energy to produce new flowers.
On the other hand, giving your plants too many nutrients all at once will cause issues as well. When hanging baskets get an overly large jolt of energy, they don’t use it to produce more blooms. Instead, they use that power to grow excessive foliage and a lot of roots!
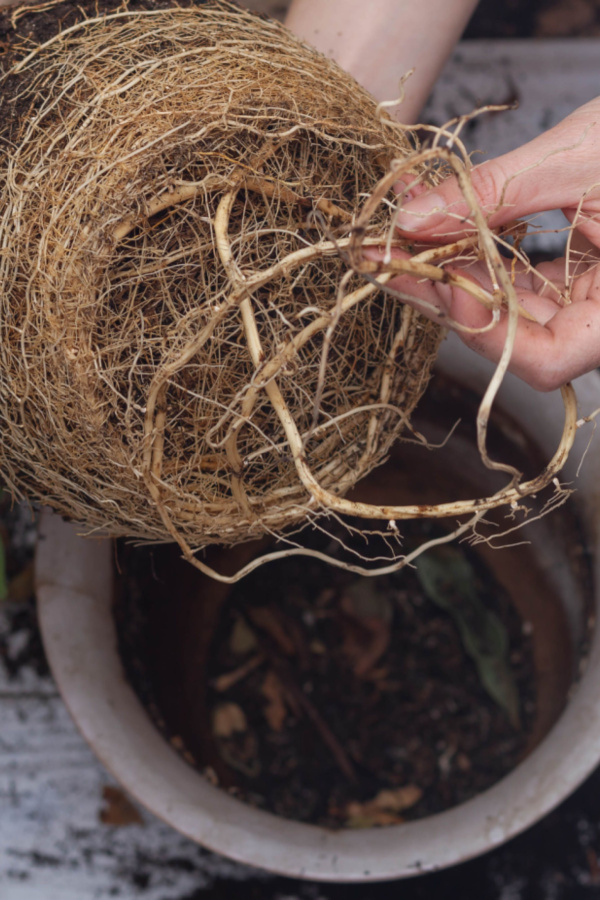

In fact, they expand their roots so quickly that the plant becomes root-bound. And once a plant becomes root-bound, it can’t absorb water or nutrients. The end result? A plant that quickly loses it luster and begins to fail.
So how do you fertilize your plants just right? With a simple two prong approach that will have them blooming with gusto all season long!
There are two ways to provide nutrients to hanging baskets – through slow-release granular fertilizers, or by using a liquid version. So which is better? As it turns out, using a combination of the two is the perfect solution for long lasting plants – and blooms!
Slow release granular fertilizers work by releasing nutrients in a low dose over a long period of time. By adding a slow-release granular fertilizer to the soil in your baskets every month, you can keep the soil supplied with a good supply of basic energy.
The good news is that it isn’t hard to do! In fact, it’s actually quite easy using either worm castings or a light commercial granular fertilizer to do the trick.
Worm castings are the manure of earth worms. And they are actually the perfect low & slow fertilizer for hanging baskets. They break down slowly, leaching their nutrients into the soil in such a way that the plant’s roots can soak it in easily.
To apply, simply sprinkle a quarter to a half cup of castings every month on the soil of your hanging baskets. Then water in to start the magic! Every time you water after, you will continue to leach light power to your plants. Product Link: 100% Pure Worm Castings
If you prefer a more traditional granular fertilizer, you can use a fertilizer with a balanced, lower strength formula. Fertilizers in the 4-4-4 range (NPK) are best. Product Link: Jobe’s Slow Release Granular Fertilizer
Liquid fertilizers make the perfect partner to granular slow release fertilizers. Granular is slow and steady -while the liquid gives a more instant but still steady punch of power. In liquid form, the nutrients absorb easily. Not only via the roots in the soil, but through the leaves and stems as well.
The plants take the nutrients in fast in liquid form, and the nutrients quickly begin to feed and help the plant. It’s a process that granular fertilizers can’t compete with, and exactly why using a combination of the two works so well.
The slow release granular fertilizer works to provide a steady stream of low-dose nutrients to keep the plant healthy. Meanwhile, applying a liquid fertilizer every 10 to 14 days provides a light but quick boost that plants can use to power new blooms.
When it comes to powering you baskets with liquid fertilizer, it’s important to select one that will not be too powerful or strong, but yet still contain a good enough supply of nutrients to energize your plants. For liquid fertilizing, there are 3 great choices that all work well:
If purchasing a liquid fertilizer, look for a liquid soluble fertilizer with a high ratio of phosphorous versus nitrogen and potassium. Phosphorous powers blooms – and can it ever have your baskets flowering big Product Affiliate Link: Miracle Gro Garden Pro Bloom Booster 10-52-10


Compost tea is an incredible all-purpose liquid fertilizer. And because of that, it truly is excellent for fertilizing hanging baskets and container plants. Even better, it can be made for free! See: How To Make Homemade Compost Tea – Power Your Plants Naturally!
To create, simply mix a few shovel-fulls of fresh compost in a 5 gallon bucket. Allow the mix to steep for a few days. Be sure to stir the mixture a few times each day to help the water absorb the nutrients from the compost.
To use, simply strain the mixture and water your plants as you would for a regular watering. It really is that easy! The nutrients are absorbed both by the foliage and the roots, and your plants will have strong, steady and beautiful growth.
Worm castings can make an excellent slow-release fertilizer, or a powerful liquid one too. This tea is made in the same fashion as compost tea, but using worm castings in place of the compost.
To make, place 1/2 cup of castings into 1 gallon of water. Stir or shake well, and allow it to steep for 24 hours. To use, simply shake one final time and water your plants with the tea as you normally would for a regular watering.

The beauty is there is no need to strain the castings. They can be poured on the plants right with the water, and with no worry of burning or harming the plants. In fact, they will only help release more nutrients as they break down.
By using a low and slow two-prong approach to keeping your hanging baskets powered, not only will you extend your plants life, but its bloom cycles as well. In fact, in most cases, not just though summer, but right into fall too. Here is to keeping your baskets strong and vibrant from spring until fall!
Looking for some other hanging basket tips? Then be sure to check out our article: How To Grow Hanging Baskets From Seed – Grow Better Baskets For Less!
Follow Our Facebook Page For Great Gardening Tips And Advice! This Is My Garden Facebook Page
This Is My Garden is a garden website created by gardeners, for gardeners. Jim and Mary Competti have been writing gardening, DIY and recipe articles and books and speaking for over 15 years from their 46 acre Ohio farm. They publish three articles every week, 52 weeks a year. Sign up today to follow via email, or follow along!
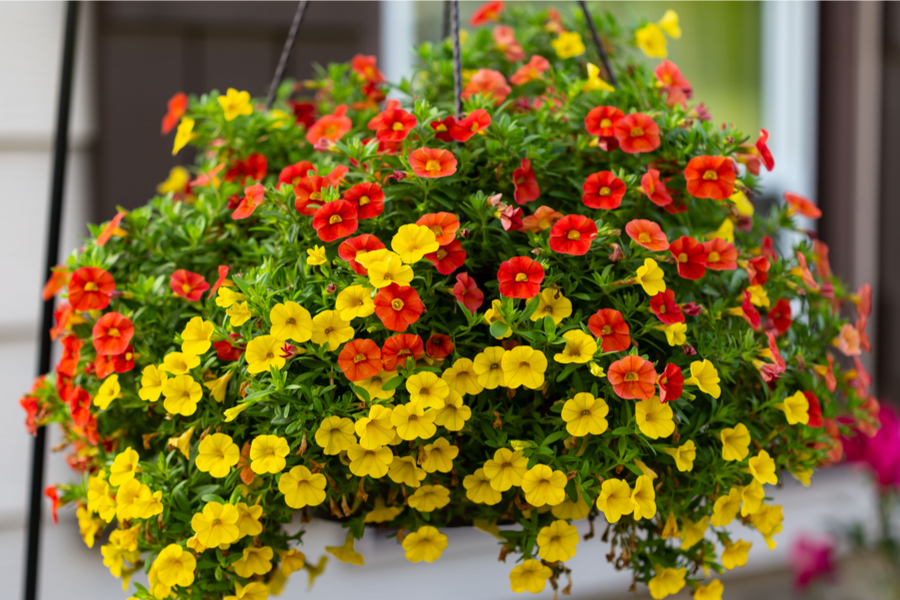
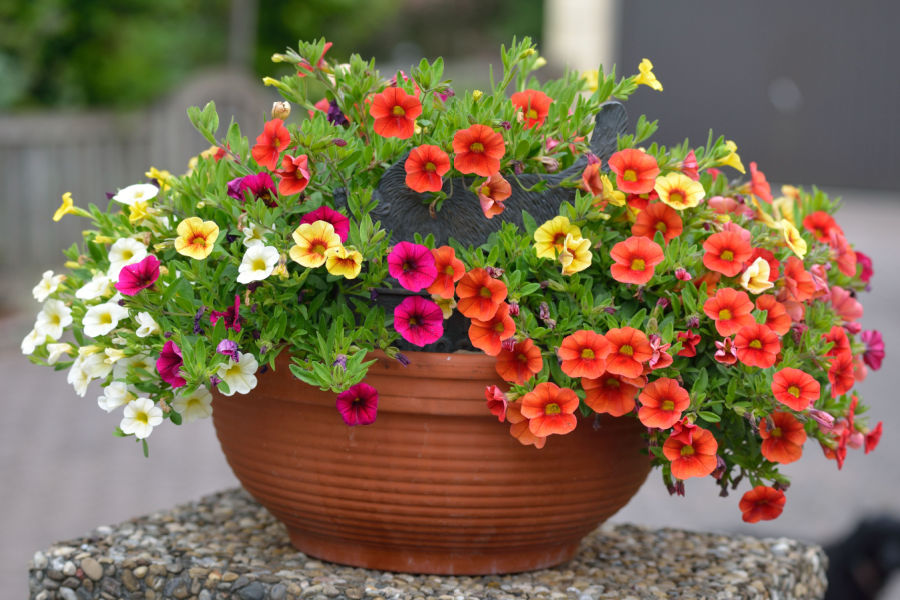
If you are looking for the best hanging basket plant to light up your landscape with big blooms that last from spring until fall – then Calibrachoa (Million Bells) is the plant for you!
Although there are so many wonderful annuals that can fill baskets with color, nearly all of them have issues with all-season flower power. And let’s face it, there is nothing more disheartening than bringing home a gorgeous flowering basket in the spring, only to watch it fade away by the time summer rolls around!
As gorgeous as petunias are, they often become wiry and weak by mid-summer. And the same can be said for geraniums, impatiens, begonias and other annual hanging basket choices.

It’s not to say that there is anything wrong with any of those flowering selections. In fact, they can all add incredible beauty when in full bloom. But if you are truly looking for a hanging baskets plant that can last with amazing beauty and blooms all season – nothing compares to Calibrachoa.
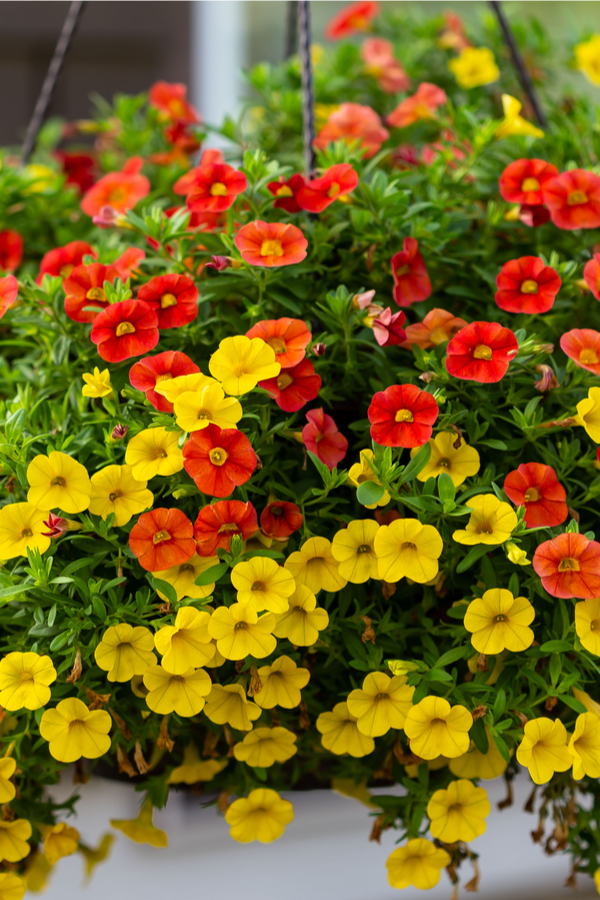
Calibrachoa is an annual that is growing more popular each and every year. And, it’s easy to see why! The plant is simply a stunner when grown in containers and hanging baskets.
There is a reason many gardeners refer to this plant as Million Bells. Not only does it produce a heavy load of miniature petunia-like blooms, it produces them continuously. So much so that by the end of the growing season, it seems as though the plant had to have a million blooms or more!
But that is just the tip of the iceberg when it comes to the wonders of this beautiful annual. As you’ll see below, it’s foliage, durability and ease of maintenance truly make it one of the best choices of all to grow in hanging baskets.

Often mistaken as a petunia plant, Calibrachoa actually grows as a perennial in warmer, tropical climates. However, it grows as an annual in more traditional climates, and stays strong right up until the first hard frost.
In recent years, there have been a tremendous amount of new hybrid Calibrachoa plants developed. And it seems as though with each new type, the plant only performs better!
The colors you can find calibrachoa blooming in seem almost endless. From blue, pink, yellow, red and violet, to bronze, magenta, coral, white and lavender – you can find the varieties in a vast array of bright hues to match any color scheme.
Calibrachoa is a trailing annual that fills out planters and baskets with a bushy canopy of bright green foliage. The plant spills over containers with ease, but unlike many vining plants, it doesn’t grow wildly out of control.
Instead, it’s trailing growth is slow and compact, giving the foliage and blooms big impact and huge color. Beyond the incredible flower power it provides, Calibrachoa also holds up extremely well to the elements.

The plant thrives in full sun, making it a perfect choice for hot patios and decks. But it also handles partial shade too, making it an all-purpose container plant like no other. But perhaps best of all, the plant has a very slow root and foliage growing pattern.
That, of course, gives it the ability to last all season long much easier and without a lot of work. In fact, although the plants does not require a lot of care to maintain its good looks, with just a little bit of extra attention it can absolutely flourish all spring, summer and fall.
One of the best attributes when it comes to caring for Calibrachoa is that the plant does not require deadheading for continuous blooming. The same can’t be said for other big-flowering annuals such as geraniums and petunias.
In addition, unlike many other annuals whose roots quickly outgrow their container, Calibrachoa’s slower root growing pattern means that it rarely needs to be repotted in-season. And if it does, it won’t require a much bigger basket to last through fall!
For most, it is easiest to purchase the plants already in hanging baskets or as transplants from a nursery to make their own baskets or containers. There are a lot of hybrid styles that will not reproduce from seed. And the plant is so popular now, you can readily find it in most nurseries, greenhouses and big-box stores.
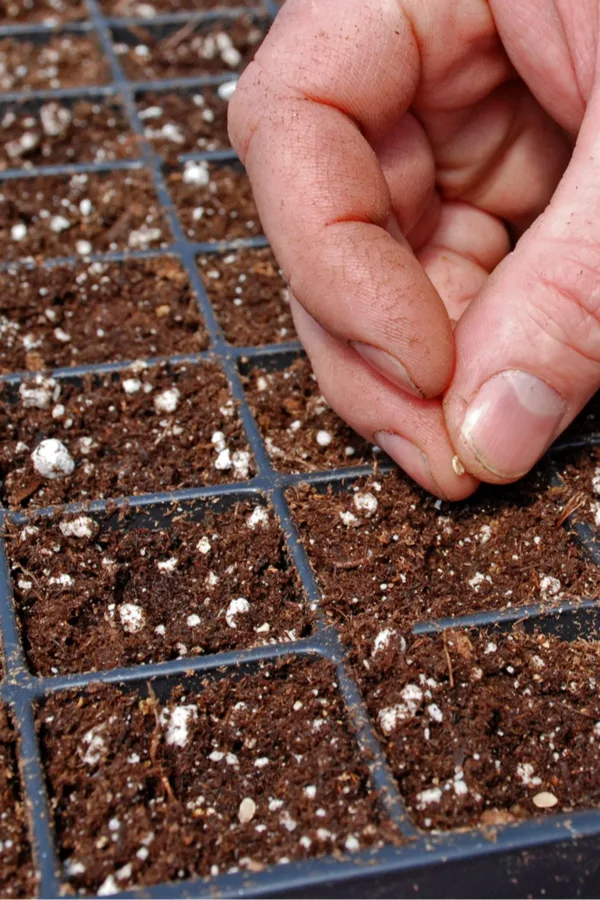
If you do want to grow from seed, you can find many beautiful varieties on line for purchase. When starting from seed, you will want to start them indoors six to twelve weeks before your areas last frost date. Affiliate Seed Link: Calibrachoa Seeds Million Bells
In addition to consistent watering, there are really only two simple chores you need to perform on your Calibrachoa plant to help it perform at its peak potential. The first is to provide your plant with a low but steady diet of fertilizer. The second is to prune it back a bit each month to help it re-energize its blooms. Here is a look at each of those in-depth:
Calibrachoa is not a massively heavy feeder, but a little extra power will help keep it blooming stronger. But the key word here is a little extra power!
As with most hanging baskets and annual flowers, when fertilizing, lower but consistent doses of fertilizer are the best way to go. See: Fertilizing Hanging Baskets – How To Keep Baskets Blooming Strong
By giving the plant a slow and steady diet of nutrients, it keeps it them from spending too much energy growing foliage and not producing blooms. Heavy fertilizing also leads to plants growing too large of a root structure and becoming root bound faster.
Calibrachoa responds best to liquid fertilizer. It absorbs through the roots and foliage giving the plant the energy it needs fast. If using compost or worm casting tea, give the plant a dose every seven to ten days.

If using a commercial liquid fertilizer, mix at half of the recommended rate and feed every ten to fourteen days. Commercial fertilizers tend to be stronger. By mixing them at half strength, you can keep from overpowering the plant with too many nutrients. Affiliate Product Link: Water Soluble Bloom Booster Flower Food
Finally, once mid summer arrives, pruning back your Calibrachoa can really help it power up more blooms for the remainder of the season.
This is no so much deadheading the plant (although you will be removing blooms with a cut back), but taking a few inches off all around to restart new growth. For this, a pair of hedge shears works great! Just go around shaping the plant, cutting it back a few inches.
Within a week to ten days, you will see tons of new blooms starting to appear, and your plant will bloom stronger than ever. Here is to growing Calibrachoa this year, and to lasting blooms in your hanging baskets! For more great tips on growing beautiful hanging baskets and containers, see our article: The 6 Best Trailing Plants To Use In Containers & Hanging Baskets!
Follow Our Facebook Page For Great Gardening Tips And Advice! This Is My Garden Facebook Page
This Is My Garden is a garden website created by gardeners, for gardeners. Jim and Mary Competti have been writing gardening, DIY and recipe articles and books and speaking for over 15 years from their 46 acre Ohio farm. They publish three articles every week, 52 weeks a year. Sign up today to follow via email, or follow along!


Looking for the best hanging basket plants this year to grow in the shade to finally bring some big flower power and color to the less-than-sunny parts of your landscape?
All too often, gardeners think their covered front porches, decks and patio areas are all but impossible to light up with flowering plants. It’s certainly an understandable thought. After all, common big blooming annuals like petunias, marigolds and geraniums need a lot of sunlight to flower.
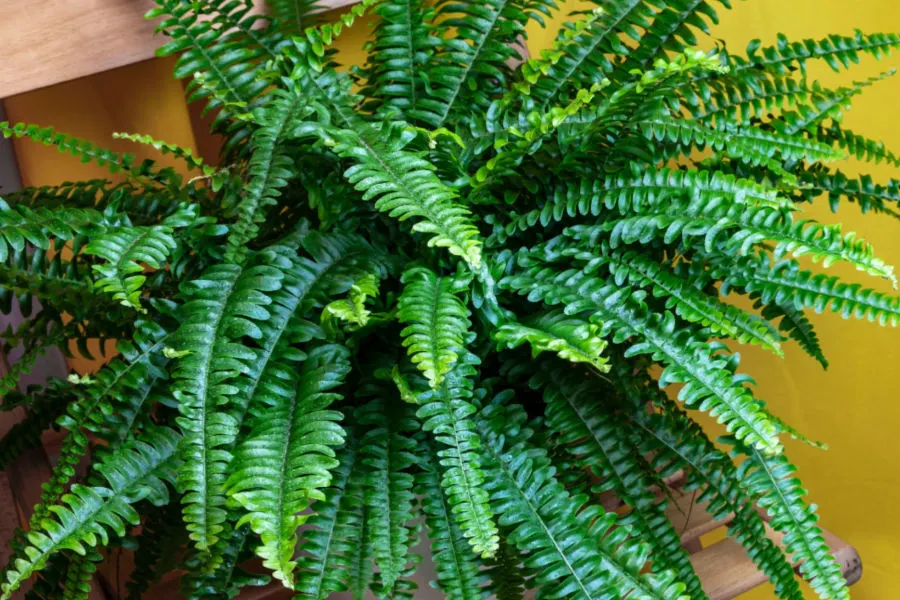
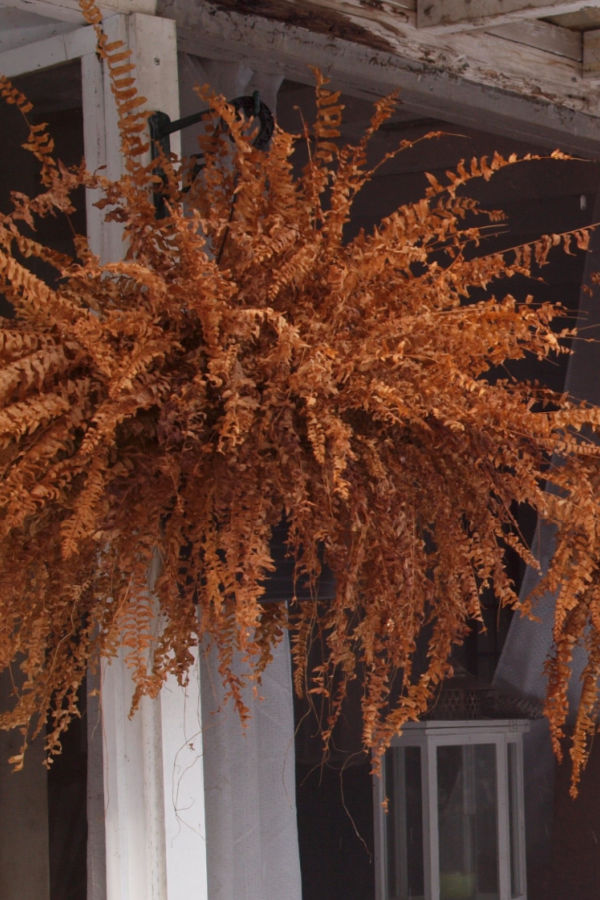
Because of that, many gardeners limit their choices for their shady areas to ferns and other greenery options that thrive in low light situations. Although ferns do well in low light and can be quite beautiful, they don’t exactly ooze with color.

But just because an area gets only a few hours of direct or filtered sunlight – it doesn’t mean you can’t have a few flowering annuals bloom there to brighten it up. In fact, surprisingly, there are quite a few flowering annual options that do quite well with little to no sunlight.
Even better, all happen to make the perfect pairing with a fern or other greenery to really bring a space alive!
The real key to growing in the shade is knowing first just how much light an area gets. All plants need some light to survive – whether it is direct sunlight or indirect. Direct light is when the sun shines in full view of the plants. Indirect, on the other hand, is light that comes into an area that has a shade source over it.
An area that gets no direct sunlight but gets plenty of indirect light from the sun can still grow many shade loving plants quite well. And yes, that even includes flowering plants! In addition, a location that receives a few hours of direct morning or evening sunlight can still grow shade loving plants too.
But where many shade loving plants fail is when they get a few hours or more of hot afternoon sun. Morning and evening sunlight is far less intense than mid-day sun. Because of that, only select shade plants for areas that do not receive midday sun as their light source!

As an example, if you have a porch or deck area that is in the shade all morning and evening but gets a lot of midday sun – you are much better off selecting a sun-loving plant. A shade plant might get less early and late, but the midday sun will simply scorch it.
With that thought in mind, here is a look at four of the best options to bring big blooms and color to less than ideal lighting situations around your landscape.
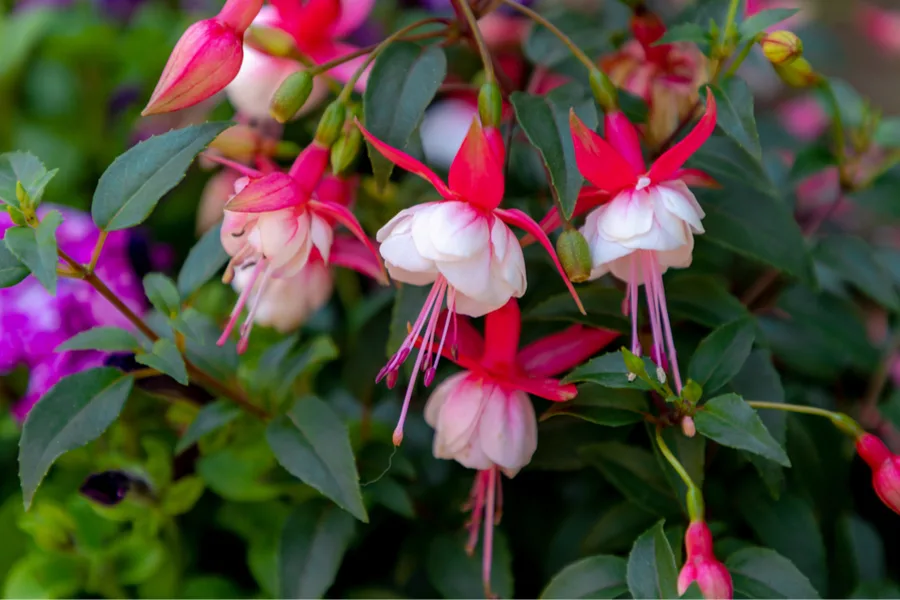
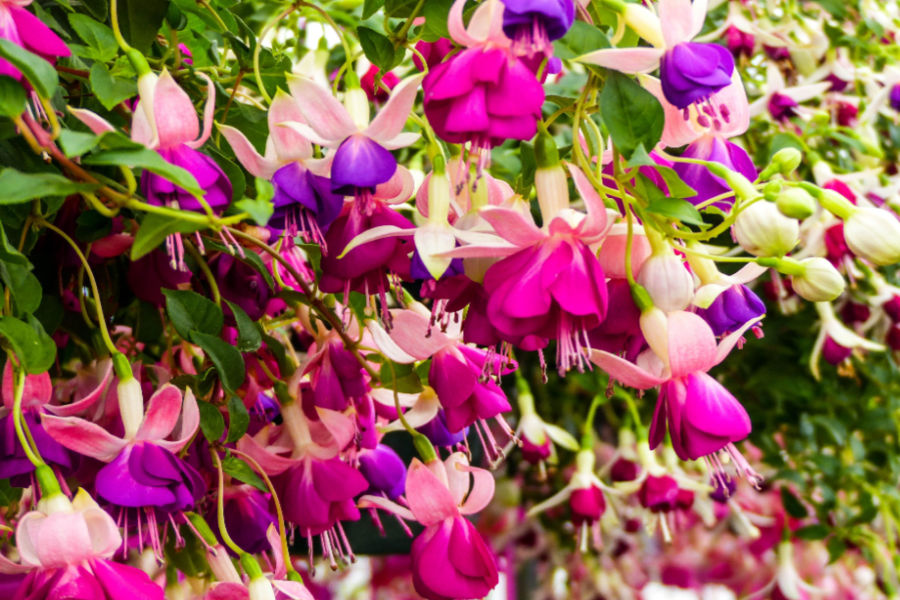
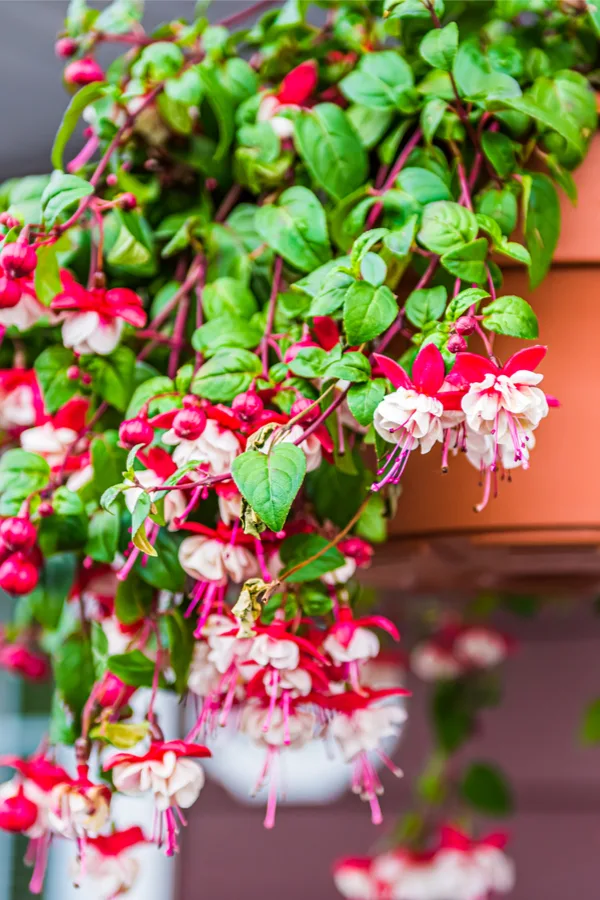
Fuchsia (pictured above) is one of the biggest, brightest and most colorful shade loving plants of all. It’s dangling blooms light up hanging baskets with a stunning display of cascading flowers that resemble fireworks falling from the sky.
The plants are perfect for hanging baskets. Not only will the foliage spill over and down the edges of the basket, the blooms dangle from the ends of the stems to keep all of the color at eye level. And that color can be intense! From orange, red and white, to deep purple and pink – the flowers seem to leap from the foliage.
One thing fuchsia cannot handle is intense sunlight. That, of course, makes it perfect for bringing big color to partially shaded areas like porches, decks and patios that might only get morning or late evening sun.
To get the most from this gorgeous annual, keep it well watered and fertilized. The constant blooms can quickly zap the nutrients from the soil, so keeping it powered up is a must! For more on growing fuchsia, check out : How To Keep Fuchsia Blooming All Summer
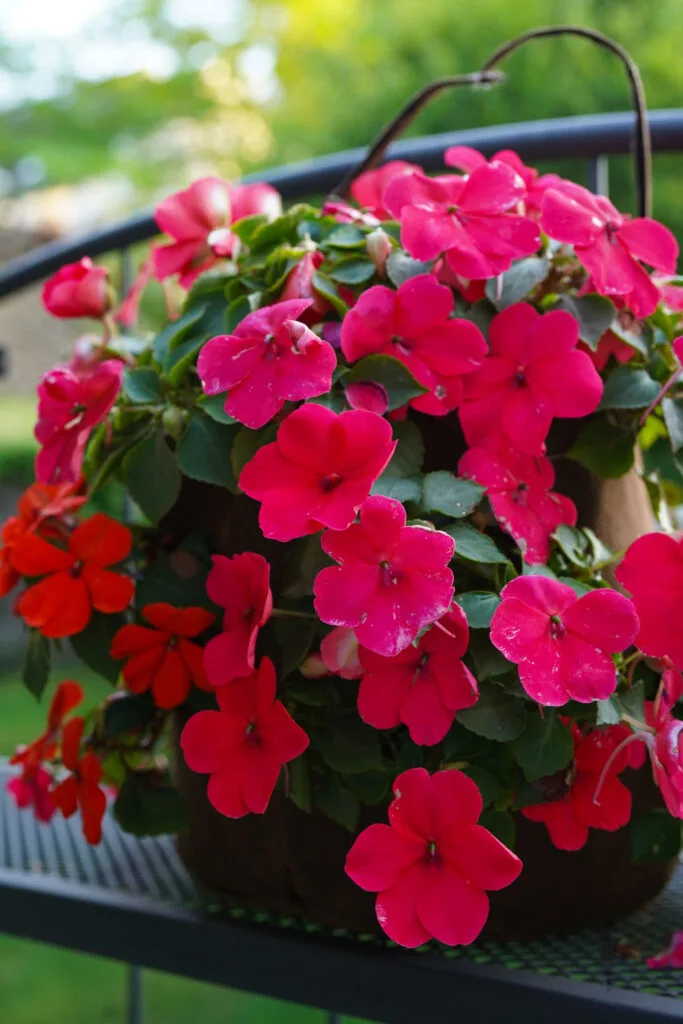
Impatiens have long been the standby annual for providing a mass of color in shady locations. When placed in the right location and allowed to grow in fertile, well-draining soil – impatiens can produce so many blooms that it becomes hard to see the foliage!
Impatiens varieties can be found in nearly every blooming color imaginable. Not only do they look great on their own, they are also one of the best flowering annuals to pair with ferns and other low-light loving greenery.
The bright blooms of impatiens pair well with any shade of green, and their shallow and smaller root systems are perfect for planting in containers with other plants.
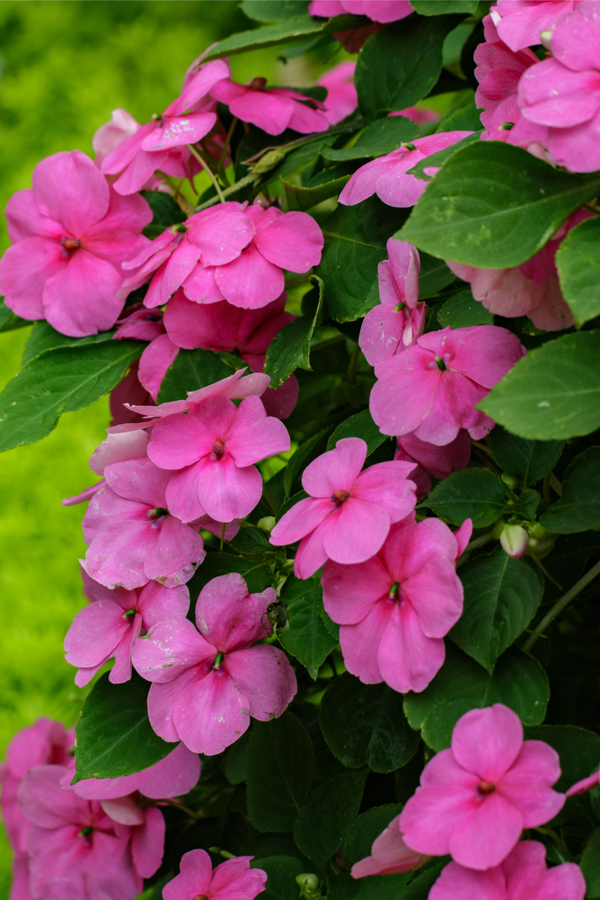

For impatiens to bloom well, place them in a location that receives no more than a few hours of direct sunlight each day. As with nearly all shade plants, early morning or late day sun if far better than mid day sunlight.
Finally, for impatiens to continue to thrive and bloom, they need consistent water and fertilizer. Fertilize with with light doses every ten to fourteen days. Do not allow the soil to completely dry out between waterings.
At the same time, be careful not to allow the soil to stay overly wet either. Impatiens can suffer easily from both rot and mildew, so always water wisely. This is where an inexpensive moisture meter can really come in handy for an instant read of the soil! Affiliate Link : Soil Probe Moisture Meter
Often confused as a fuchsia plant, bleeding heart is another great choice for growing big blooms in the shade. The blooms of fuchsia and bleeding hearts are certainly similar. And to boot, both plants also dangle their booms in cascading fashion.
But when it comes to the difference between the two, the blooms of the bleeding heart are, you guessed it – in the shape of a heart that looks like it might just be bleeding!

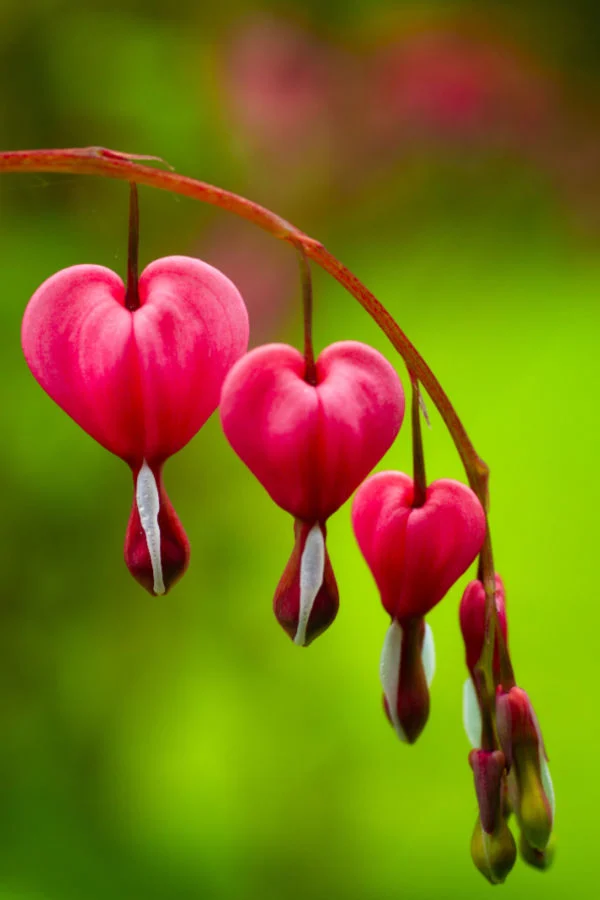
Much as with other blooming annuals that perform best with some shade, bleeding heart will flower best when it has a bit of morning or evening sun. Avoid locations with hot afternoon sunlight, and plant in rich and well draining soil.
The plant requires a fair amount of moisture, but never allow the soil to remain wet for too long. The plants root system can rot out when it sits in water too long. Always allow the soil to dry out between waterings for best results.
The last plant on our list of shade loving, color-adding annuals is Coleus. And is it ever one special plant! Not only can it provide huge amounts of interest and color to low-light areas – it does so not with its blooms, but with its amazingly patterned and colorful foliage!
The leaves of coleus are filled with bright, interesting colors and patterns. The foliage is so bright that it often looks as though the plant is glowing under a neon light.
Coleus is a member of the mint family. It is actually a perennial in climates without cold winters. Coleus can be brought indoors to grow as a houseplant in cold climates. It performs magnificently in low light areas. In fact, it only requires a few hours of direct sunlight or good indirect lighting to flourish.
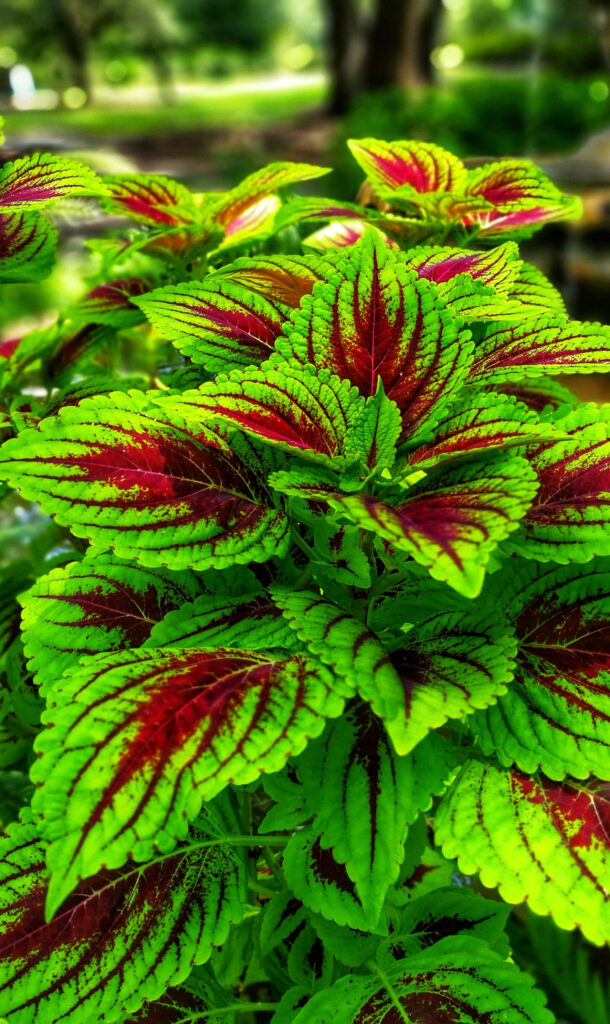

The plant requires little in the way of additional fertilizer to stay healthy all season long. Interestingly enough, Coleus does produce a bloom, but it’s best to remove it. The blooms are tiny and not overly impressive, but will take energy from the plant so removing them is best.
Here is to adding some big color to the shadier parts of your landscape this year!
Follow Our Facebook Page For Great Gardening Tips And Advice! This Is My Garden Facebook Page
This Is My Garden is a garden website created by gardeners, for gardeners. Jim and Mary Competti have been writing gardening, DIY and recipe articles and books and speaking for over 15 years from their 46 acre Ohio farm. They publish three articles every week, 52 weeks a year. Sign up today to follow via email, or follow along!
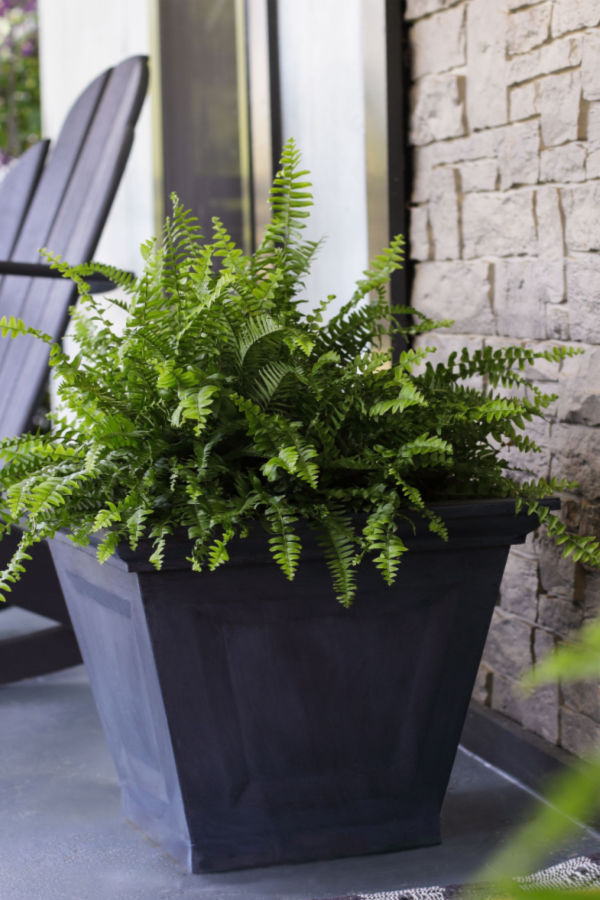
Looking for a few winter fern care tips to keep last year’s outdoor ferns alive and well indoors this winter? We have you covered with today’s article!
Saving your potted or hanging ferns from year to year is one of the best ways to save on your gardening budget. Ferns are actually a fairly low maintenance plant, whether growing outdoors in the spring, summer and fall months – or overwintering inside through the cold of winter.
For many though, it’s the indoor winter months that are the most challenging. By the middle of winter, depending on how and where your ferns is overwintering, they can begin to look pretty ragged. In fact, so ragged that many gardeners often mistake their plants for being dead or near death!

Here’s the good news, your plants are more than likely fine. And depending on how and where you are overwintering them, they could be going dormant (which is more than okay), or simply struggling a bit to keep their foliage with low light, too much or not enough water, inconsistent heat – or a combination of all 3!
With that said, here is a look at how to care for your ferns in the middle of the winter, along with a few tricks to have them ready to grow big as spring arrives!
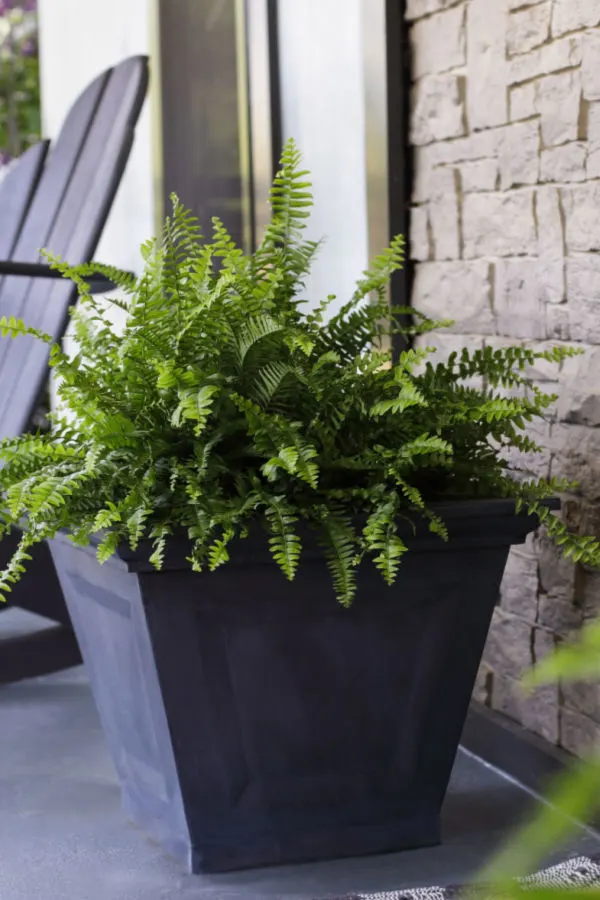
When it comes to saving your outdoor ferns through the winter months, there are really two options. The first is to continue to grow your fern as a traditional houseplant. As you will see below, this works well for those who have manageable sized ferns, and who have the ideal room and light to keep the plant growing well.
The second option, and by far the easiest of all, is to simple allow your fern to go dormant over the winter. This option can be done right from the start in early fall, or even during the winter if the fern you are trying to grow as a houseplant is starting to look quite shabby.
We will take a look at both options, starting with growing your fern as a houseplant through the winter. Although this one can be a bit trickier, if you have the right conditions and light, it can make for a beautiful houseplant!
If you are lucky enough to have the right lighting and temperature conditions indoors, you can keep your fern growing right on through the winter months. Ferns do not have to go through a dormancy period. In fact, in their natural habitat, this perennial plant keeps its foliage year round.
So what does it take to keep a fern growing beautifully indoors? Well, for starters, it is best to select smaller ferns to grow as a houseplant.
Large, overgrown ferns are simply too hard to keep in tip top condition through winter. Not only are their roots often bound too tightly for water and nutrients to be absorbed, larger plants struggle to get enough light to keep all of the fronds healthy and green.
If you have a large fern, your best bet is to opt to allow it to go dormant. But if your fern is on the smaller size, bringing it in to grow as a houseplant is quite easy. All it really takes is giving it the right lighting and temperature, and controlling the humidity and moisture it receives.
For best results, move your fern indoors to a room that receives filtered light. Ferns are a shade and moisture loving plant. Unfortunately, placing them near a sunny window or in a room that receives direct sunlight will cause them to dry out. As a result, their fronds will shrivel and die off – just as they would in direct sunlight when outdoors.

Place your fern away from a window in a room that receives only dappled or indirect sunlight. In addition, keep it away and out of the line of heating or cooling vents. These too can dry the plant out in quick fashion.
Watering is another big key to success. Ferns can easily rot out if their roots remain too wet. However, they can also suffer if they have no access to moisture as well.
Water plants only when the moisture down in the soil just slightly begins to dry out. Inexpensive moisture meters are great for checking moisture levels deep at the root level.
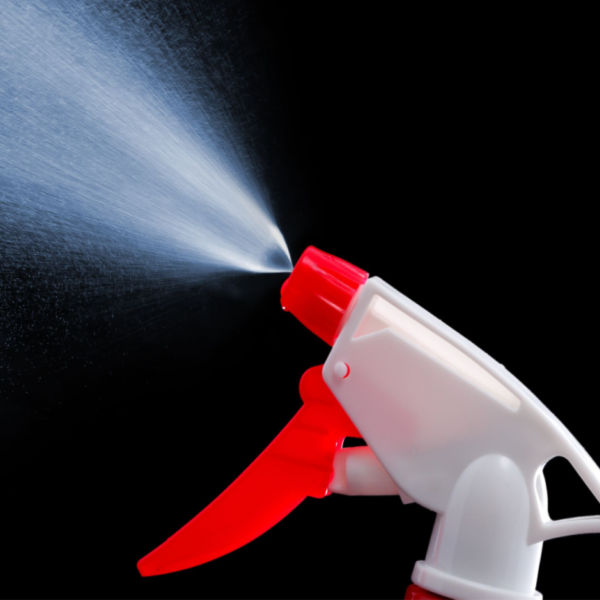
In addition, sit your plant on a tray or saucer with small pebbles or marbles underneath. This will allow drainage and keep the plant’s roots from sitting in water for too long. Finally, and this is a big key to success, spritz or mist your plants often with water!
By simply misting your plants with water from a water bottle a few times each week, the fronds can absorb the moisture. It keeps the plant hydrated, helping it to stay healthy and green without having to overwater the soil below.

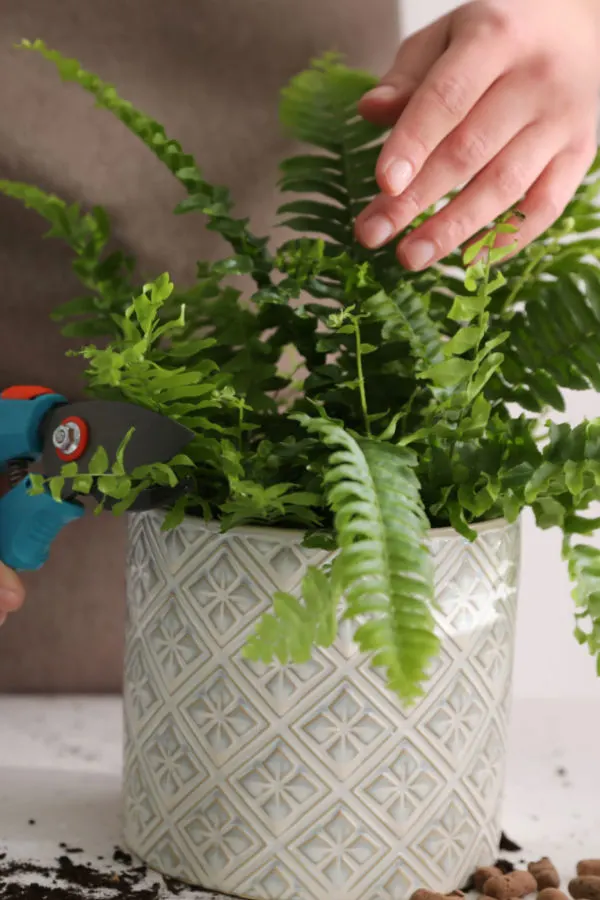
Throughout the winter, do not be afraid trim off fronds that begin to show signs of wear and tear. This will keep your plant looking great. It also allows for new growth to takes its place. As spring returns, your plants can go outside in top condition, ready for another outdoor growing season!
Here’s the good news, if at any time your plant just isn’t cutting it as a houseplant, you can always cut it back and allow it to go dormant until spring. And if your plant is too large, you can also divide it in the spring to create smaller starts with ease. See: How To Divide Ferns
If you simply want to keep your fern alive over winter but don’t want the fuss of houseplant care, you can allow the plant to go dormant. Not only is the process easy, it also helps to eliminate the mess of cleaning up fronds throughout the winter.
To begin, start by cutting back all of the fronds to within a few inches of the soil line. Yes, it will make the plant appear to be quite dead, but no worries, it will overwinter just fine and come back alive in the spring.
Select an area of your home where the temperature remains cool but not too cold. Basements are usually the best spot of all, as they stay both cool and a bit moist. If you have an insulated garage that does not see freezing temperatures, that will work as well.
The good news is that light is not a factor for ferns when they are dormant. They do not require light to stay alive, so even if your basement is dark, it will work. They can be placed in partial light, but it is simply not necessary. The only thing to avoid is placing them where they will receive direct sunlight as it can keep them from going dormant.


Here is the easy part – other than lightly watering your plant a few times each month – that’s all you have to do for dormant winter fern care! As it begins to warm in late winter / early spring, you can move your plant if you wish to a warmer room with dappled light.
This will help the plant begin to come out of dormancy. You may even see new growth appear within a few weeks. As the temperatures begin to warm outdoors, you can then take the plant outside. This will allow it to begin its full growth and fill out once again.
Here is to keeping your ferns alive and well with a little winter fern care. And even more, to saving on plant purchases next spring! If you would like to learn how to keep geraniums alive over winter to grow again next spring, be sure to check out our article How To Save Potted Geraniums Indoors – 2 Easy Ways To Keep Geraniums Alive Over Winter!
Follow Our Facebook Page For Great Gardening Tips And Advice! This Is My Garden Facebook Page
This Is My Garden is a garden website created by gardeners, for gardeners. Jim and Mary Competti have been writing gardening, DIY and recipe articles and books and speaking for over 15 years from their 46 acre Ohio farm. They publish three articles every week, 52 weeks a year. Sign up today to follow via email, or follow along!
Want to keep your fuchsia plants in your hanging baskets and containers blooming strong all summer long?
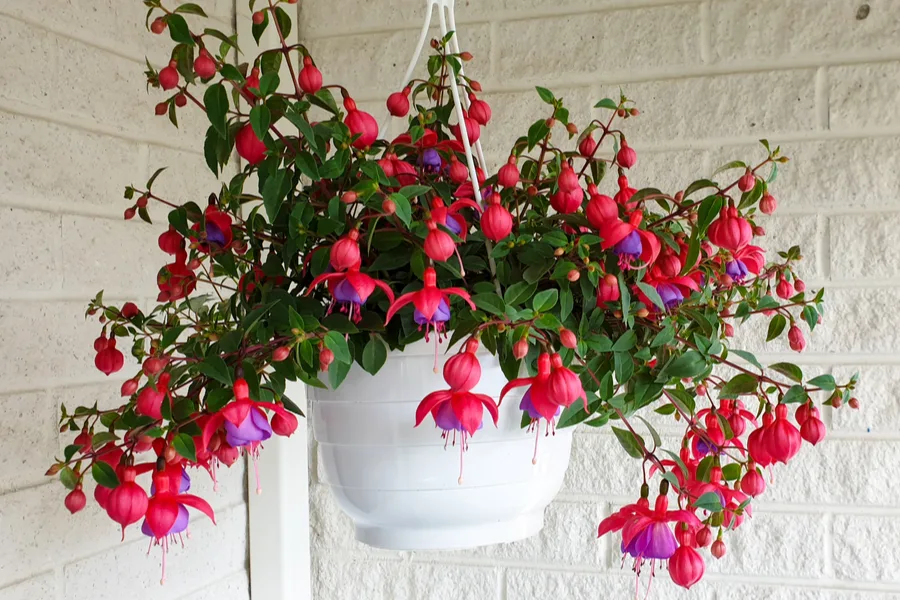
Fuchsias are one of the most beautiful of all summer annuals to grace the landscape. Their bright, colorful teardrop blooms can be stunning when flowering big in pots, containers and hanging baskets.
Fuchsia plants are prized for their multi-colored flowers. When in full bloom, the plant almost appears as though it is exploding in a bevy of fireworks cascading down from its foliage above. Especially when they are planted in hanging baskets and pots where they can spill over the edges!

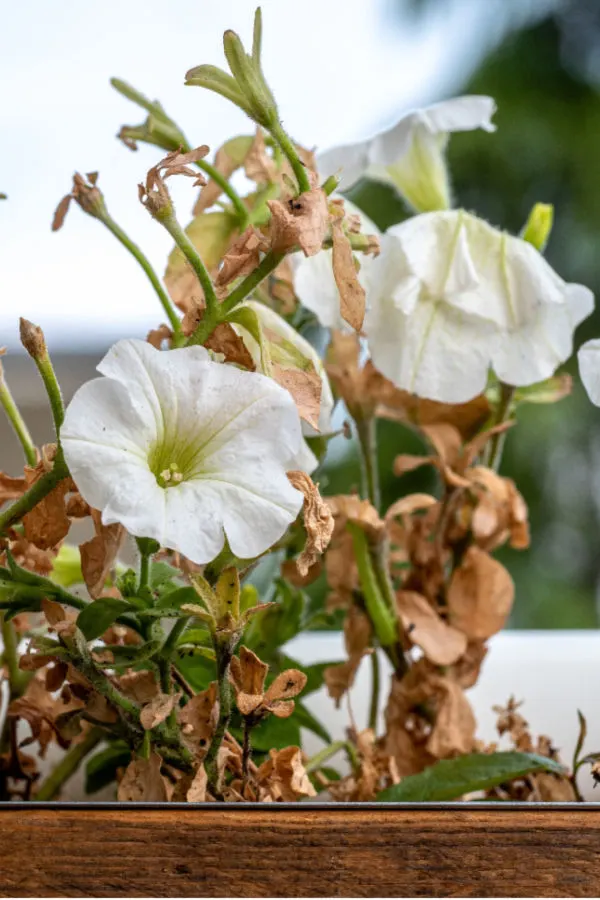
But if there is one drawback to growing fuchsia, it’s that many gardeners find them hard to manage by mid summer. Without proper care, fuchsia baskets and pots that were once completely covered in blooms in the early spring can often become wiry and weak by July or August.
As the plant begins to fade and the blooms fall off without being replaced, many gardeners assume the plant has simply reached the end of the line.
But here’s the good news – with just a few simple tips and tricks, fuchsia plants can thrive not just into the middle of summer, but right up until the first frost.
Even better, the plants can do so with a recurring flurry of beautiful blooms that continue to bring life to wherever you grow them. With that in mind, here is a look at how to get the most out of your fuchsia plants, including how to keep them flowering all spring, summer and fall long!
Many times, when fuchsia plants fail, it is their growing location that is to blame. Simply put, fuchsia will not grow well when it receives intense sunlight.

Not only can fuchsia not handle all day sun, it also needs to be spared full sun at mid-day. The scorching hot afternoon sun is simply too much for its tender foliage and blooms to handle. It can dry the plants out quickly, and make it hard to absorb the nutrients it needs.
On the other hand, by no means is fuchsia a full shade plant. In fact, it needs and wants sunlight. But the key to success is to give it that sunlight in moderation. And and even more, to supply it at the right time of day.
For best results, locate your fuchsia where it will receive early morning or late day sun. This sunlight is much cooler than middle of the day sunlight. It will more than provide the light needed for better blooming, without causing the stress that mid day heat can bring.
Nearly all fuchsia varieties that grow in containers and hanging baskets are tropical plants. And as a tropical plant, they need humidity and moisture to thrive.
When a fuchsia plant dries out, both the leaves and roots begin to shrink and shrivel. Unfortunately, once this occurs, it makes it even more difficult for the plant to absorb moisture. The result is a plant that grows weaker by the day, and produces little to zero new blooms.
The key to success all lies in providing proper hydration. Fuchsia loves to grow in soil that is moist, but not saturated or flooded. Most fuchsia will require water daily to stay strong and healthy. If you are growing in an extremely warm climate, they may even require a second daily watering.
Fuchsia plants are one annual that truly needs additional nutrients to continue thriving. To produce those long, gorgeous flowers, it takes a lot of nutrients. And a constant supply of them!
Because fuchsia are almost always grown in containers or baskets, the contained soil quickly becomes depleted of the nutrients the plant needs to continue blooming. But by providing a slow and steady dose of energy, you can keep the plant in full bloom.
The real key with fertilizing fuchsia successfully is to power the plant low and slow. Too much fertilizer all at once can create excessive root and foliage growth – all at the expense of more blooms.
Instead, by supplying a weakened dose of liquid fertilizer every 7 to 10 days, the plant can steadily take in the nutrients it needs for proper blooming.
Compost tea is an excellent choice for powering for Fuchsia. The balanced nutrient levels in compost tea are perfect for keeping the plant with a slow and steady growth rate. You can also use a high quality liquid fertilizer as well. Product Link: Performance Organics All Purpose Plant Nutrition

Deadheading and pruning are two tasks that are vital to a Fuchsia plants ability to produce new blooms. As blooms begin to fail, remove them to keep the plant’s energy focused on new production. See : How To Deadhead Plants
Allowing spent or decaying blooms to remain allows the plants to waste energy trying to repair them. But once they are removed, the plant will quickly divert the energy to new flower production.
Pruning your plant every so often also will play a big role in new blooms. Fuchsia plants only produce new blooms on new growth. By pruning or trimming the plant back a few inches on a regular basis, you will force new growth and new blooms.
In fact, if your plant has slowed its new bloom production, simply cut it back three to four inches all around – within a few weeks, it will begin to flower strong on all of the new foliage growth.
Finally, sometimes your fuchsia plants simply need a larger space! As spring rolls into summer, many hanging basket and container plants run out of room for their roots. (See: How To Give New Life To Worn Out Hanging Baskets)
Fuchsia need fertile, well draining soil to grow at their peak. Unfortunately, by mid-summer, many fuchsia plants growing in containers simply run out of soil room and nutrients.
Root bound plants can’t absorb the moisture and nutrients they need to survive. No matter how often you water or fertilize, once they have outgrown their space, they will continue to fail.
The answer for root bound plants is to replant them into a larger vessel. Select a container or basket that is at least 1/3 larger in size. Use a high quality potting soil and replant the cramped plants into their new and larger space.
With this simple process, you will be amazed at how quickly your fuchsia regain their strength and vitality. Here is to getting the most out of your fuchsia plants this year, and to keeping them blooming beautiful all season long!
Follow Our Facebook Page For Great Gardening Tips And Advice! This Is My Garden Facebook Page
This Is My Garden is a garden website created by gardeners, for gardeners. Jim and Mary Competti have been writing gardening, DIY and recipe articles and books and speaking for over 15 years from their 46 acre Ohio farm. They publish three articles every week, 52 weeks a year. Sign up today to follow via email, or follow along!
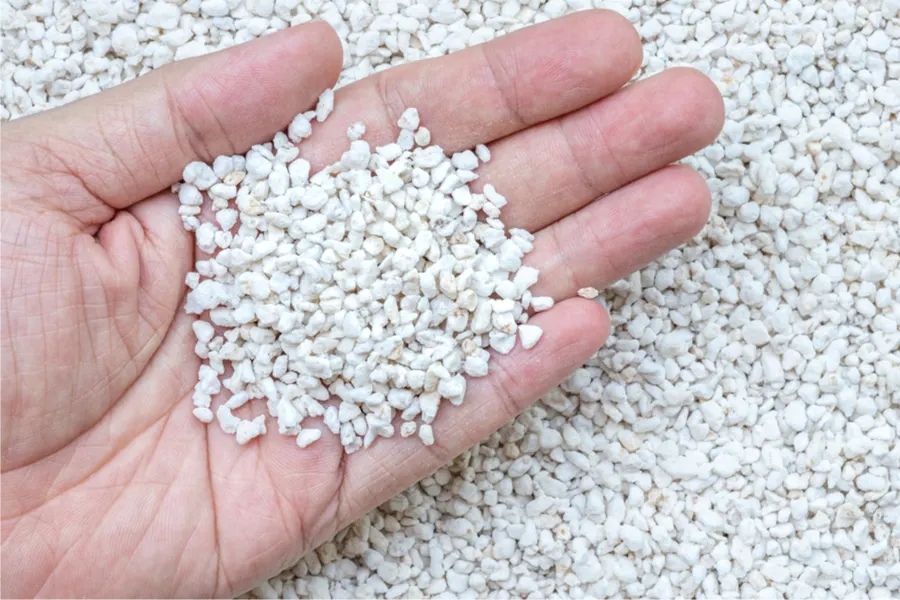
So just how can you use all-natural perlite to create better soil and grow better plants? Actually, in a whole slew of ways!
Perlite is the white, lightweight, grain-like material that you often find in commercial potting soil and mixes. Although many confuse its lightness and texture as being a type of styrofoam or plastic, it is actually a 100 percent organic substance.
Perlite in its all-natural form is volcanic glass. But when the glass is heated to temperatures in excess of 1500° Fahrenheit, it explodes like popcorn into ultra-light white bits and pieces.
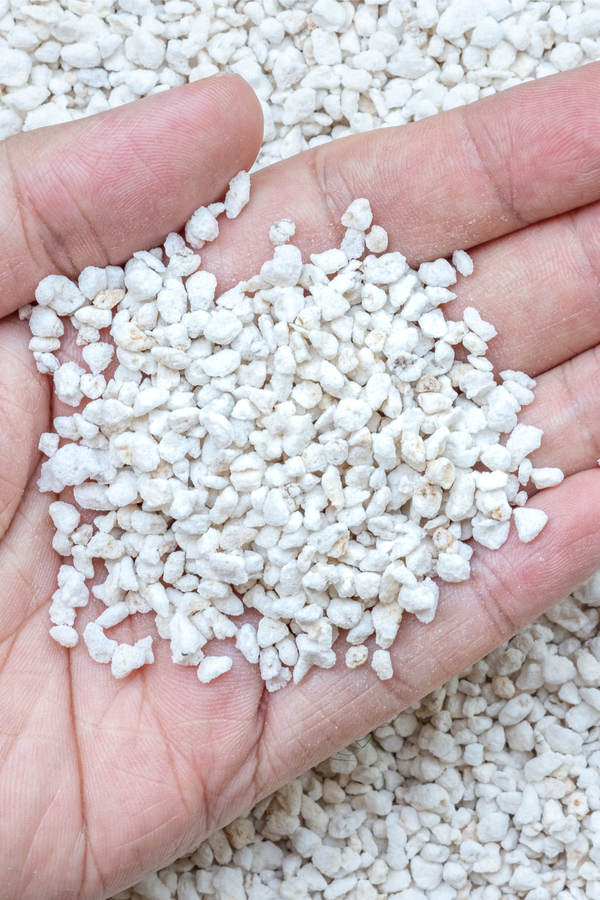
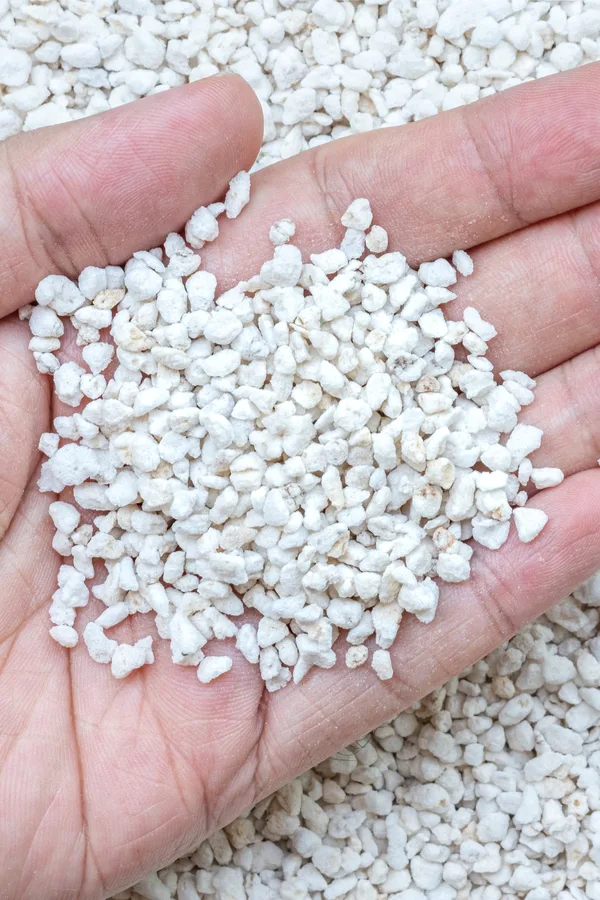
Once perlite bursts open, it takes on a completely different profile. And can it ever be beneficial to both the soil, and the plants that grow near it! In fact, so much so, that it can make a huge difference in the overall health and well-being of container plants, hanging baskets, and even the vegetable flower plants growing in your garden.
With that in mind, here is a look at the many benefits of this popcorn-like material, and how to best use it to power your plants like never before.
So how does perlite help improve your soil and help your plants grow better? Well, first and foremost, it is one of the best ways to lighten your soil.
Perlite is extremely lightweight. In fact, a large, two cubic foot bag usually weighs only 2 pounds. When mixed in with soil, especially heavy soils, it can create a much less dense structure.
That is exactly why it is perfect for using in container and hanging basket soil mixes. By adding in generous amounts, you don’t end up with baskets that fall from their hooks, or containers that can only be moved with a small forklift!
But perlite is also added to potting soil for a few additional but very important reasons. The first has to do with improved root growth. When added to heavier soil, the light and airy white kernels keep it from clumping together.
The puffy granules are incredibly adept at keeping dirt from compacting. Because of that looseness, it makes it easier for roots to expand and grow.
Not only does perlite make root growth easier, but it also opens up channels in the soil for water to reach the roots of plants at a quicker pace.
Hard, compact soil will keep water at the surface. But with the open channels perlite provides, water can filter down easily to the roots. That means when you water or it rains, the roots get the moisture they need.

Obviously, that is tremendously important for keeping plants hydrated. If a plant’s roots are unable to find moisture, they will struggle to survive. But those open channels are also important for allowing liquid fertilizer and other applications to the reach the roots as well.
If all of that wasn’t enough, there is one more major benefit perlite brings to the soil, and it just might be the most important of all. That advantage? Water absorption!
Perlite can actually absorb three to four times its own weight in water. That can be an incredible help to plants, especially during the hot summer months when soaring temperatures and drought can often dry plants out quickly.
Although most commonly found in potting soil, perlite has a wide range of uses in gardens, flowerbeds, raised beds and more.

You can find perlite in bags at most nurseries, plant stores and Home & Garden centers. When purchasing, always make sure you are buying pure perlite and not a mix of other fillers.
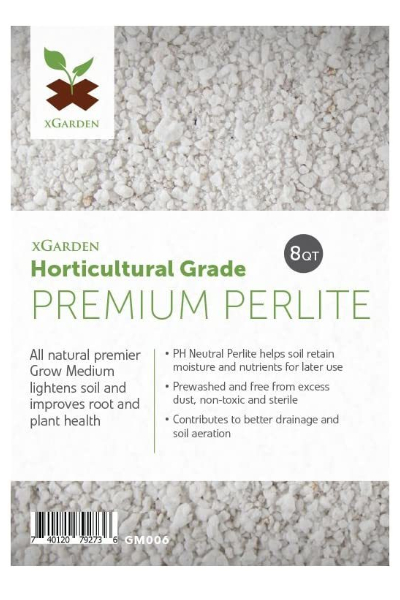
Look for a horticultural grade of perlite. The horticultural grade is made entirely from volcanic glass and is both pure and stable. This type will never break down over time, meaning it stays helpful in your soil forever. Product Link: XGarden Horticultural Grad Perlite – 8 Cubic Ft. Bag
Now that you know about its benefits, here is a look at some of the best areas to use perlite to help your soil and plants:
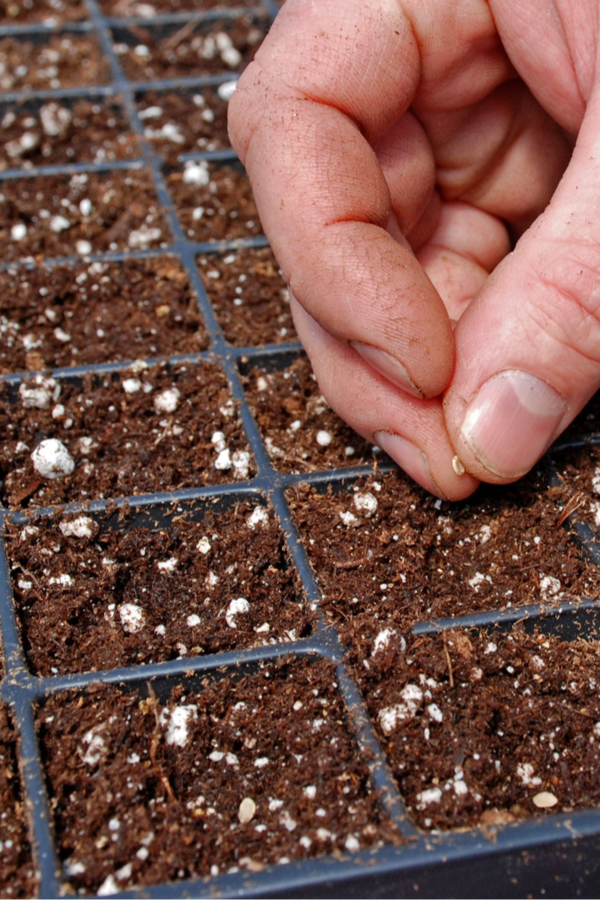
Adding perlite to your seed starting soil allows tender seedlings to expand roots quickly. In addition, the moisture retention qualities help to draw water in near the roots of plants to keep water near. See: Our Best Seed Starting Soil Recipe
One of the best and most underutilized ways to use perlite is in raised beds. Raised bed soil needs to be light and airy, and mixing in perlite is the perfect way to make that happen!
Whether building new or refreshing existing raised beds, adding in perlite can help to bring new life. A good rule of thumb is for every 5 gallon bucket of soil, add in a cup of perlite. And if you really want to recharge your beds, add in an equal amount of compost too!
Working in generous amounts of perlite to your potting soil can pay big dividends for your container plants and hanging baskets.
Although many commercial potting mixes already contain perlite, you can add an additional cup to every six to eight quarts of potting soil to help lighten the soil even more. Even better, save big and create your own homemade potting soil!
When planting your tomato, cucumber, pepper and other transplants into the garden, mix in a bit of perlite to each planting hole.
Adding this in with other amendments such as compost and worm castings can help plants get off to a great start. It helps loosen the soil around plants and keep the roots from compacting over time. Just one more reason having a bag of perlite on hand is always a good idea!
Here is to using perlite this year to lighten up your soil, improve drainage, and help plants absorb the moisture and nutrients they need to thrive!
Follow Our Facebook Page For Great Gardening Tips And Advice! This Is My Garden Facebook Page
This Is My Garden is a garden website created by gardeners, for gardeners. Jim and Mary Competti have been writing gardening, DIY and recipe articles and books and speaking for over 15 years from their 46 acre Ohio farm. They publish three articles every week, 52 weeks a year. Sign up today to follow via email, or follow along!
Looking for the best hanging basket varieties to grow this year? Plants that will keep their blooms going strong and bright all season long?
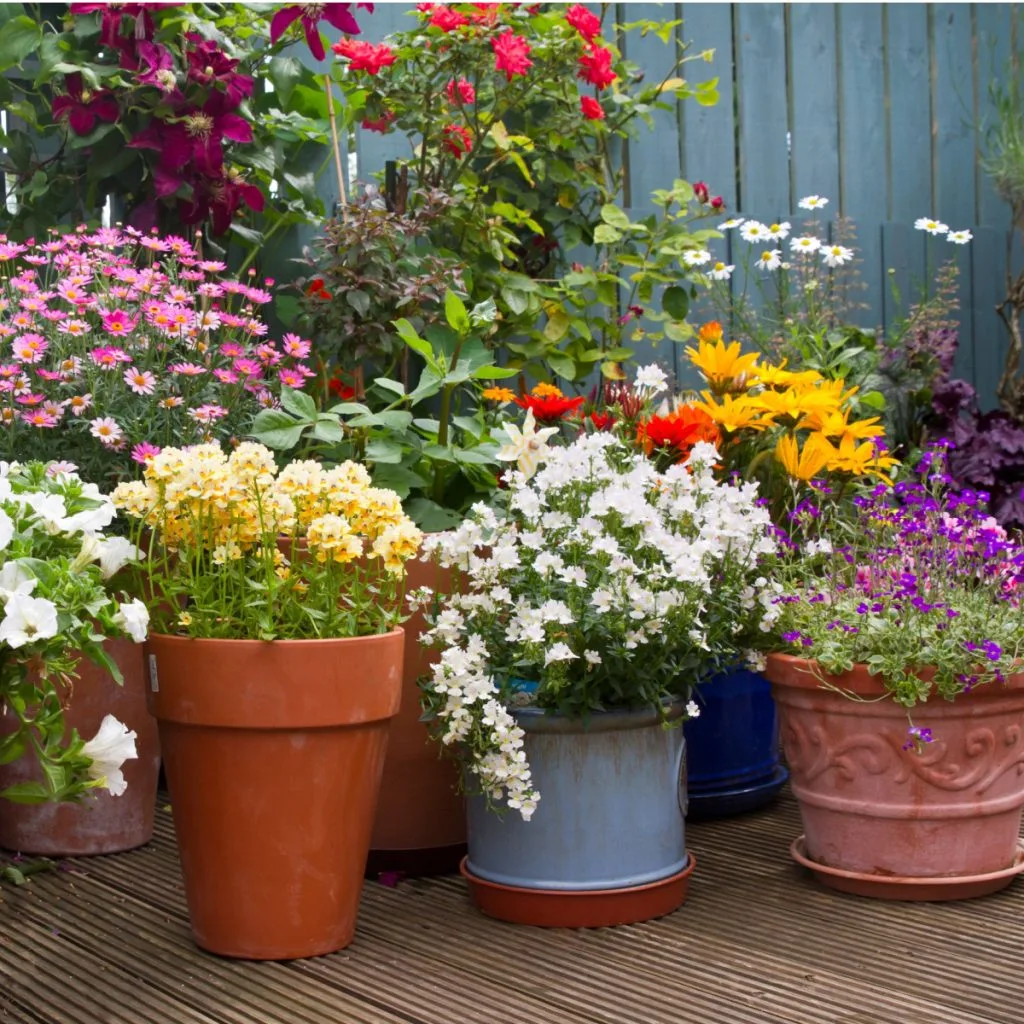
It is hard to beat the color, energy and interest hanging baskets can bring to a home. Especially when they are thriving and flowering at their best!
Hanging baskets are one of the most popular residential garden expenditures of all. Whether you live in a small city apartment with a balcony, or have a home in the country, a hanging basket always adds a little pizazz to your outdoor area.
One thing is for sure, hanging baskets are expensive to purchase. And getting more expensive with each passing year! There is nothing worse than spending a small fortune, only to watch your baskets fade away by mid-summer. And that is exactly why selecting a variety that can last the entire season is so important.
Getting your flowering baskets to stay in full bloom all summer certainly has a lot to do with the care they receive. After all, failing to water or fertilize even the best of plants consistently will ultimately result in failure. (See : The 3 Reasons Hanging Baskets Often Struggle – And How To Fix Them!)
But in addition to providing the right care, selecting the right varieties to grow plays a major factor as well.
With that in mind, below are 5 of the best of the best for hanging basket plants that can stand up to the rigors of a full season of growing – all while staying in full bloom.
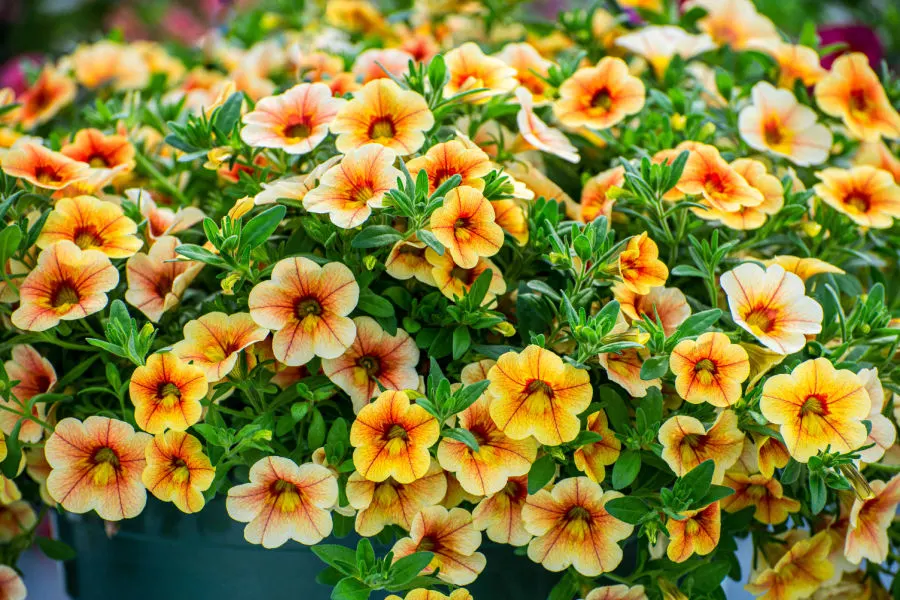
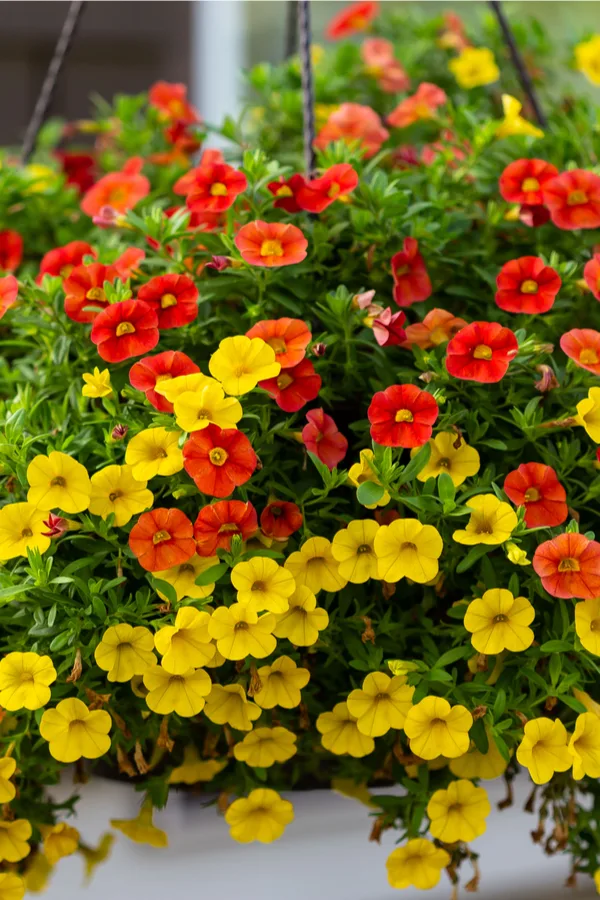
Topping our list of best varieties for flowering baskets is Calibrachoa (pictured at the top of the article). Also commonly known as the Million Bells plant, this annual produces an incredible abundance of petunia-shaped blooms that fill its canopy of foliage with color.
Calibrachoa’s vibrant green foliage grows in a trailing pattern, making it a great choice for hanging baskets. It can be found in a wide assortment of bloom colors, from blue, purple and red, to orange, white, pink and yellow.
What makes this plant such a great choice is how little care it requires to stay in continuous bloom. It handles heat and dry conditions well, and requires no deadheading to force new blooms.
In fact, with consistent watering and monthly or bi-monthly fertilizing, it will bloom from spring until late fall.
For more on this incredible plant, check out our article How To Grow Calibrachoa, The Perfect Hanging Basket Plant.
Verbena is one of the most underrated of all hanging basket plants when it comes to all-season flower power. Not only can this tough plant stand up to hot summer heat, it is even fairly deer resistant too.

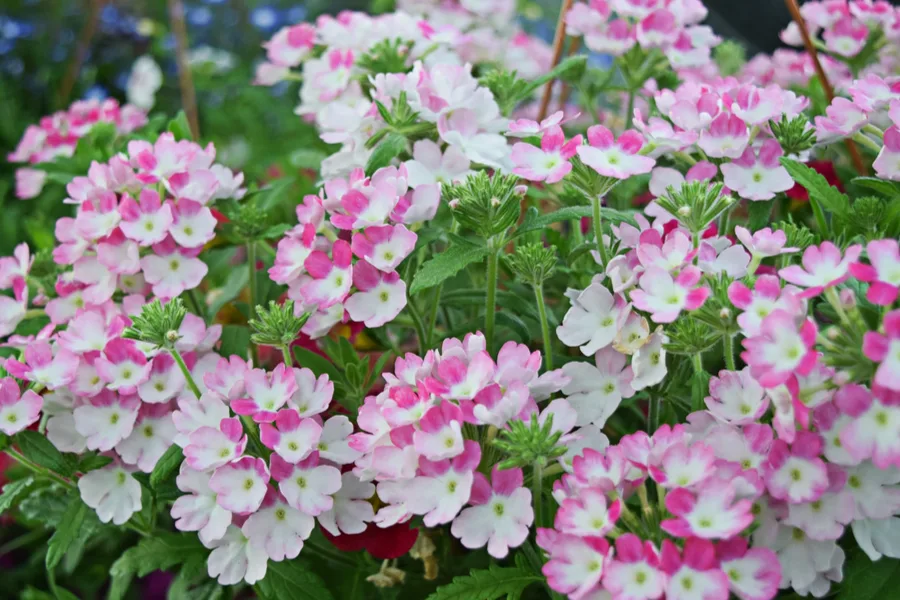
The wispy, colorful blooms of Verbena are extremely durable. Available in solid or variegated colors of blue, pink, purple, red, white or peach, verbena’s light foliage contrasts well with its showy flowers.
Much like Calibrachoa, Verbena is more of a trailing plant, and its foliage will fall and cascade over the top of its basket. This is one plant that benefits from regular deadheading to keep more blooms coming on strong.
Yes! Believe it or not, ornamental peppers make for great hanging basket plants! With their tiny colorful “blooms” of peppers, ornamental peppers can fill out hanging baskets in full color. And stay that way all season long!
Varieties such Chili-Chili, Sangria, and Dwarf Chili fill plants with hundreds of colorful peppers. With their compact growth and massive bloom sets, they are quite the conversation piece!
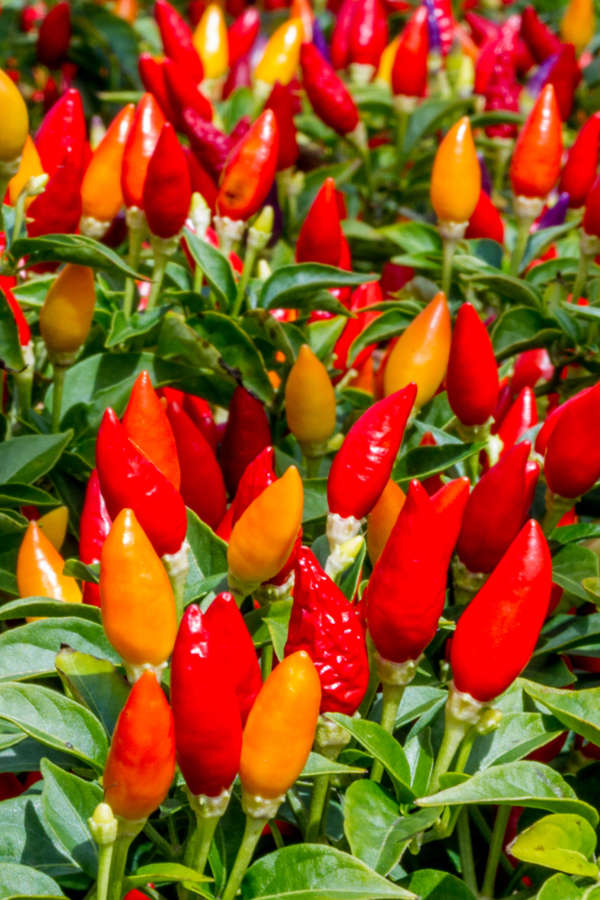
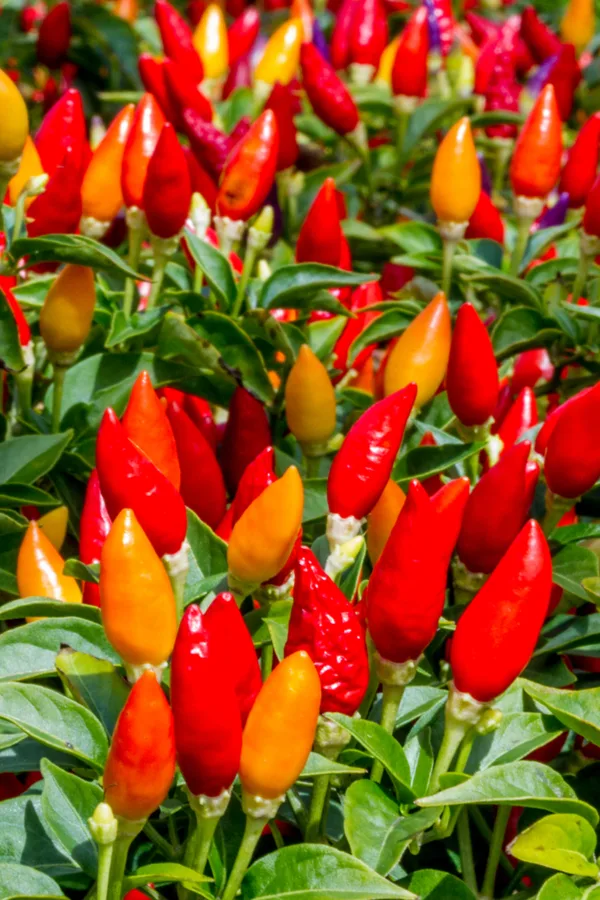
But it gets even better when it comes to growing ornamental peppers in hanging baskets. Ornamental hot peppers naturally stand up to intense sunlight and heat. It makes them ideal for full-sun locations.
Even better, they can handle a day or two without water, unlike many tender annual bloomers. Ornamental peppers are also extremely easy to grow from seed.
Best of all, late in the fall, when many annuals begin to finally fade, the peppers turn to fiery shades of red and orange for big late season color. Seed Link : Dwarf Chili Seeds
The stoic begonia is a true workhorse when it comes to hanging basket varieties. Talk about an annual that can handle tough conditions!
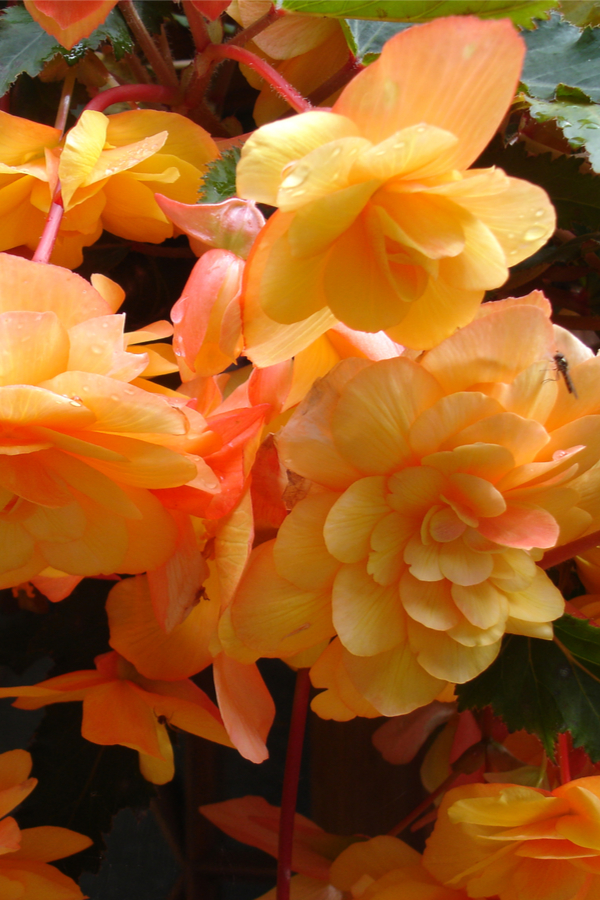

The waxy, sturdy foliage of begonias stands up well to both full sun and high heat. Its foliage is especially showy when contrasting it to its deep and colorful blooms.
Much like ornamental peppers, begonias can handle a little neglect now and then and keep on blooming. With blooms that can burst forth in shades of red, pink, orange, white and yellow, there is a color to fit any space.
Just like the other plant varieties featured today, begonias will continue blooming right up until the first hard frost. See: How To Keep Begonias Blooming Strong All Summer Long.
If you want to bring all-season interest to the shadier sides of your landscape and home, Impatiens are the answer!
Impatiens thrive in the shade. They make an excellent choice for patios and porches. Especially ones that might only receive a few hours of direct sunlight each day. With bloom sets that engulf their deep green leaf set, they can simply be stunning to behold.
Impatiens are available in a wide array of colors, from white, red, pink and violet, to coral, purple and more. As a self-shedding annual, regular deadheading is not required to keep plants blooming. That is especially helpful to gardeners who don’t have the time for constant maintenance.
They do require frequent watering, especially if temperatures soar. Although traditional varieties of impatiens prefer shade, try New Guinea impatiens for hanging baskets in partial or full sun locations.
Here is to selecting the best variety of hanging basket for your home, and to flowering success from spring til fall.
Follow Our Facebook Page For Great Gardening Tips And Advice! This Is My Garden Facebook Page
This Is My Garden is a garden website created by gardeners, for gardeners. Jim and Mary Competti have been writing gardening, DIY and recipe articles and books and speaking for over 15 years from their 46 acre Ohio farm. They publish three articles every week, 52 weeks a year. Sign up today to follow via email, or follow along!
If you are looking for a great way to save money and have beautiful hanging planters for a shady porch or outdoor living space – you need to try creating a few hanging baskets from hostas!
When it comes to the shadier spots of your landscape, the choices for hanging basket plants are fairly limited. Especially if you are looking a plant to keep alive to use again, year after year.
There is of course, the Boston fern. With it’s stately green fronds, the fern is by far the standard choice for adding greenery to locations that receive little sun.
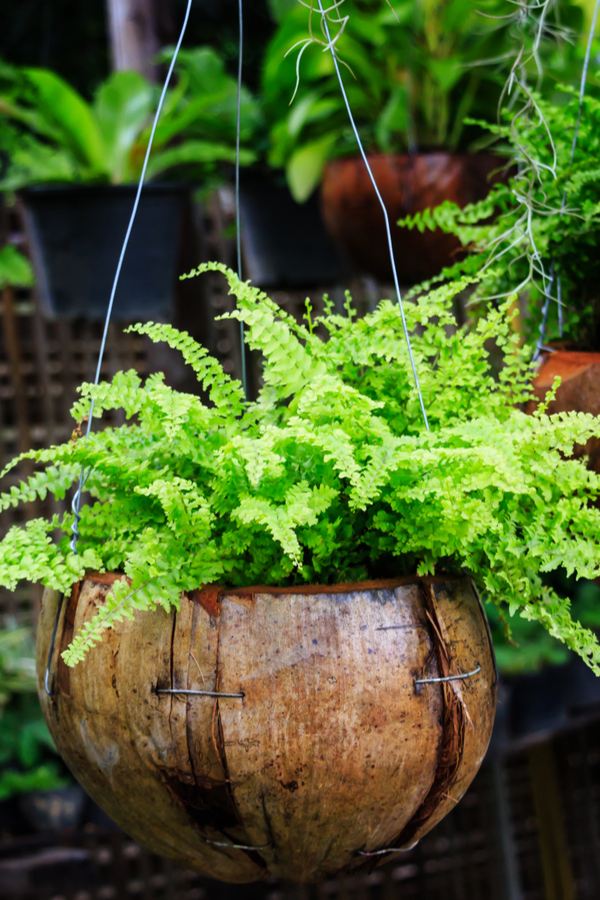
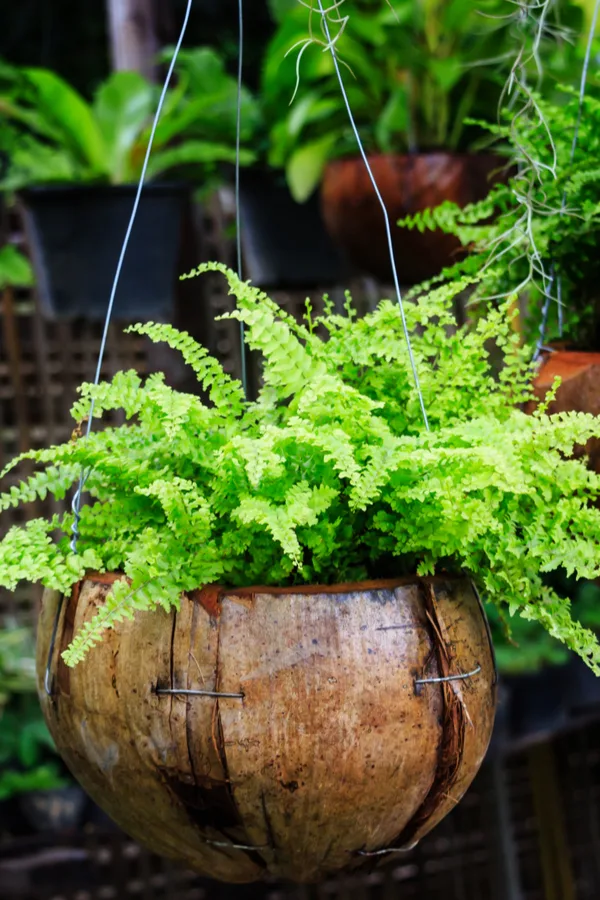
But ferns do have a few drawbacks. For one, in most climates, they need to be overwintered indoors in order to keep alive from year to year. In addition, many grow so fast, they need to be split and divided yearly just to keep them fitting in a basket.
And finally, although they do provide ultra-green foliage, ferns don’t exactly light up a space with interesting color and contrast.
In fact, let’s face it it, ferns can get a bit boring when placed in the same space, year after year. And that is exactly where hostas come to the rescue!
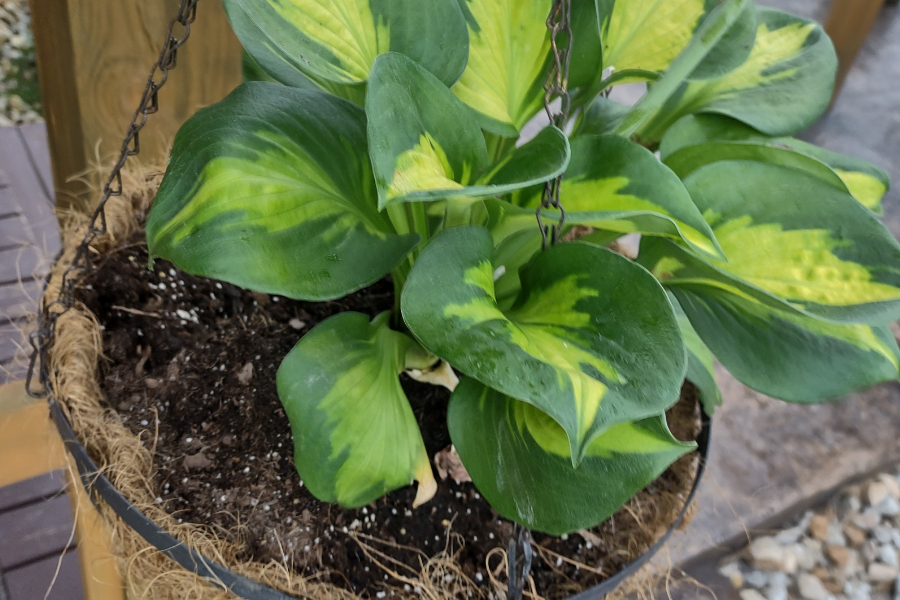
It’s well known that hostas are the ultimate shade-loving perennial. The gorgeous plants have long been a wondrous choice for filling shaded flowerbeds with their stunning large-leafed foliage. And does that foliage ever come in a staggering array of colors and designs!

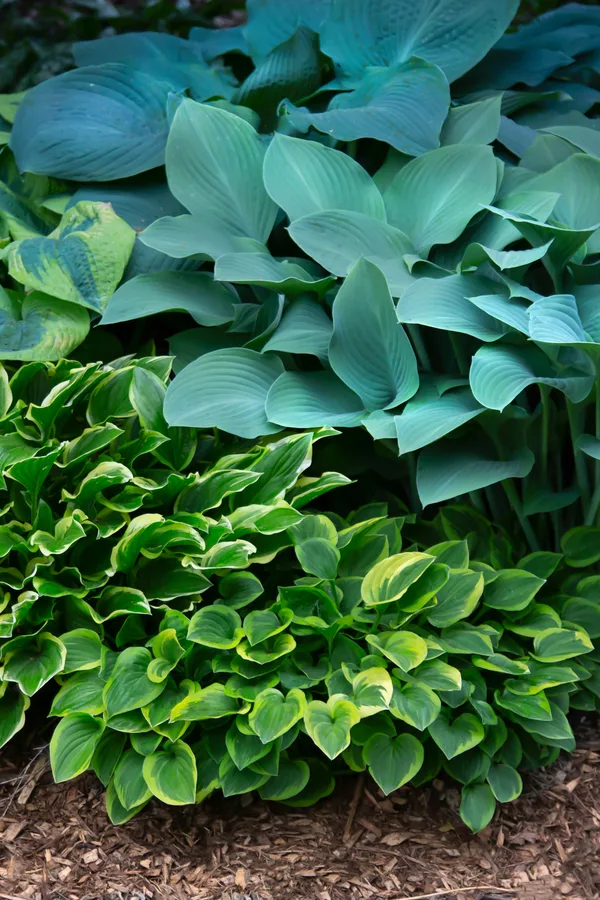
Hostas are available in hundreds of varieties, from solid green, blue, yellow and white, to variegated versions with a whole slew of different striping patterns. In fact, the selection is so diverse it can be overwhelming picking your favorite!
With all of that beauty, it’s easy to see why they are such a favorite for flowerbeds. But it just so happens that these leafy perennials also perform equally well in pots and containers. And even better, in hanging baskets too!
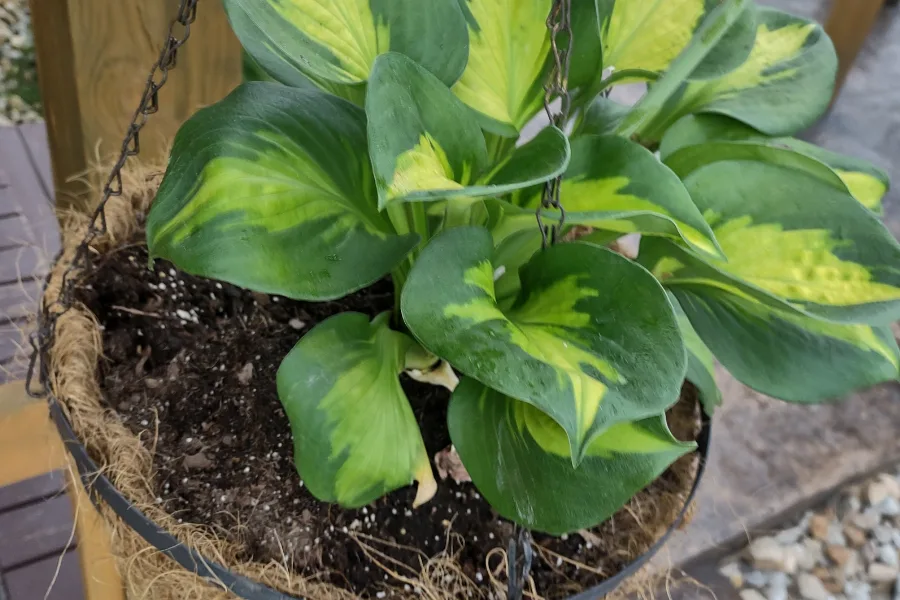
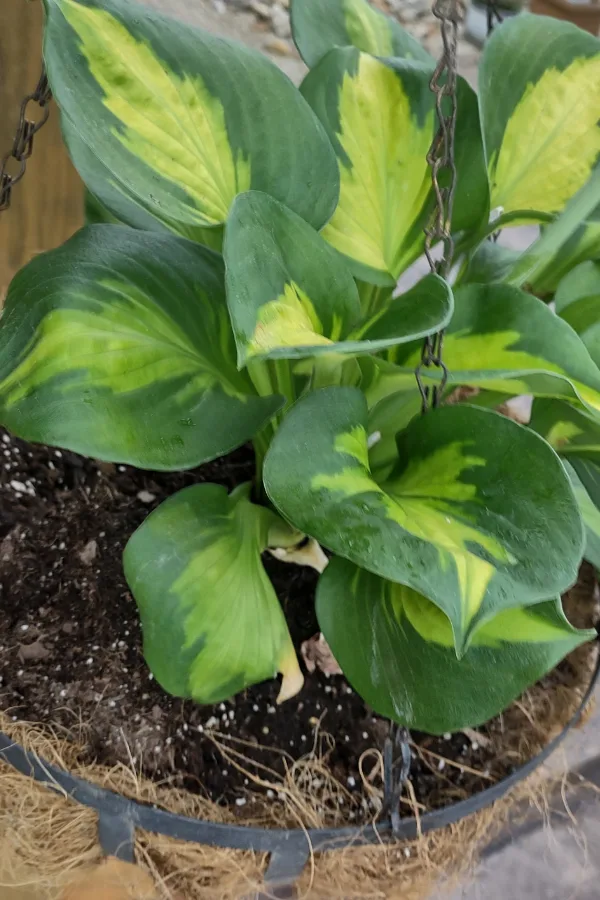
With their stunning large-leaf foliage, hostas are a unique alternative from more traditional shade-loving hanging basket plants. With leaves that naturally spill down over the sides from their own weight, they fill out baskets quickly.
Even better, hostas require very little nutrients from the soil. That means there is little need for special potting soil or fertilizing to keep them growing strong. In addition, as a perennial, they also require less frequent watering than a typical hanging planter.
But perhaps best of all, hostas are an extremely economical choice for creating shade-loving hanging basket planters. In fact, in many cases, as you will see below, you can create them for free, year after year!
There are two easy and inexpensive ways to create hanging basket planters from hostas. The first is by purchasing smaller sized hosta plants at your local nursery or garden centers.
Many garden centers carry smaller, 1 quart or even half-gallon hosta plants for well under $10. Considering many flowering baskets can go for $40 or more, it’s quite the bargain. Especially when you consider you can keep the plants from year to year!

Planting is as easy as adding a bit of potting soil and compost in the basket, and placing the transplant down into the soil. Fill around the edges of the basket with additional potting soil, and your hosta planter is ready to go!
When planting store-bought transplants, don’t be afraid to break the roots apart a bit to allow them to fit down into the basket. Hostas are actually quite hardy and durable, and the roots will re-establish quickly in the surrounding soil.
Purchasing small transplants is not only economical, but a great way to add to your hosta collection. And by year’s end, the plants are usually large enough to divide into even more to use in your flowerbeds as well.
The second method for creating hanging basket planters is to use existing plants already in your landscape. If creating in early spring, simply dig up the crown of an existing plant and plant into a basket.
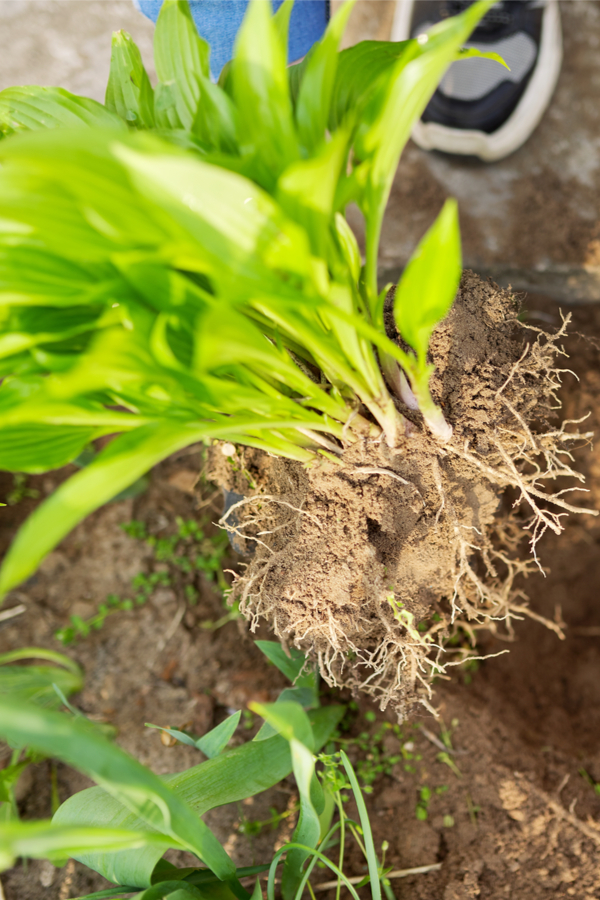

Spring is ideal because if the roots are too large, you can divide enough to fill several baskets. And dividing can even give you additional plants to put back into the landscape.
Although spring is the ideal time to create hanging baskets from hostas, you can also create them in early to mid summer from existing oversized plants. (See : How To Divide Perennials In The Summer)
Begin by digging up the plants and splitting into sizable portions that will fit into baskets. Plant the roots in the same method, but cut back the foliage to about an inch above the surface level and keep well watered.
Don’t worry, the foliage will brown off, but the plant won’t die off. In fact, It’s quite surprising how quickly new foliage will spring up from the roots at the base. Within a few weeks, your new shade loving basket will begin to fill out!
Caring for your baskets through the summer couldn’t be easier. Even though you will still need to water plants on a regular basis, you will notice they are not as needy as traditional annual flowering plants.
Although fertilizing is not necessary, a bit of compost tea once a month will help keep the foliage strong and vibrant. Most hosta plants will still set blooms when growing in hanging baskets. You can leave the blooms in place to enjoy, but removing will help to keep more energy for stronger foliage.
The best part of using hostas as hanging basket plants is reusing them year after year. As fall approaches, simply remove the hostas from their pots and place into the ground to overwinter.
Unlike other shade favorites like ferns, there is no need to bring them indoors to save. Next spring, you can either leave in the landscape, or dig back up to create more baskets planters for the new season. Talk about saving money and adding big color to shady porches!
For more on hosta care, be sure to check out our article “How To Keep Hostas Healthy All Summer Long”on the blog. Here is to creating a few shade -loving hanging baskets from hostas this summer!
This Is My Garden is a website dedicated to spreading the love and knowledge of gardening around the world. We publish two new garden articles each week. This article may contain affiliate links.