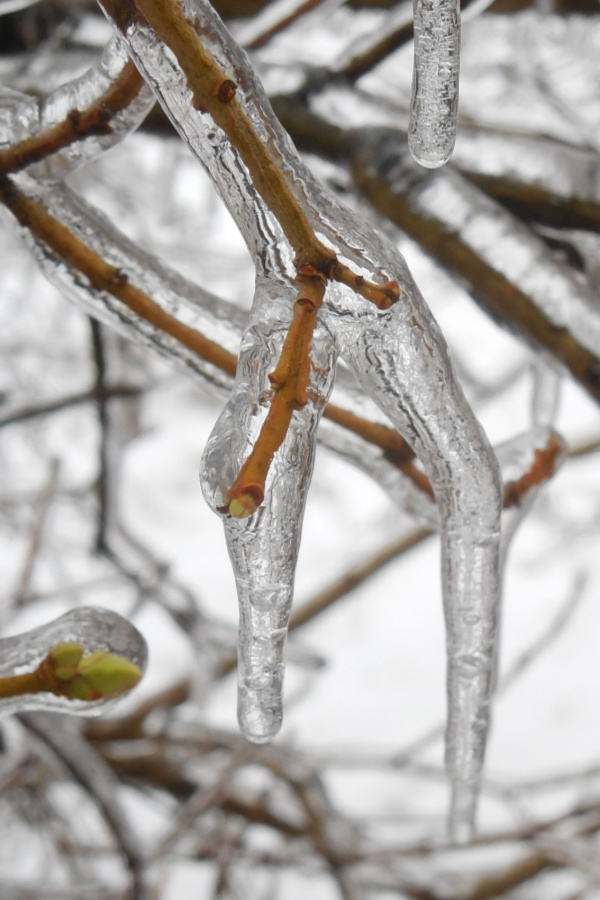
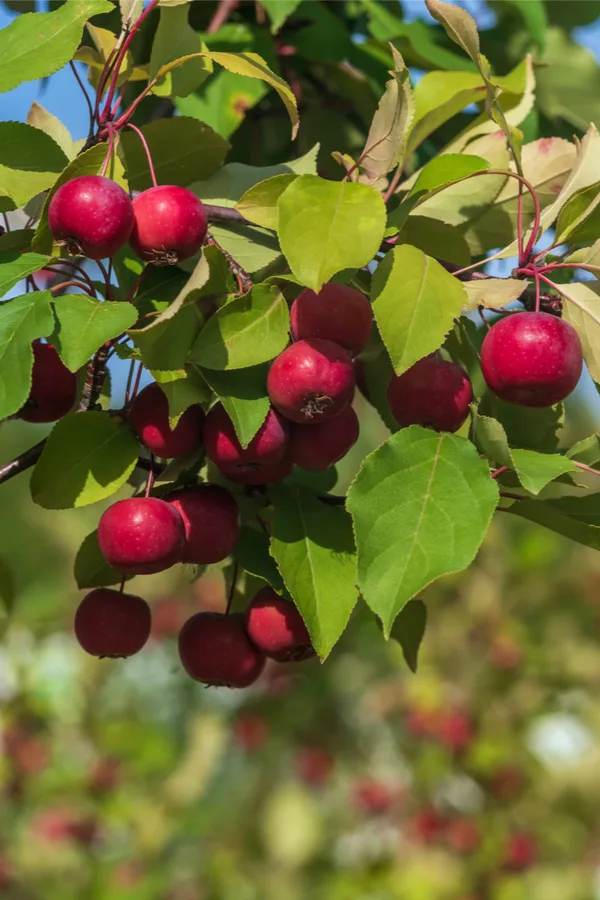
Nothing brings a landscape to life more than beautiful trees, shrubs and bushes. Here are all of our how-to articles on planting and maintaining these lasting beauties in the landscape:


Nothing brings a landscape to life more than beautiful trees, shrubs and bushes. Here are all of our how-to articles on planting and maintaining these lasting beauties in the landscape:
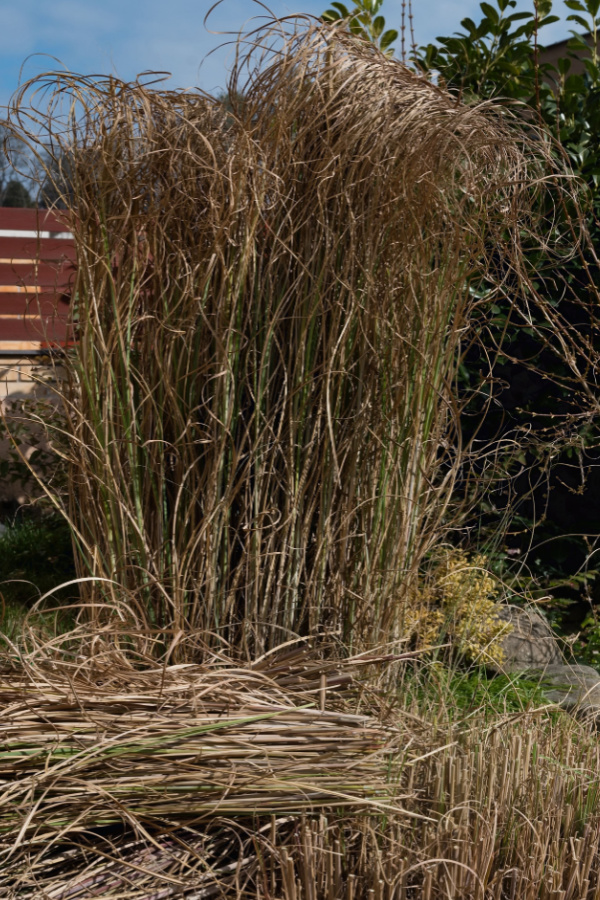
If you are looking to keep your ornamental grasses healthy, strong and vibrant – and create even more plants for your landscape for free – then late winter and early spring is the time to jump into action and cut back and divide your grasses!
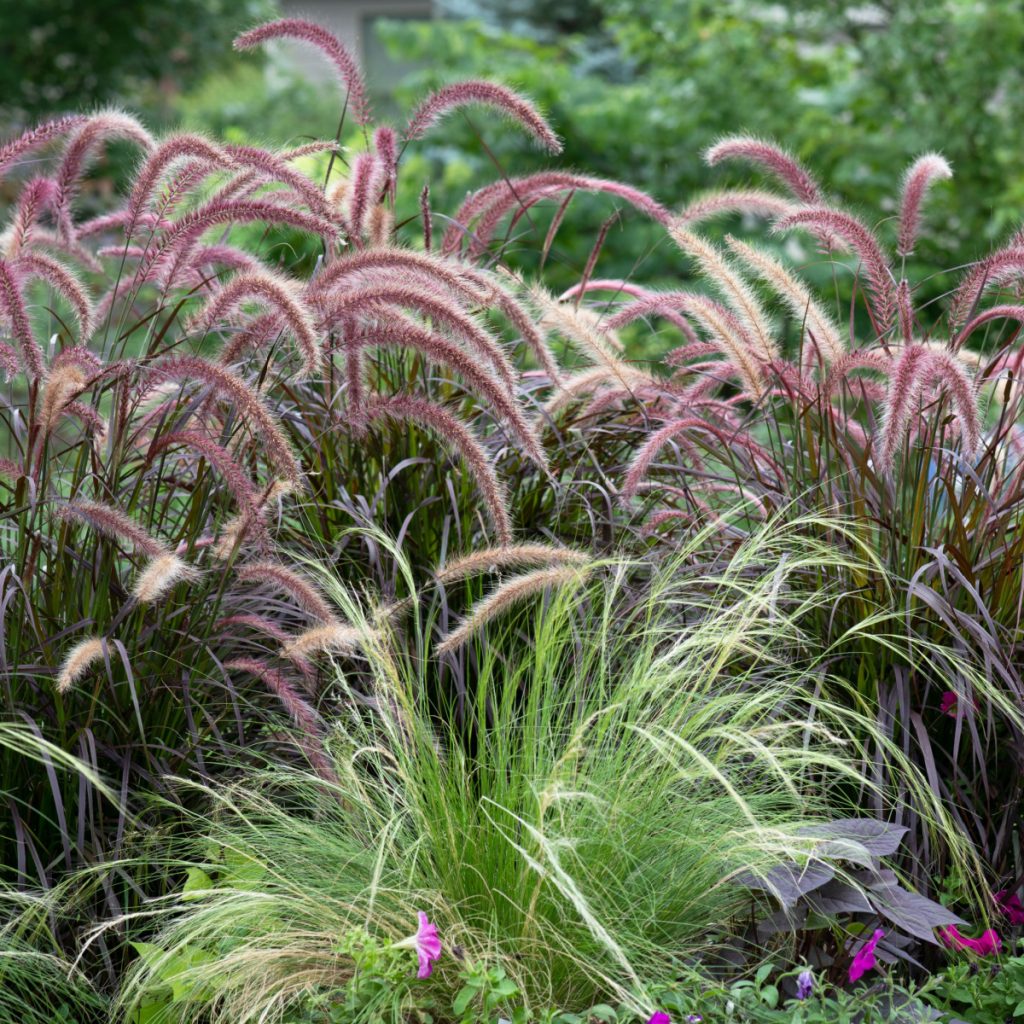
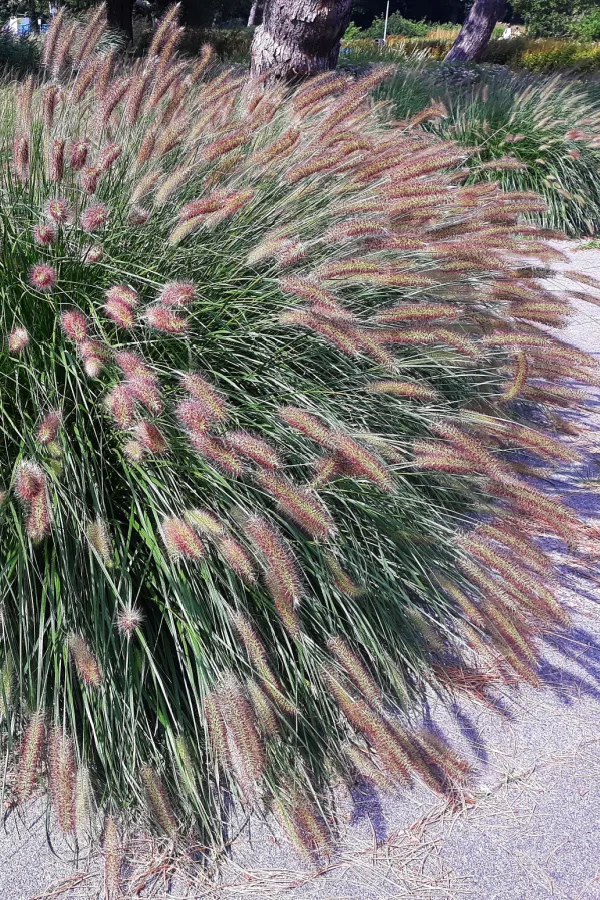
With all of the different shapes, sizes and colors to choose from, there are ornamental grasses to match any landscaping need. Smaller grass varieties are great for creating edges and borders along pathways or garden spaces, while larger grasses can create a big impact almost anywhere.
Making grasses even more attractive, they also happen to be extremely low maintenance. Not only are they drought and heat-tolerant, they are also rarely bothered by disease or pests, including two of the worst – deer and rabbits.

But perhaps best of all, ornamental grasses can be extremely economical. Especially when you consider just how easy they are to divide to create additional plants. In fact, most grasses can be dug up and divided in as little as two to three years to create more plants – which can be a huge saving for homeowners looking to fill their flowerbeds without breaking the bank!
Dividing is not only important as a way to create additional plants for free, it’s also crucial in helping to keep your grasses strong and vibrant. Plants that are allowed to grow for too long begin to get oversized and unruly at their outer edges.
Even more, as they age, the crowns or roots of the grasses begin to die from the center out. As they do, they become weak at the edges and topple over quite easily. Older grass clumps also tend to have a more spotty growth pattern – making them far more unattractive as they grow.
But by simply dividing every two to four years, these issues are all but eliminated. And, of course, with the added bonus of additional plants as well!
The good news is that digging up and dividing your grasses couldn’t be easier. Especially when you do so on a regular basis every few years.
Although ornamental grasses can be cut back at any point from early fall to late spring, when it comes to digging them up and dividing overgrown crowns, you need to wait until the plants have gone dormant. And that is exactly why late winter to early spring is the best time for digging and dividing.

At this point, the grasses are still dormant. Because of that, it’s not only safe to cut them back but to also divide and transplant them as well. Even better, there is no need or worry of having to water new divisions. You just simply plant and wait for spring to arrive to watch them take off and grow!
If you did not cut your grasses back in the fall, you will need to perform the chore before you can divide and transplant. To do so, cut back the entire clump so that only a few inches of the grass stems remain above the soil line.
If grasses are larger and older clumps, this can actually be a tough task. A good pair of hedge shears usually will do the job in short order. However, when dealing with large clumps of large grass varieties, a powered set of hedge shears or even a chainsaw is best to make cutting back easier. Affiliate Product link: WORKPRO Cordless Grass Shear & Shrub Trimmer

Always wear gloves, protective glasses, a long sleeved shirt, and pants when cutting ornamental grasses back. The individual grass blades can be very sharp and cut exposed skin quite easily. They can also leave welts and rashes wherever they come in contact with your skin.
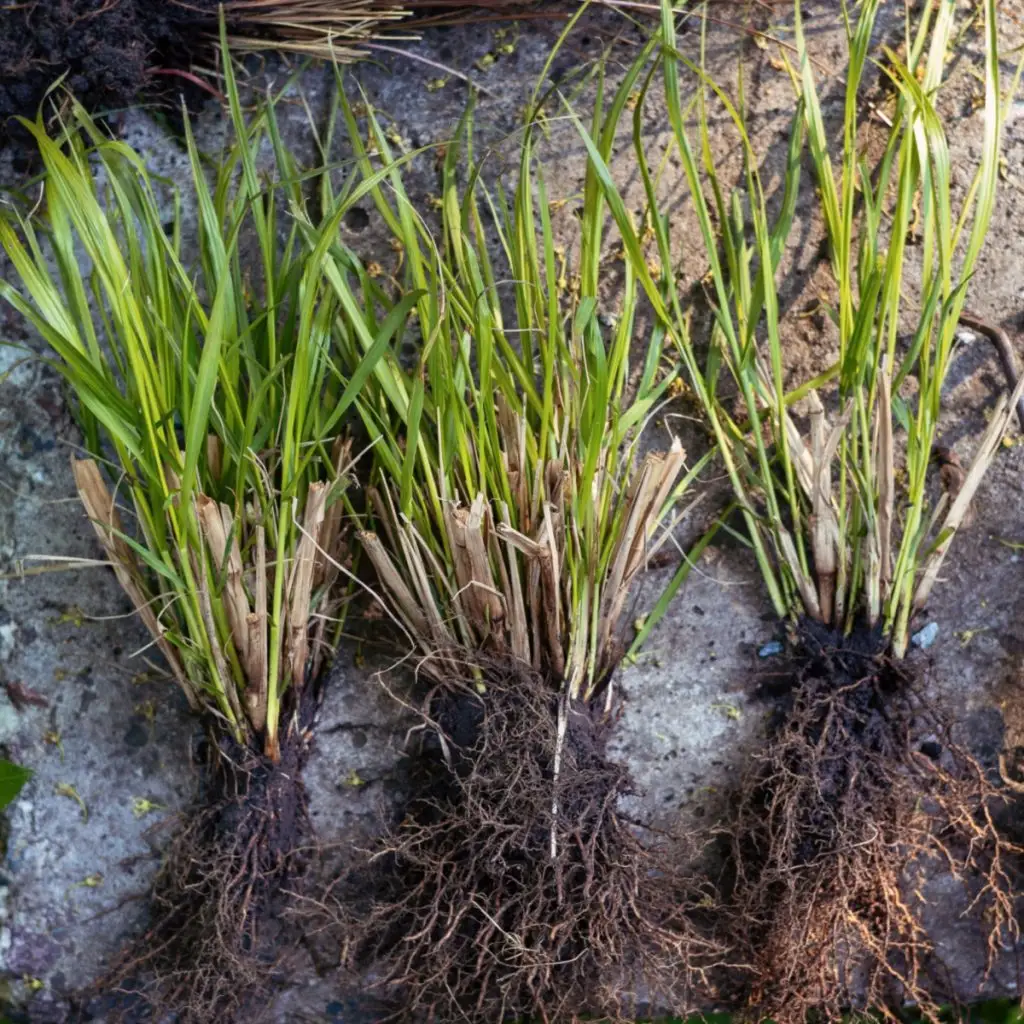
Once your grass is cut back, it’s time to remove the root ball. To dig out the clump of roots, you will need a strong, sturdy shovel with a sharp cutting edge. You also might want to have a pick (mattock) or an axe on hand as well. Especially if you happen to be dealing with larger and older root sections.
Start by placing the blade of your shovel about an inch behind the outer edge of the clump. Cut down as far as the shovel will dig, trying to go at least 6 to 8 inches into the ground.
Work your way all around the circumference of the plant, continuing to cut down 6 to 8 inches. Once you have cut all the way around, use your shovel to dig down under the plant and try to pop it out of its planting space.
Most ornamental grass roots will be near the top four to five inches of the soil line. Occasionally, they will have a bigger center root that can be difficult to sometime pop out. This is where the pick/mattock tool can come in handy to help pry the grass clump from the ground.


For older and larger plants, you may need to dig out the root ball in sections. Simply slice out a section as you would a piece of pie. Each piece you pop out can then become a new plant. Affiliate Product Link: Knights Of Armur Weeding Mattock
Once you have the clump and roots out of the ground, it’s time to divide them into new plants. With transplants, the smaller you cut the transplant section, the smaller your grass will be in the first year of growth.
How small or large you cut really depends on your needs. If you want more mature plants during the first year of growth, leave the sections larger. Remember that the larger the transplant is, the more often you will have to divide it to keep it under control in the future.
The easiest way to divide a large grass clump is to first turn it over so that the bottom of the roots are facing up. This makes it easier to slice through with your shovel as there are no hard grass edges to cut through first. This also helps you more easily see the size of the root when cutting to get the size you are looking for.


If you happen to be dealing with grass roots that are extremely large and tough, the sharp end of an ax can make quick work of slicing new divisions. Usually, one hard chop will separate the clump with ease. Don’t worry about harming the plant – ornamental grass roots are extremely durable and recover quickly to grow into new plants.
Finally, when cutting new sections, be sure to only select the outer edge areas of the original root ball for new transplants. Avoid the center area of the original clump since this is where the plant dies out as it ages. It can be chopped up and placed in a compost pile, but it is not good to use for creating new plants.
One of the easiest parts of dividing and creating new starts of ornamental grass is the planting process. Ornamental grasses are extremely hardy and require very little to sprout and grow again. In fact, they can handle a frost or hard freeze with zero issues.
This is exactly why as long as your ground is not frozen in late winter, you can dig, divide and transplant without worry.
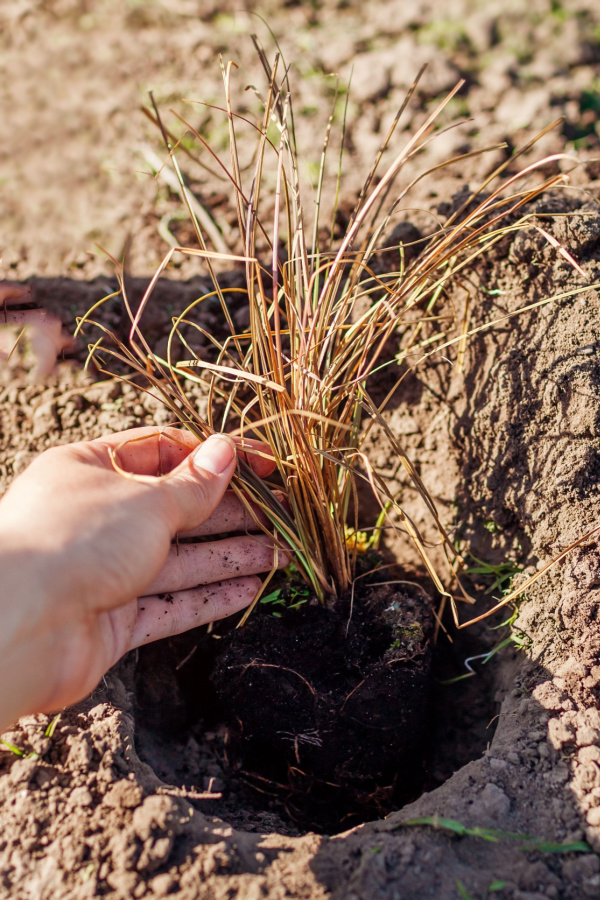
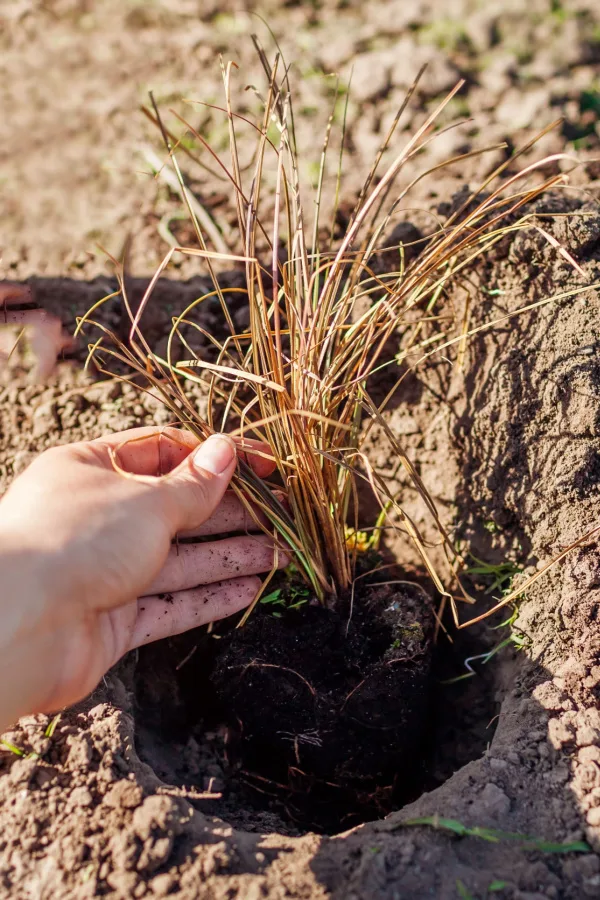
To replant, simply dig a hole twice the size of the circumference and just below the depth of the transplant. Mix in a bit of compost to the planting hole, water, and cover so that the plant’s crown is slightly below the soil line.
As soon as the temperatures begin to warm in late spring, new growth will begin to grow from the crown. Before you know it, you will have a landscape full of free plants! For more on grass varieties to plant in your landscape, check out our article: The Best Ornamental Grass Varieties To Plant For Easy Care & Big Interest.
Follow Our Facebook Page For Great Gardening Tips And Advice! This Is My Garden Facebook Page
This Is My Garden is a garden website created by gardeners, for gardeners. Jim and Mary Competti have been writing gardening, DIY and recipe articles and books and speaking for over 15 years from their 46 acre Ohio farm. They publish three articles every week, 52 weeks a year. Sign up today to follow via email, or follow along!
One of the best ways to add lasting curb appeal and stunning color to your property is by planting perennial flowering shrubs – especially when you plant varieties that have some serious flower power!
Not only can flowering shrubs be enjoyed when in full bloom, they can also add year-round appeal and interest to your home. And, once they are fully established, most take little if any maintenance other than routine shaping and a little bit of fertilizer now and then.
Flowering shrubs come in all sorts of different sizes and shapes. From small patio containers to those commanding a massive 10-foot-tall space, it’s easy to find the right variety to fill up any sized area – and all without having to break the bank to do it!

Most flowering shrubs, like lilacs or viburnums, bloom during the spring and summer months. However, you can also find many options such as hydrangeas that bloom into late summer and fall. And depending on your location and climate, there are even some that put out stunning displays during the winter months too!
To help find the right varieties for your landscape, today’s article features 6 of the “best of the best” when it comes to flowering shrubs. All of the shrubs below have huge flower power – as well as foliage and branch structure that can keep your yard looking interesting no matter the time of year!
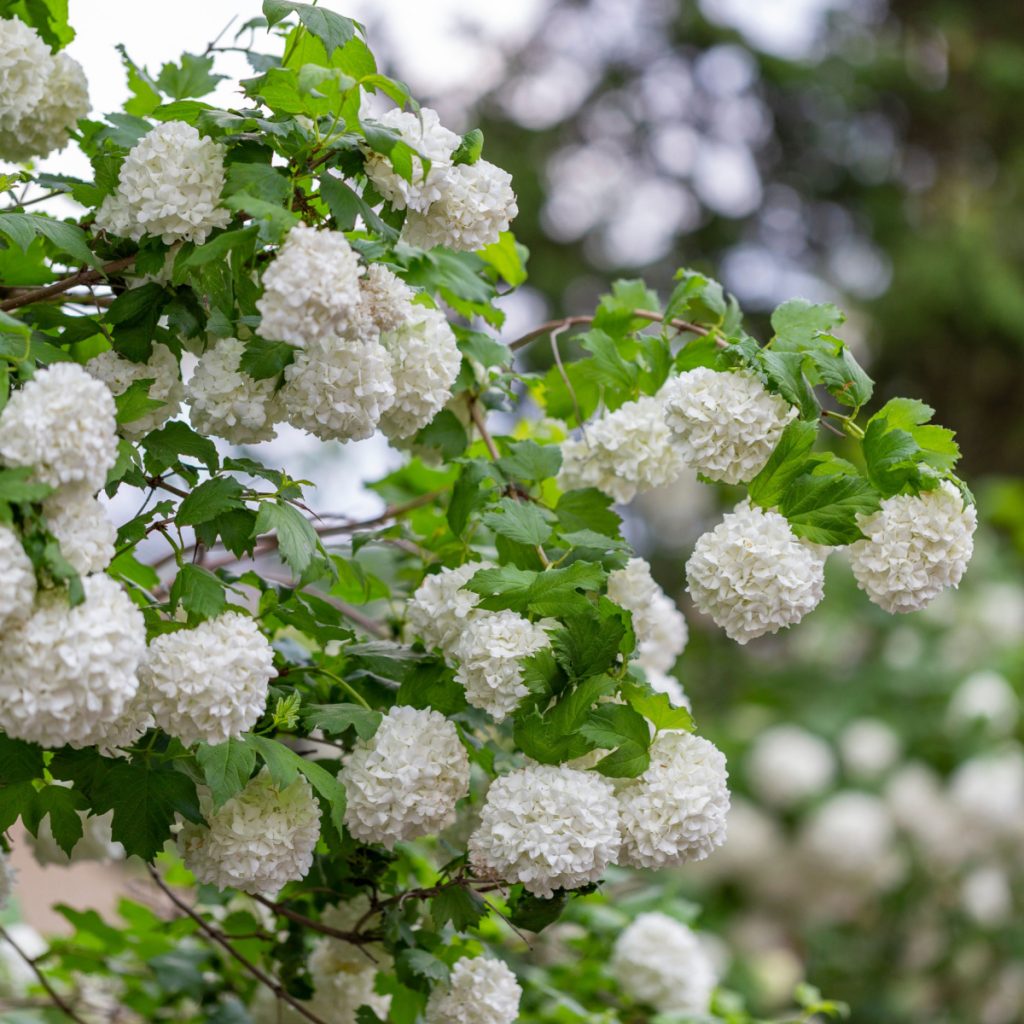
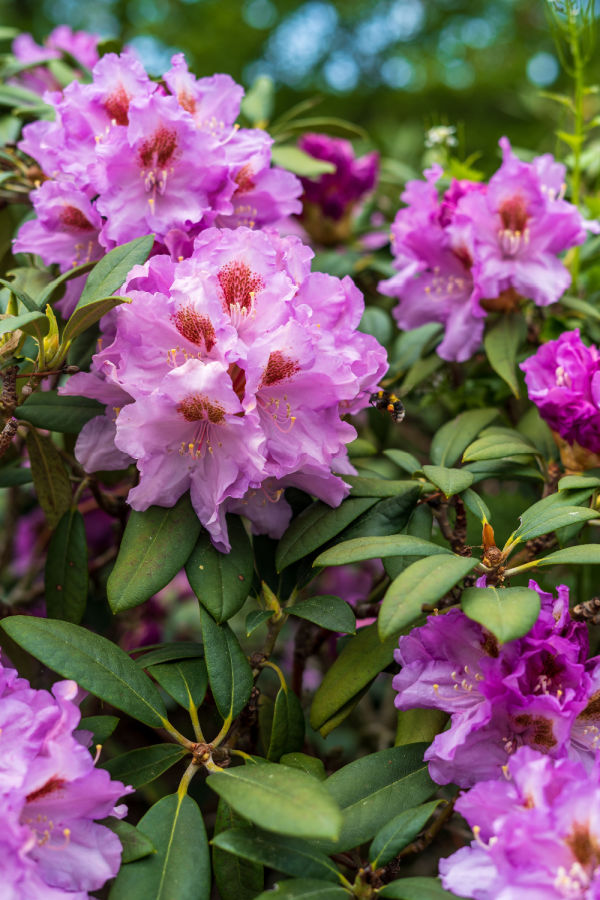
With varieties that can handle hardiness ranges from zones 2 through 9, viburnum (pictured at the top of the article) is perfect for a wide range of climates and locations. And with well over a hundred types to choose from, there is a hardy flowering, fragrant viburnum to fit almost any situation.
Some viburnum varieties are perfect for handling full sun. Others, meanwhile, thrive in shadier locations. Adding to their versatility, there are viburnum that grow in warmer southern climates, colder northern climates – and everything in between!
One thing is certain, all of the varieties produce beautiful blooms. Most types of viburnum bloom from late spring to early June, showcasing shades of pink and white in clusters that are both gorgeous and fragrant.
The leaf canopy of the bush is simply stunning as well. It provides a wide array of greenery before turning in the early autumn to a full showcase of fall color. Most viburnum species will fruit as well, providing an excellent source of food for birds and other wildlife. Affiliate Link: Snowball Viburnum Plant
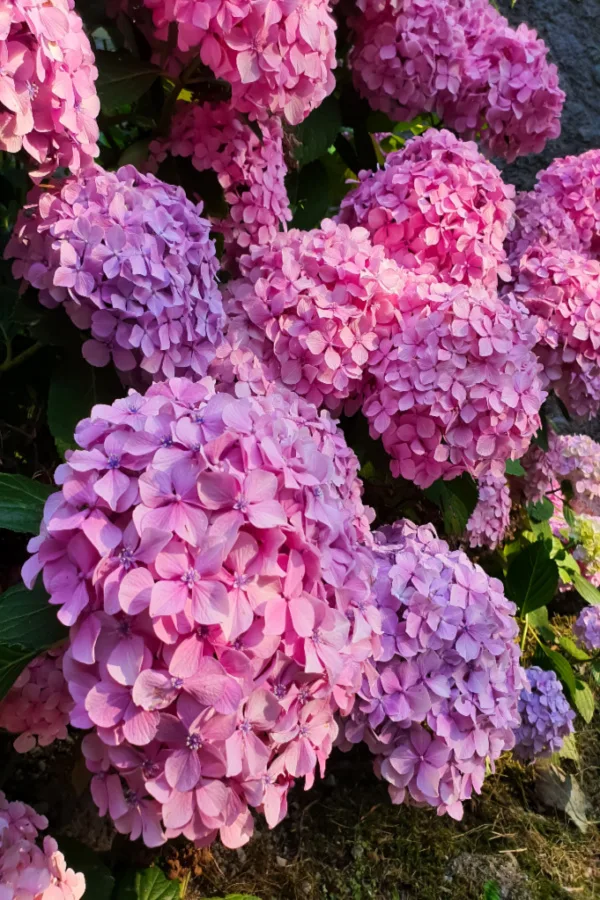
Hydrangea bushes have become extremely popular in the landscape over the past few years and for good reason! For starters, they are easy to grow and work well in most soil types. Even better, they can produce gorgeous blooms from mid-summer through fall that are simply spectacular!
Anyone who has ever witnessed a hydrangea in full bloom knows how beautiful it can be. Their huge flower heads can range in a wide array of vibrant colors. From pinks to whites to all shades of blue, lavender, and rose – their blooms are a conversation piece all by themselves.

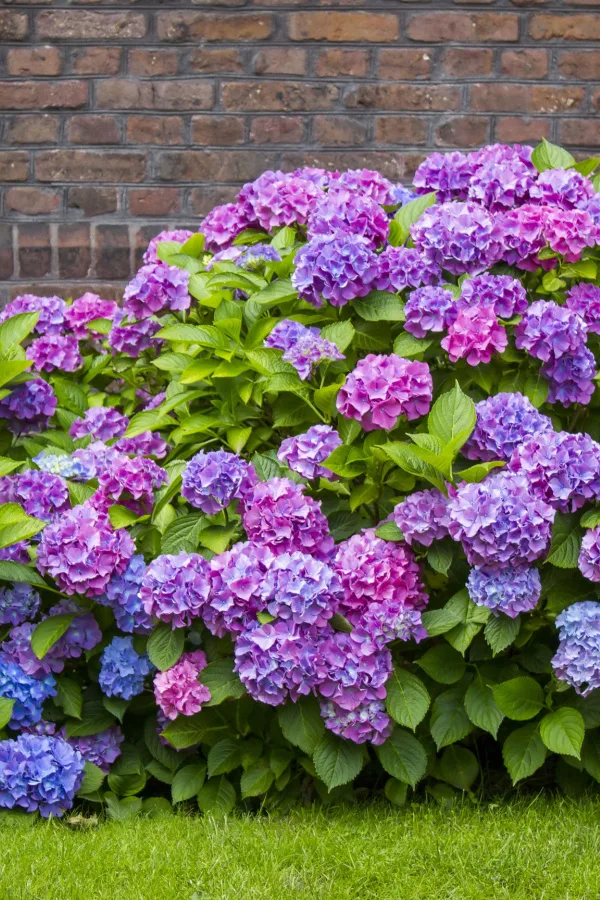
Hydrangeas work well when grown as a hedge, in a mass planting, or simply as an accent all by themselves. Some dwarf varieties can even be planted in pots and containers. One thing is for sure, the plant is highly versatile.
With hydrangea varieties hardy from zones 6 through 10, they can grow in a wide range of climates. Although they do prefer slightly acidic soil, they will grow in average soil with just the slightest of amendments. Affiliate Link: Proven Winners – Hydrangea Pan. Fire Light
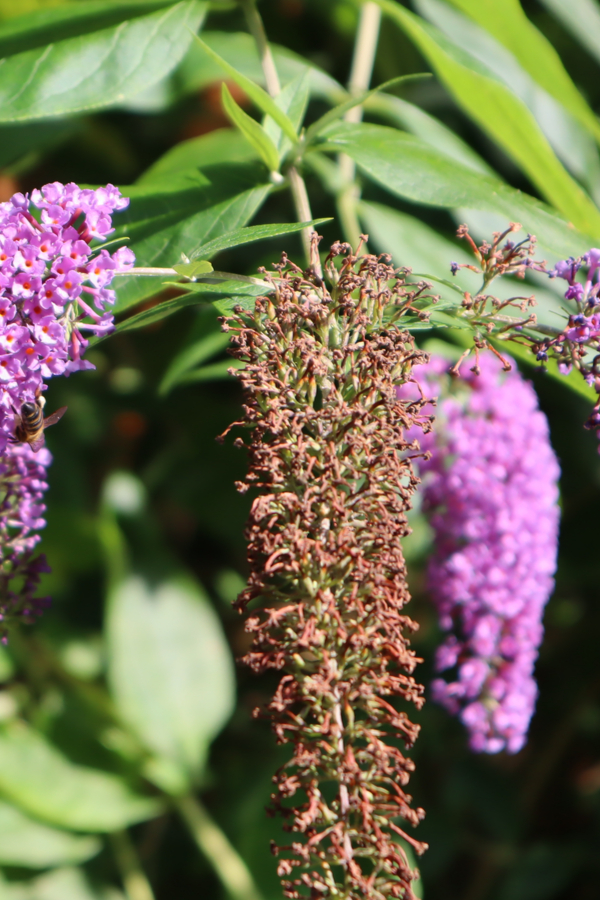
If you love to attract pollinators like butterflies, bees, and birds, a butterfly bush is a must! Just as its namesake implies, the bush attracts butterflies in droves. When in full bloom, it is simply beautiful to behold.
Light, wispy foliage gives way to a full bloom set in the summer that can last all the way into early fall. Depending on the variety chosen, the shrub can be a perfect choice for flowerbeds, fence lines, or as a stand-alone focal point.
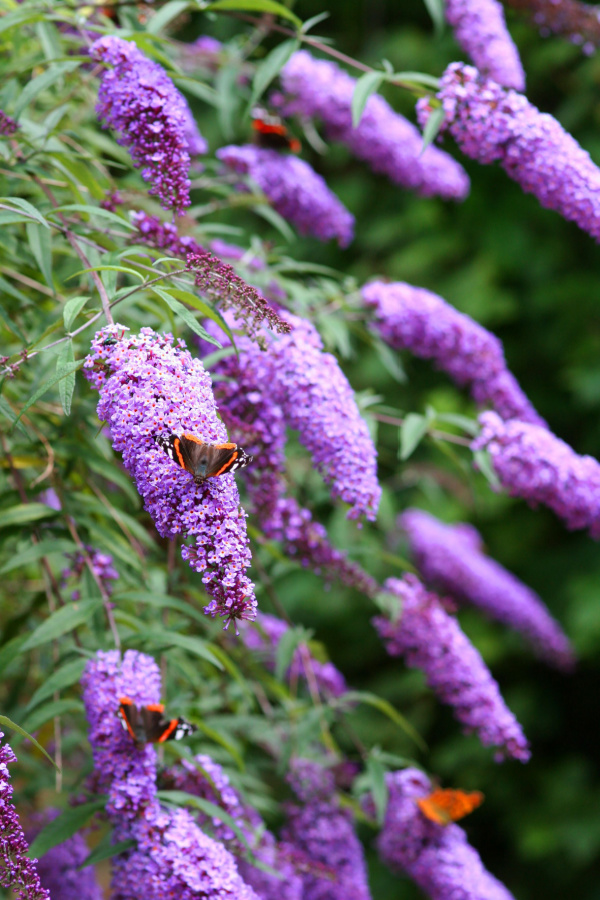
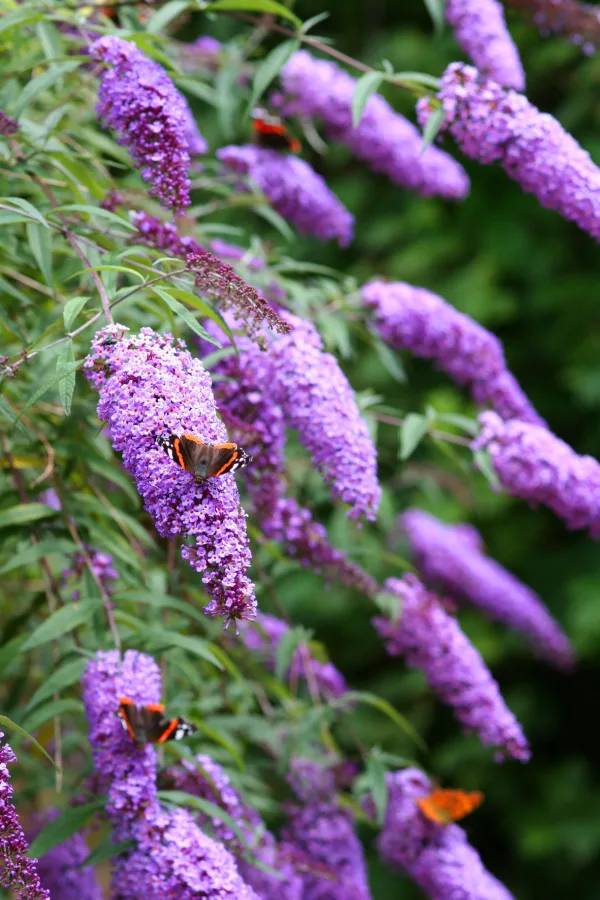
The flowering shrub is excellent for open spaces that receive harsh, bright sunlight. Butterfly bushes can handle both heat and the hot sun, actually preferring to grow in areas that receive at least 8 hours of full sunlight each day.
Butterfly bushes are not only heat tolerant but extremely drought tolerant as well. In fact, if there is one thing butterfly bushes don’t like, it’s too much water. The hardy shrub should not be planted in areas of extreme wetness, as its roots will rot out when too much moisture is present. Affiliate Link: Proven Winters – 1 Gal. Miss Molly Butterfly Bush
Weigela is a great choice for those looking to add a low-maintenance pop of color and texture to their landscape. They are extremely easy to care for once established, requiring only basic watering for the first few months after planting.
Depending on the variety chosen, leaf colors can range from a deep purple or dark red wine color to a lighter variegated green and white. The shrub is an excellent choice to fill a large, open sunny space – or for tucking into flowerbeds to add intense foliage and bloom color.
Most varieties bloom best in the spring, with gorgeous tiny pinkish to red trumpet flowers. Some will bloom again in mid-summer to late fall with a second smaller flowering.

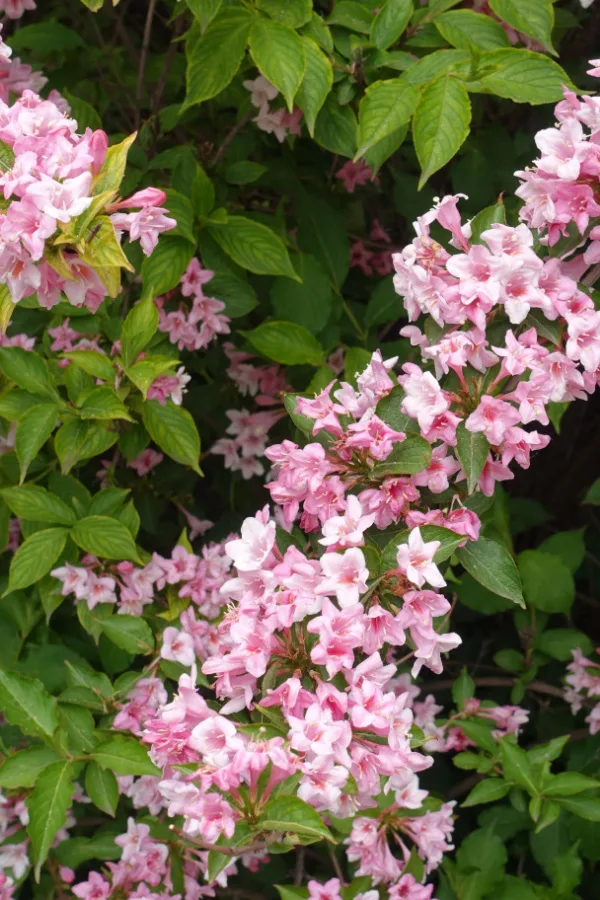
Larger varieties can grow to a mature height of 5 to 6′ in both height and width. There are also dwarf varieties that can be kept in the 1 to 2′ range. All can be pruned back easily to keep them under control. Hardy from zones 4 through 9 depending on variety, they grow well in a wide range of climates. Affiliate Link: Brighter Blooms – Wine & Roses Weigela
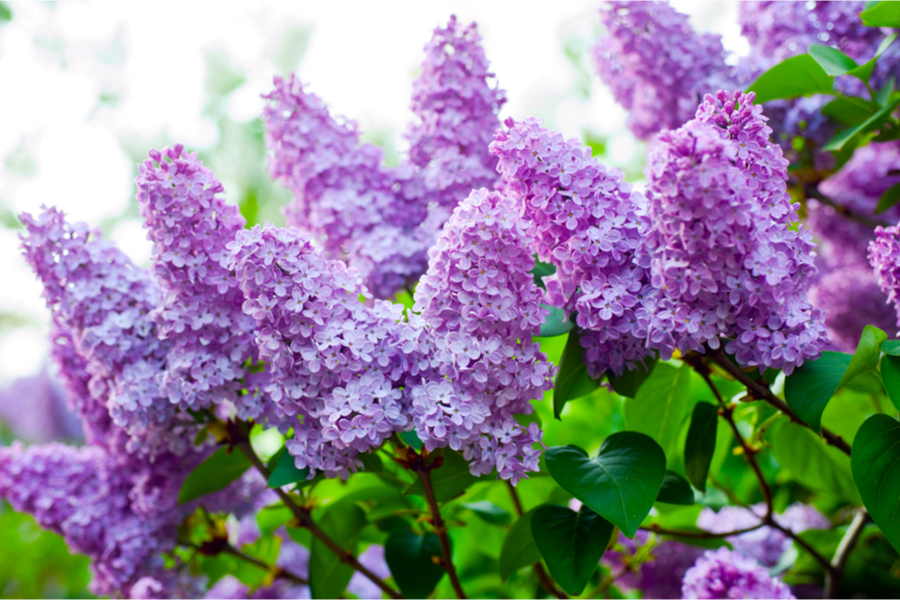
When it comes to a fragrant shrub with big flower power, it’s hard to beat a lilac bush. And that blooming power can come at nearly any point of the season depending on the variety you grow.
There are lilac bushes that bloom in early spring, mid-spring, summer, and even fall. Another excellent pollinator plant, lilacs attract bees, butterflies and more to your landscape. And with species that grow from just a few feet in diameter to 15 feet or more, there is one to fit almost any space. Affiliate Link: DAS Farms Miss Kim Lilac Bush
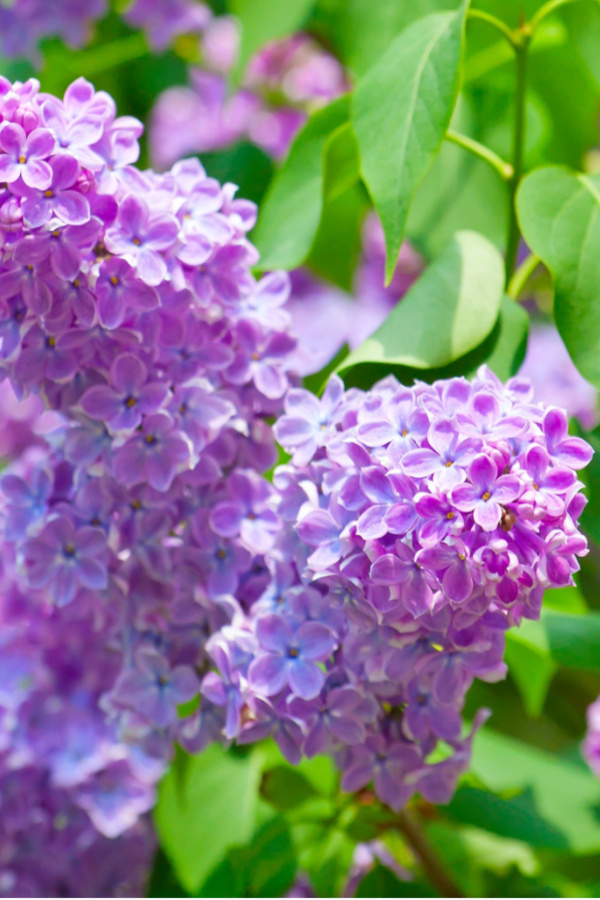
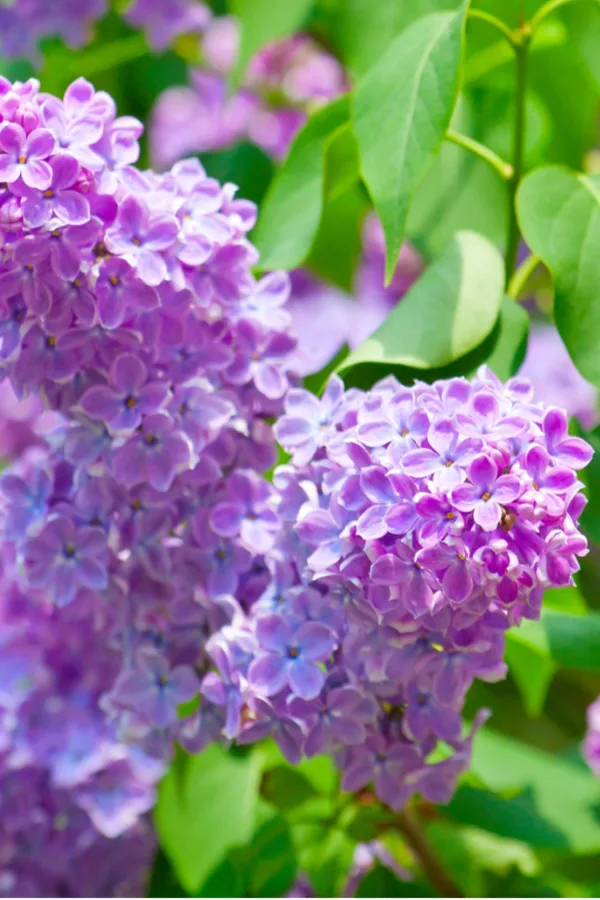
Lilacs are fairly low-maintenance once established in the landscape. They are both drought-resistant and heat tolerant. Even better, they require little to no fertilizing. See our article: Fall Lilac Care – 2 Things To Never Do To Lilac Bushes In The Fall!
With sizes that range from only a foot tall all the way up to a towering 20 feet in height, azaleas are a great choice for for adding huge spring color and interest. Although you often see azaleas in more southern climates, there are some really great varieties that thrive in northern locations as well.
Azaleas are broken down into two main types: evergreen and deciduous varieties (those that lose their foliage during the winter). Evergreen varieties bloom best in partial or filtered sunlight while deciduous varieties do best in full sun.

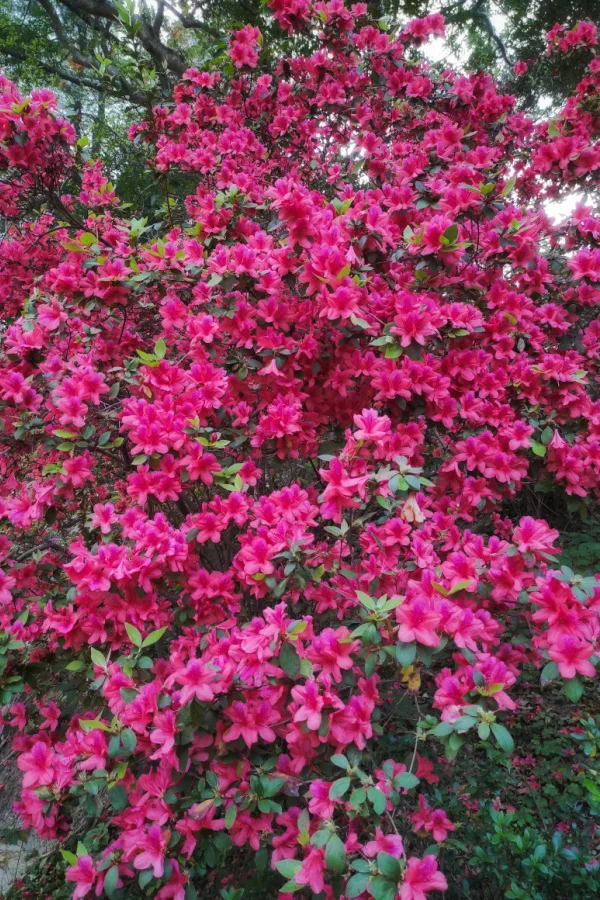
Most azaleas start producing long-lasting blooms during the spring and early summer. Their fragrant blooms range in color from pink, red and orange, to various shades of yellow and white. Affiliate Link: 1 Gallon, Azalea Encore Autumn Sangria
No matter which type of flowering shrub you add to your property, any or all of the 6 featured today are a great way to add lasting color and pizazz to your home for years to come!
Follow Our Facebook Page For Great Gardening Tips And Advice! This Is My Garden Facebook Page
This Is My Garden is a garden website created by gardeners, for gardeners. Jim and Mary Competti have been writing gardening, DIY and recipe articles and books and speaking for over 15 years from their 46 acre Ohio farm. They publish three articles every week, 52 weeks a year. Sign up today to follow via email, or follow along!
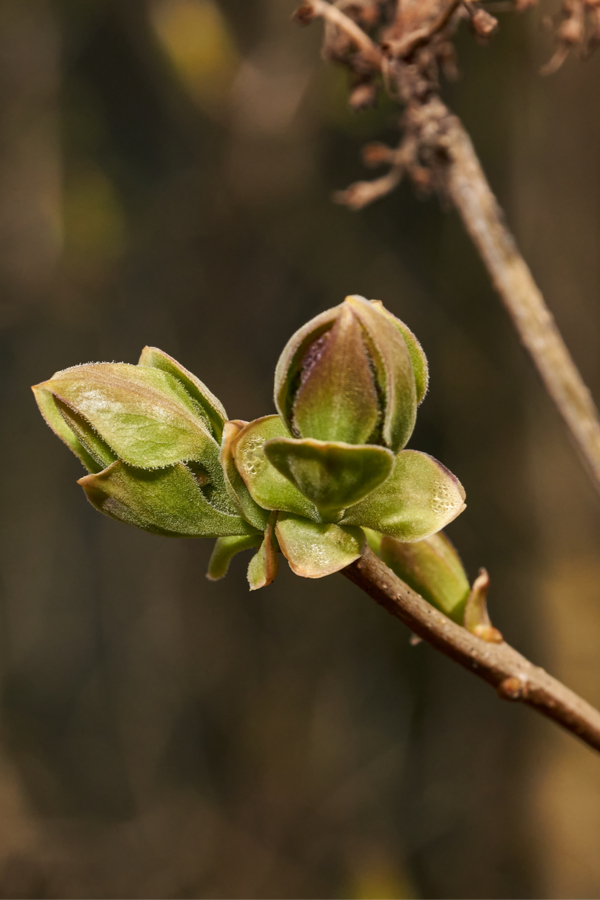
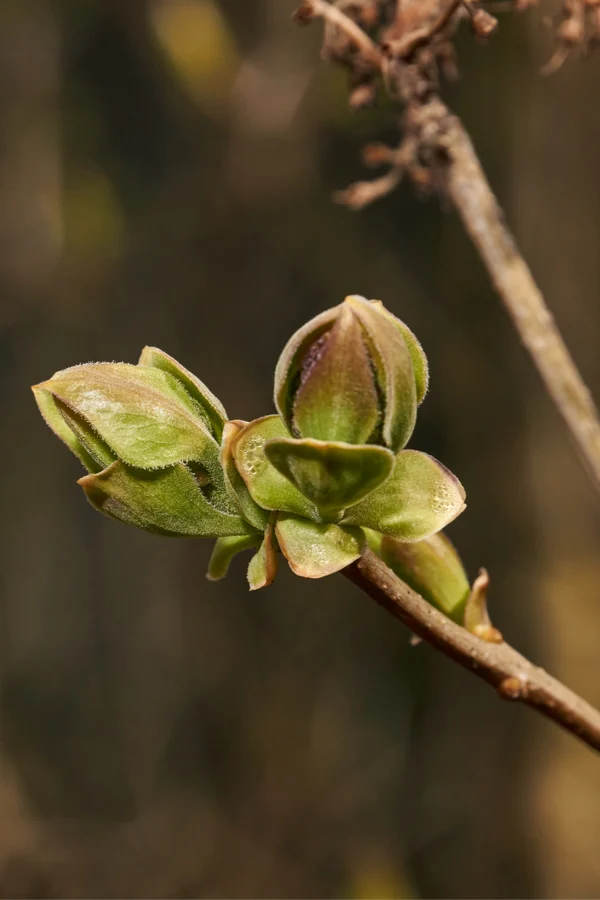
When it comes to fall lilac care – what you do in the autumn months before winter arrives can make a huge difference in just how well your bushes bloom next year – or whether they even bloom at all!
Lilacs are one of the most common bushes in the home landscape. Not only do they perform well in a wide variety of soil and climate conditions, they also produce some of the most magnificent blooms of all in spring and early summer.
Adding to their allure, lilacs are also one of the lowest maintenance bushes around. In fact, as long as you plant them in an area that gets a fair amount of daily sunlight, and in soil that is either neutral or slightly acidic, they will bloom almost at will. That is, as long as they are not improperly cared for.

As it turns out, when lilacs struggle to grow or bloom, and the soil and sunlight conditions are within an acceptable range, the issue for the bushes lack of flower power can usually be traced back to how it was cared for the previous fall. And not because it didn’t get the care it needed – but because it received way more than it needed!
With that in mind, here is a look at two of the biggest and most common mistakes gardeners make with their lilac bushes in the fall. And more importantly, how to avoid those mistakes for big blooms from your lilacs next year!
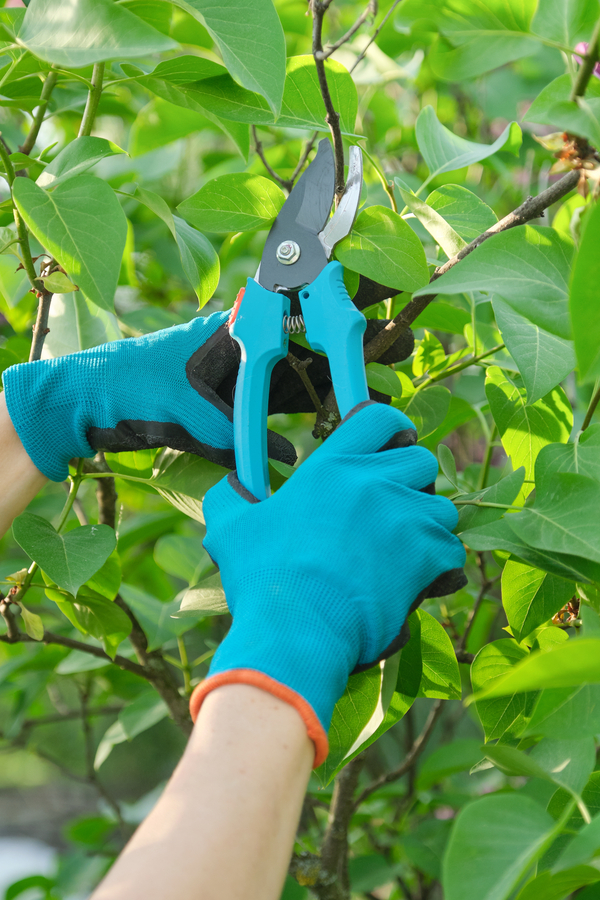
One thing you never want to do to lilac bushes in the fall is prune them back. In fact, not only do you want to avoid fall pruning, but late winter and early spring pruning as well. Why? Because it is the quickest way of all to keep your lilacs from blooming!
Lilacs, like many varieties of hydrangeas and other flowering bushes, bloom on “old” wood. Old wood is the wood that grew from the bush the prior spring, summer and fall.
Once a lilac bush finishes blooming early in the season, it then concentrates its energy on growing new branches and stems. And as it grows that new wood, it forms the following year’s blooms within them. Those branches then go dormant over the winter months, and produce the bushes blooms the next spring.

Unfortunately, pruning a lilac back in the fall removes much or all of the next year’s “old” wood. Likewise, if you prune it in late winter or early spring, you are still removing the plant’s future old wood. And without that old wood in place, the plant won’t be able to produce blooms that year.
The only time you ever want to prune a lilac bush is right after it completes its blooming cycle. Pruning at this point allows the bush plenty of time for new growth. Growth that if left in place – will produce gorgeous blooms the following year!
One thing you can and should do in the fall if you have not done so already is deadhead old blooms from your lilac bushes. Deadheading is not the same as pruning, as it is only removing the old flowers right below the bloom.
Deadheading helps the plant to stop wasting energy on old blooms as they decay. This is actually best to do after they first finish blooming, but if they still remain in late fall, cutting just the old blooms off of plants will not harm the bush in the least.
The second biggest thing to avoid doing to your lilac bushes in the fall is fertilizing. As it turns out, fall fertilizing is the second biggest culprit when it comes to poor plant health and or failing blooming patterns for lilacs.
First and foremost, as with many perennial plants, bushes and shrubs, fall fertilizing puts plants at risk of winter damage. When you provide power to a plant, it spurs growth. In the spring and early summer, that can be helpful to a plant. But late in the season it can spell disaster. Especially for lilacs and other blooming bushes.
In the fall, lilacs bushes are preparing for dormancy. In addition to forming next year’s buds, they are also storing energy to their roots for next year’s blooms as well.
But a sudden dose of fertilizer can change all of that. It actually fools the plant, tricking it into using that extra energy to fuel growth. Instead of slowing down and saving energy, the plant burns more to produce new stems and foliage.
Sadly, those new stems and foliage do not have the time to mature and harden up before winter arrives. Because of that, they are highly susceptible to winter damage. Even worse, because the plant burned energy instead of saving, it too can be at higher risk of winter damage.
For all of these reasons, lilacs should only be fertilized in early spring. The best time of all is right before they begin to leaf out . This will help to power both early growth and the coming year’s booms. See: Spring Lilac Care 101
Although you should always avoid fertilizing lilacs in the fall, it’s also important to know when you do power them in the early spring, what you give them can make a big difference in bloom performance as well.
Lilacs do not perform well when there is too much nitrogen in the soil. In fact, when levels of nitrogen are too high, the bush won’t bloom at all. For this reason, always use a balanced fertilizer with equal amounts of nitrogen, phosphorous and potassium.
In addition, when fertilizing your lawn, be careful to keep nitrogen-heavy lawn fertilizers away from their root zones. Most lawn fertilizers are extremely heavy in nitrogen. And when they are broadcast around the roots of lilacs, they can overpower the plant and prevent it from blooming.


So what should you be doing for your lilacs this fall before winter arrives? There are actually only two simple chores to perform that can help your lilacs perform better next year. The first is to make sure it is getting enough water – and the second it to give it a thick blanket of mulch for protection.
Here is to putting your lilacs to bed properly this fall – and to bigger, better and more plentiful blooms next spring and summer!
Follow Our Facebook Page For Great Gardening Tips And Advice! This Is My Garden Facebook Page
This Is My Garden is a garden website created by gardeners, for gardeners. Jim and Mary Competti have been writing gardening, DIY and recipe articles and books and speaking for over 15 years from their 46 acre Ohio farm. They publish three articles every week, 52 weeks a year. Sign up today to follow via email, or follow along!
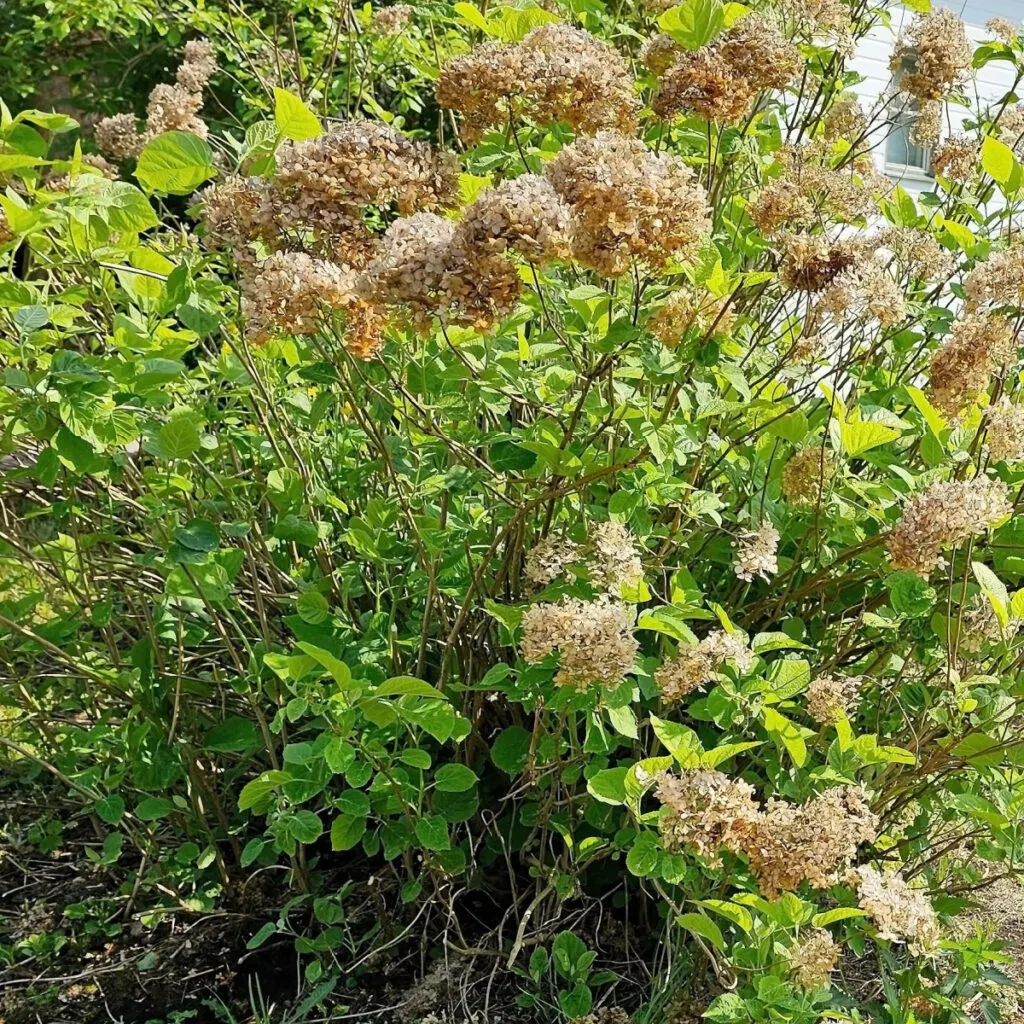
When it comes to preparing your hydrangeas for winter, how you care for your hydrangeas in the fall can have a big impact on not only their health and winter survival, but their ability to bloom next year as well.
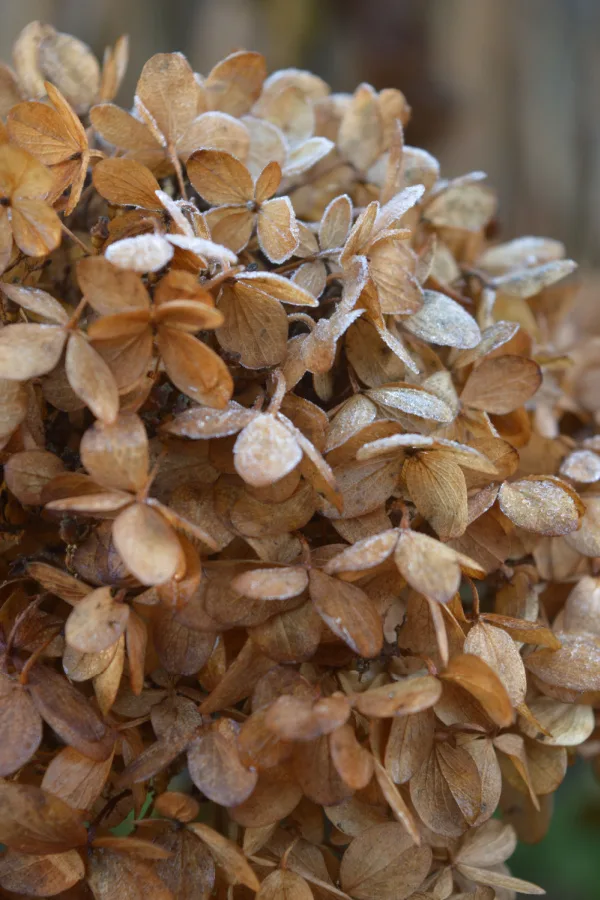
Although they are one of the most beautiful blooming shrubs of all, hydrangeas are also one of the most confusing of all perennials for gardeners. Especially when it comes to fall care! After all, long after their blooms have unfurled, they can still look amazingly beautiful drying on the plant.
But what do you do with them as the weather starts turning cooler? Is it okay to prune hydrangeas back in the fall? Do they need to be fertilized before winter to help them next spring? And what about mulching and watering – do they need that in the fall as well?

All of those question and more roll off the tongues of gardeners each and every fall. And for good reason. How you care for your hydrangeas before winter arrives plays an amazingly important role in both their survival and blooming performance the following season. In fact, more than you can ever imagine!
When hydrangeas fail to bloom during a growing season, the issue can almost always be traced back to fall care. And not just a lack of care – but sometimes too much. Yes, how you mulch, water and fertilize will play a key role in the plant’s success – but it’s pruning that usually makes or breaks it.
Although fall pruning is a annual ritual for a large majority of perennials, with many varieties of hydrangeas, it can result in a total loss of future blooms. As can fertilizing or failing to keep the bush hydrated.
That is exactly why before performing any fall maintenance on your hydrangeas, the first step to success is knowing exactly what type of hydrangea you are growing. And then from there – taking the proper steps to get your bush not just ready for winter – but for blooming bigger than ever next year!

When it comes to hydrangeas, there are two major categories when it comes to bloom cycles. One group of hydrangeas blooms in early to mid summer, while the other group blooms in late summer to early fall. And when it comes to fall maintenance – the two need to be treated entirely different. That is exactly why it’s important to know which type you have!
Summer blooming hydrangeas include Bigleaf hydrangeas and Oakleaf Hydrangeas. Bigleaf varieties include the ever-popular massive mophead blooms, These oversized flowers can light up the landscape in early summer with their huge blooms, seemingly covering the bush in color.
Oakleaf varieties bloom in the summer as well and can flower as early as June. Oakleaf flowers are not quite as showy, but their clusters of flowers that form on cone-shaped blooms can still provide quite the floral display during the summer months.
Late summer / early fall blooming varieties include Panicle and Smooth hydrangeas. Panicle hydrangeas produce their flowers in a cone shape. They will begin to flower late in the summer. In the fall, their blooms then turn to stunning deep colors as they dry.

Smooth varieties (often called wild hydrangeas) have larger more rounded blooms. They come into bloom in late summer as well and age gracefully all the way into late fall.
So why does knowing what type you have matter? Because depending on the type you grow, if you prune them at the wrong time, you risk pruning off the next set of blooms!
Summer blooming hydrangeas flower on old wood. Old wood is the growth that occurs on a hydrangea after it finishes blooming in the summer. That is extremely important when it comes to fall care, because if you prune summer blooming hydrangeas in the fall, you are pruning off the following year’s blooms.
The only time summer blooming hydrangeas should be pruned is right after they bloom. This allows the plant to still grow the new wood for the following season’s flowers. If you missed this opportunity, it’s important to let any major pruning go until the following year.
Although you can’t prune summer blooming hydrangeas in the fall, the one thing you can do is deadhead the flowers before winter arrives. Deadheading is the practice of removing the aged blooms from a plant. And for summer blooming hydrangeas, it can help the plant conserve valuable energy for winter – and for next year’s bloom set!
By deadheading the spent blooms, the perennial can instead direct it’s resources to storing energy in its roots. Unfortunately, as long as you allow the old blooms to hang on the plant, the bush will continue to pour energy into the flower to help it develop seeds. And that’s energy that should be going to next year’s blooms!
When deadheading summer blooming hydrangeas, it is important to only remove the bloom and nothing more. Simply snip off the stem right below the flower head. This will allow all other growth to remain. Growth that most likely holds next year’s blooms.
Unlike their early summer flowering counterparts, late summer/fall blooming hydrangeas bloom on new wood. New wood is the growth that occurs on the bush during the same season. More precisely, it is the growth that occurs on the bush from spring until it flowers in late summer or early fall.

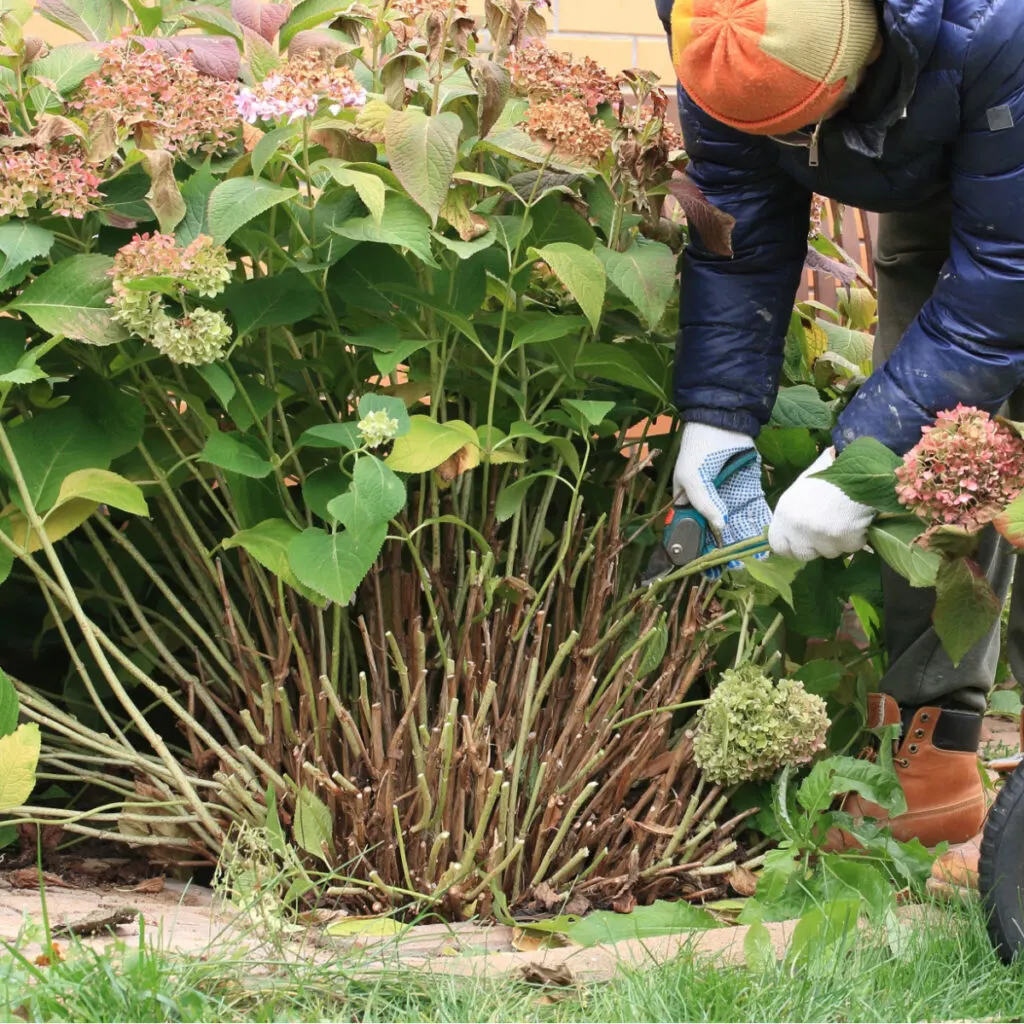
For these varieties, not only is fall deadheading important, so is pruning them back for shape. By pruning in the fall, you remove the spent flowers to help the plant conserve energy. But you can also remove overgrown branches and trim the plant back to size – all without worry of hurting next year’s bloom cycle.
One thing is for sure, no matter which variety you grow, the single biggest thing you can do to help your hydrangea before winter is to remove the spent blooms – no matter the variety!
Above and beyond pruning, watering and mulching your plants in the fall is vital for their well being and protection.
Whether you grow summer or fall blooming hydrangeas, it’s important to keep your plants hydrated and protected before winter settles in. Hydrangeas need water at their root level to help keep roots productive and store energy for next year’s blooms.
On average, hydrangea bushes should be getting an inch of rain or water per week. If allowed to get to dry in the late fall months, a lack of water will cause a reduction in the following year’s blooms.
Mulching your bushes in the fall before winter helps greatly to retain valuable moisture in the soil. It also helps keep competing weeds away. Even more, mulch also helps insulate the roots from the constant freezing and thawing winter can bring.

In mid to late fall, a four to six inch layer of shredded hardwood bark or shredded leaves spread around the base and drip line edge of your hydrangeas is more than enough to do the job. The drip line is simply where the edge of the bush grows to. By mulching to this point, you keep the entire root structure protected.
Last but not least, when it comes to fertilizing – fall is not the time to give your hydrangeas power! Fall fertilizing can actually harm the shrub by causing unwanted late growth. Unfortunately, late growth is weak and tender, and highly susceptible to winter damage.
Instead, save fertilizing for early spring and summer to help promote same season blooms and growth. Here is to giving your hydrangeas the proper fall care this year – and getting them ready for an explosion of flower power next year!
For more info on growing and maintaining perennials in the landscape, check out our Perennials section on the website.
Follow Our Facebook Page For Great Gardening Tips And Advice! This Is My Garden Facebook Page
This Is My Garden is a garden website created by gardeners, for gardeners. Jim and Mary Competti have been writing gardening, DIY and recipe articles and books and speaking for over 15 years from their 46 acre Ohio farm. They publish three articles every week, 52 weeks a year. Sign up today to follow via email, or follow along!
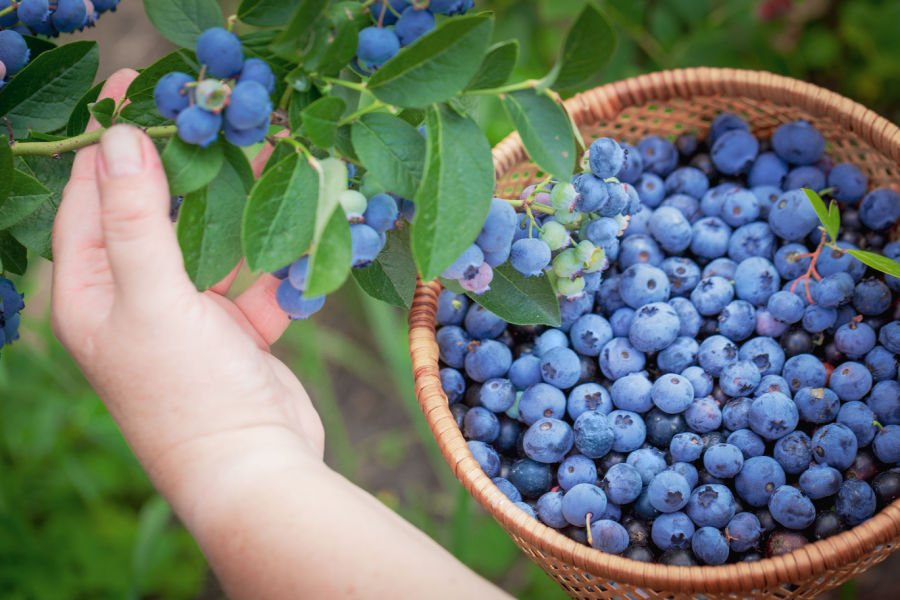
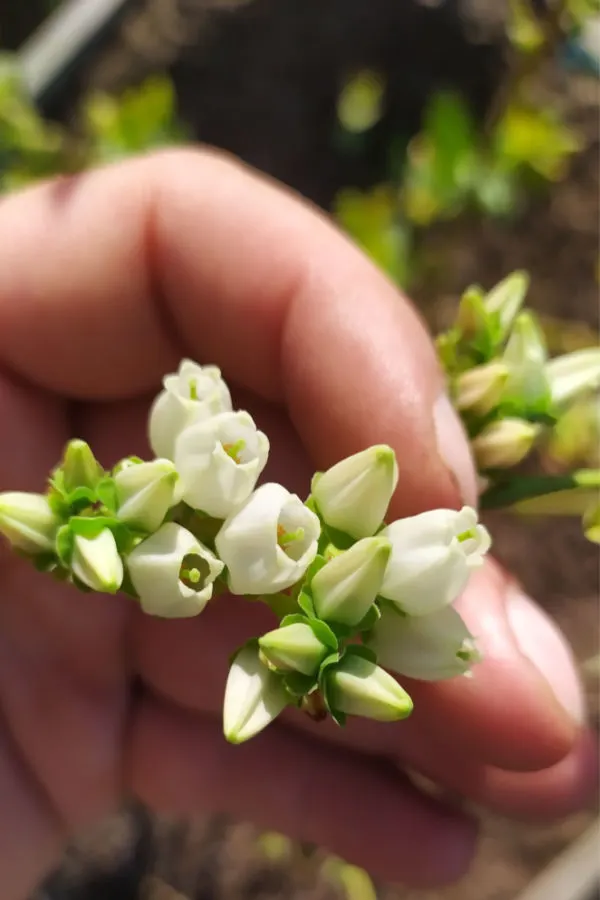
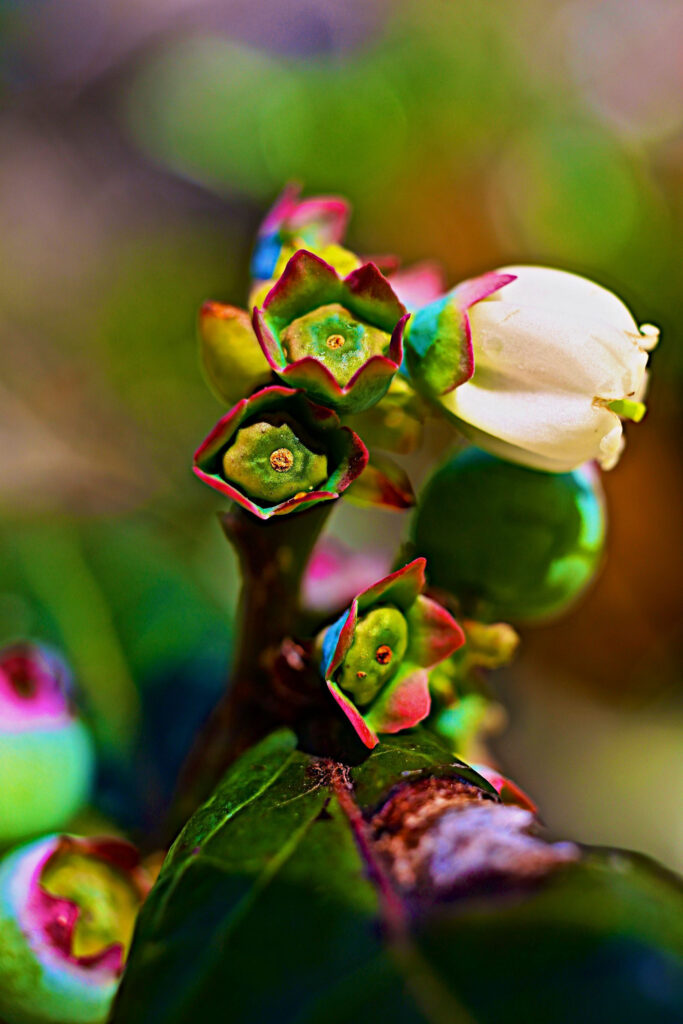
Looking for the best way to fertilize your blueberry bushes for healthier plants and a bigger harvest?
One of the best ways to ensure a great harvest of delicious blueberries is to give them the power they need for strong root development, thick foliage and loads of bud production. But when you give your bushes that fertilizer, and what you use for powering them can really make a huge difference in just how successful your crop can be.
When blueberry bushes struggle to produce or even survive, the issue is usually because of one of three major issues – the bushes not getting enough light, the soil not having the proper pH – or – and this is often the biggest issue of all, the plant failing to get enough nutrients.

Blueberries certainly need sunlight to grow and produce. And lots of it! In fact, for maximum yields, blueberry bushes need at least 6 full hours of sun each day. In addition, they also require a soil that leans to the acidic side. As an acid loving plant, blueberries need a soil with a pH somewhere between 4.4 and 4.8.
Sunlight, of course, is easy to provide simply by planting you bushes where they will receive the necessary light. And if your soil’s pH is off, it too can be corrected fairly quickly by adding a soil acidifier.
But when it comes to the nutrients your blueberries need to thrive and produce – it’s extremely important to feed your bushes not only the right kind of energy, but to give it to them at the right time as well. With that in mind, here is a look at how to power up your blueberries for success this year!
Like nearly all plants, blueberries require the BIG 3 of nutrients – nitrogen, potassium and phosphorous (NPK) for good growth. And, for good fruit production, those three major energy sources need to be fairly balanced.

But, and this is important, the nitrogen source needs to be different from the one most standard fertilizers provide. Unfortunately, one of the biggest mistakes made when fertilizing blueberries is giving the bushes the wrong type of nitrogen. It is vital not to use standard nitrate based fertilizers.
Although this is the most common type of fertilizer and works well for vegetable plants, annual flowers and most perennials, it is not a good choice for blueberry bushes. Nitrate is actually toxic to blueberries and can cause harm to the bush instead of powering it.
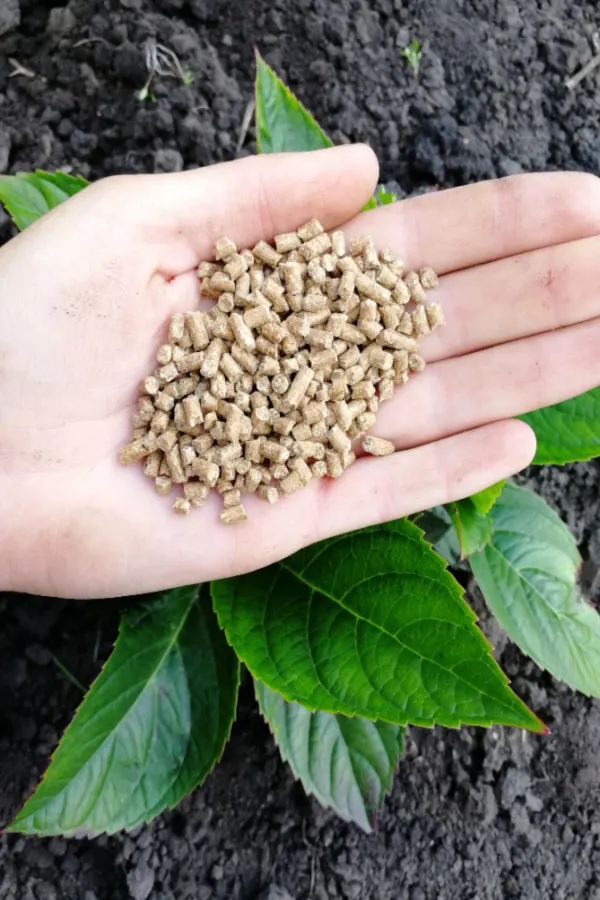
So what type of fertilizer do you need? For best results, blueberry bushes require an ammonium/sulfur form of nitrogen for energy. And that is why when selecting a fertilizer for blueberries, you always want to pick one formulated for acid loving plants. Why? Because it will contain the right type of nitrogen.
Look for granular acid plant loving fertilizers with an N-P-K in the range of 4-3-4 to 4-3-6. These often list that they are specifically for blueberries, azaleas, rhododendrons and other acid loving plants. This balanced energy source will help maintain good growing habits and better fruiting. Affiliate Fertilizer Link: Down To Earth Granular Acid Plant Fertilizer


Unlike many perennial plants, blueberries actually benefit from fertilizing multiple times during the year. In fact, for maximum yields, it is best to give them a dose of fertilizer at three specific but separate times. The good news is you can use the same acid loving granular fertilizer for all three applications.
The first dose of fertilizer for blueberries needs to go on early in the season. This application needs to go on right before or as the bushes are beginning to leaf out. This helps the bush produce strong foliage and allows it to store up more energy for flower production.
There is no doubt about it, strong early growth is vital in setting the stage for strong blooming. This early dose of power sets the stage for everything to come.
The second application of granular fertilizer should be four to six weeks after the initial dose. This burst of energy to the bush is critical in helping it replenish all of the nutrients it has used to prepare for fruiting. Powering the bush at this point will help spur higher production and maximum yields.

The third and final boost of fertilizer needs to go to your bushes just after they complete production. At this point, the bush needs the extra nourishment to replace all of the energy it used for fruiting. This application is vital, and is usually the one that is most often missed.
Although the third dose will not help produce more berries, it does allow the bush to recover and begin to store energy for the following season. Without it, the following year’s production levels will not be as fruitful.
One time you do not want to fertilize your blueberry bushes is in late fall. This can cause the bush to grow tender new foliage, which can be highly susceptible to winter damage. In addition, do not mulch or side dress blueberry bushes with compost. Again, like traditional nitrate fertilizers, it will give the wrong type of nutrients to your bushes.
When applying granular fertilizer to blueberry bushes, it is best to slightly rake the surface after sprinkling the granules. This helps the small granules to filter down into the top layer of soil where they can more quickly release their nutrients to the roots below. If you really want to speed the process up, watering in the soil & mulch after raking the granules will really do the trick.
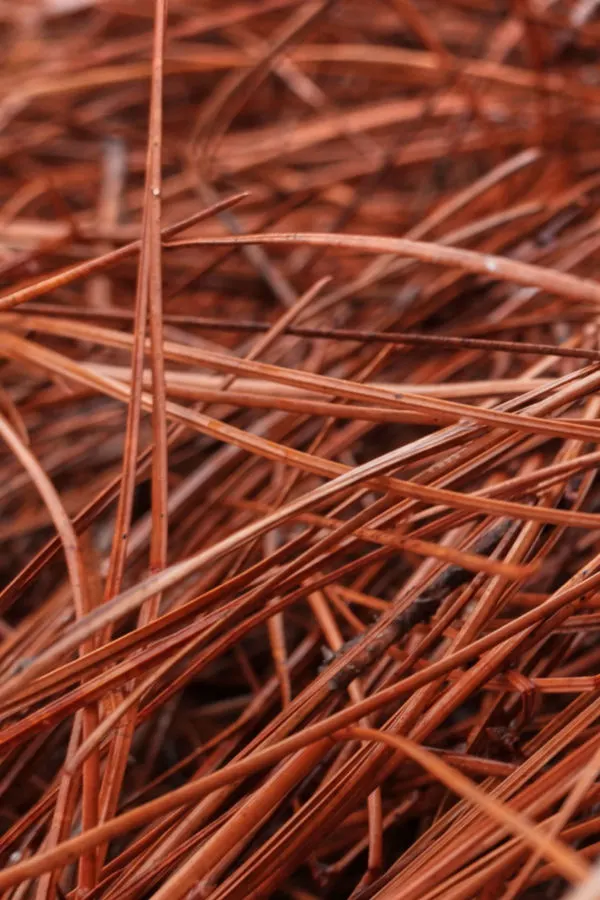
One final note – when mulching blueberries, you can give them a little extra boost of acid by mulching with green pine needles. Fresh pine needles release acid as they brown off. They are an excellent organic way to give even more power to your blueberries! See: How & Where To Use Pine Needles
Here is to powering up your blueberry bushes this year – and to growing your biggest harvest ever! Once the Fall season rolls around, be sure to check out: What To Do With Blueberry Bushes In The Fall – Before Winter Arrives!
Follow Our Facebook Page For Great Gardening Tips And Advice! This Is My Garden Facebook Page
This Is My Garden is a garden website created by gardeners, for gardeners. Jim and Mary Competti have been writing gardening, DIY and recipe articles and books and speaking for over 15 years from their 46 acre Ohio farm. They publish three articles every week, 52 weeks a year. Sign up today to follow via email, or follow along!
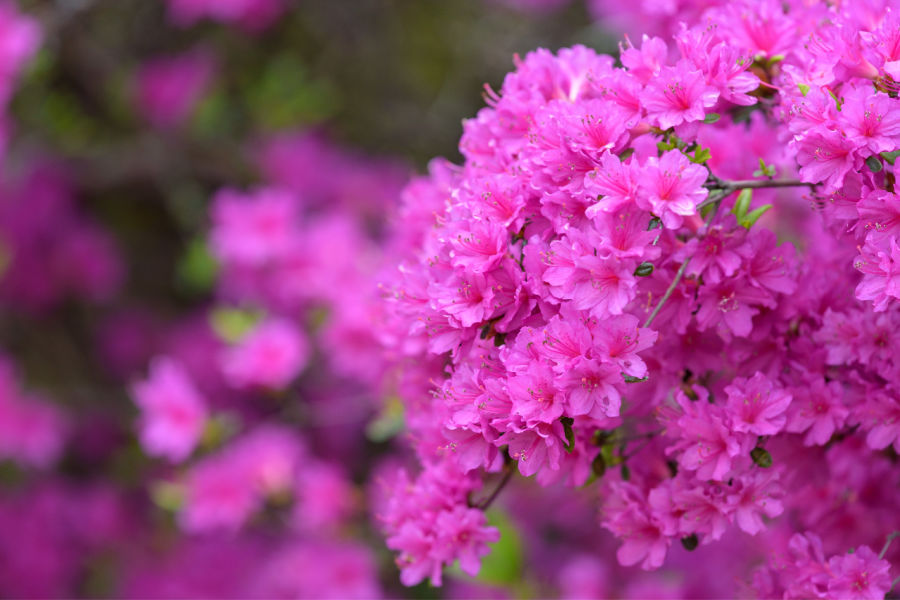
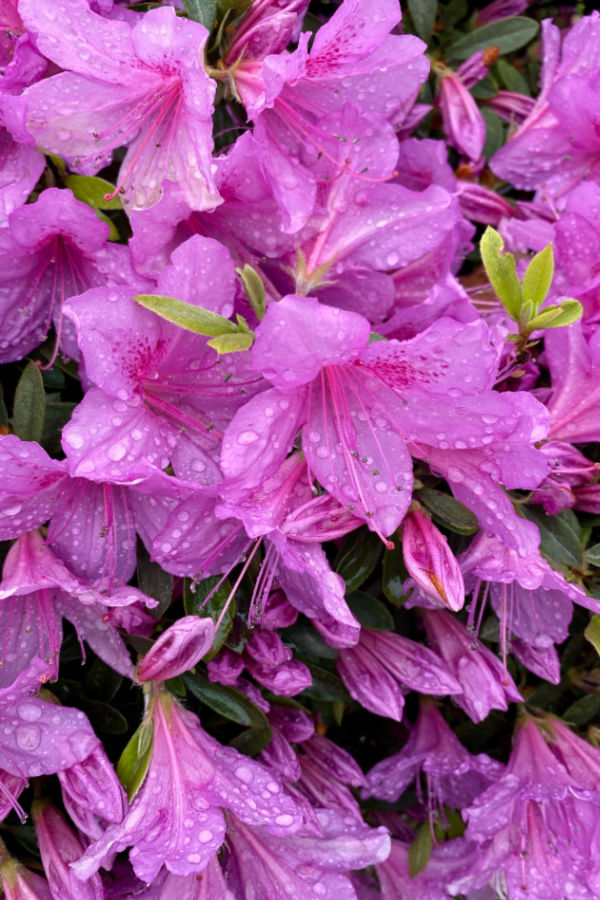
Looking for a few tricks and tips to get your azaleas to bloom bigger, brighter and longer than ever?
One of the most beautiful blooming shrubs of all, the azalea bush has long been known for its vibrant flowers that signal spring is officially here. Azaleas in full bloom are stunning. In fact, their flowers can be so dense, it’s often hard to see the slightest bit of their shiny foliage lying underneath all of that massive flower power.
Often the first shrub to provide spring color, azaleas can quickly bring a landscape to life after a long, bleak winter. And are those colors ever something to behold! Azalea varieties can be found flowering in a near endless array of bright hues that in the sunlight, almost appear neon-like

But establishing azaleas and getting them to thrive can be a bit tricky for some gardeners. Especially when it comes to getting them to bloom strong and bright year after year. Azaleas, unfortunately, have a bad reputation among many gardeners when it comes to keeping their bloom cycle strong.
But here is the good news – that reputation is really not fair at all to this gorgeous flowering shrub. Azaleas are actually quite easy to keep healthy and flowering strong each and every year. Even better, as you will see below, all without a lot of fuss, work or hassle.
A properly located and cared for azalea bush should bloom every spring for a solid two to three week period. When it doesn’t, the problem usually boils down to a short list of potential issues:
The first issue on the list is the only problem that is not fixable. Sometimes, when an azalea struggles to bloom or even survive, it is simply because the variety planted can’t handle the climate where it is growing.


When this is the case, unfortunately, little can be done to help the plant survive or bloom. While most azaleas are unable to handle extremely cold winters, other varieties can survive and bloom just fine in those conditions.
As a member of the Rhododendron family, azaleas share many of the same growing patterns as their cousin the rhododendron. Like rhododendrons, azaleas can be found in both evergreen and deciduous varieties that lose their foliage each winter.
From dwarf varieties that mature to just a few feet in height, to larger types that soar to ten to twenty feet or more, there is an azalea to fit every space. But the key is to select one that grow best in your specific growing zone!
As mentioned above, climate plays a key role in the success of an azalea bush. Known by many as a southern blooming shrub, there are actually many varieties that are actually hardy to temperatures as low as 20 below zero Fahrenheit.
Typically, cold hardy varieties struggle to survive in the warmer climates of the south. Likewise, azaleas that thrive in the warm, hot and humid south typically cannot survive the northern winters. When selecting your azaleas, always be sure to select a variety specifically designed for your climate to ensure the best chance for success.
Now that we have covered planting the right azalea for your area – let’s get into how to get those plants to bloom big! And when it comes to blooming success, it all starts with making sure your bush is planted right, and in the best possible location.
Where to plant your azaleas for big blooms depends on your location. Although azaleas are generally a shrub that enjoys more shade than sun, to thrive and bloom in the northern states, they need to grow in a bit sunnier location.
This helps to warm the plant early and produce more prolific bloom cycles. In northern climates, a good rule of thumb is to plant azaleas in locations that receive at least 4 to 6 hours of full sunlight.
When planting in warm southern climates, place shrubs in a location that receives more shade than sun. Unfortunately, the hot summer sun will take its toll on the foliage of plants with too much exposure in the south. No more than 3 to 4 hours of direct sunlight is best for southern locations.
No matter where you live, planting or transplanting azaleas in the early spring is best. It allows the plants time to establish in the soil before the heat of summer sets in. Fall planting can occur in southern climates, but a cool winter can certainly adversely affect late season plantings.

For that reason, planting azaleas in the north in mid to late fall is never a good idea. There is simply too much chance for winter injury. As for how exactly how to plant or transplant, we have included a section at the end of the article that covers planting in-depth.
Azaleas need a fair amount of water to flourish. Especially to help their blooms reach full potential. If plants are not receiving at least 1″ of rainfall per week, supplement with hand watering. Continue watering from spring through fall to give the plant the moisture it needs.
Water at the base of plants to avoid soaking the leaves. This is even more important for younger bushes that have been growing for just a year or two. Azaleas are prone to mold and fungus. Unfortunately, excess water laying on the foliage encourages both to occur in short order.
To avoid these issues, always water in the early morning. This allows the leaves to dry quickly with the warmth of the day.
Azaleas benefit greatly from a yearly dose of fertilizer to help promote fuller bloom cycles. But when and what you use to fertilize the bush is extremely important to their overall flowering success.


Many common plant fertilizers are not formulated to handle the nutrient and PH needs of azaleas. Be sure to use a fertilizer specifically created for the Rhododendron family of acid loving plants. For large azalea bushes, fertilizer spikes do a great job of slowly and easily feeding plants. Affiliate Product Link : Azalea Fertilizer
To power bloom sets, it is best to fertilize azaleas right after they complete their bloom cycle in the spring. This encourages the plant to build up, save and store energy for the following year’s blooms.
Most often, one application is more than enough. However, if your bush has struggled to bloom in the past few years or looks weak, a second application in mid to late June can provide extra power. There is no need to power the plants in early spring before they bloom as it will not help this year’s blooms in the least.
One thing you do not want to do is fertilize any more after the 1st of August. This can power late growth that can leave the bush susceptible to winter damage.
Azaleas do not require pruning to continue blooming from year to year. Shaping and cutting back can occur if the plant is a bit out of control, but the timing of the pruning is extremely important. Azaleas, like rhododendrons, form their flowering buds in the summer for the following year.
If you prune an azalea in the summer or fall, you will be removing the buds. Because of this, it will not flower the following spring. Unfortunately, untimely pruning is often the culprit for azalea plants that don’t bloom, as their future blooms were cut off in late summer or fall.
If pruning is needed, cut the plant back as soon as it finishes blooming. This allows time for summer growth and for buds to form for the following spring.
As a fellow member of the Rhododendron family, azaleas prefers a more acidic soil for strong growth. PH levels should range somewhere between 4.0 and 5.0 for optimum growth. A soil that is too alkaline will result in poor plant growth, and with little to no blooms in the spring.

If your soil leans to the alkaline side, you can amend it with ammonium sulfate to help lower the PH. In addition, mulching with pine bark or fresh needles can help to lower the PH over time as well. Fresh green pine needles are best as they have more acid to release to the soil than dry needles.
When planting, dig the planting hole to twice the circumference of the potted plant. Amend the planting hole with 25% compost to help supply vital nutrients and loosen the soil. Azaleas can suffer if they sit in too much moisture and the compost will help promote better drainage.
Plant with the top surface level of the potted plants slightly above the soil line. This again will help excess water drain away from the crown and prevent rot.
Mulch with a 3 to 5 inch layer of pine nuggets, pine needles, shredded oak leaves or straw to help the plants retain moisture. Avoid using hardwood bark mulches as they can raise the PH level over time as they break down. For more azalea growing tips, be sure to check out our article: What To Do With Azalea Bushes After They Bloom – 2 Must Do Chores For Big Blooms Next Year!
Here is to getting the most out of your azaleas this year and beyond! For more on shrub and bush care, check out our Shrub Section on the website!
Follow Our Facebook Page For Great Gardening Tips And Advice! This Is My Garden Facebook Page
This Is My Garden is a garden website created by gardeners, for gardeners. Jim and Mary Competti have been writing gardening, DIY and recipe articles and books and speaking for over 15 years from their 46 acre Ohio farm. They publish three articles every week, 52 weeks a year. Sign up today to follow via email, or follow along!
Are you looking to get your lilac bushes to bloom bigger than ever this year? Then it is time for a little spring lilac care to get them ready for better health and a great growing season!
Lilac bushes are synonymous with spring color, and lots of it! Although most varieties bloom in a wide array of purple and lavender hues, there are also lilacs that flower in white, red, pink, yellow and even blue.
But no matter the color, they can make quite the statement in the spring landscape. With large, fragrant dangling blooms that fill their entire canopy, lilacs bring massive color to a yard. Even better, they do so for a long period of time. In fact, many lilacs can stay in full bloom for up to two weeks or more each spring!
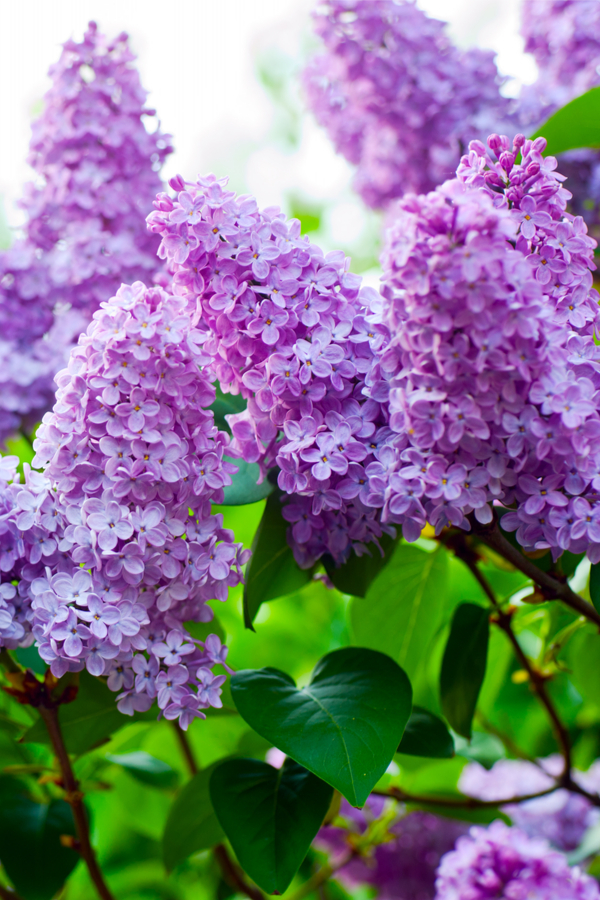

With all of that beauty, it’s easy to see why they are incredibly popular to grow. Especially when you add in that they are extremely hardy, durable and fairly pest resistant too. So durable that many can grow for up to fifty or more years without issue.
With all of that long-lasting beauty in mind, let’s take a look at how to get the most from this amazing bush, and more importantly, how to ensure that you have the biggest and best blooms each and every spring!
For starters, lilacs need a fair amount of sunlight to reach their maximum potential. Full sun is always best, but at the least, be sure your lilac bush is growing in an area that receives a minimum of 6 full hours of sunlight each day.
As for soil, lilacs prefer to grow in dirt with a PH that ranges from neutral to slightly acidic (6.5 to 7.0). If your lilac has had issues blooming in the past, a soil that is out of this range can often be the culprit.
To check soil PH, there is no need for an expensive soil test. Inexpensive soil probe PH testers are great for quick soil tests around plants, and can give you a reading instantly.
If your soil is out of the 6.5 to 7.0 range, you can use a soil acidifier to adjust the PH of the soil if needed. If the soil PH happens to be too acidic, you can add lime or dolomite to the soil to help adjust the acidity the other way.
More common is the need to create a more acidic soil. Product Link : Soil Acidifier Additive
Another issue with lilacs that do not bloom well is they are often incorrectly pruned in the spring.
What you do in late winter and early spring can have a big impact on your lilac’s bloom cycle. Both with this year’s blooms, and for blooms next year as well. For starters, never prune your lilacs in the early spring before they come out. Doing so can actually highly reduce or even eliminate this year’s blooms.

Much like most common varieties of Hydrangeas, Lilacs’ blooms form on older wood and stems. Because of this, removing any stems or branches from the bush before the foliage comes out means you are also removing its future blooms.
The simple rule of thumb is to never prune a lilac bush in the summer, fall, winter or early spring. Instead, only prune lilacs right after they finish blooming. This way, they have the rest of the growing season to produce new growth and new bloom sets for the following year.
There are two big tasks to perform on your lilac bushes for spring care. The first is adding compost. And the second is applying a thick layer of mulch underneath its base.
The compost will help to power your lilacs with just enough energy for great blooms. If too much fertilizer is given to lilacs it can actually cause them not to bloom. And that is where compost fits the energy needs of a lilac bush to a tea.
Compost has the perfect blend of nutrients to power lilac bushes. But even more, it does so without overpowering them with a full blast of instant energy that can keep blooms from appearing.
For best results, apply the compost in early spring, before the bush begins to leaf out. Spread a few inches of compost around the base of your bush. Use a rake to work it slightly in to the top layer of soil. After adding the compost, water it in to help start leaching the compost’s nutrients into the root area.
Next, apply a thick layer of mulch on top of the compost around the base of the bush. A 4 to 6 inch coating of hardwood or bark mulch will work best. This will help keep competing weeds from stealing nutrients. As mentioned prior, it also helps the soil to retain valuable moisture for the lilac’s roots.
When your lilacs begin to bloom, deadheading the flowers as they fade will help the plant immensely. Unfortunately, when allowed to stay on the bush, old blooms will continue to take water and nutrients from the plant.

By removing the blooms as they fade away, you allow the plant to continue to feed the remaining new flowers that are still coming on. But even more, it allows the plant to power new growth during the summer. The result will be an even better bloom set next year!
When your lilac has finally completed its bloom cycle in late spring, it is time to remove the final old blooms and do any pruning or necessary shaping of the bush. By doing this immediately after the bloom cycle completes, the bush still has all summer and fall to grow new wood and limbs for the following year’s flowers.
This is also a great time to add a few more inches of compost. Adding compost to the base will help feed and fuel the bushes summer growth. Just as in the spring, compost feeds slowly, which is perfect for lilacs.
In lieu of the compost, you can give the plant a very light feeding of an all-purpose 10-10-10 fertilizer right after they complete their bloom cycle. Remember, a light application is best as lilacs do not like too much fertilizer.
For the remainder of the summer and fall, the two most important tasks for your lilac bush are making sure it is receiving enough water, and keeping the area around its base clear of grass and weeds.
Established lilacs rely heavily on water and moisture for strong growth and health. On average, they should receive around an inch of rainfall per week for best health. If you experience extended drought or dry periods, watering your lilac can pay off big in helping it store up energy for next year’s blooms.
In addition, keep the area underneath your lilac bush free and clear of grass and weeds. Lilacs do not like to compete for nutrients. By mulching around their base and keeping the area free of other growth, it can go a long way in helping them have the energy they need to produce big spring bloom sets.
With this in mind, it is best to mulch around lilacs that grow by themselves out in the lawn. Allowing the grass right around the base means less nutrients for your lilac to bloom.
Here is to getting your lilacs in shape for a big blooming season with a little spring lilac care. And to keeping them healthy and strong for years to come!
Follow Our Facebook Page For Great Gardening Tips And Advice! This Is My Garden Facebook Page
This Is My Garden is a garden website created by gardeners, for gardeners. Jim and Mary Competti have been writing gardening, DIY and recipe articles and books and speaking for over 15 years from their 46 acre Ohio farm. They publish three articles every week, 52 weeks a year. Sign up today to follow via email, or follow along!
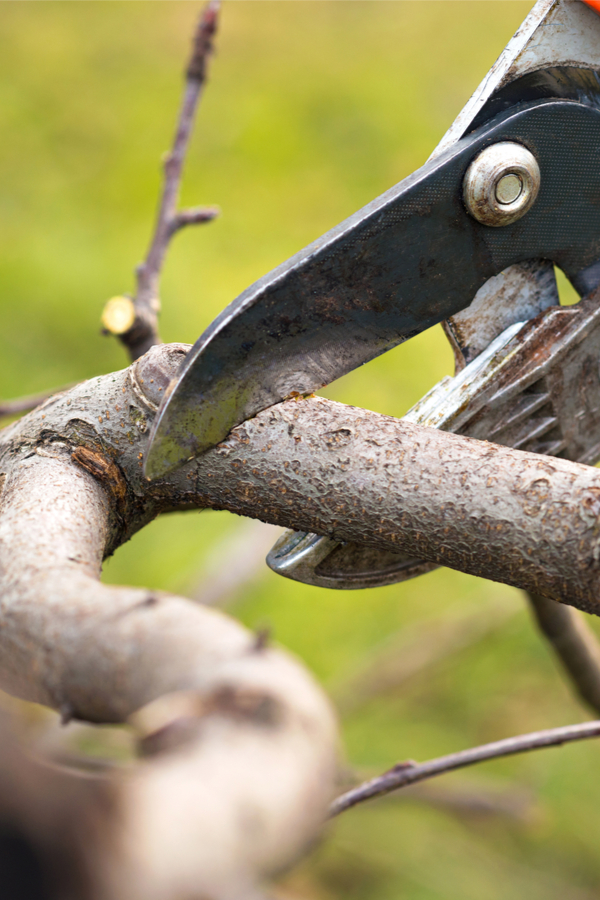
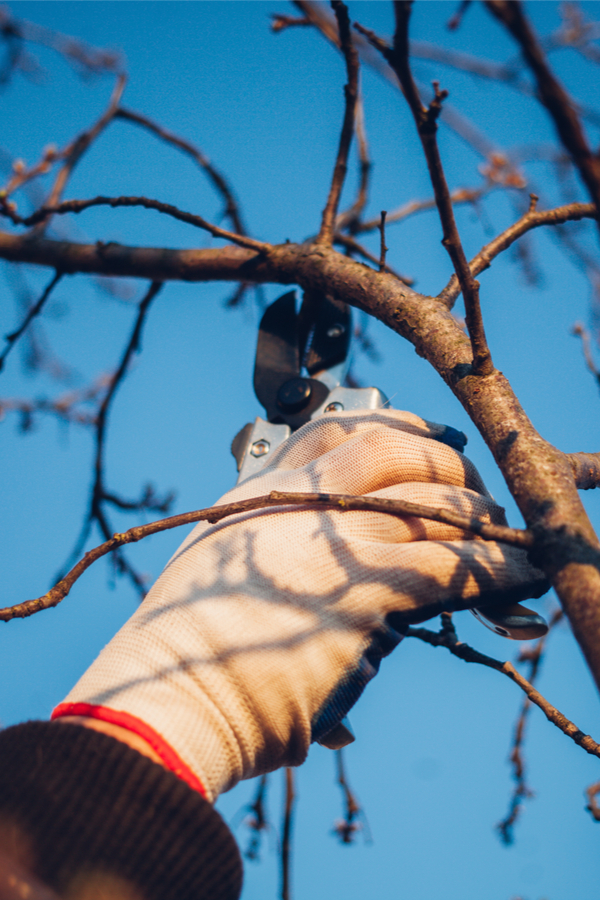
When it comes to pruning fruit trees, winter is the ideal time to get your trees in tip top shape. Pruning not only helps create a healthier tree, it also can lead to larger and more plentiful yields.
Pruning fruit trees is not as difficult and scary as many are led to believe. It is, however, an important chore to keep fruit trees healthy and productive. Trees that are left to grow unchecked are not just unsightly, they will also bear less fruit over the years.
Many homeowners are confused by when to prune their fruit trees. For many plants, fall is a great time for cutting back before winter sets in. But for fruit trees, fall pruning should be avoided entirely.

Why is fall bad for trimming back fruit trees? The act of pruning stimulates new growth. And as trees prepare for winter and head into dormancy, new growth can be quite detrimental to their health.
With fall pruning, new growth shoots don’t not have adequate time to harden off before winter’s freezing temperatures settle in. In addition, the cuts from pruning don’t have adequate time to heal either. Both can leave a tree susceptible to the harsh conditions winter can bring.
Although fruit trees can be pruned in the spring and summer months, pruning in the winter has several advantages. Both for the tree, and the pruner!
For starters, with their leaves gone for the season, branches are easy to see and cut. That is certainly not the case when trying to prune back a full canopy of leaves in spring or summer.

But even more importantly, because fruit trees are dormant in the winter, there is little stress to a tree when it is cut back. In fact, in full dormancy, there is no stress at all. And that allows the tree to conserve and store more energy for flowering and fruiting.
So now that we have established winter as the optimum time for pruning, here is a look at how to go about it this winter to get your trees in shape for big production next year!
Success with pruning all begins with having the proper tools for the job. For pruning fruit trees, 3 basic tools will do the job well. A pruning saw, a pair of pruning loppers, and a good pair of hand held pruners.
A pruning saw is perfect for removing large limbs and branches quickly. Loppers are good for removing most small to mid size branches up to a few inches in diameter. The hand pruners, meanwhile, are great for easily clearing away small shoots and starts.

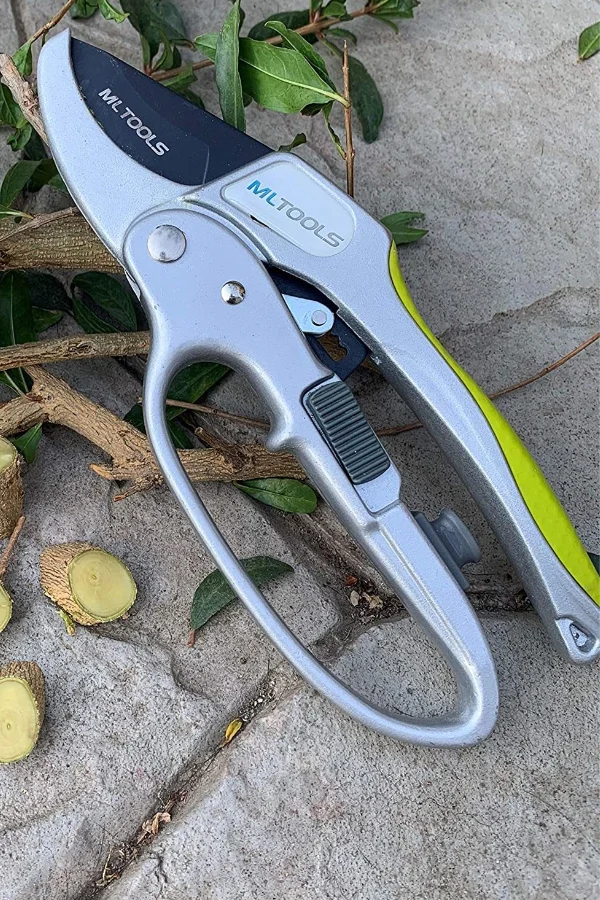
As for the loppers and hand held pruners, investing in a ratcheting tool versus traditional pruners can be extremely helpful. These pruners use a gear and ratchet to make pruning thick or tough limbs much easier.
Always make sure your pruners are sharp before you start cutting. Dull blades will tear limbs, branches and bark, causing both stress and injury to the tree.
Having a clean blade is equally important. The metal blades and teeth on pruners and saws can easily carry disease from tree to tree. Before cutting, wipe down blades with rubbing alcohol, or a 5/1 solution of water and bleach. It is also important to clean the blades from tree to tree.
Begin pruning your fruit trees by removing any wood that is dead, diseased or damaged. The last thing you want is a tree spending energy attempting to heal damaged limbs, so your first cuts should concentrate on eliminating any wood that is less than ideal.
When making cuts, always trim back flush to the trunk or branch the limb is coming from. Keeping all cuts flush keeps the tree from having tiny stubs. Not only are they unsightly, they can produce new, unwanted growth.
Next, it’s time to begin to thin the tree. This is the one pruning task that often causes more angst than any other. The good news is, keeping it simple is the key to success.
For thinning out, think of pruning as opening a blind or window shade for the tree. Trees, much like vegetable plants and flowers, need light and air to survive and thrive. (See : Why Pruning Your Tomato Plants Can Lead To More Tomatoes!)

This is an important step that opens up the tree canopy to let air and light in. By doing this, it allows the fruit to form and ripen better. It also helps to improve the overall health of the tree.
To thin, begin by removing branches that cross each others path. Remove the smallest or least healthy of the two crossing. Repeat this process until the branches within the core of the tree are not touching. This will allow the necessary light needed into the tree.
Next, remove branches with horizontal or downward growth. These branches struggle to hold mature fruit. Branches that grow upwards or at an upwards angle are the best to leave. They naturally hold fruit more securely.
The last step is to trim back last year’s growth a bit. This process helps to strengthen the tree, and conserve vital nutrients from being wasted on overgrowth.
When trimming back tree growth, a good rule of thumb is to take off about a quarter (25%) of last year’s growth. This will help to shape the tree into a nice form, and keep it manageable. That is not only good for the tree, but for harvesting as well!
Once you are finished cutting back last year’s growth, all that is left is to pick up the trimmings from around your trees. Cleaning up any branches not only keeps your landscape tidy, it will keep your mowing blades safe and sharp next spring. Here is to pruning your fruit trees this winter!
Follow Our Facebook Page For Great Gardening Tips And Advice! This Is My Garden Facebook Page
This Is My Garden is a garden website created by gardeners, for gardeners. Jim and Mary Competti have been writing gardening, DIY and recipe articles and books and speaking for over 15 years from their 46 acre Ohio farm. They publish three articles every week, 52 weeks a year. Sign up today to follow via email, or follow along!
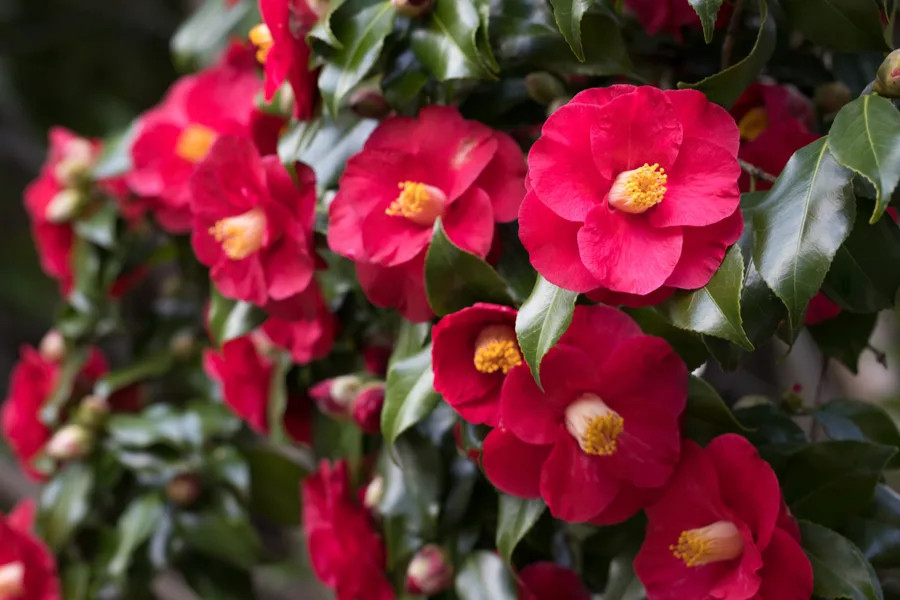
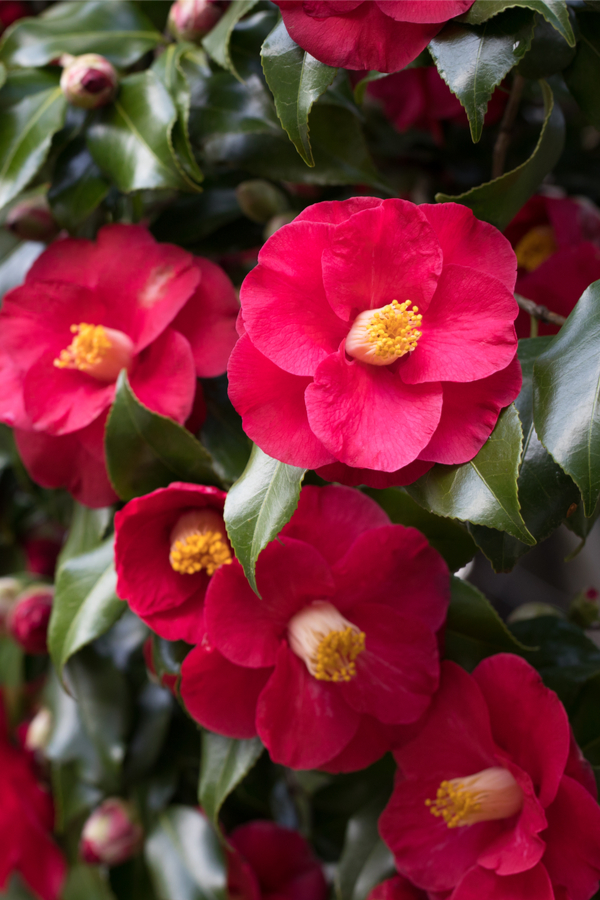
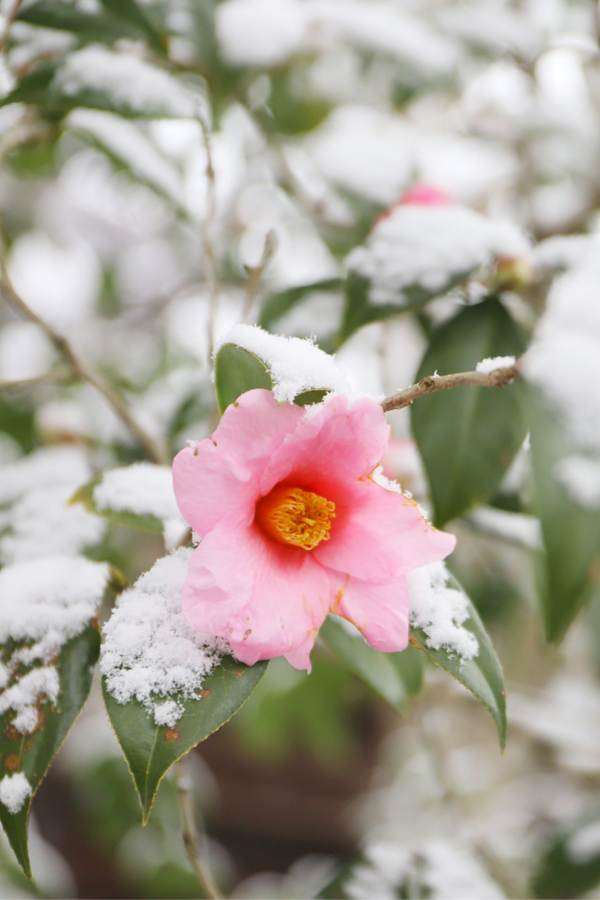
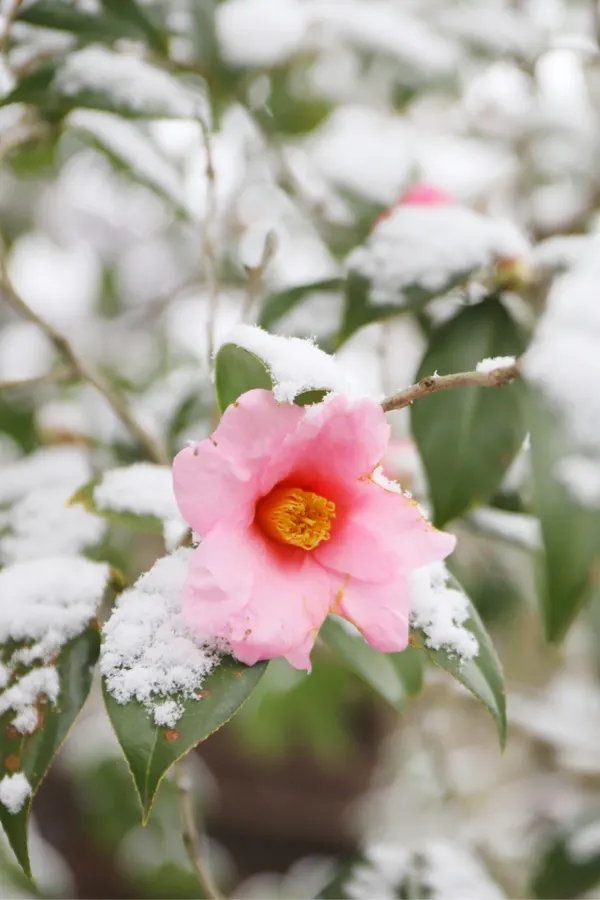
If you happen to live in growing zones six through ten, then you know just how special it can be to grow and enjoy the incredible beauty of camellias, especially when they are blooming.
Camellias, whether found in shrub or tree form, are truly magnificent specimens. The long living specimen with its glossy foliage is a sight to behold. But the gorgeous plants really come alive when they are in full bloom and overflowing with a mass of fragrant flowers!
But for many, those amazing blooms can be hard to come by. In fact, generations of gardeners have struggled with the finicky bush and its sometimes fleeting blooms.

So much so that today, many homeowners shy away from planting camellias in their landscapes because of its reputation for being hard to grow. Unfortunately, that bad reputation isn’t fair at all to camellias.
One thing is for sure, it certainly shouldn’t be a reason to keep this incredible flowering beauty from gracing your lawn. Well, that is, as long as you live in a warm enough climate to grow them!
The truth is, armed with a few simple planting and maintenance tips, you can have your camellias blooming like nobody’s business. With that in mind, here is a look at the secrets to success for growing camellias.
We touched on it at the beginning of the article, but the first key to success in getting camellias to have vibrant growth and big blooms is by planting them in the proper climate.
Most camellias are hardy throughout zones seven to ten, with some varieties being able to handle a bit cooler in zone 6. If you are trying to grow beautiful, blooming camellias in zone 5 or in the cooler areas of zone 6, it is almost impossible to have success.
Although breeding of the plant has produced some cooler-hardy versions, if you live in an area where an overnight low can get into the single digits, your plant will most likely suffer because of it. See : Understanding Growing Zones
Beyond the obvious importance of growing in the right climate, where you plant your camellia in the landscape also plays a big role in its success. Camellias will grow and bloom best when planted in partially shady locations.
Camellias tend to suffer when they have to deal with the hot, scorching afternoon sun. For best results, find a location that receives sun in the morning or early evening, and not in the middle of the day. This allows their roots to stay cool, which, in turn, allows them to keep moisture in.
In addition, avoid planting near sources of extreme heat such as a brick wall that can retain daytime heat, or near vents or air conditioners that give off large amounts of heat and air.
Finally, when it comes to location, you need to select an area with soil that is slightly on the acidic side. Camellias will not grow well in alkaline soil, and they certainly won’t bloom well either.
Check the soil PH before planting with a PH tester. For optimum growing conditions, the soil needs to have a PH of 5.5 to 6.5.
If the soil tests higher and more to the alkaline side, amend with peat moss or an acid tone soil conditioner. This little bit of work now can pay off with big dividends come bloom time!
Another big key to long term success is properly planting camellias from the start. The first key to planting is selecting the right time to plant, and that all depends on how warm your climate is.
For warmer climates (zones 8, 9 & 10), planting should occur in the fall. This allows the camellia to spread it roots without heading right into a hot summer. For the cooler zones of 6 and 7, spring planting is the better choice.
This allows the roots to become established over the summer, providing more protection by the time winter rolls back around.
Next on the list for planting success is planting your camellia at the right height. When a plant is set into the ground, the top of the root ball needs to be two to three inches above the surrounding soil.

When planted too deep in the soil, the roots of camellias will struggle to grow and take hold. Deep planting can also result in plants becoming water-logged in periods of excessive wetness.
Dig your planting hole to twice the width of the container and equal to it’s depth. When planting, amend the soil with a good quality acidic soil conditioner to help loosen and fortify the dirt. Set the root ball in the hole, making sure the root ball is a few inches above the soil line.
This is the perfect time to water the root ball well. Next, back fill in around the roots, sloping the dirt up slightly to the base of the plant. Finish by applying no more than two inches of mulch around the plant to help regulate the soil temperature.
Newly planted camellias should be watered frequently when adequate rainfall is sparse. To check soil for moisture, stick your finger or a moisture meter down a few inches into the soil. If it is dry to this point, it is time to water.


For young plants, watering once a week is usually sufficient. For bushes two to five years old, it is still important to keep them well hydrated, especially in extremely dry conditions. Without adequate water, not only is their health compromised, so is their bloom cycle and intensity.
Bushes that are older than five years tend to be fairly drought tolerant and rarely require supplemental watering. That is, of course, unless extreme drought becomes an issue.
If there is one task that can really make for bigger and better blooms for camellias, it is fertilizing. Camellias use a lot of nutrients from the soil. Because of that, the nutrients need to be replaced to continue to provide nourishment for the plant to bloom.
Camellias should be fertilized every year about four to six weeks after they complete their bloom cycle. This allows the nutrients to be available as the shrubs begin to grow their new buds for the following year’s flowers.
Use a good quality fertilizer such as Dr. Earths Acid Lover Fertilizer that is made specifically for camellias, azaleas and other acid loving plants.


Avoid fertilizing shrubs in late summer or early fall as this will promote tender, new growth that can easily be damaged through the winter months.
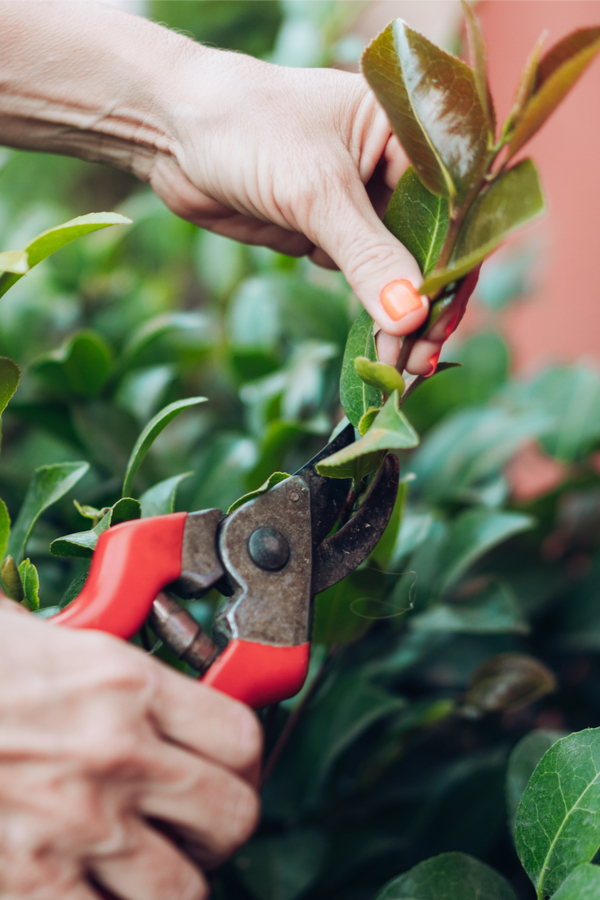
Keeping your camellias in tip top shape with a bit of pruning each year can also help to keep plants blooming. When pruning camellias, it all starts with selecting the right time to cut and shape.
The best time to prune a camellia is just after it has finished blooming. Begin by removing any old blooms that are lingering, and cut out dead or diseased wood.
Next, trim out a few branches on the inside of the shrub to help open it up a bit. This allows light and air to the plant, and will help encourage new growth.
When removing or shaping branches, cut back to just above the previous year’s growth. This will allow the branch to develop more shoots for a fuller, more robust bush, and more blooms!
So if you happen to live in a warmer climate suited for camellias, make this the year you fill your landscape with incredible blooms from an incredible plant!
Follow Our Facebook Page For Great Gardening Tips And Advice! This Is My Garden Facebook Page
This Is My Garden is a garden website created by gardeners, for gardeners. Jim and Mary Competti have been writing gardening, DIY and recipe articles and books and speaking for over 15 years from their 46 acre Ohio farm. They publish three articles every week, 52 weeks a year. Sign up today to follow via email, or follow along!
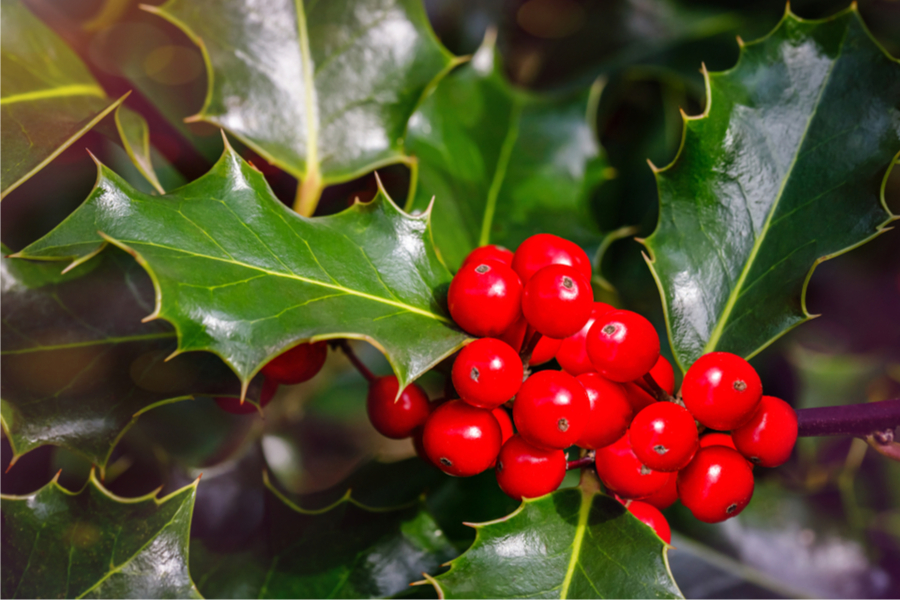
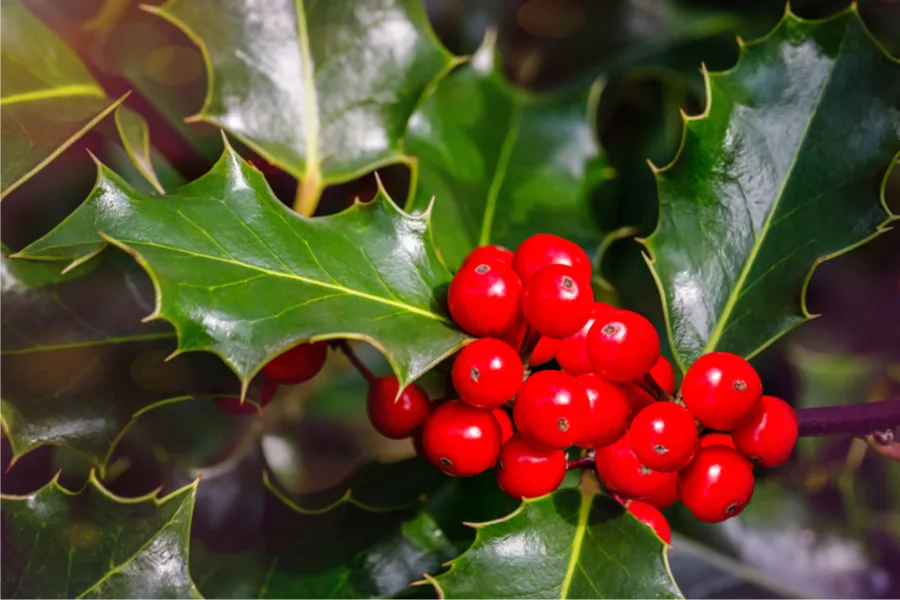
One of the best ways to add lasting winter color to your landscape is by planting and growing the American Holly bush.
The American holly bush variety is often referred to as Christmas holly. This is of course due to its festive glossy green foliage and bright red berries that are on full display through the winter months and holiday season.
In fact, freshly cut holly is perfect for making beautiful wreaths, garland and many other Christmas decorations. And it’s just one more reason to have it growing in your backyard for an everlasting supply!

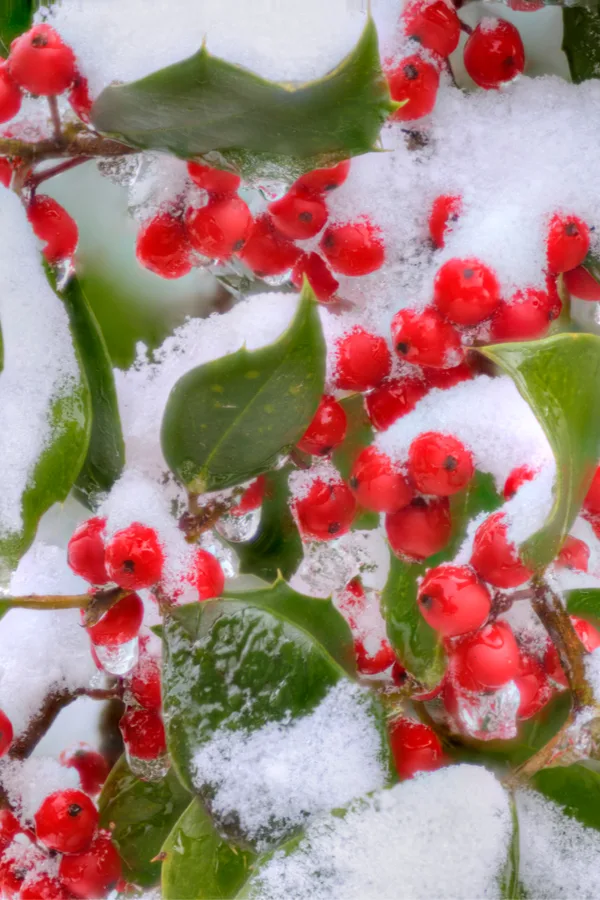
The good news with holly is that it is easy to grow. With a hardiness from growing zones 5 through 9, it can thrive in a wide range of locations. Even better, the bush can grow in full or partial sun, making it a good fit for almost any landscape.
There are a couple of key things to know and consider before planting American Holly. For starters, if you want your holly to produce those lovely red berries, you need to purchase a female plant -and a male plant as well.
Holly bushes are dioecious plants. In short, that means that each plant is either a male or female. Because of that, each sex of each plant has different characteristics.


In the case of a holly bush, only females can produce berries. Meanwhile, the males produce the pollen that helps those berries to form from the female flowers.
For berry production to occur, a male holly bush must be planted to grow within a maximum distance of fifty (50) to one-hundred (100) feet of the female bush. This allows for pollinators (bees are the main pollinator) to carry the male pollen to the female flowers.
One final note on the berries, they are slightly toxic to pets and humans if accidentally ingested. On the other hand, they also happen to be great source of food for bluebirds, robins and other birds, especially in the winter.
American holly can grow to be quite large without pruning. A native to the eastern and central states, it will grow to 30 feet and taller in woodland settings.
Often referred to as a holly “tree” instead of a bush, the American holly grows in a conical shape. It actually grows much like a pine tree, making it is easy to see how the term tree is used.
Holly can however be pruned quite easily to grow as a hedge, rounded shrub, or as individual bush within the landscape. When purchasing, there are quite a few varieties of American holly to select from.
Within the American Holly range, you will find varieties that grow from just a few feet in height all the way up to large, massive tree-like varieties. (See links below for specific examples of each)
The dwarf varieties are perfect for using as a low hedge planting, or as a focal point in smaller flowerbeds. It is still important to order male and female plants if berries are desired with any variety.
Although they can handle partial shade, when it comes to growing holly, the sunnier the location, the more fuller the canopy will grow.
If planting in a shady area, try to locate the plant so that it receives mid day sun for best growth habits. Again, it will still grow well in partially shady areas, it just won’t be as robust and full.


As for soil, holly is quite tolerant of most soil conditions as long as the PH leans toward the acidic side. A soil PH between 4.0 and 5.5 is the ideal range for growing holly bushes.
If your soil is more alkaline, you will definitely want to amend it before planting. Adding sphagnum peat moss will help lower PH, as will using a good acidic soil conditioner.
In addition to creating the right PH for your holly bush, it is important to make sure the soil will drain well. Loose soil is far better than hard, clay-pan dirt. Most soil conditioners will help to loosen soil, but you can also add perlite or vermiculite to help add drainage as well.
Dig your planting hole twice the diameter of your container, and one and a half times the depth. Plant your bush so that the base of the plant is level or barely above the final soil line.
Planting holly in a divot or soil depression can lead to too much water around its roots. Water the plant in well at planting time, and continue to water weekly for the first few months.

Once established, holly will rarely if ever require watering unless extreme drought condition persist. As for when to plant, late fall, late winter and early spring are the best choices.
A holly bush is truly a low-maintenance plant. In addition to rarely requiring water after establishing, it also requires little to thrive and survive.
To add vitality and vigor, apply an acid loving fertilizer in the early spring. This will help as the plant produces its flower set heading into late spring and summer. Do not fertilize holly in the fall as it can produce tender, vulnerable growth right before the cold of winter sets in.
All that is left is pruning your holly for the shape you want. As mentioned, holly can be pruned to take nearly any shape. The key to pruning success is all about timing.
Holly should be pruned when the plant is dormant in mid to late winter. Pruning in the spring and summer can put undo stress on the plant. It can also cut down severely on blooms, flowers and berries.
For more on evergreen planting, check out our article on 4 Great Evergreens To Plant. Here is to planting and growing American Holly bushes in your landscape this year!
Follow Our Facebook Page For Great Gardening Tips And Advice! This Is My Garden Facebook Page
This Is My Garden is a garden website created by gardeners, for gardeners. Jim and Mary Competti have been writing gardening, DIY and recipe articles and books and speaking for over 15 years from their 46 acre Ohio farm. They publish three articles every week, 52 weeks a year. Sign up today to follow via email, or follow along!