There is nothing more sinister to a gardener than the sight of weeds! Here are some of our best tips and tricks for combating weeds:


There is nothing more sinister to a gardener than the sight of weeds! Here are some of our best tips and tricks for combating weeds:
Looking for a few simple remedies to eliminate dollarweed from your landscape?
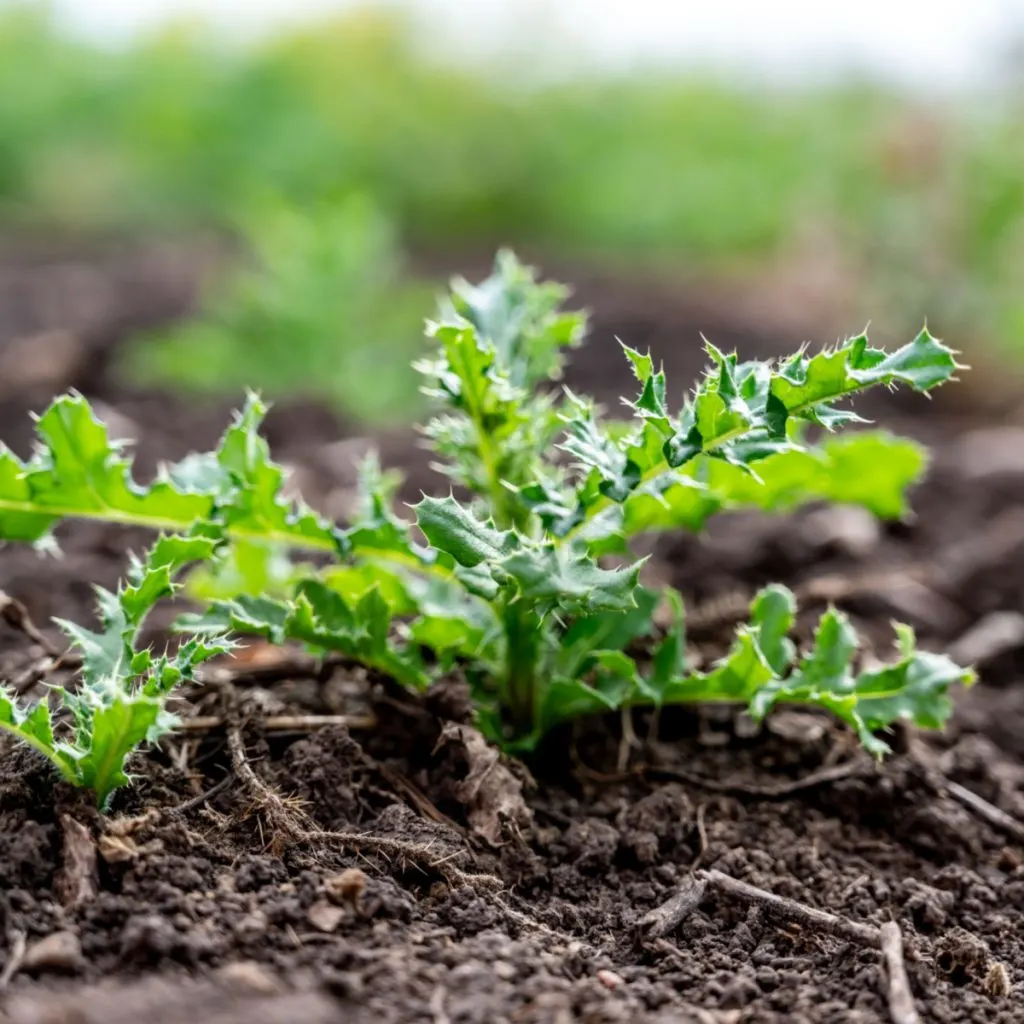
Dollarweed is a weed that seems to appear overnight – and then spread everywhere before you realize what is happening. It pops up in flowerbeds, garden rows, walkways, and even raised beds, often forming thick mats that crowd out flowers and vegetable plants.
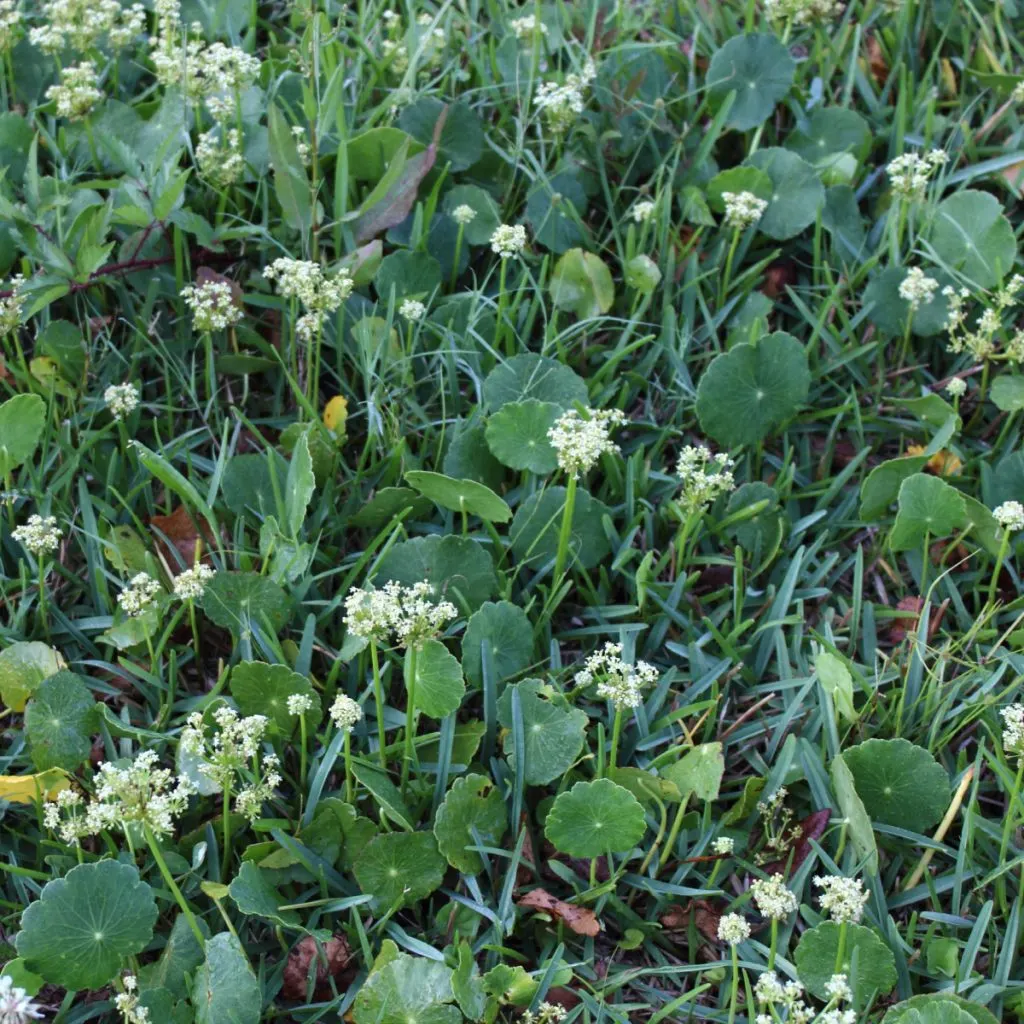
Although it looks harmless at first, dollarweed can quickly become invasive if left unchecked. Dollarweed, also commonly known as pennywort, gets its name from its small, round, coin-shaped leaves that grow on thin stems. While some types of dollarweed are grown intentionally in water gardens, the variety that invades lawns and garden beds is anything but welcome.

So what is the key to stopping it from growing in your beds? It all starts with understanding what dollarweed is, why it appears, and how it spreads. The good news is with a combination of better soil conditions, natural removal methods, and proper mulching, you can all but eliminate it from your landscape.
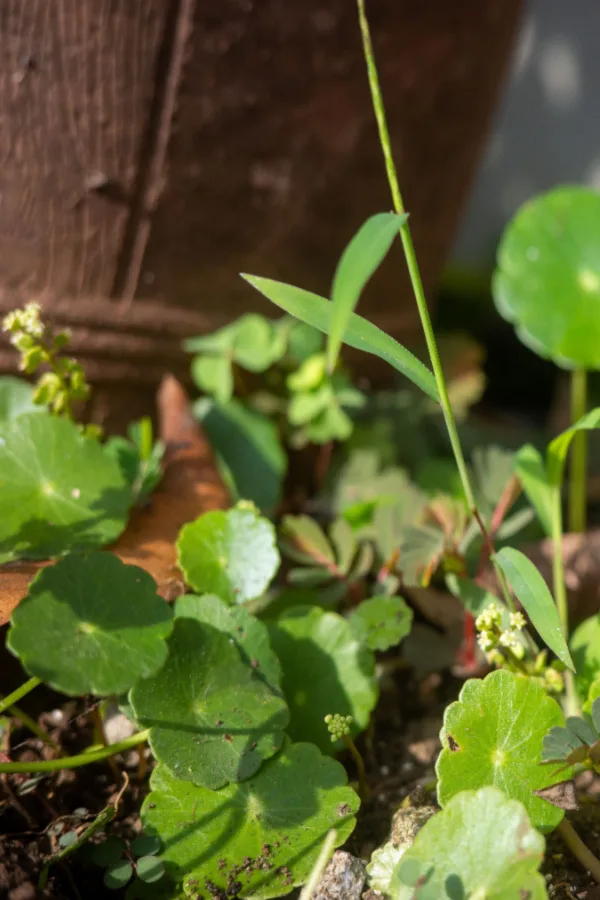
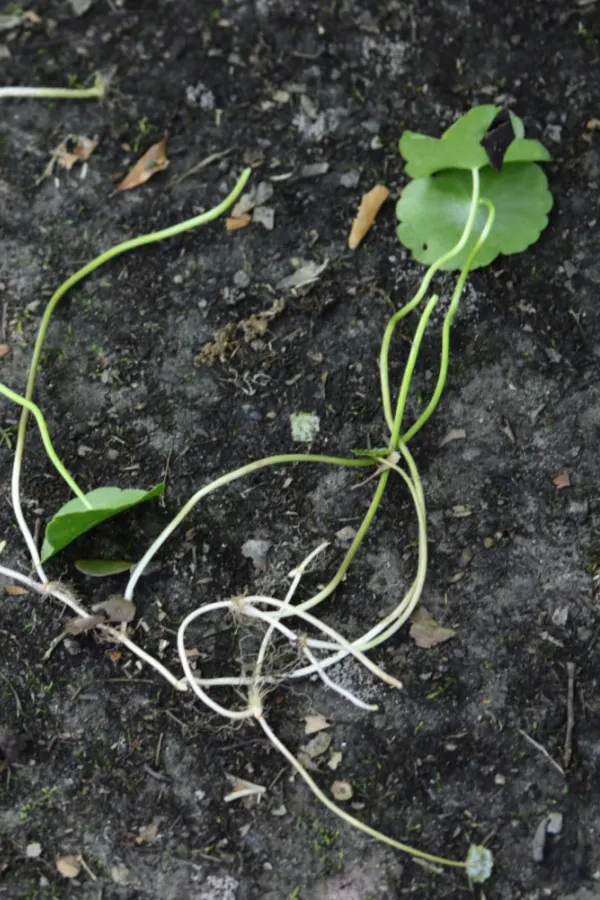
Dollarweed is a low-growing perennial weed that spreads by both seeds and creeping underground stems called rhizomes. Once established, it forms dense clusters that can quickly take over open soil. Its leaves are round, smooth, and bright green. They often grow in clusters that resemble small lily pads.
Unlike many weeds that thrive in dry, neglected soil, dollarweed prefers moist environments. It’s most commonly found in areas where the soil stays consistently wet or compacted. This is why it often appears in flowerbeds, low spots in gardens, and raised beds with poor drainage.
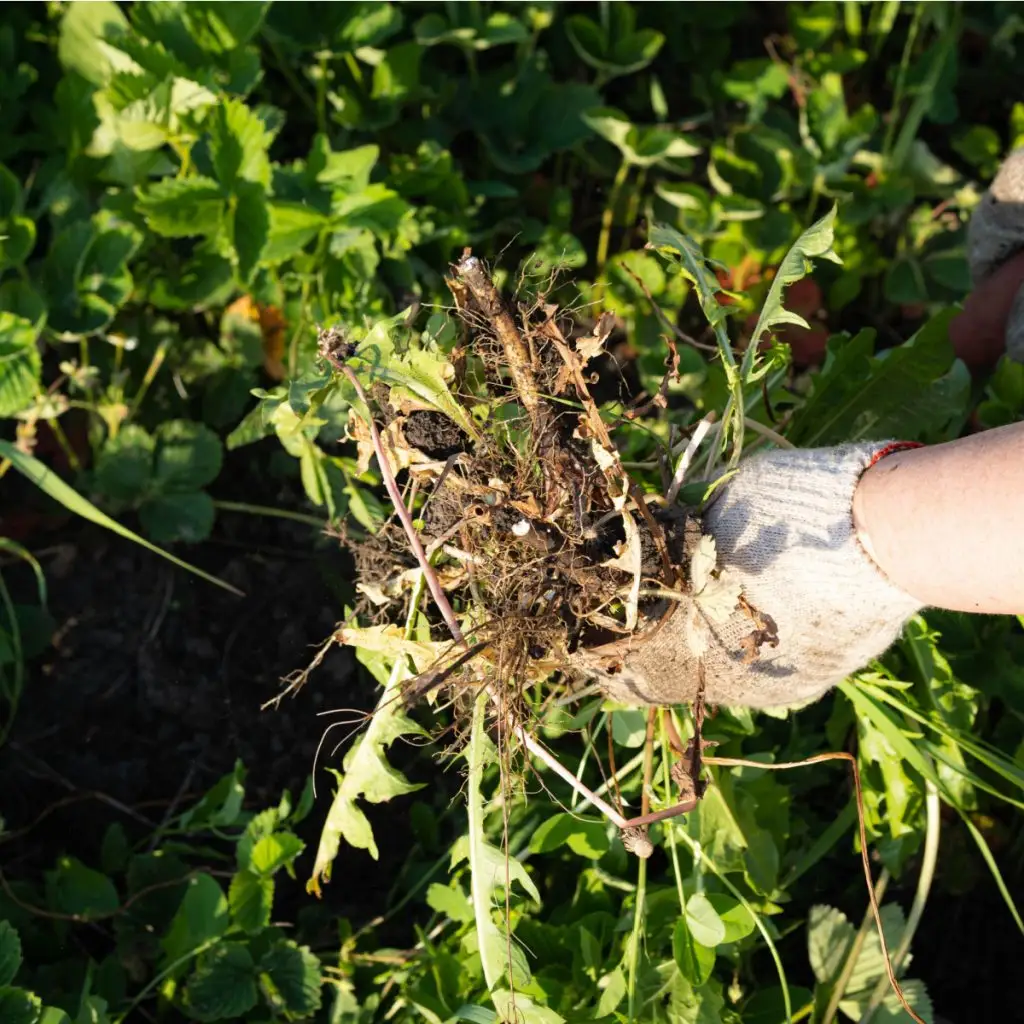
Because dollarweed spreads underground, simply pulling the visible leaves is rarely enough. If even small portions of the roots or rhizomes are left behind, the plant can regenerate and return stronger than before.

Dollarweed is on the invasive list because of how quickly it spreads and how difficult it can be to remove once established. The plant grows aggressively during warm weather. It then devours the water and nutrients that flowers and vegetables need to thrive.
One of the biggest reasons dollarweed becomes such a problem is its ability to thrive in conditions that many garden plants struggle with. Wet, compacted soil creates the perfect environment for dollarweed, allowing it to spread while other plants weaken.
Once dollarweed takes hold, it can form thick mats that block sunlight from reaching the soil surface. This makes it harder for seeds of desirable plants to germinate and grow. Over time, flowerbeds and gardens can be overtaken by dollarweed if action is not taken early.
One of the most important things to understand about dollarweed is that its presence is often a warning sign. Dollarweed does not usually appear randomly. In most cases, it indicates that the soil is staying too wet for too long.
Poor drainage is one of the most common causes. Soil that is heavy with clay or compacted from foot traffic holds water instead of allowing it to drain away. Raised beds that lack proper drainage holes or have dense soil mixes can also trap moisture, creating ideal conditions for dollarweed.


Overwatering can make the problem even worse. Frequent watering, especially in shaded areas, keeps the soil consistently damp and encourages dollarweed to spread rapidly. With that said, improving drainage and loosening the soil is the biggest key. It truly is the most effective long-term solution for eliminating dollarweed.
But if you do have dollarweed already in your beds, you also need to eliminate it first. The good news is you can do so with a few simple approaches.
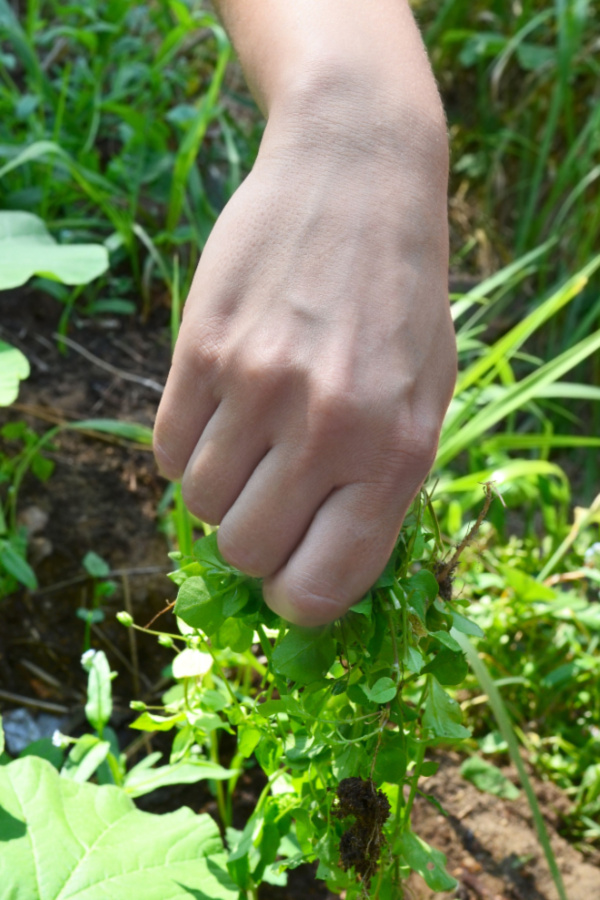
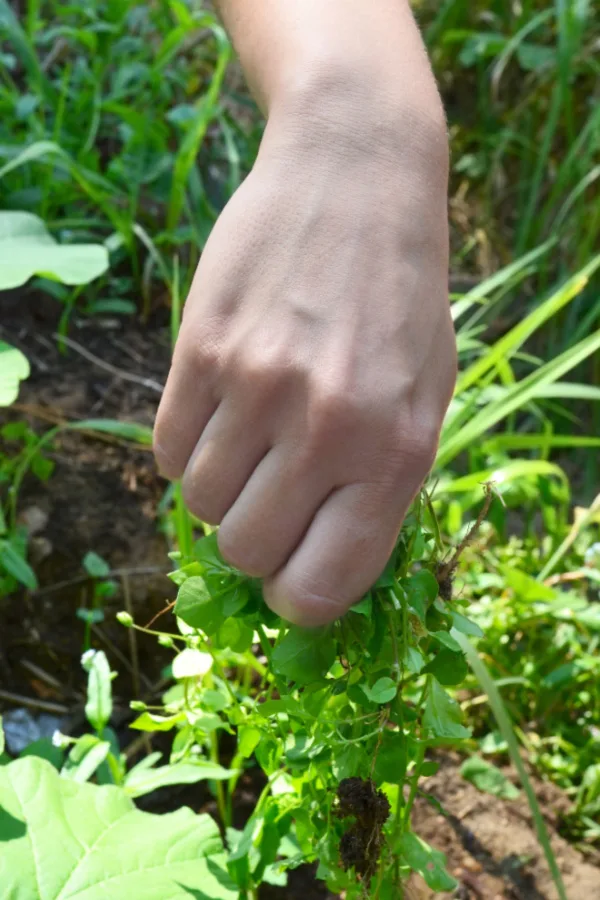
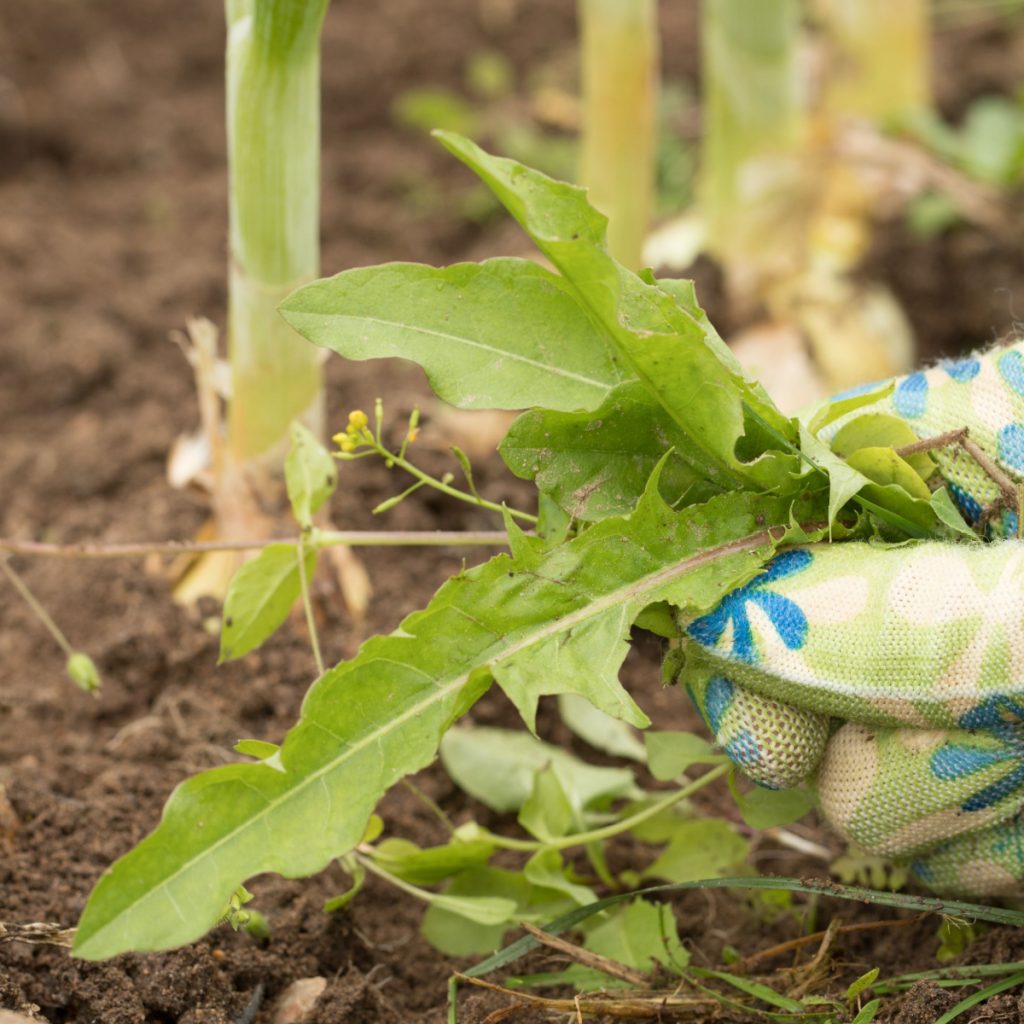
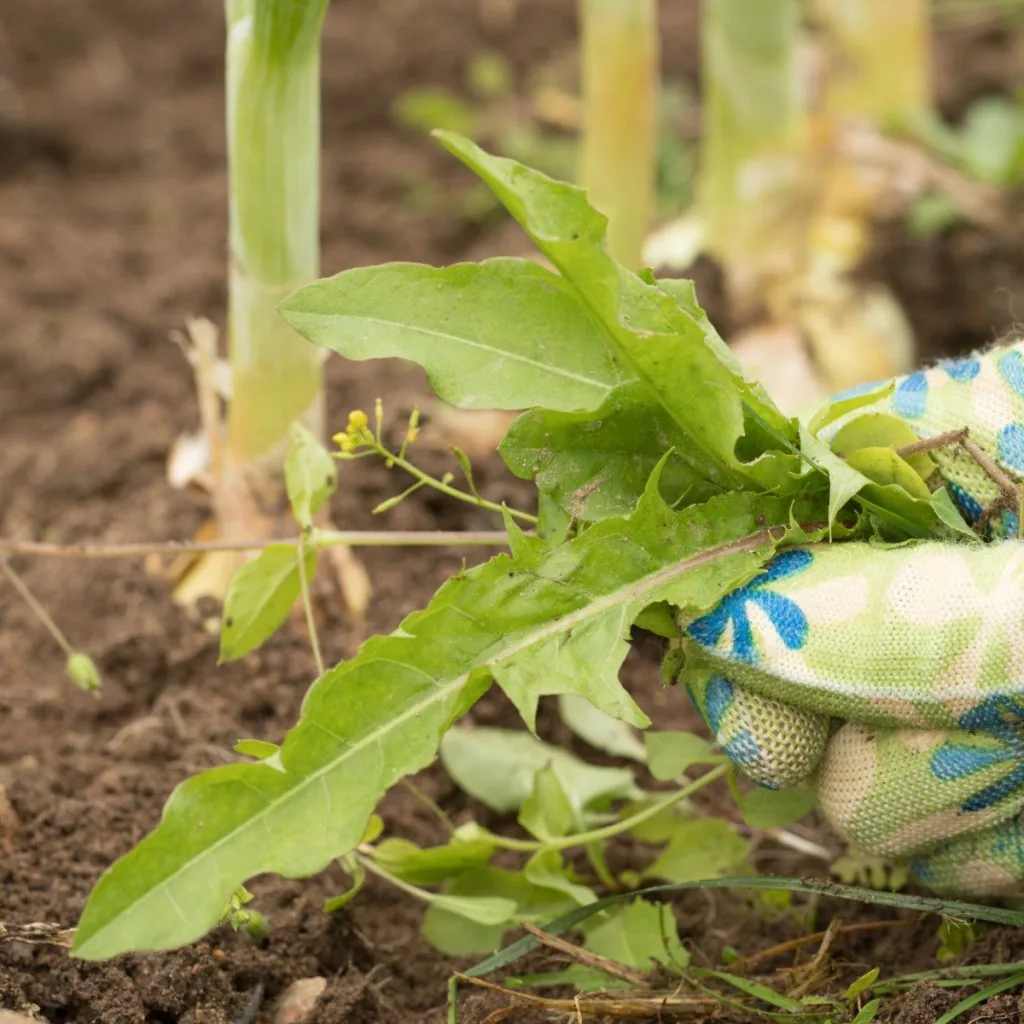
Hand pulling is the best approach for small infestations, but you need to do it carefully. Simply snapping off the leaves will not solve the problem, as the roots and rhizomes will remain in the soil.
The best time to pull dollarweed is when the soil is slightly moist but not saturated. This makes it easier to remove the entire root system. Using a hand weeder or garden fork can help loosen the soil around the plant, allowing the roots to come out more cleanly.
Every piece of the plant should be removed and disposed of properly. Leaving pulled dollarweed on the soil surface can allow it to re-root, especially in damp conditions. Keep an eye on the soil after pulling it out. Any new growth should be pulled as soon as it appears to prevent the plant from spreading further.

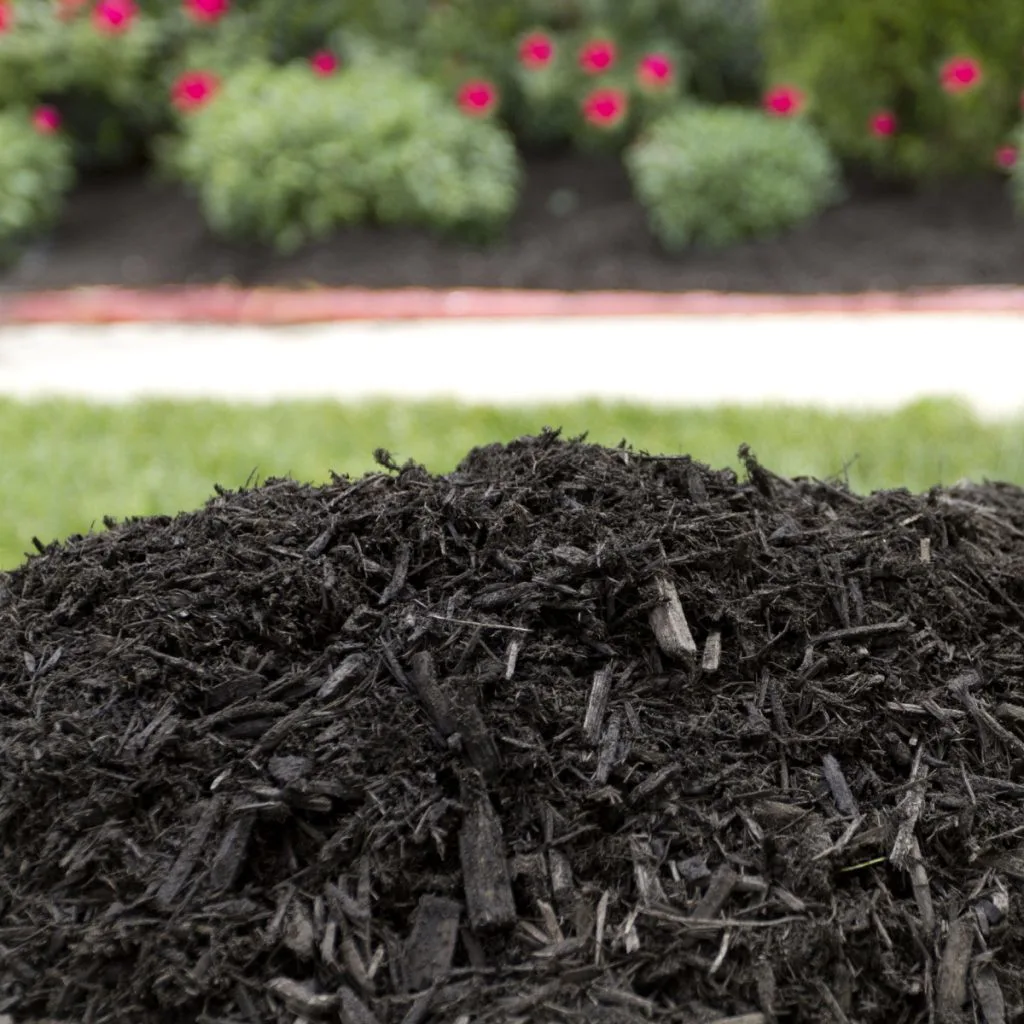
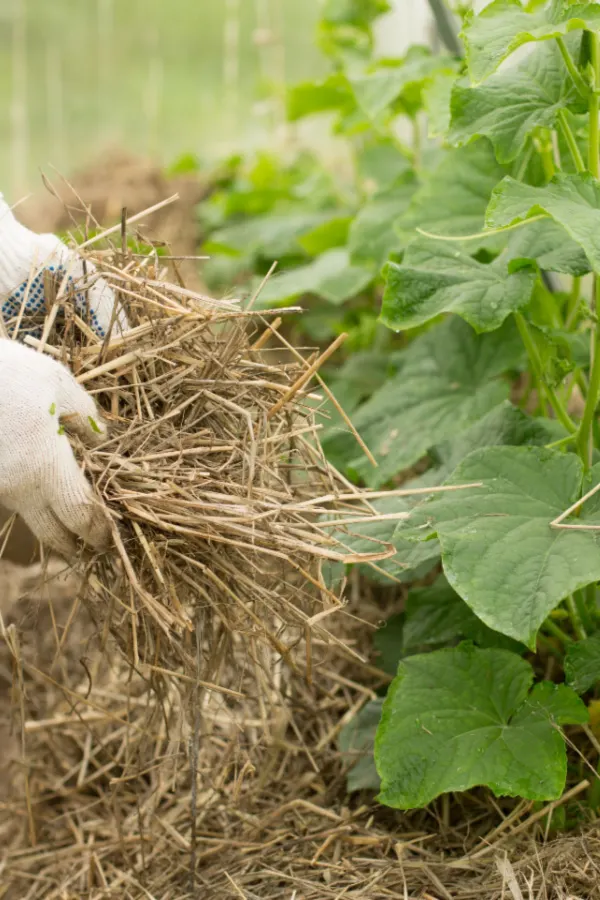
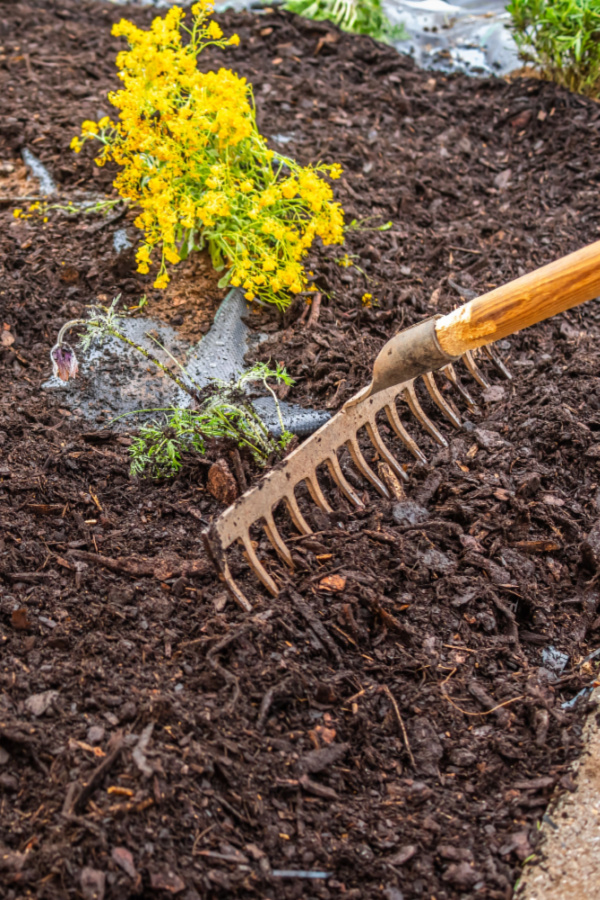
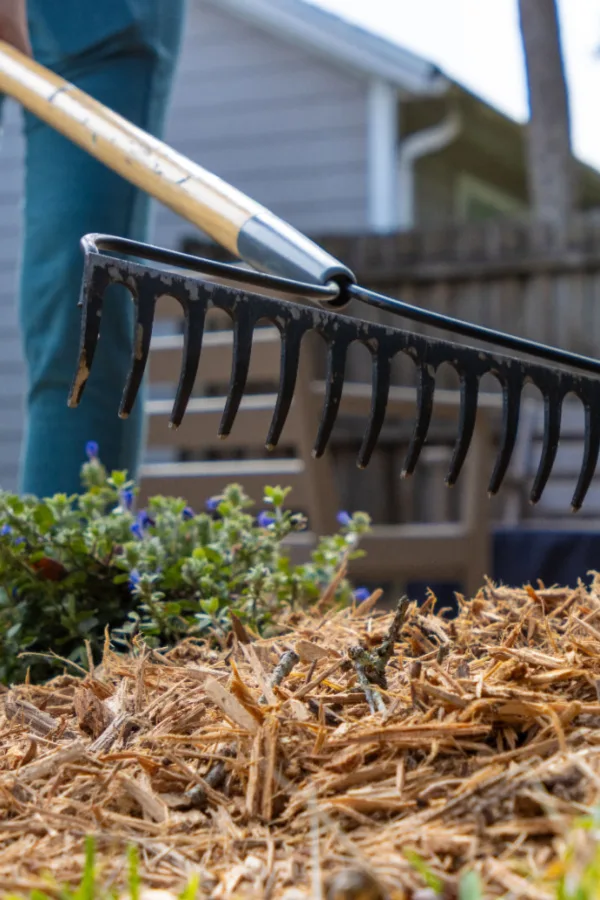
One of the most effective natural methods for eliminating dollarweed is heavy mulching. Dollarweed needs light to grow, and a thick layer of mulch can block sunlight and prevent new growth from emerging.
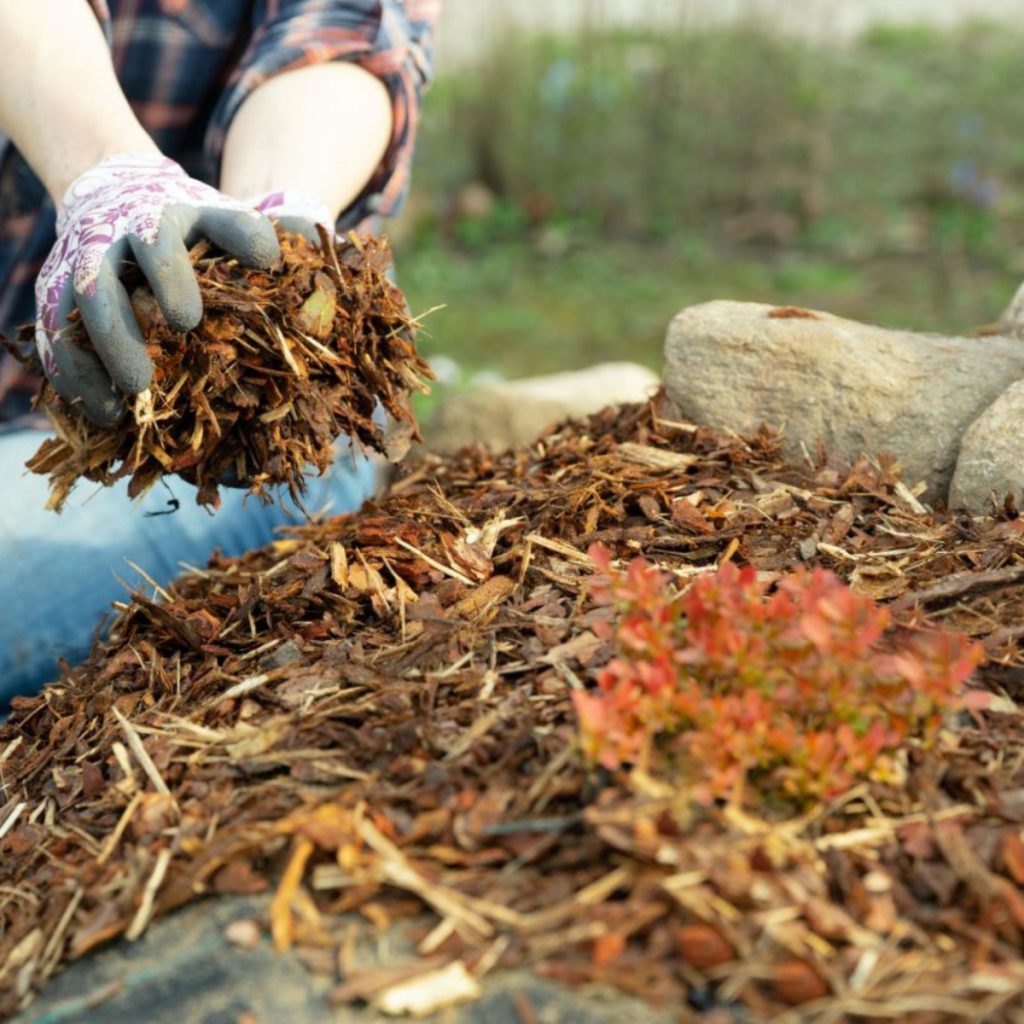
Organic mulches such as shredded bark, straw, wood chips, or shredded leaves work especially well. A mulch layer of four to six inches is usually enough to smother existing plants and prevent seeds from germinating.
Before applying mulch, remove as much of the visible dollarweed as possible. This gives the mulch a better chance to fully suppress regrowth. Once down, make sure to keep the thickness to at least four inches to maintain the effectiveness.
Mulch also helps regulate soil moisture by preventing excess evaporation while still allowing water to drain properly. Over time, this creates healthier soil conditions that are less favorable to dollarweed.
For heavily infested areas, sheet mulching can be an effective solution. This method involves placing thick layers of cardboard directly over the soil to block light and smother weeds.
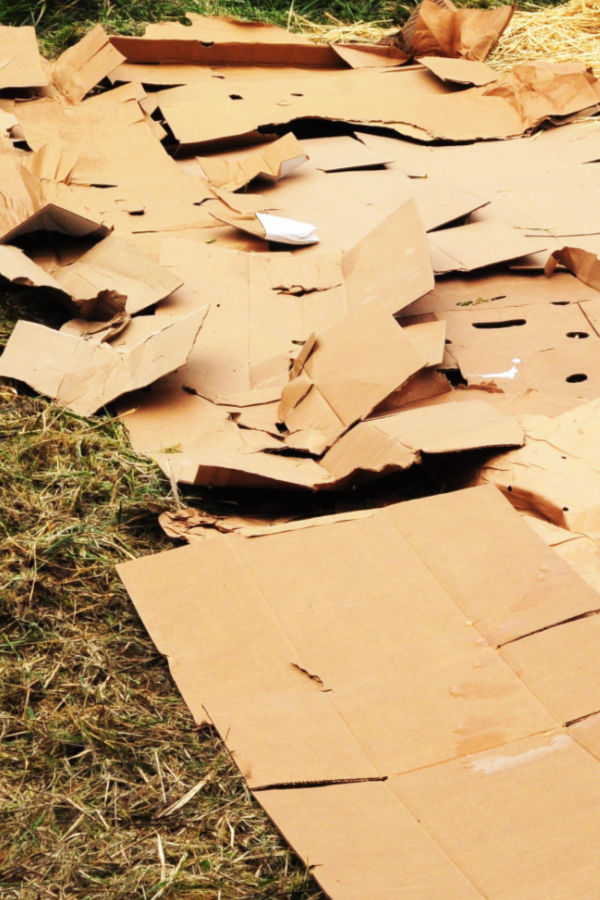

After removing large dollarweed plants, lay cardboard flat over the affected area. Overlap edges to prevent gaps where light can reach the soil. Then cover the cardboard with several inches of mulch to hold it in place and improve appearance.
This method works well in flowerbeds and garden paths and can be especially helpful when starting fresh in problem areas. Over time, the cardboard breaks down and adds organic matter to the soil. See our article: How To Eliminate Flowerbed Weeds With Cardboard – And Have Beautiful Beds!
Planting a fall cover crop is a simple and effective way to snuff out dollarweed in gardens and raised beds. Dollarweed loves bare, wet soil, and a cover crop quickly fills that space. As the cover crop grows, it shades the soil and blocks sunlight, making it difficult for dollarweed seeds to sprout and spread.
Cover crops also help fix one of the main causes of dollarweed – poor drainage. Plants like oats, rye, and clover loosen compacted soil with their roots, allowing excess water to drain away instead of sitting on the surface. Drier, better-drained soil creates an environment where dollarweed struggles, but garden plants thrive.
When the cover crop is cut down in spring, it leaves behind a natural mulch. This mulch continues to smother weeds while improving soil health. Over time, planting a fall cover crop can greatly reduce dollarweed and help keep it from returning.
Once dollarweed is under control, prevention becomes the focus. Healthy, well-drained soil is the best defense against future infestations. Regularly adding organic matter helps maintain loose soil structure. Keeping beds mulched year-round prevents bare soil, which is an open invitation for weeds to take hold.
Inspect flowerbeds, gardens, and raised beds regularly. Catching new dollarweed plants early makes removal much easier and prevents them from spreading underground. Here is to taking the steps need to eliminate dollarweed from your garden and flowerbeds this year!
Follow Our Facebook Page For Great Gardening Tips And Advice! This Is My Garden Facebook Page
This Is My Garden is a garden website created by gardeners, for gardeners. Jim and Mary Competti have been writing gardening, DIY and recipe articles and books and speaking for over 15 years from their 46 acre Ohio farm. They publish three articles every week, 52 weeks a year. Sign up today to follow via email, or follow along!
Looking for a few simple tips to get rid of all of that chickweed that’s appearing in your flowerbeds this fall and winter? And how to keep it out for good?
Chickweed might look soft and harmless at first glance, but anyone who has battled it in their flowerbeds knows just how persistent this little plant can be. It spreads fast, grows in thick mats, and takes advantage of cool temperatures in a way that makes fall and winter one of the most important times to stay ahead of it.
The good news? Getting rid of chickweed doesn’t have to involve chemicals or complicated methods. In fact, with a little understanding of how this weed grows and what helps it thrive, you can eliminate it naturally and set your flowerbeds up for a much better spring.

Chickweed is a cool-season annual weed. That means it grows best when the rest of the garden is slowing down. While most weeds wait for warmer weather, chickweed begins to germinate in late fall and can continue to sprout throughout the winter whenever temperatures rise just a little and the soil remains moist.
Because of its growth pattern, many gardeners think it only shows up in early spring. The truth is, by the time you see it then, most of it has already been growing for months underneath fallen leaves, mulch, or open soil.
And that is exactly why tackling chickweed in fall and winter is so important. Once you understand what chickweed is, how it spreads, and what natural methods work best against it, you can finally stop it from overtaking your flowerbeds each year.
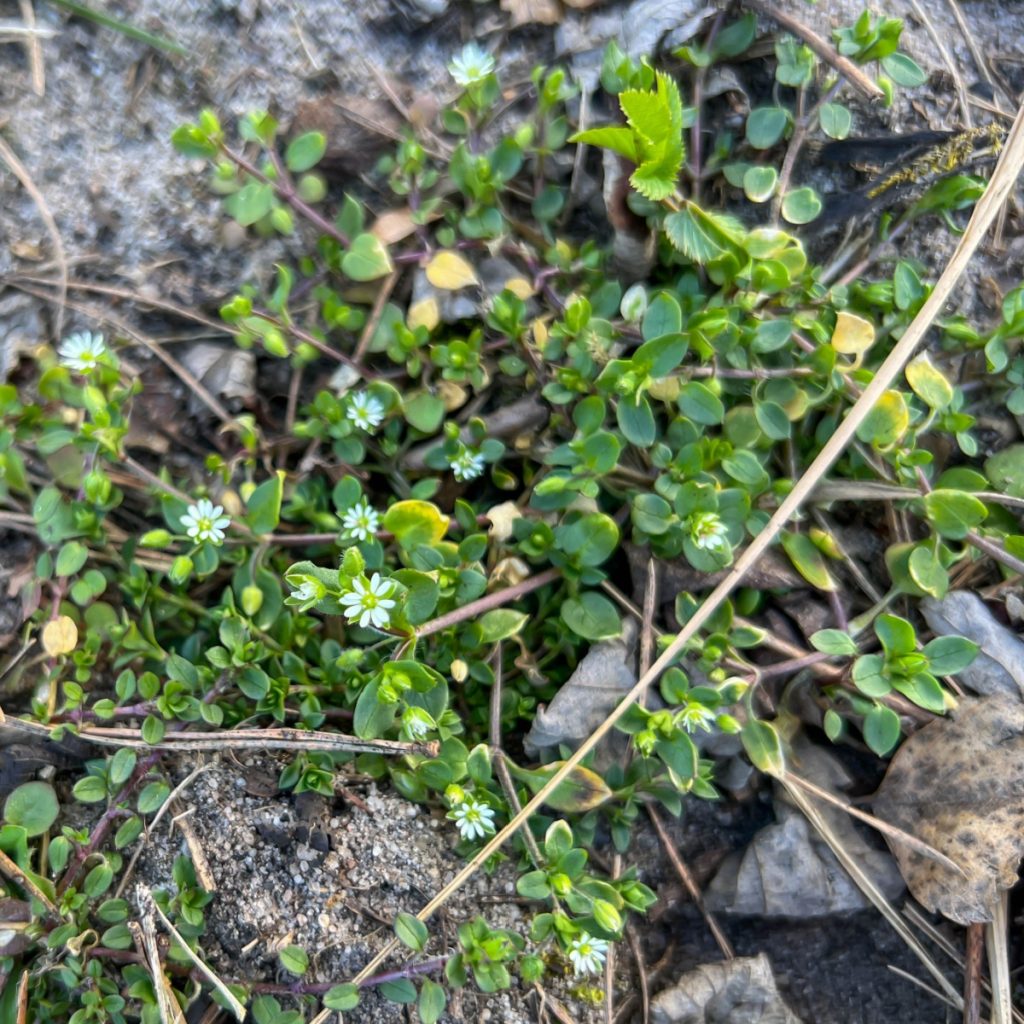
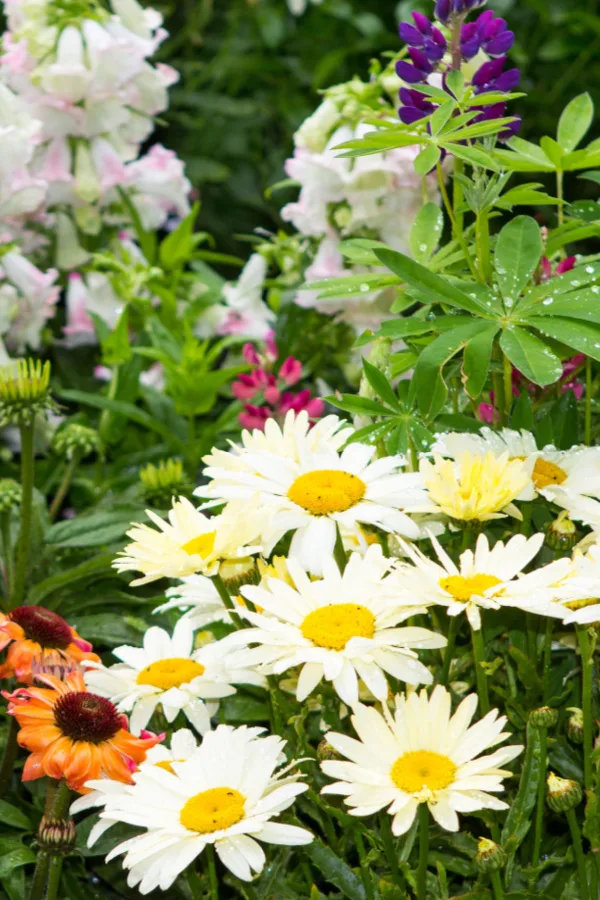
Chickweed is a low-growing weed that forms dense mats of bright green leaves and tiny white flowers. It prefers cool, damp conditions, which is the opposite of many other common annual weeds.
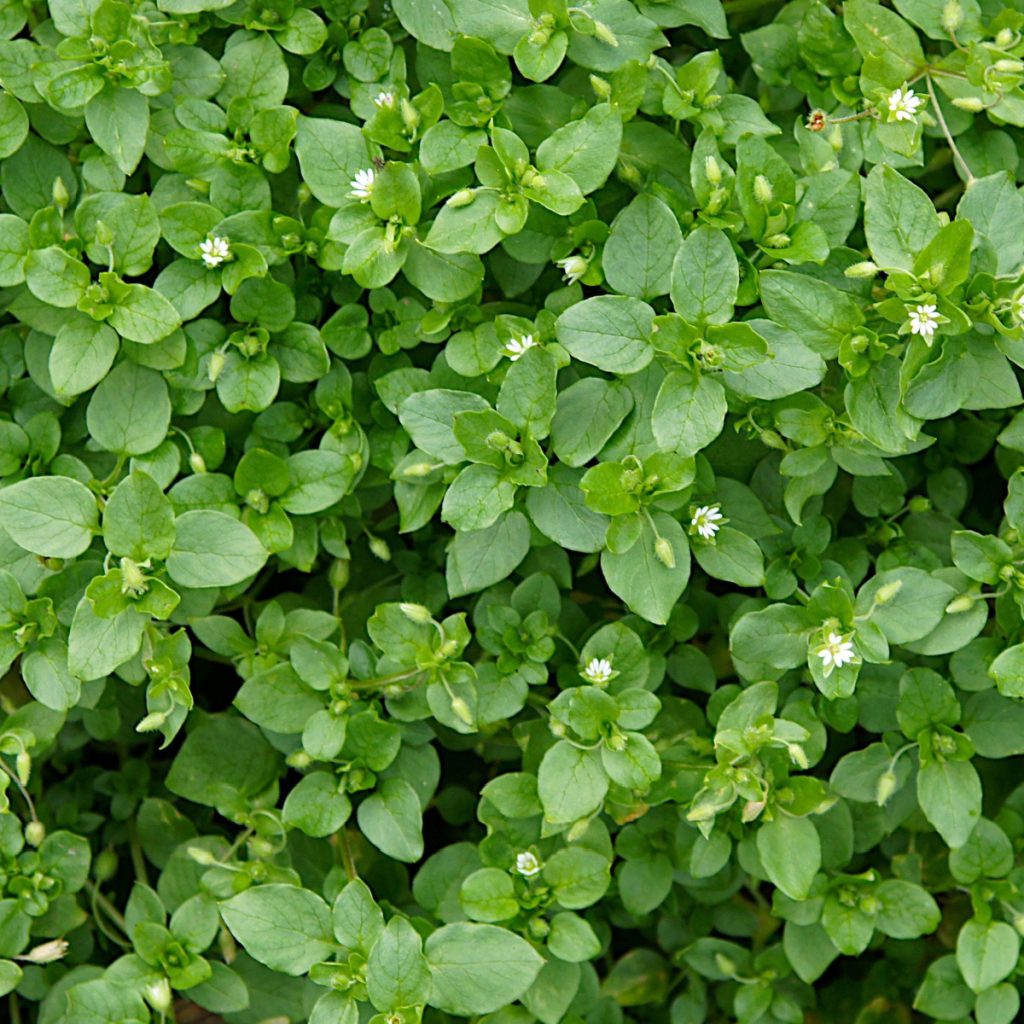
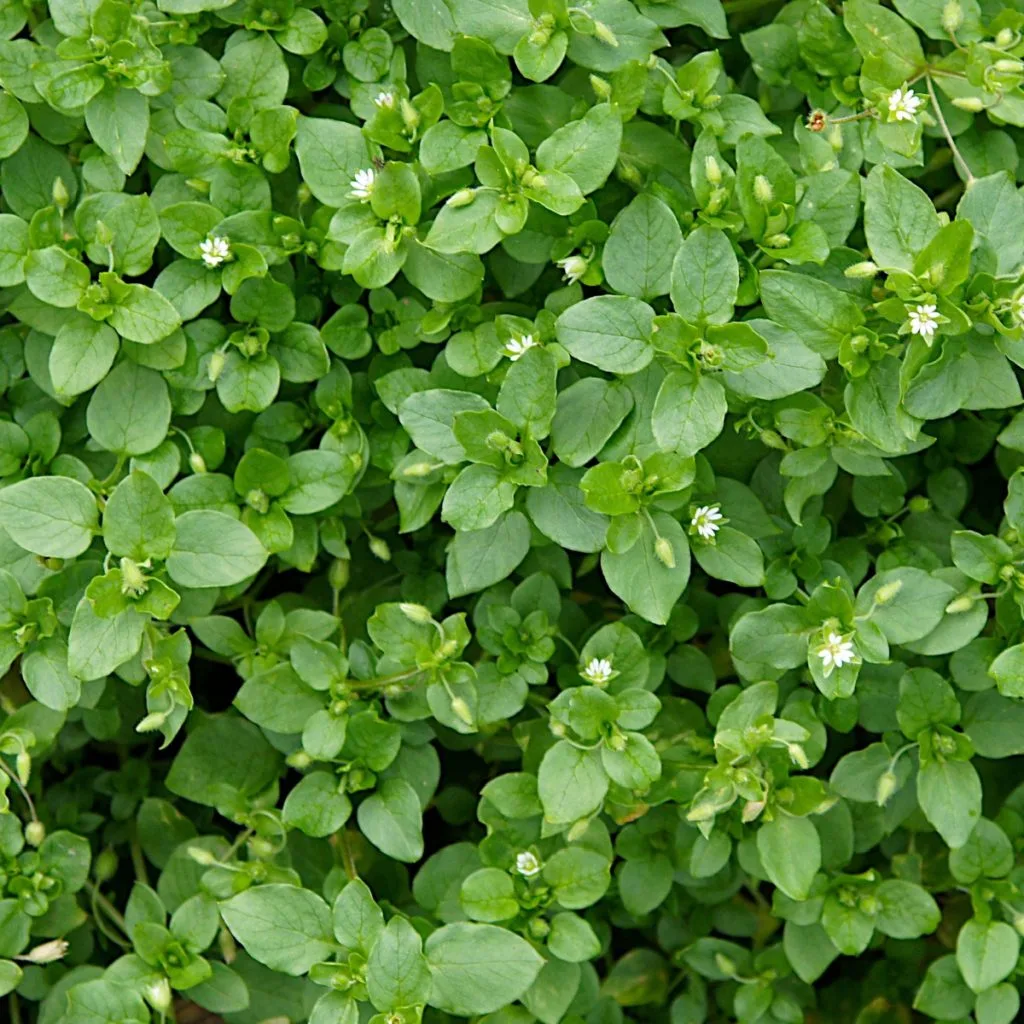
There are two common types: common chickweed and mouse-ear chickweed. Both behave similarly, but common chickweed is usually softer and forms thicker mats. Mouse-ear chickweed tends to have slightly fuzzier leaves.
The reason chickweed is so tough to control is because it germinates and spreads in conditions when most gardeners aren’t paying much attention to their flowerbeds. Once fall arrives and the weather turns chilly, chickweed seeds start sprouting. And it can keep growing all winter long as long as the ground isn’t frozen.
Chickweed seeds can also lay dormant in your soil for years. Those seeds drop into flowerbeds, get buried by mulch, and wait for the cool, moist conditions that fall and winter provide. And because chickweed grows low and stays low, light layers of mulch or leaves often aren’t enough to stop it.
Chickweed spreads in three major ways: seeds, rooted stems, and mat-like growth. The seeds are the biggest long-term problem because each plant produces so many.
But chickweed also spreads through its stems. If a stem touches the soil, it can root. This can lead to new plants forming all along the edges of a small patch. Before you know it, that patch can double or triple in size. Because the plant grows close to the ground, it hugs the soil and avoids frost damage that often harms other weeds.
Another reason chickweed gets out of control is that it loves disturbed soil. Anytime the soil is exposed, whether from weeding, digging, raking, or a light layer of mulch blowing away, chickweed sees an open opportunity. Weed seeds thrive on bare soil, and chickweed is especially good at taking advantage.
By the time spring arrives, the compact green mat you see is usually the end result of months of growth. That is why it’s so important to address chickweed during the fall and winter when it’s most vulnerable.
Although chemical sprays exist for chickweed, they often fail for two main reasons. First, sprays have a hard time penetrating the thick mats the weed forms. Second, cool weather reduces the effectiveness of many herbicides. That makes fall and winter the worst time to rely on chemicals to get rid of chickweed.
Natural methods, on the other hand, work with the seasons. Chickweed may be persistent, but it has weaknesses. It cannot handle heavy layers of organic mulch, consistent bed coverage, or disturbed roots that are pulled up entirely. It also struggles when beds remain well-mulched and the soil is not exposed.
What makes natural control effective is the fact that chickweed has such a shallow root system. It grows fast, but the roots do not dig deep. They sit close to the surface and pull up easily when the soil is moist. That makes hand removal, smothering, and mulching highly effective options during fall and winter.
One of the easiest and most effective ways to eliminate chickweed is simply pulling it out by hand. Because it has a shallow root system, chickweed comes up easily when the soil is damp. Cool, wet fall and winter days are perfect for pulling it. Grab the plant at the base and pull gently. The entire root system often comes out in one motion.
The key is to remove the plant before tiny white flowers appear. Once it flowers, it will quickly begin producing seeds. Even if you accidentally tear the plant while pulling, the root system is usually weak enough that it doesn’t regrow well after being disturbed.
Make sure to pull chickweed patches as soon as you spot them. Even small clumps can produce huge amounts of seed if left alone.
Mulching is one of the most powerful tools you have to get rid of chickweed. Because chickweed seeds need light to germinate, deep mulch keeps the seeds from sprouting. A two-inch layer of mulch is not enough, however. Chickweed can sometimes push right through. See: Why You Need To Mulch Flowerbeds In The Fall – How To Stop Next Year’s Weeds Now!
For fall and winter protection, apply a four- to six-inch layer of mulch in your flowerbeds, especially in open areas between perennials. Straw, shredded leaves, composted bark, wood chips, or pine needles all work well. Not only does this prevent chickweed from germinating, but it also protects your existing plants from temperature swings.
Chickweed also cannot survive being smothered. If you already have patches starting to grow, bury them under a heavy layer of mulch. This blocks light and prevents the plants from photosynthesizing. Within a few weeks, the chickweed will weaken and die back.

If you have an area with heavy chickweed pressure, place cardboard or several sheets of overlapping newspaper directly on the soil. Then cover it with mulch. This combination blocks the light and smothers the weed from above while also keeping seeds below from germinating.
This method works extremely well in fall and winter because the layers stay moist, which causes the cardboard or paper to break down slowly over time. As it decomposes, it enriches your soil while depriving chickweed of the light it needs to grow. It’s one of the simplest long-term solutions for persistent beds.
One of the biggest mistakes gardeners make is leaving soil exposed during the fall and winter months. Bare soil is an open invitation for chickweed. To stop future infestations, keep your flowerbeds covered year-round.
Add mulch, plant ground covers, or leave winter foliage from perennials in place until spring. Even a temporary cover of shredded leaves can help block seeds from germinating.
The more covered your soil is, the more likely you are to get rid of chickweed. This one step alone can drastically reduce the number of chickweed plants you see throughout the winter and early spring.
Last but not least, keep your beds as dry as you can. Chickweed thrives in moist, shaded soil. Improving drainage in your flowerbeds can make the environment far less appealing. Avoid overwatering during the fall, especially as temperatures drop.
Here is to getting rid of chickweed once and for all this fall and winter!
Follow Our Facebook Page For Great Gardening Tips And Advice! This Is My Garden Facebook Page
This Is My Garden is a garden website created by gardeners, for gardeners. Jim and Mary Competti have been writing gardening, DIY and recipe articles and books and speaking for over 15 years from their 46 acre Ohio farm. They publish three articles every week, 52 weeks a year. Sign up today to follow via email, or follow along!
Did you know that one of the best things you can do for your flowerbeds to stop weeds is to never use landscape fabric?
Keeping weeds out of flowerbeds and landscaped areas is something that every gardener wants. No one enjoys pulling weeds again and again all summer long. Because of that, it can be very tempting to use landscape fabric as a weed-blocking solution.
Many stores advertise landscape fabric as a one-time fix. Install it once, cover it up with mulch or stones, and enjoy a weed-free garden forever. Unfortunately, that promise simply does not hold true!
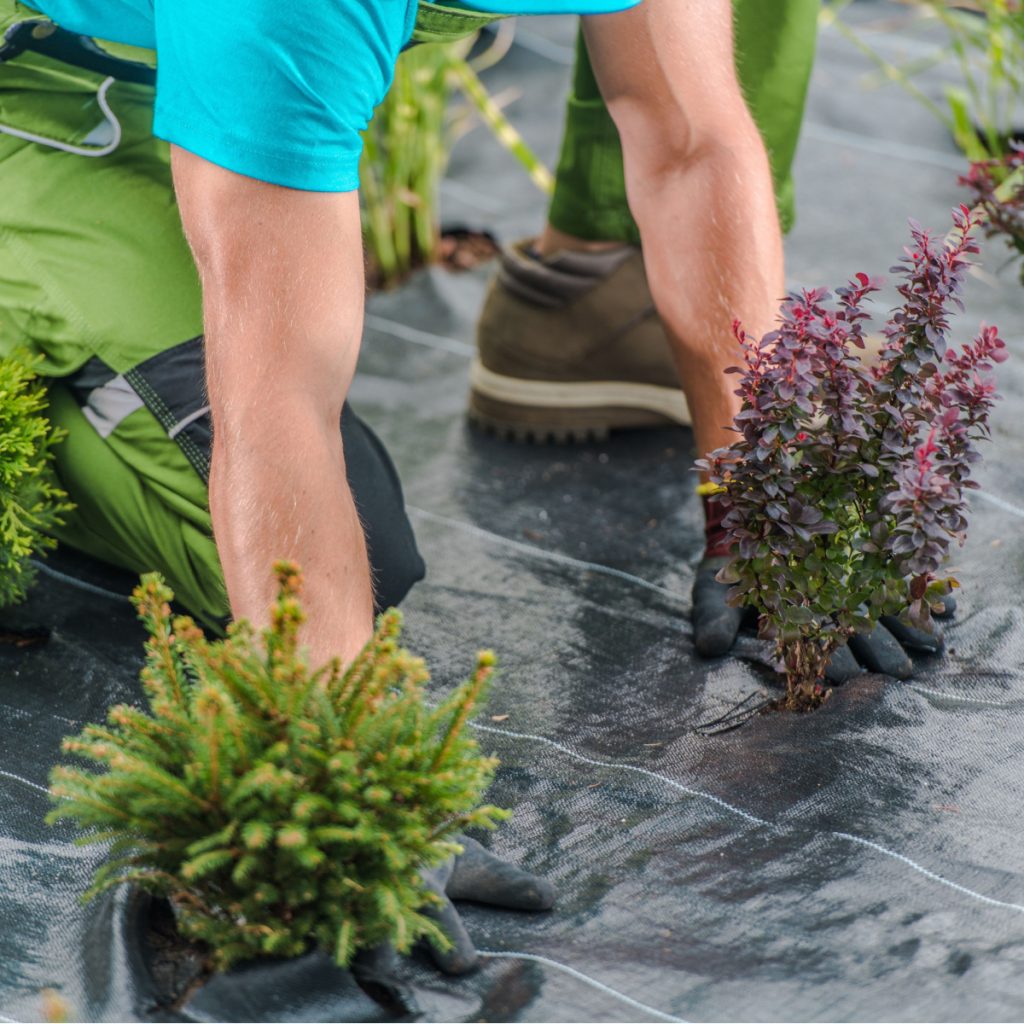

Landscape fabric might seem like a helpful gardening tool at first, but over time it can become one of the biggest problems in your flowerbeds. In fact, landscape fabric often leads to more weeds, not less. It can also harm the health of your soil and damage the long-term growth of plants.
There are three main reasons why landscape fabric should never be used to stop weeds. Here is a look at each – and why you definitely want to keep it out of your flowerbeds!
Landscape fabric is sold as a material that can allow air, water, and nutrients to pass through. When it’s brand new, that can be somewhat true. Most landscape fabrics are made from synthetic fibers with tiny holes that let moisture and oxygen flow into the soil below.
But the key point is this: the fabric only works like that for a limited time. It will not keep working forever.
As soon as the fabric is installed, dirt, small particles, mulch dust, and other debris begin to settle on top of it. All of those tiny pieces get washed down during rainstorms and quickly clog the openings in the fabric. As more and more of the holes fill up, the fabric begins to act like a plastic sheet. Instead of letting water and nutrients through, it blocks them almost completely.

Without water and nutrients, the soil below begins to dry out and weaken. Plant roots struggle to find what they need to survive. New plants may fail to establish strong roots. Shrubs, perennials, and ornamental trees growing in those beds become stressed and stunted. Over time, they can even die off.
Plants do not just need water poured near them – the soil needs to absorb that water. When water runs off the surface instead of soaking in, it creates multiple problems. It can wash mulch away, create muddy areas, and expose roots. But the biggest issue is that the soil under the fabric becomes lifeless.
Good soil is full of worms, microorganisms, and beneficial bacteria. These living creatures break down organic matter and turn it into nutrients that plants use. When landscape fabric blocks water and nutrients from entering the soil, those living creatures disappear.
The soil becomes compact and hard, making it even worse for plants to grow. Landscape fabric changes the soil environment in a harmful way. Instead of helping beds stay healthy, it traps soil underneath and cuts it off from everything good.
Even if plants seem fine in the first year or two, they are slowly losing access to what they need to thrive. In the end, the fabric does not solve the weed problem – it creates a plant-health problem.
Mulch is one of the best tools a gardener has for long-term weed control and soil improvement. When wood mulch, shredded bark, or leaves decompose, they turn into rich organic matter. This organic matter feeds the soil and improves its ability to hold water and nutrients. It helps earthworms and other beneficial organisms multiply and improve soil structure.
But when mulch is placed over landscape fabric, this natural cycle comes to a complete stop. The mulch sits on the fabric instead of touching the soil. As it breaks down, it stays above the barrier and has no way to mix with the soil below.
That means no nutrients are being added back in. The soil becomes deprived of the compost-like material mulch normally creates. What starts to happen instead? Gardeners have to keep adding fertilizers and soil amendments year after year because the mulch is not doing its job.
Without mulch being able to break down naturally, the soil below becomes poorer and poorer every season. Plants rely on mulch to help them grow strong and healthy. Blocking that process takes away one of the greatest benefits of mulching.

Something else happens too. Because the mulch is breaking down on top of the fabric only, it begins to form a new layer of loose organic material. And what loves to grow in loose, moist organic material more than anything? Weeds. This leads directly into the third major reason landscape fabric creates long-term problems!
Even if landscape fabric could allow water through forever, this problem alone is enough to make it not worth using.
As mulch breaks down on top, it creates a thin soil-like layer that is perfect for weeds to germinate in. Weed seeds blow in from the wind, drop from birds, or wash in from nearby areas. Once they land on the mulch and find that soft organic material, they sprout.
In the first year or two you may not notice many weeds. But by year three or four, the top of the fabric becomes a weed-growing haven. Weeds love the fact that the fabric holds moisture near the top surface. The roots of the weeds then begin to grow through the fabric in search of more water and nutrients.
The weed roots grab onto the fabric and weave through it. When you try to pull the weeds, they will not come out cleanly. Instead, the fabric lifts up, tears, or becomes a knotted mess. You end up having to cut around the weeds just to remove them. Often, pieces of the weed root remain, and new weeds grow right back.
The landscape fabric becomes a tangled layer of dead mulch, new soil, weed roots, and broken fibers. At this point, many gardeners simply give up trying to maintain the bed.
Removing the fabric is not easy either. By now, it is stuck under plant roots and buried beneath years of mulch. Taking it out can damage shrubs, perennials, and decorative plantings. The job takes a lot of time and effort. Far more than it would have taken to simply pull a few weeds each season.
Instead of solving a problem, the fabric creates a bigger one. You are left with a weed-filled, unhealthy flowerbed that requires major work to fix.
Gardeners do not need landscape fabric to keep weeds under control. There are far better solutions that improve soil health instead of harming it.
A thick layer of natural mulch of around 4 to 6 inches is one of the best ways to prevent weeds from growing. Mulch blocks sunlight from reaching weed seeds, which keeps them from sprouting. It also helps keep moisture in the soil and adds nutrients as it breaks down. See: The 3 Most Common Mulching Mistakes – And How To Avoid Them For Weed Free Flowerbeds!
Another great weed-blocking practice is planting flowerbeds more densely. When plants grow larger and fill empty space, weeds have fewer open spots to grow. Adding ground covers, perennials, and spreading shrubs can help shade out weeds naturally.
Finally, keeping up with weeds early before they go to seed can greatly reduce future weed problems. Pulling small weeds once a week is far easier than battling thousands later.
Here is to never using landscape fabric in your flowerbeds to stop weeds – and to healthier plants because of it!
Follow Our Facebook Page For Great Gardening Tips And Advice! This Is My Garden Facebook Page
This Is My Garden is a garden website created by gardeners, for gardeners. Jim and Mary Competti have been writing gardening, DIY and recipe articles and books and speaking for over 15 years from their 46 acre Ohio farm. They publish three articles every week, 52 weeks a year. Sign up today to follow via email, or follow along!
Looking for a few simple ways to get rid of crabgrass from your lawn, flowerbeds and garden spaces late this summer and fall and stop it for good? All without having to resort to harsh chemicals or sprays?
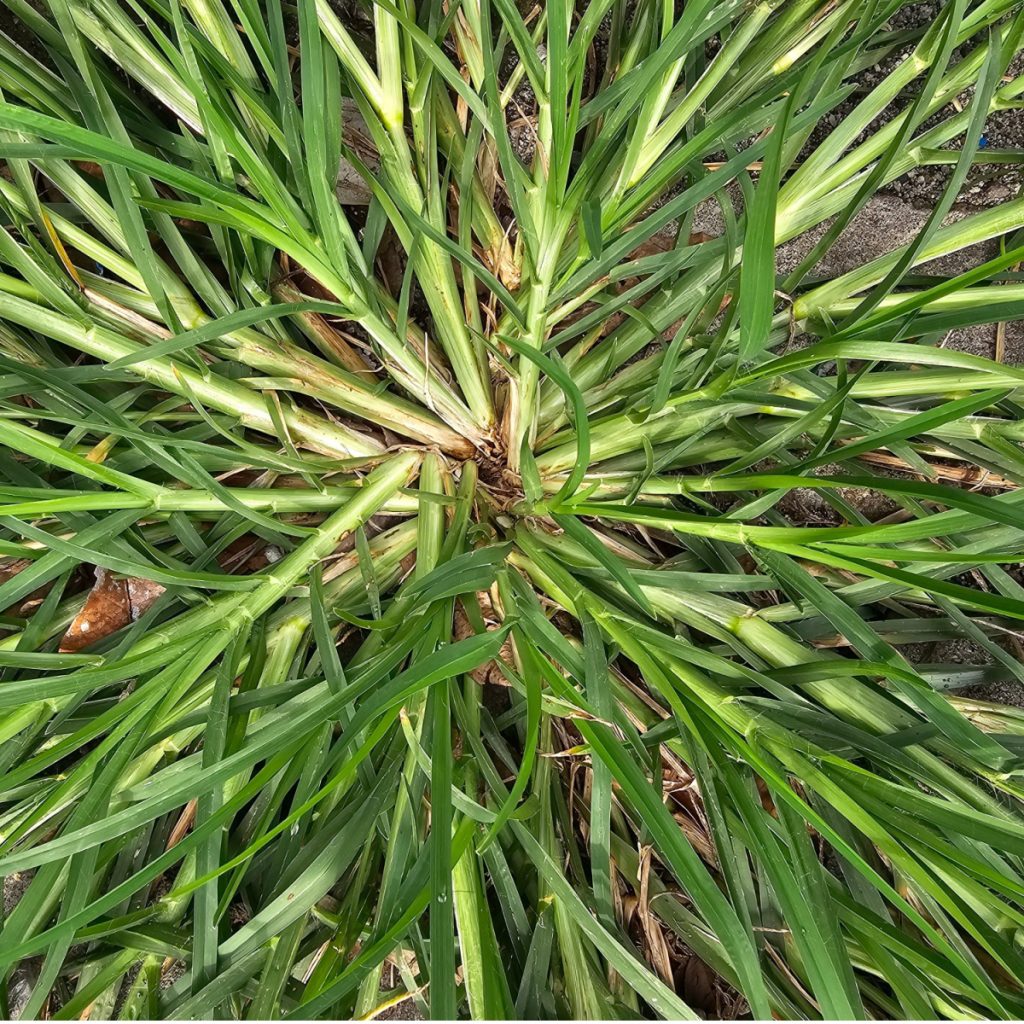
Crabgrass can be quite an issue for anyone who maintains a lawn. Especially in mid summer to late fall, when the invasive plant can suddenly explode with growth. One thing is for sure, once it appears, it spreads like wildfire – quickly weaving and growing all throughout a lawn. And is it ever unsightly!
Unfortunately, once crabgrass takes hold, there are a couple of factors that make it extremely difficult to control. For starters, a single plant can produce tens of thousands of seeds. Seeds that can easily release, blow away and find a new home anywhere a tiny spot of bare soil exists.

Making it even tougher, not only are the plants prolific seed bearers, the seeds themselves are some of the toughest around. In fact, crabgrass seeds can stay fertile for three or more years. All the while waiting patiently dormant for their chance to come alive in your lawn.
But there is some good news. With just a little effort in the late summer and fall to keep crabgrass from setting those seeds, you can start to gain the upper hand. But the key is to act fast before those seeds start to form and fly around!
There are actually two different methods you can use to effectively eliminate the crabgrass you have growing right now. The first is spot treating – and the second is hand digging.
Although hand picking might sound labor intensive, it’s actually not that difficult. By far – it is the most effective! Even better, hand weeding works fast, and only needs to be for the short term.
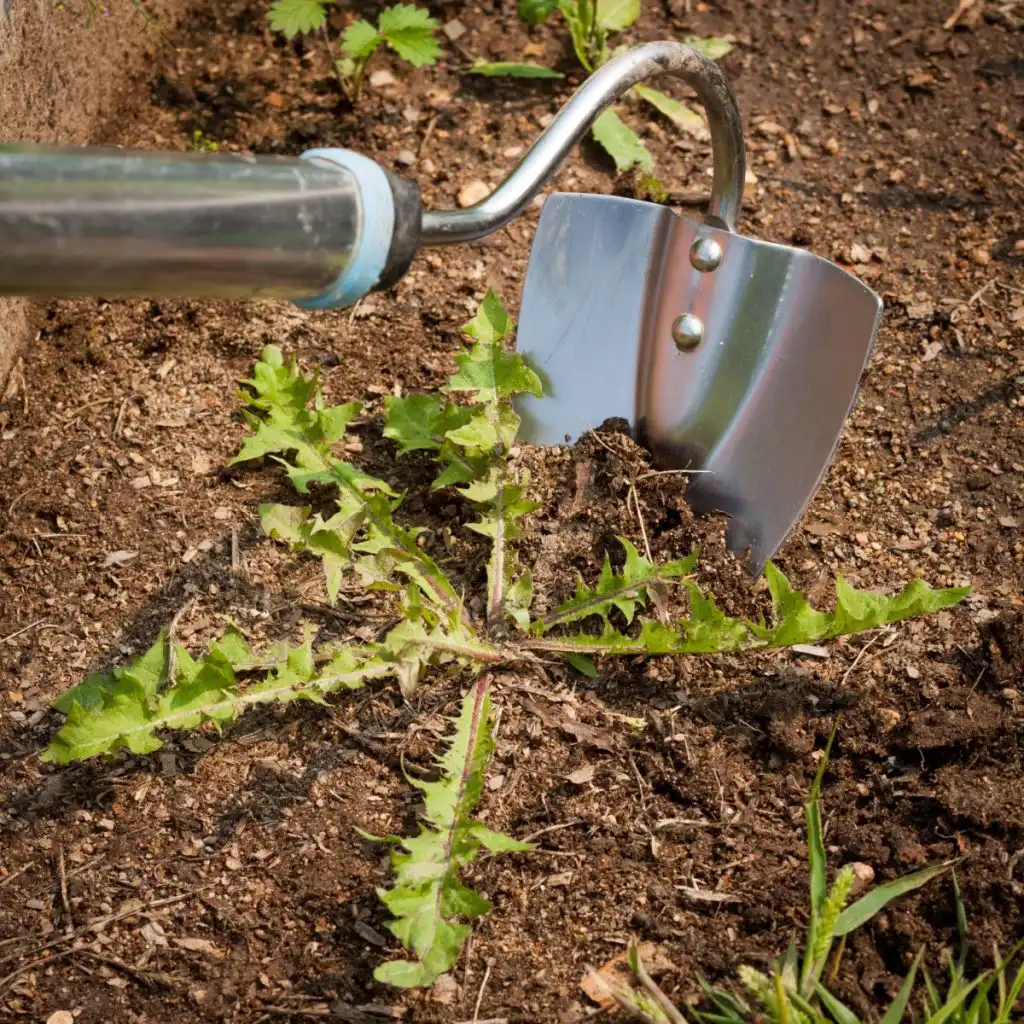
Crabgrass is fairly easy to spot in a lawn. That is one of the reasons it’s so unsightly in lawns where it grows. To remove, use a small shovel or a weeding fork to pop the roots from the ground. Crabgrass actually will pull up quite easily once the main stand is dislodged.
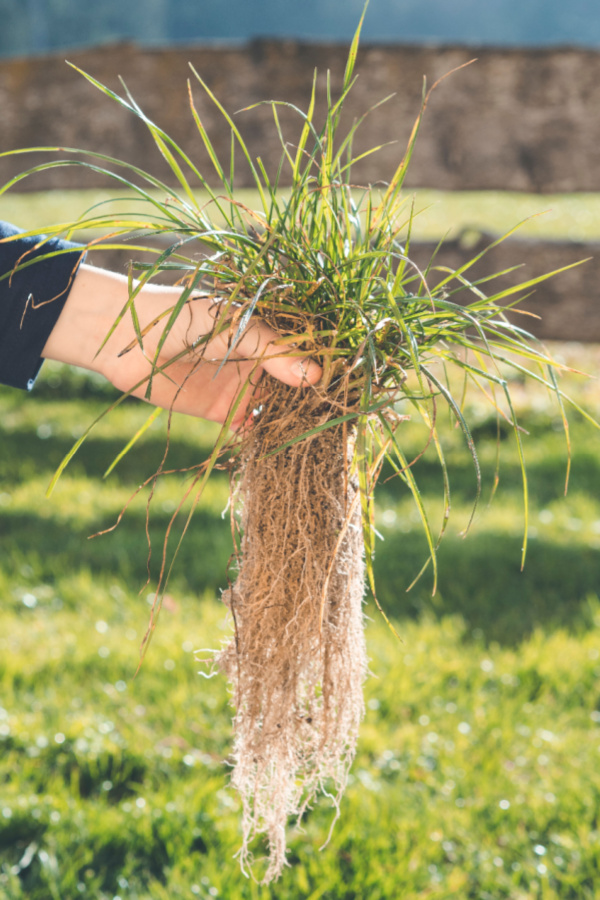
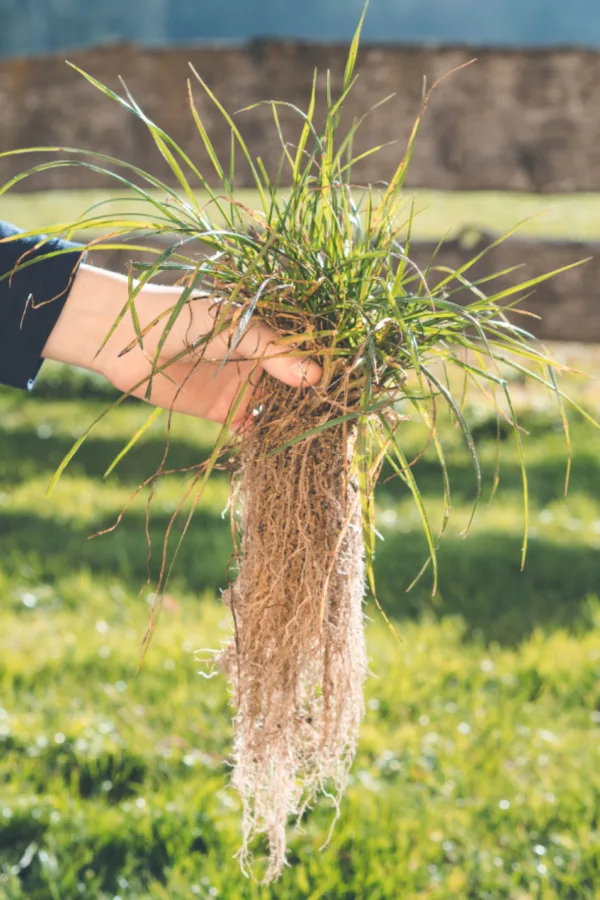
This is where it’s vital to be sure to get the entire root – or it will come back. Stand up hand weeders can actually make this chore very fast and easy. Not just for removing the crabgrass, but for saving your back as well! Affiliate Product Link: Stand Up Weeding Fork
It’s important to hand pick crabgrass before it flowers and goes to seed. Walk your lawn on a regular basis to locate and remove any new starts. More importantly, once you remove the crabgrass plant, reseed the area with grass seed and cover with straw. This will keep any open soil from having new seeds blowing in and taking hold.
You can also choose to spot treat crabgrass with all natural industrial or horticultural vinegar. This vinegar type is much stronger (30 to 45% acidity) than traditional store bought vinegar (5%) and will kill crabgrass quickly. Affiliate Product Link: Nature’s Freedom 45% Vinegar (2 Gallon)
The key is to only spot treat the individual plants and not the lawn around them. It’s best to do this with a small spray bottle, targeting the foliage of crabgrass. Vinegar is safe once dry for pets, kids and adults. You will want to use gloves and eye protection when applying, as the vinegar is very acidic.
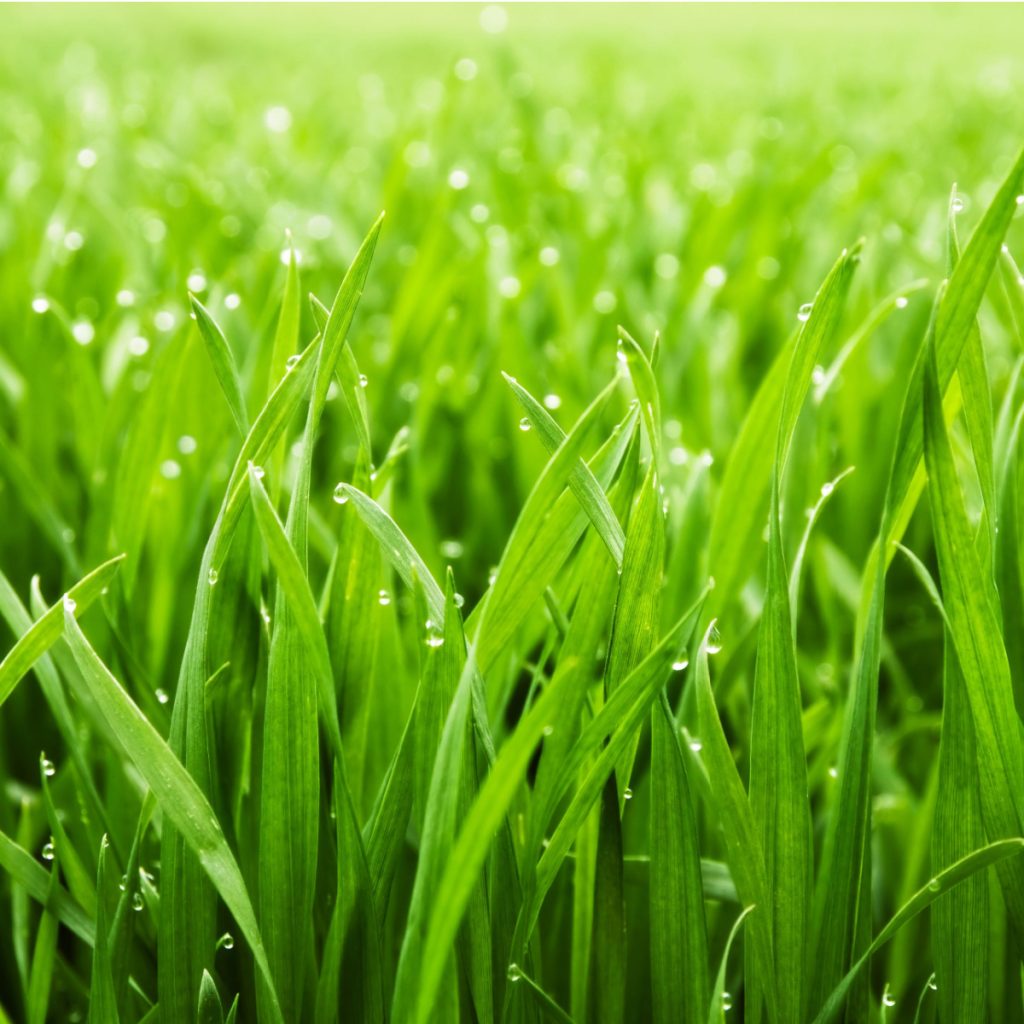
More than anything else, the best offense and defense against crabgrass is a thick, healthy lawn. Just as with fighting weeds in flowerbeds, the more open soil spaces there are, the more easily it will be for crabgrass to find a home to seed and sprout.
One of the easiest things you can do immediately to help is to raise the height of your mower. Mowing your grass low is like sending an open invitation for crabgrass to come calling. When blades of grass are higher they help to shade open lawn space and keep bare spots from exposure to crabgrass seeds.
Even more, crabgrass seeds need soil, sunlight and warmth to germinate. And if you have a healthy, thick cover of existing turf, the seeds simply can’t get what they need. A thick lawn also helps conserve moisture in the soil, allowing existing grass to grow healthier and stronger.
This is exactly why you should be sowing any bare spots with grass seed as soon as you see them. By keeping your lawn thicker – you will eliminate most of your crabgrass worries right away. See our article: How To Plant Grass Seed – 2 Big Secrets To Get Grass To Grow Fast And Thick!
So how high should you mow your lawn for protection throughout the year? For traditional lawns, a good height is somewhere between 3.25 and 4 inches.
Finally, if you do have crabgrass going to seed in your yard and happen to have a bag on your mower, it is best to mow the turf with the bag on and not allow the clippings to fall. By bagging in late summer or early fall, you can put a quick stop to the spread of seed.
Last but not least, an application of a pre-emergent seed control product is essential to totally get rid of crabgrass. And the good news is that you can use a 100% organic product to do it!
Springtime is a critical time for the development of crabgrass. In the spring, the seeds of crabgrass begin to sprout and the plant’s root system starts to develop. But by putting down a pre-emergent control application, you can block both from occurring.
A pre-emergent application prevents a seed from germinating. It basically sterilizes the seed. The good news is there are 100% organic pre-emergents that are safe for kids, pets and your lawn. They use natural ingredients like corn gluten to both thicken up the lawn and block weed germination. Affiliate Product Link: Natural Corn Gluten Weed Control/Fertilizer
The key to success with a pre-emergent is to put it down before crabgrass begins to sprout and develop. That means putting it on early in the spring, well before temperatures warm up enough to allow germination.
Last but not least, it’s important to understand that in order to get rid of crabgrass permanently, it takes a consistent approach. With its heavy seeding rate and explosive growing capabilities, it takes a bit of time to get crabgrass under control.
The real key to success is to be vigilant in your approach. By simply employing a few of the methods above, you can more than have your lawn free of crabgrass within a few seasons. And even better – keep it that way with ease!
Follow Our Facebook Page For Great Gardening Tips And Advice! This Is My Garden Facebook Page
This Is My Garden is a garden website created by gardeners, for gardeners. Jim and Mary Competti have been writing gardening, DIY and recipe articles and books and speaking for over 15 years from their 46 acre Ohio farm. They publish three articles every week, 52 weeks a year. Sign up today to follow via email, or follow along!
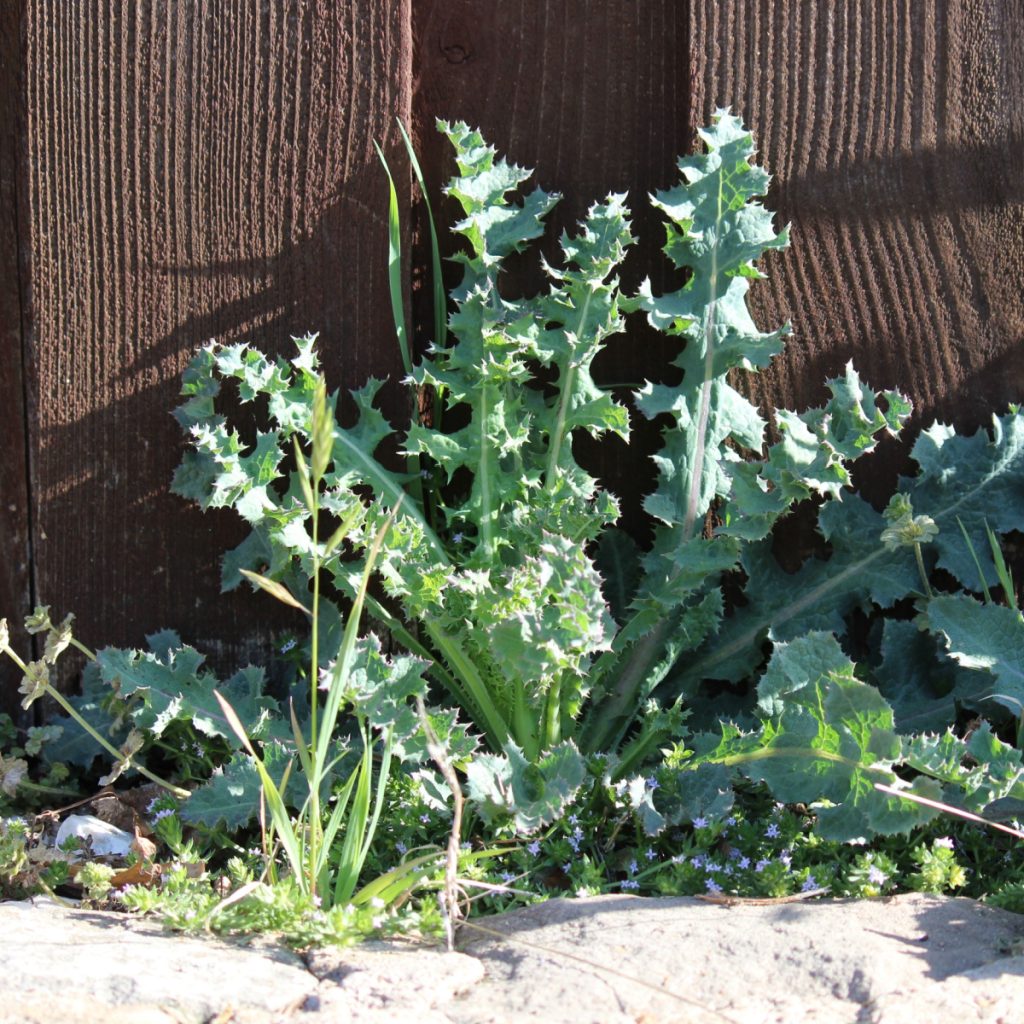
Looking for an easy way to get rid of thistles in your flowerbeds and gardens? And one that keeps them from coming back time and time again?
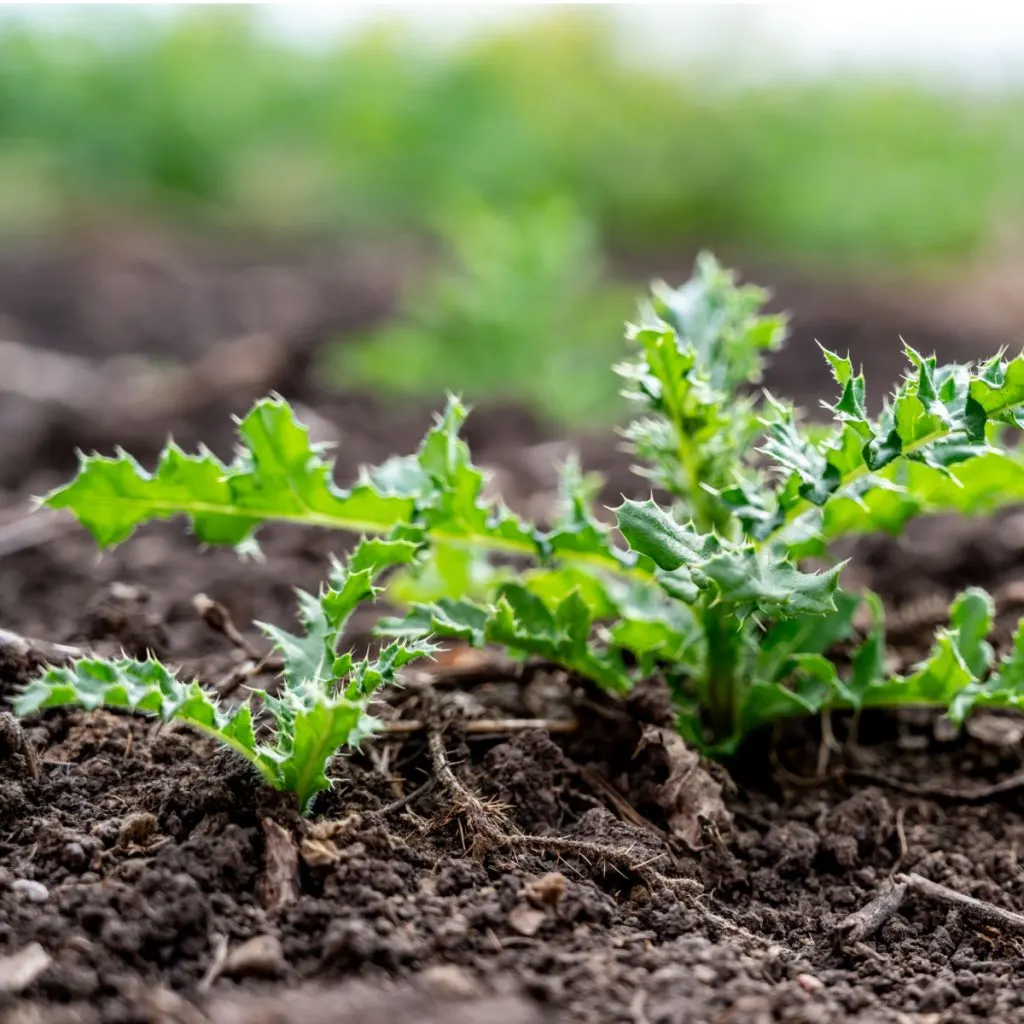
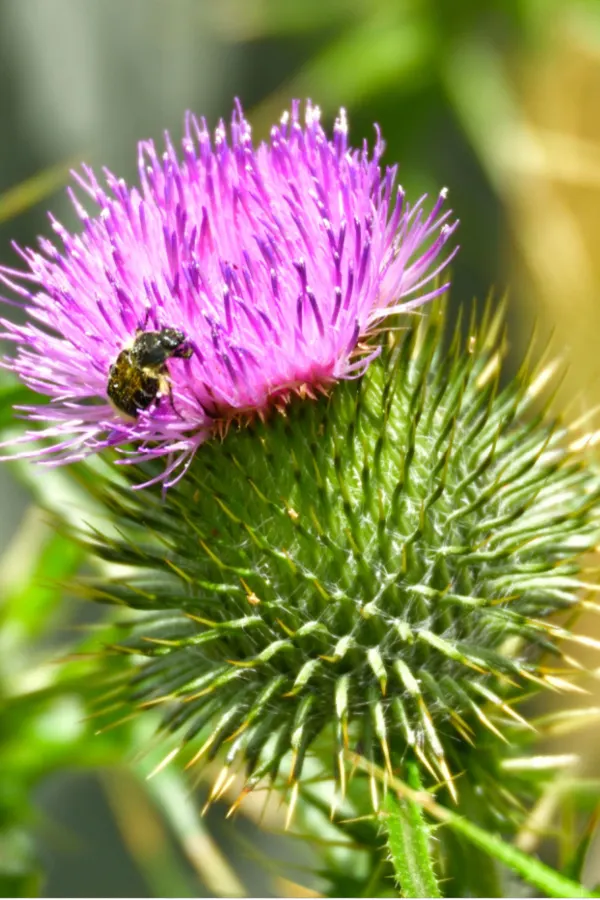
If you’ve been struggling with thistles popping up in your garden, flowerbeds, or even across your lawn, you’re not alone. Thistles are one of the most stubborn and frustrating weeds a gardener can deal with. Once they find a way into your soil, they don’t go away easily.
What makes them even harder to deal with is that pulling them up by hand rarely works. In fact, it often makes the problem worse. But here’s the good news: there’s a simple, natural way to get rid of thistles – and keep them from coming back for good.
With the right approach, you can thistles out without relying on harsh chemicals, and without damaging your soil or hurting nearby plants. The method is easy, effective, and something every gardener can do with ease. All by using vinegar!
Thistles don’t act like most other weeds. What makes them such a problem is their strong and deep taproot. This taproot can grow straight down into the soil several feet deep. Even if you manage to pull out the top of the plant, chances are you’ve left part of that root behind. And as long as any piece of that root remains, the plant will simply grow back.
It doesn’t take long for thistles to spread, especially when they’re left to grow. One mature thistle can produce thousands of tiny seeds. And those seeds float around with the slightest of breezes, spreading not just across your garden, but into your flowerbeds and lawn.
Before you know it, you’re dealing with dozens or even hundreds of thistles all over again. And the worst part? When you start pulling or disturbing thistle plants, it often triggers even more growth. That’s because underground roots may already have small shoots ready to sprout. Dig too aggressively, and you risk making the problem worse instead of better.

The answer to thistle lies in a simple product that’s natural but powerful – horticultural vinegar. This is not the same vinegar you cook with in the kitchen. While household vinegar usually contains about 5% acidity, horticultural vinegar is much stronger. It often comes in strengths of 20%, 30% or higher.
The higher concentration makes it strong enough to kill even the toughest weeds – including deep-rooted thistles. But to work properly, you need to use it the right way.
Spraying the leaves of a thistle might seem like a quick solution, but that only kills the top part of the plant. The root below the surface can still live on and grow back. That’s why a little more care is needed if you want to stop thistles from returning.
There’s a surprisingly simple two-step trick that works incredibly well at getting rid of thistles. Not only does it stop the plant in its tracks, it also helps kill the root below and keeps it from growing back.
Step One: Cut the Plant Low
Using a sharp pair of garden scissors or pruning shears, cut the thistle plant down as close to the ground as possible—about one to two inches above the soil line. Don’t try to dig it up or pull it out. Just give it a clean snip across the stem.

Why is this important? When a thistle is cut, it goes into repair mode. It starts pulling water and nutrients from the root to heal the cut stem. And that’s when step two comes into play.
Step Two: Apply Higher Strength Vinegar Directly
Right after cutting the stem, use a small spray bottle or dropper to apply horticultural vinegar directly to the cut surface. Using a vinegar with at least a 30% acidity is perfect to do the job. Affiliate Link: 30% Vinegar – Pure Concentrated Active-Force Vinegar
This fresh wound acts like an open door, allowing the vinegar to be absorbed deep into the plant’s system. It will travel down to the taproot – and kill it off in the process. Be sure to also spray any remaining leaves that might still be attached, but be careful not to let the vinegar touch other nearby plants. This solution doesn’t just kill weeds – it kills any foliage it touches.
The reason this method is so successful is because of how plants respond to injury. When a plant like thistle is cut, it tries to heal by pulling in energy and moisture from the root system. But when you introduce vinegar at the moment of injury, it takes in the acid instead.
Once inside the plant, the vinegar burns its way through the inner cells. This process destroys the plant from within and shuts down the taproot’s ability to keep sending up new growth.
If you only spray the leaves of a thistle, the top part of the plant may die – but the taproot likely survives. That’s why many gardeners see weeds come right back again and again after using regular vinegar sprays. The cut-and-spray method ensures that the plant takes in the vinegar and allows you to get rid of thistles for good.
Even though horticultural vinegar is natural, it’s still a strong acid. When handling it, always wear gloves and eye protection. Avoid using it on windy days, as even a small breeze can carry the spray to nearby flowers or vegetables and cause damage.
Also, never pour vinegar directly into the soil or over a wide area. While a little splash here or there isn’t usually harmful, overdoing it can change the pH of the soil. This can make it harder to grow plants in that spot for months to come.
To avoid waste and damage, use an eyedropper or very small spray bottle. This helps you be precise with where the vinegar lands – and ensures it goes only where you want it.
If your garden is full of thistles, don’t be discouraged if you don’t eliminate them all in one day. Thistles often grow in clusters, but many times those clusters are part of a main root system. Once you remove those big root bases, the rest usually fade away quickly.
It may take a few days or even a couple of weeks of treating cut thistles before you stop seeing new ones pop up. But stay with it. As you cut and treat each one, you are breaking down their underground network and cutting off their ability to grow back.
The best part? You’re getting rid of thistles without damaging your garden soil – or using chemicals that could harm other plants, pets, or people!
Industrial strength vinegar is also great for keeping weeds clear from driveways, patios and walkways. For more on that, check out our article: How To Get Rid Of Weeds With Horticultural Vinegar.
Follow Our Facebook Page For Great Gardening Tips And Advice! This Is My Garden Facebook Page
This Is My Garden is a garden website created by gardeners, for gardeners. Jim and Mary Competti have been writing gardening, DIY and recipe articles and books and speaking for over 15 years from their 46 acre Ohio farm. They publish three articles every week, 52 weeks a year. Sign up today to follow via email, or follow along!
Want to finally eliminate all of those weeds that keep coming back again and again in your garden?
One of the most frustrating aspects of gardening is the issue of trying to eliminate and keep weeds out of your garden – or in many cases, from completely overtaking your garden by the middle of summer. Let’s face it, weeds can certainly make a garden or raised bed area look unsightly. But they also happen to cause a long list of other issues for plants and soil too.
Allowed to grow freely, weeds steal valuable nutrients and resources from your soil. Much like tomato, pepper and other vegetable plants, weeds need the minerals and nutrients in the soil to survive. And when they absorb them to grow, it leaves less for your vegetable plants.
But weeds don’t stop there. They also happen to be a safe harbor and breeding ground for pests and disease. Both of which can quickly establish in the weeds and then move on to take out the vegetables growing in your garden.
But here is the good news. In spite of what you might think, garden weeds can be controlled quite easily. And, without endless hours of backbreaking labor and constant weeding. Better yet, once controlled, they can also be kept to a minimum year round.
Every garden season, millions of gardeners grab their shovels, rototillers and rakes to turn their soil over. In the process, they plant thousands upon thousands of weed seeds. Weed seeds that up until that moment were lying dormant on the surface, with little hope of ever germinating.
Unfortunately, the easiest way to create a bigger weed issue in a vegetable garden is tilling or digging old weeds under. The more you disturb your soil by digging and turning it, the more future weed issues you create.
You may be thinking – isn’t tilling the best way to prepare a garden in the spring? Doesn’t it help to loosen the soil and grow a better garden? Tilling can certainly help clear an area for planting, but it can cause far more issues in the process.

Tilling destroys soil structure and many of the good things that are happening under the surface – like earthworms and microbe life. For the average backyard garden, a no-till approach is not only better for the soil and better for your plants – it’s also easier on the garden!
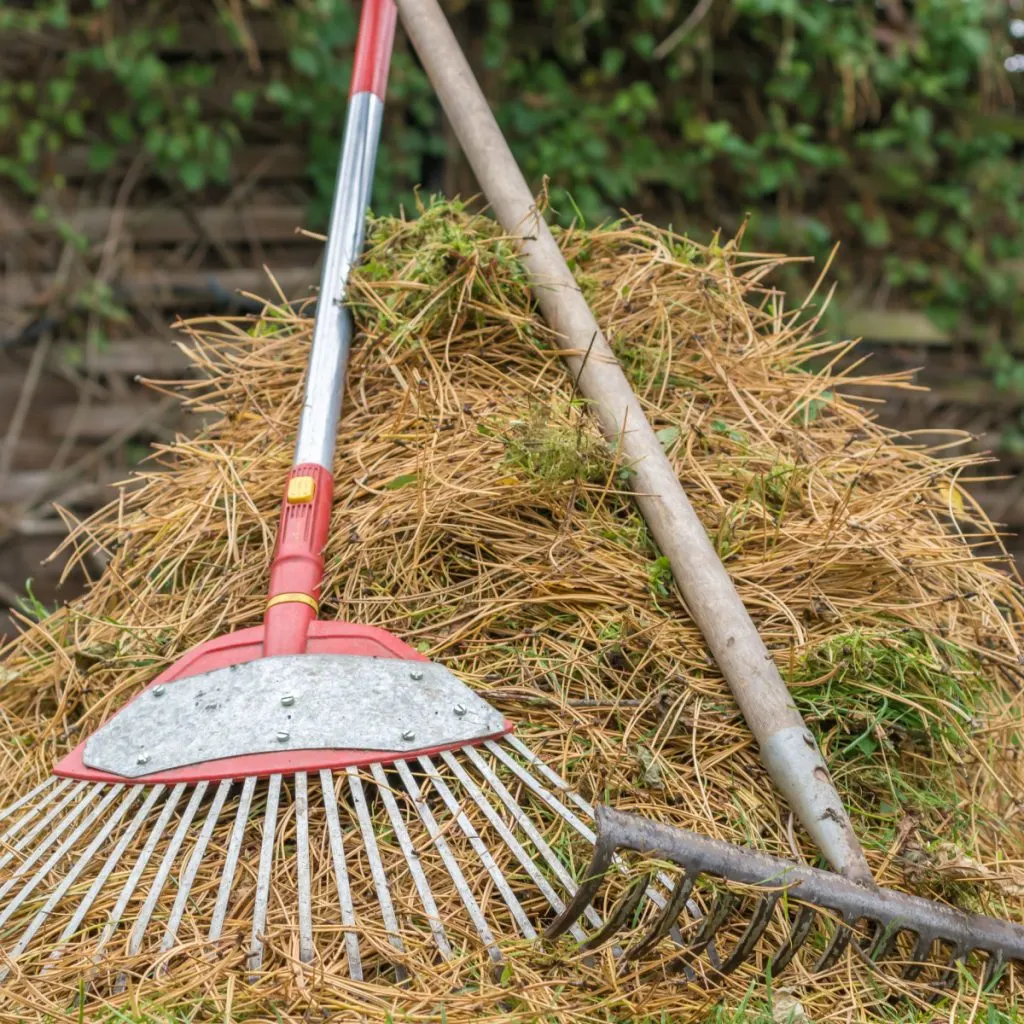
You can also eliminate weeds in your garden by working less with your shovel, hoe and rake! The more soil you dig and expose with big, heavy tools – the more it will compound your weeding issues. It has the same effect as tilling when it comes to replanting weed seeds that lie in wait on the surface of the soil.
Instead, it’s far better to use a weed pulling tool for the weeds you find initially. These hardly disturb the soil – and almost always pull out the entire root! Affiliate Link: Grampa’s Weeder – The Original Stand Up Weed Puller Tool with Long Handle
So that leads to the question – if you can’t till or dig up weeds with a shovel – how do you stop all of them consistently? The answer is with mulch – and a lot of it!
Keeping the soil covered at all times is the number one way to both control weeds and eliminate future ones from ever establishing in your garden space. During the growing season, the easiest way to cover your soil is with an organic mulch.
Mulch in the garden is absolutely critical for weed control. But it also helps your plants in so many additional ways as well.
A thick layer of mulch helps to control soil temperature, keeping the roots of your plants safe from the hot summer sun or cool nights. Even more, it helps to keep moisture from evaporating out of the soil – which can be a huge benefit when it comes to watering your plants less.
If all of that wasn’t enough, a good organic mulch adds loads of valuable organic matter to your soil as it breaks down. This in turn creates better structure and more fertile soil, which is highly beneficial to future crops.
So how much mulch is enough to do the job? A thick four to six inch application around plants is best to not only suppress existing weeds, but also keep future weed seeds from finding a home down at the soil level.

Anything less and there simply isn’t enough thickness to prevent weeds or keep the soil insulated. In fact, one of the biggest mistakes gardeners make is not putting enough mulch down to do the job.
As for the best mulches to use in a vegetable garden – straw, shredded leaves and lawn clippings top the list. All three are most often commonly available, and do a wonderful job of weed control. All three also happen to break down easily into the soil as well.
No matter how much you mulch and how little you disturb your soil, a few weeds are still going to find a way to make an appearance now and then. And that is where consistency of garden maintenance comes into play!
If you want to keep your garden space manageable, a little every day goes a long way to success. By simply strolling your garden rows each day for a few minutes, you can pluck small weeds with ease.
But let them grow for three or four days or a whole week – and they can multiply like wildfire! Spending 10 minutes in your garden every day or every other day is critical to keeping it easy, manageable and weed free.
It sounds so simple, but it is where most gardeners usually slip up and let the weeds multiply. Be diligent in your efforts. A little bit of time every day will pay off huge when it comes to stopping weeds for good!
One final secret to eliminate weeds from your garden is to always make sure to cover your garden in the late fall with a cover crop. Remember earlier in the article when we talked about keeping the soil covered at all times? Well, that includes the fall and winter when a garden is dormant.
Garden soil left exposed all winter long is an open invitation for an invasion of weeds. Weeds that will become next year’s garden issue. For more on that, check out our article: How To Plant Peas As The Perfect Garden Cover Crop – An Easy, No-Till Way To Recharge Your Garden! And for more weed-control tips for gardens & flowerbeds, see: A Simple Way To Get Rid Of Thistles In Flowerbeds & Gardens – Forever!
Follow Our Facebook Page For Great Gardening Tips And Advice! This Is My Garden Facebook Page
This Is My Garden is a garden website created by gardeners, for gardeners. Jim and Mary Competti have been writing gardening, DIY and recipe articles and books and speaking for over 15 years from their 46 acre Ohio farm. They publish three articles every week, 52 weeks a year. Sign up today to follow via email, or follow along!
Did you know that by simply following 3 very basic tips – you can easily and almost effortlessly keep your flowerbeds weed free all through the spring, summer and fall?
It’s true! If you are tired of battling weeds year after year, only to give up on your flowerbeds by mid-summer, it’s time to stop the madness. And you really won’t believe how easy it can be. In fact, it probably means actually working less than you ever have in year’s past!
Weeds cause far more problems than simply making flowerbeds unsightly. As they grow and establish their roots, they steal valuable nutrients and moisture from the soil. Even more importantly, they steal it away from the perennials and annuals growing in your flowerbeds!
But here’s the good news, keeping your flowerbeds weed free doesn’t have to mean spending countless hours weeding and re-weeding. Nor does it have to mean resorting to harmful sprays that can be dangerous to pets, children – and your plants too.
With low-maintenance, weed free gardening in mind – here’s a look at how to work less – and have the best flowerbeds on the block!
The number one way to stop current and future weeds from finding a permanent home in your flowerbeds is to keep the surface of the soil covered at all times – and the best way to do that is with a thick, heavy coat of mulch. Not just in the spring, summer and fall months, but all throughout the winter too.
Open soil in a flowerbed provides easy access for weed seeds to self-plant. Just as with most annual and perennial plants, weeds produce flowers with seed heads. And those seeds can quickly and easily be distributed and deposited into open bed spaces by the wind, birds, and other wildlife.
Unfortunately, once they find bare soil, weed seeds will quickly sprout and take root. But by simply covering your soil with a thick coating of mulch, you can stop that cycle in its tracks. And in the process, eliminate one of the biggest sources of weeds in your flowerbeds.

But how you mulch and how you maintain it is the real secret to having weed free beds, or flowerbeds that need constant attention.
Mulch actually serves a whole slew of beneficial purposes when properly applied to flowerbeds. Not only does it provide a barrier for weed seeds, it also helps regulate soil temperature and conserve moisture. It can also add valuable nutrients to the soil as it breaks down.
But just using mulch isn’t enough. It also needs to be put down and maintained correctly to help eliminate future weeds from your flowerbeds.
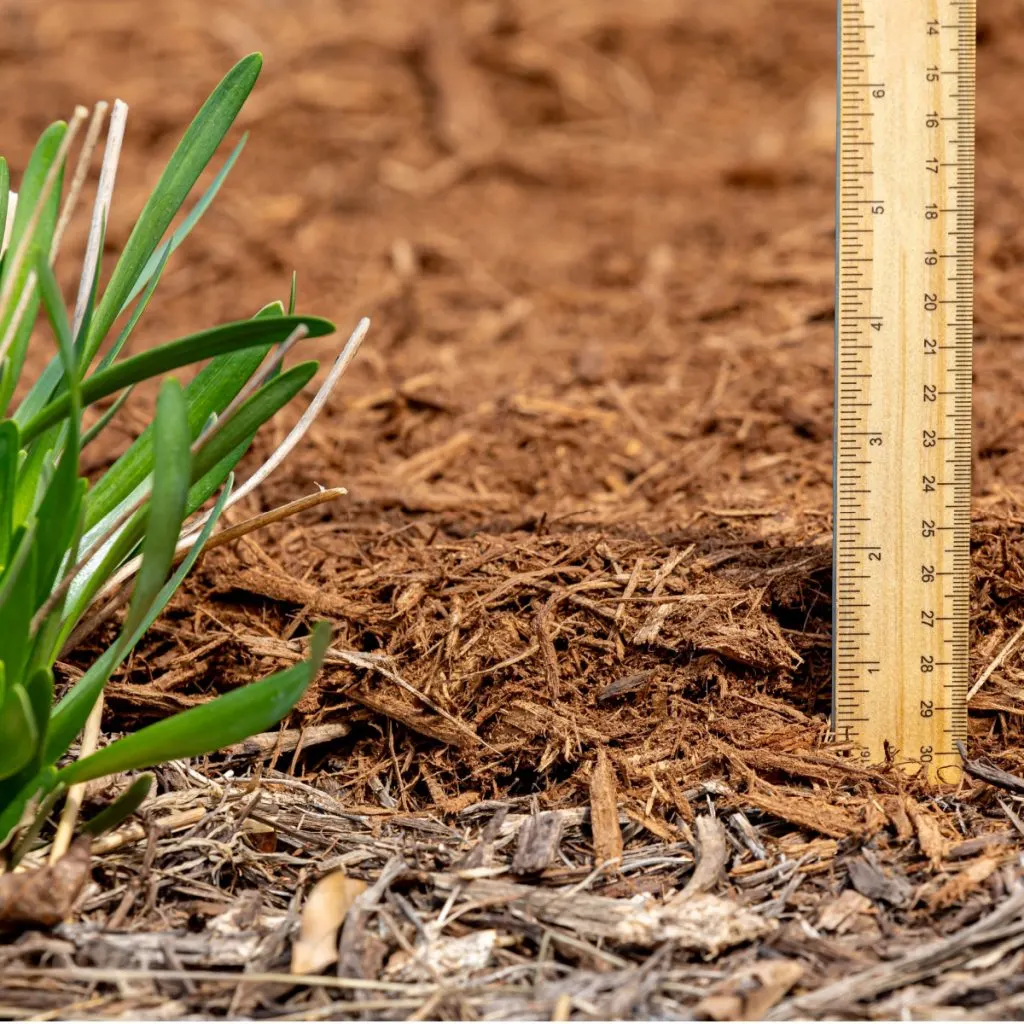
One of the most common mistakes made when mulching is failing to put down a thick enough layer in the beds. One or two inches of mulch is simply not enough. Not enough to protect plants – and certainly not enough to keep weed seeds from finding a home in the soil below.
To be effective as a weed barrier, the layer of mulch in a flowerbed needs to be kept at a minimum of four inches in depth, with six inches being ideal. Anything less, and weed seeds will continue to cause havoc. (See: The 3 Most Common Mulching Mistakes – And How To Avoid Them For Weed Free Flowerbeds!)
Now let’s cover the ” working less is working more” part. Once your thick layer of mulch is in place, don’t disturb it! One of the biggest mistakes made by gardeners in their flowerbeds is to rake, turn over, or “freshen up” their mulch. Believe it or not, this actually is one of the best ways to create more weeds!
Unfortunately, although raking or turning the mulch may give it a fresh look, it also creates weeds. And a lot of them. Every time mulch is disturbed by raking and turning, all of the seeds that have been trapped in the layer of mulch get turned over to the bare soil underneath.
On top of the surface, seeds struggle to find the ability to sprout. But as soon as the mulch is stirred, they quickly find a home underneath the surface. Even worse, once turned under, the mulch now actually serves to help them survive and thrive – much as it helps your flowers do the same.
Resist the urge to turn over mulch. Keep the mulch barrier intact to keep weed seeds from finding soil. Instead, freshen up with a light coat of new mulch every few months if you think your mulch needs spruced up. This also helps keep the layer thick enough to repel future weed seeds.

One of the biggest mistakes many gardeners make with mulch is not mulching in the fall. It’s just as if not more important than spring mulching! It’s vital to always apply a thick coating of mulch in the fall before winter arrives.
By keeping the level of mulch at four to six inches, plants will be more insulated from winter damage – and from allowing weed seeds to find a home. See our article: Why You Need To Mulch Flowerbeds In The Fall
With all of the talk above how important mulch is in flowerbeds – you might find it surprising that you should actually should be using less with each passing year. Why? Because you should be making sure you have less area to mulch!
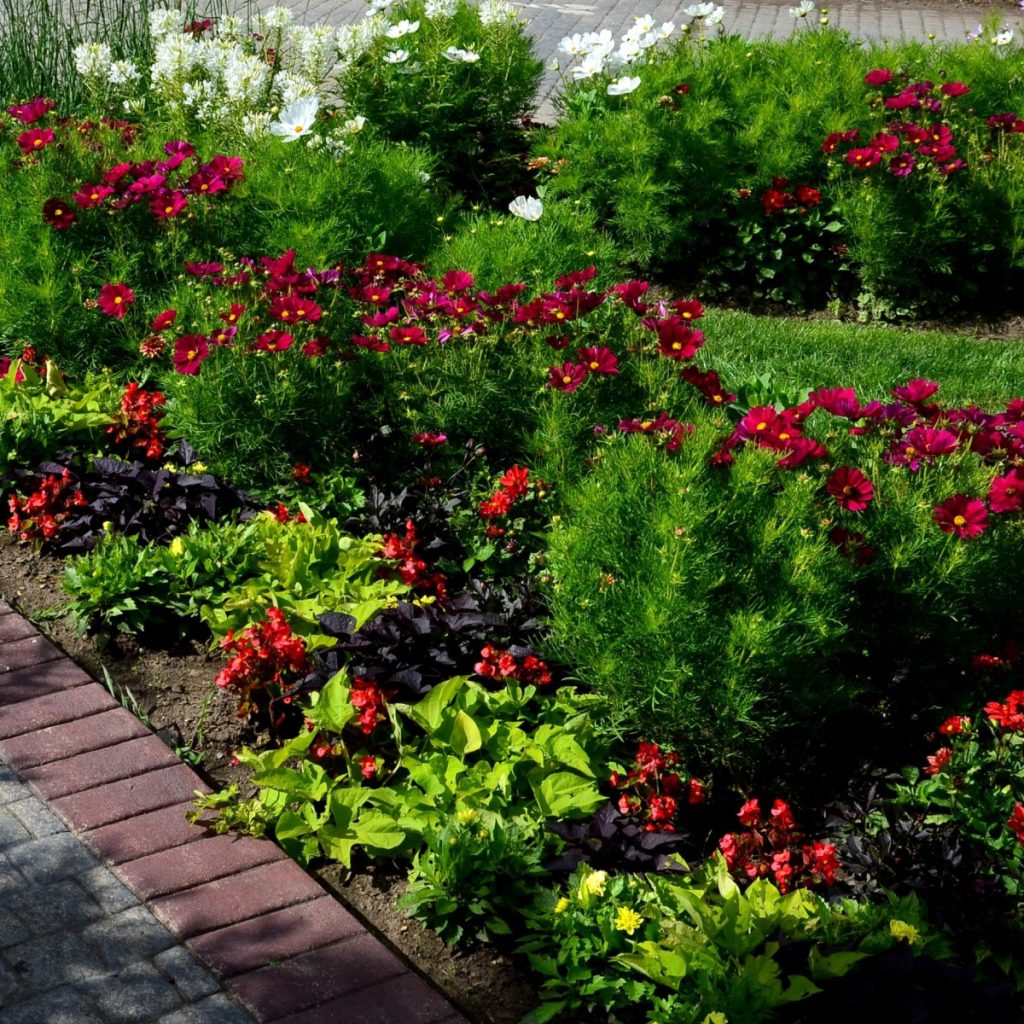
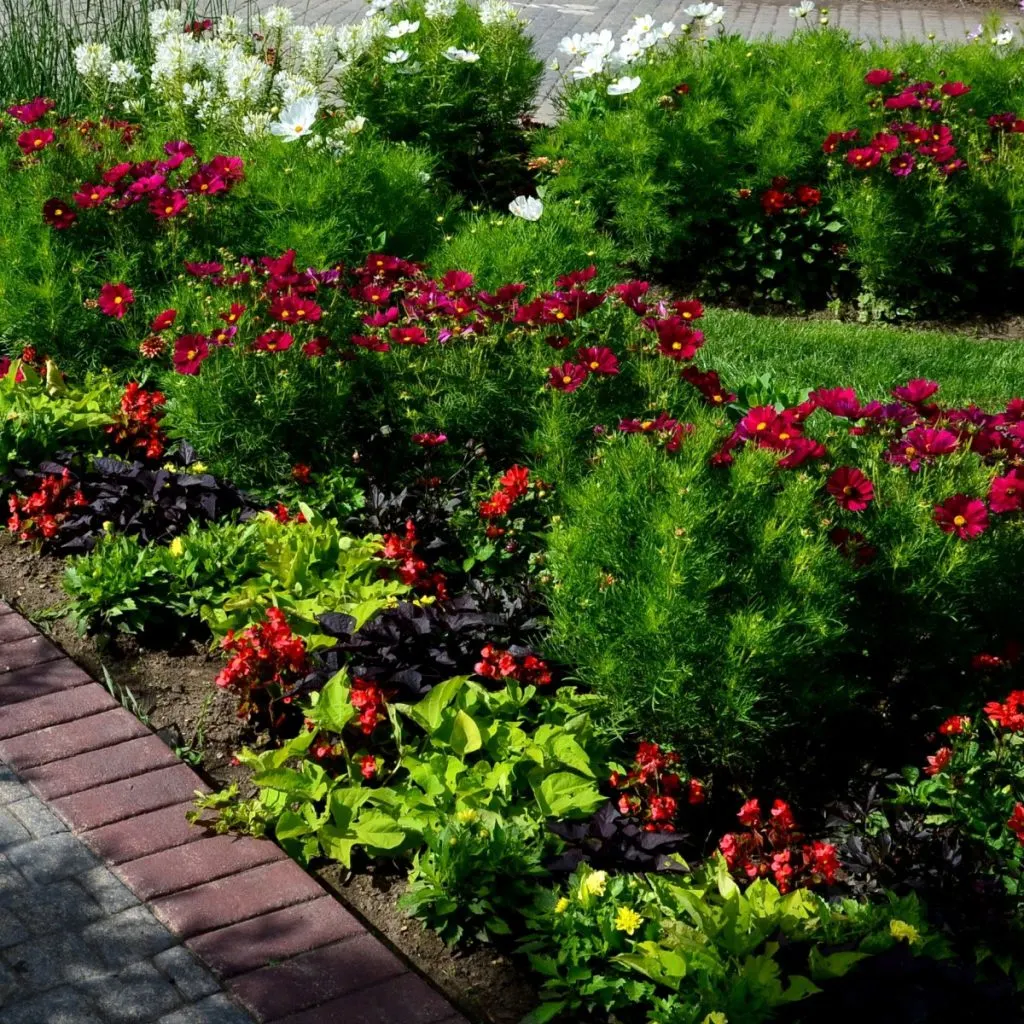
The best way of all to keep your flowerbeds weed free forever is to simply not give them any room at all to find a home in the first place. And the best way to do that is to fill your flowerbeds chock full of as many plants as you can.
Here is even better news, filling your beds with plants doesn’t have to be expensive. As late summer and fall approach, divide and split overgrown perennials to fill in open spaces. It not only adds to the beauty of your beds, it also cuts future weeding chores greatly.

When it comes to covering bare soil, the absolute best mulch of all is a living mulch. And it also happens to be the number one way to eliminate future weeds from flowerbeds.
Instead of having wide open spaces that constantly need mulch for protection, fill your flowerbeds full of plants. The more the better. Thick plantings of annuals and perennials are the best defense for crowding out and preventing future weeds.
The benefits don’t stop there. Dense planting helps to conserve moisture in the soil, meaning less watering time for you. It can also save huge on your garden budget. After all, the less you need to mulch, the less mulch you have to buy. Here is to keeping your flowerbeds weed free this year – and beyond!
Follow Our Facebook Page For Great Gardening Tips And Advice! This Is My Garden Facebook Page
This Is My Garden is a garden website created by gardeners, for gardeners. Jim and Mary Competti have been writing gardening, DIY and recipe articles and books and speaking for over 15 years from their 46 acre Ohio farm. They publish three articles every week, 52 weeks a year. Sign up today to follow via email, or follow along!
Looking for the best way to use all of those falling pine needles in your garden and flowerbeds?
Just as many trees shed their leaves every fall, pine trees also drop a fair amount of their needles to the ground each and every year as they replace and replenish their own green foliage. And although they might not drop them all – you can end up with a pretty big supply of needles on the ground. But what can you really do with all of them?
When it comes to pine needles and how and where to use them in the landscape, there are often way more questions than solid answers. And it’s easy to see why. There are a lot of misconceptions and misinformation, and it certainly leads to a lot of confusion about just how valuable they are to a gardener, and where you can safely and effectively use them.

The simple truth is that pine needles can be wonderful for a whole slew of uses when it comes to gardening. Both in the vegetable garden and in flowerbeds as well. But the key to success is knowing when, where and how to use them – and more importantly, where not to!
Before we get to where you can use pine needles, it’s important to cover the acidity topic. Unfortunately, pine needles get a bit of a bad reputation when it comes to being overly acidic.
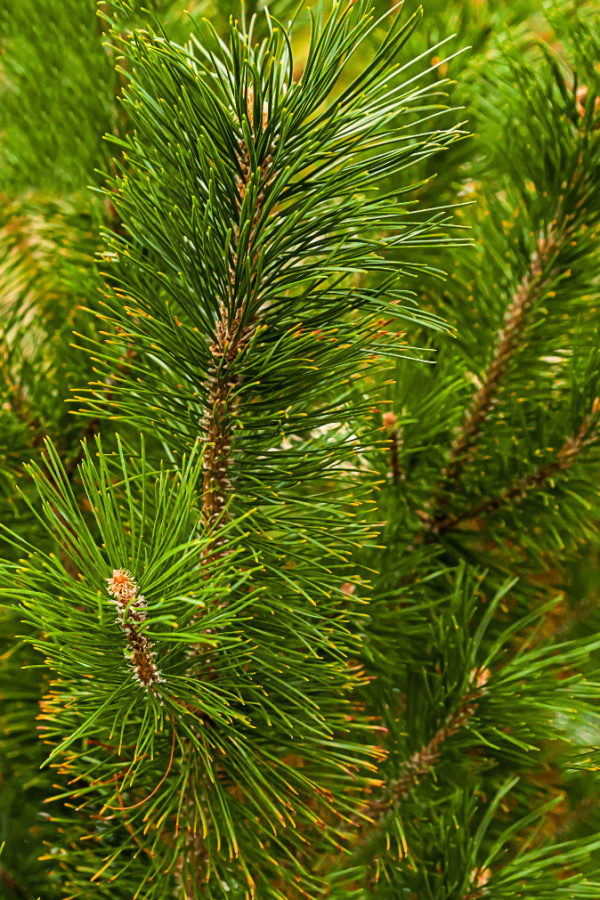
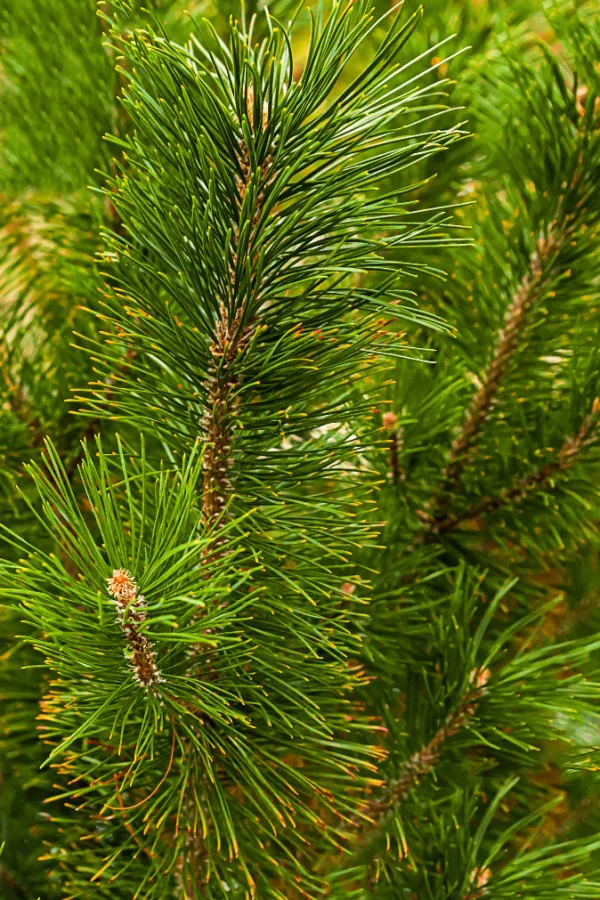
Many gardeners mistakenly think you can only use needles around acid loving plants, but that is actually not the case. It really depends if you are talking about green needles, or the brown ones that have fallen to the ground.
When needles are green and on a tree, they are acidic in nature. Green pine needles will register around 3.0 to 3.5 on the PH scale while still green. If you were to use green needles around plants that prefer more alkaline soils, it would definitely negatively impact their growth – and your soil’s acidity levels.
But as pine needles age and break down, much of that acidity is lost. In fact, by the time needles die and drop to the ground, they are much, much closer to a neutral PH. And after they age even more and turn deep brown, they basically register as neutral. Which means you can use them in more places than you might have thought!
Now that we have covered the topic of acidity, let’s take a close look at how and where you can use pine needles in both flowerbeds and vegetable gardens. And why, even though dead needles are not acidic, they shouldn’t be used in all situations when growing vegetables.
The sheer volume and availability of pine needles makes them excellent for use as a mulch. But where do they work best as a mulch?
Brown (aged) needles are great for mulching flowerbeds and around bushes or trees. Again, remember that they are near neutral in PH and will not affect the plants or the soil when it comes to acidity.
A three to four inch layer of fallen pine needles can do wonders to keep weed seeds out and flowerbeds looking fresh. The needles also break down very slowly, saving on the amount of re-mulching that will need to take place. Especially in perennial flowerbeds that are not worked as often.
For perennials and bushes that love more acidic soil, you can mulch with fresher needles. Azaleas, rhododendrons, blueberry bushes and even strawberry plants prefer slightly acidic soil. To help these plants, mulch around them with green needles or freshly fallen pine needles.

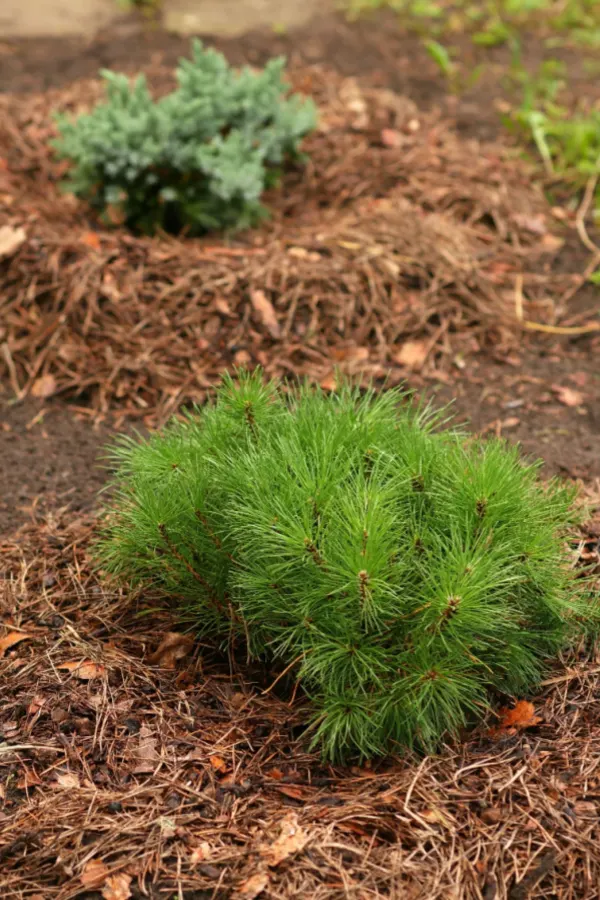
The green needles will provide the most acidity for plants, but even freshly fallen needles will give a small dose of acid to plants as it leaches out, helping them in the process.
The good news is that you can use brown needles anywhere in a garden as a mulch without worry of acidity. A thick layer of pine needles is an excellent way to mulch between your rows. This helps to keep weeds down, eliminates having to till or work the soil, and keeps rows from getting muddy and messy from excess rainfall.
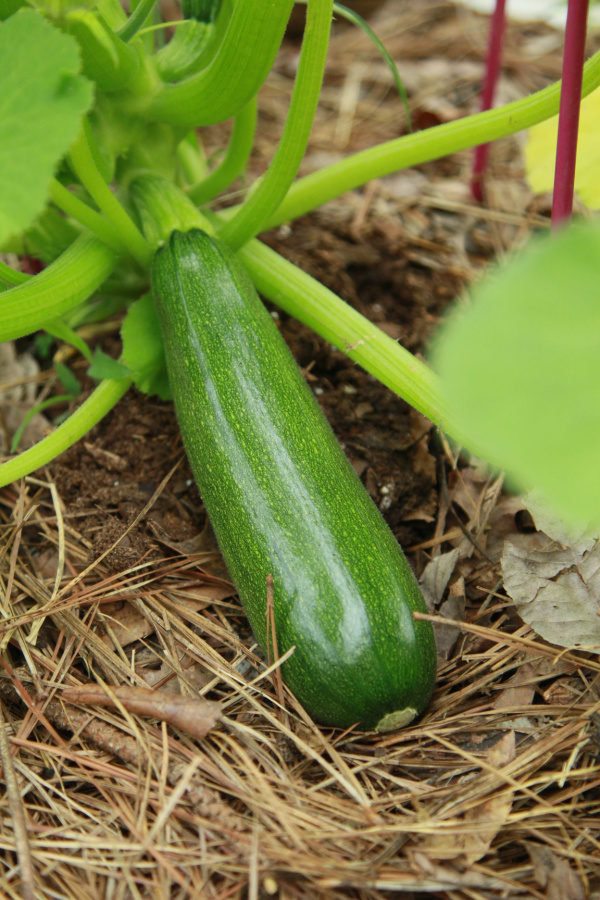
But where pine needles can really be excellent as a mulch is underneath sprawling, vining crops. Leaving soil bare under melon, cucumber, squash, zucchini and other vining vegetables can lead to disaster for the plant’s fruit.
When ripening fruit touches the soil, the moisture can often cause rot or soft spots that damage and even ruin the fruit in some cases. But by putting a few inches of pine mulch underneath the vines, they keep the fruit from touching bare dirt.
Although you can use straw or grass clippings for this, they often hold moisture in. This, of course can also cause the fruit to stay wet and rot.
Pine needles, however, are thin and don’t hold water. That means they dry quicker and still provide good air flow. They also have the added benefit of not being attractive to insects. Three more reasons they are perfect for helping vining fruits ripen as a mulch!
To use around vining crops, simply lay a few inches of needles on the ground all around the plants. All that is left is to let the vines grow over them. The thick layer of needles will also help to keep competing weeds from coming up around the vines, serving one more useful purpose.
Pine needles can also be used around ground and root crops such as onions and garlic. They are also great for protecting ripening strawberries from touching the ground. Again, there is no worry of aged needles changing the pH of the soil around these crops.
Last but not least, pine needles are great for covering raised bed soil in the winter. A thick three to four inch covering is perfect for keeping weed seeds out. Even better, it also helps to protect the soil from erosion from winter winds, snow and ice.
There are some vegetable plants that pine needles are not good for mulching with. It’s not that the needles will hurt them, they just won’t help as much as other organic mulches will in their place. Tomato and pepper plants are two of the biggest to not mulch with pine needles.

Pine needles are thin and narrow. Because of that, they are poor insulators of the soil. They also don’t hold in moisture well either. Even worse, they can mat together over time, keeping water and nutrients from getting to the roots if too thick.
Most importantly, because they break down slowly, needles don’t add organic material to the soil in quick fashion. Straw, grass clippings, and compost all do much a better job of adding more organic nutrients for high nutrient plants such as tomatoes and peppers.
So what about using all of those falling needles in your compost pile? The short answer is that it’s best to leave needles out of a home compost pile. Again, it’s not due to any acidity issues at all. Once fully composted, pine needles are not acidic in the least.
The reason you should not use pine needles is that they are extremely slow to decompose. Pine needles have a waxy outer coating that takes considerably longer to break down than most other organic materials.
Because of that, it can take tremendously longer to create finished fresh compost. Even when you chop them up prior to adding.
When it comes to pine needles, you are better off to create a dedicated pile of needles. They will break down slowly, but you can then have them at the ready to use anywhere and everywhere you need them.
Here is to taking advantage of all of those falling pine needles this year, and using them to help power and protect your vegetable garden this year! And if you have falling pine cones too – here’s a great read as well: How To Make Scented Pine Cones – Turn Ordinary Pine Cones Into Holiday Magic!
Looking for more info on pine trees? Check out: The 5 Best Pine Trees For A Christmas Tree – Whether Picking A Live Or Cut Tree!
Follow Our Facebook Page For Great Gardening Tips And Advice! This Is My Garden Facebook Page
This Is My Garden is a garden website created by gardeners, for gardeners. Jim and Mary Competti have been writing gardening, DIY and recipe articles and books and speaking for over 15 years from their 46 acre Ohio farm. They publish three articles every week, 52 weeks a year. Sign up today to follow via email, or follow along!
Did you know that by simply mulching your flowerbeds in the fall, you can not only help to protect your plants from the upcoming winter – but also all but eliminate next years weeding chores? It’s true! And all while cleaning up and making your flowerbeds look great for the entire fall and winter season!
Mulching flowerbeds before winter might seem a bit out of the ordinary. Although most gardeners are anxious to mulch their beds in the spring for the upcoming season, few take the time to lay down a second layer late in the growing season. But believe it or not – it’s actually one of the most important times of all to mulch!
A fall layer of mulch can play an extremely pivotal role in the health and maintenance of your perennial beds. In fact, as you will see below, the list of benefits goes on and on – including far fewer weeds next year, healthier plants, bigger blooms – and far less work for you!

So why is mulching in the fall so important? For starters, it is critical in helping to stop weeds. Not just weeds that appear late in the season, but next year’s weeds as well.
As plants begin to die back, large areas of soil become exposed. And with no covering, weeds can quickly appear and take hold. Even worse, that bare soil is a haven for weed seeds to blow in and find a cozy space to overwinter. And when spring arrives, so will the weeds!
Fall mulching is also pivotal in helping to regulate soil temperatures from the wild swings winter can bring. Hard frosts, deep freezes and warm winter days that thaw the soil out in quick fashion can all be tough on plants.
When the roots of perennials are not properly protected, these wild swings in soil temperature can injure and even freeze out plants entirely. But a good layer of mulch can minimize all of those potential problems.
In addition, mulching is also critical for helping to retain moisture in the soil. Even when perennials go dormant, their roots still need moisture to survive. Especially when they are trying to survive throughout the long, dark months of winter. But the real secret to success is making sure you apply that mulch at the right thickness – and right at the right time!

The first key to success for mulching flowerbeds in the fall is to get your mulch down at the right time. Mulch too early and bare spots can still occur as plants die back. Mulch too late, and the weeds and weed seeds can already be taking hold by the time to cover the soil.
As perennials begin to fade and die back in mid to late autumn, they often leave bare soil in their wake. And that bare soil is exactly where weed seeds will find a home to become next year’s weeding problems.
The key is to clear the foliage as it begins to die back, and then immediately protect the open area with mulch. Do this, and weed seeds simply can’t find a home to germinate later.
One of the biggest mistakes gardeners make in their flowerbeds in the fall is to disturb the existing mulch. Many gardeners like to rake or turn over the existing the mulch already in place. Unfortunately, although it may freshen up the look of the beds temporarily, it also creates a long list of issues.
For starters, raking or turning existing mulch over will create more weeds than ever. Mulch forms a protective barrier against weed seeds that lie harmlessly on top of the existing mulch. Undisturbed, they will never sprout or cause an issue.

But once turned over, the weed seeds are basically “planted” and now lay in wait to germinate next spring and summer. Just like that, in the blink of an eye, you multiply your weeding chores for next year! See our article: 2 Simple Secrets To Eliminate Weeds In Flowerbeds – For Good!
For best results, before fall mulching, simply clear the flowerbeds of any existing weeds and dying foliage. Next, add a new layer of mulch directly on top, all without trying to disturb the current mulch already in place.
That leads to the next subject – how much mulch is enough? A good rule of thumb for maximum protection is to have a total of four to six inches of mulch in place at all time. And this is especially true through winter.
This is more than enough mulch to help suppress existing weeds, keep soil temperatures regulated, and retain moisture. It is also enough to keep new weed seeds from blowing in and finding bare soil, which is extremely important for reducing next year’s weeding chores!
If you have a few inches of mulch existing, add a few more to get to a proper thickness. If you have little to no mulch, add the full four to six inches to protect your plants and soil before winter arrives.
Last but not least is the subject of selecting the best mulch for your flowerbeds. When it comes to protecting perennial flowerbeds, hardwood and hardwood bark top the list of best choices.
Natural, organic selections like bark and hardwood mulch not only provide good protection for the soil and plants, they also add organic material as they break down. But be careful not to select hardwood mulch that is too finely shredded.
The more finely shredded mulch is, the faster it will disappear. Although triple or ultra-shredded mulches may look beautiful when you place them down, they won’t last nor protect long. Instead, select single or double shredded versions to extend the life and protection levels for your beds and plants.
Even though rock, stone and even synthetic mulches can be used, they are not the best choices. They simply don’t have the weed-stopping and plant protecting power found in organic mulches. In addition, these materials will not add any additional nutrients to the soil over time.
One final note on fall flowerbed maintenance. Autumn is the perfect time to dig up existing perennials that have grown too large for their space and divide them. Not only will it help keep plants healthy and blooming strong, it creates a whole slew of free plants. Plants you can then use to fill open spaces.
There is simply no better long-term way to crowd out weeds than by filling your existing bed spaces with plants. Even better, it saves on mulching materials and time. All while creating great looking beds full of foliage and color.
Here is to giving your flowerbeds a great layer of mulch in the fall. Remember that a little work now means less work for you next spring and summer! For even more tips on keeping flowerbeds weed free, see How To Eliminate Flowerbed Weeds With Cardboard – And Have Beautiful Beds! and How To Eliminate Flowerbed Weeds With Cardboard – And Have Beautiful Beds!
Follow Our Facebook Page For Great Gardening Tips And Advice! This Is My Garden Facebook Page
This Is My Garden is a garden website created by gardeners, for gardeners. Jim and Mary Competti have been writing gardening, DIY and recipe articles and books and speaking for over 15 years from their 46 acre Ohio farm. They publish three articles every week, 52 weeks a year. Sign up today to follow via email, or follow along!
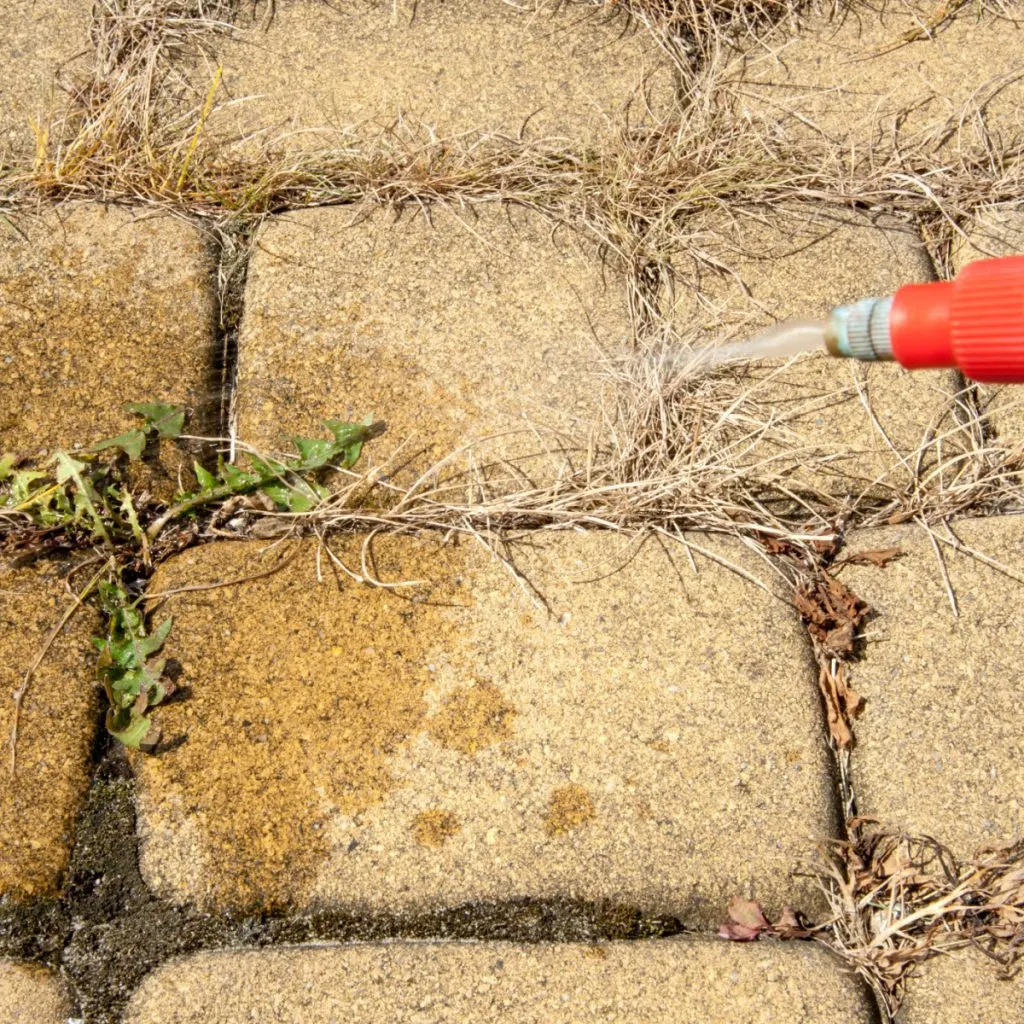
Did you know that one of the easiest and all natural ways to get rid of weeds in driveways, paths and gravel areas is with horticultural vinegar? And even better, that you can also use it to eliminate tough and pesky weeds like thistle, bindweed and more in your flowerbeds and garden too?
It’s true! Not only is it easy and effective to use, horticultural vinegar is also a much safer choice for taking out weeds when pets, wildlife and humans are around. And, it’s even safe for important pollinators such as bees and butterflies as well.
There is more concern than ever for using chemical sprays for weed control. Not just for residue left in the soil, but for the animals, insects and humans that come in contact with the sprays both before and after they dry. But that is exactly where vinegar, or more precisely horticultural vinegar can work wonders!

The natural acid found in all vinegar is quite effective in killing and controlling weeds. Especially when you apply it in a higher concentration of acidity which is found in a type of vinegar known as horticultural or industrial strength vinegar.
Although you can kill weeds with traditional store bought vinegar, horticultural vinegar is a far better choice. Why? Because regular vinegar found at your local grocery store usually has an acidity of around 5%. Although this lower concentration can work to control emerging or tender young weeds, it is certainly no match for tough, mature and persistent weeds.
But horticultural vinegar is far stronger. In fact, it can have acidity concentrations that range anywhere from 20% all the way up to 40% or more!
Unlike the 5% off-the-shelf store versions, that higher concentration of acidity does wonders for controlling tough weeds. Not just for the short term – but killing all the roots of the weeds down deep to keep them from ever coming back!

Vinegar works in two distinct ways to eliminate weeds. First, the acid in it kills the vegetation as it comes in contact with it. In essence, it burns the foliage. But as the vinegar soaks into the soil, it also absorbs into the roots of the weeds.
This not only burns the roots with acid, but settles into the soil to make it difficult for the roots to recover. As an added benefit, as the soil turns more acidic, it makes it difficult for future weeds to germinate as well.
This is exactly why it is important to only use vinegar to kill weeds in spaces where plants will never grow – or when using for tough weeds like thistle, bindweed and crabgrass in a lawn, flowerbed or garden setting, to treat only the individual foliage of the leaf to keep nearby plants and grass safe. (more on that later in the article)
So what is the best horticultural vinegar strength to use? It really comes down to where you will be using it and what type of weeds you are attempting to eliminate.
You can still use ordinary 5% store bought vinegar to control tiny weeds and small seedlings. But in general, when spraying driveways, walkways and paths – aim for a vinegar with an acidity in the range of 30%. It is usually labeled as horticultural or industrial vinegar. Affiliate Product Link: Harris 30% Vinegar, Extra Strength
You can dilute it down with an equal amount of water to create a spray with a concentration of 15%. This is usually enough to kill most average weeds. But for stubborn weeds, you can use it at full strength (30%) to really clear out weeds for good!
Before mixing or spraying any vinegar solution, it’s important to take a few precautions. Remember that although vinegar is all-natural, it is still an acid.
As with any acid, it is important to take precautions to prevent burns to the skin and eyes. Especially if you are using the more potent acidic concentrations found in horticultural vinegar. Always use goggles and gloves to prevent burns to the eyes or skin. In addition, be sure to keep any vinegar solution safe and securely stored away from children.
If spraying for tough weeds and using full strength, simply pour the vinegar into your sprayer. At this point, you can add a few drops of liquid dish soap for every quart of vinegar you put into the spray bottle.
To apply, a hand-help pump spray bottle works best for small areas. This is also great when trying to just hit a single plant in flowerbeds. For larger spaces such as driveways and walkways, a pump or backpack sprayer are the better choice. They can certainly help cover large spaces in quick fashion.
Once your vinegar solution is ready to go and your protective gear is in place, it’s time to spray! The best time to spray vinegar for killing weeds is in the afternoon and on hot, wind-free sunny days.
The sun and heat help to accelerate the effectiveness of the acid in vinegar. They also help the vinegar absorb and kill weeds at a much higher rate. Avoid windy days as it can lift the spray to nearby vegetation, grass and flowerbeds, causing damage in the process.
Never spray when there is dew present or after a rain. This will only dilute the acidity level and make the solution much less effective. Spray so that you coat the foliage of the weeds completely. You do not have to douse or saturate the leaves, but make sure the foliage is wet.
It is best to use vinegar in areas where you do not grow anything else such as driveways, patios and paths. However, if you have stubborn large weeds like thistle, bindweed, etc. in your garden, lawn or flowerbeds – you can carefully spot spray them to eliminate them. See our article: How To Get Rid Of Canadian Thistle – Forever!
Again, when spraying in vegetation areas, be careful to not hit the surrounding vegetation in the process with over spray. For these areas, a small hand help sprayer can make spot weeding much easier.
As for the speed of the solution’s effectiveness, it all depends on the weather and the type of weed. If using an acidity solution of at least 15 percent on a warm sunny day, the foliage will start to wilt and die back in 24 hours.


On cooler days, it may take a bit more time to begin to take effect. If after five to seven days, there is still some green to the weeds, repeat the application for complete control.
Remember, the larger the weeds and roots, the longer it will take to get them under control. Once you have the area cleared of weeds, try to spray new weeds as they are just beginning to sprout. This will require less vinegar strength, and make the weed seedlings easy to control.
Here’s to controlling your weeds with horticultural vinegar this year!
Follow Our Facebook Page For Great Gardening Tips And Advice! This Is My Garden Facebook Page
This Is My Garden is a garden website created by gardeners, for gardeners. Jim and Mary Competti have been writing gardening, DIY and recipe articles and books and speaking for over 15 years from their 46 acre Ohio farm. They publish three articles every week, 52 weeks a year. Sign up today to follow via email, or follow along!