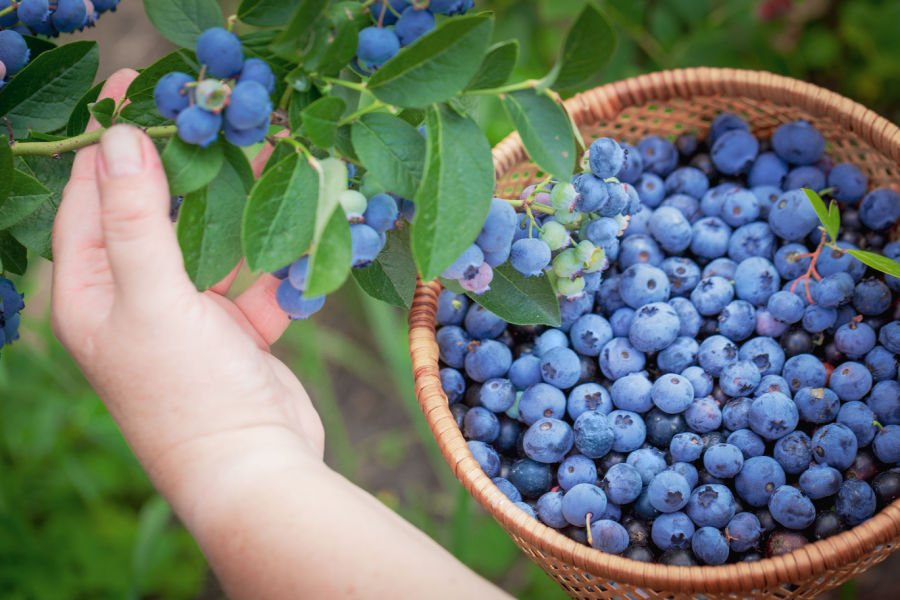
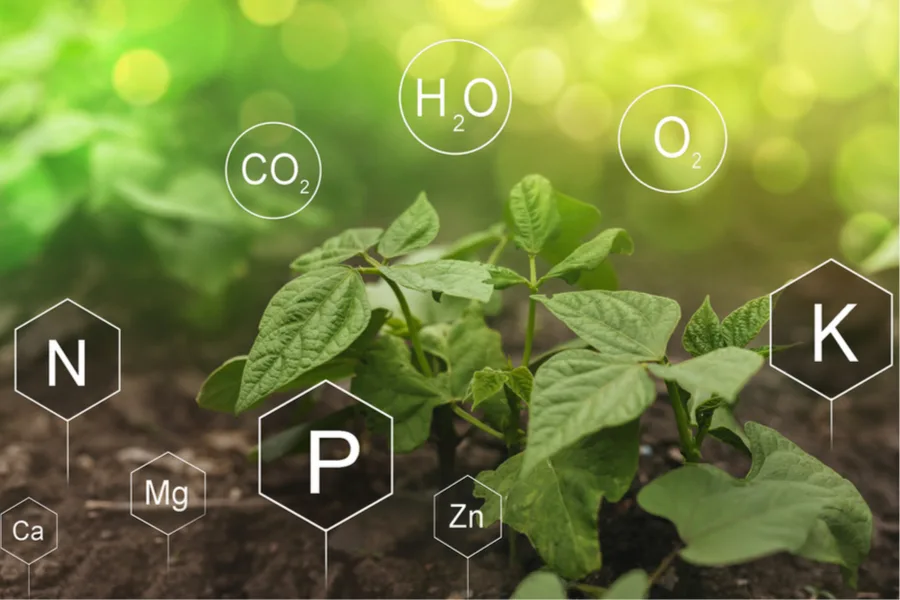
Everything you need to know about fertilizing – all in one page! From making your own organic compost tea, to using worm castings, compost and more – here are all of our best articles on using fertilizers effectively in your gardens, flowerbeds and landscapes.
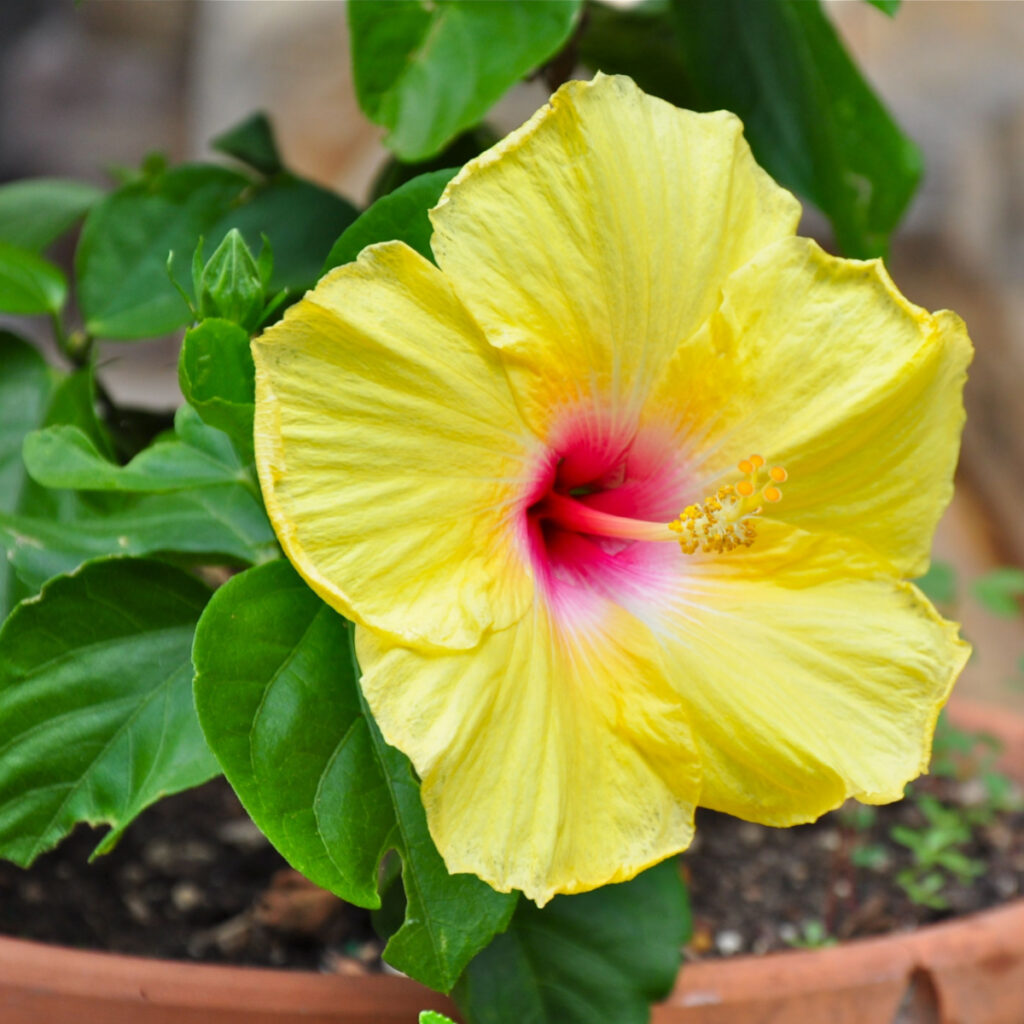
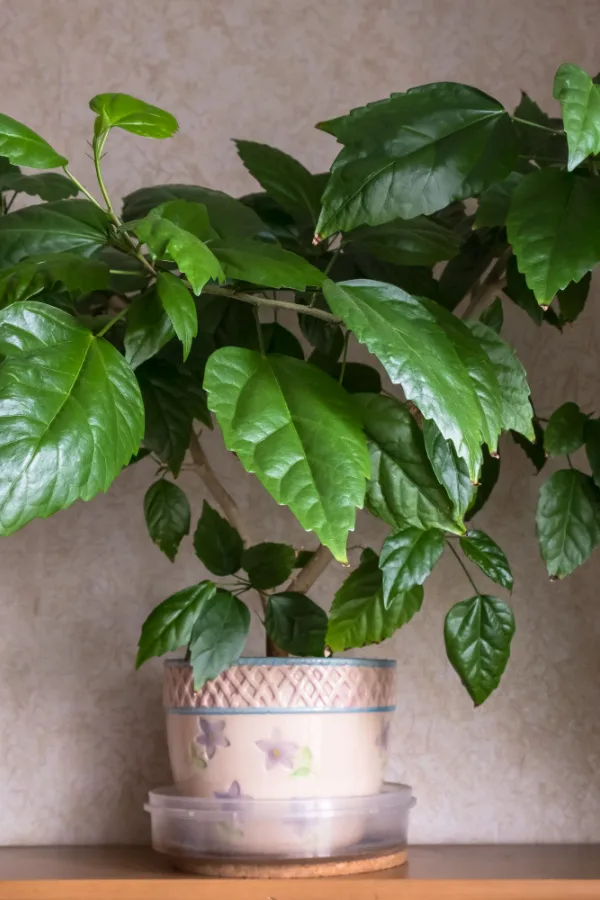
Looking for a few tips and tricks to keep your hibiscus plants alive and thriving indoors this winter?
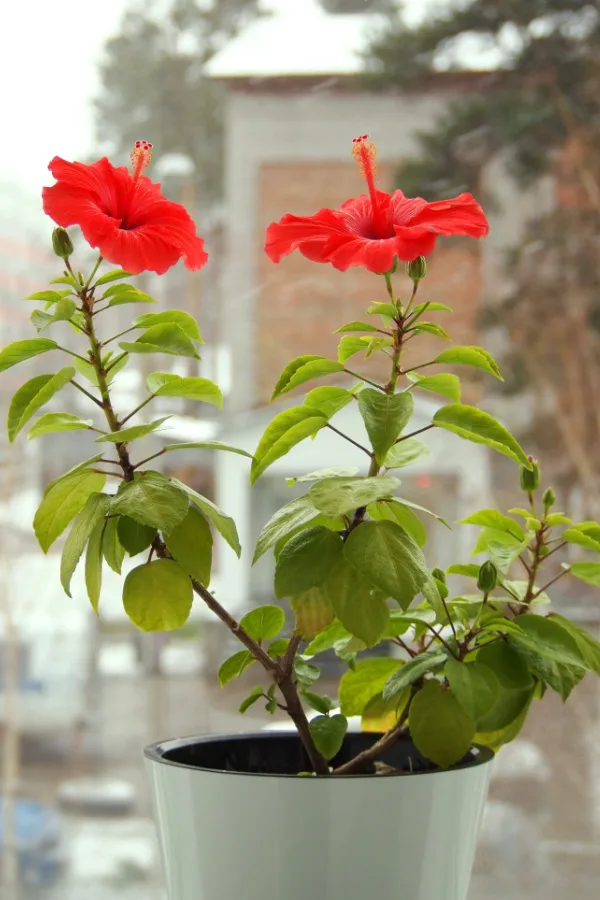
Hibiscus is a tropical plant featuring beautiful, glossy foliage and large intricate blooms in a variety of bold colors. They really are quite the showstoppers during the warm months in almost any growing zone. But in order for this gorgeous plant to survive the harsh, cold winter months, it needs to be brought indoors to stay alive.
Whether you are growing hibiscus in pots on your patio or deck, or directly in flowerbeds, these perennial plants truly flourish with the heat of summer. However, if you live in a location that experiences true winters, your hibiscus plants will quickly start to suffer if exposed to freezing temperatures.
Hibiscus plants are a great way to add color and beauty to your property. But if left outdoors in cold winter climates, they simply can’t survive.
The good news is that overwintering hibiscus plants doesn’t have to be difficult. Nor does it require an indoor greenhouse, special lights, or expensive equipment to successfully keep the plants alive and ready for blooming next year.
How To Keep Your Hibiscus Plants Alive Indoors Over Winter
Acclimating Hibiscus To Indoor Life
Success with overwintering hibiscus starts with getting the plant indoors early in the fall. Unlike other perennials that can be brought in right before a hard frost or freeze, a hibiscus plant is different.
For starters, its roots and foliage can suffer issues simply with cold soil. Because of this, it is best to not allow the plant to remain outside if temperatures drop below 50º Fahrenheit for any extended time.
If your hibiscus is growing in a pot or container, this is a simple, fast task. If a cold night is in the forecast, simply bring it in for overnight protection. However, if your plants are growing directly in the soil, you will need to dig them up and pot them in advance of any cold temperatures.
Digging Up Hibiscus Growing In The Ground – How To Keep Hibiscus Plants Alive Indoors
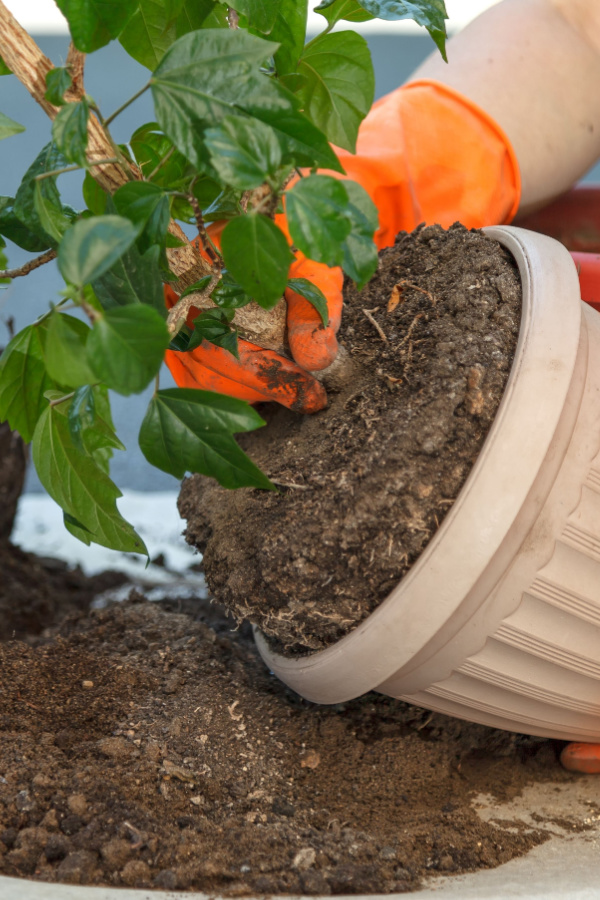
If you have planted your hibiscus in the soil, it should be dug and potted early in the fall. The ground unfortunately begins to chill by mid-fall. By getting the plant out while the soil is still warm, it will suffer less shock and have a much better chance of survival.
Keep as much of the root ball intact as possible when potting up a hibiscus plant that was growing directly in flowerbeds. This makes the transition indoors far easier on the plant and its chances for survival far greater.
When digging out the roots, it is important to keep the soil ball as intact as possible. Since the plant will only be overwintering, the pot needs to be just slightly larger than the root ball.
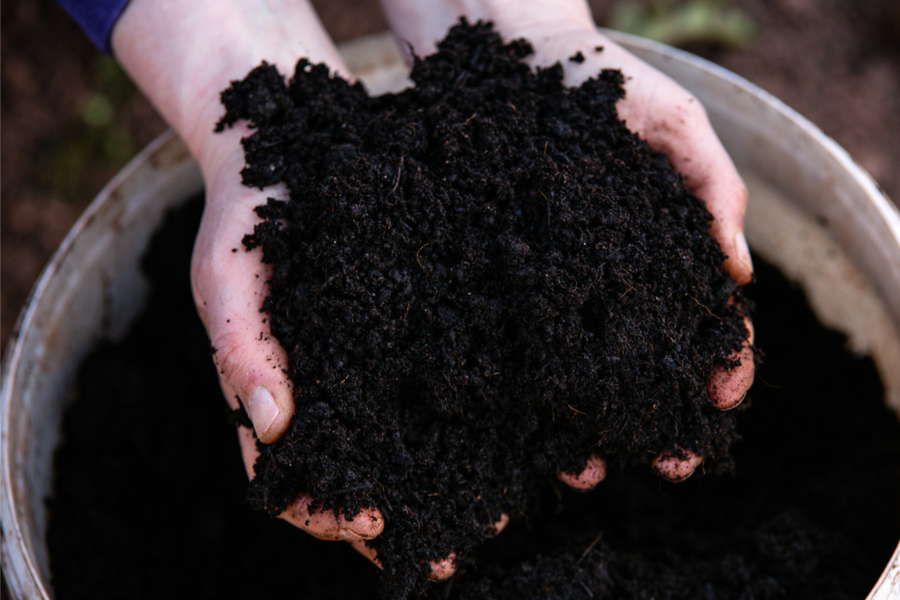
When potting, select an all-purpose, loose, well-draining potting soil. Although hibiscus plants need a fair amount of moisture, potting soil that holds too much water will rot the roots. Place a bit of potting soil in the bottom of the pot and slightly moisten it before placing the root ball into the pot. Affiliate Product Link: Burpee Premium Organic Indoor Potting Soil Mix
Pack the soil around the ball as you continue to add more soil. Allow space for a light covering of mulch on top, as this will help keep the soil from drying out too quickly indoors. Finish by lightly watering the soil and plant so that it is slightly moist but not over saturated.
Bringing Plants Indoors – How To Keep Hibiscus Plants Alive Indoors
Whether you are starting with hibiscus plants already in containers or you just potted them up from your flowerbeds, you can continue to leave them outside on warm fall days.
The more late season sun and warmth they get, the better. This allows the plant to store more energy and keep its roots strong. This is especially important for plants that were just potted up. The important thing is to keep an eye on the forecast and bring them in if the temperatures will be dropping too low.
As fall temperatures start to cool consistently, it’s time to prepare your hibiscus for its permanent spot indoors. This will allow it to slowly adjust to less light. It also protects your hibiscus from exposing it to too much cold.
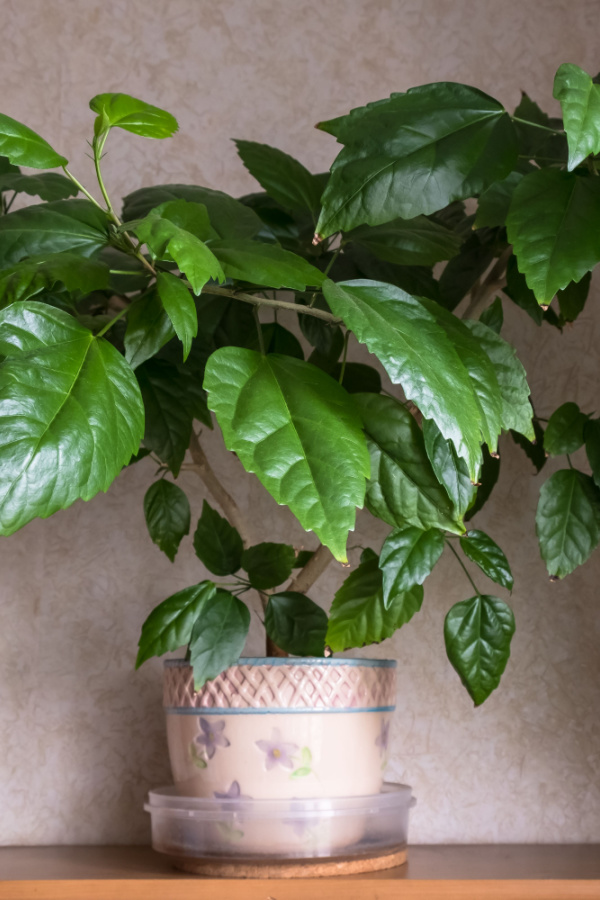
Winter Care – How To Keep Hibiscus Plants Alive Indoors
For best results, select the warmest, most well-lit room of the house for your plant’s winter home. Hibiscus plants do not have to sit in a window, but the closer they are to natural light the better. Avoid placing plants near vents or drafty windows. This can cause stress to your hibiscus and result in both leaf and bloom loss.
Depending on the amount of light and heat indoors, your hibiscus may continue to grow and even bloom. It can also go semi-dormant if there is not enough light or warmth.
If your hibiscus stays active, it will require more frequent watering. Plants that go semi-dormant will need only occasional watering. The best rule of thumb if your hibiscus goes semi-dormant is to never let the plant completely dry out.
If too many leaves begin to brown or fall off, it’s likely your plant is not receiving enough light, warmth, or both. In these cases, an ordinary fluorescent or LED bulb can help stimulate the plant. If you happen to have a grow light, it will work as well but the special light is not necessary to give the plant the light it needs.
If you simply don’t have enough room or light to keep the plant bright enough, you can also allow your hibiscus plant to go completely dormant in a cooler, dark room of the house.
Although this is an option for those with no sunny windows or available room, note that it can be difficult to bring a hibiscus out of dormancy in good health. For that reason, it’s best to keep the hibiscus plant active or semi-dormant when overwintering.
Pruning Hibiscus – How ToKeep Hibiscus Plants Alive Over Winter
Like many perennials, hibiscus plants bloom on new growth each year. Because of this, it is best to only prune them in the spring. That allows for new stems and foliage to grow and sets the stage for new blooms.
Over pruning your hibiscus plant in the fall can stress out plants and cause a reduction of blooming.
When bringing hibiscus indoors in the fall, a bit of light shape pruning is fine. Simply cut back unruly stems or a few leaves here and there to make it fit your indoor space better. But beyond small cuts, leave any major pruning until spring.
Unfortunately, fall pruning can adversely affect future bloom cycles by promoting late growth. It can also put a fair amount of stress on the plant as it tries to regenerate new growth. This can be exceptionally hard on plants that are being overwintered since they will already have less light and warmth than usual.
Fertilizing – How To Keep Hibiscus Plants Alive Indoors
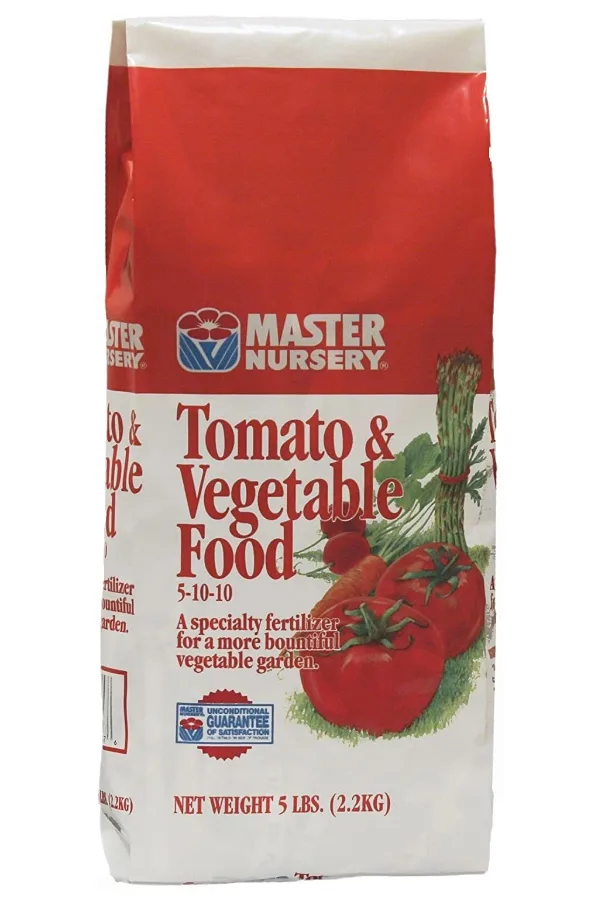
One of the best ways to keep your hibiscus healthy, vibrant, and blooming while you overwinter is regular fertilizing. Hibiscus plants perform best with a balanced ratio fertilizer of nitrogen, potassium, and phosphorous. Look for fertilizers with equal ratios like 5-5-5 or 10-10-10. Affiliate Link: Dr. Earth 1 lb. 5-5-5 All Purpose Fertilizer
All of these options will supply a fair amount of nutrients without overpowering the plant. Fertilize your hibiscus plant every 3 months for best results. Early spring, mid-summer, late fall, and mid-winter is a good rule of thumb.
You can also use compost tea monthly as an alternative fertilizing approach. With balanced nutrients in a liquid form, it works well for keeping your hibiscus healthy without overpowering the plant. (See: How To Make Compost Tea)
Before you know it, you will be able to bring your hibiscus plant back outside for new growth and blooms.
When the weather starts to warm up in the spring and stays consistently above 50º F, start to bring your hibiscus plant outside. Place it in a protected warm, sunny location for a few hours each day. Slowly increase that time to help re-acclimate the plant for outdoor living once again.
Here’s to taking the time to overwinter your hibiscus this year and enjoying the beauty of this tropical plant all year round!
This Is My Garden is a garden website created by gardeners, for gardeners. Jim and Mary Competti have been writing gardening, DIY and recipe articles and books and speaking for over 15 years from their 46 acre Ohio farm. They publish three articles every week, 52 weeks a year. Sign up today to follow via email, or follow along!
Fertilizer
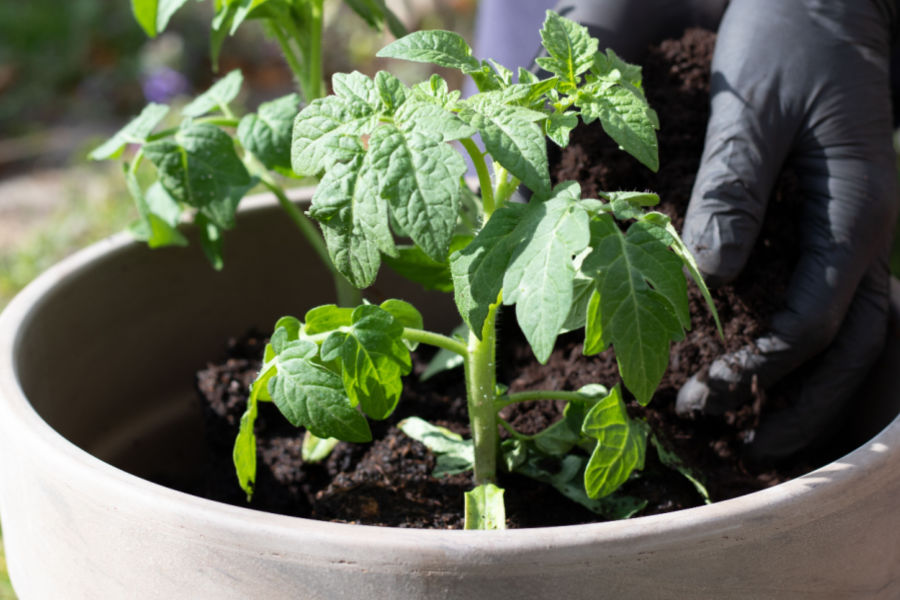
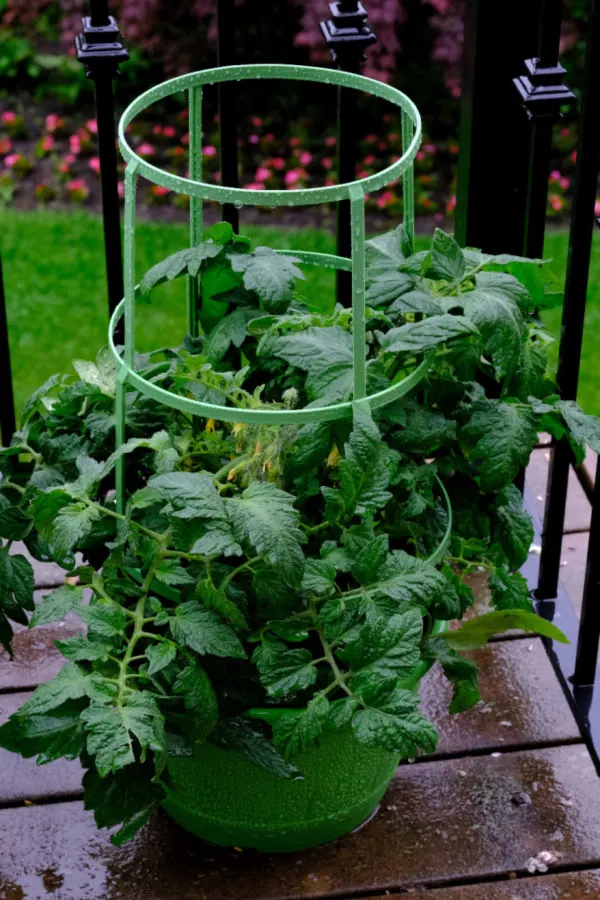
Looking for the best way to fertilize the tomato plants you have growing in pots, containers, grow bags or 5 gallon buckets?
Growing tomatoes in containers is becoming more popular than ever. Whether it’s planting a mini cherry tomato plant in a small pot on your back patio to enjoy for salads or snacking, growing a few slicing tomatoes in a hanging tomato grow bag, or growing full size heirloom tomatoes in 5 gallon buckets or large containers – the sky is the limit when it comes to growing tomatoes outside of a traditional garden setting.
There are actually a lot of built in advantages for growing tomatoes in containers. For starters, it doesn’t require a big yard or space. In fact, all you need is a sunny patio, balcony or deck – and you’re in business!
Planting tomatoes in pots is a breeze. And with little weeding chores after planting, maintenance is a snap too!
Even better, planting and maintaining tomatoes in containers is far easier than in a traditional garden. There is no need for heavy tilling or digging to plant. Nor is there the worry of constant weeding once the plant starts to grow.
Even More Advantages – How To Fertilize Tomato Plants In Pots, Containers & Buckets
Perhaps best of all, when growing in pots and containers, you are less likely to encounter many of the pests, disease and growing issues that tomatoes can often have.
With your plants being off the ground, pests have a harder time attacking. As for disease and growing issues, the chance of tomato blight and blossom rot are severely reduced as well since the tomatoes are growing in fresh new potting soil each season.
But one thing you do need to do with container tomatoes is provide them with plenty of power – and that means fertilizing is a must. But as you will see below, how and when you give your tomato plants that energy can make a huge difference in just how successful they are!
How To Fertilize Tomato Plants In Pots & Containers
Tomato plants require a tremendous amount of nutrients to grow and produce their fruit. Even in a tradition garden or raised bed setting, tomato plants almost always need more nutrients than the surrounding soil can provide. But when growing in a container, that need is multiplied!
Growing tomatoes on a sunny deck or patio can be a great way to have tomatoes close by for salads or dishes!
Because of the limited soil space, tomato plants in containers use up the available nutrients quickly. That is why it’s so important to start fertilizing tomatoes growing in containers right from the start.
A steady supply of energy from the get go will help plants develop strong roots, stems and foliage. And that sets the stage for strong blooming and great production later on. But for big success, the fertilizer you provide needs to be given in small but steady doses.
The Dangers Of Over-Fertilizing – How To Fertilize Tomato Plants In Pots, Containers & Buckets
Too much or too powerful of a fertilizer will cause your tomato plants to grow enormous amounts of foliage. They may look dark green and healthy, but unfortunately, they are spending all of the excess energy on growing only foliage and roots – and not blooms.
Over-fertilizing will actually reduce your overall yields. Plants that get too much food will stop producing blooms and simply concentrate on growing bigger. Even worse, their roots will grow too big as well – often leading to the plants becoming root bound.
Of course, under-fertilizing will cause the plant to grow at too slow of a pace. And, that in turn will lead to a smaller harvest as well. So how can you fertilize your tomato plants in containers just right?
The answer is to simply provide your container tomato plants a light but very steady and consistent dose of nutrients – and the easiest and best way to do that is with liquid fertilizer!
Why Liquid Fertilizers Work Best For Tomato Plants In Pots & Containers
Liquid fertilizers are perfect for tomato plants in containers for a couple of very big reasons. First and foremost, they can absorb into the plants quickly. Both through the roots as the liquid leaches into the soil – and through the leaves and stems.
But what also makes using liquid fertilizer on your tomato plants even better is that you can easily control the strength and dose by simply diluting your mix. By weakening the strength of the fertilizer, you can then give your plants a lighter but more regular dose of energy – allowing them to grow at the perfect slow and steady pace that sets the stage for big production!
So how often should you be applying liquid fertilizer to your plants? If giving a light and steady dose, the feedings should be applied every 7 to 10 days – and right from the start! With that in mind – here is a look at the best liquid fertilizers to use on your plants:
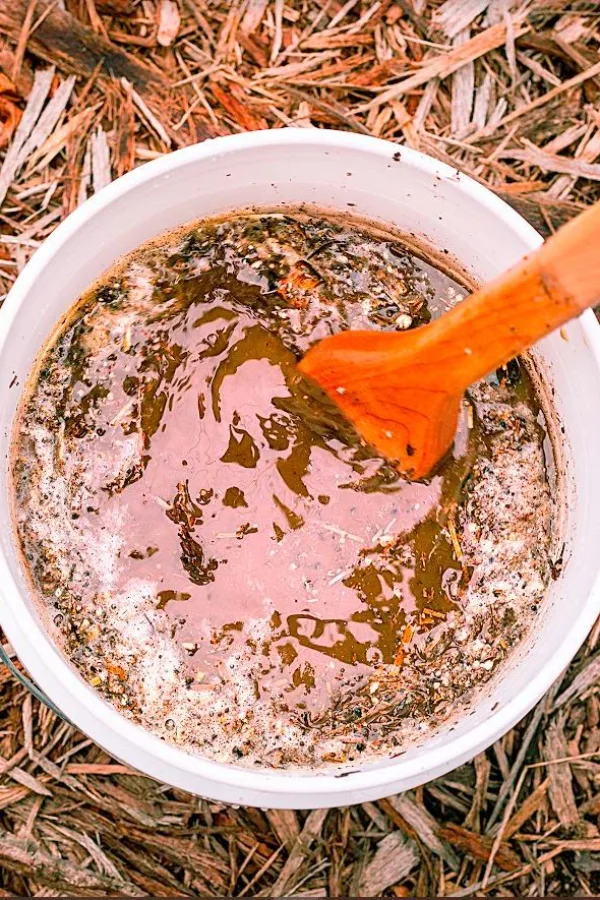
Compost Tea – How To Fertilize Tomatoes In Pots, Containers & Buckets
Compost tea is 100% organic and an excellent choice for powering tomatoes. Made from simply soaking compost in water, the nutrients are easy for plants to soak up. It also happens to be free to use if you have your own compost pile!
All you need to make great compost tea is a 5 gallon bucket, water, a stir stick and compost.
Even better, the nutrients in compost tea are so pure, stable and low, you don’t need to dilute the mix when applying. For best results, simply water your plants once a week with the tea. See : How To Make Homemade Compost Tea
Commercial Liquid Fertilizers – How To Fertilize Tomatoes In Pots, Containers & Buckets
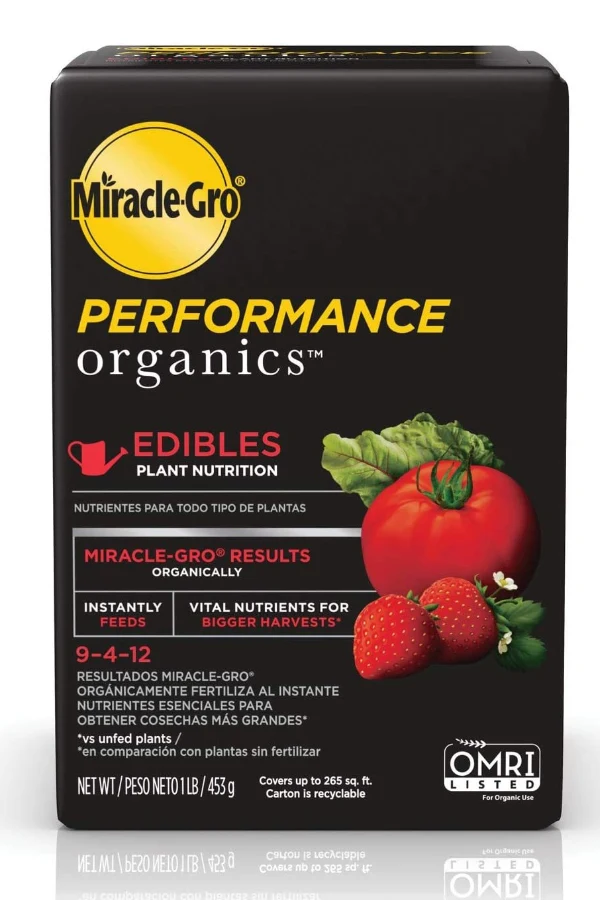
When growing any edibles, it is always best to choose an organic fertilizer. The good news is there are plenty of great commercial organic fertilizers on the market today to choose from. But when selecting a commercial fertilizer, be sure to select one that does not have an overly high nitrogen content.
Nitrogen is important for plant growth and foliage growth. But phosphorous is key for fruit production and potassium is big for helping plant health and ripening the fruit. When looking at N-P-K ratios, look for a balance, or one that is higher in the phosphorous and potassium numbers. Avoid any fertilizer with a higher nitrogen rating than the other two.
Select liquid fertilizers that have higher middle and end numbers and not a higher nitrogen number.
Worm Casting Tea – How To Fertilize Tomatoes In Pots, Containers & Buckets
Worm casting tea is another great organic option for powering tomatoes. Much like compost tea, it can be used at full strength and delivers the perfect low and steady punch of power for your tomato plants.
To create your own liquid casting tea for tomatoes, steep 1 cup of castings in one gallon of water and allow it to soak in for a few days. Shake up or stir the castings a few times each day to help them soak into the water. Then simply strain and water your plants!
Worm casting tea is great for all of your vegetable plants, annuals and more. And be sure to put the leftover grounds after straining into your compost pile! Product Affiliate Link : Pure Worm Castings
Here is to powering your container tomatoes this year with liquid fertilizer – and to having your best crop of tomatoes ever!
This Is My Garden is a garden website created by gardeners, for gardeners. Jim and Mary Competti have been writing gardening, DIY and recipe articles and books and speaking for over 15 years from their 46 acre Ohio farm. They publish three articles every week, 52 weeks a year. Sign up today to follow via email, or follow along!
Fertilizer
Looking for how to best fertilize your potted flowers for blooms that are not only big and beautiful – but last all season long?
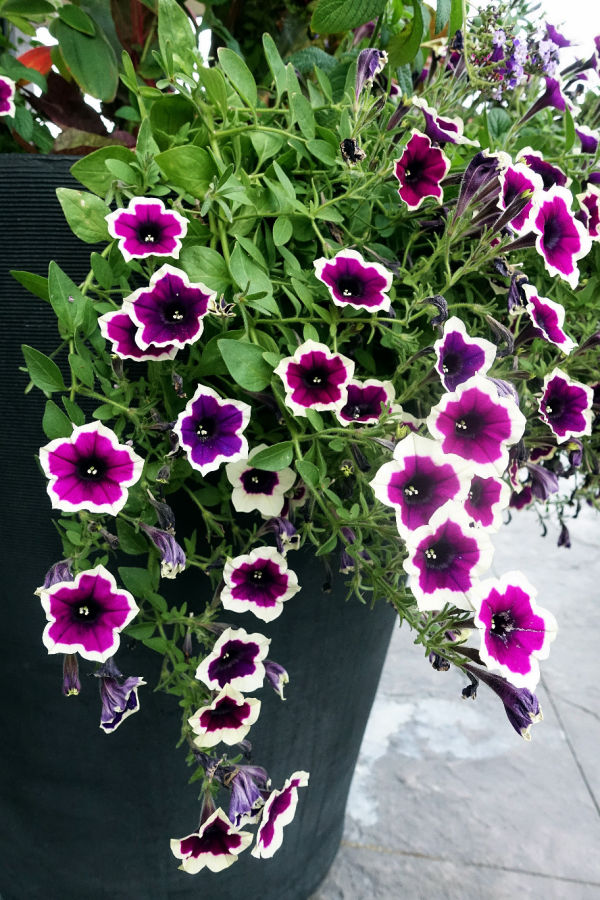
Potted flowers are one of the easiest ways to add a huge splash of color nearly anywhere in the landscape. They are perfect for bringing big interest and color to patios, porches and decks. They also happen to look just as good at entrances or along paths, adding even more beauty to your home.
Perhaps best of all, when growing flowers in containers, there isn’t the constant chore of pulling weeds! After all, when you grow in pots, the chores of planting and maintaining are pretty easy. Especially when you compare it to digging, weeding and even mulching large flowerbed spaces.
Flowerpots add instant color and interest anywhere. Even better, they can be far easier to maintain than flowerbeds!
But if there is one drawback to growing flowers in containers, it’s trying to keep the plants in your pots blooming and booming from late spring until fall. Let’s face it, as good as flowering pots look in full bloom – they can be quite uninviting when the plants growing in them begin to fade or fail.
The good news is that keeping your flowers blooming big doesn’t need to be difficult or time consuming. In fact, by simply giving them the energy and nutrients they need on a consistent basis (along with proper water too!), it’s actually quite easy to keep your plant healthy right up until the first frost in late fall.
With that in mind, here is a look at the simple secrets to fertilizing the flowers growing in your containers, and how to make sure they flower bigger and longer than ever this year!
How To Fertilize Potted Flowers
If there is one major secret to success when fertilizing potted flowers, it’s that low and slow power is far better than providing your plants with big jolts of energy once a month.
Whether you grow in small pots, hanging baskets or even large containers – they all have limited space for the roots to grow in their vessel. Unfortunately, if you provide too much energy to the plants, their roots will grow too fast.
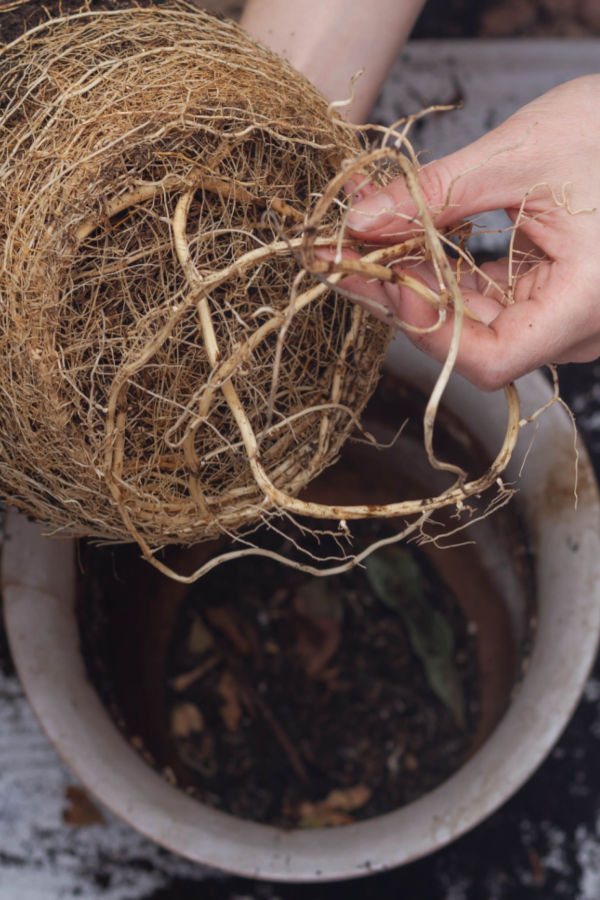
Over-fertilizing potted plants can lead to root overgrowth and an early demise. When plants become root bound, they can’t absorb the nutrients and water they need to survive.
When this happens, the plants quickly become root bound. And once a plant’s roots become overcrowded, they will begin to fail in short order. This is because a root bound plant is unable to absorb fertilizer or water. Instead, they both simply pass right through the container, and the plant slowly dies off.
If you have ever went to water your plant and the water either spills off the top or runs immediately through and out the bottom drainage holes, it’s very likely your plant is root bound.
Once this occurs, your only option is to replant into a larger space with more soil. That of course can not only be time consuming, but costly as well. But this issue can be avoided, and it all starts with fertilizing your plants for slow but steady growth.
The easiest way to do this is to provide your flowering plants with lower doses of energy, but on a more regular basis. And even more, by using a fertilizer that will power blooms, and not just foliage growth!
Selecting The Best Fertilizer For Potted Flowers
A One-Two Punch Approach To Fertilizing Potted Flowers
So what is the best fertilizer to use for annual flowers growing in containers? Should it be a liquid all purpose fertilizer? Or perhaps a slow-release granular type? The best and most effective choice is actually to use a combination of both!
Listen To Our Podcast Below On How To Keep Your Hanging Baskets Beautiful All Summer Long!
Slow release granular fertilizers break down a little at a time. Because of this, they power plants over the long haul. That is actually perfect for potted flowers and can help keep them growing well, but at a slower and more steady pace.
Liquid fertilizers give a far faster boost of energy. Because they are in a liquid form, they absorb both through the roots and through the leaves. As you will see below, both have their place in helping to power your container plants to great results.
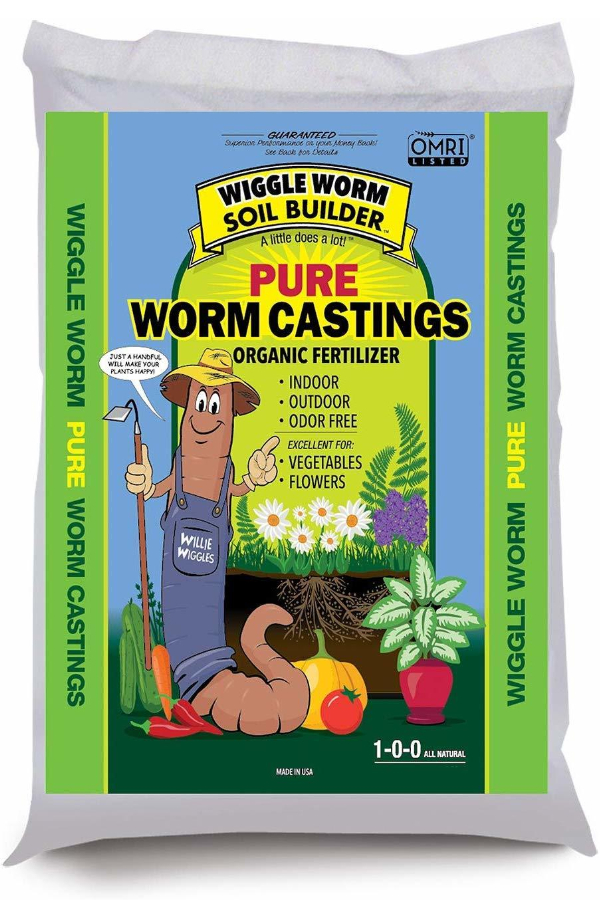
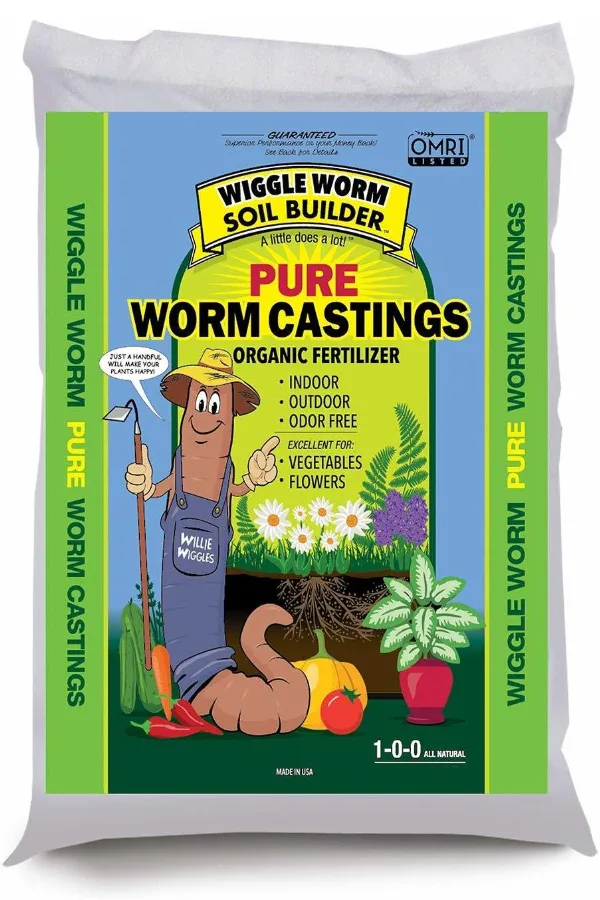
For granular fertilizers, select an all-purpose, balanced fertilizer to feed your potted plants once a month. There are several choices when it comes to granular feeding, but one of the best all-natural choices of all to use are worm castings.
Worm castings contain a nearly perfect blend of trace nutrients that can slowly power potted plants. When applied once a month to plants, they slowly release their energy every time it rains or you water as the nutrients leach down into the soil and absorb into the roots.
Worm castings are an excellent choice for feeding container plants. They soak in their nutrients every time it rains or you water your plants.
How much to use will depend on the size of your container. For mid to large pots (12 to 18 inches in diameter), a quarter to one-half cup of castings will give just the right power. For overly large pots and containers, a full cup will do the trick. Affiliate Product Link: 100% Pure Worm Castings
Using Traditional Granular Fertilizers – How To Fertilize Potted Flowers
You can also use commercially available granular fertilizers in place of worm castings. Look for fertilizers in this category that are balanced and contain a near equal rate of Nitrogen, Phosphorous and Potassium. This will keep plants growing at a more steady pace but not overload them with too much nitrogen.
By cutting the feeding in half, you will still give enough power to the plant for good foliage growth and production. The half dose also will help the plant have enough energy for blooming as well. But by reducing the feeding to half, it most importantly keeps it from overpowering root and plant growth.
Liquid Fertilizing Potted Flower Plants
In addition to once a month granular feedings, more frequent (but still light) doses of liquid fertilizer will do the trick when it comes to keeping your plants blooming strong.
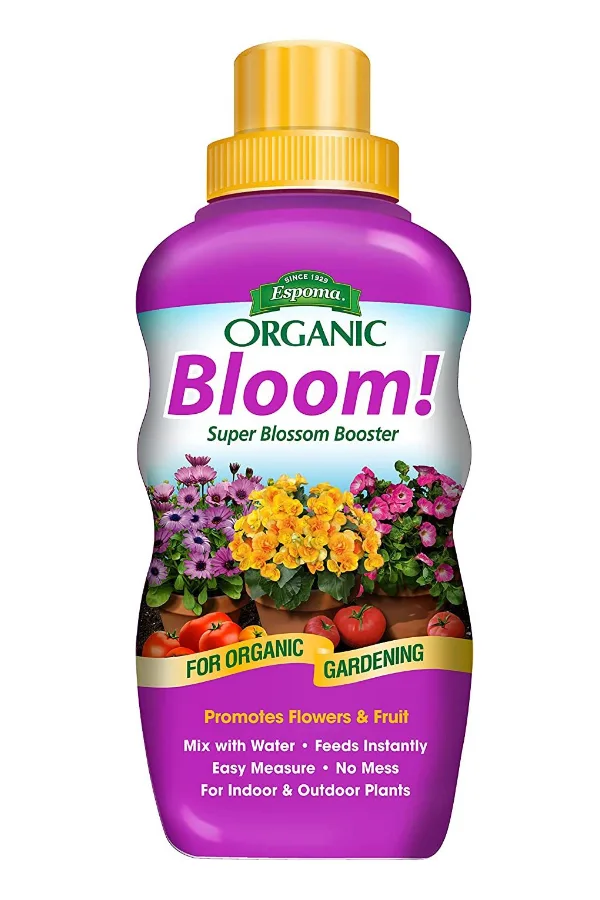
Bloom booster fertilizers are perfect for providing more phosphorous to help plants produce more flowers.
Liquid fertilizers provide a faster punch of power to plants than granular fertilizers. And when they contain the right nutrients, nearly all of that power can go to producing more blooms and flowers, and not too much growth.
Fertilizing With The Right Liquid Power
When selecting a liquid fertilizer, choose one that has a higher rate of phosphorous than nitrogen. Why? As noted earlier, nitrogen will power stem and foliage growth. And, too much of it will lead to big green plants with a lot of leaves but little to no blooms.
Phosphorous, on the other hand, powers blooms. And by feeding your plants more of it, it will help the blooms and flowers to keep on producing all summer long.
For best results, look for liquid fertilizers that contain a higher middle number on the N-P-K scale. Apply the liquid boost every ten to fourteen days. If using an organic product with a lower N-P-K ratio, use at full strength. Affiliate Product Link : Espoma Organic Bloom Booster
For liquid fertilizers with higher percentages, use at half strength.This will once again keep your plants from overgrowing too fast! The best part of liquid fertilizing is that it can be done as part of watering your plants – so other than mixing up the solution, it couldn’t be easier – here is to powering your potted flowers like never before this year!
This Is My Garden is a garden website created by gardeners, for gardeners. Jim and Mary Competti have been writing gardening, DIY and recipe articles and books and speaking for over 15 years from their 46 acre Ohio farm. They publish three articles every week, 52 weeks a year. Sign up today to follow via email, or follow along!
Fertilizer
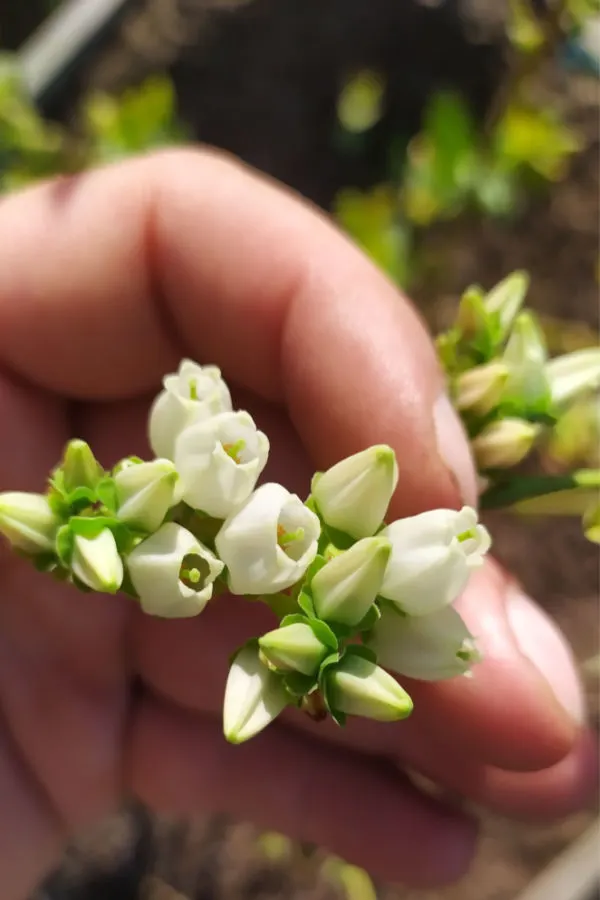
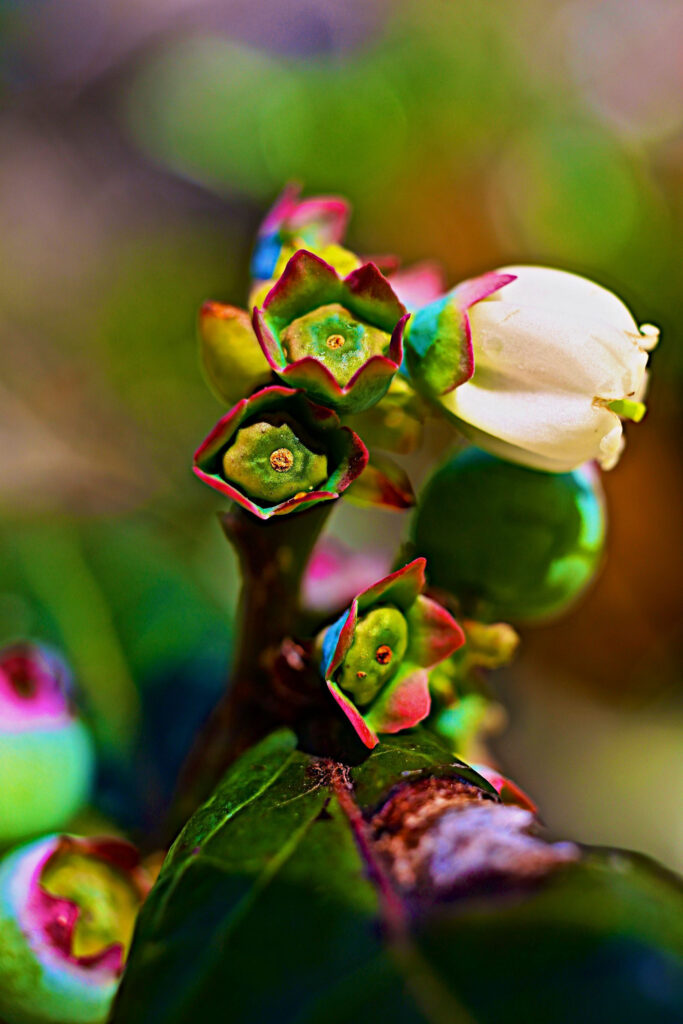
Looking for the best way to fertilize your blueberry bushes for healthier plants and a bigger harvest?
One of the best ways to ensure a great harvest of delicious blueberries is to give them the power they need for strong root development, thick foliage and loads of bud production. But when you give your bushes that fertilizer, and what you use for powering them can really make a huge difference in just how successful your crop can be.
When blueberry bushes struggle to produce or even survive, the issue is usually because of one of three major issues – the bushes not getting enough light, the soil not having the proper pH – or – and this is often the biggest issue of all, the plant failing to get enough nutrients.
In order to produce a big crop, blueberry bushes have three major needs that need to be met. Good sunlight, acidic soil – and plenty of nutrients!
Giving Blueberries What They Need – How To Best Fertilize Blueberry Bushes
Blueberries certainly need sunlight to grow and produce. And lots of it! In fact, for maximum yields, blueberry bushes need at least 6 full hours of sun each day. In addition, they also require a soil that leans to the acidic side. As an acid loving plant, blueberries need a soil with a pH somewhere between 4.4 and 4.8.
Sunlight, of course, is easy to provide simply by planting you bushes where they will receive the necessary light. And if your soil’s pH is off, it too can be corrected fairly quickly by adding a soil acidifier.
But when it comes to the nutrients your blueberries need to thrive and produce – it’s extremely important to feed your bushes not only the right kind of energy, but to give it to them at the right time as well. With that in mind, here is a look at how to power up your blueberries for success this year!
How & When To Best Fertilize Blueberry Bushes
What Blueberries Need For Power
Like nearly all plants, blueberries require the BIG 3 of nutrients – nitrogen, potassium and phosphorous (NPK) for good growth. And, for good fruit production, those three major energy sources need to be fairly balanced.
In order to produce their buds and berries, blueberry bushes require a great deal of energy from the soil.
But, and this is important, the nitrogen source needs to be different from the one most standard fertilizers provide. Unfortunately, one of the biggest mistakes made when fertilizing blueberries is giving the bushes the wrong type of nitrogen. It is vital not to use standard nitrate based fertilizers.
Although this is the most common type of fertilizer and works well for vegetable plants, annual flowers and most perennials, it is not a good choice for blueberry bushes. Nitrate is actually toxic to blueberries and can cause harm to the bush instead of powering it.
So what type of fertilizer do you need? For best results, blueberry bushes require an ammonium/sulfur form of nitrogen for energy. And that is why when selecting a fertilizer for blueberries, you always want to pick one formulated for acid loving plants. Why? Because it will contain the right type of nitrogen.
Look for granular acid plant loving fertilizers with an N-P-K in the range of 4-3-4 to 4-3-6. These often list that they are specifically for blueberries, azaleas, rhododendrons and other acid loving plants. This balanced energy source will help maintain good growing habits and better fruiting. Affiliate Fertilizer Link: Down To Earth Granular Acid Plant Fertilizer
Select granular fertilizer that are specifically made for acid loving plants. Look for fertilizers with an N-P-K of around 4-3-4 to 4-3-6.
When To Fertilize – How To Best Fertilize Blueberry Bushes
Unlike many perennial plants, blueberries actually benefit from fertilizing multiple times during the year. In fact, for maximum yields, it is best to give them a dose of fertilizer at three specific but separate times. The good news is you can use the same acid loving granular fertilizer for all three applications.
The first dose of fertilizer for blueberries needs to go on early in the season. This application needs to go on right before or as the bushes are beginning to leaf out. This helps the bush produce strong foliage and allows it to store up more energy for flower production.
There is no doubt about it, strong early growth is vital in setting the stage for strong blooming. This early dose of power sets the stage for everything to come.
The second application of granular fertilizer should be four to six weeks after the initial dose. This burst of energy to the bush is critical in helping it replenish all of the nutrients it has used to prepare for fruiting. Powering the bush at this point will help spur higher production and maximum yields.
The second dose of fertilizer to your blueberry bushes helps the bush to maximize production of its berries.
The third and final boost of fertilizer needs to go to your bushes just after they complete production. At this point, the bush needs the extra nourishment to replace all of the energy it used for fruiting. This application is vital, and is usually the one that is most often missed.
The Third & Final Application – How To Best Fertilize Blueberry Bushes
Although the third dose will not help produce more berries, it does allow the bush to recover and begin to store energy for the following season. Without it, the following year’s production levels will not be as fruitful.
One time you do not want to fertilize your blueberry bushes is in late fall. This can cause the bush to grow tender new foliage, which can be highly susceptible to winter damage. In addition, do not mulch or side dress blueberry bushes with compost. Again, like traditional nitrate fertilizers, it will give the wrong type of nutrients to your bushes.
How To Apply Granular Fertilizer – How To Best Fertilize Blueberry Bushes
When applying granular fertilizer to blueberry bushes, it is best to slightly rake the surface after sprinkling the granules. This helps the small granules to filter down into the top layer of soil where they can more quickly release their nutrients to the roots below. If you really want to speed the process up, watering in the soil & mulch after raking the granules will really do the trick.
One final note – when mulching blueberries, you can give them a little extra boost of acid by mulching with green pine needles. Fresh pine needles release acid as they brown off. They are an excellent organic way to give even more power to your blueberries! See: How & Where To Use Pine Needles
This Is My Garden is a garden website created by gardeners, for gardeners. Jim and Mary Competti have been writing gardening, DIY and recipe articles and books and speaking for over 15 years from their 46 acre Ohio farm. They publish three articles every week, 52 weeks a year. Sign up today to follow via email, or follow along!
Fertilizer
You might be surprised just how easy it can be to build your very own two bin compost system – and how fast it can help make a continuous supply of amazing compost for your garden and flowerbeds!
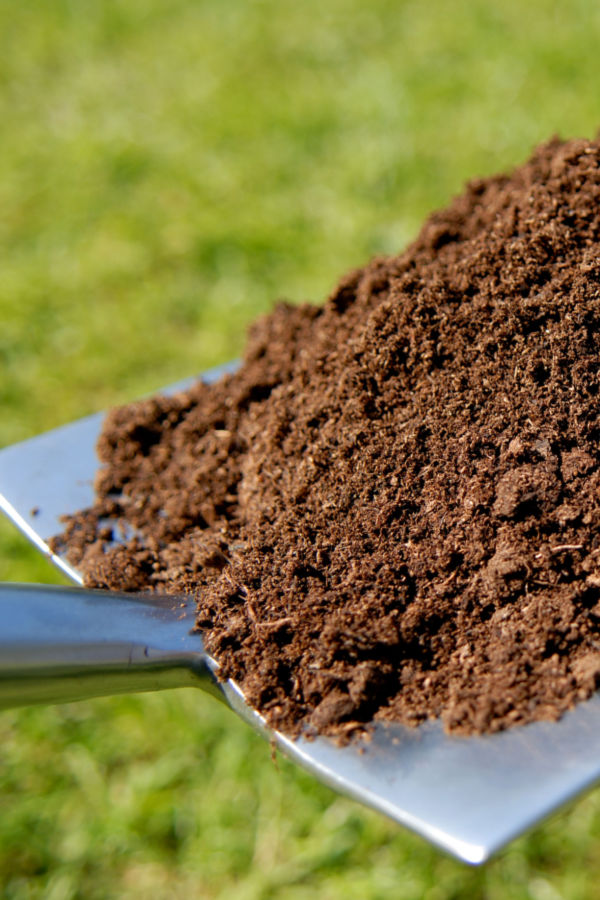
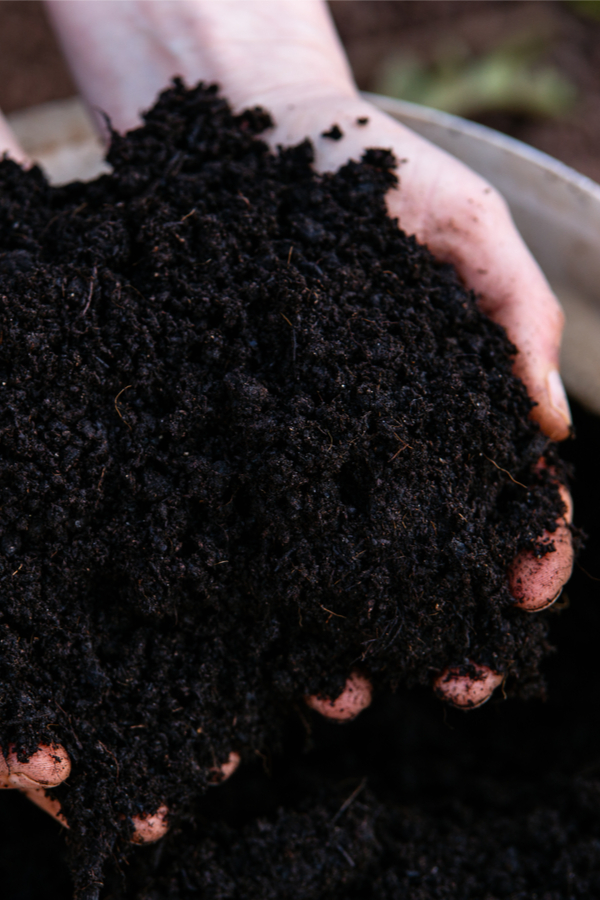
When it comes to powering your soil and plants, nothing beats compost. Compost contains the perfect blend of nutrients and organisms that can bring tired soil back to life. Those same nutrients can also absorb easily into the roots of plants to give them the power they need to thrive.
Compost is perfect for adding into spring planting holes for vegetables, flowers, herbs and more. It’s also great to use as a mulch around plants. As a mulch, it holds in moisture while leaching nutrients down into the soil. In addition, you can also make an incredibly powerful fertilizer tea – simply by soaking water in compost.
Compost is a must to have on hand to build and maintain healthy soil and plants. The more you can make and use, the more productive your plants will be!
The only real issue with compost is that you can never seem to make or have enough on hand for an entire growing season. Even the best compost piles can take six to eight weeks to break down, and if you only have a single pile working, you can run out of compost quickly. And that is exactly where a two bin compost system can help save the day!
The Benefits Of Using A Two Bin Compost System
A two bin system allows you to instantly double the amount of compost you can make. No more waiting for a pile to finish before starting a new batch. Instead, with a two bin system, you can have your next batch already going.
The advantages of a two bin system go far beyond simply doubling the amount of compost. For starters, you can take out materials that are slow to decompose from a nearly finished pile and place them into the new batch. That allows you to use what is ready and start another pile even faster.
Even better, by placing a bit of nearly finished compost from one bin to a new pile in the other bin, you introduce the bacteria and organisms that are vital for breaking down materials fast. That means more compost for you to use quicker than ever! See: How To Make Compost Fast!
A two bin system allows for twice the compost making ability. One pile can be finishing while a new pile starts.Not only can you make more compost, but it can be made faster than ever!
Perhaps best of all, having two bins allows you to collect twice the material! When all of those leaves fall, you have more space than ever to collect them. The same goes for grass clippings or when you cut back plants. Unfortunately, all too often, with a single bin, you only have room for a portion of the materials available.
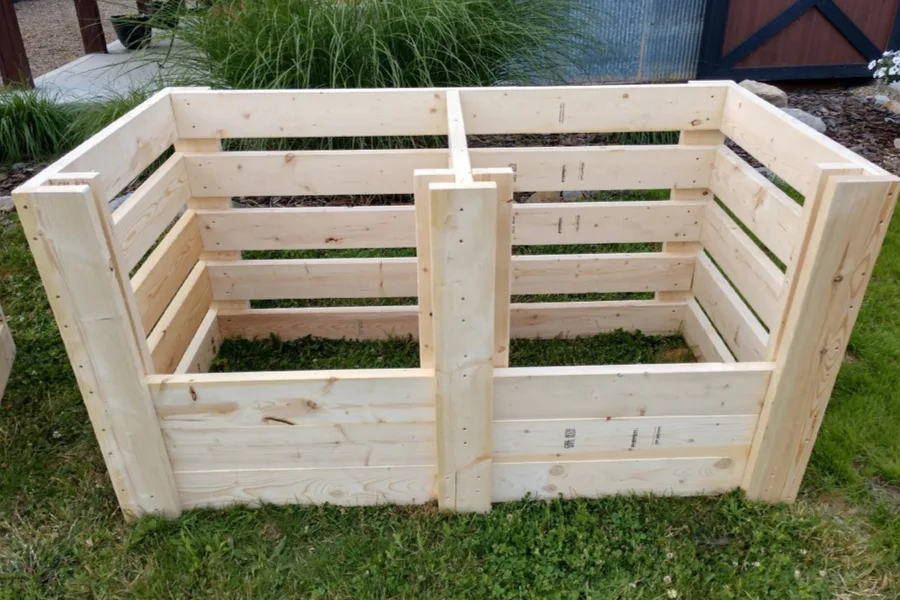
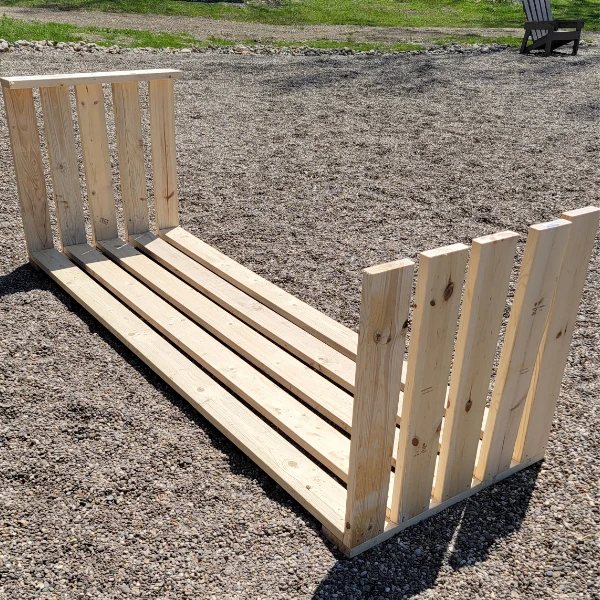
How To Build & Use A Two Bin Compost System
Creating your own two bin composter is actually a simple process. In fact, armed with a few basic tools and some untreated 2x lumber, you can fashion together a beautiful 2 bin system in just a few hours.
There are a few things that are very important to know when creating any compost bin. For starters, the size of each bin needs to be able to hold at least 3 cubic feet of material. In fact, 3′ x 3 ‘x 3’ is the perfect size for a single compost pile.
Unfortunately, smaller piles cannot keep their heat. As they cool off, it slows decomposition, extending the time frame needed for finished compost. Bigger piles can certainly hold heat, but they can be extremely hard to work and turn, not to mention find the space for!
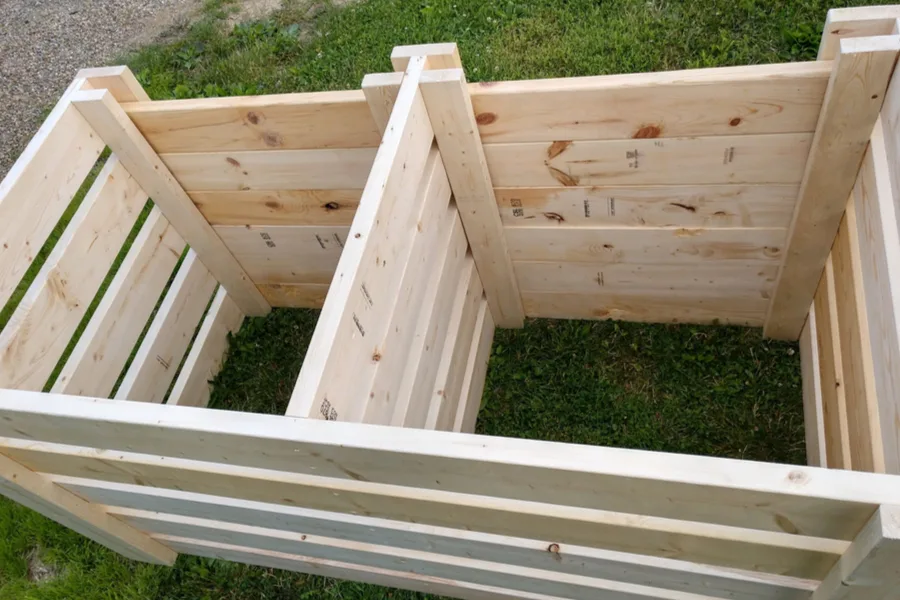
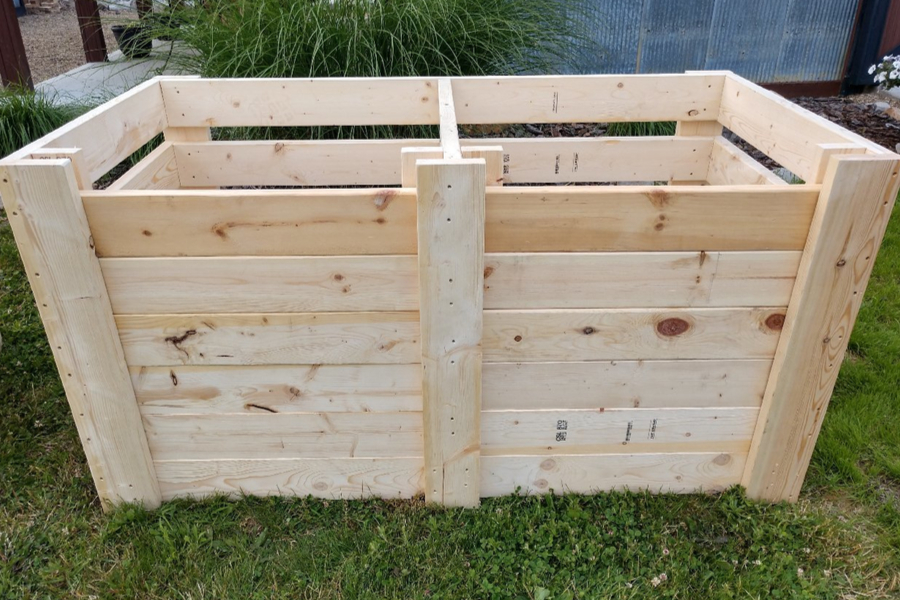
With that in mind, creating a double bin system with two individual 3′ x 3′ x 3′ bins side by side is ideal. It allows for plenty of size for each working pile – and easy access to both.
The slats in the front of this double bin can be added as needed to hide the pile. The open slats in the back and sides allow air to get to the pile, which is critical for keeping the pile hot and allowing materials to break down.
Compost Bin Materials – How To Build & Use A Two Compost Bin System
Ordinary 2x framing lumber is perfect for building compost bins. And yes, it is important to use untreated wood for your bins. Treated lumber contains a long list of chemicals. Chemicals that can leach into your compost and be quite harmful for your plants and you.
Untreated framing lumber actually holds up extremely well. And, you can paint or stain the outside (compost will not come in contact with outside edges) to help keep it looking good.
How To Build & Use A Two Compost Bin System
We do have complete step by step building plans for the double compost bin pictured below in our Etsy shop. All of our step by step plans are instant download pdf’s, and for $10, include a full material list, cut list and step by step instructions with photos all along the way.See: Double Compost Bin Plans
With two bins, you have double the space for composting! Even better, you can let one pile finish while starting another.
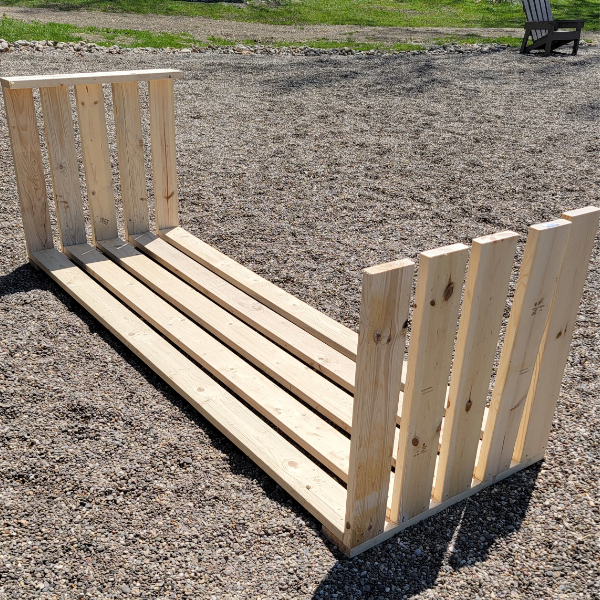
The bin highlighted below features slat spaces on the sides and back to allow for good air flow to the pile. The front section has removable wood slats that can slide in and out as needed to work the pile. This is great for keeping the pile out of sight when not working it.
The double compost bin requires (11) 2 x 6 x 12’s and (1) 2 x 4 x 12′ board to complete. The 2 x 6 x 12’s are easy to cut down to the main front 6′ sections and smaller 3′ side sections. Again, using 2x lumber is a must for durability – unfortunately, 3/4 inch and even 1 inch thick boards will warp and rot too quickly.
Tools & Fasteners
It is best top use screws when assembling any wood bin. Not only does it make fast work of assembly, the screws will hold the boards tighter whereas nails will usually work their way out over time.
As for tools, you will need some type of saw to cut straight boards. A chop saw, circular saw or even a hand saw will work. In addition, a power screw driver/drill and 1/8th inch drill bit for pre-drilling screw holes is all you will need.
The two bin composter goes together fast. In fact, once the frame is built, all that is left is to add the center divider.
Not only does the compost bin go together easily, it looks great anywhere! The 3′ sides and 6′ back are assembled as a “U”, and then a simple middle section separates the two bins in to (2) 3′ sections. A 2 x 4 is then used on each front side to create a channel for the front slat boards to slide in.
It is an open top composting bin system, which is great for easy access and air flow. It is quite simple to create a lid or cover the bin if desired. Here is to creating and using a double compost bin system – and never running out of compost again!
This Is My Garden is a garden website created by gardeners, for gardeners. Jim and Mary Competti have been writing gardening, DIY and recipe articles and books and speaking for over 15 years from their 46 acre Ohio farm. They publish three articles every week, 52 weeks a year. Sign up today to follow via email, or follow along!
Fertilizer
One of the best ways to power up your perennial plants for better growth and bigger blooms is by giving them the right dose of fertilizer at just the right time.
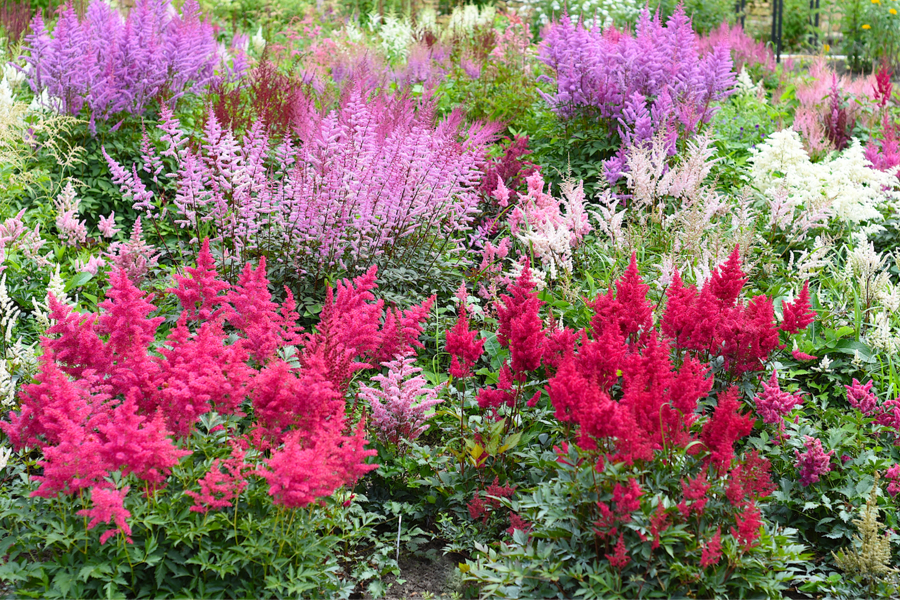
It goes without saying, perennials plants are the backbone of most home flowerbeds. Unlike annual flowers, perennials add texture and color to the landscape year after year. As an added benefit, they also don’t require the constant season maintenance that their annual counterparts often do.
Most perennials flower for only two to three weeks each season. But when they do bloom, they can light up your flowerbeds with amazing color. Better yet, even when they aren’t flowering, they still provide plenty of greenery and texture wherever they grow.
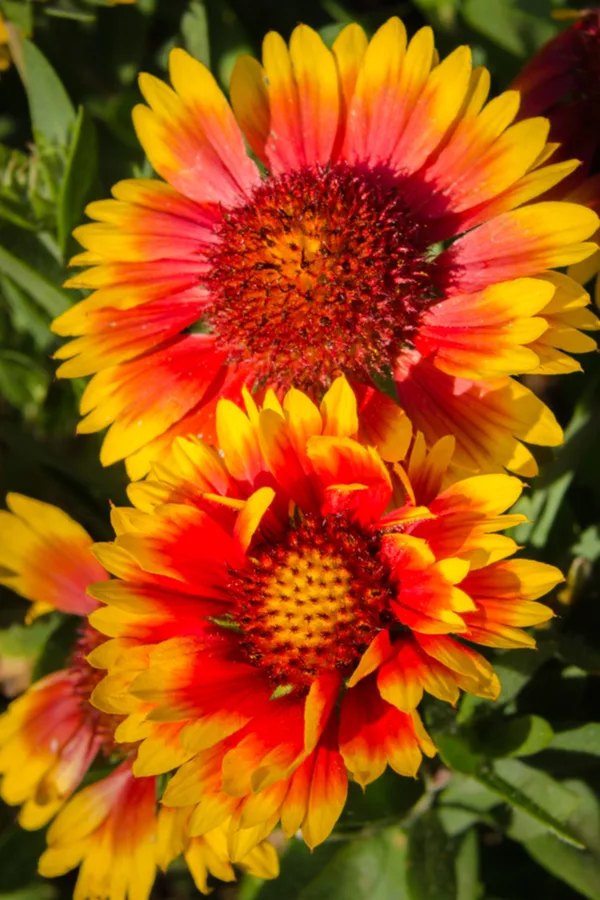
Perennials like this Blanketflower provide a big punch of color when in bloom. And those blooms can be even more spectacular when powered with extra energy from a bit of fertilizer.
Although perennials don’t require constant care, they do benefit tremendously from the simple chore of fertilizing. Not just to help grow their foliage, but even more to power bigger and brighter bloom sets.
One thing is for sure, generating foliage and flower power can take a lot of resources. Since perennials grow in the same soil season after season, it is easy for them to run out of available energy without help. And that is exactly where fertilizing can play a key role in filling the gap.
With that in mind, here is an in-depth look at how and when to fertilize your perennials!
How To Fertilize Perennial Plants
Selecting The Right Fertilizer
There are two basic types of fertilizers you can use for energizing perennials. The first are dry granular fertilizers. Granular fertilizers are usually applied on top of the soil around a plant’s root zone. Granular fertilizers break down slowly to help feed plants over a longer time period.
The second type of fertilizer you can use for perennials are liquid-based fertilizers. Liquid fertilizers supply power in two separate ways to plants.
Granular fertilizers work into the soil and feed the roots of plants slowly. They are perfect for early spring fertilizing.
The first is by leaching their nutrients into the soil and absorbing through the roots. The other is by absorbing through the foliage and stems of plants. Because of this dual effectiveness, liquid fertilizers supply their energy more quickly to plants.
As you will see below, both granular and liquid fertilizers have their place for powering perennials. In fact, when used together, they give plants the best chance for overall health – and big blooms too!
When To Fertilize Perennial Plants
When it comes to perennials, there are two key time frames where providing added power can really benefit your plants.
The first is in early spring, when they are just coming out of their dormant stage. The second is right before or as a perennial is coming into bloom. And it doesn’t matter if it’s coral bells, or even if you grow hops! Let’s start by taking a look at each of these two specific time periods, and how to best fertilize for each one.
Early Spring Fertilizing
For nearly all perennials, an early spring dose of fertilizer is key. This helps them develop strong roots and healthy foliage. The best time to apply this dose is just before or right as your perennials are emerging from the ground and starting to leaf out.
Check out our Podcast below on Fertilizing Vegetable Gardens!
As a plant comes out of its dormancy stage, it needs fuel to power early growth. The healthier and stronger a plant’s roots and foliage grows early in the season, the more it can power blooms when it comes time to flower.
For early spring fertilizing, granular fertilizers are the best choice. At this point, it is not about energizing the plant quickly for bloom power, but trying to supply steady power for great plant growth.
Granular fertilizers are perfect for slowly releasing their nutrients to plants. As they break down in the soil, they leach into the plant’s root system. This slow and steady approach is exactly what perennials need for early spring power.
When it comes to fertilizing for bigger and brighter blooms, liquid fertilizers are the better choice. Liquid fertilizers should be applied to your plants right before or as they are coming into bloom.
Applying liquid fertilizer to plants before and as they bloom can help produce bigger and brighter bloom sets.
As a perennial plant begins to flower, it uses a tremendous amount of resources in the process. Liquid fertilizers help re-energize the plant by supplying a quick boost of energy. Energy that absorbs quickly into the plant’s roots and foliage.
Compost tea, worm casting tea, or commercial liquid fertilizer work wonders for powering blooms at this point. For best results, apply in two separate doses. Apply the first as the perennial is just coming into bloom. Then, apply a second boost halfway through the blooming period. The two applications are best usually about two weeks apart.
This dual dose will help supply energy to see the plant through the entire bloom cycle. Not only will the first blooms benefit, but so will the final flush of flowers as well.
When Not To Fertilize Perennial Plants
Believe it or not, there is a time when fertilizing your perennials can put them in harms way. For the large majority of perennial plants, fertilizing in mid to late fall can spell disaster. Fertilizing should always be avoided during this time.
By the time fall rolls around, perennials are beginning to wind down their growth. Instead of using energy to power more leaves or blooms, they begin to store the energy to protect themselves through the winter.
Liquid fertilizers act fast. They absorb into the soil to the roots and through the foliage of plants too. They are perfect for powering up perennials right before they bloom.
Unfortunately, when fertilizer is applied to perennials in the fall, it disrupts this entire process. Instead, the power boost can re-energize the plant, causing it to begin to grow both new roots and foliage.
Why Not To Fertilize In The Fall
Although that may not sound like an issue on the surface, it can leave plants vulnerable for winter. Especially if the winter happens to be extremely cold or harsh.
Once the bitter cold settles in, any new tender root growth can easily freeze and die. In addition, because the plant began to power up right before dormancy, it doesn’t always have the stored energy that is usually available to help it through.
This can leave a plant vulnerable to freezing out over winter. And even if they do survive, they can be far less healthy and produce far fewer blooms.
Here is to fertilizing your perennial plants for success this year – and for years to come!
This Is My Garden is a garden website created by gardeners, for gardeners. Jim and Mary Competti have been writing gardening, DIY and recipe articles and books and speaking for over 15 years from their 46 acre Ohio farm. They publish three articles every week, 52 weeks a year. Sign up today to follow via email, or follow along!
Fertilizer
One of the more confusing topics for gardeners is trying to understand just exactly what the N-P-K ratio on the label of their fertilizer bag means. Especially when it comes to the health and well-being of their vegetable garden, flowers and lawn.
Fertilizing can play a big role in the success of a plant’s health and productivity. Whether it be annual flowers and vegetable plants, or perennials, shrubs and trees – all plants need nutrients to survive. But giving each type of plant the right mix of nutrients is a huge key to fertilizing success.
Although plants draw nutrients from the soil, sometimes they require more than is available. This is especially true of annual flowers and vegetable plants.
Not all fertilizers are the same. When it comes to powering your plants, it’s important to select the right fertilizer for a specific plant.And an important part of that is selecting a fertilizer with the right N-P-K makeup.
Both use a tremendous amount of resources to flower or create edible crops, and they can quickly deplete the soil of the nutrients they need. And although perennials, shrubs and trees don’t require the same high level of nutrients, they too can deplete the resources available in the surrounding soil over time.
The Need For Fertilizing – Understanding N-P-K Ratios
In all of the aforementioned cases above, applying fertilizer to the plants and the soil around them can help fill the nutrient void. In the process, that extra power can help keep your plants healthy, vibrant and thriving.
But how you fertilize, and more importantly, what you fertilize with can make all the difference! And that is exactly where understanding what the N-P-K ratios and labels on the fertilizer you are using comes into play.
Although plants need a wide variety of micro-nutrients to survive, there are three that stand out from the crowd when it comes to providing major power to a large majority of plant life. Those three are Nitrogen (N), Phosphorous (P) and Potassium (K).
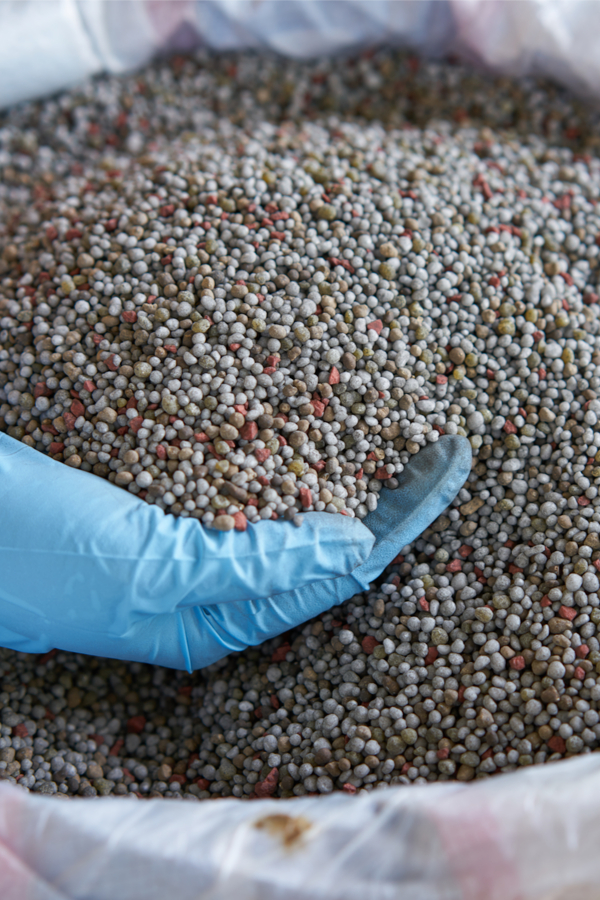
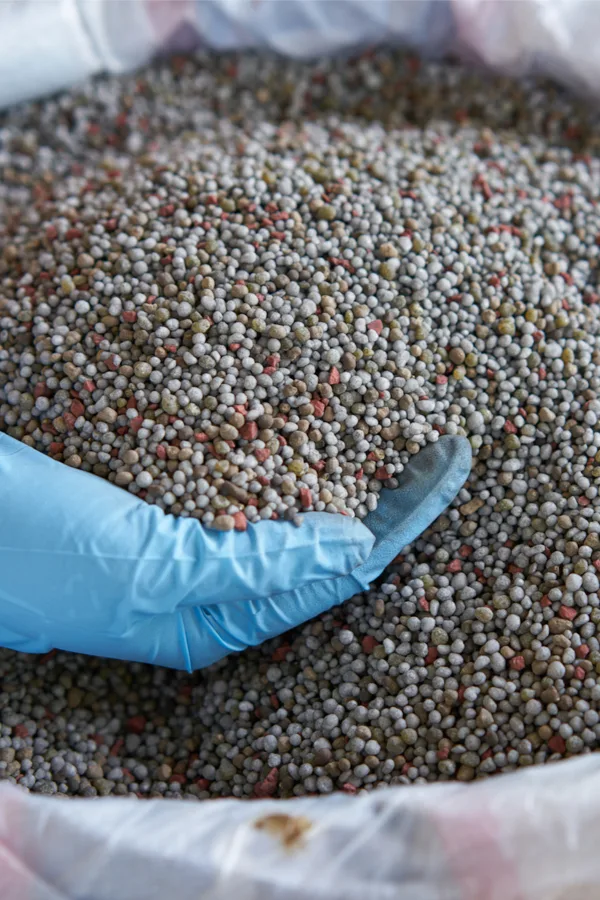
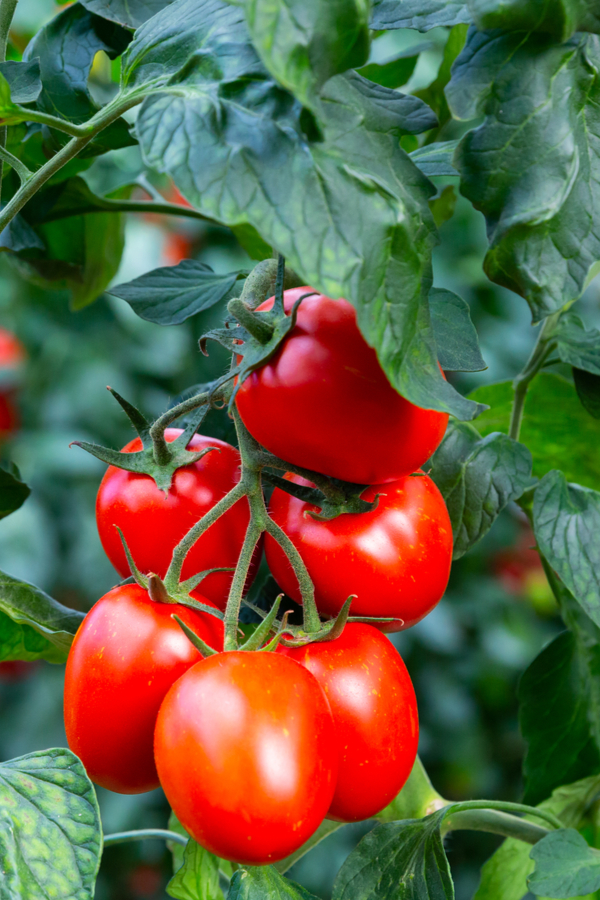
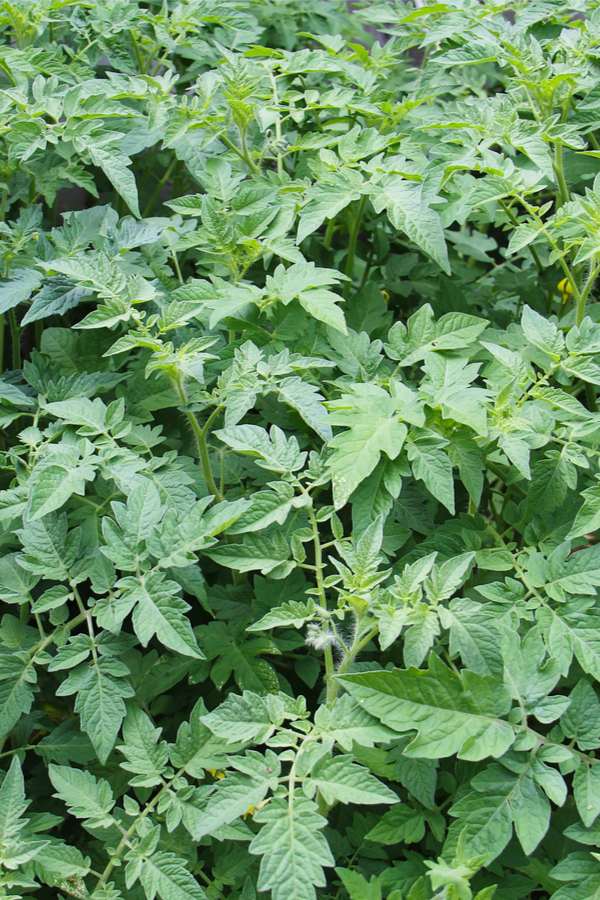
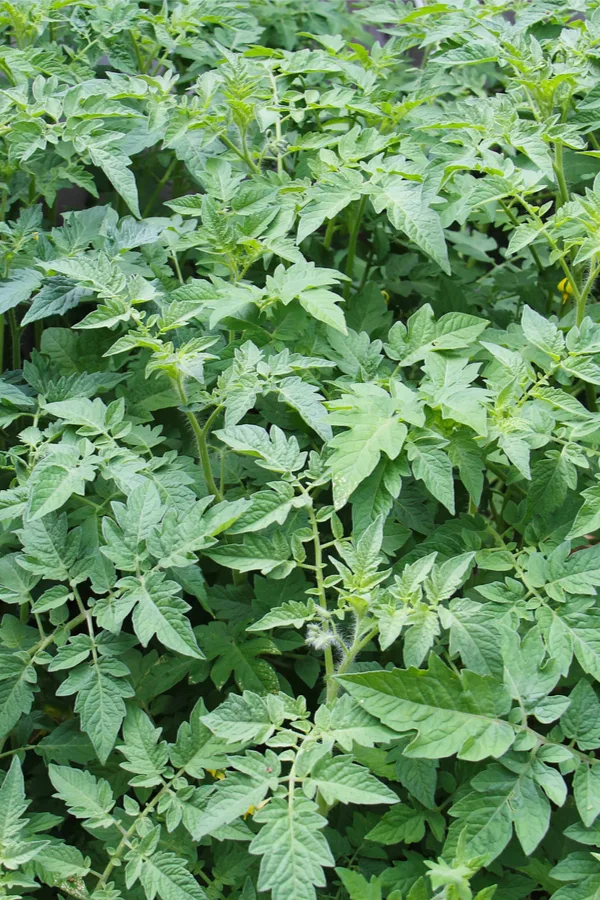
Tomato plants use up a tremendous amount of nutrients as they grow, and without additional fertilizer, they can fail to produce large yields.
The N-P-K Ratio
Together, the three nutrients are the basis of the N-P-K ratio number listed on a fertilizer bag. The N-P-K set of numbers refers to the exact ratio or weight of Nitrogen (N), Phosphorous (P) and Potassium (K) that is present in a specific bag or container of fertilizer.
As an example, a 5-5-5 set of numbers on a fertilizer bag would mean that it contains 5% nitrogen, 5% phosphorous and 5% potassium. Likewise, a 5-10-10 ratio would correlate to a 5% nitrogen ratio, and a 10% ratio of phosphorous and potassium for that specific fertilizer.
So what makes up the rest of the bag? Well, it all depends on the fertilizer. Some contain small portions of other nutrients that are important as well, such as calcium, magnesium, copper and sulfur. But most often, the large majority of the additional ingredients are simply fillers.
It’s not that fillers are bad or a way to simply fill the bag. Fillers are actually inert substances such as sand or grit that weigh down the nutrients and make them easier to apply. Without them, it would be extremely difficult to apply.
So now that we know what the N-P-K number stands for, it’s time to cover what it all relates to with plants – and that means understanding what each of the “Big Three Nutrients” can do for plants. As you will see below, selecting the right ratio will depend on what plant you are fertilizing. In addition, it also will depend on what results you want from the plant.
Selecting The Right Fertilizer For Your Plants – Understanding N-P-K
Each of the three major nutrient minerals fill a different need when it comes to a plant’s growth. To know what fertilizer, or more importantly, what fertilizer ratio is best for your plant, it is extremely important to know what all three individually do for plants.
With that in mind, here is quick breakdown of each, along with what they provide to plants:
Nitrogen – How To Understand N-P-K Ratios
One of the most important nutrients of all for plants is nitrogen. And it is indeed a power-packed energy source! But as you will see, it is not the end all to fertilizing. And too much nitrogen in some cases can actually hurt production, especially for vegetable plants.
Nitrogen is what makes grass growth thick, luscious and dark green. It is also the nutrient responsible for creating a full canopy of healthy foliage on vegetable plants, annuals and perennials. In fact, when it comes to powering any type of leaf, stem and foliage growth – nitrogen is the go-to nutrient.
Nitrogen is what gives grass a thick, deep green color. It feeds and fuels foliage growth of all kinds.
The higher the first number in the N-P-K ratio, the more nitrogen it will have in it. When you are trying to power plant growth and leaves, more nitrogen will help. This is exactly why if you are fertilizing a lawn, you want a fertilizer with a high nitrogen number and low phosphorous and potassium ratios.
But, and this is key to know – too much nitrogen in a mix can be detrimental. Especially when you are trying to get your plants to produce more blooms or vegetables.
A high number of percentage of Nitrogen for annual flowers and vegetables will create a plant with tons of foliage – and no fruit or flowers. That is exactly why when fertilizing these types of plants, you need a different N-P-K strategy.
Phosphorous – How To Understand N-P-K Ratios
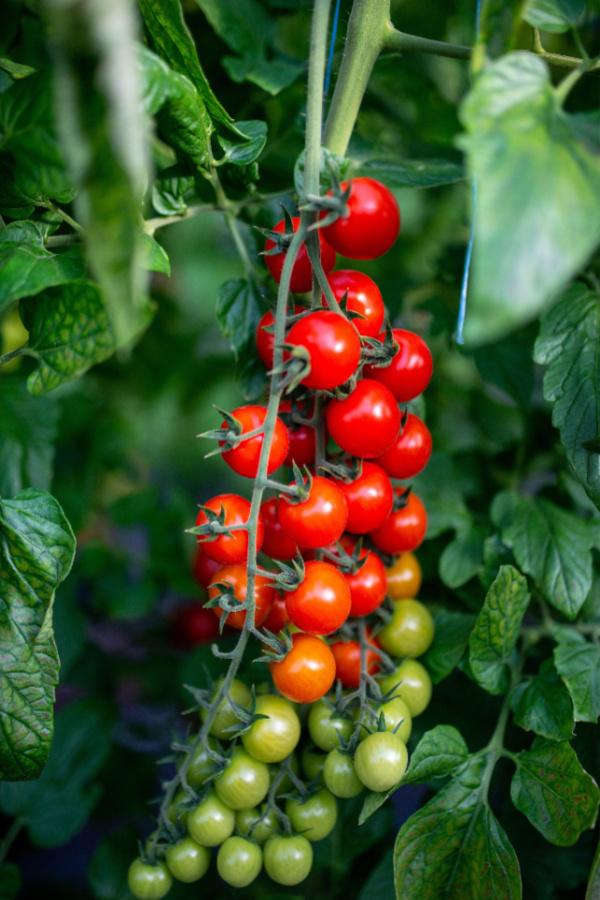
Unlike Nitrogen, which powers plant growth, phosphorous powers blooms and fruiting. Want more flowers on your petunias and more tomatoes and peppers on your vegetable plants? Then select a fertilizer with a larger percentage of phosphorous.
Phosphorous is also key in developing strong root systems. That in turn not only helps anchor plants firmly in the soil, but also allows a plant to absorb more nutrients from the soil as well.
As a general rule of thumb, 5-5-10 fertilizer ratios are excellent choices for promoting stronger flowering and more vegetables. There is still enough nitrogen to power plant growth, but the higher phosphorous level will keep a plant’s concentration on producing more blooms and fruiting, and not too much foliage growth.
It is exactly why using compost or worm casting will help to power more flowers and veggies. Both have balanced power without too much nitrogen. (See: How To Fertilize Tomatoes With Compost)
Potassium – How To Understand N-P-K Ratios
So where does potassium fit into the picture? Well, as a member of the “Big Three” it is certainly still very important.
For starters, potassium helps a plant to stay strong and vibrant. It also helps it fend of disease and pests as well. Think of it as the ultimate multi-vitamin for plants. While nitrogen powers the growth and phosphorous powers blooming – potassium keeps it all running smoothly.
Without enough potassium, plants can suffer quickly, and succumb to disease quite easily. When selecting for vegetable plants and annual flowers, always be sure the potassium levels are near the same level as nitrogen and phosphorous.
How To Select The Right Fertilizer – Understanding N-P-K Ratios
When it all comes down to selecting the best fertilizer for the job, here are some great base guidelines to success:
To power grass or foliage only plants – select fertilizers with higher nitrogen ratios.
For perennials, shrubs and trees, select all-purpose ratios the provide a steady but smaller supply of all three. For these types of plants, look for 5-5-5 and 10-10-10 N-P-K ratios.
Here is to better understanding N-P-K ratios, and to powering your plants like never before!
This Is My Garden is a garden website created by gardeners, for gardeners. Jim and Mary Competti have been writing gardening, DIY and recipe articles and books and speaking for over 15 years from their 46 acre Ohio farm. They publish three articles every week, 52 weeks a year. Sign up today to follow via email, or follow along!
Fertilizer
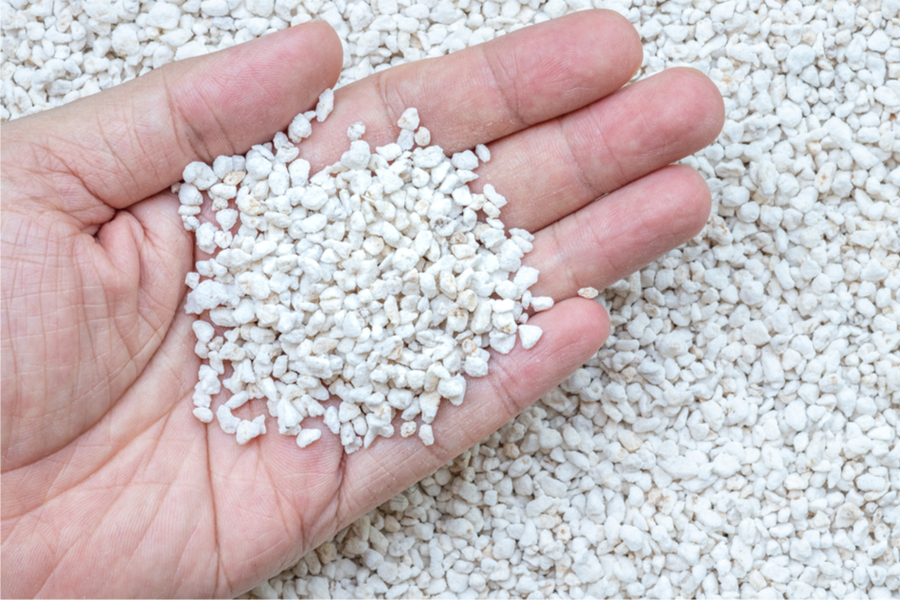
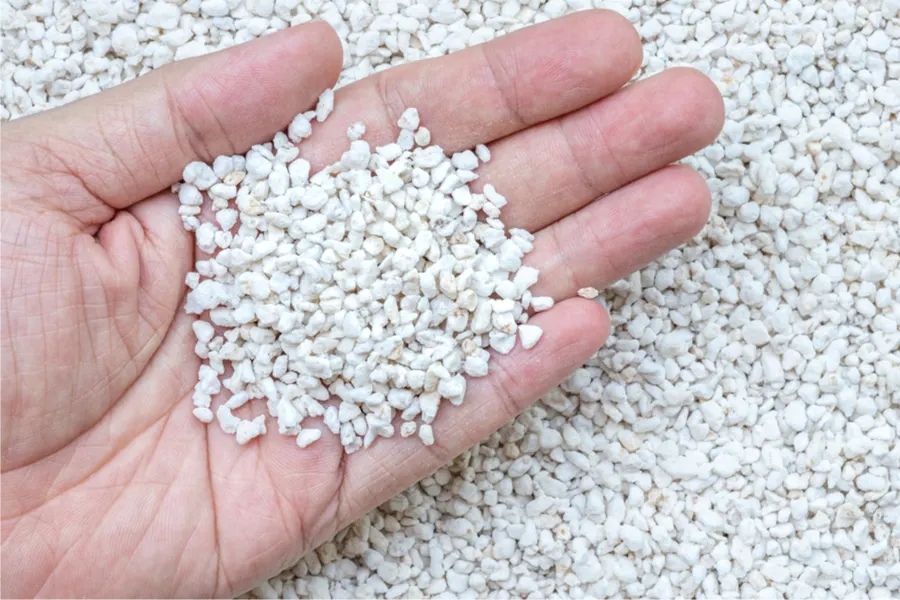
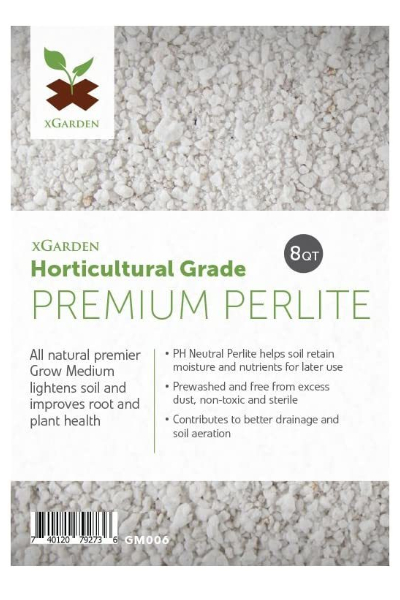
So just how can you use all-natural perlite to create better soil and grow better plants? Actually, in a whole slew of ways!
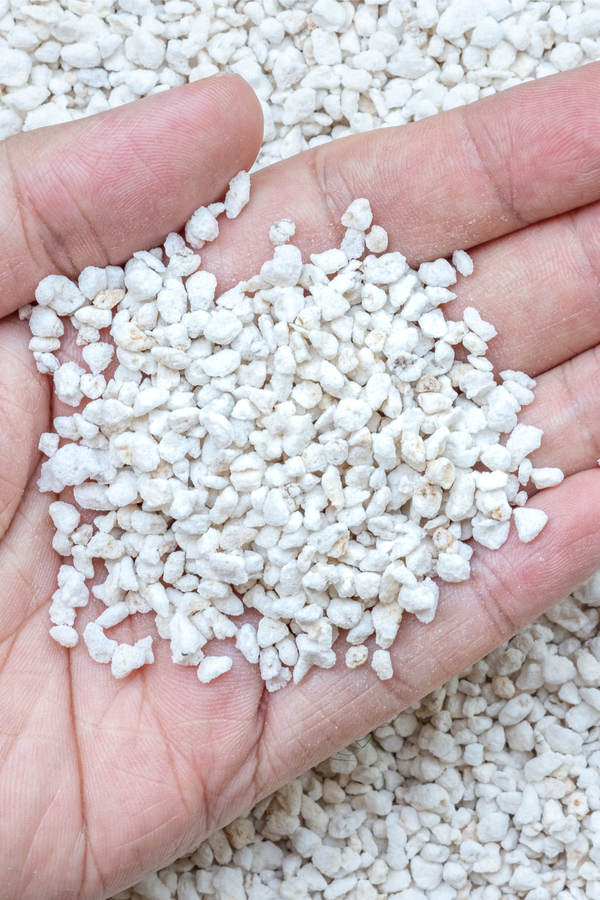
Perlite is the white, lightweight, grain-like material that you often find in commercial potting soil and mixes. Although many confuse its lightness and texture as being a type of styrofoam or plastic, it is actually a 100 percent organic substance.
Perlite in its all-natural form is volcanic glass. But when the glass is heated to temperatures in excess of 1500° Fahrenheit, it explodes like popcorn into ultra-light white bits and pieces.
Many think the white, lightweight grains of perlite are made from styrofoam. The substance is actually one hundred percent natural. It comes from volcanic glass that is simply heated to ultra high temperatures to make it explode into feather-light kernels.
Once perlite bursts open, it takes on a completely different profile. And can it ever be beneficial to both the soil, and the plants that grow near it! In fact, so much so, that it can make a huge difference in the overall health and well-being of container plants, hanging baskets, and even the vegetable flower plants growing in your garden.
With that in mind, here is a look at the many benefits of this popcorn-like material, and how to best use it to power your plants like never before.
How To Use Perlite To Create Better Soil & Plants
A Long List of Benefits
So how does perlite help improve your soil and help your plants grow better? Well, first and foremost, it is one of the best ways to lighten your soil.
Perlite is extremely lightweight. In fact, a large, two cubic foot bag usually weighs only 2 pounds. When mixed in with soil, especially heavy soils, it can create a much less dense structure.
That is exactly why it is perfect for using in container and hanging basket soil mixes. By adding in generous amounts, you don’t end up with baskets that fall from their hooks, or containers that can only be moved with a small forklift!
But perlite is also added to potting soil for a few additional but very important reasons. The first has to do with improved root growth. When added to heavier soil, the light and airy white kernels keep it from clumping together.
The puffy granules are incredibly adept at keeping dirt from compacting. Because of that looseness, it makes it easier for roots to expand and grow.
Better Drainage And Water Absorption
Not only does perlite make root growth easier, but it also opens up channels in the soil for water to reach the roots of plants at a quicker pace.
Hard, compact soil will keep water at the surface. But with the open channels perlite provides, water can filter down easily to the roots. That means when you water or it rains, the roots get the moisture they need.
When mixed with compost, regular potting soil and other additives such as worm castings, perlite can help create an incredible potting soil that is perfect for growing flowers, vegetables, herbs and more.
Obviously, that is tremendously important for keeping plants hydrated. If a plant’s roots are unable to find moisture, they will struggle to survive. But those open channels are also important for allowing liquid fertilizer and other applications to the reach the roots as well.
If all of that wasn’t enough, there is one more major benefit perlite brings to the soil, and it just might be the most important of all. That advantage? Water absorption!
Perlite can actually absorb three to four times its own weight in water. That can be an incredible help to plants, especially during the hot summer months when soaring temperatures and drought can often dry plants out quickly.
When, How & Where To Use Perlite To Power Your Soil & Plants
Although most commonly found in potting soil, perlite has a wide range of uses in gardens, flowerbeds, raised beds and more.
Make sure you purchase horticultural grade perlite. This grade is completely organic and all-natural. More importantly, it will not break down over time in the soil.
You can find perlite in bags at most nurseries, plant stores and Home & Garden centers. When purchasing, always make sure you are buying pure perlite and not a mix of other fillers.
Look for a horticultural grade of perlite. The horticultural grade is made entirely from volcanic glass and is both pure and stable. This type will never break down over time, meaning it stays helpful in your soil forever. Product Link: XGarden Horticultural Grad Perlite – 8 Cubic Ft. Bag
Now that you know about its benefits, here is a look at some of the best areas to use perlite to help your soil and plants:
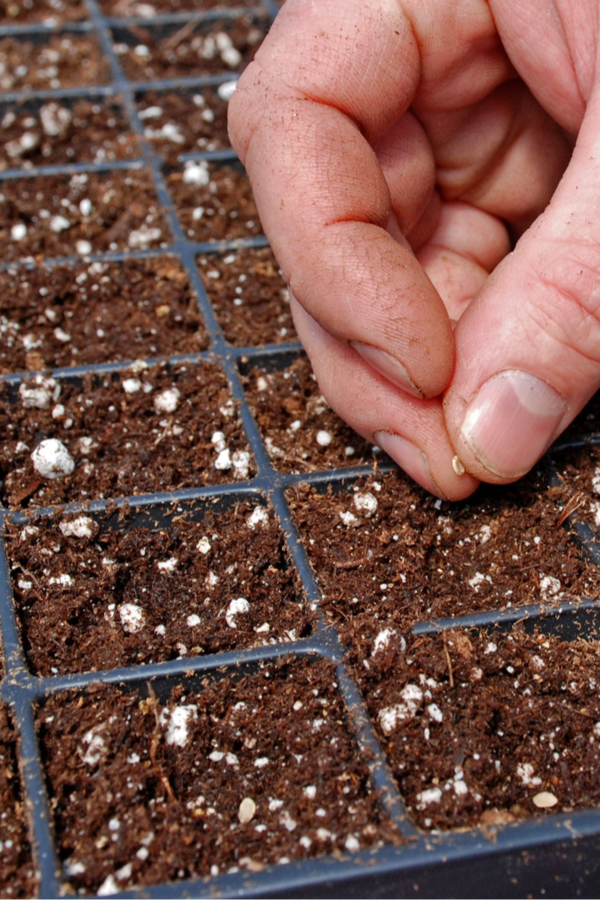
Seed Starting Soil
Adding perlite to your seed starting soil allows tender seedlings to expand roots quickly. In addition, the moisture retention qualities help to draw water in near the roots of plants to keep water near. See: Our Best Seed Starting Soil Recipe
Adding in perlite to your seed starting soil can help young seedlings have an easier time expanding their roots.
Raised Bed Soil
One of the best and most underutilized ways to use perlite is in raised beds. Raised bed soil needs to be light and airy, and mixing in perlite is the perfect way to make that happen!
Whether building new or refreshing existing raised beds, adding in perlite can help to bring new life. A good rule of thumb is for every 5 gallon bucket of soil, add in a cup of perlite. And if you really want to recharge your beds, add in an equal amount of compost too!
Potting Soil
Working in generous amounts of perlite to your potting soil can pay big dividends for your container plants and hanging baskets.
Although many commercial potting mixes already contain perlite, you can add an additional cup to every six to eight quarts of potting soil to help lighten the soil even more. Even better, save big and create your own homemade potting soil!
Transplanting In Garden & Flowerbeds – How To Use Perlite To Create Better Soil
When planting your tomato, cucumber, pepper and other transplants into the garden, mix in a bit of perlite to each planting hole.
Adding this in with other amendments such as compost and worm castings can help plants get off to a great start. It helps loosen the soil around plants and keep the roots from compacting over time. Just one more reason having a bag of perlite on hand is always a good idea!
Here is to using perlite this year to lighten up your soil, improve drainage, and help plants absorb the moisture and nutrients they need to thrive!
This Is My Garden is a garden website created by gardeners, for gardeners. Jim and Mary Competti have been writing gardening, DIY and recipe articles and books and speaking for over 15 years from their 46 acre Ohio farm. They publish three articles every week, 52 weeks a year. Sign up today to follow via email, or follow along!
Fertilizer
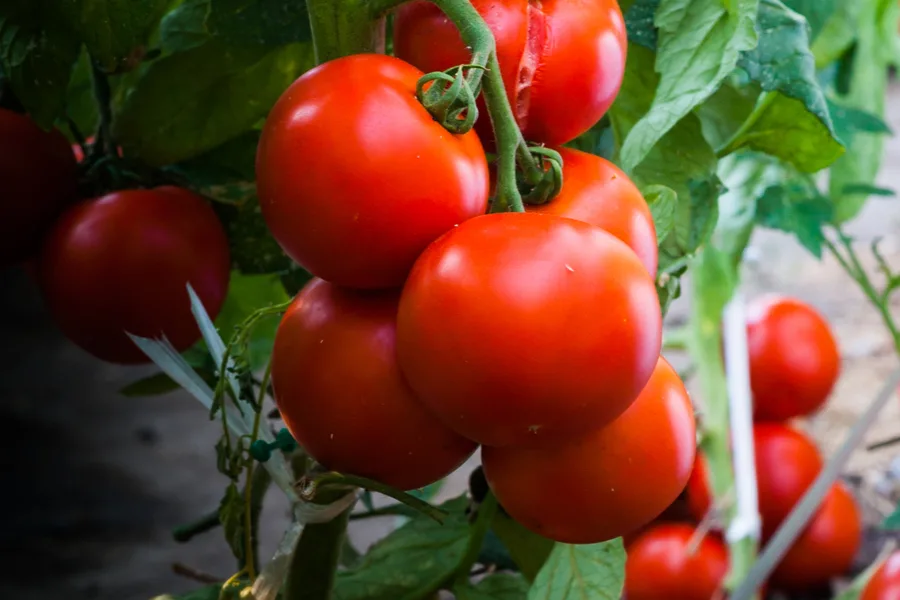
When it comes to growing healthy, productive and delicious tomatoes in your garden naturally, there is no better way to power your tomato plants than to fertilize them with compost.
You simply can’t get more organic and natural than compost. Created from the remnants of once living plants and organic material, it is both safe and powerful. And can it ever invigorate plants – especially when it comes to the tomato plants growing in your garden!
The nutrients within compost are a perfect match for what tomatoes need to thrive. But even more, they are in a form that can easily absorb into the plants roots and foliage.
Fertilizing your tomato plants at the right time and with the right nutrients is a big key to their growing success. One of the best ways to do that is with compost. It can propel both big growth and better yields.
Why Tomatoes Need Fertilizer
Tomato plants require a tremendous amount of nutrients from the soil in order to grow healthy and strong. In addition to a tomato plant’s need for nitrogen, phosphorus and potassium, they also need calcium, magnesium and other minerals.
All of these important nutrients help to maintain healthy foliage, produce blooms and ripen fruit. Not just when they are seedlings and young plants, but as they begin to flower and fruit as well.
No matter how rich and fertile soil might be in early spring, it can lose its vitality during the season. As plants continue to draw and deplete resources from the soil, it becomes more difficult for them to find and locate the nutrients they need.
Unfortunately, when this happens, the plant begins to suffer. For starters, poor nutrient levels lead to less growth and fewer tomatoes for you to enjoy. In addition, a weak plant is also a prime target for pests and disease. And that is exactly why tomatoes need a boost of energy from time to time.
But here’s the catch, fertilizing tomatoes can be a tricky business. Fail to give them enough nutrients, and they struggle in some cases to even survive. But give them too much energy, or too much at once, and it can result in big trouble for the plants as well.
Tomato plants that receive too much fertilizer will stop trying to produce blooms and fruit. Instead, they use all of the energy to grow more foliage. The result are big plants, and few tomatoes!
The Dangers of Over Fertilizing – How To Fertilize Tomatoes With Compost
When tomato plants receive too much fertilizer, they use all of that excess energy to promote growth. And lots of it! That might sound good on the surface, but that massive growth comes at the expense of setting flowers and fruit.
Quite often, a tomato plant that has too many nutrients will look beautiful at first glance. In fact, it can have massive growth, sturdy, thick stems, and deep green foliage. But unfortunately, if you look closer, you will see very few blooms or future tomatoes on the plant.
This is the direct result of too much fertilizer absorbing into the plant. Instead of using the excess nutrients to create more flowers and tomatoes, they use it to expand and grow. And while in that massive growing mode, the plant shuts down its flower and fruit production.
The good news is, with compost, over fertilizing is never an issue. The balanced nature of compost supplies the nutrients needed for strong, steady growth, without overpowering plants.
Even better, compost can be utilized quite easily in two distinct methods. And when used together, they supply your tomato plants with the energy they need, right when they need it most.
With that in mind, here is a look at how to use compost to energize your tomato plants this year with a simple one-two approach!
How To Fertilize Tomato Plants With Compost – The 1-2 Punch That Works!
Powering your tomato plants with compost couldn’t be easier. The nutrients within compost are easily and quickly absorbed by plants. And depending on how the compost is used, it can supply those nutrients to the roots, or through the leaves of the plants.
When first planting your tomatoes, compost should be liberally in the planting hole. Mixing in a 50/50 ratio of soil and compost into the planting hole is the perfect way to get your tomatoes off to a great start. (See: How To Best Plant Tomatoes!)
The compost helps to loosen the soil and conserve moisture for the expanding roots, all while leaching nutrients to power growth. But that is not where composts power ends for energizing plants.
Once planted, compost can then be used to supply nutrients using two simple methods – top dressing ( mulching), and compost tea. Together, they will supply nutrients at just the right time, and in just the right way.
Compost is the perfect fertilizer for tomatoes because it contains the nutrients and minerals they need most. Even better, compost can be used in two unique and powerful ways to deliver those nutrients. One, through its roots – and two, through its foliage.
As you will see below, top dressing will provide the low & slow nutrients tomato plants need for development. Meanwhile, compost tea can supply a more powerful but balanced punch of energy when your tomato plants need it most.
Top Dressing with Compost – How To Fertilize Tomato Plants With Compost
Once you plant your tomatoes it is extremely important to apply a thick layer of mulch. Mulch not only helps repel weeds, it also aids in conserving moisture and regulates the soil temperature.
But if you mulch with compost, you get all of those benefits and more! By using a layer of compost mulch a few inches thick and six to 12 inches around each plant, you can power plants too. Every time it rains or you water, the compost leaches nutrients right to the roots below.
It is the perfect slow and steady release of nutrients tomato plants need to grow strong. And as the plant continues to grow, you can add more compost around the plants base every month to continue the slow release boost.
Liquid Fertilizing With Compost Tea – How To Fertilize Plants With Compost
Top dressing your tomato plants with a thick coating of compost provides the slow, steady trickle of nutrients plants need to develop good roots and foliage. Meanwhile, compost tea can help to power up plants for blooming and tomato production!
All you need to make great compost tea is a 5 gallon bucket, water, a stir stick and compost!
Compost tea can be made by simply steeping water and compost in a 5 gallon bucket. By soaking in the water for a few days, the compost imparts its nutrients into the water. And is it ever powerful! (See: How To Make Compost Tea)
Compost tea is a quick and effective boost of energy for plants, especially during their first few months of growing. By watering your plants with the tea, they plants absorb the nutrients both through the foliage and root zones.
But with compost tea, the nutrients absorb fast. And together with the low and slow of top dressing, it is the perfect fertilizing combination. By the way, if you do not make your own compost, bagged compost will work for making tea. Product Link : Bagged Compost
How Often To Apply
As for how often you should apply compost tea to tomato plants, a good rule of thumb is every two to three weeks for the first few months after the plants have been planted outdoors. Then, as plants begin to produce, you can simply let the slow and low compost mulch take back over.
It truly is a one-two fertilizing combination that will work wonders for your tomato plants. And, best of all, it is 100% natural and organic. It really doesn’t get much better than that! Here is to fertilizing your tomato plants naturally this year with compost.
This Is My Garden is a garden website created by gardeners, for gardeners. Jim and Mary Competti have been writing gardening, DIY and recipe articles and books and speaking for over 15 years from their 46 acre Ohio farm. They publish three articles every week, 52 weeks a year. Sign up today to follow via email, or follow along!
Fertilizer
When it comes to being ready to plant, grow & maintain your garden or flowerbeds this year, there are four essential garden supplies that can really help make a difference between smashing success, or a less than desirable growing season. And it is ever important to have them on hand and at the ready right from the start!
Once spring arrives, gardening chores arrive in an instant. Before you know it, you are in the thick of planting, watering, mulching, fertilizing and more. And it can get overwhelming quickly!
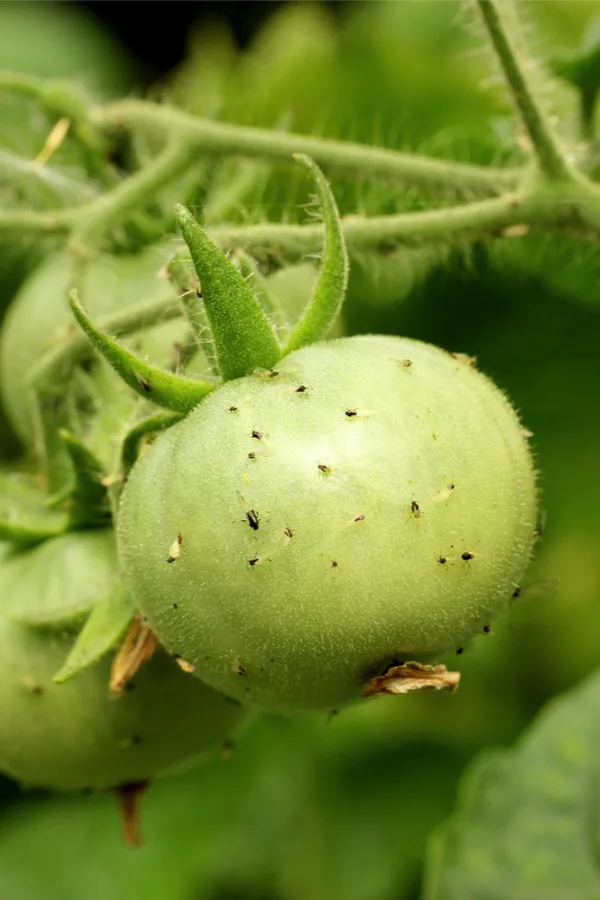
One moment, you are planting a young transplant into your vegetable garden, waiting patiently for it to grow. Just like that, in the blink of an eye, it’s time to fertilize. But wait! Now here comes an invasion of aphids and whiteflies – and you need a quick solution.
For a gardener, problems can crop up overnight. These aphids will cause serious damage to this tomato plant if not controlled quickly. Having supplies such as neem oil on hand to help control issues like can keep crops and flowers safe from damage.
Waiting too long to fertilize or treat an insect issue can spell big trouble. In fact, a single pest issue can explode almost overnight if you are unable to treat the problem quickly.
Being Prepared – Having Essential Garden Supplies At The Ready
Unfortunately, when it comes to maintaining your garden and flowerbeds, timing is everything. And not being prepared, or more importantly, not having the right planting soil, supplements or remedies on hand when you need them most can spell disaster for your plants.
Whether you love flower gardening, herb gardening, vegetable gardening – or enjoy all three, it is important to be at the ready. With that in mind, here is a look at 4 essential supplies every gardener should have ready to go this spring!
4 Must Have Garden Supplies
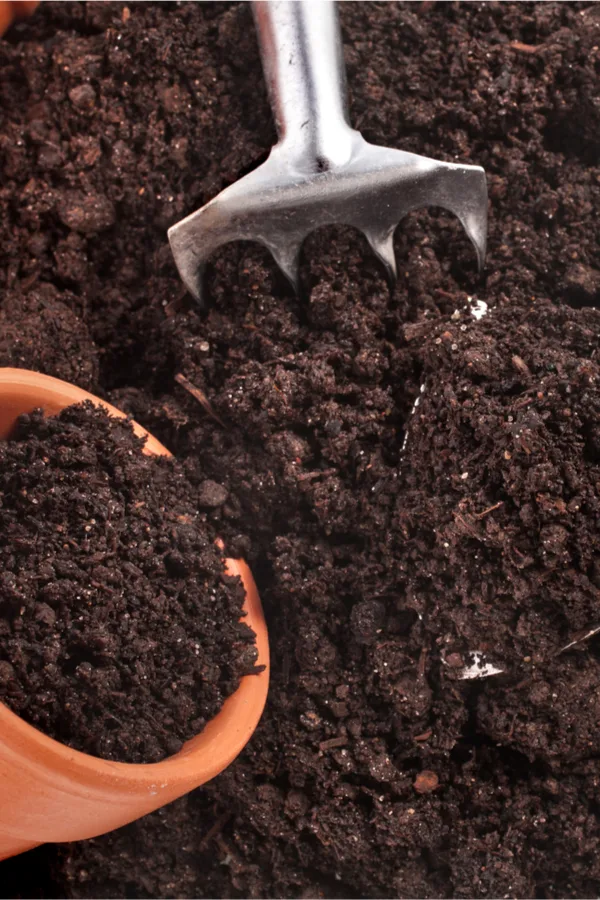
#1) Compost
Above all else, having a good supply of compost on hand is an absolute must for any gardener. Not only for maintaining healthy soil, but for powering your plants to their best.
Compost is a critical ingredient for planting annuals, perennials and more. It is perfect for powering young seedlings, container plants and vegetable plants too.
Compost is wonderful for energizing annual flowers, vegetable plants, herbs, perennials, shrubs and more. And in a multitude of ways! With its perfect balance of nutrients that absorb into plants with ease, it is the ultimate organic fertilizer.
When mixed into planting holes, it helps loosen the soil and gently feed the tender roots of young transplants. Compost is also excellent for adding to potting soils, or for using as a power mulch on top of container and hanging basket plants.
The Power of Compost Tea
If that wasn’t enough, soaking compost in water also creates an amazing fertilizing tea. One that is powerful and fast acting with a great balance of nutrients. Even better, it won’t burn plants like typical fertilizers can often do.
Perhaps best of all, compost tea is simple to create at home. In fact, with just a bit of water and a bucket, you can make it anywhere. Compost tea truly is the ultimate organic liquid fertilizer for nearly any plant a gardener can grow. (See : How To Make Compost Tea)
Always, always, always make sure you have compost at the ready. It can, of course, be made with ease right in your backyard. And completely for free! But if need be, you can also purchase bagged compost to keep on hand when supplies run low.
#2) Worm Castings – 4 Essential Garden Supplies
If you have never used worm castings to power your plants, you won’t believe the difference it can make! Just like compost, worm castings are overflowing with nutrients. Not only that, they are extremely easy for plants to absorb.
Worm castings are a charming name for what are really just the excrement of worms. Before you get squeamish, castings are dry to the touch, and basically odorless. But do they ever contain serious power for plants!
Worm castings can be used everywhere to provide energy to plants. They can be used in planting holes or on top of the surface as a slow-release fertilizer. They can also be soaked in water to create an excellent liquid fertilizer.
Worm castings are one of the best, all-natural ways to power your plants. They are wonderful for maintaining strong flowering baskets and containers, and just as great for vegetable plants, perennials and even house plants!
Best of all, just as with compost, they will not burn or over-power plants. Instead, they release a slow, steady stream of nutrients that can keep your vegetables and flowers growing strong all season long. Product Link : Worm Castings
#3) Neem Oil – 4 Essential Garden Supplies
If compost and worm castings are incredible plant powering materials, the next two garden supplies (Neem oil & diatomaceous earth) are amazing and all-natural plant protectors.
If you garden for any length of time, you are going to have issues with pests. And having these two supplies on hand and at the ready is a must.
Especially if you don’t want to use harsh, man-made chemical or pesticide sprays!
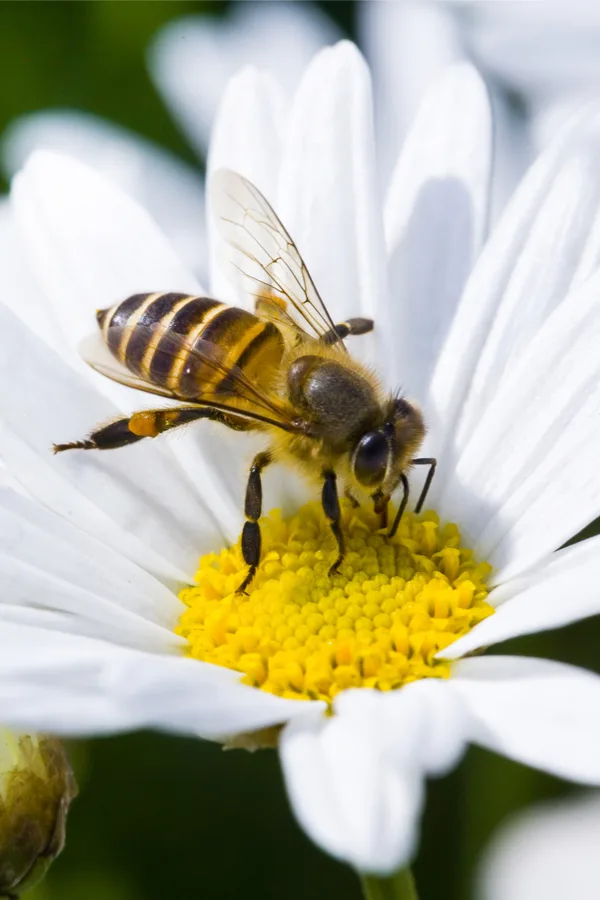
Neem oil is a great natural spray for protecting plants from pests – but is also safe for important pollinators like bees and butterflies. This all natural spray is a must to have on hand at all times.
Lets start with the amazing protective properties of neem oil. Neem oil is an all-natural liquid made from pressing the seeds of a neem tree. You can mix the oil with water and spray the liquid without the worry of injuring pets, children or adults – or damaging the plant.
Neem oil is great for controlling many common garden pests such as aphids, mites, beetles, whiteflies, moths and more. Not only is it 100% organic, it will not harm important pollinators such as bees and butterflies. Product Link : 100% Neem Oil
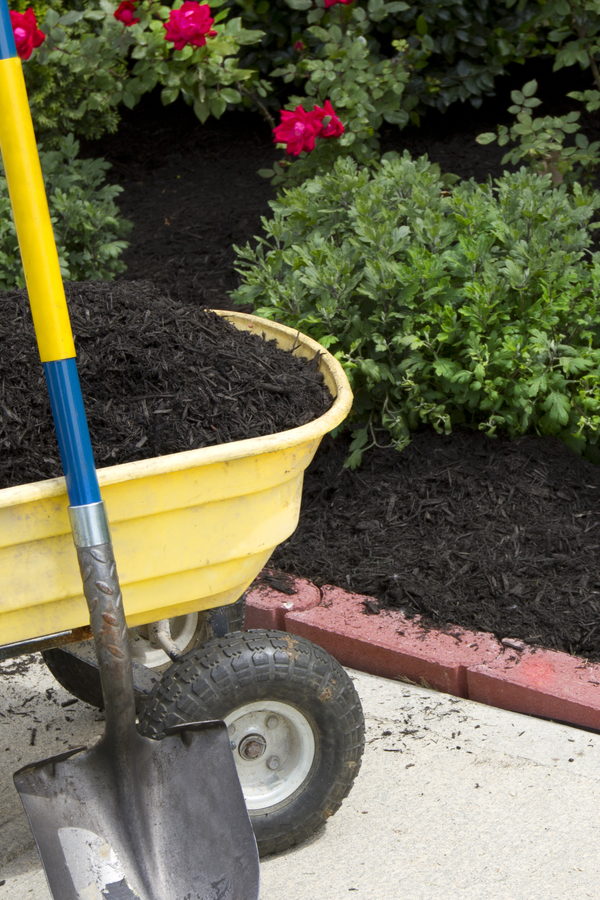
#4) Mulch – 4 Essential Garden Supplies
If there is one organic material that can help both your plants and you to an incredibly productive, yet extremely low-maintenance gardening season – it is mulch.
Yes, believe it or not, mulch is the unsung hero of low-maintenance gardening. Both for flowerbeds, and in the garden. And it is exactly why you should always have plenty on hand to apply as needed.
Mulch is one of the best ways to protect plants and eliminate weeds. Both in your flowerbeds, and in your garden!
Whether using hardwood or bark mulch in flowerbeds, or straw, grass clippings or shredded leaves in the garden, keeping your soil covered is the ultimate key to healthy plants, and easy-care gardening.
A proper mulching of plants can keep weeds out, moisture in, and your weeding tools in the garden shed. Flowerbeds should have a minimum of 4 to 6 inches for weed control.
This Is My Garden is a garden website created by gardeners, for gardeners. Jim and Mary Competti have been writing gardening, DIY and recipe articles and books and speaking for over 15 years from their 46 acre Ohio farm. They publish three articles every week, 52 weeks a year. Sign up today to follow via email, or follow along!