From how to plant, to fertilizing, pruning and staking – see all of our best tomato advice below!


From how to plant, to fertilizing, pruning and staking – see all of our best tomato advice below!
How do you know when it’s the right time to harvest a tomato from your tomato plant for maximum quality and taste? The answer to that question is actually quite surprising to many gardeners!
Believe it or not, there is a bit of an art to knowing when to pluck tomatoes from your plants. And doing so correctly can pay big dividends for both you and your tomato harvest. Not only can it have a major impact on the quality and flavor of your tomatoes, it can also play a huge role in your plant’s overall productivity and health.
Although the thought of picking a perfectly ripe red tomato straight from the vine might sound like the ideal answer to the question above, as it turns out, it’s not. In fact, allowing your tomatoes to fully ripen on your plants is actually the last thing you ever want to do!

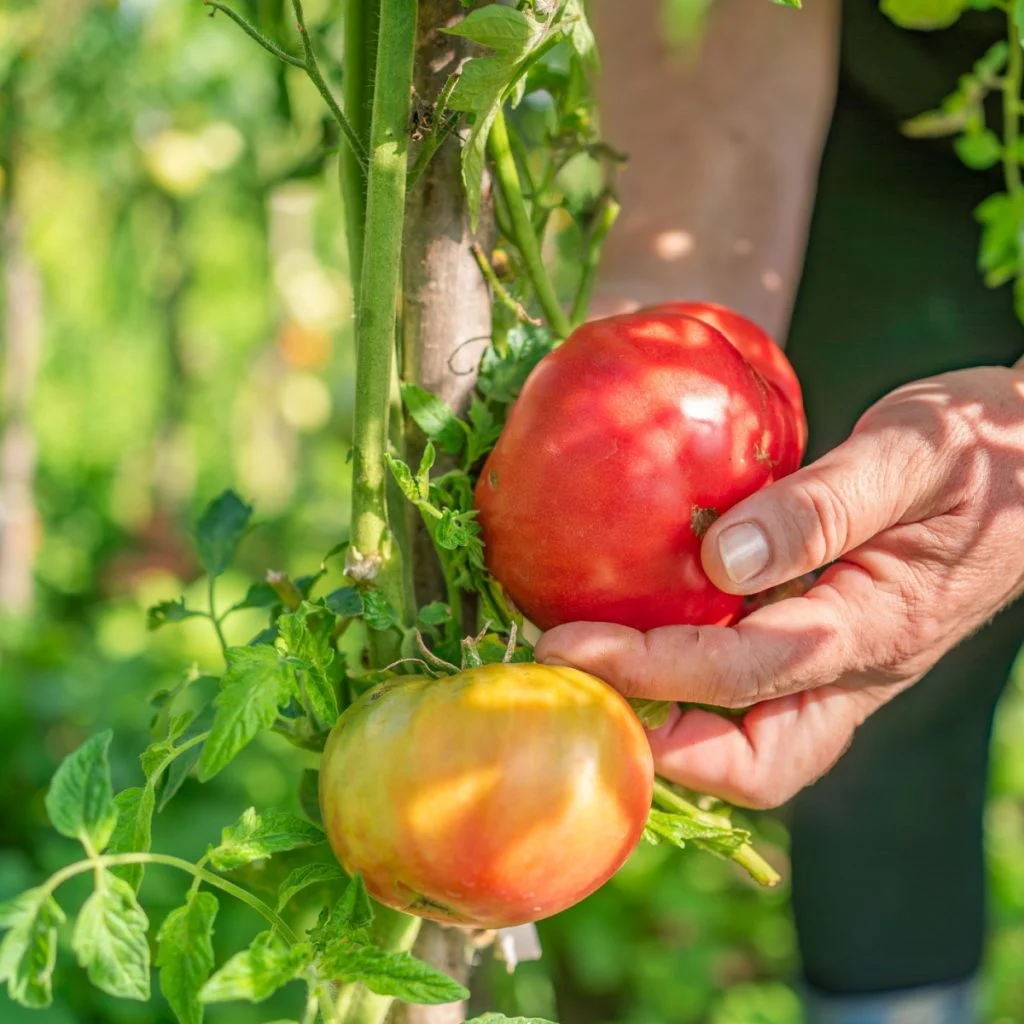
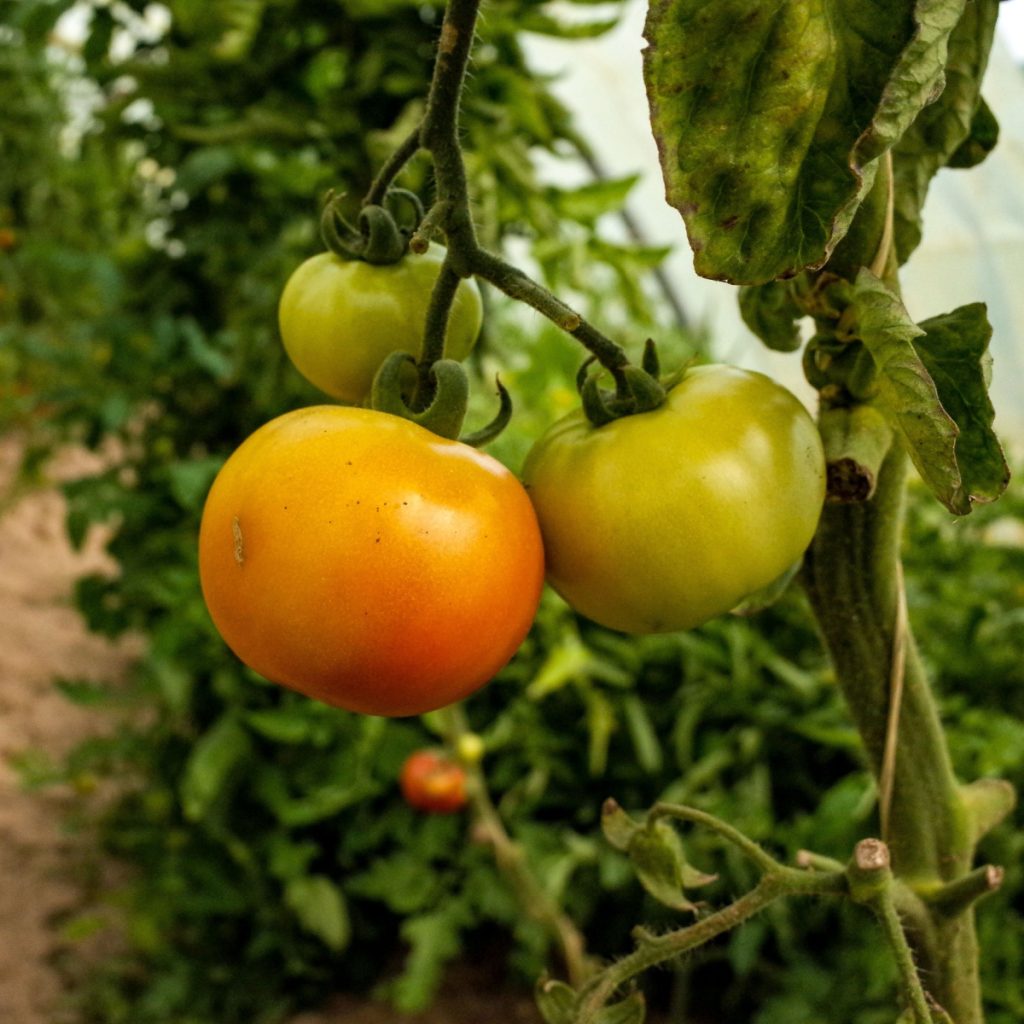
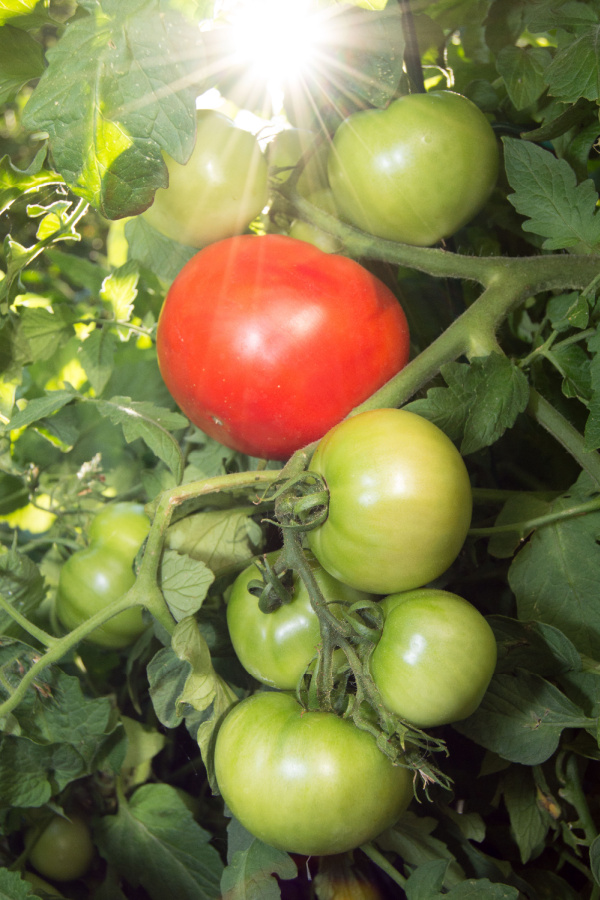
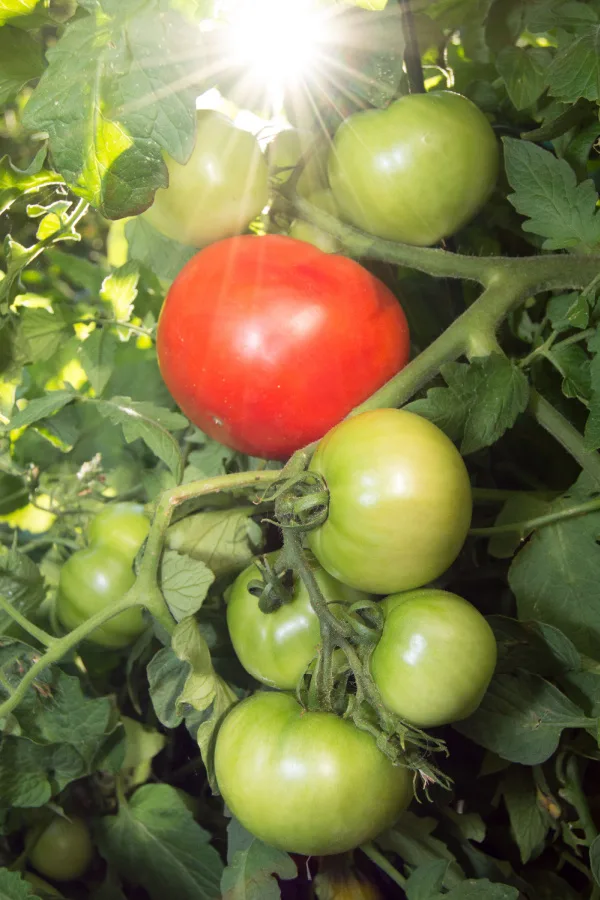
So when is the best time to harvest a tomato? Surprisingly, the optimum time for harvesting tomatoes from a plant is when they have turned to one-third to one-half of their full ripening color. Not only will picking early will help your tomatoes ripen faster and better, it also helps the actual plant in a myriad of additional ways too.
Let’s first cover the subject of ripening. Once a tomato’s coloring begins to change from green to slightly pink, it naturally stops taking nutrients from the plant. This is what is known as the breaking stage for a tomato.
Once a tomato reaches this stage, it will continue to ripen and flavor off the vine without any issues. At this stage, it’s also important to note that the plant is not helping the tomato ripen in the least. In fact, allowing it to remain past the breaking stage can actually be detrimental to the plant – and the tomato.
Once picked and placed in a proper area (we will cover that in a moment), tomatoes will actually ripen faster and more evenly off the vine than on it. And with far less chance of having the tomato be ruined by other factors.
Another big reason to pick early is that the longer a tomato stays on the vine, the more risk it has of incurring damage from insects, animals and disease. Simply put, the more ripe a tomato becomes, the more inviting it is to everything and everyone. But by picking it early and ripening it in a safe area, you eliminate the risk of damage.
There are a lot more advantages for your tomato plant when you pick early too. For starters, picking your tomatoes when they first start to ripen helps keep the weight of your tomato vines manageable.

By mid-summer, a fully loaded tomato plant can become quite heavy. Heavy, overloaded vines are easily damaged by small wind and rain storms. Quite often, even without a storm, overloaded branches will easily split and tear from the plant. And when they do, it not only ruins the tomatoes growing on the limbs that tear off, but it can injure the rest of the plant in the process.
In addition to keeping vines safe, picking early and often keeps your plants from suffering from fruit overload. When too many tomatoes are present and ripening, the over abundance of fruit sends a signal to the plant to slow down production of blossoms. And once that occurs, it will diminish your future harvest greatly.
Finally, when you harvest a tomato early, it helps the plant conserve valuable energy. As long as a tomato remains on the plant, the plant will continue sending it energy – even though it doesn’t help it in the least. But by picking early, those resources can instead go towards producing new blooms and developing more tomatoes.
Equally important to the art of taking time to harvest a tomato early is knowing the best way to allow it to ripen off of the vine. Here again, the answer may surprise you for where and how to best ripen the fruit.
Once the tomato has begun the ripening process, it does not need sunlight to ripen. In fact, too much sun can potentially blister or even injure the fruit. Coincidentally, it’s exactly what happens when over-ripe tomatoes start to split open when on the vine! See our article: How To Stop Tomatoes From Splitting & Cracking As They Ripen!

One thing is for sure, the best place to ripen tomatoes is not on a sunny windowsill. Putting tomatoes on a sunny windowsill can cause the exact same issue. It can make the tomato ripen unevenly. Even worse, the bottom can turn soft as it comes in contact with the warm window sill.
When it comes to the ideal placement, tomatoes ripen best when stored in a cool, shady location. It’s best to have the temperature between 60 to 70 degrees for ripening. Anything cooler and they will stop turning. Anything hotter and they can turn mushy fast.
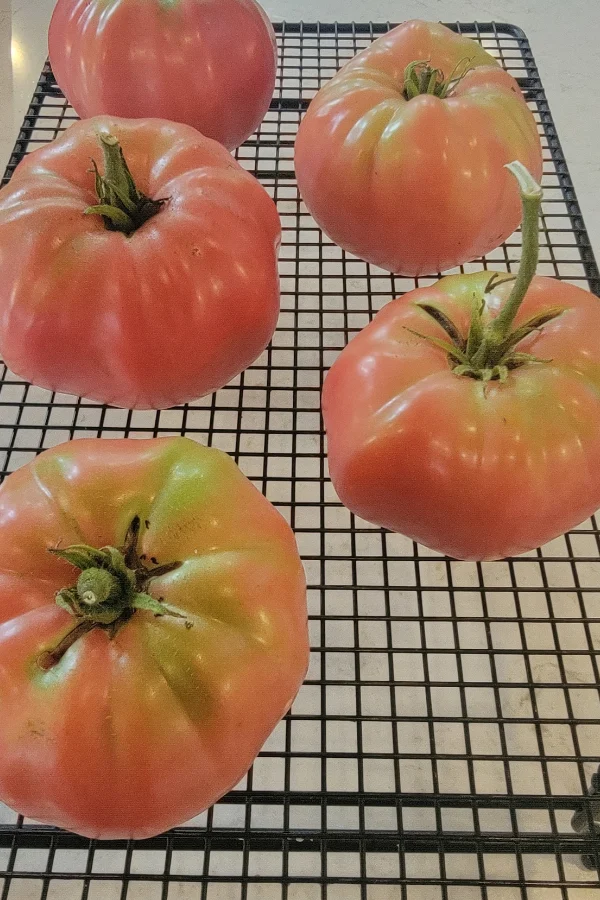
One thing that will help tomatoes ripen faster is to make sure they get plenty of circulation. When oxygen circulates around the fruit, it allows for fast and even ripening. Placing tomatoes on a baking rack or bread rack works great for this. It keeps the tomatoes off the ground and air above and below. Affiliate Link: Cooling Rack and Baking Rack with Stainless Steel, 2 – Pack 10 x 15 Inches
You can also create a homemade drying rack with a few 2 x 4’s and hardware cloth stapled on top. The mesh hardware cloth allows the tomatoes to ripen on all sides. It also lets it have optimal air flow from above and below.
If you can’t store your tomatoes indoors, a cool, shady porch, garage or barn is the next best location. As long as the outside temperatures are not too high, your tomatoes will ripen evenly. The important thing is to keep them out of hot, direct sunlight.


Much like when trying to ripen tomatoes in a windowsill, ripening and even storing tomatoes in a refrigerator is not a great option. Unfortunately, a refrigerator will cause the process of a tomato ripening to stop almost entirely.
Storing tomatoes in the refrigerator not only halts the ripening process, it also causes tomatoes to lose flavor and nutrients over time as well. If you want to chill your tomatoes for a few minutes, by all means give them a little time in the refrigerator, but storing them long term will only lead to less and less flavor and nutrients. If you want to find out the best way to save seeds from your tomatoes, see: How To Save Tomato Seeds From Your Tomatoes – And Why Late Summer Is The Time To Save!
Here is to knowing when to harvest that just ripening tomato from your plant – and enjoying your tomatoes more than ever this year! For more summer gardening tips, check out: Why Are My Cucumber Plants Dying In The Summer – And How To Fix It!
Follow Our Facebook Page For Great Gardening Tips And Advice! This Is My Garden Facebook Page
This Is My Garden is a garden website created by gardeners, for gardeners. Jim and Mary Competti have been writing gardening, DIY and recipe articles and books and speaking for over 15 years from their 46 acre Ohio farm. They publish three articles every week, 52 weeks a year. Sign up today to follow via email, or follow along!
Wondering why the leaves on your tomato plant are starting to curl in the middle of summer? And more importantly – what to do about it to fix the problem fast?
If you’ve walked out into your garden and noticed the leaves on your tomato plants curling, you’re definitely not alone. It’s something many gardeners deal with, especially during the summer months. The good news is, even though curled leaves can look concerning, they’re often a sign of stress rather than disease. And even better, the problem can usually be cured with just a little attention.
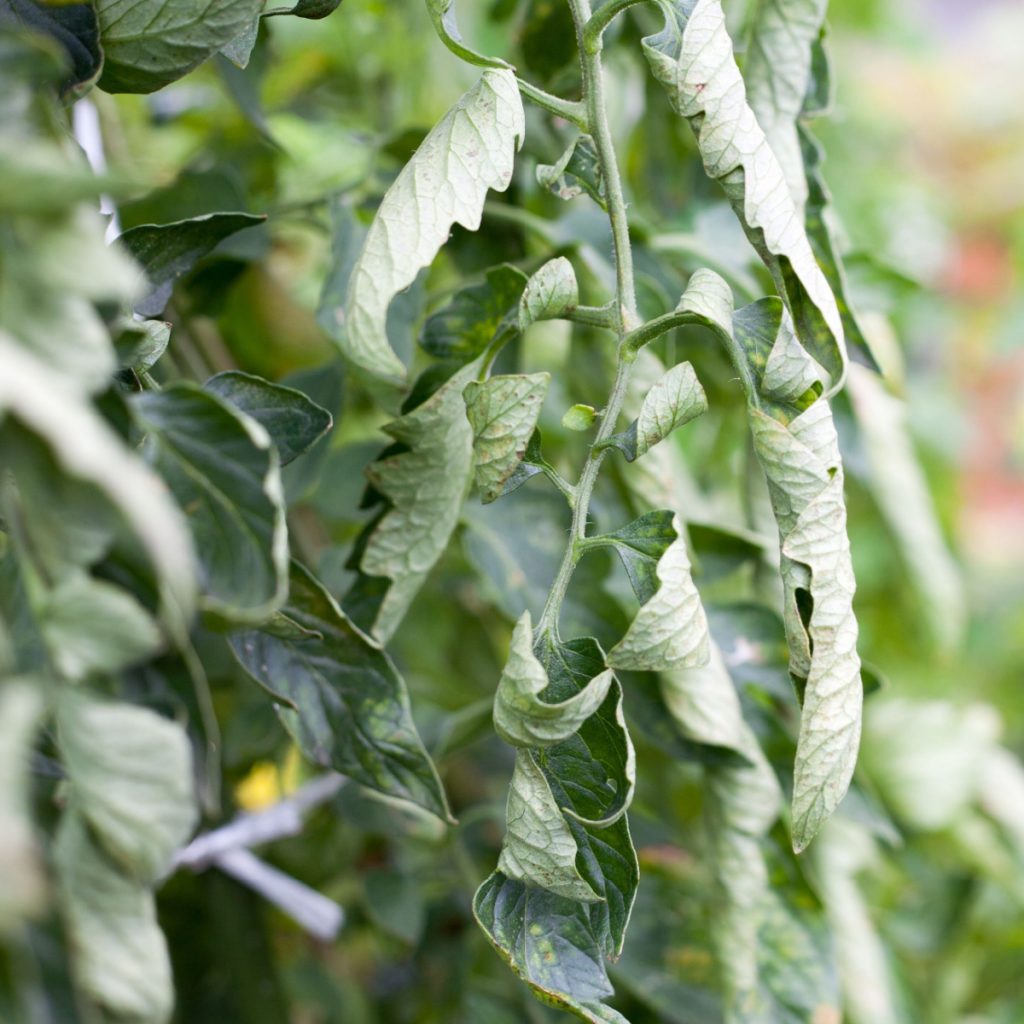
Tomato leaf curl is when the leaves begin to roll, twist, or fold inward instead of lying flat. Sometimes it only affects a few leaves at the bottom of the plant. Other times, it can impact the newer growth at the top.

So what causes it? It can actually be caused by a number of factors such as watering issues, heat, pests, and over fertilization. And the first key in solving the issue with your plant is determining which of the above might be the cause. Once you do – the problem can usually be fixed before it ever harms the plant’s health long term.
One of the most common reasons for tomato leaves to curl is heat and stress. And when the stress occurs, the plant curls it leaves trying to protect itself.
When temperatures rise and the sun is intense, tomato plants often curl their leaves to reduce how much moisture they lose through evaporation. It’s a defense mechanism that helps them survive harsh conditions.
How To Help Fix Heat & Stress Issues:
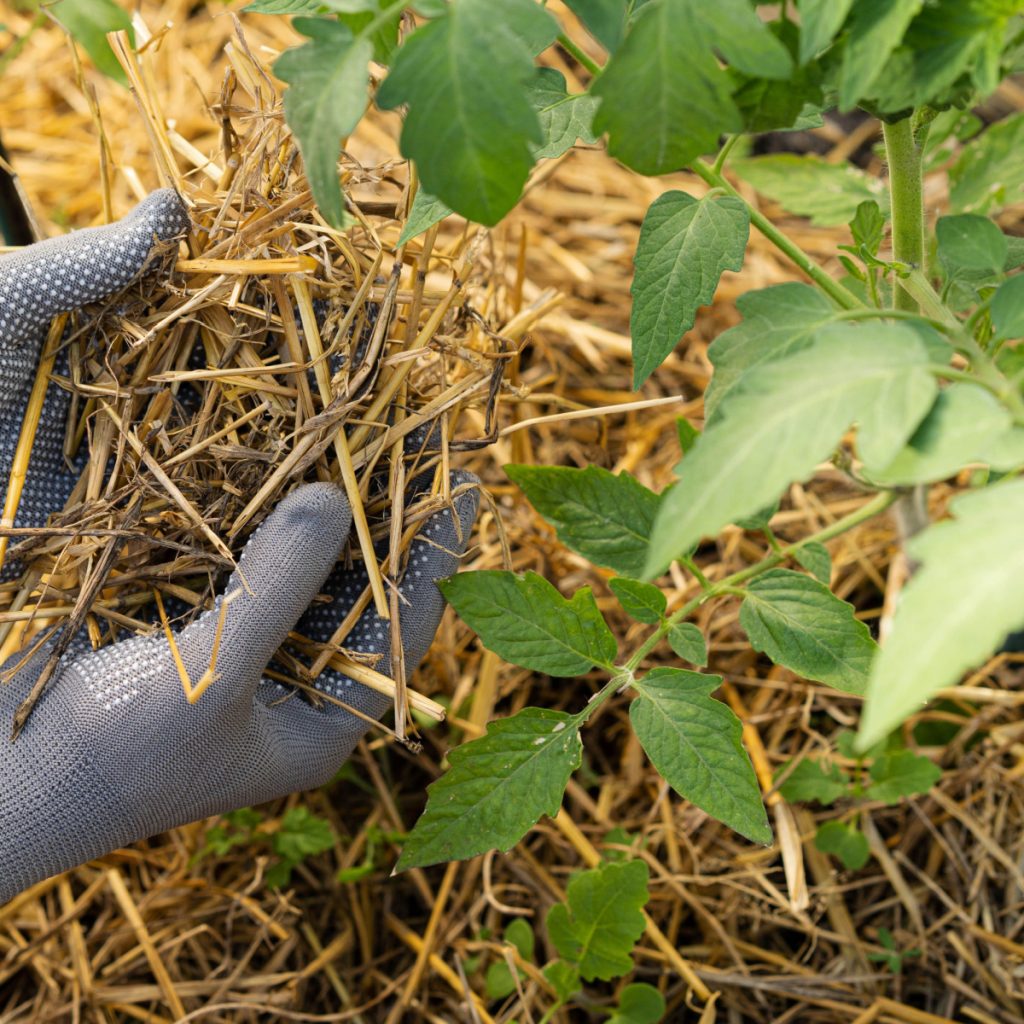
If your plants are otherwise healthy, flowering, and growing well, this kind of curling isn’t something to worry about. To help, apply a thick layer of mulch around the plants to keep the soil cooler and help it hold moisture.
Mulch such as straw, shredded leaves, or dried grass clippings works well. It also helps to water the plants deeply every few days instead of giving them a light watering each day. Deep watering encourages roots to grow down where the soil stays moist longer.
If temperatures get extremely hot, providing some temporary shade using garden fabric or row covers can also reduce stress.

Another major reason leaves curl is due to watering problems. Both overwatering and underwatering can cause stress that shows up as curling leaves.
When plants get too much water, their roots can become waterlogged and lack the oxygen they need to function. On the other hand, when plants don’t get enough water, especially in hot weather, they begin to curl their leaves to conserve moisture.
How To Fix:
The best way to check if your soil is too wet or too dry is with a long probe soil meter. A soil meter will tell you what the moisture is right at the root level, where it’s most important to the plant’s overall health and well being. Affiliate Link: XLUX Long Probe Deep Use Soil Moisture Meter Sensor
If the soil is overly wet, you need to stop all watering. If it’s dry several inches down, the plant needs more water. Try to keep the soil evenly moist. Use a deep watering method and avoid letting the soil completely dry out between waterings.
For more on watering tomato plants, be sure to check out our article: The Best Way To Water Tomato Plants In Summer!
One of the most common causes of leaf curl is tomato plants getting too much nitrogen. Nitrogen is important for plant growth, but when tomato plants receive too much of it, they tend to grow big, bushy leaves – all at the expense of flowers and fruit.
The leaves may curl, become thicker, and turn a darker green than normal. If your plants are full of foliage but aren’t producing many flowers or tomatoes, fertilizer is most likely the issue. Many general-purpose fertilizers are high in nitrogen, so it’s a good idea to check the numbers on the package.
How To Fix:
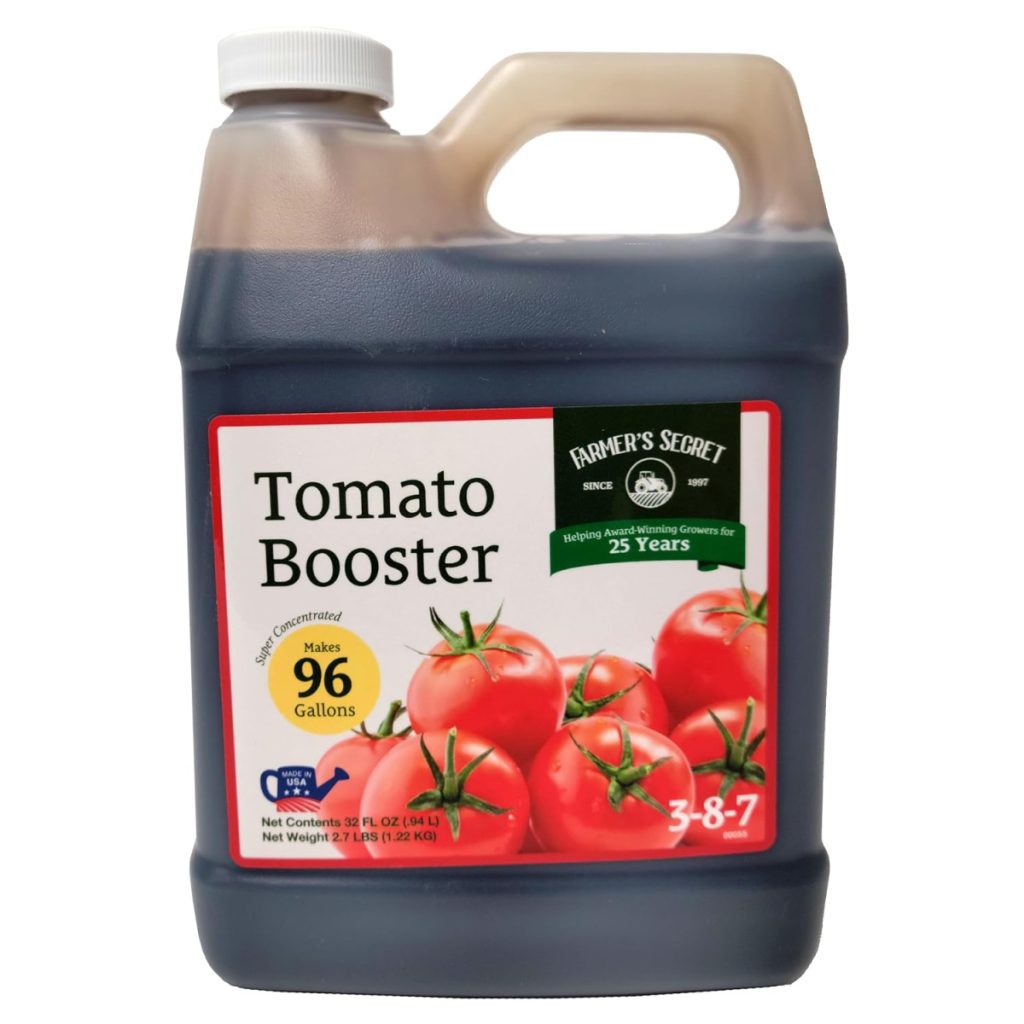
The three numbers listed on nearly all fertilizer bags will show the levels of nitrogen, phosphorus, and potassium. For tomato plants, especially during the summer when they are blooming and fruiting, you want a fertilizer that’s lower in nitrogen and higher in phosphorus and potassium. Affiliate Link: Farmer’s Secret Tomato Booster Fertilizer (32oz) – Super Concentrated – 3:8:7 Ratio
Liquid fertilizer is ideal because it’s absorbed faster by the plants and is less likely to build up in the soil. Apply a diluted, half-strength dose every seven to ten days to keep your plants fed without overloading them.

Surprisingly, just walking or stepping too close to your tomato plants can also cause problems. Every time you step on the soil near the base of your plants, you’re compacting it. Compacted soil becomes hard and dense, which makes it difficult for water and air to reach the roots.
This added stress can lead to poor root development and eventually curled or wilted leaves. Roots need loose, well-drained soil to absorb nutrients and moisture. To prevent this, avoid walking in the areas right around your plants.
How To Fix:
Create clear walking paths and try to kneel on boards or stepping stones if you need to get close. You can also use mulch around your plants to protect the soil and reduce compaction. If your soil has already become hard, you can gently loosen it with a hand fork around the base of the plant to help restore airflow.
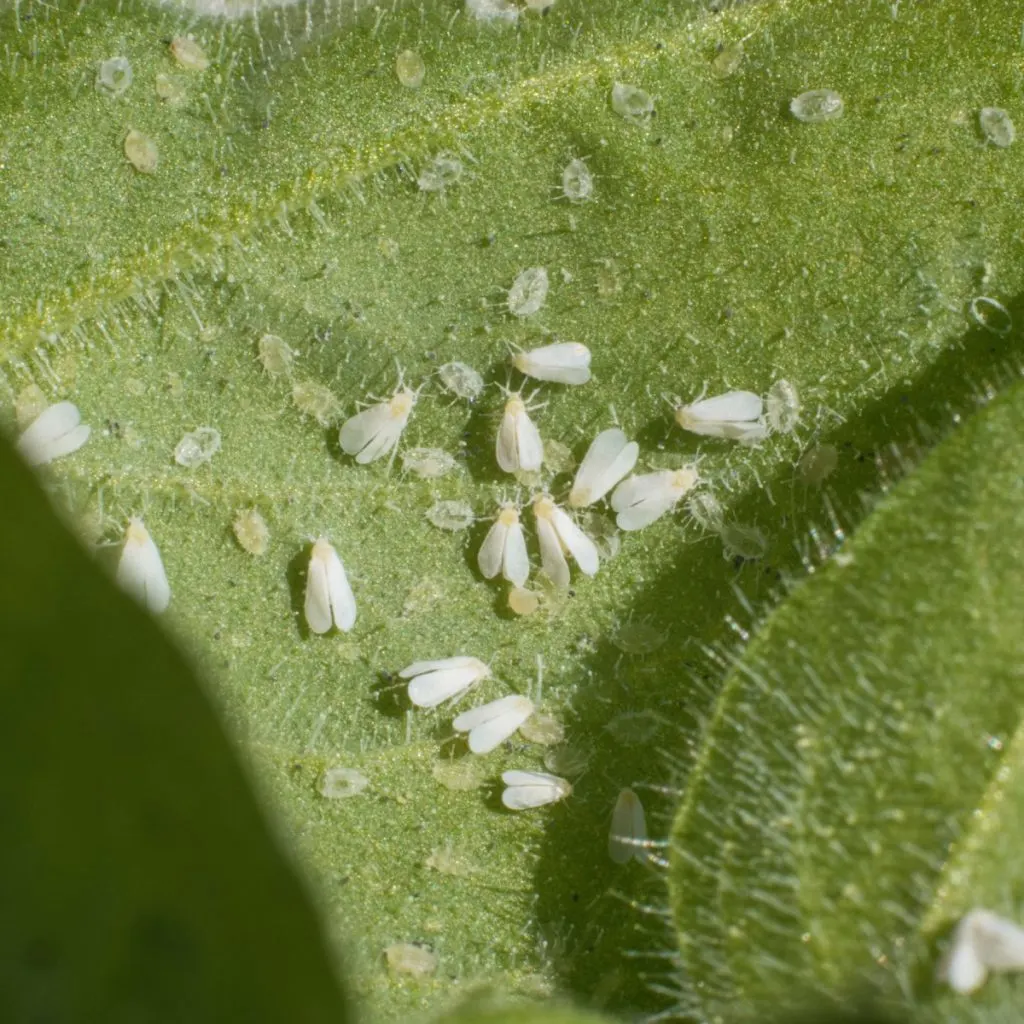
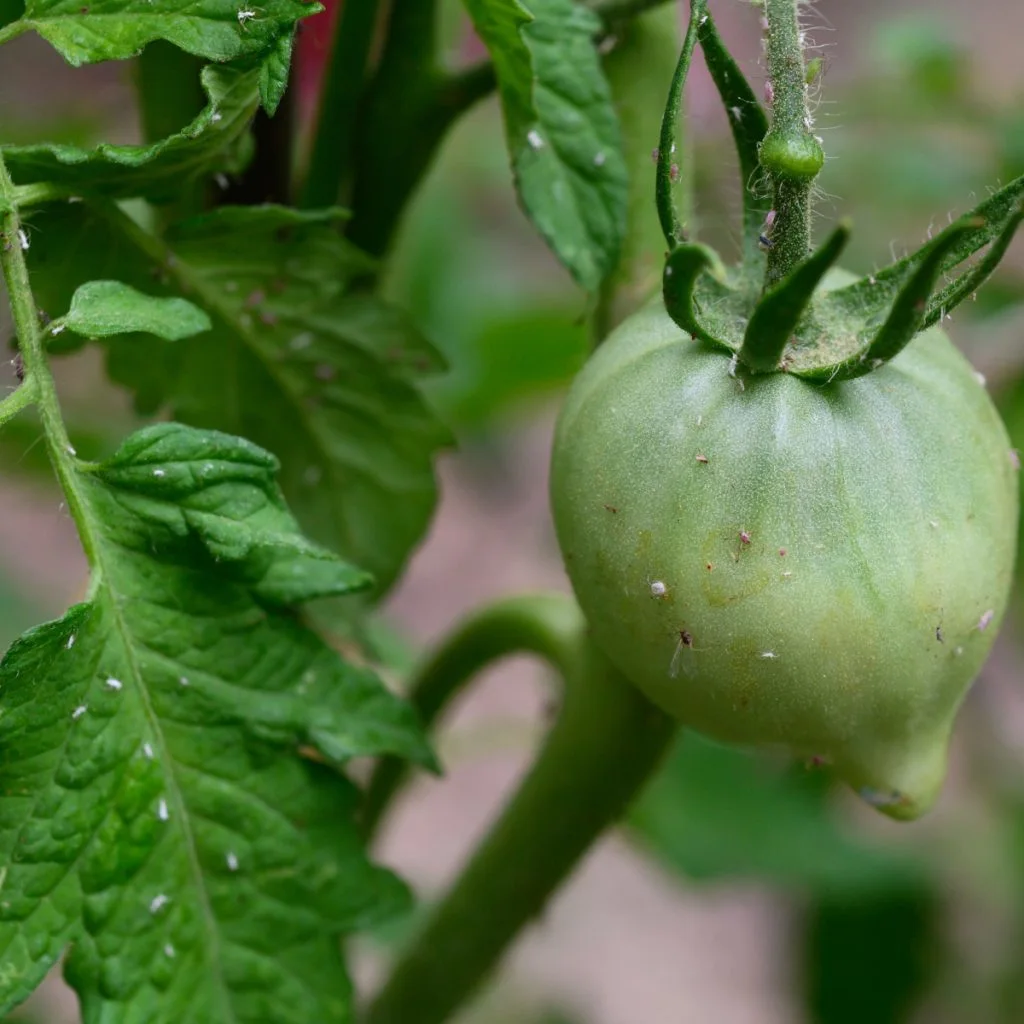
Insect problems can also cause tomato leaves to curl. Pests such as aphids and whiteflies feed on the sap of tomato plants and often hide underneath the leaves. As they feed, they cause the leaves to curl or twist. You may also notice a sticky residue, which is a sign of insect activity.
These pests can be difficult to spot at first because they are so small. Look closely under the leaves for tiny green, black, or white bugs. If you spot them, try spraying the plant with a strong stream of water to knock them off. You can also use neem oil or insecticidal soap to get rid of them naturally.

It may take a few treatments to fully eliminate the problem, especially if the weather is warm and the pests are reproducing quickly.
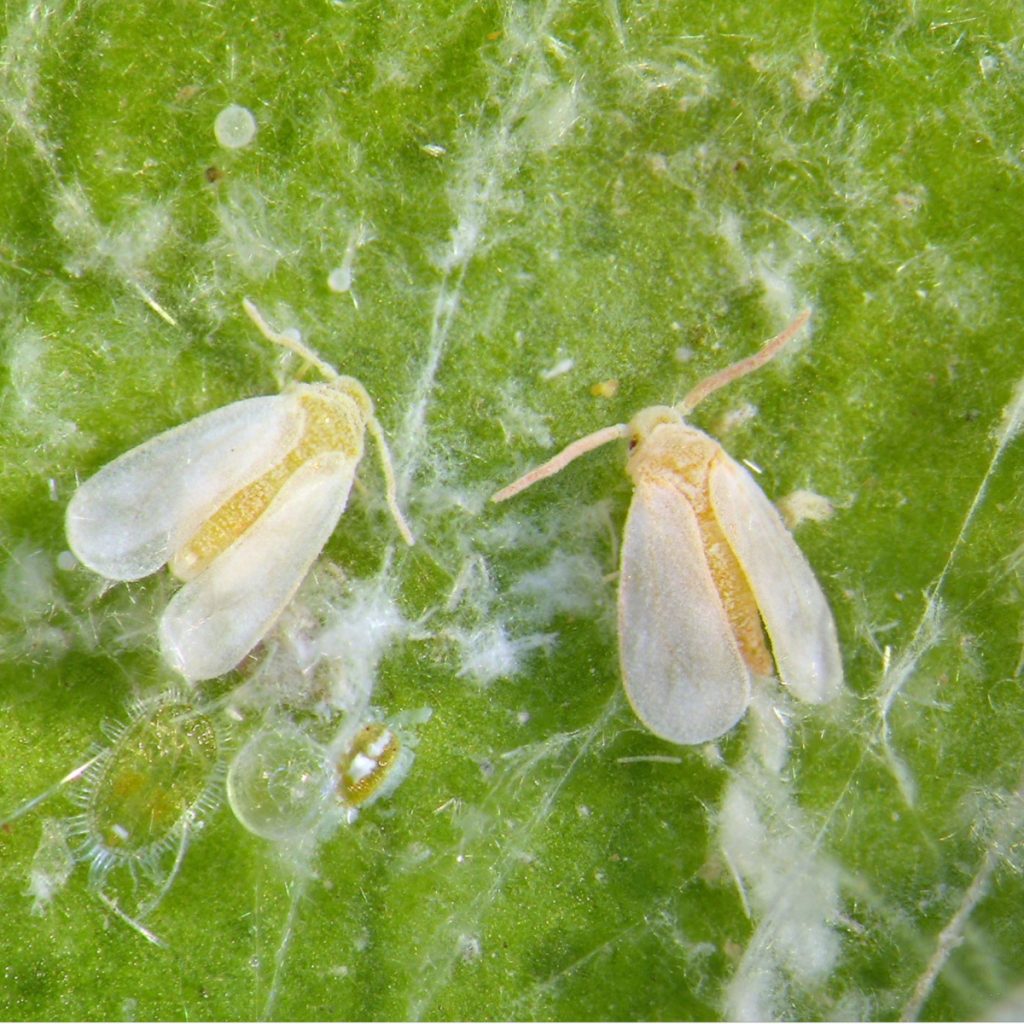
Last but not least, in some cases, curling is indeed caused by a virus. Tomato Yellow Leaf Curl Virus is a serious disease that’s spread by whiteflies. If your plant has yellowing leaves, is curling and twisting, and has stopped growing or producing fruit, it may have this virus.
Unfortunately, there is no cure for it, and it spreads easily to other plants. If you suspect this problem, remove the affected plant right away and throw it in the trash. Don’t compost it. To protect your other plants, control whiteflies as quickly as possible using neem oil or insecticidal soap.
While curled leaves on tomato plants can be a cause for concern, the key is to watch for other signs of trouble. If your plant is still blooming and growing strong, a little curl isn’t usually a big deal. By watering properly, feeding with the right fertilizer, avoiding compacting the soil, and keeping an eye out for pests, you can help your tomato plants stay healthy and productive all summer long. For even more tips on keeping your plants healthy, see: What To Do If Your Tomato Plants Show Signs Of Blight – Why & How To Act Fast!
Here is to helping your plants recover from leaf curl – and to having a great harvest this summer of juicy tomatoes!
Follow Our Facebook Page For Great Gardening Tips And Advice! This Is My Garden Facebook Page
This Is My Garden is a garden website created by gardeners, for gardeners. Jim and Mary Competti have been writing gardening, DIY and recipe articles and books and speaking for over 15 years from their 46 acre Ohio farm. They publish three articles every week, 52 weeks a year. Sign up today to follow via email, or follow along!
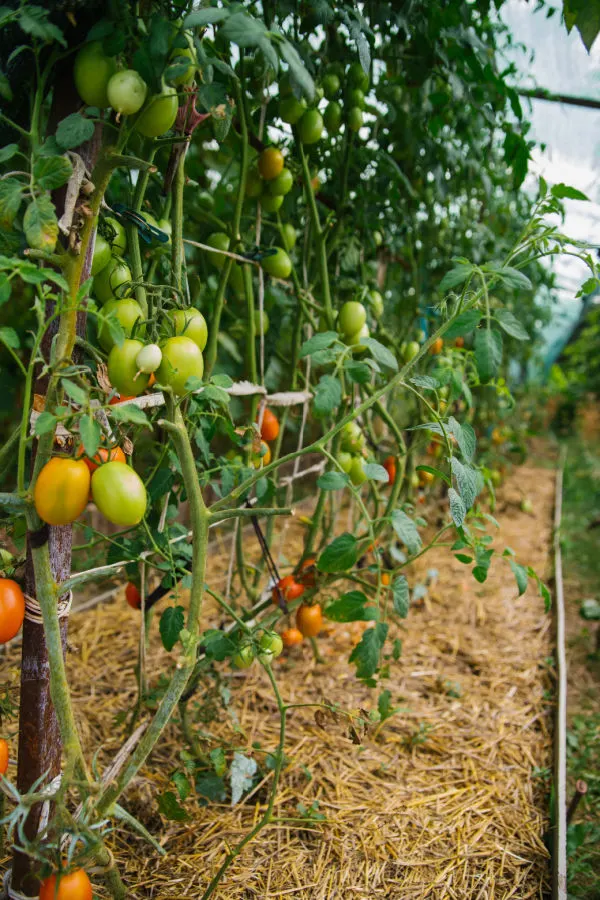
Wondering the best way to tie up all of those branches and stems growing wildly from your tomato plants?
As summer begins to hit full stride, tomato plants usually begin to as well. What were once small, floundering transplants suddenly are now fast growing plants that quickly need help. One thing is for sure, when it comes to growing great tomatoes, how, when and what you use to support your plants as they grow can play a major role in their overall performance.
Not just in helping to keep the plant from toppling over when full of fruit, but also to keep them productive and free of pests and disease!

As it turns out, there is actually a long list of benefits to tying up your plants. First and foremost, supporting your tomato crop is vital in keeping branches from snapping under the weight of ripening fruit. Believe it or not, a heavy fruit load can add as much as 25 to 30 pounds per plant.
Unfortunately, without support, that weight can topple plants quite easily as they begin to produce. Especially if a strong summer storm happens to blow through when fully loaded. One thing is for sure, it can ruin a harvest in a flash!
But more than just supporting your tomato plants, tying up branches as they grow also allows for better air flow and light. Good air flow is extremely important in keeping plants healthy and allowing for better pollination. And the more light a plant gets, the better chance it has to ripen its fruit.
Tying up your plants also makes daily chores of watering, weeding and harvesting more manageable as well. But perhaps most important of all, keeping fruit and the branches off of the ground can protect your harvest from the perils of pests and disease.
When branches are allowed to sprawl to the ground, it makes it easy for soil borne diseases to hitch a ride. And, of course, it also allows insects and pests to climb and hide out without trouble as well.
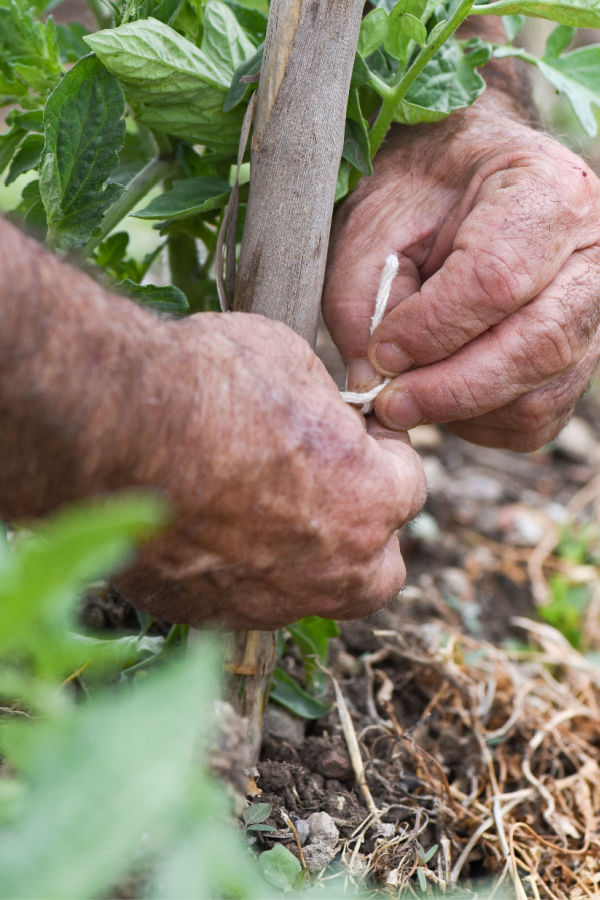

When it comes to tying up tomatoes, success begins with supporting the main stem – and it needs to be done as soon as possible! In fact, the best time to put your tomato supports in the ground is the day you plant.
No matter if you use a stake, cage, trellis or any other type of support system, putting them in place before or as you plant will help protect your plants in two key ways.
First, it allows to tie off your main stem from day 1. The main stem, especially early in a plant’s life cycle, is it’s lifeline. The more it moves and ways, the more chances there are for it to be damaged. Providing early stability for the main stem of your plant is critical to anchoring all of the other branches, stems and future growth.
Secondly, and just as important as tying off your main stem, putting your supports in early also keeps you from damaging roots and compacting the ground if you have to drive them in after the plant has been growing. Both of which can severely stunt your plant’s growth!
We will cover some of the best materials to use in a moment (along with a few not to use!), but let’s start with how to support your tomato plants as they grow by tying them up at the right time and in the right places.
Listen In Below To Our Podcast On Supporting Tomatoes!
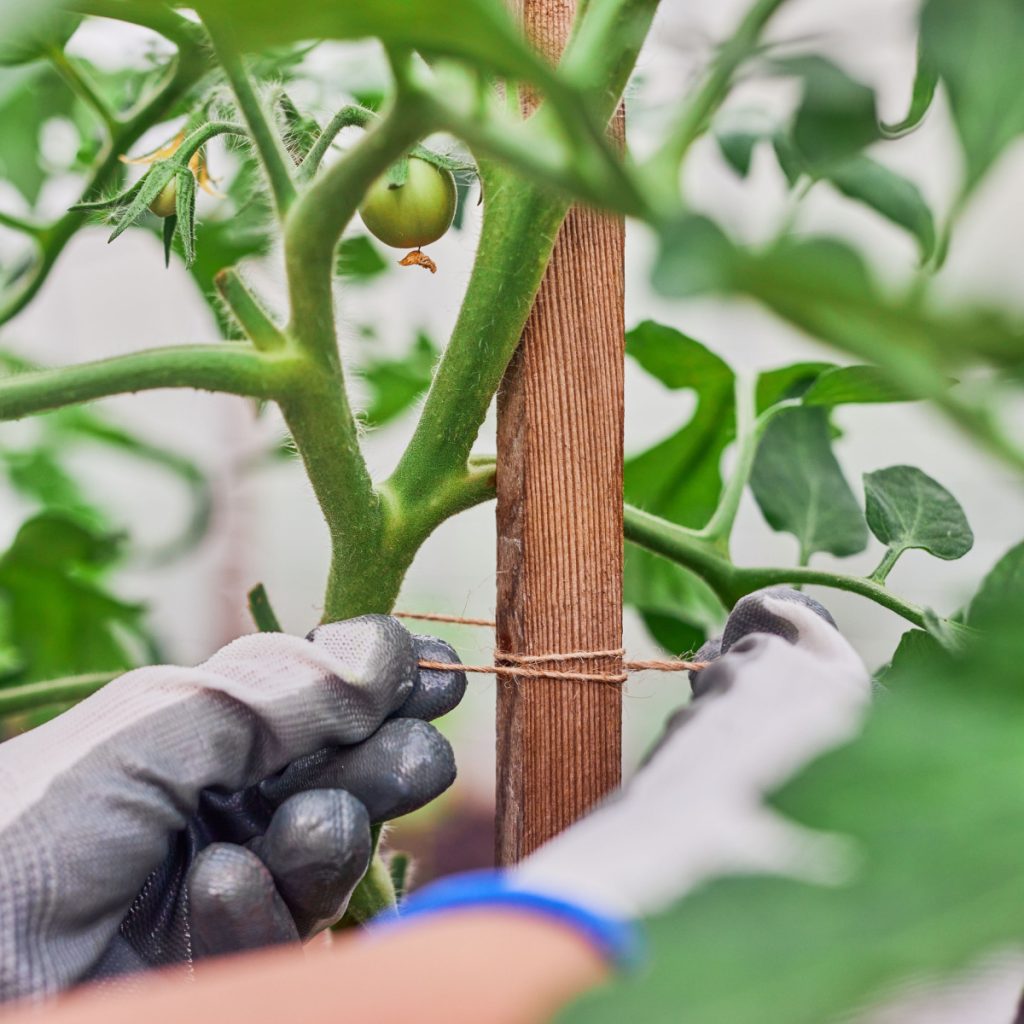
Begin at the base of plant, tying off the main stem a few inches off the ground. Allow a bit of room for the base to grow when tying, as it will thicken as summer progresses. If your plants are tall enough, add a second tie off point six to eight inches above ground level for the main stem.
These two tie-offs will provide the main support for the plant as it grows. As you do this, always be sure to trim off any branches below this point.
For the branches above, it is all about keeping the plant under control. Begin by tying the longest branches back to the center post. If you are using a stake, you can weave branches to support each other as you tie them back.
For cages, try to tie branches equally around the supports. Tying these off-shoots back to the main branch area provides much needed support as they begin to bear fruit. Once the plant has four to five main tie off spots in the middle and top, it should have all the support it needs.
As the season progresses, only tie back additional branches when they begin to wane from too much fruit. Quite often, pruning wild branches is the better option than tying up for wild or excessively large branches.
Cutting these back will allow more energy to go to producing and ripening more fruit. If there is one mistake gardeners often make with their plants, it is trying to keep up and tie all of the branches that grow. In this case, less is more! See: Why You Need To Prune Tomato Plants Early – And How To Do It With Ease!
Selecting the wrong material to tie up your tomatoes can cause serious damage to your plants. Materials that are too rigid will easily cut and damage the plants as they grow. They can also slice and rub tender shoots off in windy conditions.
Stay clear of zip ties, metal wire, and hard plastic ties. Heavy rope can also create issues as well. So what can you use? The key is to select materials strong enough to hold plants, but with flexibility. With that in mind, here is a look at some of the best materials to use:
When it comes to specific products that are made for tying off tomato plants and other vegetables safely and with ease, velcro wraps are one of the best. Not only are they reusable, but they go on with one of the easiest methods ever, velcro!

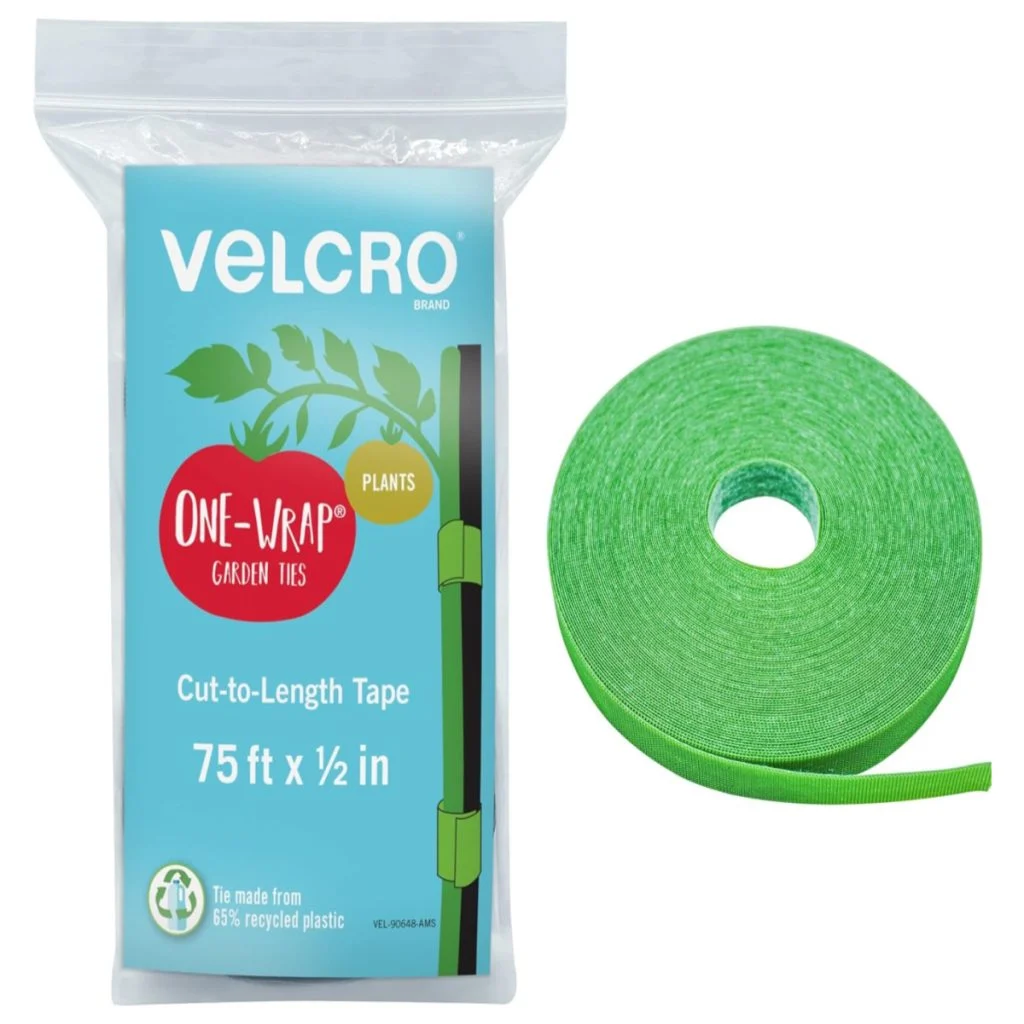
Simply cut off the desired length from the roll, and then wrap around the stem. The material is weather resistant, and can be re-adjusted and re-used as needed. Affiliate Link: VELCRO Brand ONE-WRAP Garden Ties | Plant Supports
One of the most economical choices around for tying up plants is a thick, all-cotton yarn. Cotton yarn is both strong and flexible. It allows plants to move freely, and more importantly, expands when a stem grows thick against it.
Since it can be purchased in long rolls and cut to size, it is also one of the least expensive ways to tie up tomatoes, peppers, or nearly any plant that needs support. And you can even select it in a natural green color to blend right in with your plants.
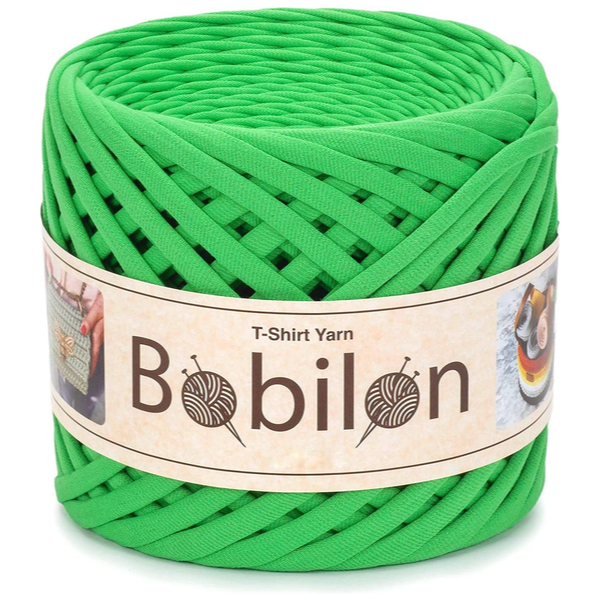
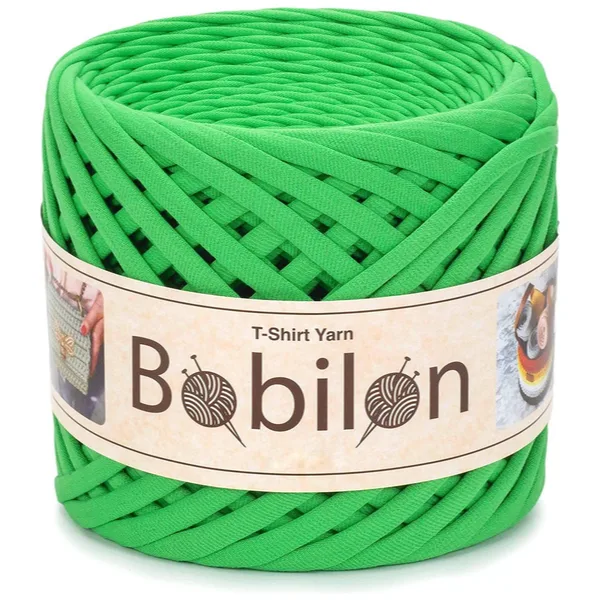
One of our favorites of all is cotton t-shirt yarn. It is thicker and easy to work with, and you can usually purchase a 100+ yard roll for under $15. Talk about a lot of tying for a little! Product Link: T-Shirt Yarn Fettuccini Spaghetti Style, 7-9 mm
Tomato twine or jute string are old-time favorites used by many gardeners to tie up tomato plants. Both are economical, although jute can sometimes be an issue rubbing into plants.
Of course, we can’t forget to mention the old standby of tying up tomatoes – pantyhose! They do work extremely well in supporting plants, and their flexible nature is easy on plants. But they can be hard to find these days, and are certainly quite expensive if purchased new.
Old cotton t-shirts cut into strips are an excellent economical way to tie up your plants. Cut the t-shirts into one inch thick strips and then tie loosely around your plants to allow them room to grow. For more tips on keeping your tomato plants healthy all season long, be sure to check out our article: Why Tomato Plant Leaves Curl – And How To Fix The Problem Fast!
Here is to giving your tomato plants the support they need this year – and to a banner crop of tomatoes!
Follow Our Facebook Page For Great Gardening Tips And Advice! This Is My Garden Facebook Page
This Is My Garden is a garden website created by gardeners, for gardeners. Jim and Mary Competti have been writing gardening, DIY and recipe articles and books and speaking for over 15 years from their 46 acre Ohio farm. They publish three articles every week, 52 weeks a year. Sign up today to follow via email, or follow along!
Wondering how to get rid of the whiteflies on your tomato plants? And how to do it fast? Whiteflies can be devastating to a tomato plant – and unfortunately – in several different ways.
For starters, whiteflies love to feed on the leaves of tomato plants. They do this because they love the sap that is inside of the leaves. When they devour the sap, it causes leaves to yellow, curl, and eventually die. As they feed, they take precious nutrients from the plant.
Not only are the leaves affected, but the entire plant begins to suffer from a lack of nutrition. That can lead to lower bloom and fruit production. It can also leave the plant far more susceptible to disease and pest attacks.

Whiteflies can also cause a fungal infection in tomato plants as well. And if all of that wasn’t enough, the energy whiteflies steal from plants can cause the few tomatoes that do appear to ripen unevenly. Usually, when this occurs, a portion of the tomato rots from over. Most often, it results in the fruit becoming completely inedible.
One thing is for sure, allowing whiteflies to stick around and increase in numbers can be disastrous for your garden. The good news? Battling whiteflies can be done quickly with the right treatments. And even better, without the need for questionable chemical sprays!
What really makes fighting whiteflies tough is that they can be hard to spot when they first arrive. Unfortunately, these tiny little creatures prefer to hang out on the underside of plants. Because of that, they often go unnoticed until it’s too late and damage occurs.
Whiteflies begin by laying eggs on the leaves of the plant. It can take about ten days for the eggs to hatch, but once they do, the young whiteflies (known as nymphs) begin feeding on the plant’s leaves and sap immediately.
As they do this, they continue to find new leaves and new plants to consume. When you consider an adult whitefly can live for an entire month, not only can it cause a tremendous amount of damage, but it can reproduce at an alarming rate.
And although they love tomato leaves, they will attack other nearby plants as well. In fact, whiteflies can actually be incredibly devastating to a long list of plants in the vegetable garden once they appear. So how can you get rid of whiteflies fast? The first line of defense is with a quick spray of soapy water!
One of the easiest, fastest and most economical methods to get rid of whiteflies is with a simple homemade mixture of liquid dish soap and water. To make, simply mix four tablespoons of liquid soap to one gallon of water. Affiliate Link: Sonett Organic Dishwashing Liquid
The best way to apply the mixture is with a small hand held spray bottle or a larger sprayer. Simply mix well and spray it on the leaves of the affected tomato plants. Always be sure to hit the undersides of the plants where the whiteflies usually reside and hide.
Whiteflies that come in contact with this solution will be killed instantly. Since liquid soap is mild, there is no worry about harming the tomato plant. Repeat the process daily for at least 7 days to eliminate any that may still be hanging around your plants.
Neem oil can not only keep whiteflies at bay but other pests and insects as well. In addition to keeping whiteflies away, a neem oil spray will smother the larvae and eggs, thereby eliminating the entire population of whiteflies all at once. It is especially helpful when there is a heavy infestation. Affiliate Product Link: Neem Oil Spray


To make your neem oil mix, combine four teaspoons of neem oil to 1 gallon of regular water. Some gardeners like to add a few drops of organic liquid dish soap to the solution as it helps the spray adhere better to the whiteflies and leaves of their tomato plants.
Neem oil is 100% organic so there is no worry of using it on vegetable plants. It is made by pressing the seeds of a neem tree for oil. It is an all-natural organic insecticide that can be effective in the fight against many pests – including even ticks! See our article: How To Eliminate Ticks In Your Yard With Neem Oil.
One of the best ways to get rid of whiteflies for good is to make your garden unfriendly to them. And that all starts with having beneficial insects already there. Ladybugs, dragonflies, parasitic wasps and even garden spiders all love to dine on whiteflies.
Although you can often purchase beneficial insects for release, the best and easiest way to bring them in is by planting the plants they love to visit. Marigolds, zinnias and nasturtiums are all flowers that attract the beneficial insects that can feed on whiteflies.
There are also plants you can grow that actually repel whiteflies. Marigolds, basil, thyme, and chives are all known to keep whiteflies far away. To have them work for you, simply plant them as companion plants right along or near your tomato plants and watch whiteflies disappear from your garden!
Did you know that worm castings are not only great for powering your tomato plants as a low and slow fertilizer, they also happen to help get rid of whiteflies away in a big way.
Worm castings help to increase an enzyme in the soil and plants that whiteflies detest. And when plants contain higher levels of this specific enzyme, whiteflies will not feed from them. Simply plant a half cup of worm castings in your planting hole, or sprinkle a cup around your plants.
As the casting’s nutrients soak into the plant, the enzyme levels increase, defending your plants naturally from attack. At the same time, the worm castings fertilize the soil, improving the tomato plant’s yield. It’s a win-win for tomato plants for sure!
Here is to getting rid of whiteflies naturally this year – and to keeping your tomato plants safe!
Follow Our Facebook Page For Great Gardening Tips And Advice! This Is My Garden Facebook Page
This Is My Garden is a garden website created by gardeners, for gardeners. Jim and Mary Competti have been writing gardening, DIY and recipe articles and books and speaking for over 15 years from their 46 acre Ohio farm. They publish three articles every week, 52 weeks a year. Sign up today to follow via email, or follow along!
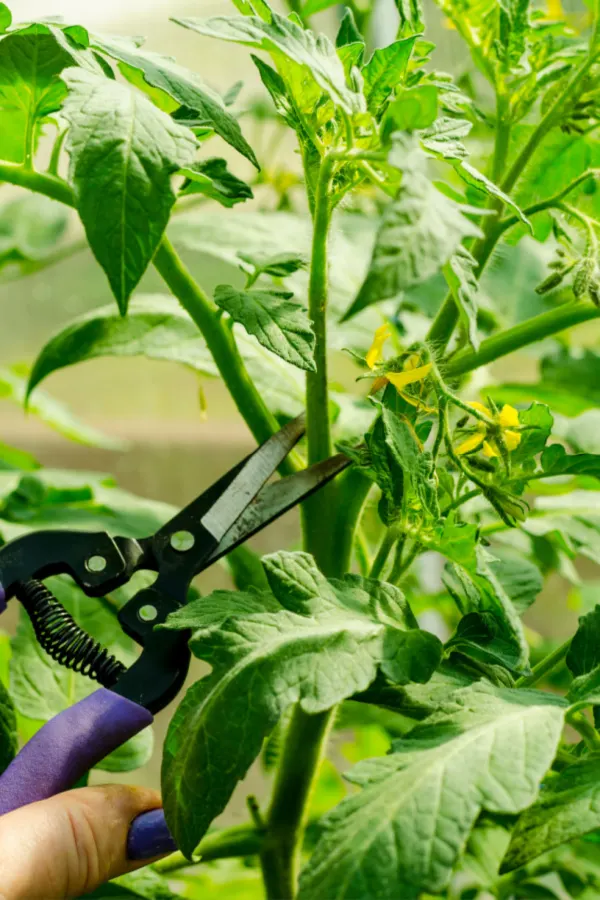
When it comes to growing tomatoes, the one topic that always spurs a lot of debate is just exactly what to do with the tomato suckers that form on your plants – or more to point – should you remove them, or let them be?
On one side, you have long-time growers that insist that removing the suckers is a must. And at the other end of the spectrum, there are plenty of seasoned gardening veterans that say removing suckers is a waste of time and effort.
So who is right? Well – the first step to knowing the answer to this all important question is knowing exactly what a tomato sucker is – and what its purpose is for the plant.
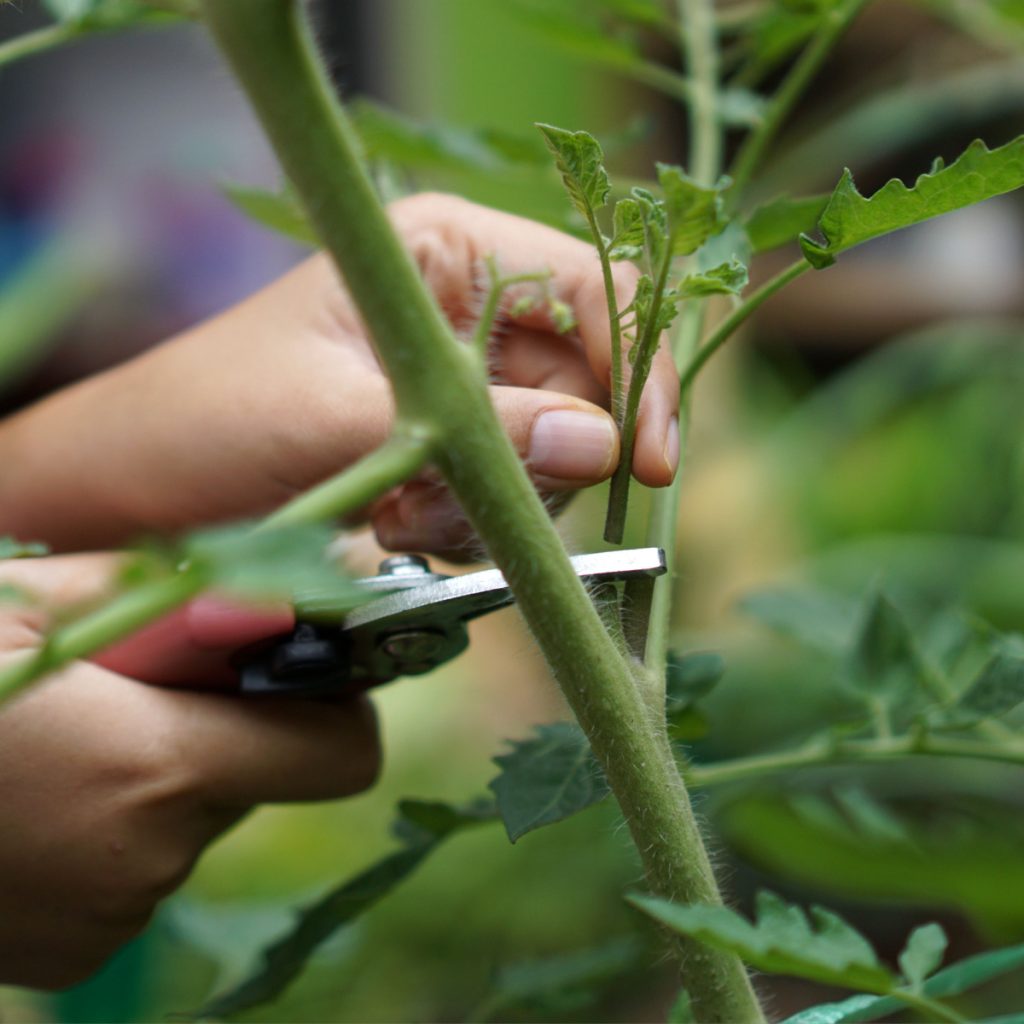

Tomato suckers are side shoots that grow in the joint of where the stem and branch of a tomato plant meet. In some cases, suckers can grow to only be a small set of small leaves. Other times, they can grow to become quite large branches.
In fact, some can grow big enough to have their own main stem and even more suckers of their own. But are they good to allow to grow?
One of the biggest misconceptions when it comes to tomato suckers is that they cannot produce blooms or fruit. They can actually do both quite well. If left to grow on their own, the branches, stems and fruit that suckers produce can be significant. So much that they can make up thirty percent or more of the plant’s total fruit if all are allowed to reach full maturity.
Sounds like a good thing to let them grow, right? After all, 30% more fruit sounds like a better deal on the surface. But surprisingly, it truly is best to remove them. Why? The answer is all about quality over quantity!
When it comes to pruning tomato plants, removing all or most of the suckers that form is truly the best option for a better harvest. Why? Because even though allowing the suckers to remain will allow your plant the opportunity to produce more tomatoes – it doesn’t mean they will all be good tomatoes.

Tomato plants require a tremendous amount of nutrients to grow, produce flowers and set their fruit. And when a tomato plant is allowed to grow at will, it burns more energy than ever. So much so that with an overabundance of branches, flowers and fruit, it doesn’t have enough energy left to grow sizable tomatoes. Even worse, it also has more issues developing the flavor of the tomatoes it produces.
By removing suckers, the plant doesn’t have to maintain or expend energy on growing excess foliage. And with less foliage, there will also be fewer flowers and fruit to develop as well. Because of that – all of the extra energy can instead go to producing bigger, more flavorful tomatoes!
The good news? Removing tomato suckers is so easy to do! There is no need for fancy pruners. All you need to do is pinch them off with your fingernails as they develop. In a matter of a few seconds, you can help to keep your plant under control all summer long.
In addition to removing tomato suckers, a little extra pruning at the base of your tomato plant will also pay huge dividends when it comes to the health of your plants. And also with the quality and quantity of your harvest.
One of the most vulnerable parts of a growing tomato plant is its base. When too many branches and stems are left near the bottom of a plant, it can make it easy for pests and disease to gain access to the foliage and fruit above. And once that happens, it can put an entire harvest in jeopardy.
Blight, one of the deadliest of all tomato diseases, occurs from spores in the soil getting on plants. And when leaves and branches of a tomato plant touch or are near the soil – the deadly spores can easily splash up on them whenever it rains or you water. See our article: How To Keep Tomato Blight Away From Tomato Plants – 2 Simple Ways To Eliminate Blight!
All of those low hanging leaves also make it easy for pests to climb up onto plants too. Aphids, whiteflies, hornworms and other tomato pests can easily hide under all of that low foliage, building their populations as they do so.
There are also three additional and very important reasons to prune the bottom of your tomato plants up – and those happen to be to allow in air, light and water.
When you allow a large mass of stems, branches, and leaves at the bottom of your plant – it can block all three. And that can be bad for tomato plants that need good air flow, circulation and moisture to stay healthy and productive.

As your plants grow and mature, trim off the bottom set of leaves and branches. At first, trim up so young plants have at least 4 to 6 inches of space above the soil. At full maturity, large indeterminate tomatoes should have 12 to 18 inches of space. For smaller varieties and determinate types, prune up 8 to 12 inches at full maturity.
Here is to removing those tomato suckers this year and pruning your plants up. And when you do, to a healthier and better harvest of tomatoes all summer long! For more tomato growing tips, see: The Best Way To Tie Up Tomato Plants – How To Keep Your Tomatoes Under Control!
Follow Our Facebook Page For Great Gardening Tips And Advice! This Is My Garden Facebook Page
This Is My Garden is a garden website created by gardeners, for gardeners. Jim and Mary Competti have been writing gardening, DIY and recipe articles and books and speaking for over 15 years from their 46 acre Ohio farm. They publish three articles every week, 52 weeks a year. Sign up today to follow via email, or follow along!
Want to know the three biggest mistakes many gardeners make when growing backyard tomatoes? Or more importantly – how to avoid them so you can grow healthy plants that give you a big harvest?
Whether you grow your tomatoes in a traditional garden, a raised bed, or in pots or containers – there are a few key needs plants require to maintain their health. At the top of that list are water, nutrients and sunlight. Without all three, plants simply can’t survive – let alone produce a good crop of tomatoes.
Quite importantly, how a plant is cared for as it grows impacts how these three important needs are met. And, in a very big way! Which is exactly why avoiding the three miscues below is important to grow strong plants – and a big crop of tomatoes.

To reach their full potential, tomato plants need nutrients. And even if they are planted in the best soil possible, they usually need more than the soil can provide to really produce a sizable harvest.
The best way to give your tomato plants the extra nutrients they need is with fertilizer. But, and this is often where gardeners make a critical mistake, the type of fertilizer you feed your plants – and how you fertilize your plants can make a big difference between success and failure.
When it comes to the type of fertilizer to use – select a fertilizer that is higher in phosphorus and potassium than nitrogen. Yes, nitrogen will green up your plants and help them grow. But too much of it makes the plant only grow stems and foliage – and not concentrate on fruiting.
Phosphorus, on the other hand, is what plants use to produce blooms and eventually fruit. Potassium is important as well for plant health and ripening. When powering tomato production, these two are more important than nitrogen.
Look for fertilizers with an N-P-K ratio (Nitrogen, Phosphorus & Potassium) that provides at least double the phosphorus and potassium to nitrogen. This will still give enough nitrogen for plant power – but keep the plant concentrating more on fruiting. Affiliate Link: Farmer’s Secret Tomato Booster Fertilizer (32oz) – Super Concentrated – 3:8:7 Ratio
When it comes to fertilizing tomatoes, more is not always better. It is better to give your plants a steady but lower diet of energy than just a few big doses of fertilizer throughout the growing season.
Too much power all at once can send the plant into a growing frenzy. But instead of helping to produce more tomatoes, the plant uses all of the extra energy to grow more stems and leaves – all at the expense of producing more blooms and fruit!
The best ways to fertilize your plants is by taking a steady and slow approach. Fertilize every seven to ten days with a lighter dose. Use half of the recommended rate as this will help to not overpower the plant. But by fertilizing more regularly, it supplies constant, steady energy to stay healthy and produce fruit.
One of the biggest mistakes of all when it comes to growing tomatoes is not giving plants a protective layer of mulch. Even if you are growing your tomatoes in containers and pots – a light layer of mulch can make a huge difference in your plant’s performance!
Leaving the soil bare under your growing plants can lead to a whole host of issues for tomato plants. First and foremost, a thick layer of mulch helps to minimize weeds and the chore of weeding. Weeds are not only unsightly, they also steal valuable nutrients from the soil. Nutrients that your tomato plants need to grow and produce.
But mulch does so much more than just prevent weeds. It also helps keep moisture in the soil. Bare soil can quickly dry out from the hot sun. But a layer of mulch helps to keep that moisture in at the root level of tomato plants, right where they need it most.
Even more, mulch helps to regulate the soil temperature. It keeps the soil from overheating on extremely hot days, and yet, it helps hold the heat in through cool nights. By doing this, it keeps the roots of your tomato plant steady. Which is exactly what they need for optimum growth!
Perhaps most importantly of all, a layer of mulch can help keep your tomato plants safe from blight. Blight is caused from spores that live in the soil. If left bare, those spores can easily splash up onto the leaves of plants when it rains or you water. And when it does, it can infect your plants in the process. See: How To Stop Tomato Blight – 3 Simple Secrets To Keep Your Plants Safe!
How much mulch is enough? In a traditional garden or raised bed setting, plants should have at least four inches of mulch to be effective. 6 inches is even better. For containers, one to two inches is best to help hold in moisture and keep the plants from drying out too fast.
Listen Below To Our Podcast On The Best Way To Support Your Tomatoes
As for best choices – straw, shredded leaves and grass clippings all work great for mulching tomato plants. To really make your mulch powerful, put a few inches of compost around your plants. Every time you water or it rains – the compost nutrients will leach to the roots below!
Another one of the most common mistakes gardeners make when growing tomatoes or any vegetable for that matter, is stepping on or too close around the root zone of their plants. And for tomato plants, that can really have a negative impact on their health, growth and their ability to produce a sizable harvest!
The roots of a tomato plant are its lifeline. They not only anchor the plant to the ground, they are also responsible for absorbing air, water and nutrients from the soil that the plant needs to grow and produce.
The roots of a healthy tomato plant can easily extend 12 inches out from each plant. And when those roots become smashed from heavy foot traffic, the soil around them compresses down on them. Once that happens, it becomes difficult for the roots to breathe or absorb food and water – and the plant suffers.
When watering, weeding, fertilizing or harvesting, always take care to stay far away from the root zone. Leaving the soil loose and undisturbed allows the roots to grow freely. And loose soil gives your plant the best chance of success.
Here is to avoiding 3 of the biggest mistakes gardeners often make when growing tomatoes – and to a big harvest of juicy fruit this summer! Once harvest time rolls around, be sure to check out these tips: How To Know When To Harvest A Tomato – The Answer Might Surprise You!
Follow Our Facebook Page For Great Gardening Tips And Advice! This Is My Garden Facebook Page
This Is My Garden is a garden website created by gardeners, for gardeners. Jim and Mary Competti have been writing gardening, DIY and recipe articles and books and speaking for over 15 years from their 46 acre Ohio farm. They publish three articles every week, 52 weeks a year. Sign up today to follow via email, or follow along!
Looking for a way to quickly get rid of the aphids on your tomato plants? And keep them off for good?
Aphids might be small insects, but they can cause huge problems in a short amount of time. Especially when it comes to tomato plants. Once they find your plants, they can multiply fast. So fast, in fact, that their numbers can double or even triple in just a few days!
If you don’t catch them early, a small group can turn into a major infestation that damages or even kills your plants. Even worse, aphids don’t stop with tomatoes. If left untreated, they can quickly move to other plants in your garden. And when they do, they can all but decimate an entire garden’s harvest for the year.

The damage aphids leave behind can not only reduce plant growth and hurt fruit production, in some cases, it can even lead to the death of the plant. The good news? You can stop aphids quickly and naturally. Especially if you act early and know just what to do!
Aphids feed by piercing plant leaves and stems and sucking out the sap. This sap is full of nutrients, and when aphids remove it, they rob the plant of important energy needed for growth and fruit development.
As they feed, aphids cause leaves to curl, turn yellow, or become deformed. You may notice that your tomato plant stops growing. In other cases, new leaves that appear look misshapen or weak. In severe cases, the plant may even lose leaves and start to die back.
But that is just from the initial sap loss. What makes aphids worse is that they very often carry viruses and plant disease. So not only can their feeding weaken your tomato plants, they can also spread infection from plant to plant. And once a virus takes hold, there’s usually no way to reverse it. That’s why early detection and action is a must when it comes to aphids.


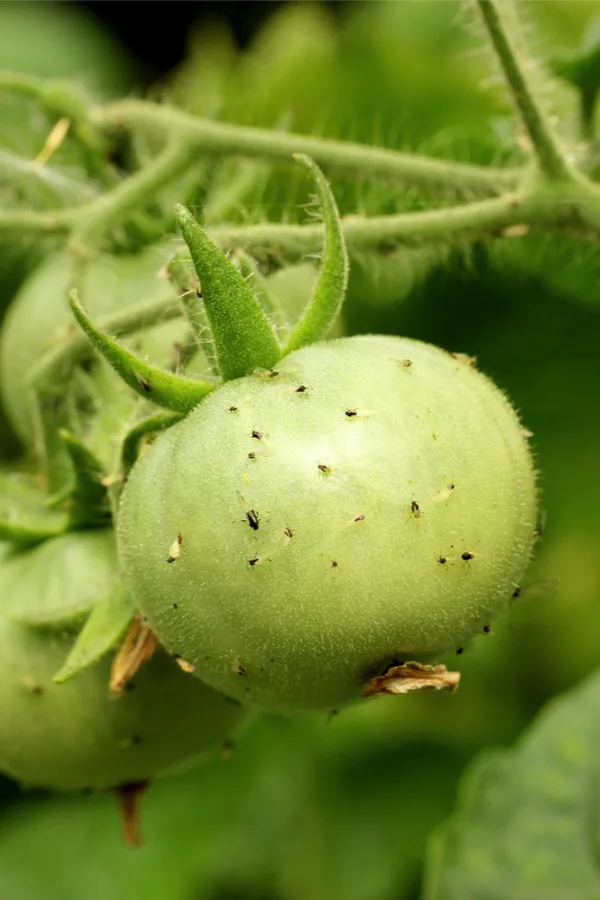
Since aphids are tiny – often no larger than a pinhead – it can be easy to miss them at first. They often gather on the undersides of leaves, out of sight. That’s why it’s important to look closely when checking your plants.
Flip a few leaves over and see if you can spot any light green, black, yellow, or white insects grouped together. If you see any sticky sap or curling leaves, it usually is a sign they’re already feeding.
Another sign of aphids is an increase in ants around your plants. As aphids feed, they produce a sugary waste called “honeydew,” which ants love to eat. If you see ants crawling up and down your tomato plants, there’s a good chance aphids are nearby.
Honeydew can also leave behind a black, moldy-looking coating on leaves, which can further harm a tomato plant’s health. If you see this or any of the signs above, it’s time to take action quick. And the easiest way to do that is with a quick stream of water!
One of the easiest and fastest ways to remove aphids is with a strong spray of water from your garden hose. The water knocks the aphids off the leaves and stems and onto the ground. Once they fall, they usually can’t make their way back to the plant and will die shortly after.
When spraying, make sure to focus on the undersides of the leaves where aphids like to hide. But it’s important to be careful when doing this not to damage your plant. Start with a light spray and adjust the pressure as needed. You may lose a few flowers or small tomatoes, but your plant will recover faster than if the aphids are left alone.
This method works well for light to moderate infestations. For bigger problems, or if aphids return quickly, you’ll want to use more than just water. And the easiest way to do that safely and naturally is with neem oil.
If water alone doesn’t solve the problem, neem oil is an excellent next step. Neem oil is made from the seeds of the neem tree and is completely natural. It’s safe for pets and people and breaks down quickly in sunlight.
When sprayed on plants, neem oil coats the aphids and stops them from feeding and reproducing.To use neem oil on tomato plants, add two tablespoons of neem oil per gallon of water. In addition, squirt in a few drops of dish soap to help the mixture stick to the leaves.
Use a handheld spray bottle or garden sprayer to coat the leaves, especially underneath where the aphids hide. For best results, spray in the early morning or late evening when pollinators are not active. This helps protect helpful insects like bees and butterflies.


To eliminate aphids entirely, reapply the spray every 5 to 7 days until you no longer see any sign of activity or damage. Affiliate Link: HARRIS Neem Oil Cold Pressed Water Soluble Concentrate
Another great way to keep aphid populations in check is by attracting insects that eat them. Ladybugs, lacewings, and parasitic wasps are all natural predators of aphids. These helpful bugs can help manage small infestations before they ever become a serious problem.
The easiest way to attract these beneficial insects is to plant flowers and herbs that offer pollen and nectar. Some great options include:
Not only do these plants bring in helpful bugs, but they also add beauty to your garden and even help repel other pests. You can plant them directly in your garden or in pots and place them near your tomato plants.

Another smart way to protect your tomato plants is with companion planting. Certain plants naturally repel aphids due to their strong smell or taste. By planting these near your tomatoes, you can keep aphids from ever wanting to visit.
Some great aphid-repelling plants include:
Plant these close to or between your tomato plants for best results. If you’re short on space, you can grow them in small containers and place them right next to your tomato plants. See our article: The Best Marigolds To Grow To Repel Pests & Attract Pollinators.
Whether it’s spraying them off with water, treating with neem oil, attracting beneficial insects, or planting helpful companion crops, one thing is for sure, a little care goes a long way in helping to get rid of aphids on your tomato plants – for good! For more tips on keeping destructive pests out of the garden, see our article: How To Keep Groundhogs Out Of The Garden – 4 Simple Ways To Stop Groundhogs!
Follow Our Facebook Page For Great Gardening Tips And Advice! This Is My Garden Facebook Page
This Is My Garden is a garden website created by gardeners, for gardeners. Jim and Mary Competti have been writing gardening, DIY and recipe articles and books and speaking for over 15 years from their 46 acre Ohio farm. They publish three articles every week, 52 weeks a year. Sign up today to follow via email, or follow along!
Are your tomato leaves on your newly planted tomatoes turning yellow?
Yellowing leaves are one of the most common issues gardeners face when growing tomatoes. Especially in the early stages of growth. Tomato plants can struggle to take off after transplanting – and yellow leaves are often the first sign that something isn’t quite right.
While there can be a few different reasons for this, more times than not, the root of the problem comes down to one main issue – too much water.
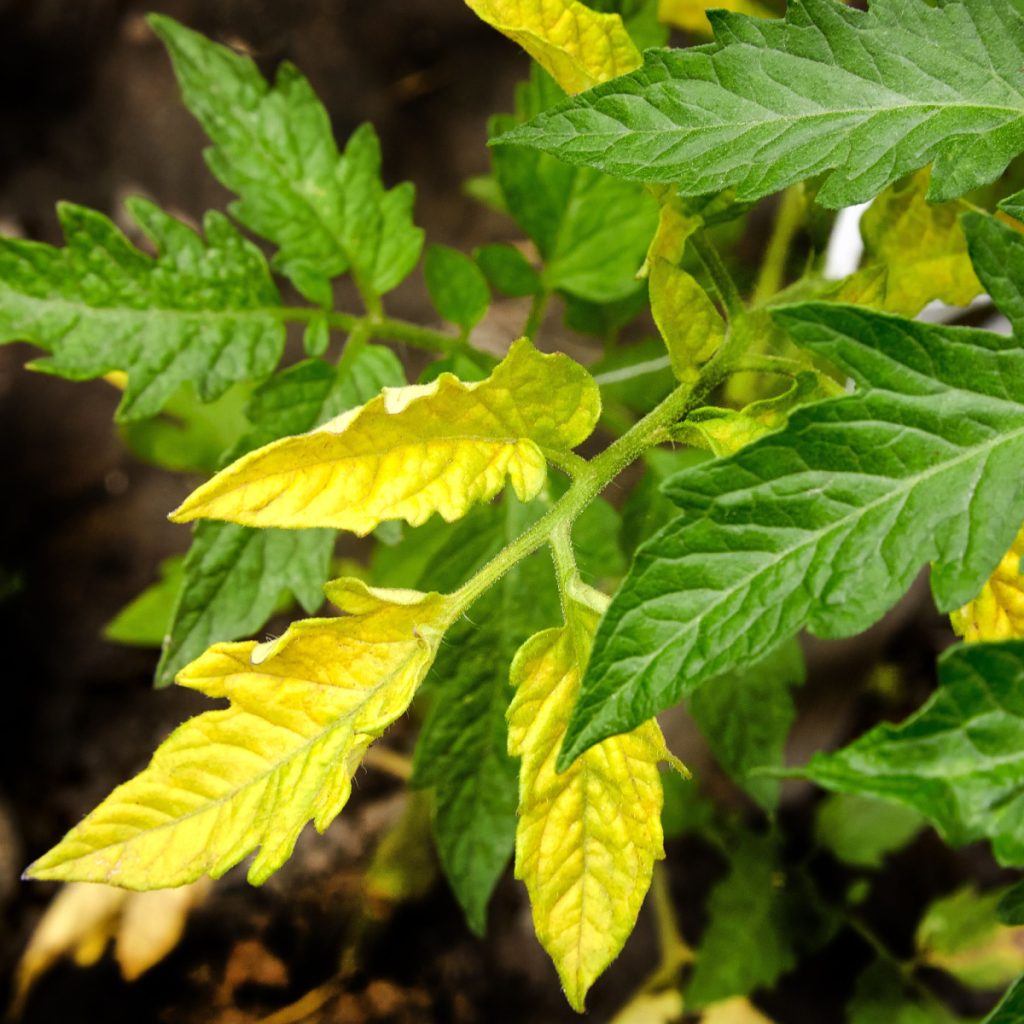
Yellow leaves on a tomato plant can be confusing, especially for new gardeners. It’s easy to assume the yellowing is caused by the plant not getting enough water. After all, yellow leaves often look dry and sickly.
But in reality, the opposite is usually true. More often than not, it’s too much water that is to blame, not too little. Tomato plants, like all vegetables, need water to survive. But when they get too much of it, the roots begin to suffer.
The root system of a tomato plant is responsible for taking in oxygen and nutrients from the soil. When the soil around the roots stays too wet, the oxygen gets pushed out. Over time, this wet environment causes the roots to swell and become waterlogged.
When roots swell up like this, they can no longer take in nutrients effectively. The plant starts to suffer, and it shows up in the leaves. Instead of the bright, healthy green color tomato plants are known for, the leaves begin to turn pale, then yellow. This is the plant’s way of signaling that it’s not getting the nutrition it needs to grow.
The tricky part is that many gardeners see the yellow leaves and assume the plant is thirsty. So, they water more. And unfortunately, that only makes things worse. The soil stays soggy, the roots get more stressed, and the leaves continue to yellow. Eventually, the plant can even die if the issue isn’t corrected.


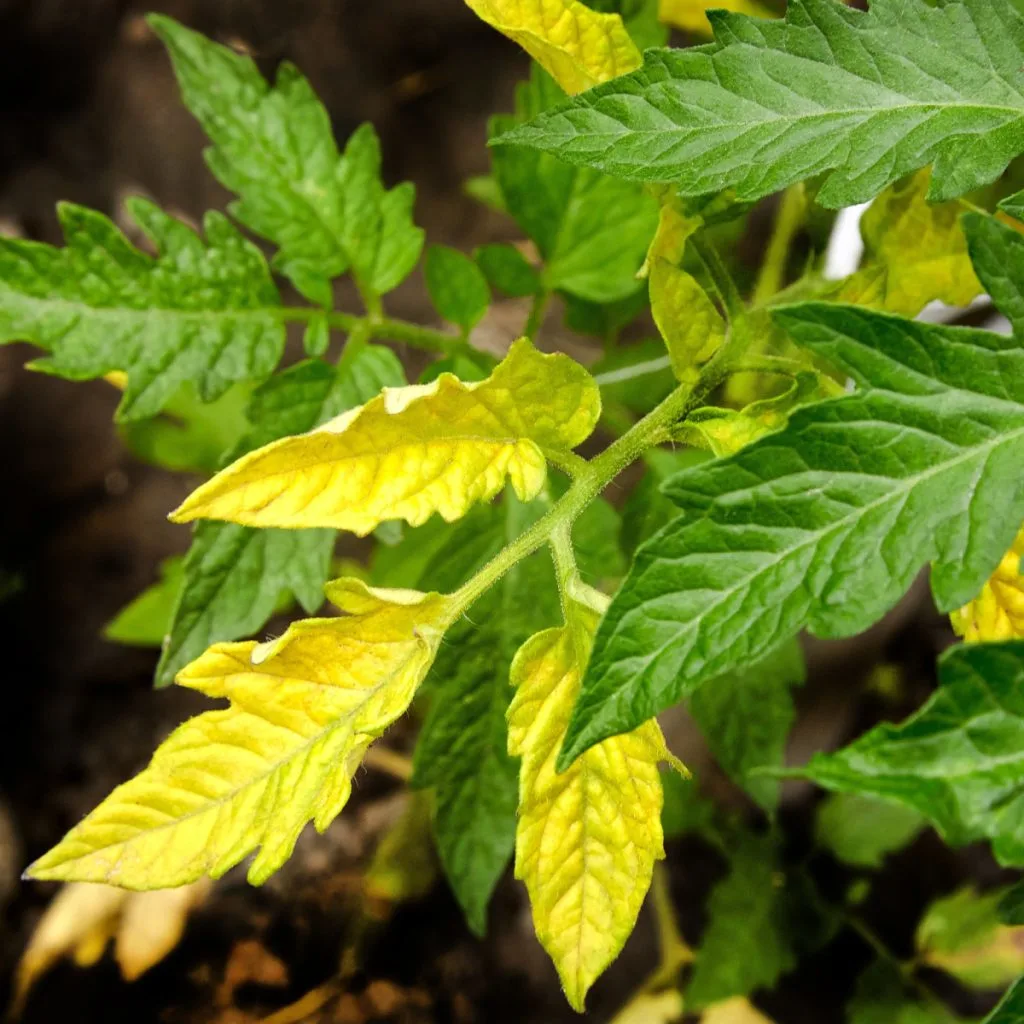
Young tomato plants are especially prone to their leaves turning yellow. Right after transplanting into the ground or a container, their roots are still getting adjusted to the new environment. If you add heavy watering on top of that, it’s easy to overwhelm them.
Because young plants don’t have deep roots yet, the moisture builds up in the top few inches of soil. That, of course, is right where their roots are trying to grow.
Early spring rains, cooler weather, and cloudy days can make it worse. With less sunshine and warmth, the soil doesn’t dry out as quickly. That can lead to soggy conditions that linger day after day, which is bad news for young tomatoes trying to settle in and grow strong.
The best way to avoid overwatering your tomato plants is to know exactly how wet the soil is before you water. That’s where a moisture meter can be a huge help. These small, inexpensive tools are easy to use. You simply push the probe into the soil, and it gives you a quick reading of how wet or dry the soil is. Affiliate Link: XLUX Long Probe Deep Use Soil Moisture Meter
Tomato plants do best when the soil is kept evenly moist but not soggy. You want the soil to be damp several inches down but not soaking wet. If the meter reads in the “wet” zone, you don’t need to water. If it shows “dry,” especially a few inches deep, then it’s time to give your plants a drink.

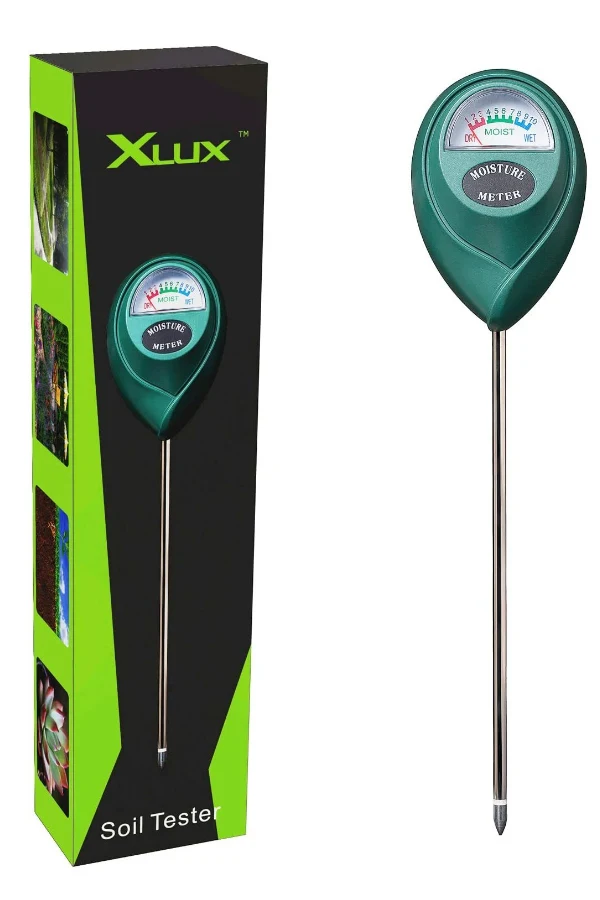
Many gardeners are surprised by how wet their soil actually is, even after a few days without rain. Using a moisture meter can take the guesswork out of watering and help prevent yellow leaves before they start.
So how much water is the right amount? For tomato plants in the ground, about 1 to 1.5 inches of water per week is all they really need. That can come from rain, hand watering, or a combination of both. If your area gets regular rainfall, you may not need to water much at all.
Instead of watering a little every day, it’s better to water deeply every few days. Deep watering encourages the roots to grow deeper into the soil. That helps plants find moisture during dry spells and makes the plant more stable and productive. Shallow, frequent watering keeps the roots near the surface, where the soil dries out faster.
If you’re growing tomatoes in containers, keep in mind that they’ll likely need to be watered more often than those in the ground. Containers dry out faster, especially in hot weather. But even so, it’s important to let the top inch or two of soil dry out before watering again.
So what if your plants leaves are yellow right now? The first thing you can do (besides not watering) to help is remove any mulch.

Mulch is great for tomato plants. It helps keep moisture in the soil, regulates temperature, and keeps weeds down. But when your soil is already too wet, mulch can trap in even more moisture. That’s why, if your tomato plants are showing signs of overwatering and the soil feels soggy, you may need to temporarily remove the mulch around the base of the plant.
Removing the mulch allows air and sunlight to reach the soil, helping it dry out faster. Once the soil has returned to a normal moisture level, you can replace the mulch to help keep it that way. Just be sure to keep mulch a few inches away from the plant’s main stem. This will avoid trapping moisture right at the base, which can lead to rot.
When tomato leaves turn yellow from overwatering, the plants are lacking nutrients. But adding a liquid fertilizer at this point will only make the problem worse. Applying more liquid to already soggy soil just adds to the stress.
Instead, switch to a dry, granular fertilizer. A slow-release granular fertilizer sits on the soil and gradually dissolves as you water or as it rains. It delivers nutrients without dumping more water into the soil. This can help feed the plant and encourage the roots to recover without worsening the wet conditions. Affiliate Link: 5-10-10 Tomato & Vegetable Granular Fertilizer
You can apply a light dose of fertilizer around the base of the plant, keeping it a few inches away from the stem. As the plant begins to recover, you should start to see new green leaves appearing, and the yellowing should slowly stop spreading. For more on fertilizing, see: How To Fertilize Tomato Plants In The Summer For A Bigger Harvest.
Yellow leaves are a warning sign, but they don’t always mean the plant is doomed. If caught early, many tomato plants can bounce back from overwatering with just a little care and patience. By cutting back on water, allowing the soil to dry out, and feeding your plants the right nutrients, you can turn things around quickly.
It’s also a good idea to remove the worst of the yellow leaves once the plant is recovering. This helps the plant focus its energy on producing new, healthy growth. Just be sure not to remove too many leaves at once.
Tomatoes need foliage to photosynthesize and grow, so it’s best to snip off a few of the most damaged leaves at a time over the course of a few days. Here’s to stopping your tomato leaves from turning yellow – and to a big harvest this summer of tomatoes! For more tips on keeping your tomato plants healthy, be sure to check out: How To Get Rid Of Aphids On Tomato Plants – Fast!
Follow Our Facebook Page For Great Gardening Tips And Advice! This Is My Garden Facebook Page
This Is My Garden is a garden website created by gardeners, for gardeners. Jim and Mary Competti have been writing gardening, DIY and recipe articles and books and speaking for over 15 years from their 46 acre Ohio farm. They publish three articles every week, 52 weeks a year. Sign up today to follow via email, or follow along!
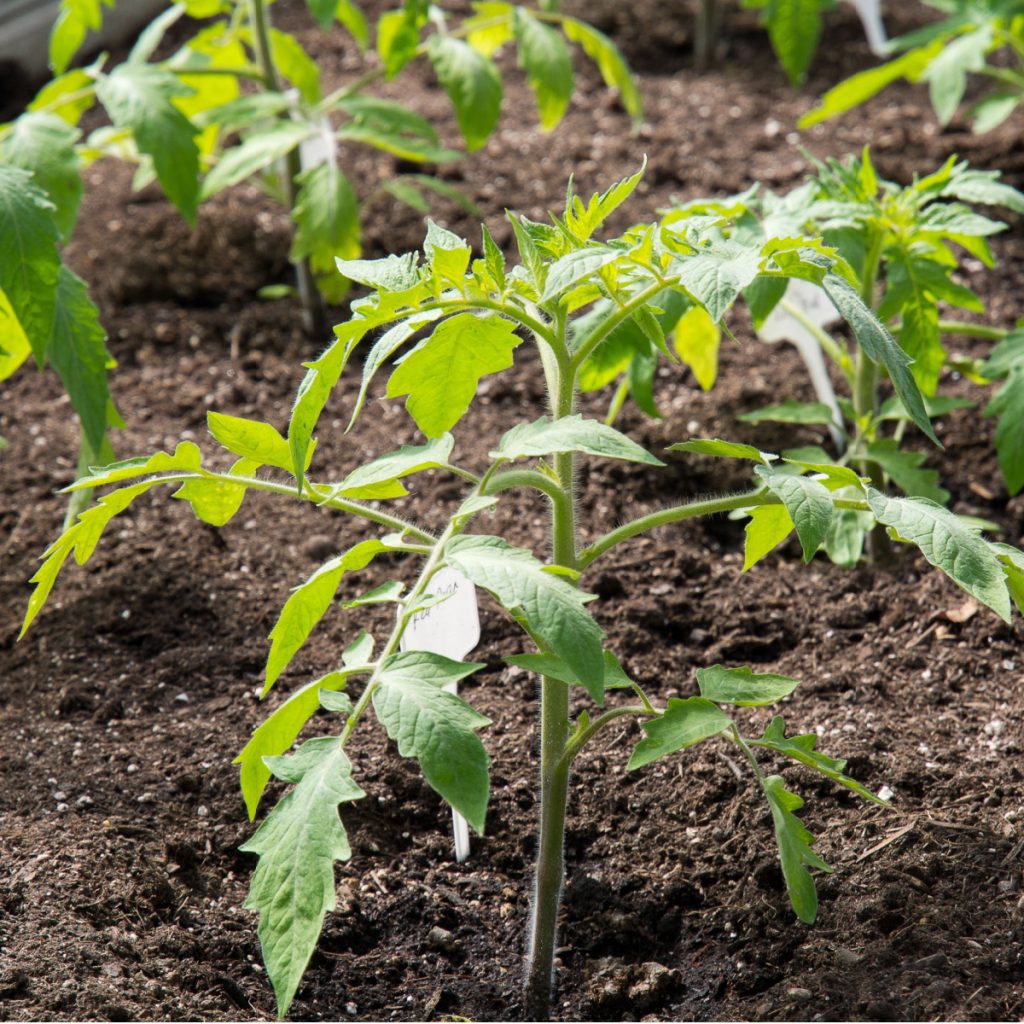
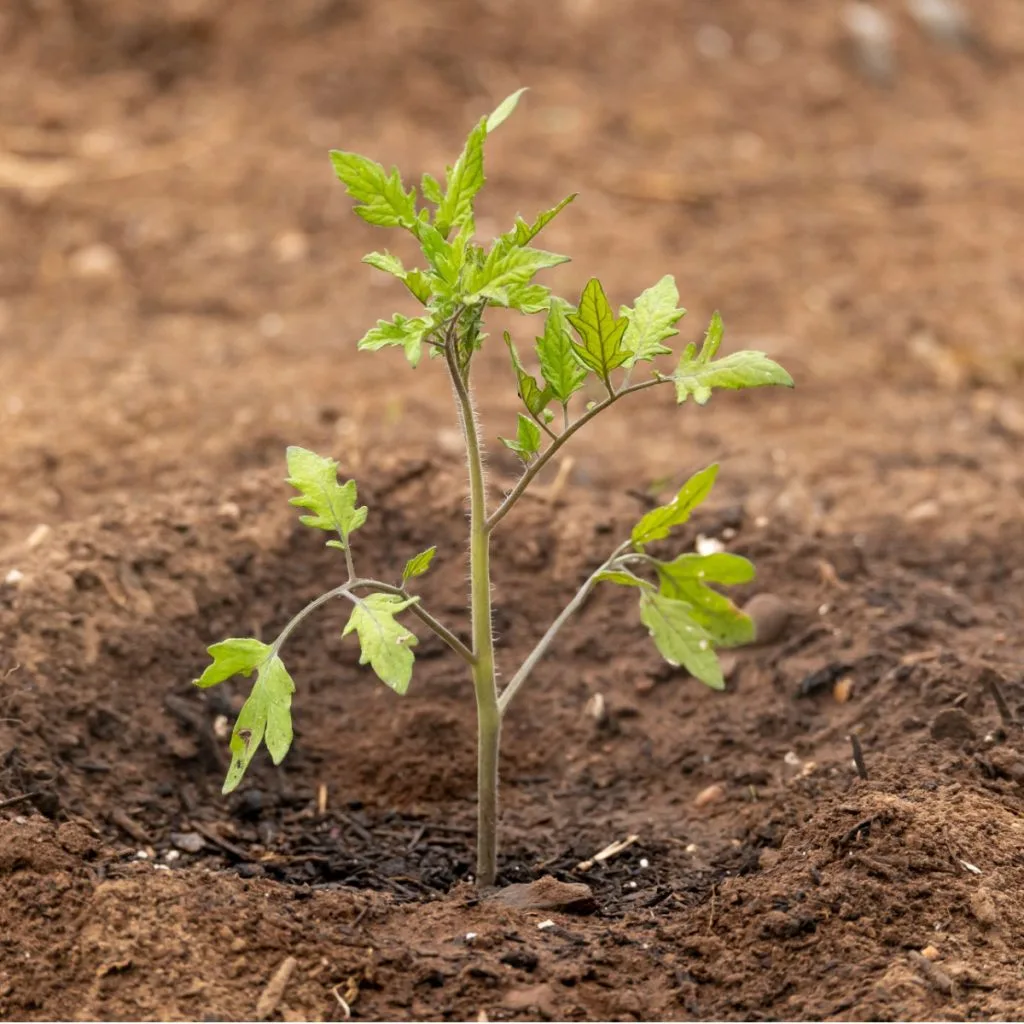
If you are looking for the perfect way to get your tomatoes off to a fast start after planting day – there is no better remedy than fertilizing your young tomatoes with just the right dose of power!
Tomato plants need a lot of power to fill out and grow strong. Not only do they require the typical big 3 nutrients of nitrogen (N), phosphorus (P) and potassium (K), – they also need a host of other nutrients to produce great roots, strong foliage – and eventually, lots of blossoms and fruit.
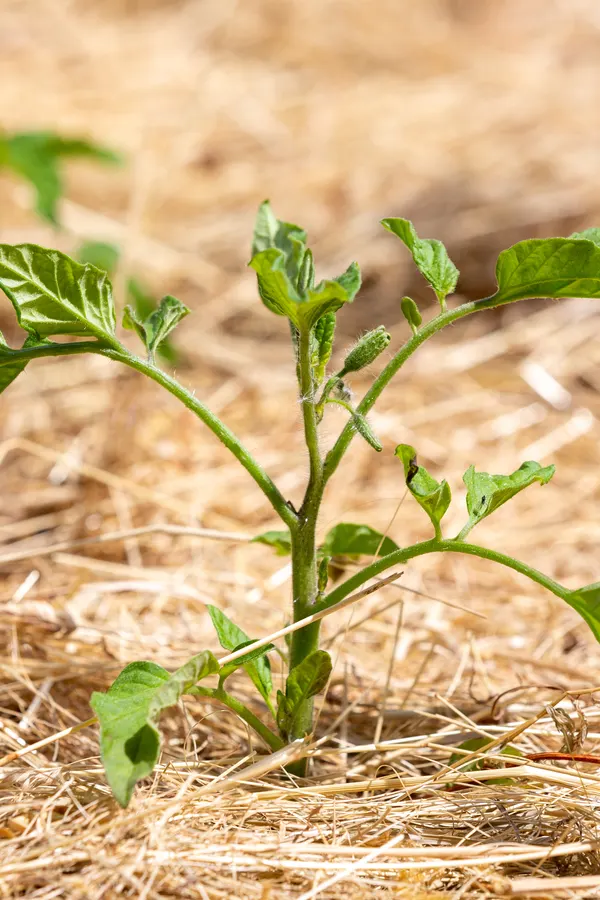
The first four to six weeks of a tomato plant’s life in the soil are extremely important for setting the stage for success. Plants need to develop strong roots early in the season to help anchor and feed the plant as it grows.

The deeper and more developed a root system is, the more nutrients and moisture it can absorb for the plant. Likewise, the foliage of a plant needs to develop early as well. Without a good leaf canopy, tomato plants will struggle with the process of photosynthesis, which also provides energy.
Although plants can and do get power from the soil they are planted in, giving them an extra boost of nutrients at this early stage can be vital to jump starting their growth. And the faster they get growing – the better they will produce later. But knowing how, when and what to power your plants with early on is the real secret to growing a huge crop of tasty tomatoes!
How you fertilize, when you fertilize, and what you use to power your young tomato plants are 3 critical factors in just how well your tomato plants will begin to grow early on. With that in mind, here is a look at how to best tackle each of those three needs with ease – and big success!
Unfortunately, for young plants, fertilizing is not as simple as loading them up with a big dose of energy. In fact, that can actually create more harm than good. Too much power will lead to an overproduction of foliage – and little to no fruit later.

When any vegetable plant receives an abundance of energy, they will put it toward growing more stems and leaves. And when that happens, the plant usually slows or even stops bloom production. And with young plants, too much fertilizer can even kill the plant if it’s in a high enough dose.
So how can you energize young plants in just the right way? There are a few important factors to consider when powering young tomato plants. The first is that they need to be given a low, slow and steady diet of nutrients.
Small but regular feedings of power are better than a few big doses of high energy all at once. Lower but consistent power creates strong, manageable growth in the roots, and above the soil in the stems and leaves.
Secondly, it’s important when fertilizing to make sure the nutrients you are giving your plants are in the right balance. Too much nitrogen will create too much foliage. Too little phosphorous can mean less root growth. And without enough potassium, tomato plants have trouble producing blooms and fruit.
In addition to the big three, they also need to be getting calcium and other trace minerals to stave off blossom end rot and other issues.
Finally, and this is extremely critical when powering young tomato plants, the nutrients you give to your plants need to be in a form that is easy for them to absorb. The simple fact is, the quicker a plant can absorb the nutrients, the better. And the best way to give plants power fast is with liquid fertilizer!
When it comes to what type of fertilizer to use for tomato plants, liquid fertilizers are the answer. Liquid fertilizers not only absorb quickly into the roots of plants, but also through the leaves. This double dose of power can help your tomato plants power up quickly.
So what are the best choices for liquid fertilizing? There are great choices for both homemade or store bought liquid fertilizers. No matter what your choice, it’s always best to stay organic in your approach since you will be consuming the tomatoes the plant produces.
If you are looking for an all-natural homemade approach, compost tea is the answer. Compost tea is full of the perfect balance of nutrients that can power tomato plants. Even better, those nutrients are low enough that they can’t overpower plants – and they absorb easily into the roots and foliage too.
You can make compost tea from your own compost, or from store bought compost. Another great option is worm casting tea – made simply from soaking castings in water. Both compost and worm casting tea are nature’s perfect organic fertilizer. Product Affiliate Link : Pure Worm Castings
Both worm casting and compost tea can be applied at full strength every 7 days without worry. The low and slow nature of the power in both allow them to power plants weekly.

There are also some great commercial organic liquid fertilizers available for powering tomatoes. They have a bit more power than compost and worm casting tea, so they should be used at half-strength of their recommended dose every ten to fourteen days instead of weekly when fertilizing newly planted tomatoes.
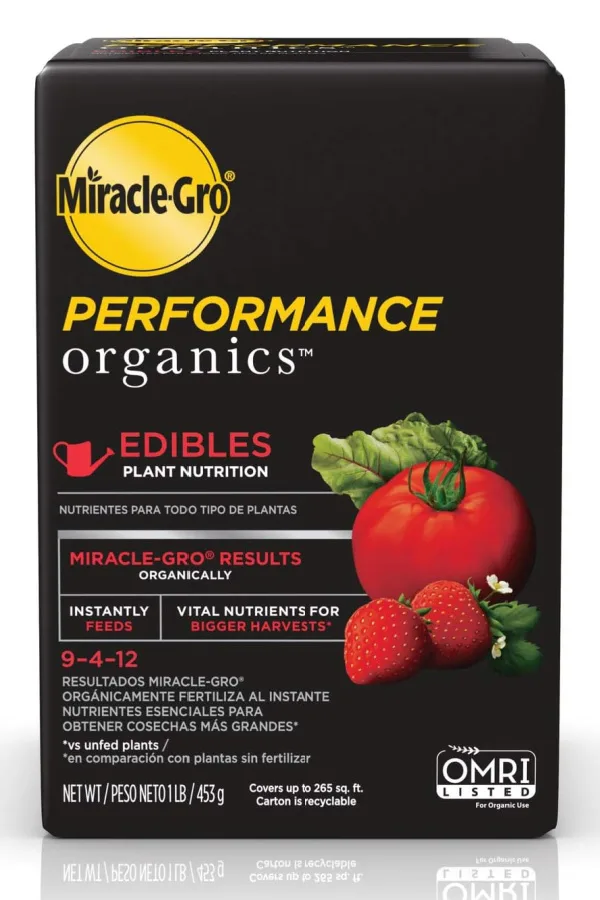
Look for options that have balanced but lower N-P-K ratios that won’t overpower plants. Always make sure with commercial fertilizers that the first number, which is the Nitrogen content, is not too much higher than the Phosphorous and Potassium numbers. Affiliate Link: Miracle-Gro Performance Organics Edibles Plant Nutrition
Nitrogen is important, but it helps plants with foliage growth, while Potassium and Phosphorous help with healthy and bloom and fruit production. It is vital that there is a balance for best results!
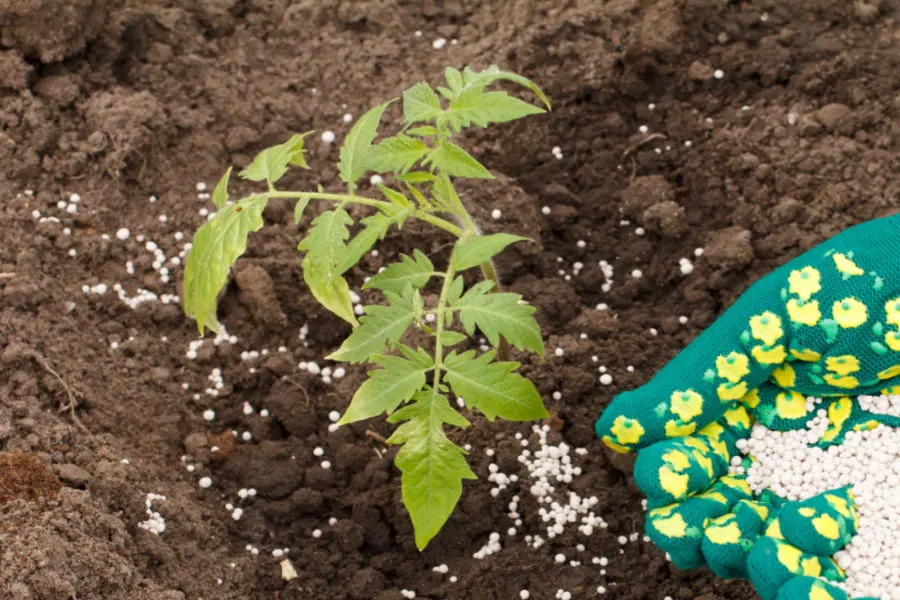
So when should you start fertilizing newly planted tomatoes? For starters, when they first go in the ground, you can help your plants immediately by powering their planting hole.
Adding generous amounts of compost, worm castings, coffee grounds and pulverized egg shells into the hole when planting will help energize the roots quickly. All four also happen to provide the right balance of nutrients as well. See: What To Put In A Tomato Planting Hole – 4 Must Add Ingredients To Power Your Plants!

But beyond adding those nutrient sources to the planting hole, you do not want to add any additional fertilizer on planting day. Or, for that matter, during the first seven days after planting. Why? Because new plants need time to settle in from the shock of transplanting.
Putting fertilizer on too soon after transplanting will actually harm more than help tomato plants. It can put them in even more shock, and can damage leaves and roots in the process. Instead, allow your plants a week to set their roots firmly into the soil.
But once that time period has passed, it’s time to start fertilizing. And regularly! For best results, your plants should be powered every ten to fourteen days after they have settled in. But, and this is key – it needs to be with a balanced, low, slow and easily absorbed nutrient source.
So when should you stop fertilizing tomato plants? For determinate varieties that produce all of their crop over a few weeks, stop fertilizing when the fruit is beginning to set in full but has not started to turn yet.
Fertilizing beyond this point for determinates will not help the plant produce any more tomatoes. In fact, fertilizing them late can often stop them from producing all of the fruit they would have. For more early growing tomato tips, be sure to see: What To Do With Tomato Suckers – Is It Better To Remove, Or Not To Remove?
For indeterminate tomatoes that grow until the first killing frost, once fruit begins to set, back off to every two to three weeks with fertilizing. This will allow your plants to concentrate more on ripening fruit than growing – but still giving them a bit of power to keep growing and producing. For more great tomato growing tips, be sure to check out: The Top 3 Mistakes Gardeners Make Growing Tomatoes – And How To Avoid Them!, and Are Your Tomato Leaves Turning Brown In Late Summer? Here’s Why – And How To Fix It!
Here is to fertilizing your young tomatoes for your biggest harvest ever this year!
Follow Our Facebook Page For Great Gardening Tips And Advice! This Is My Garden Facebook Page
This Is My Garden is a garden website created by gardeners, for gardeners. Jim and Mary Competti have been writing gardening, DIY and recipe articles and books and speaking for over 15 years from their 46 acre Ohio farm. They publish three articles every week, 52 weeks a year. Sign up today to follow via email, or follow along!
Looking for a few of the best companion plants to grow alongside your tomatoes this year?
One of the best ways to help your tomato plants perform better is to grow other plants near them that help them out – a practice known as companion planting. Not only can companion planting protect and power a tomato crop to bigger, more tastier yields, it can also help bring color, beauty and amazing scents to your garden space as well!
So what exactly is companion planting? In a nutshell, it’s the process of taking advantage of the beneficial relationships that can exist between different varieties of plants by planting them near one another.

For example, beans and peas are wonderful for growing with corn. Why? Because as beans and peas grow, they help to fix nitrogen availability in the soil. Nitrogen that is much needed by corn to reach its full potential. But at the same time, corn can provide a natural trellis for the peas or beans to climb on, flower and produce.
Companion plants exist for nearly all vegetable plants and flowers. And it can work both ways. There are also some varieties of plants that can hurt another plant when growing nearby. For instance, corn should never be planted near tomatoes. Both are heavy nitrogen feeders and will compete with each other for nutrients.
Of all the vegetable plants that can go into a garden, tomatoes are at the top of the list when it comes to benefiting from companion planting.
Tomato plants can suffer quite easily from disease and attacks from pests. In fact, tomatoes are the prime target for a myriad of insect problems and plant health issues. For starters, you have the tomato hornworm, which can decimate a plant seemingly overnight.
There are also aphids, cutworms, nematodes and a long list of other pests waiting to attack as well. Unfortunately, plants that fall victim to pests then become even more susceptible to disease. A weak plant is an easy target as it doesn’t have the strength to fight off attacks.

It is a vicious cycle that for tomatoes, can cause poor health and lead to low yields. But luckily, that is exactly where companion planting can step in and come to the rescue!
As you will see below, there all all kinds of plants that can help benefit tomatoes. Most help with providing natural protection from pests. Meanwhile, others aid in defending against pests, all while actually improving the flavor of your tomatoes as well.
Best of all – all the beneficial plants below can grow by simply seeding a few seeds around your tomato plants after planting. Talk about an easy, all-natural way to grow better tomatoes. Here is a look at all five, starting with the best of the best, zinnias!
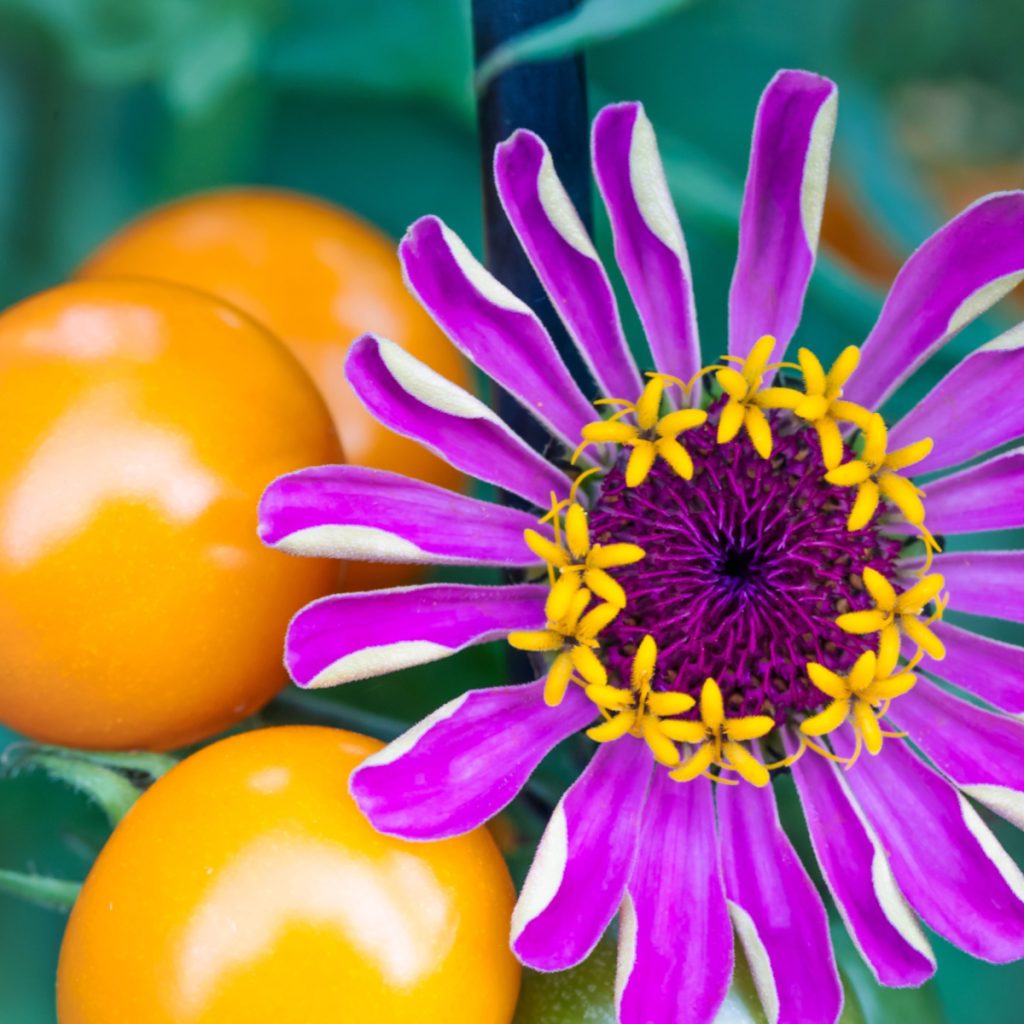
Want big color in your garden and great pest protection? Then planting zinnias will do the trick! Zinnias are one of the best companion plants of all when it comes to adding beauty and protection for tomatoes. In fact, many old-school gardeners still seed them as a border around their entire garden. Not only to help deter pests, but to create a beautiful ring of color.
Zinnias are great for defending against tomato worms. But they also help attract predatory wasps, which are the mortal enemy of tomato and tobacco worms. Even better, they attract lady bugs as well, which in turn keeps the aphid and white fly populations in check.
The best part, zinnias can be direct seeded. They also germinate extremely fast. The flowers can be cut to keep plants blooming all season long – and those cut flowers are perfect for filling your home with big flower power! Affiliate Seed Link: Zinnia Multi Variety Seed Pack
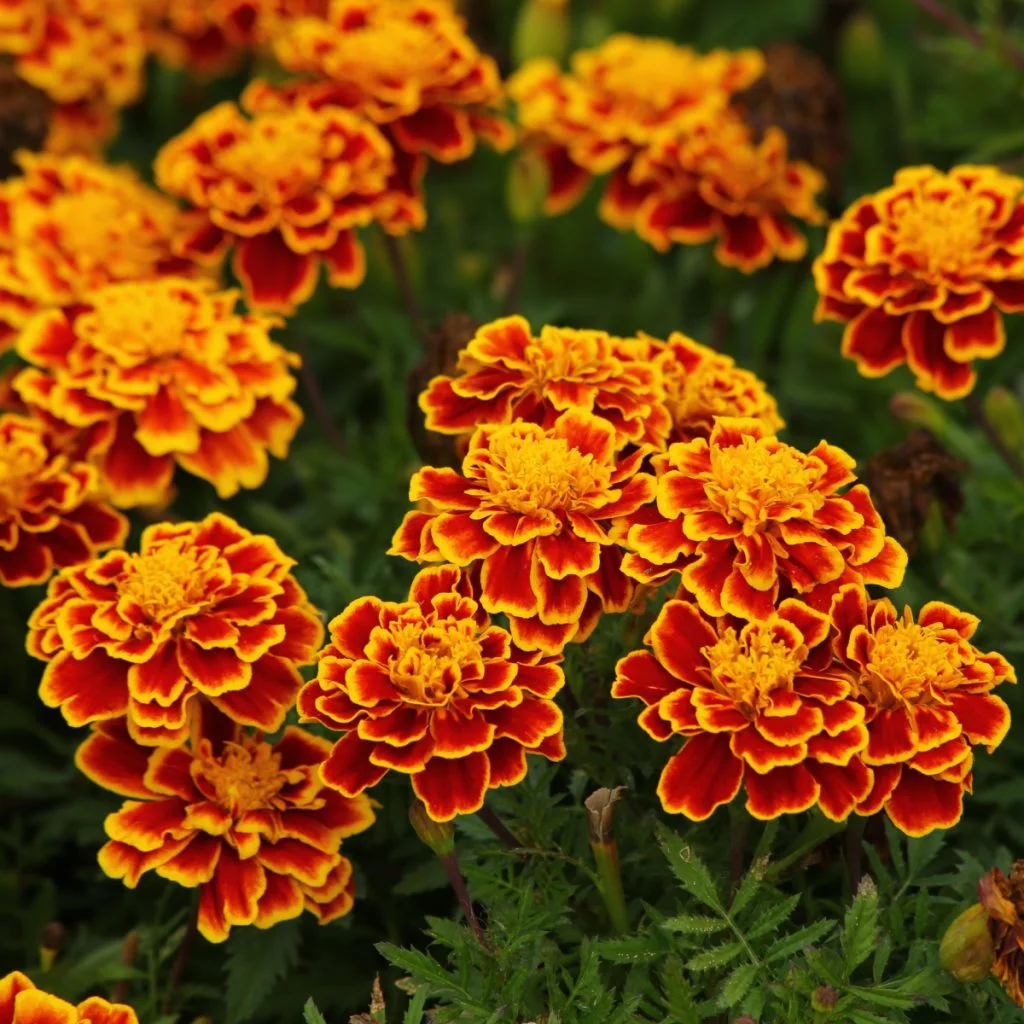
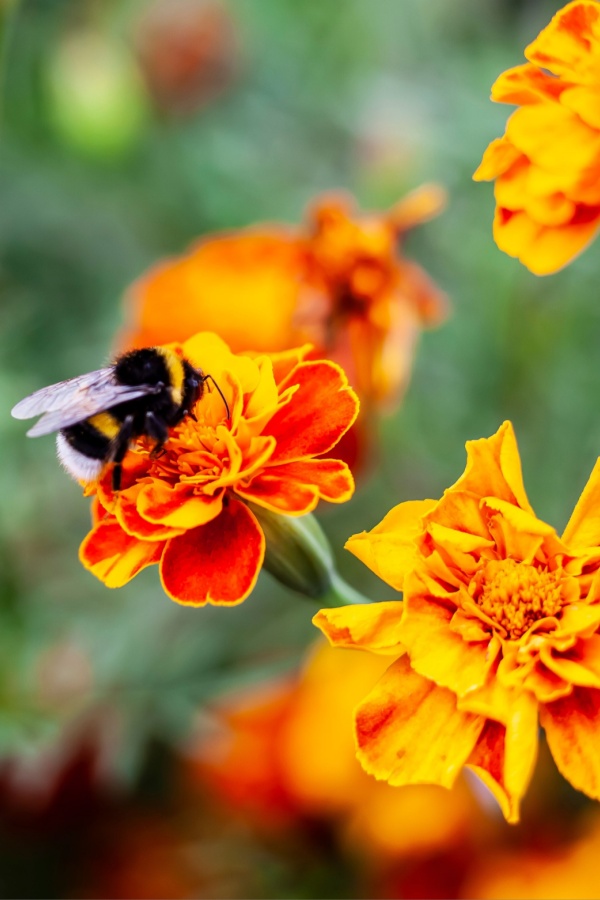
Marigolds are another incredible companion plant to grow in the garden. And that is especially true when growing near tomato pants! The pungent scent of marigolds does wonders for keeping an entire host of garden pests at bay, including nematodes, white flies and aphids.
Nematodes can be terribly destructive to tomato plants. They can suck the life out of tomatoes as they feed off the plant’s roots in the soil. But marigolds can stop that issue quickly. Nematodes can’t stand the scent and chemical markers of marigolds. By planting just a few marigold plants among your tomato plants, you can eliminate the nematode issue entirely.
Marigolds also bring big blooms and color to your garden. Not only do they add beauty, those blooms also bring in a long list of pollinators that help the flowers on all of your vegetable plants turn into luscious fruit.
The real beauty of marigolds is that they are among the easiest seeds of any annual flower to scatter. They germinate fast without much need for watering or care. If the soil is warm enough, they can actually germinate in as little as just five days after planting.
Best of all, they can then produce flowers in four to five weeks, just as the tomatoes begin to flower themselves. See our article: The Best Marigolds To Grow To Repel Pests, Attract Pollinators – And Add Big Color!

Marigolds pungent scent helps deter other big tomato pests as well, such as tomato hornworms, squash bugs and cabbage worms. They can even be offensive to rabbits, deer and squirrels too. To plant, simply sow seed 1/8 deep in the soil and water in! Affiliate Seed Link: French Marigold Seeds
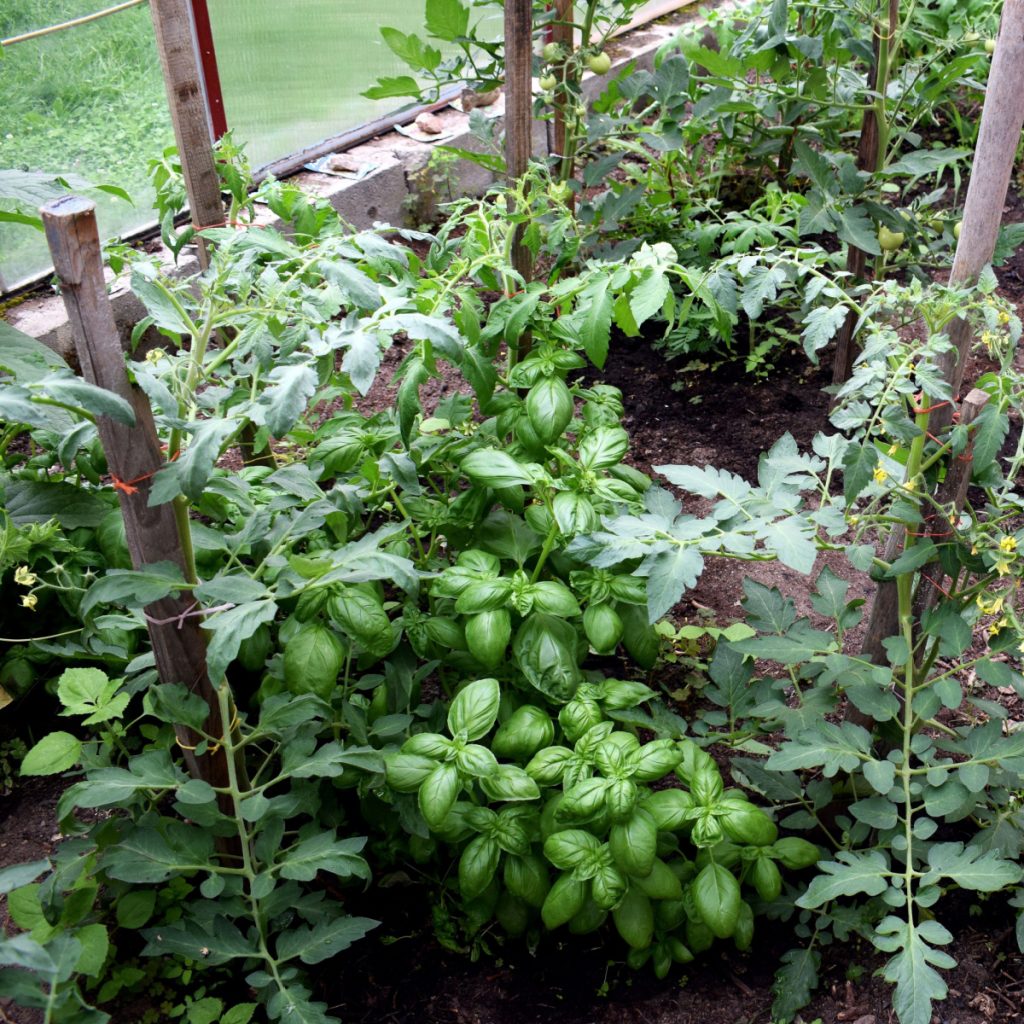
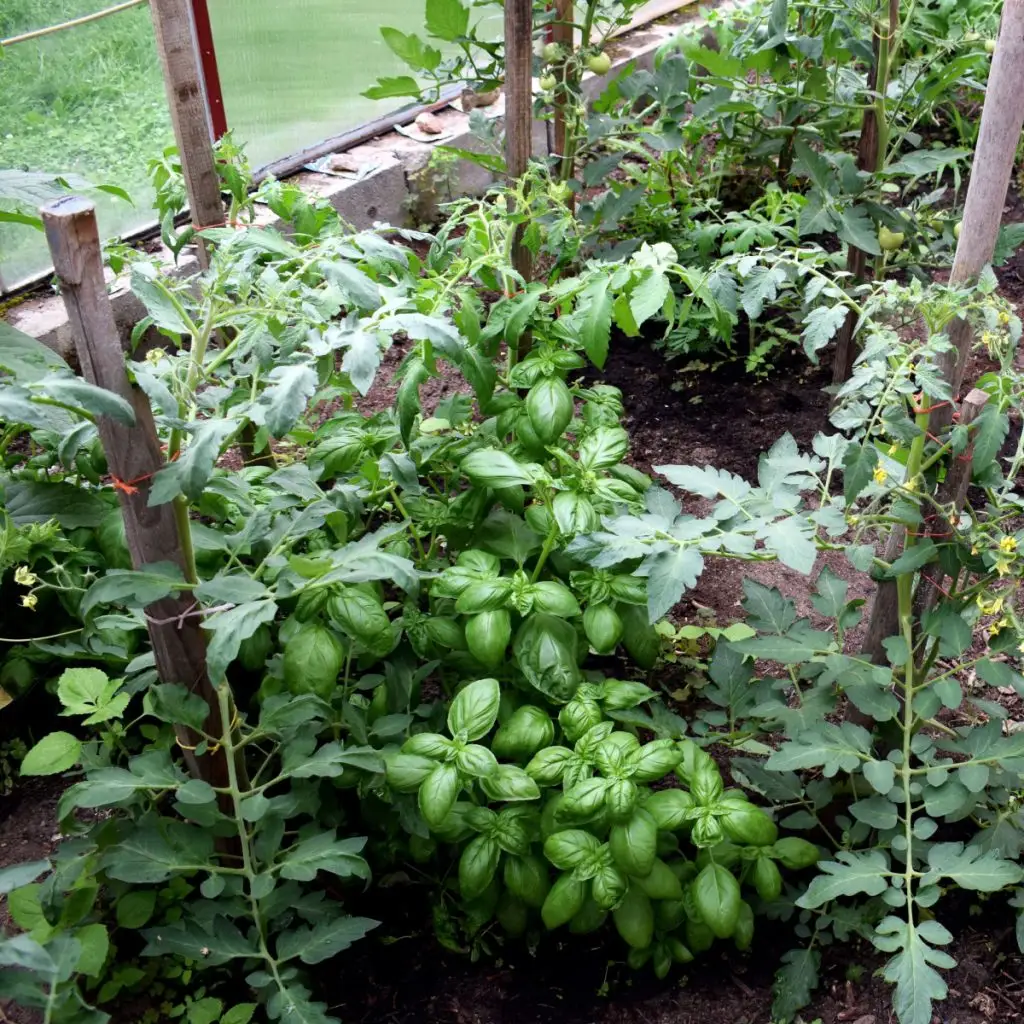
Basil is another wonderful choice for companion planting with tomatoes. This is one case where the harvest from two plants pair just as well in the kitchen as the plants do while growing in the garden!
Basil helps to deter an army of common tomato pests when planted near tomato plants. That includes white flies, aphids and the dreaded tomato hornworm. But even better, mosquitoes and the common house fly are not fond of basil’s oily foliage or distinct scent either.
That means being able to work in the garden and water and harvest your tomatoes with a little less worry of being bitten. But perhaps best of all, basil also is said to improve the flavor of tomatoes when growing in close proximity to tomato plants. In fact, many restaurant chefs request this from growers and swear by it.
Basil seed can go in the ground at the same time as you are planting your tomato transplants. Simply scatter a few seeds around each plant and allow them to grow in harmony. Affiliate Seed Link : Sweet Basil Seeds
Not only can sunflowers bring amazing beauty and interest to your vegetable garden space, they can also help protect tomatoes like nobody’s business!
More than anything else, sunflowers help repel aphids and are also known to keep white flies away. Both happen to be more than a nemesis to tomatoes. By simply planting sunflowers within a few feet of your tomato crop, you can help protect your plants with ease. Affiliate Seed Link : Sunflower Seed Assortment
Even better, you are then rewarded in late summer with gorgeous seed heads from your sunflowers. Not only are they good for roasting and eating, they also make great cut flowers – or prime food for bird feeders.
Here is to planting some of the best companion plants for your tomatoes this year – and to having your best crop of tomatoes ever!
Follow Our Facebook Page For Great Gardening Tips And Advice! This Is My Garden Facebook Page
This Is My Garden is a garden website created by gardeners, for gardeners. Jim and Mary Competti have been writing gardening, DIY and recipe articles and books and speaking for over 15 years from their 46 acre Ohio farm. They publish three articles every week, 52 weeks a year. Sign up today to follow via email, or follow along!