Whether it be insects or animals, pests can cause big headaches in the garden. Check out our latest articles below on how to handle pests in your backyard!


Whether it be insects or animals, pests can cause big headaches in the garden. Check out our latest articles below on how to handle pests in your backyard!
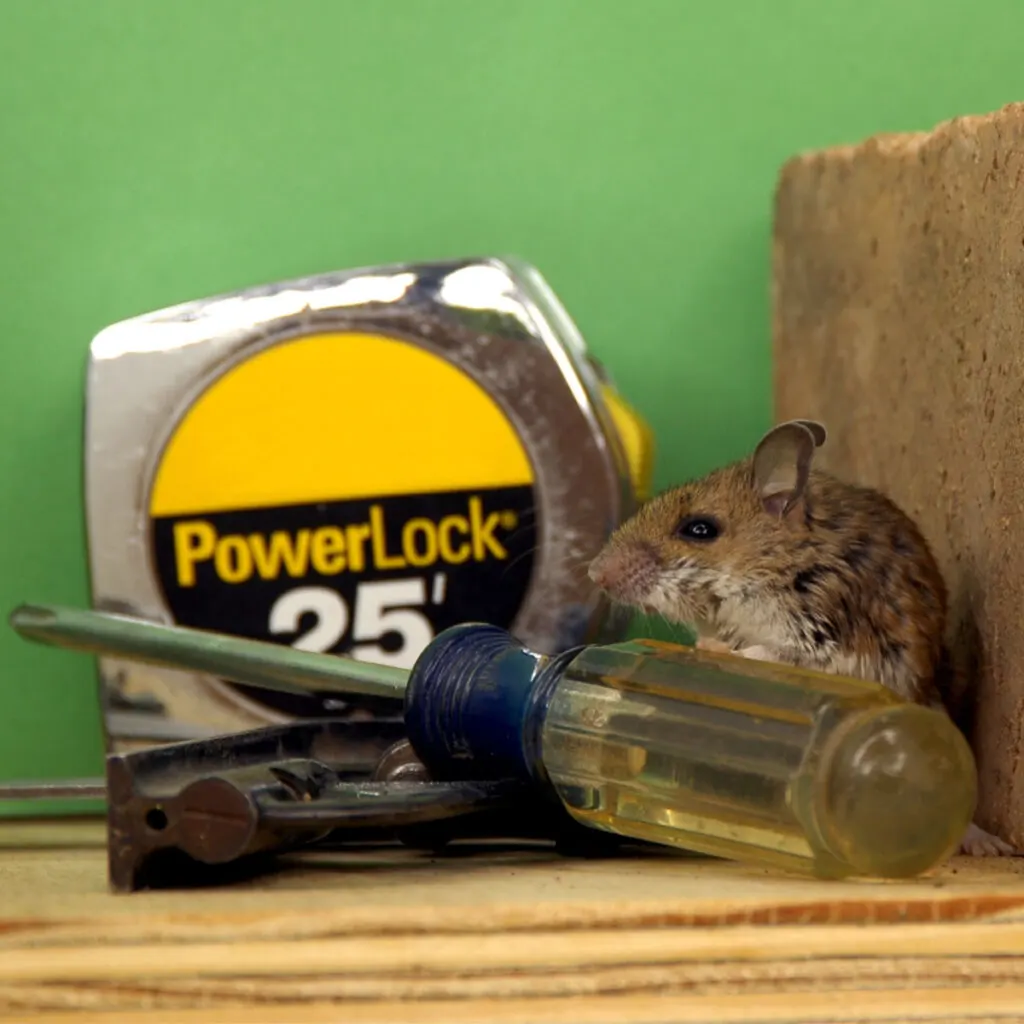
Looking for an effective way to keep those pesky and destructive mice out of your garage this fall and winter – and stop them from coming in for good?
When it comes to looking for a place to find protection from the cold, a garage is a virtual goldmine for a mouse! Not only are garages far easier to gain access to than inside a house, they also usually have everything a mouse needs for survival, including shelter, warmth and yes, even food!
As little as they are, mice can create big and costly damage. Especially in a garage where expensive tools, supplies, cars, mowers and more can sustain heavy damage. Mice are also prone to chewing their way through walls and electrical wires, creating even more harm and a fire risk to boot.

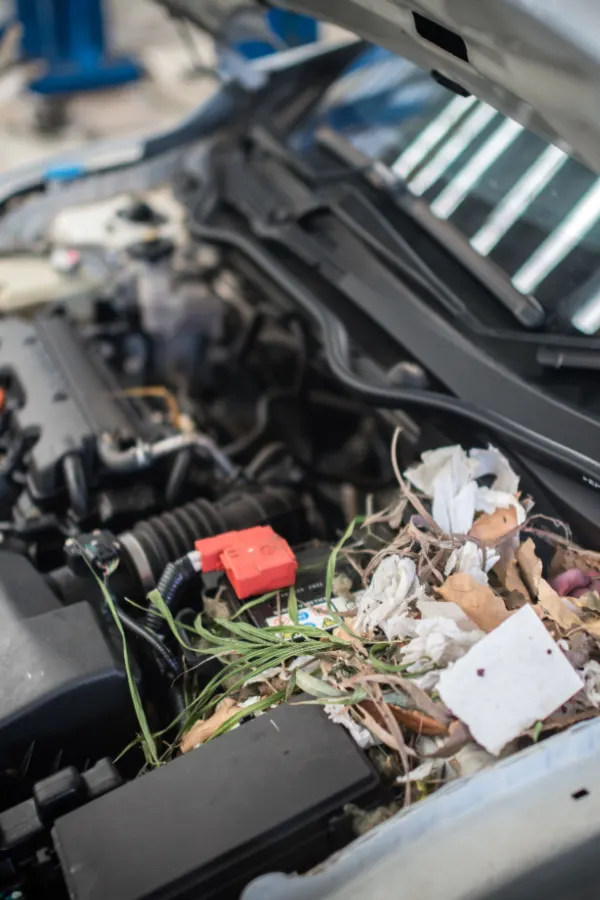
When creating their home, mice will use any and all available materials. Looking for warmth and protection, they will chew up cardboard, paper, fabric and even plastic to create their nests. And if building their home didn’t cause enough destruction – just wait until they begin raising a family!
Nests can cause all kinds of issues in a garage. For starters, the feces and urine of mice aren’t only unpleasant to smell, they can also carry disease. In addition, once that smell soaks in, it’s in for good, ruining any fabrics, boxes or material it comes in contact with.
So how can you avoid this nightmare? Is it really possible to keep these small creatures from setting up shop in your garage? The answer is yes – and best of all there is no need for harmful chemicals that can be unsafe for you and your pets. And best of all, no more worrying about them wreaking havoc on your belongings!
There are three basic keys to keeping mice out of a garage. And by simply putting all three into place, you can and will eliminate the chance of a mouse ever taking up residence.

First, you need to start by sealing off their most common entry points. Secondly, you need to eliminate any potential food or nesting sources that make creating a home easy for mice. And third – you need to use a strong but completely safe repellent that will keep them from ever wanting to come inside in the first place.
With a mouse-free garage in mind – here is a look at how to do all three with ease!
Most mice gain entry into a garage space usually in one of four ways – an open door, an open window, gaps and cracks between walls and the floor – and through small openings around water, electrical and plumbing pipes that come into the garage.
Open doors and windows are the easiest of all to control. As soon as the weather begins to cool in the fall, garage doors need to be kept shut. As do any access doors leading in from the outside to the garage.
But beyond that, many mice sneak in from bad seals around doors. Especially the bottom of garage doors. The lower seals of doors are by far the biggest issue when allowing mice inside. Check your door when it is shut against the floor to make sure it seals the area all the way across the door. Quite often, these seals wear over time and go bad.


Replacing or adjusting these seals is one of the best things you can do to keep mice out. A mouse can squeeze through the slightest gap. There are plenty of easy-install, universal kits available to make quick work of the task. Product Affiliate Link: Universal Garage Door Threshold Seal Strip.
In addition, check the seals and trim around doors and windows. If cracks exist, caulk them shut. Not only will it keep mice out – it will help on your winter heating bills too!
Another easy entry point for mice is between the bottom wall plate and the foundation. Go around the entire garage perimeter and again caulk any openings to seal them off.
Finally, and this is one place where mice usually sneak by – check the openings around where electrical or plumbing lines come into your garage space. These holes often have gaps all around them, making it easy for mice to enter at will.
For large openings use an expandable foam to seal off. For small gaps, silicone caulk will usually do the trick. But whatever you do – closing off these entry points is the first key to success!


Now that you have your garage sealed off, it’s time to eliminate easy food and nesting sources. After all, if they can’t eat or build a home – they won’t want to come inside in the first place.
As for nesting materials – mice love fabric, cardboard and paper. In general, do not keep any of these out in the open in a garage. Use tight closing plastic totes instead of cardboard boxes for storage. Keep newspapers, paper cups and other paper products out of the garage or sealed in plastic containers.
Blankets, towels and rags should also be stored in plastic totes. They all make incredibly comfortable mouse bedding. And if you have outdoor furniture cushions, be aware that storing them in a garage can make a great home for mice – and have you replacing them next spring!
Finally, be sure to seal off any food sources like cat food, dog food and rabbit food. Again, plastic sealable totes are the way to go. Last but not least – grass seed is also a big source for mice – so seal it off as well if it’s in your garage!
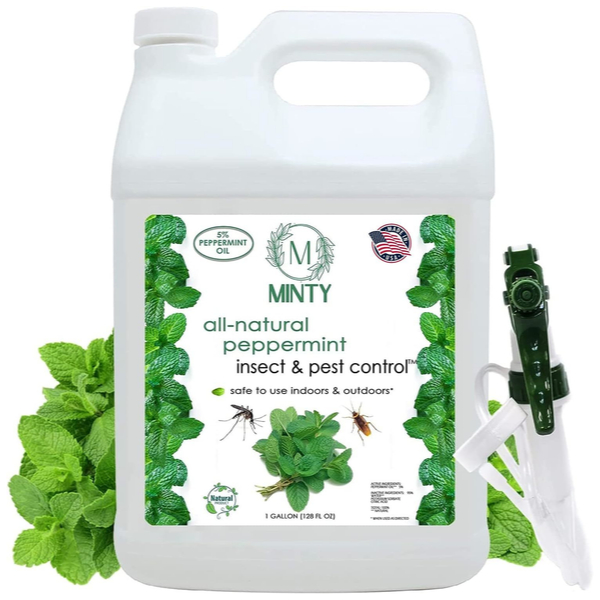
Last but not least, now it’s time to protect those vulnerable entry points and equipment with a mouse repellent. And for that, it’s hard to beat the power of peppermint and cinnamon oil sprays and repellent pouches.
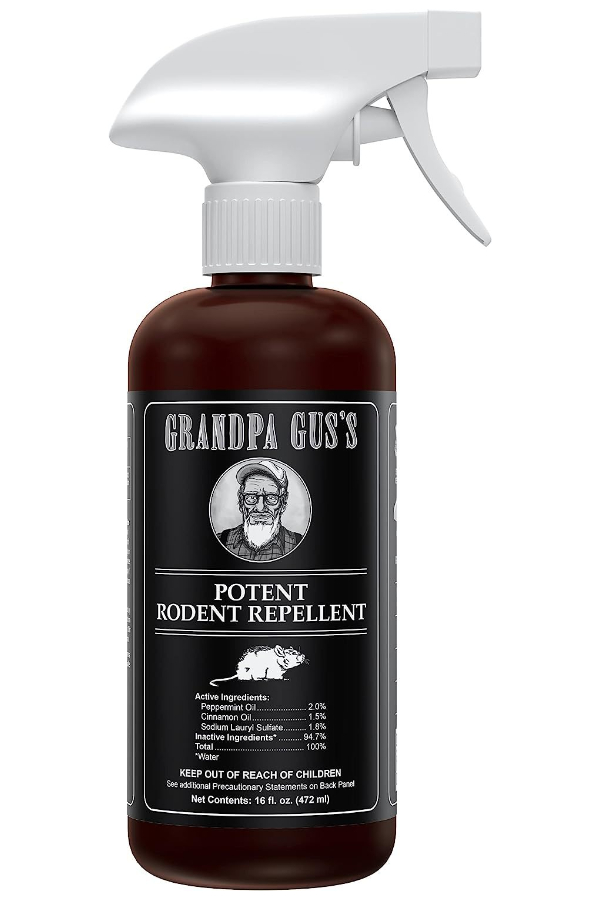
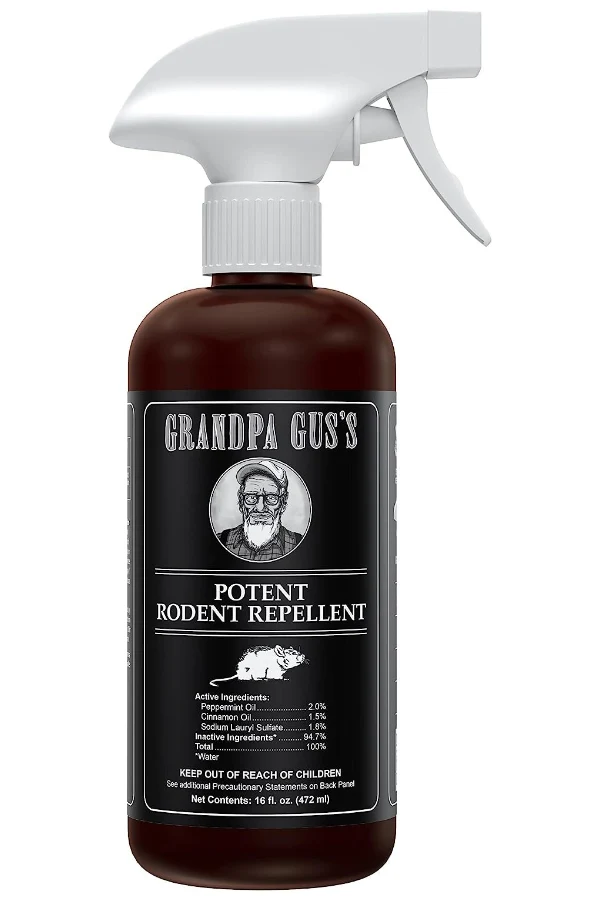
Mice absolutely hate the smell of both – and there are some incredibly strong products that are 100% natural and will keep mice from entering and damaging your property.
Use the pouches to place inside engine compartments, golf bags, grills and other areas mice like to congregate. And use the spray to spray down all of the seals and entry points. Believe it or not, these products work like a charm to keep mice away for good!
Affiliate Product Links:
Best of all, peppermint and cinnamon also help to repel a long list of other insects and pests – from beetles, stink bugs and Asian beetles, to spiders and more! See: How To Stop Spiders
If using pure essential oil of peppermint, know that it can pose an issue for cats and dogs if ingested. It is important to use in your garage with pets in mind and keep them clear when sprying. Here is to sealing off your garage from mice, eliminating their food and nesting sources – and using the power of mint and cinnamon to keep them from ever wanting to come inside!
Follow Our Facebook Page For Great Gardening Tips And Advice! This Is My Garden Facebook Page
This Is My Garden is a garden website created by gardeners, for gardeners. Jim and Mary Competti have been writing gardening, DIY and recipe articles and books and speaking for over 15 years from their 46 acre Ohio farm. They publish three articles every week, 52 weeks a year. Sign up today to follow via email, or follow along!
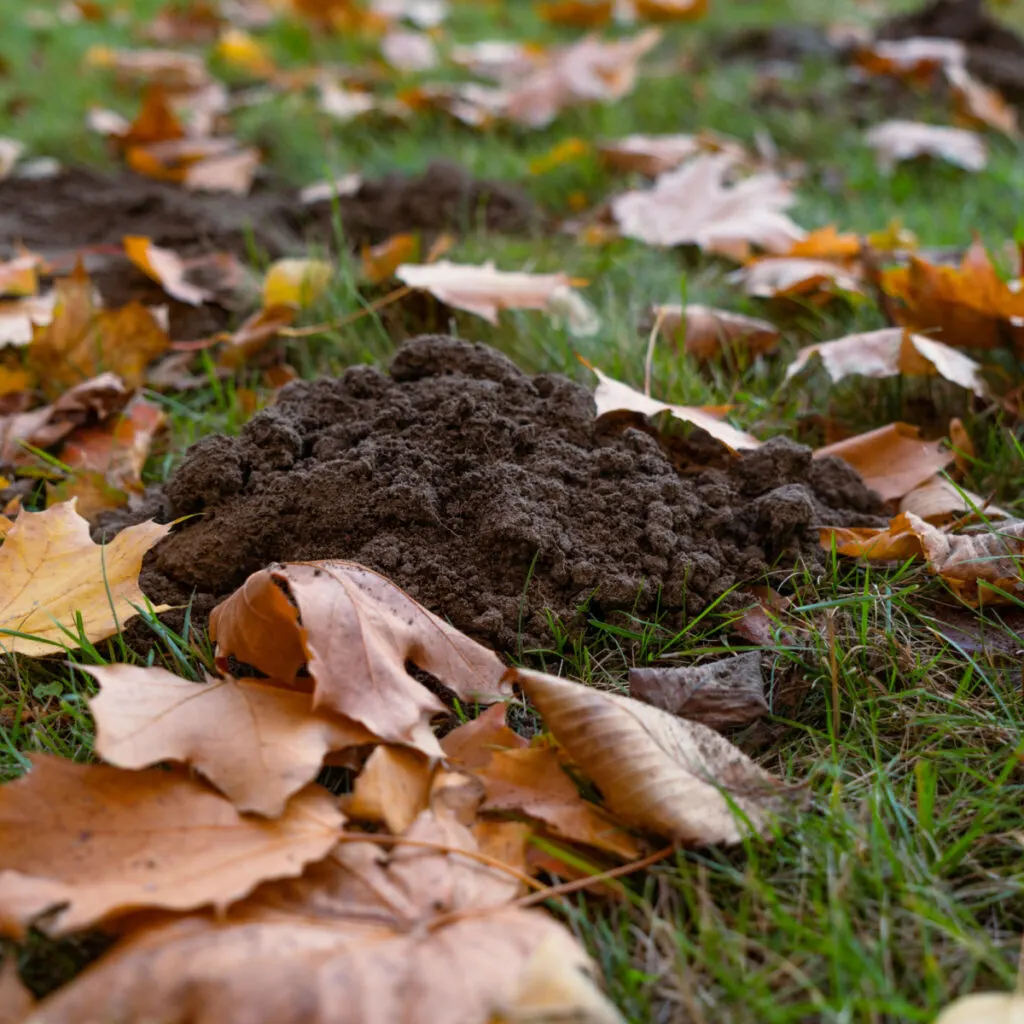
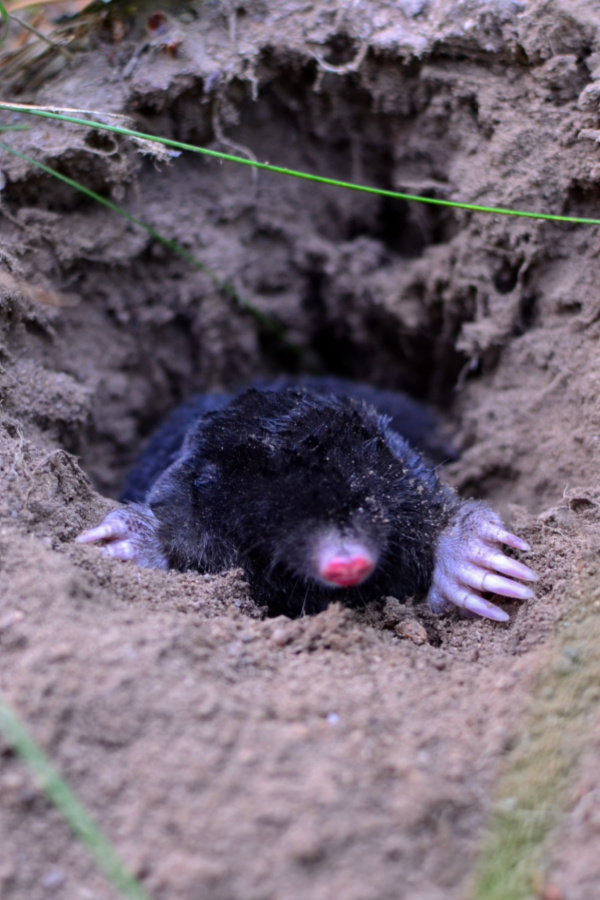
Are you looking for a way to get rid of those pesky ground moles tearing up your yard and landscape this fall?
Ground moles can do some serious damage to lawns, flowerbeds and garden. And although they can be active anytime on the surface of the soil when not frozen, they are most active in the early spring and fall. That is because the cooler and more damp conditions make the soil easy to work and dig through.
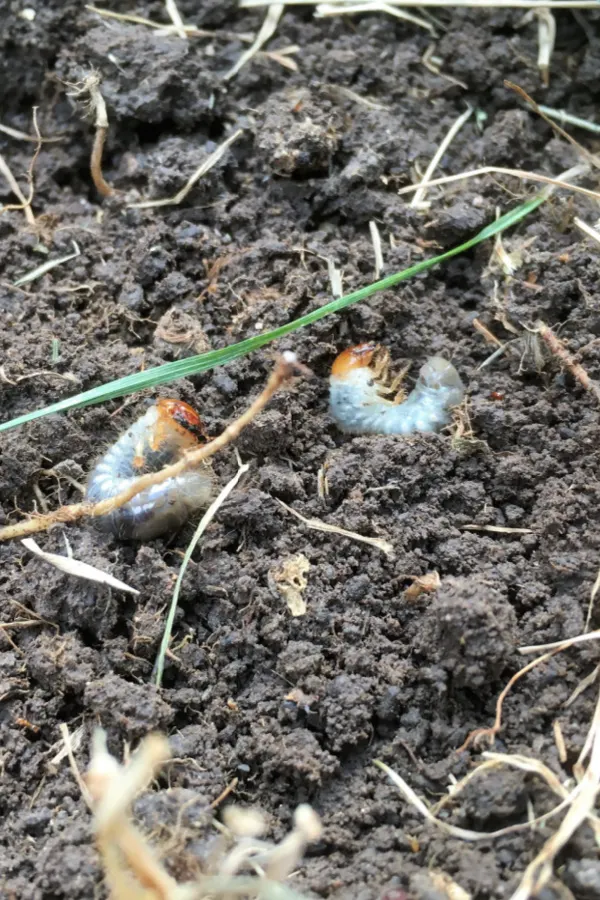
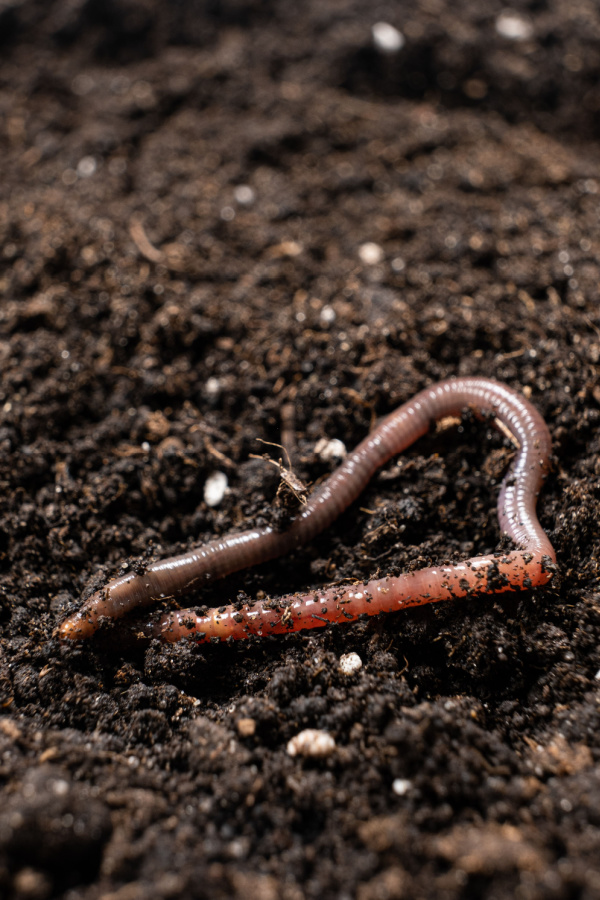
Ground moles are in your lawn and landscape for one specific reason – to eat. And when it comes to what they eat, they are especially fond of grubs. In fact, with nearly 100 percent accuracy, if you have ground moles in your yard – you have grubs. And they love to eat those grubs all year round!

Unfortunately, when ground moles establish in the autumn months, they tend to stick around all winter long in the same location. As the soil freezes, ground moles don’t hibernate. Instead, they simply dig deeper in the soil. Not just to stay warm, but to continue finding their favorite meal – grubs!
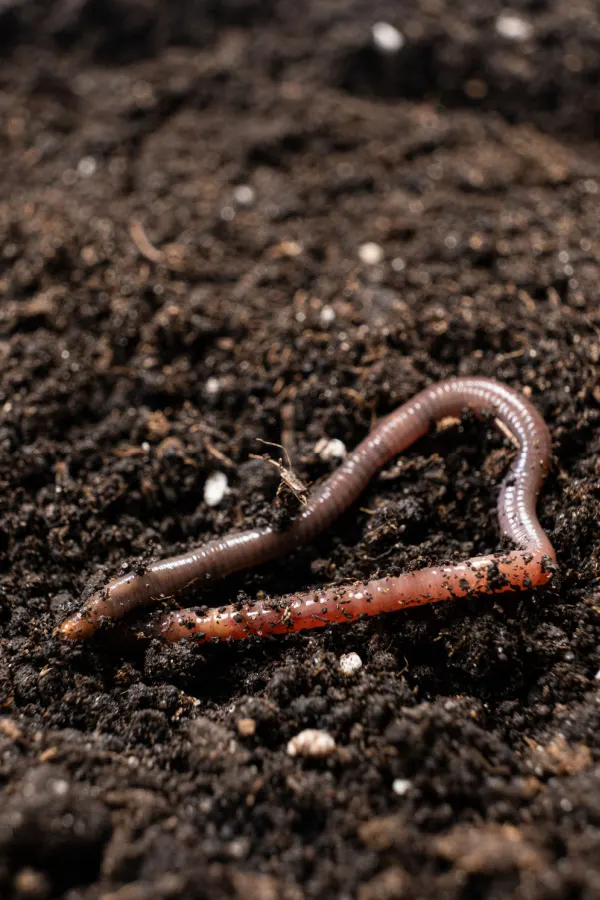
During the spring, summer and early fall, grubs hang out near the surface. They do this so they can come out and live their adult life as beetles. They then mate and live to lay eggs that become the next set of grubs.
But in the wintertime, grubs move down low in the soil to avoid freezing – and the moles follow them down to continue eating. But as soon as the spring arrives and the soil thaws – the grubs and moles come back up near the surface. And the lawn and flowerbed damage resumes!
So how do you stop the cycle? You would think that the moles would eat all of the grubs and leave. But unfortunately, when grubs establish, they do so in large numbers. And because of that, there are just too many to wipe out – even for the hungry moles.

That, of course, makes it perfect for ground moles to live in perpetuity in your yard – unless you can break the cycle. And as it turns out, fall just happens to be a great time to do just that!
Getting rid of moles before winter arrives really require a two part plan and approach. The first key is to drive the ground moles from your landscape by disrupting their feeding patterns.
This is actually quite easy to do in the fall because of the softer earth with just a few simple tasks. Even better, one of those two tasks also happen to help your lawn’s health immensely in the process. Talk about a win-win!
The second part of the plan is to begin to kill off the grubs and reduce the current and future availability of meals for the moles. After all, if you take away their food – they have no reason to stick around. Not now – or for next spring.
With those two tasks in mind – here is a look at how to eliminate moles from your yard this fall – and keep them gone next year!
Interfering with how moles eat in the fall is a short term solution to stopping tunneling, but it can be a big key to success in getting them out before they dig deep to hunker down. Even better, it can put a quick stop to damaging your lawn in the autumn.
The single best way to disrupt ground moles in your lawn in the fall is by aerating it. Not only can it send them packing – it also helps your lawn to be more healthy and robust. And to work against moles, a plug or spike aerator is best.
Aerating is the process of puncturing the soil below to create small channels. This opens up compressed soil to allow air, water, and nutrients to feed the roots of grass. But it also happens to disintegrate mole tunnels at the surface.
In addition, the noise and vibration of the aerating process is highly disturbing to moles. If there are two things moles hate – its vibrations and noise. And between flattening their feeding tunnels and creating a racket – it can send them packing for the short term. All the while helping your lawn become healthier.

Another way to get moles to move out in the fall is with sound waves from solar repelling mole stakes. These solar powered stakes emit sonic pulses about every 30 seconds. These waves penetrate the soil and work to scare off the moles and other pests living in the ground.
They can actually help repel all kinds of unwanted pests in the lawn – from moles and gophers, to snakes, groundhogs, chipmunks and voles. Affiliate Product Link: Mole Repellent Solar Powered 4 Pack
The second part of the equation in getting rid of moles in the fall is to eliminate the grubs they love to eat. For this, you need to act before the ground begins to freeze or cool. Remember that once the ground cools, both the grubs and moles go down deep in the soil during winter. And they will unfortunately stay there until spring returns.
This is why getting them out in the fall is so important. If you can eliminate a large majority in the autumn months, you can keep mole populations low and their return less likely. Even better, when spring rolls around, there are even more effective ways to eliminate grubs altogether to keep them out for good.
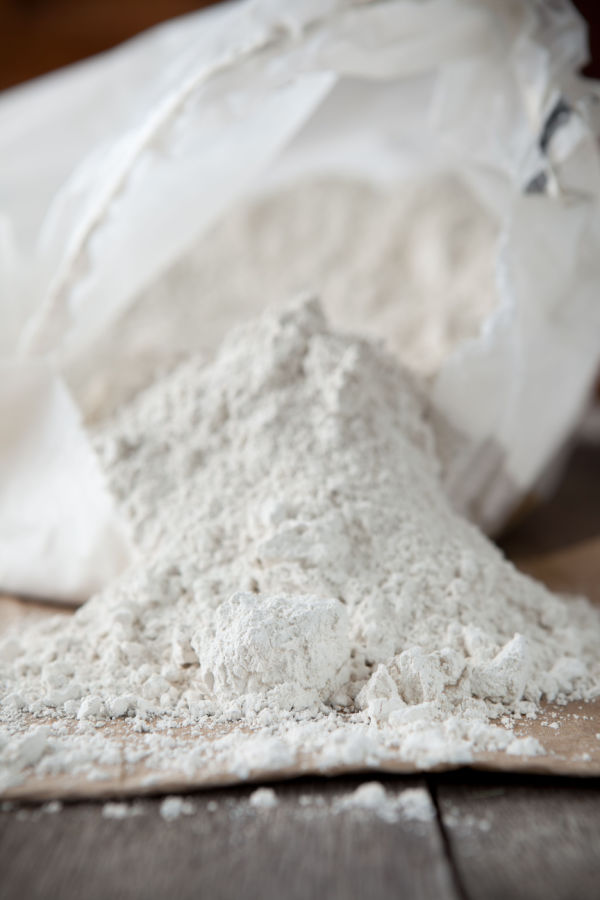
There are two great all-natural products that can work to kill grubs near the surface of the soil in the fall. One is Diatomaceous Earth, the other is plain old dish soap and water!
To use Diatomaceous Earth (DE) on grubs, you simply cover the lawn lightly using a spreader. The DE pierces the wax-like outer skin of grubs as it comes in contact with them, drying out their skin in the process. See: How To Use Diatomaceous Earth To Get Rid Of Pests.
To use dish soap to kill grubs, simply mix two tablespoons of liquid dish soap for every 1 quart of water. Then, put into a pump sprayer and spray your lawn. The dish soap suffocates the outer shell of the grubs, killing them in the process.
It is important to note that the later in the fall you use both of these remedies, the less effective they will be. But for the ones you don’t get – a spring application when they come back to the surface will finish the job!
Here is to driving out the ground moles from your landscape this fall – and to getting rid of ground moles for good!
Follow Our Facebook Page For Great Gardening Tips And Advice! This Is My Garden Facebook Page
This Is My Garden is a garden website created by gardeners, for gardeners. Jim and Mary Competti have been writing gardening, DIY and recipe articles and books and speaking for over 15 years from their 46 acre Ohio farm. They publish three articles every week, 52 weeks a year. Sign up today to follow via email, or follow along!
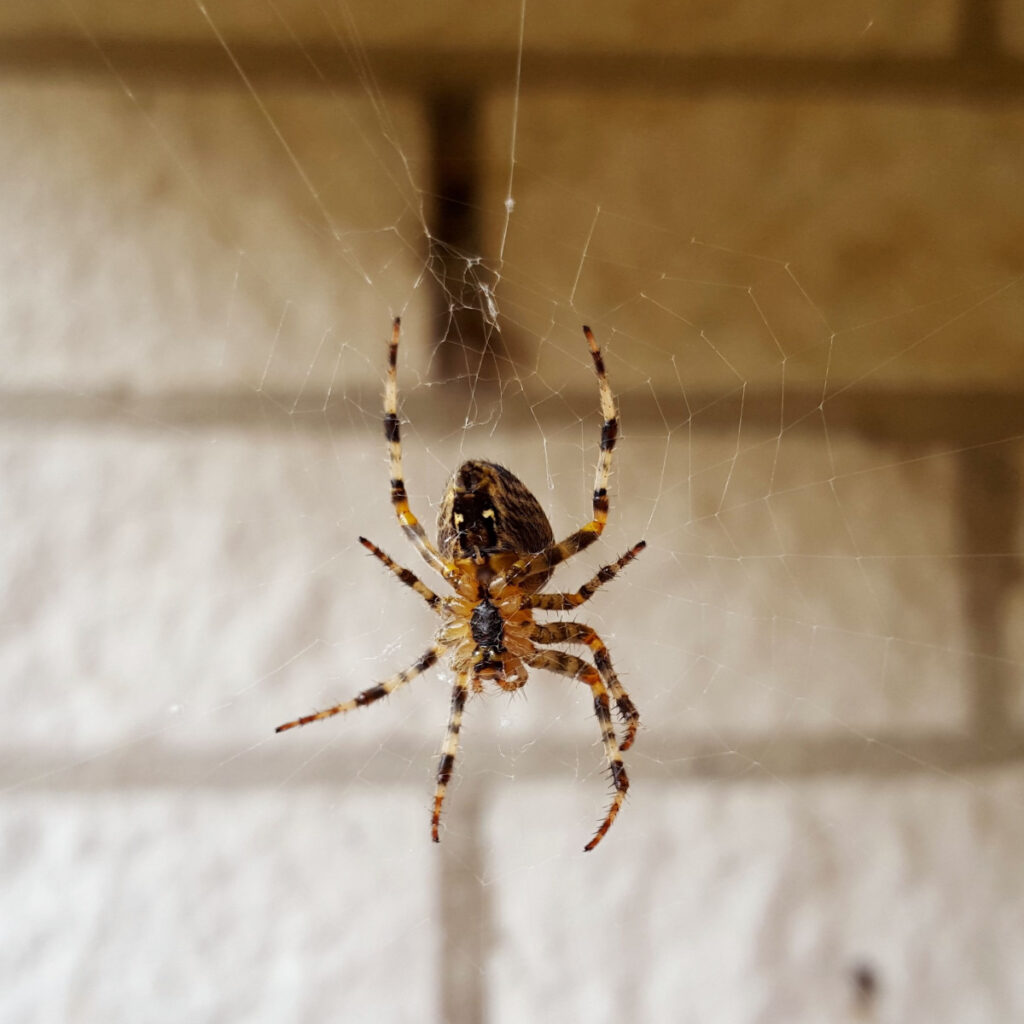
Looking for a few simple and easy ways to stop spiders from finding a way inside this fall – and for how to keep them out of your basement, garage and home for good?
Spiders certainly play a helpful role in the food chain. Outdoors, are wonderful for keeping all kinds of pests at bay, including flies, aphids, mosquitoes and more. In addition, they help to loosen soils with the tunnels and channels they dig while making their homes.
But inside – it’s a whole different story! Although they can still help to fight pests such as flies and even cockroaches, most humans are not happy to see them lurking indoors. But as autumn rolls around, that is exactly where spiders want to be.
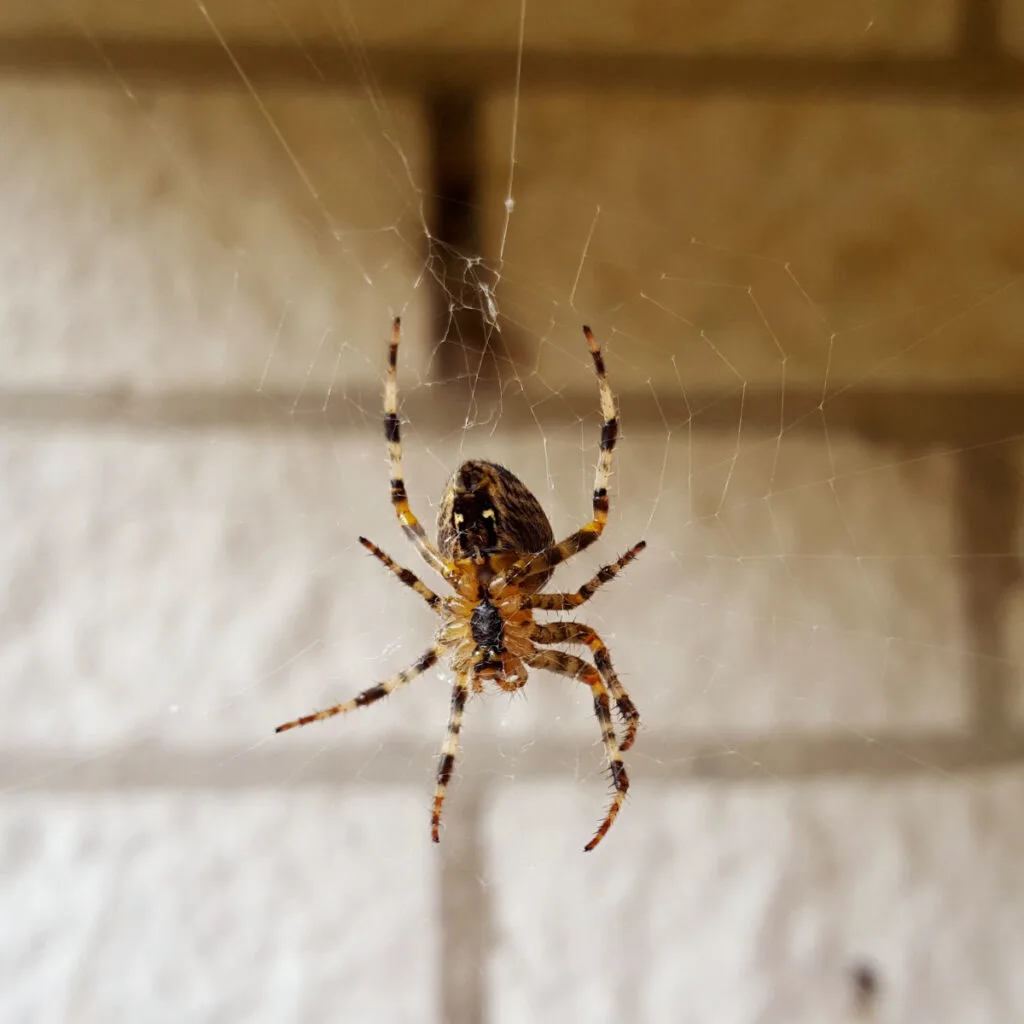
As temperatures begin to cool off in early fall, spiders become more active in their search for a mate. For many species of female spiders, fall is the time for mating and laying their eggs. They do this so their eggs can overwinter, and then hatch the following spring.
At the same time, spiders also begin the search for winter shelter. And once they do, they naturally attempt to move to one of the most attractive spaces of all, inside the warm and cozy living quarters of your home!
So is it really possible to keep spiders out of your living space? The good news is that there are a few simple preventative techniques that can greatly reduce and in some cases nearly eliminate spiders from your living space.
Beyond that, there also happens to be a couple of very effective solutions that can help keep out any spiders that still make it in. And by combining a good defense with a couple of highly effective deterrents, you really can keep spiders out of your house – and for good!
Let’s start by covering how to best seal off your house and living spaces from spiders, and then we will cover two of the “best of the best” methods & products that can keep them from ever wanting to get inside in the first place!

Much as with any insect or pest, the best way to keep spiders out of your home is to never let them indoors in the first place. And that all starts by eliminating all of their easy entry points – and not providing them with the food and moisture they need for survival.
When it comes to getting inside, worn out weatherstripping, door jambs, and torn screens are all open invitations for spiders. As are vents without screens and windows with broken or damaged caulking. In essence, any crack or open crevice that leads into your home is virtually a wide open door for spiders.
In the fight to keep spiders outside, begin by taking a walk around your home. Fall is the perfect time to seal openings with silicone caulk. Not only will it help seal off openings from all kinds of insects, it will also help keep your home warmer in the winter.
Replace old door jambs and torn or worn out weatherstripping and make sure doors and windows close tightly. For uncovered vents and vent pipes, use a fine mesh screen to seal them off from being an easy entry point for spiders.
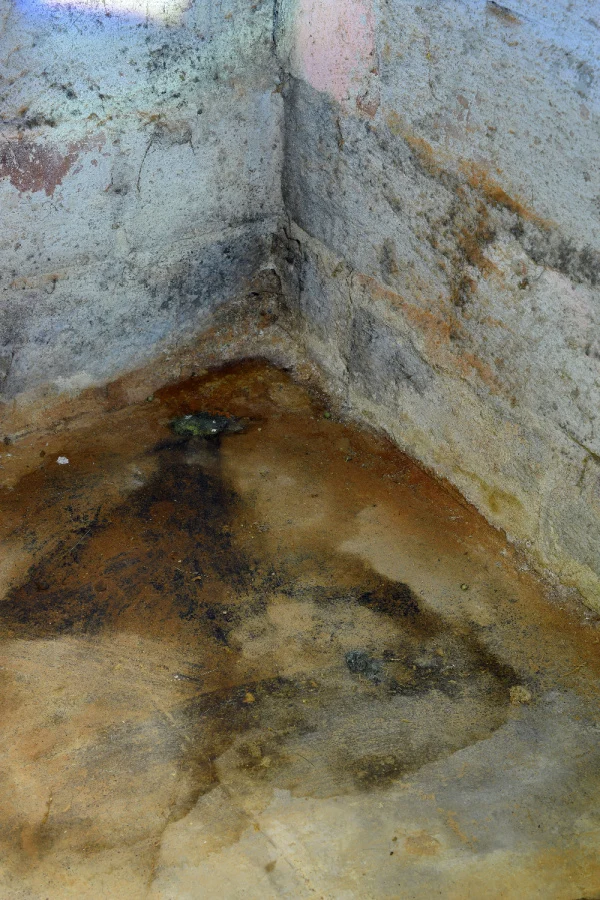
If you happen to have basement casement windows, check that they are closed tightly and sealed off. Basement windows are one of the most common of all entry points for spiders. They are also one of the most prone to having small gaps and breaks in their seals.
Finally, keep wood piles away from anywhere close to your house. Wood piles are notorious for harboring large populations of spiders. And the closer to the home they are, the less spiders have to travel to get inside.
Although spiders can live for days without water, they do need moisture to ultimately survive. And that means standing water of any kind is quite attractive to them. It is one of the major reasons they love to take up residence in damp, dark basements.
Eliminate standing water of any kind in your home. This includes slow drips and leaks around faucets, or small standing pools of water around floor drains. If your basement is extremely damp, a dehumidifier can help to dry it out and make it less attractive.

Spiders love to eat flies, moths earwigs and other small insects. By keeping these insects out, they won’t want to come inside at all. And beyond food – a clean house is usually a spider free house!
Believe it or not, by simply dusting and sweeping your house more frequently, you will greatly reduce the population of indoor spiders. Spiders love to hide and build their webs under furniture. Areas with little traffic offer both safety and security.
In addition, spaces with heavy dust build up attract spiders searching for small insects and other easy food sources. Sweep and dust often, and pay special attention underneath and behind chairs, couches and other furniture. Regularly move the furniture out and dust and sweep to keep cobwebs out.
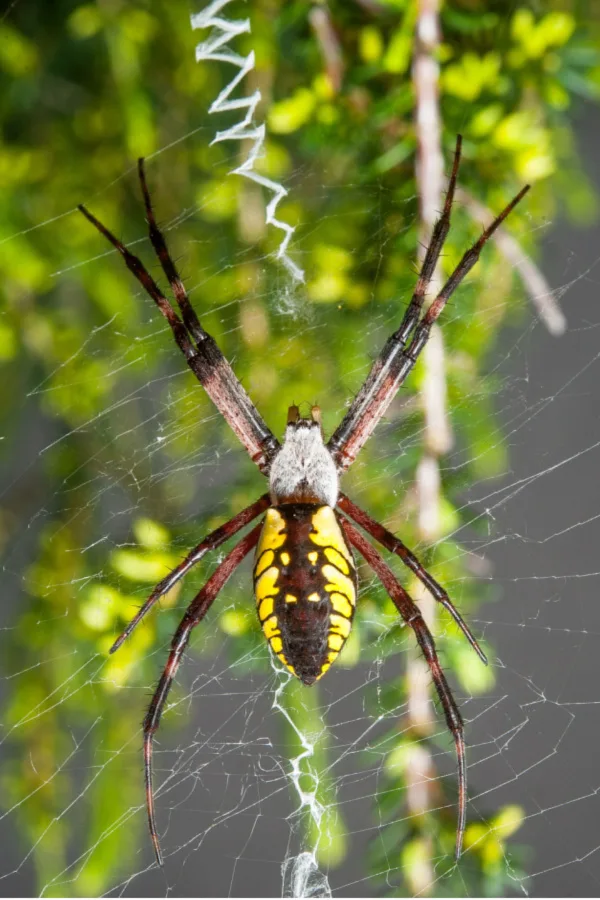
When it comes to a scent that spiders will do almost anything to avoid – peppermint is at the top of the list. And whether you use it as a liquid spray, dried in a sachet or packet, or even as a live plant – spiders will stay away!
Peppermint is actually offensive to a long list of insects and pests. That includes flies, mosquitoes, ticks, moths, roaches, fleas and of course, spiders. But not only will it keep spiders away, as you can see, it also helps to keep the insects they love to eat away too. And with no food – there are no spiders! Also See: How To Keep Gnats & Flies Out Of Your Home

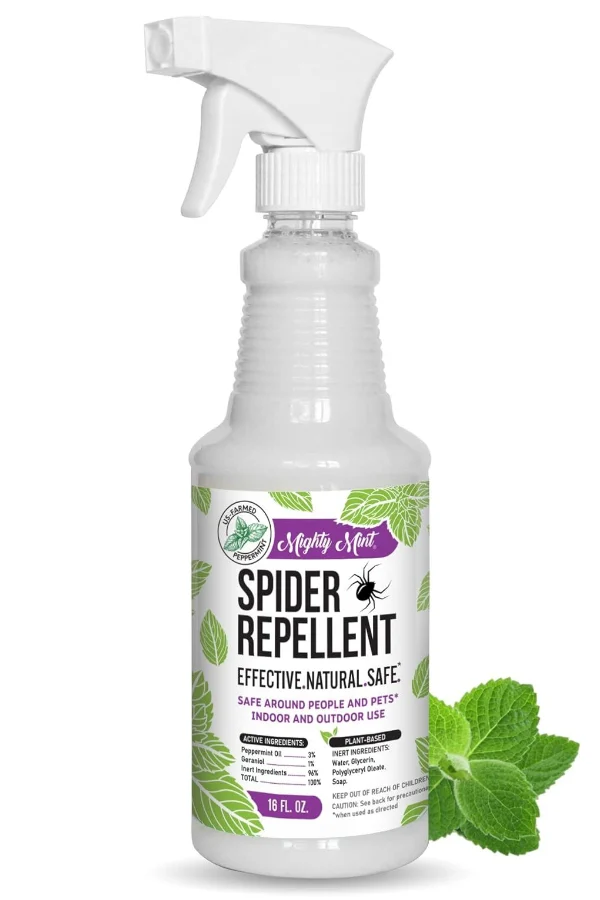
You can make your own peppermint spray by mixing 5 drops of peppermint oil for every ounce of water. There are also some highly effective peppermint oil sprays on the market that are ready to go. Even better, they are completely safe around pets, adults and children too! Affiliate Product Link; Mighty Mint – 16oz Spider Repellent Peppermint Oil
As another option, you can also use dried peppermint pouches and sachets that fill the air with the smell of peppermint. And that strong scent does wonders for keeping spiders out! Product Affiliate Link: Grandpa Gus Spider Pouches
Finally, growing peppermint as a house plant can help keep spiders and other insects out as well. Even better, you have plenty of leaves to make your own oil – or dry them to make your own peppermint sachets!
There are, of course, a couple of old legends about hedge apples and buckeyes repelling spiders. But do they really work?
Many swear that by placing buckeyes or hedge apples in front of doors, around foundations, or in the basements of homes – it sends spiders away for good. Although many stand by the claim, the reality is that there is zero scientific evidence to support either one working to stop spiders from coming inside.


But don’t despair, whether or not you believe in the power of the hedge apple or buckeyes, by simply sealing up your home, keeping away the food and water spiders need – and using the power of peppermint – you can keep these 8 legged creatures outside!
Follow Our Facebook Page For Great Gardening Tips And Advice! This Is My Garden Facebook Page
This Is My Garden is a garden website created by gardeners, for gardeners. Jim and Mary Competti have been writing gardening, DIY and recipe articles and books and speaking for over 15 years from their 46 acre Ohio farm. They publish three articles every week, 52 weeks a year. Sign up today to follow via email, or follow along!
Looking for a simple way to keep those annoying bees away from you and your food and drinks when trying to enjoy the great outdoors in late summer and fall? Well wait until you see how easy it can be!
Although bees and wasps can be quite beneficial for gardens and flowerbeds when it comes to pollinating – they can pose a serious issue when you are trying to entertain or simply sit and relax outside. Especially in late summer and early fall when they become more active than ever!
Late in the season, many of the options for bees to feed begin to dry up and disappear. Vegetable gardens are no longer full of blooms. Nor are flowerbeds, containers and hanging baskets. Even shrubs, bushes, trees and wild plants have stopped blooming for the most part. And that leaves bees hungry!


Ground bees, yellow jackets, hornets, honey bees, and just about every other kind of bee and wasp are more than happy to visit spaces whenever and wherever food and drink appear late in the year. And they can quickly turn a lovely afternoon or early evening event into a battle.
Whether buzzing around your head, hovering over food or landing directly in your drink, bees can be relentless. And they can be dangerous as well. With bees all around, the chances of getting stung can be quite high. As can accidentally swallowing one in a beverage!
For those that are allergic to their stings, it can be more than just annoying. But the good news is that there are a couple of easy ways to keep bees and the dangers they bring away from you and your outdoor activities. And all without having to resort to harsh chemicals or insecticides.
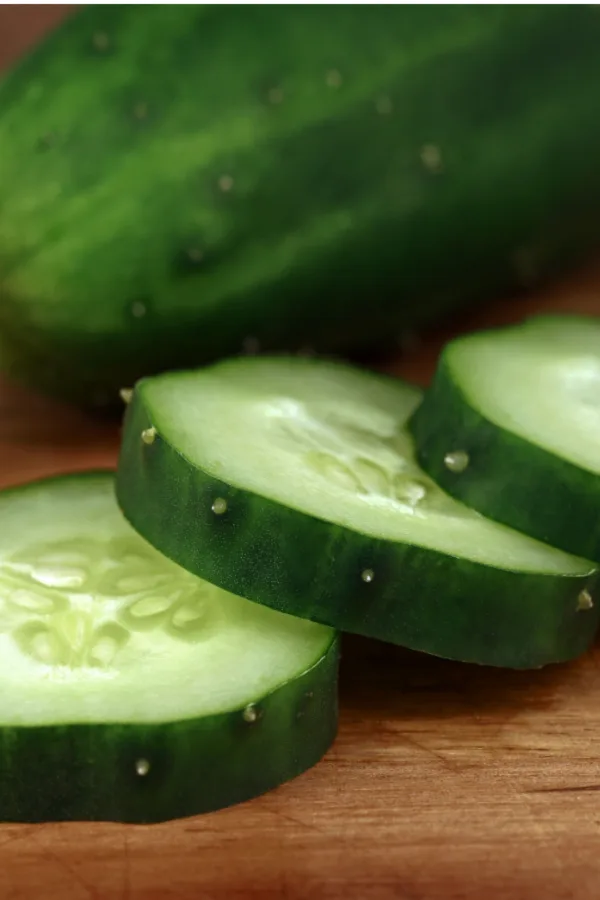
In fact, as you will see below, there are actually two super simple and inexpensive ways to stop bees in a flash – with the first and most effective of all being by using a good ol’ cucumber!


Believe it or not, cucumbers, or more precisely, cucumber peels, are one of the easiest and most effective ways to keep bees away from outdoor spaces.
The acid that is present in a cucumber rind is highly offensive to bees and wasps. So much so that they avoid it all costs. By simply placing cucumber peels around food and outdoor dining spaces, they will suddenly look for other food sources.
As crazy as it sounds, it really works! For drinks, try placing a few peels or quartered cucumber slices on a saucer and place your drink on it. Whether its water, wine or even sugary soda – the flying pests will avoid it. The same goes for placing peels or cucumber quarters on food trays. Again, they will stay far away.
As much as placing cucumber peels or sections works for protecting food, it can also protect humans. A few small peels placed around the arms of chairs, on tables, or anywhere around where one is trying to enjoy an outdoor space will leave little worry of being stung!
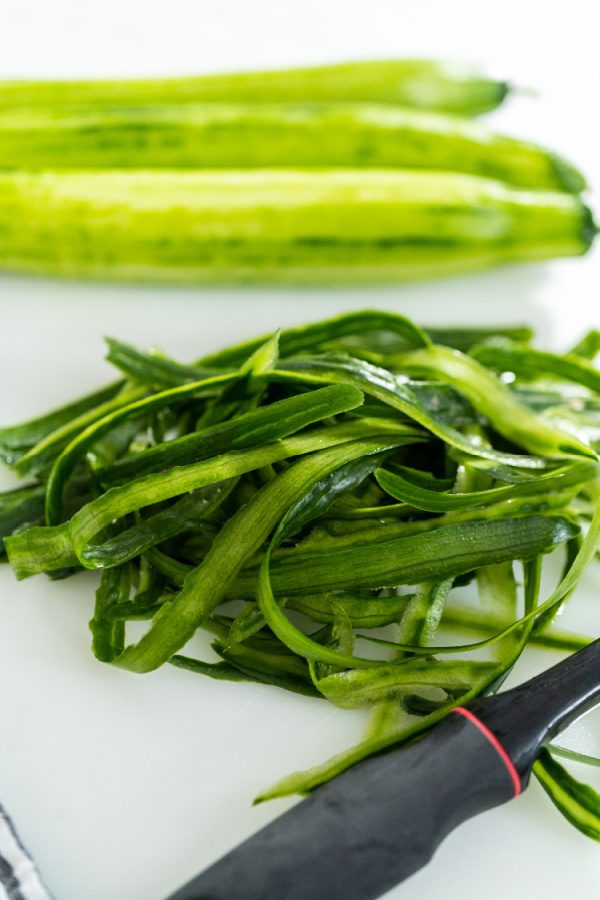
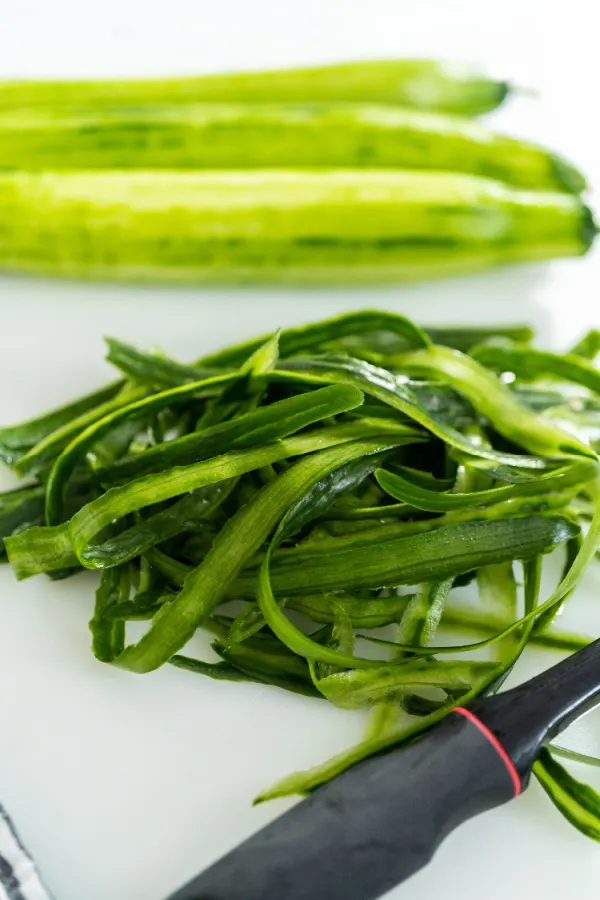
It is important to realize that it is not the flesh or scent of a cucumber that works. Instead, it is the acid in the peel that bees cannot stand. With that said, although peels work incredibly well, without a bit of the cucumber along with it, they can dry out quickly. And once they dry out, they lose their effectiveness.
For this reason, when using the cucumber trick, it is best to leave a bit of the flesh on the peel. This keeps the peel from drying out and keeps the protection level high. Slicing the cucumber into 3/4 inch slices and then quartering is best as it provides plenty of peel and plenty of moisture to keep it effective.
Perhaps best of all, the acid is not only effective against wasps and nearly all types of bees, but it also can keep other flying insects like flies and mosquitoes away too. Who knew a cucumber could be so offensive to pests! See: How To Keep Mosquitoes Away From Your Patio & Outdoors – Naturally!
Beyond the amazing cucumber trick, another great weapon against nearly all flying insects outdoors are fans. And when you combine cucumbers and fans together – the protection can be pretty incredible!

Bees, wasps, mosquitoes, flies and other flying insects are incredibly light. When any type of strong wind flow is present, they are simply unable to navigate with any accuracy. This is exactly why placing a few fans around your outdoor space can quickly clear the space.
Whether it be a ceiling fan on a back patio or a few stand up fans placed around outdoor dining tables or spaces, the air flow will keep bees and other flying insects from being able to get to you.
One of the best and easiest ways to protect outdoor tables are with small battery powered fly fans. The small fans can be placed on the table and their blades create a barrier that flying insects stay far away from. Affiliate Product Link : Fly Fan for Tables, 3 Pack Fly Repellent Fans for Indoor and Outside
When you use the cucumber slices and any fan together, you get the added bonus of wafting that acid a little more around in the space – increasing the protection even more.
Here is to keeping bees and wasps away from you this summer and fall, and to finding another great reason to love cucumbers too!
Follow Our Facebook Page For Great Gardening Tips And Advice! This Is My Garden Facebook Page
This Is My Garden is a garden website created by gardeners, for gardeners. Jim and Mary Competti have been writing gardening, DIY and recipe articles and books and speaking for over 15 years from their 46 acre Ohio farm. They publish three articles every week, 52 weeks a year. Sign up today to follow via email, or follow along!
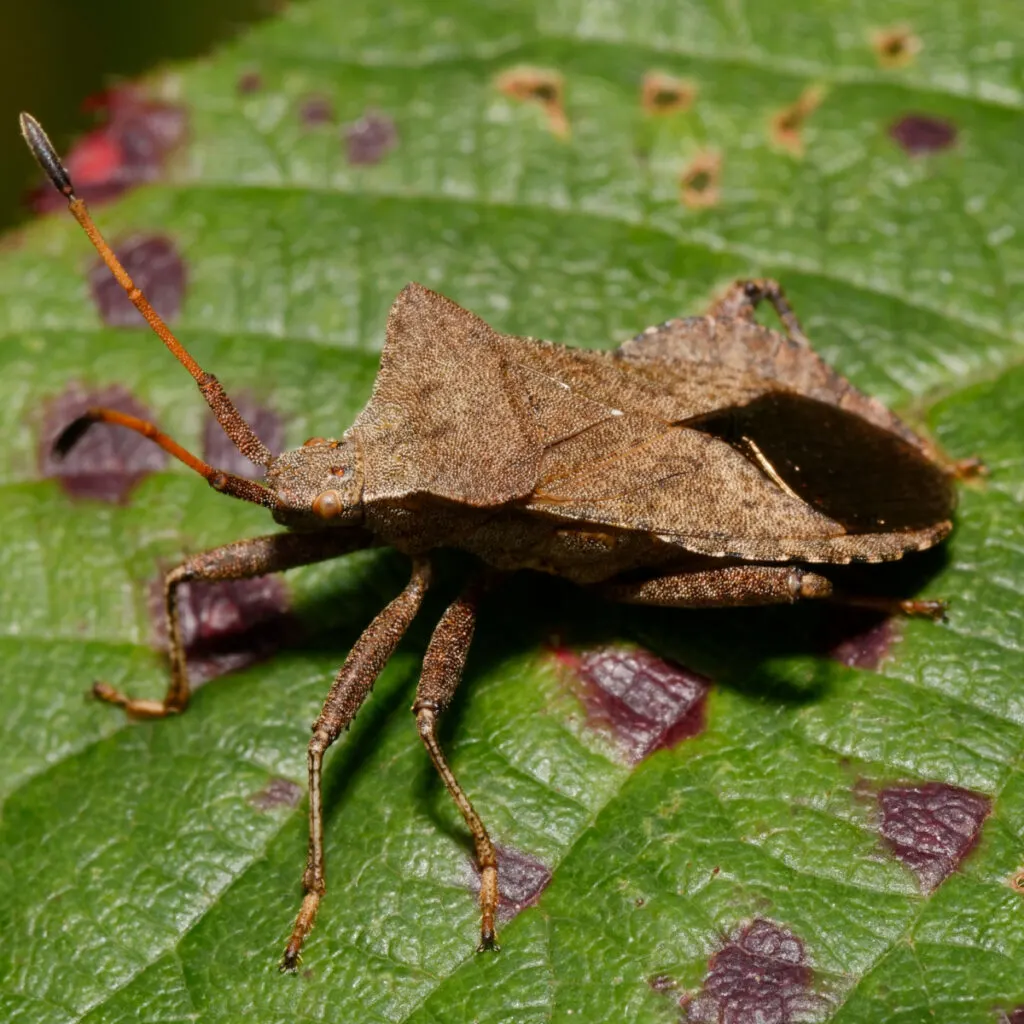
Looking for a few effective ways to stop stink bugs from getting inside your house this fall? One thing is for sure – if you are tired of having stink bugs “come out of the woodwork” inside your home in the winter and early spring – fall is the time to take action!
As autumn arrives and the first of the cooler weather begins to settle in, stink bugs seemingly appear out of nowhere. And when they do, they quickly begin their annual onslaught to get inside of homes, apartments and anywhere else they can find a bit of protection from the upcoming winter.
Stink bugs have become a major household pest in a short amount of time. The pest was first introduced into the United States in the latter part of the 1990s. Thought to have hitched a ride across the ocean in shipping containers that arrived on the east coast, they quickly established a foothold. And – have been nothing but trouble ever since!
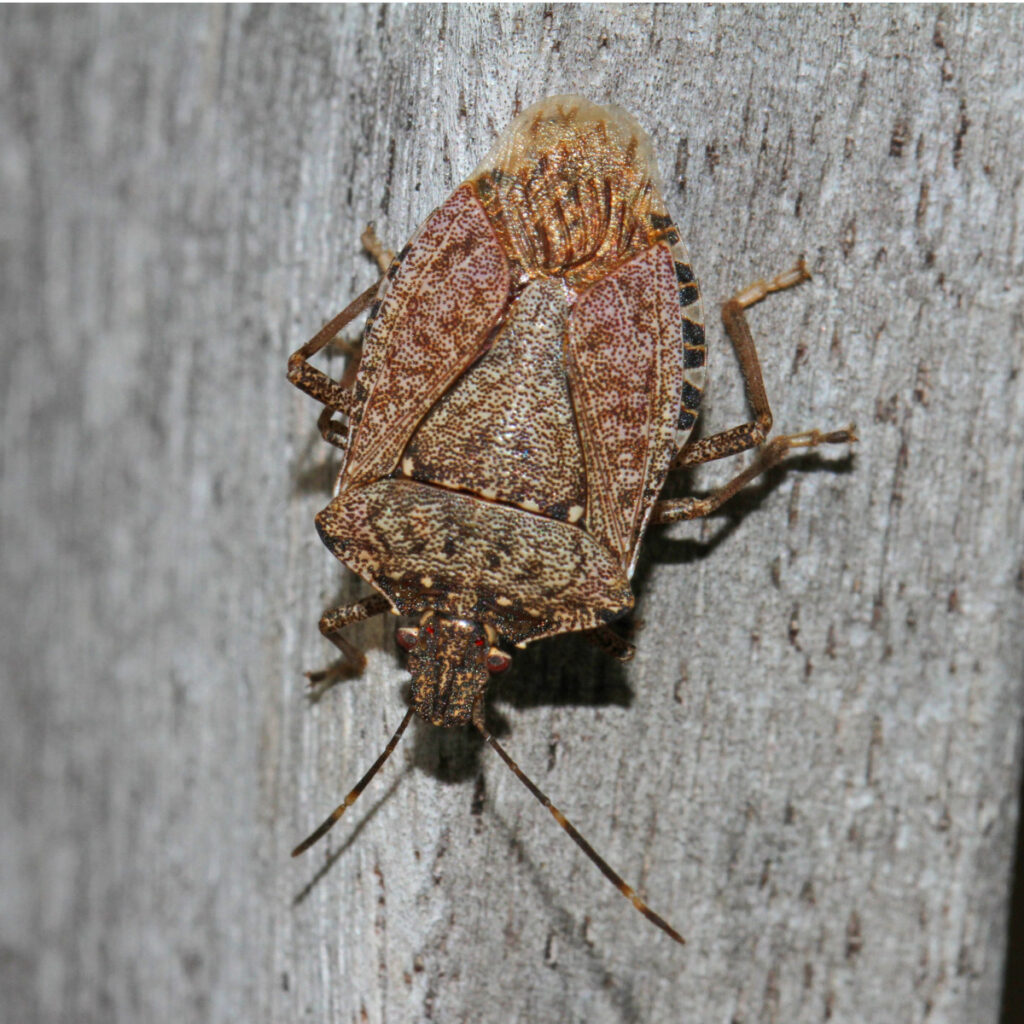

With no natural predators and a high tolerance to sprays and insecticides, stink bugs continue to multiply and spread across new regions with each passing year. Although they do not bite, sting or otherwise harm wood, drywall and other building materials, they can be a major nuisance to those who have to constantly deal with them indoors.
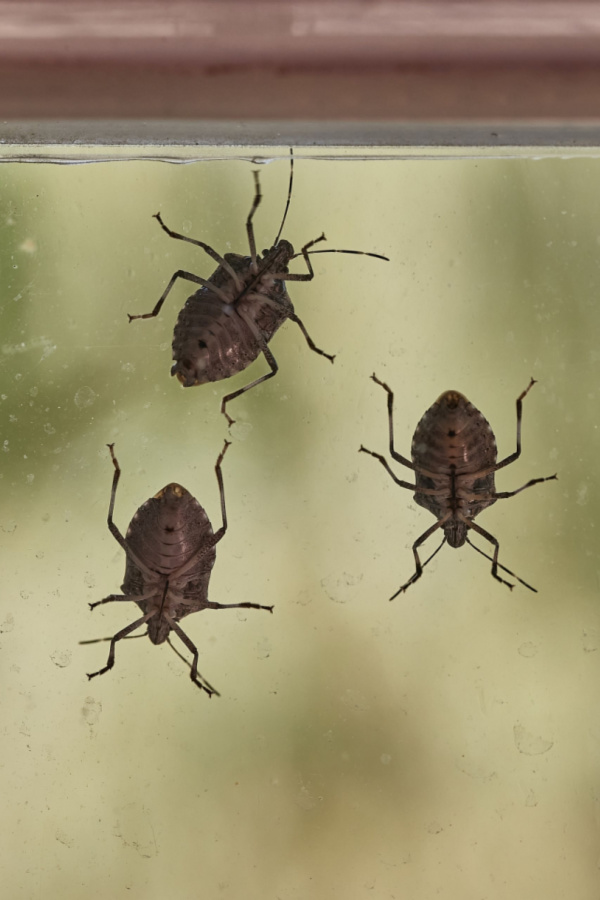
The single reason stink bugs come into a living space is survival. They are simply looking for a place to stay warm and ride out the winter. Because of this, as soon as the cool air of fall arrives, so does the home invasion of stink bugs.
Once they are able to get inside, they quickly seek shelter in corners, loose trim, attics – and wherever they can hide and hibernate. Quite often, in the fall, other than seeing a few buzzing about – you may not think you have many stink bugs inside at all. This is because they search out those hiding spots so quickly.
But once winter settles in, the warmth indoors brings them back out. And it can be unsettling for sure. You can find them crawling on couches, inside of paper towel rolls, in your bed – and you get the idea – they are everywhere!
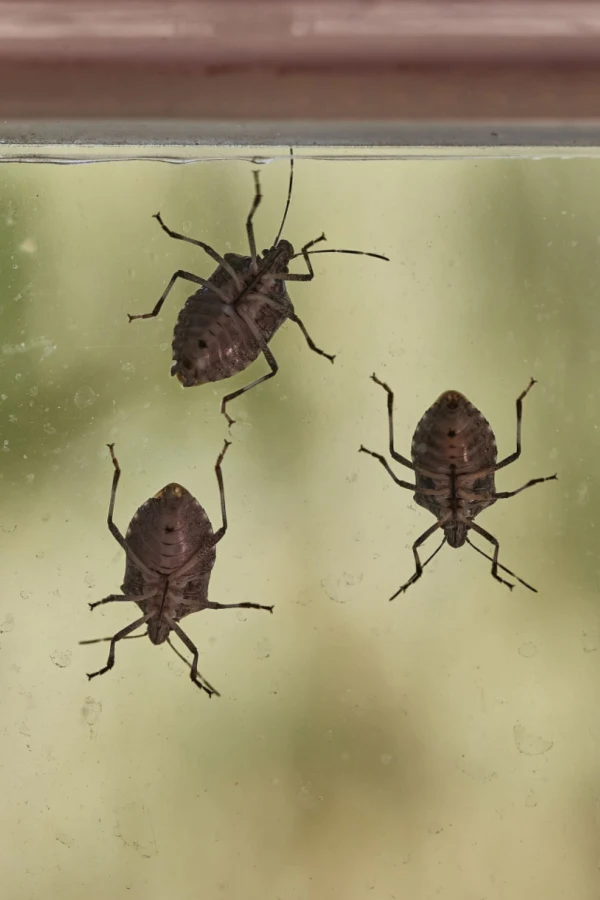
This problem of appearing indoors continues all winter and spring long. And when spring does arrive – they come out by the hundreds if not thousands. So much so that you wonder how so many could hide indoors without you knowing!
At this point, they are searching for a way to get back out. But as they do, they can drive people crazy with their constant buzzing, flying and crawling around indoors. And, of course, that all-too familiar smell.
If their crawling and buzzing wasn’t bad enough, stink bugs release a foul odor whenever they feel a threat. And that distinct odor seems to linger for hours. And if you happen to use a sweeper to try to vacuum them up, it can linger in the sweeper for days and weeks!
So what is the answer to stopping all of this madness? The good news is that with a bit of work in the fall you can indeed stop or at least dramatically reduce the amount of stink bugs that make it indoors. And with that in mind – here is a look at the best ways to do just that.
The absolute best method for keeping stink bugs out is prevention. And it requires a two prong approach to be completely effective. Even more, it must be done in the fall when they are actively searching for cover.
The first prong of the defense is to use some type of repelling barrier spray on your dwelling. As it turns out, there are a few scents and sprays that stink bugs do not like. And when sprayed around the exterior of your home, they can be fairly effective at stopping the pests from clinging to surfaces and finding entry points.
The second and absolute key to total control is to seal off all entry points. And believe it or not, there can be quite a few places that stink bugs can get in. Let’s start by covering protective sprays – and then cover how to seal off the main entry points.
Although there have not been a lot of successful insecticides against stink bugs, preventative sprays do seem to have a very good success rate. Although barrier sprays do not kill stink bugs (it’s hard to find something that really does!) – they will keep them from wanting to scour your exterior for entry points.
By using these sprays to cover foundations, eaves, doors, windows and all entry points, you can greatly reduce a stink bug invasion.
Two of the scents stink bugs do not like most are mint and garlic. And by mixing these oils from these two natural products with water and creating a spray, it can safely be used to create a barrier around your house.

The key to effectiveness with both is to start spraying early in the fall and often. In fact, the residue can come off after hard rains or heavy dew – so reapplying is necessary. But by spraying entry point areas, you can greatly reduce the amount of stink bugs trying to find their way in.
It is quite easy to make your own natural sprays from essential oil and water. In addition, there are also quite a few ready-to-go sprays available as well. These also have the added effect of repelling some of fall’s other big pests like spiders from coming indoors too!
Beyond spraying natural repellents, the next key is to seal up all entry points. And for that, a walk around your house is a must to identify and then eliminate easy access areas. In addition, fall is the time to make sure you are not leaving garage doors and entry doors wide open for any prolonged length of time.
Sealing doors and windows with fresh caulking not only helps with winter bills, but in stopping stink bugs too. In fact, window and door cracks are one of the top entry points for them as temperatures cool. Stink bugs easily pass through small cracks around windows and doors.


To prevent entry, seal both inside and outside around these areas. For best results, use a latex caulk that can expand and contract to keep the cracks sealed. When sealing, be sure to check that all trim work is solid, sealed and secure as well. If given the opportunity, stink bugs will crawl into the voids behind trim for winter warmth.
Damaged and torn screens are another huge entry point for stink bugs. They can easily pass through tiny tears in screens and quickly find a way indoors. Replace worn out screens, or keep the glass down as an alternative. An open window can easily let in hundreds of stinkbugs in a single week.
Another easy entry access point for stink bugs are door seals and thresholds. The soft rubber is easy for them to slip under and through, especially if it is worn or cracked. Once again, this task not only helps with eliminating stink bugs and other insects, but it’s also a big help in keeping energy bills down.
The thresholds at the bottom of your doorways are another key area to inspect and close off. The bottom plate can easily become loose from constant foot traffic. Seal off the thresholds tightly with a bead of silicone, making sure there are no open gaps the stink bugs can slip through.
And speaking of the bottom of doors, don’t forget your garage door seals. If the seals on the bottom of the door are worn or torn off, replace them. Garages are an easy place for stink bugs to hang out from the extreme cold and stay alive. All they need is that door to open to make it inside!
You would be surprised at just how many small holes and cracks exist around your home. And they all make it easy for bugs to come inside. Those include holes drilled for air conditioning lines, electric lines and even cable, internet and telephone.
Spend a few minutes and walk around your home looking for any areas where lines come into your home. Take time to seal all of these easy entry points with a high quality silicone caulk of foam spray.
Be sure to take time to look at any and all vents as well. Dryer and air vents are easy spaces for stink bugs to find and enter the home. Check to make sure screens are in place and are free of tears and holes. And if you don’t have a screen in them – put one in as soon as possible.
Here is to stopping stinking bugs from getting indoors this year! For more on natural pest control, check out our pest control section on the website : Pest Control
Follow Our Facebook Page For Great Gardening Tips And Advice! This Is My Garden Facebook Page
This Is My Garden is a garden website created by gardeners, for gardeners. Jim and Mary Competti have been writing gardening, DIY and recipe articles and books and speaking for over 15 years from their 46 acre Ohio farm. They publish three articles every week, 52 weeks a year. Sign up today to follow via email, or follow along!
Looking for a few quick, easy and effective methods to get rid of squash bugs from your garden this fall?
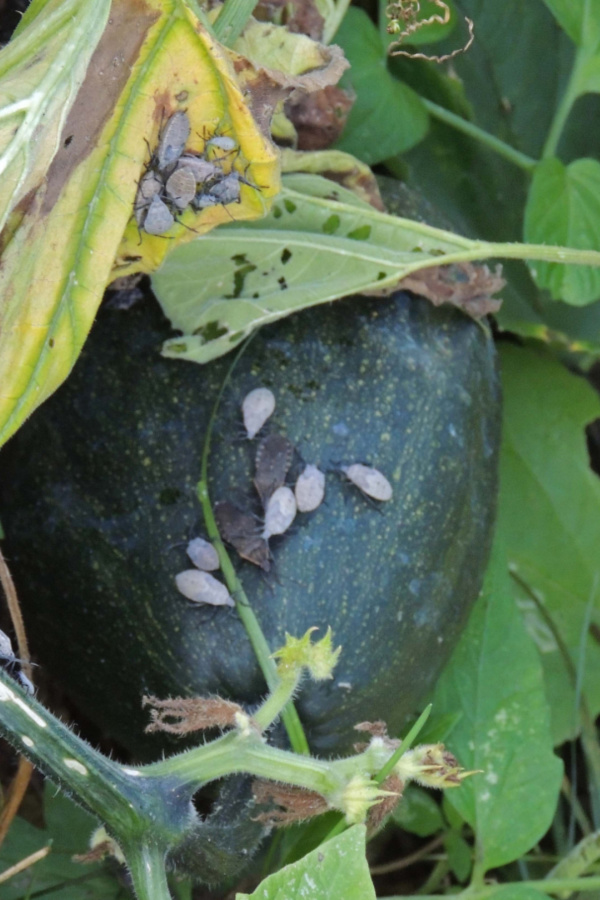
Squash bugs can be a nightmare for gardeners – especially as the cooler weather of autumn settles in. Although they can damage crops all throughout the growing season, squash bugs begin to multiply at an alarming rate in the fall.
Unfortunately, if allowed to grow their population at will, they can not only destroy any crops still present, they also can infest the ground and soil to overwinter to become even more of an issue next year. And can they ever cause a lot of damage!

Sadly, for many who love to grow squash, pumpkins and gourds, the fall increase in population couldn’t come at a worse time. Just as these autumn bearing plants are coming into their own, squash bugs can attack. And once the tell-tale signs of damage occur, it’s often too late to help a plant survive.
Squash bugs and their young (known as nymphs), wreak havoc on vegetable plants. Especially plants with sap-filled vines such as cucumbers, zucchini, squash, pumpkins and gourds. Once on a plant, they feed by biting into the vine and consuming the sap.
That alone will weaken the plant and can hurt its health and productivity. But unfortunately, their bite also happens to contain a deadly toxin. And once the toxin begins to work its way through the plant, the stems and foliage quickly begin to lose their vigor and color.
The real issue is that once you see the plant begin to yellow, it’s often too late to help it. Even if the affected foliage is removed, the toxin continues to spread throughout the entire plant, eventually killing it in the process.

One thing is for sure, if enough squash bugs are present, it can devastate an entire crop in a flash. And without taking action, not only will it affect your current crops, but the pests will then take up permanent residence to come back year after year.
The good news is that with a few simple methods, you can gain the upper hand on squash bugs. And as it turns out, fall just happens to be the perfect time to eliminate them – and to help keep next year’s gardens and plants safe as well!
By early autumn, squash bugs become quite numerous and prolific in numbers. They do this for several reasons. The first is the cool weather makes it easier for them to move about and provides the moist conditions they love. They also use this time to build numbers for future generations.
By attacking the problem in the fall, you can keep a large population of squash bugs from becoming even bigger. And most importantly, from overwintering in your soil. Although it can take a dedicated effort over a few weeks, the effort is well worth it – especially the safety of next year’s plants!
Eliminating squash bugs in the fall centers around a three prong approach. The first is treating any existing plants that are currently under attack. In the early to mid-autumn, that usually means pumpkin, squash and late season cucumber plants.
If there are just a few meandering around plants, hand picking will usually suffice. But if you have large numbers showing up, a more aggressive approach is needed. With that in mind, here are a few natural and effective remedies to take care of squash bugs this fall for good.
If you have a severe infestation of squash bugs in the fall, neem oil is a great product to use to gain a quick upper hand. Neem oil is 100% organic, so there is little worry about using it in the vegetable garden.
Neem oil is made from the oil within the seeds of a neem tree. and spraying the oil on the foliage of infected plants will work to kill adult squash bugs, as well as young nymphs and eggs.
It is important when using neem oil to make sure you are using pure neem oil. To make your spray, simply mix five tablespoons of neem oil with one gallon of water. You can also put a few drops of natural liquid dish soap to help the mixture adhere to the plant surface.
Spray the affected plants and the surrounding soil. By doing both you ensure that you can take care of all of the stages of squash bugs in the garden. Apply early in the morning or late at night to keep other beneficial insects safe.
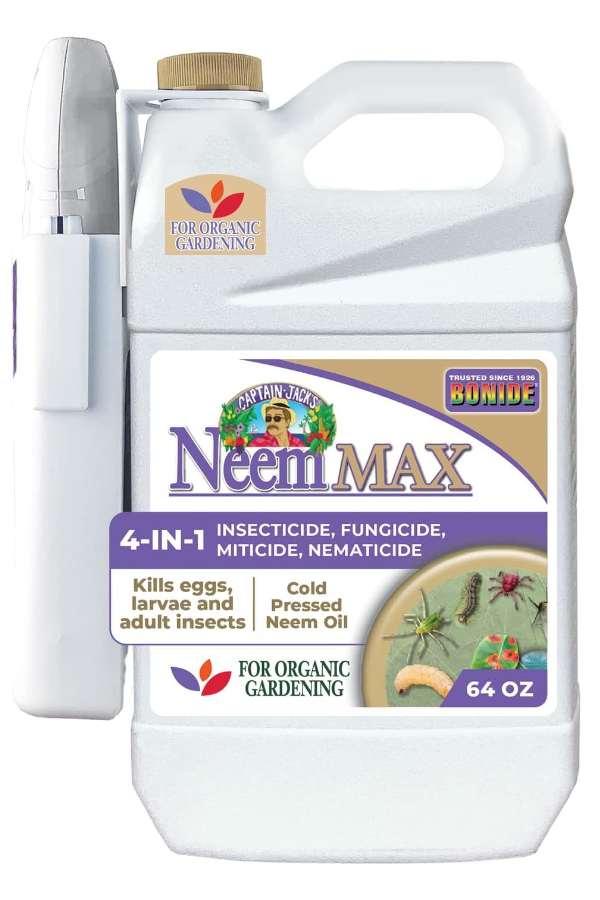

You may need to reapply a few times over the course of two to three weeks for total effectiveness. Product Affiliate Link : Captain Jack’s Neem Oil – Ready To Go
Diatomaceous earth (DE) is another all natural weapon against squash bugs and is also highly effective. Made from the fossils of ancient marine life, the sharp micro parts of DE slice the outer skin of squash bugs, killing them in the process.
As a powder, it can be sprinkled on both the plants and the ground around infected plants to help control squash bugs. This is especially effective when it comes to the eggs and young nymphs. As with neem oil, you may need to reapply once a week for a few weeks for total control. You will also need to reapply if it gets wet as it loses its effectiveness.
One of the biggest keys of all to keeping squash bugs from becoming an ongoing issue is to clear your garden at the end of the season of all decaying vegetable foliage. Especially when it comes to curcurbit plants such as cucumbers, pumpkins and squash.
Allowing vegetable plants to remain in the garden past their prime is asking for trouble. Pests and disease are easy prey for failing plants. They not only feed on the foliage, but use it for cover and protection.
The female squash bug actually overwinters in the garden, coming back to lay her eggs in the spring. And by leaving plants in the garden, you give her the perfect opportunity to breed the next generation. By simply removing plants and covering your garden soil with a cover crop, you can stop the cycle! See: How To Plant A Cover Crop – Protect & Recharge Your Garden This Fall!


The sooner you remove plants past their prime, the better. Most vegetable plants can be taken directly to the compost pile. But if any of your plants have become infested, it is best to leave them out.
Most home compost piles do not get hot enough to kill squash bugs or their eggs. That means placing them in your compost pile can actually help them increase their population for the following year.
Instead, burn or discard any infected foliage. If allowed in your area, burning the decaying foliage will instantly kill off both adults and eggs. If discarding, wrap tightly and place in your communities yard waste pick-up. Commercial facilities thankfully can heat their compost piles up to effectively kill off pests and disease.
Last but not least, be sure to make a few notes as to where your squash bugs and the plants they love were growing. Why is this so important? Because you want to be sure to plant these plants in a new location next year.
As with any garden pest, crop rotation is a vital and important strategy to keep squash bugs at bay. By moving crops to a new location from year to year, the eggs, larva and adults are unable to “set up shop” and infest the same area with the plants they love.
Moving all of your crops to new locations within your garden each season is actually a huge aid in the battle against all insects. Here is to eliminating squash bugs this fall, and to a pest-free garden next spring and summer!
Looking for a few secrets to keep gnats and fruit flies out of your kitchen and off of your countertops, sinks, fresh fruits and vegetables?
Although gnats and fruit flies can be an issue anytime of the year, they can be especially bothersome during the summer when fresh, overly ripe vegetables and fruits attract them in droves. So much so that they can all but overrun a kitchen space.
It seems within minutes, either of the pests can find and swarm a freshly sliced piece of fruit or sit atop a juice or wine glass. And as any gardener knows, just picked fresh vegetables from the garden are a prime target as well. Especially when they sit on the counter or table and become slightly over-ripe.
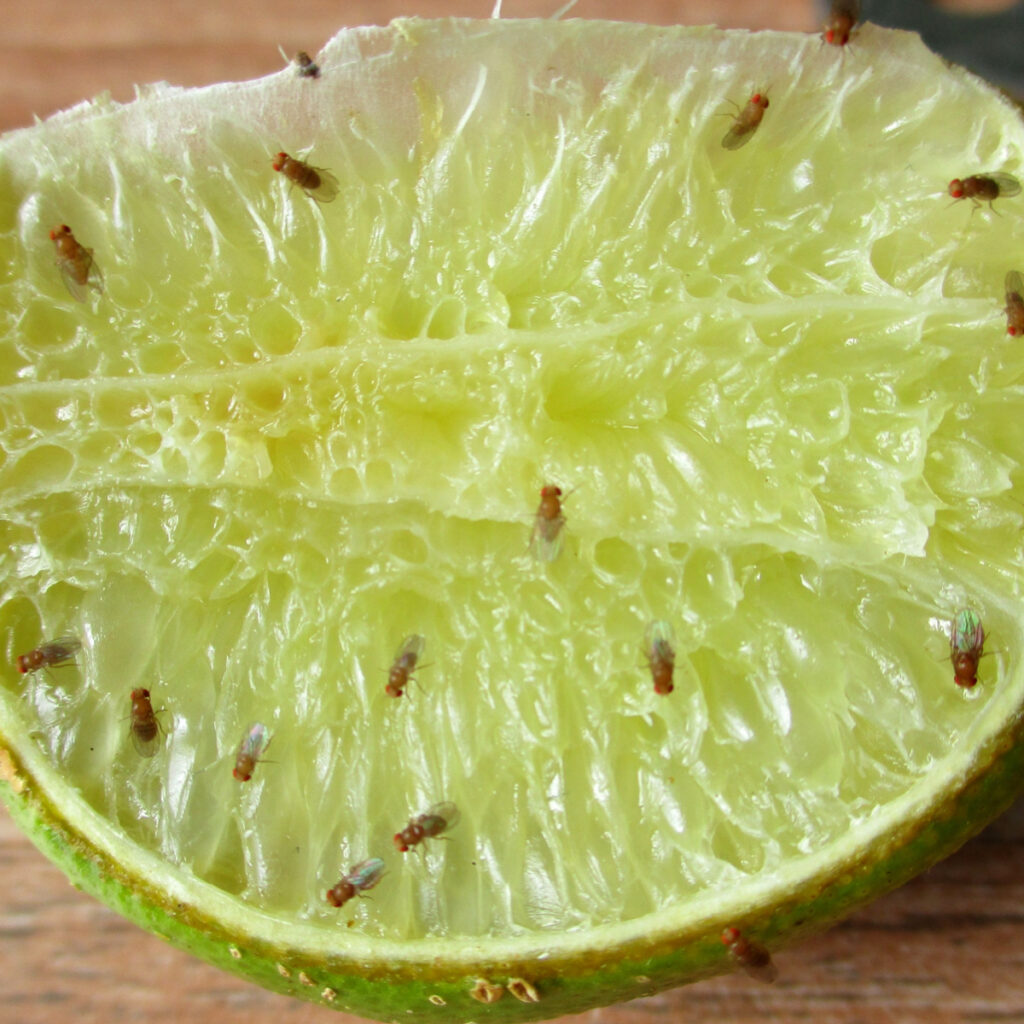
But it doesn’t stop with just vegetables and fruit. In fact, any solid or liquid food source that is slightly past its prime or overly sweet or sugary will attract these annoying little pests. And once they arrive, they can be hard to get rid of.
As it turns out, not only are the adult fruit flies and gnats attracted to the sweetness of fruit, vegetables and other food sources, they lay their larva in it. And they do so that the larva can feed off it easily. Left unchecked, fruit flies and gnats can multiply in mind-boggling numbers.
Although both pests are very similar and hard to tell apart, there are differences. Gnats live for about ten to fourteen days and reproduce nearly the entire time they are alive. Fruit flies are more productive, laying eggs that can hatch into larva in less than a day. Even worse, once a female fruit fly is two days old, she can start laying eggs!
But here is the good news – with just a few simple preventative practices and a few methods to control existing populations naturally, it’s possible to eliminate both of these pesky pests from your kitchen. And even better – in quick fashion.
When it comes to eliminating both pests, it all begins with prevention. As you will see later in the article, there are some excellent methods to get rid of existing populations, but if you don’t put preventative measures in place, they will just keep coming back.
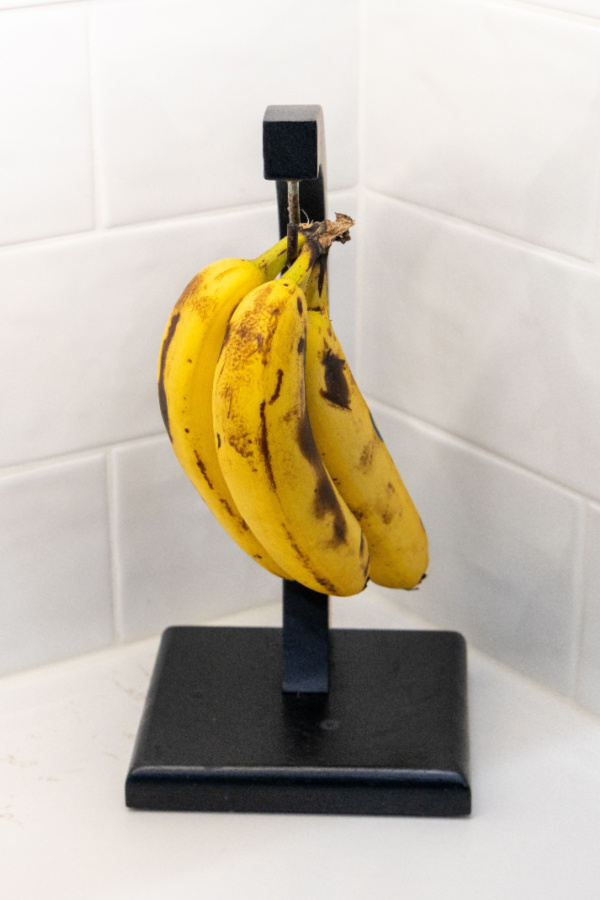
There are three major aspects to prevention, with the first and most important being to store food properly. Nothing attracts fruit flies and gnats like fresh fruit and vegetables. Especially over-ripe and/or damaged fruits.
The biggest key to success in keeping both away is as soon as fresh produce comes into the house, store it as quickly as possible. Especially if your fruits and vegetables have any signs of damage or are extremely ripe.
The best way to protect fruits and vegetables from gnats and fruit flies is in the refrigerator. But for fruits like tomatoes that are best kept out, the key is to keep them completely out of the kitchen. A cool basement or garage is far better – because as you will see below, in the kitchen, they can find a lot of places to multiply
The second key to prevention is to keep the surfaces in your kitchen clear and clean at all times. Clearing dishes from the sink and counter immediately is a must. Dirty plates, bowls and the residue in juice, soda and wine glasses will attract both pests quickly.
In addition, it’s important to wipe counters clean after every use. This will remove any trace of liquid or food particles that attract gnats and fruit flies. This residue is an easy food source, and one that helps keep their population thriving.
Finally, be sure to keep all garbage and trash cans covered and out of the way. An open trash bin is easy prey for fruit flies. There, they can find rotting food and lay larva that can reproduce at will.
Drains and garbage disposals are a favorite of gnats and fruit flies. At the top of the drain, in the trap, and in the teeth of the disposal, chunks and food particles can remain – and it is there that they live and reproduce.
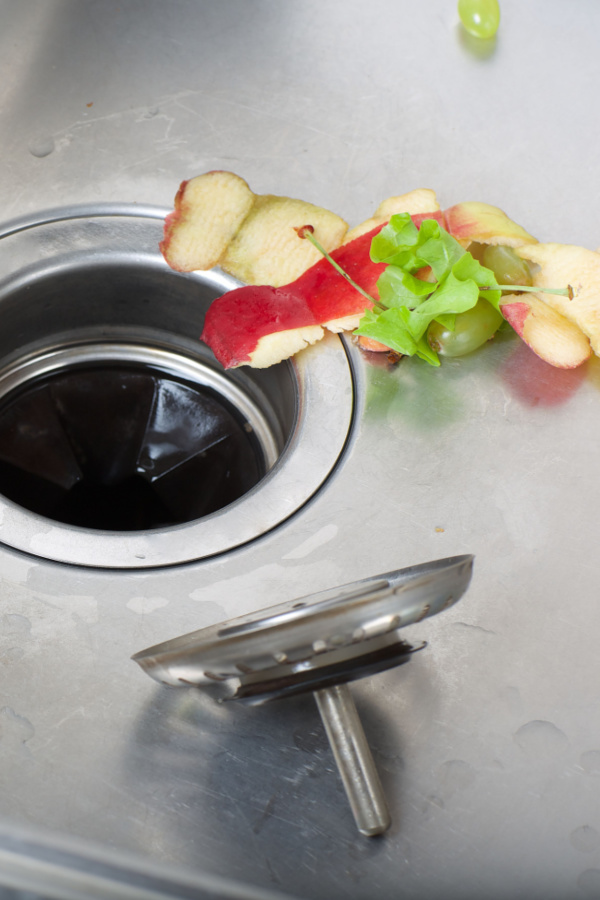

Always flush drains and disposals with plenty of water to clear debris from the blades after every use. Ice cubes placed in the garbage disposal do a great job of cleaning and clearing scraps from the blades. You can also use a solution of 1 to 2 tablespoons of bleach with 1 gallon of water and pour down the drain. The bleach kills both the fruit flies, and the larva.
Now that we have covered how to prevent fruit flies from finding a home – let’s take a look at a few quick and easy ways to get rid of the ones that are already living in your kitchen!
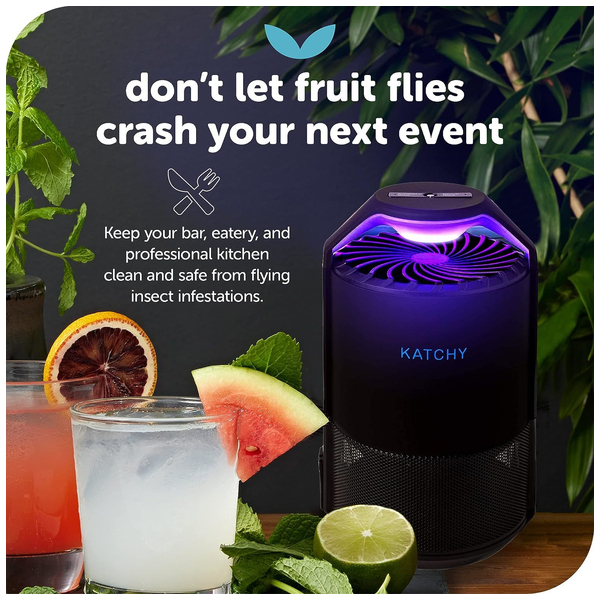
So how can you effectively kill gnats and fruit flies without chemical sprays? There are actually a couple of great home remedies below that will trap and kill both pests – but one of the easiest, fastest and cleanest ways to eliminate gnats and fruit flies is with an indoor UV light trap.
The trap works by attracting flying insects with an ultra-violet light. Then they disappear onto a sticky trap that can collect hundreds. The pads are easy to change out, and the flying pests are gone for good!
The traps even work to capture mosquitoes and moths as well. They are quiet, safe, and most of all, they really do work! Product Affiliate Link: Katchy Automatic Indoor Fruit Fly/Gnat Trap

If you are looking for a quick at-home remedy to get rid of existing gnats and fruit flies, apple cider vinegar and dish soap can be combined to make a great homemade trap. To use, fill a small glass or plastic container with apple cider vinegar and a few drops of liquid dish detergent.
The fruit flies are attracted to the cider vinegar and the dish soap makes them unable to fly out. Be sure to place the trap in a remote area of the kitchen, away from the counter and kitchen table. This will help draw them away and not closer to where you eat and cook.
If you happen to have a bit of old or stale wine (not that that actually happens very often) you can also create a trap from a wine bottle. The fruit flies are attracted to the sweetness of the wine, and head inside the bottle and drown.
The wine bottles make a nice “hidden” trap if you use a dark bottle. Again, place out of the kitchen to draw gnats away instead of bringing more into the space.
Here is to keeping gnats and fruit flies out of your kitchen and your home! For more on keeping pests away, check out Pest Control category on the website.
Follow Our Facebook Page For Great Gardening Tips And Advice! This Is My Garden Facebook Page
This Is My Garden is a garden website created by gardeners, for gardeners. Jim and Mary Competti have been writing gardening, DIY and recipe articles and books and speaking for over 15 years from their 46 acre Ohio farm. They publish three articles every week, 52 weeks a year. Sign up today to follow via email, or follow along!
Looking for a few effective and all-natural ways to keep flies away from your porch, patio, deck and other outside entertaining areas?
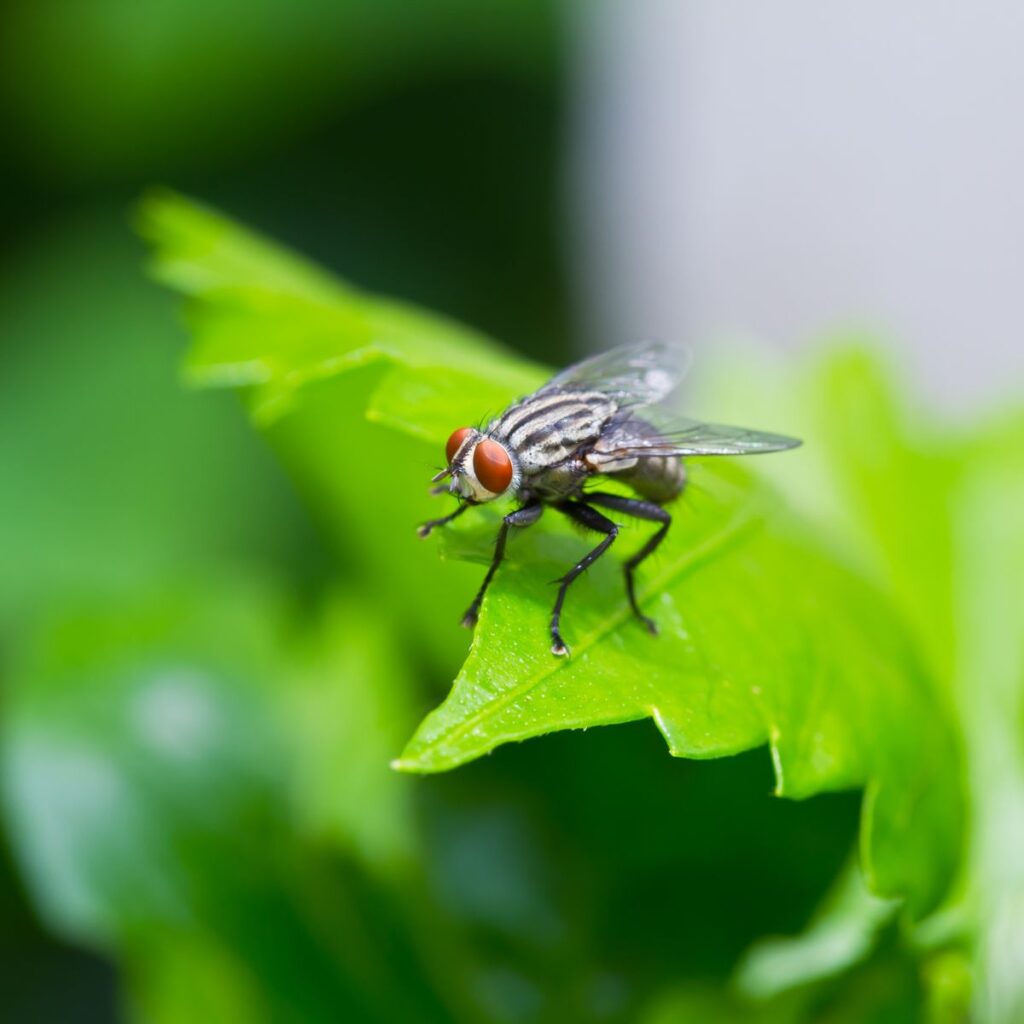
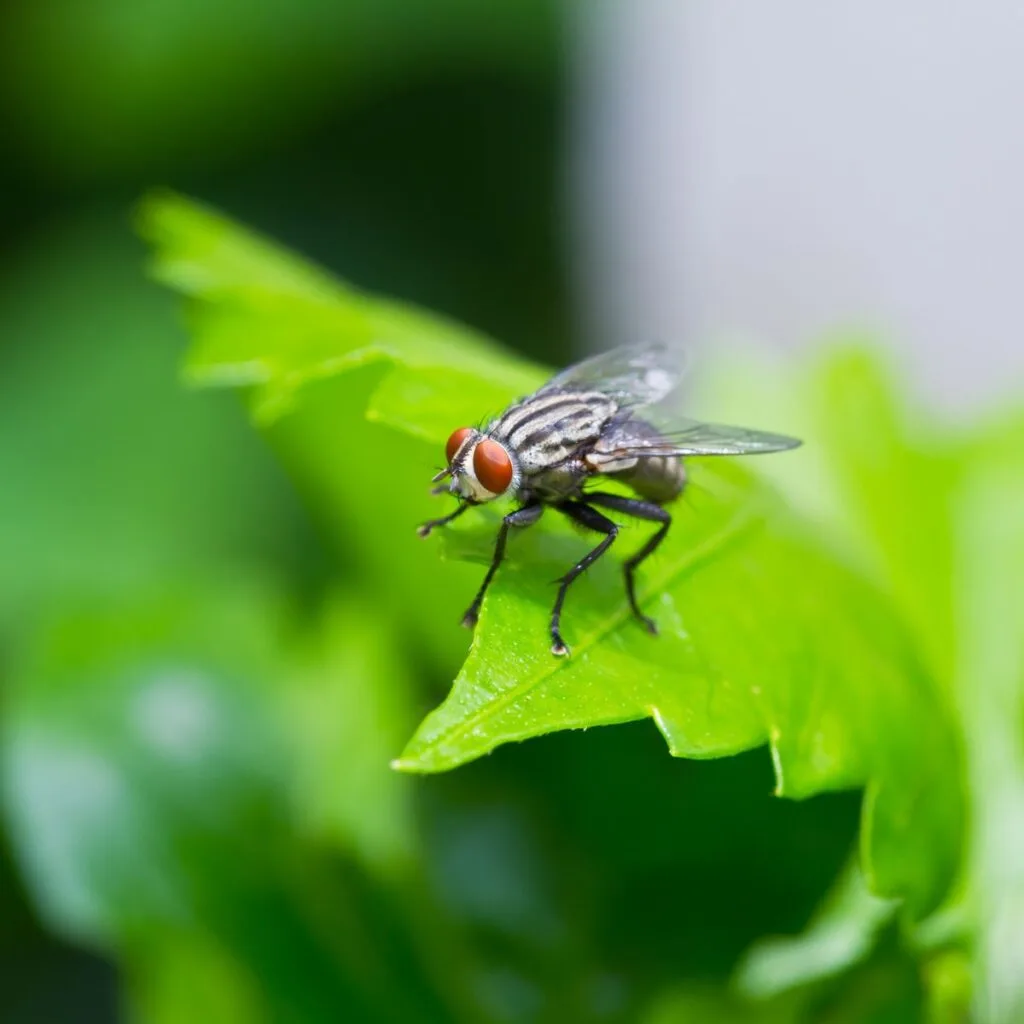
There is nothing more aggravating that trying to enjoy the outdoor spaces around your home and have a swarm of flies hovering all around. Whether it’s spoiling an outdoor breakfast, lunch or dinner by landing on your food, or having them buzz you and your guests during a visit, flies can all but ruin outdoor activities.
Flies can be more than just annoying. Not only is their constant landing on your skin and surrounding surfaces annoying, it can also spread disease. As crazy as it sounds, the common household fly is known to spread well over 60 diseases to humans. And some of those can be quite serious!
Although there are numerous commercial sprays, traps, and insecticides that can help control fly populations, they can often be a safety concern when using around children, pets and even adults. Even more, they can be quite costly as well.
But the good news is that there are safer and more economical solutions. In fact, as it turns out, when it comes to keeping flies away, there are actually several all-natural methods that are not only highly effective, but 100% safe.
One of the best all-natural methods for keeping flies out of the areas you enjoy is with herbs. Strategically placed herbs in pots, containers, hanging baskets and even in the flowerbeds around your outdoor entertaining spaces can work wonders against flies.
But not just any herbs will do. There are actually a few specific herbs that have a distinct aroma that flies simply can’t stand. Better yet, those same herbs produce a scent that although offensive to flies, is usually more than appealing to humans. Best of all – many of those same herbs can be used to give incredible flavor to drinks and dishes too!
So what herbs are best for repelling flies? At the top of the list are Lavender, Basil, Rosemary and Mint. All of these herbs are highly offensive to flies. They all also happen to be quite easy to grow and wonderful for using in the kitchen.

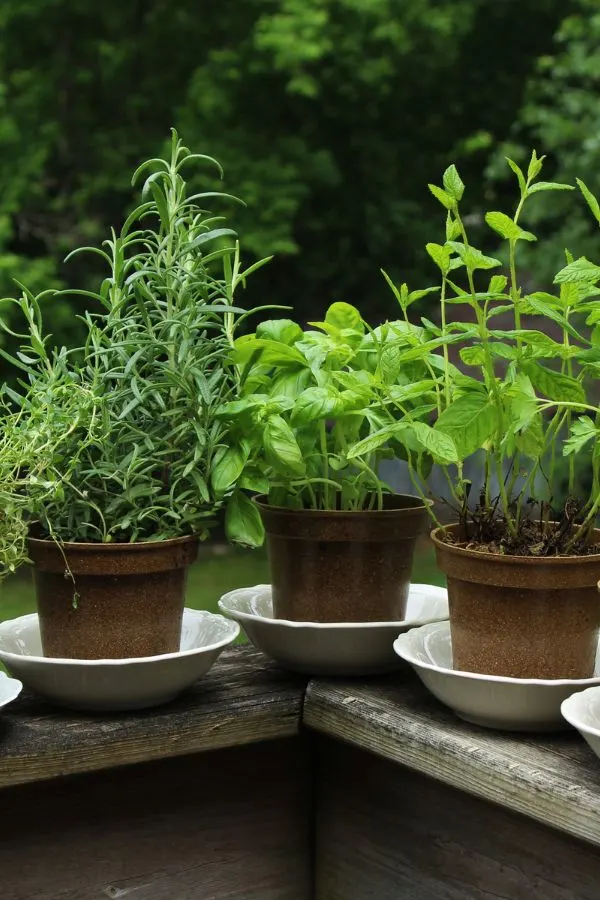
To keep outdoor dining and seating areas free of flies, plant any or all of these four herbs in pots and use as a table arrangement. Not only will it keep flies far away, it also will fill the air with color, beauty and a fragrance that is hard to beat.
If you happen to have flowerbeds bordering your patio or entertaining spaces – by all means fill them up with these four fly repelling machines. They grow just as well if not better directly in flowerbeds!
Using the same method of repelling with a strong scent, essential oils are another effective deterrent for flies. They also have the same ability to fill the air with a pleasant scent, serving a wonderful dual purpose when used around outside gathering areas.
There are actually quite a few essential oils that work well against flies, with some of the best choices being pure oils from clove, citronella, eucalyptus, lavender, lemongrass, mint and rosemary.
Any of the above oils can be used in a diffuser to spread the scent anywhere you gather. The diffuser works by spreading the scent throughout the area, creating a natural repelling barrier against flies. Product Affiliate Link : Ceramic Cordless Diffusers for Essential Oil for Camping, Travel
You can also take any of the above essential oils and make a highly effective repellent spray that can be used on surfaces to keep flies from landing. The recipe is easy to make with three simple ingredients:
Mix the ingredients thoroughly and pour into a spray bottle. Then, simply use outside wherever necessary to spray surfaces and surrounding areas. Tables, chairs, railings are all excellent for spraying to keep flies from landing.
You can also saturate a small cloth or sponge with the mixture. Use an open container such as a decorative can or small dishwasher safe storage container and place the cloth or sponge inside. Then place the container around the area where you will be outdoors.
The water and witch hazel will slightly weaken whichever essential oil you choose, but it will also help make the repellent last longer. Most importantly, it will keep the flies away!
Did you know by simply putting a fan in an outdoor space you can not only keep flies away, but mosquitoes, sweat bees and other annoying insects too?


It’s true! Flies, mosquitoes and other lightweight flying insects cannot move freely against the strong breeze of a fan. A small fan placed to cover an outside dining table or outside sitting area can keep it clear of flies as long as the fan is running. And in the process, keep you and your guests free from them!
Product Affiliate Link: Portable Misting Fan, 8-Inch Rechargeable Battery Operated Fan
As mentioned earlier, citronella oils are a very popular deterrent when uses in diffusers and / or sprays. However, a super quick, convenient way to repel flies surrounding a specific area is with a simple citronella candle.
Although the oil works to deter them, the smoke from the candle is also a factor that flies (and mosquitos) find unpleasant.


Citronella candles are widely available in most local hardware or big box stores or on line. They make for a quick, easy and natural solution to avoid outdoor pests and other insects – especially when you are gathering at the last minute! Product Affiliate Link: Citronella Candle
Apple cider vinegar has all kinds of uses around the home – and that includes helping to keep flies away! Flies do not like the pungent smell of apple cider vinegar and will avoid it at all costs.
To use outdoors, place 1/4 cup of apple cider in a small jar or open container. Next, add a few drops of natural soap and gently mix. Simply leave the jar open and place it nearby when using it outdoors.
Need to keep flies away from your kitchen? Use the same solution but be sure to cover the jar and poke small holes in the top. This helps to control the vinegar scent in a smaller space while still repelling flies indoors.


Lastly, while the tips mentioned above are vital to protect your outdoor space, you can also help keep flies away with a few simple but all-important tips:
While clove and cinnamon may be more seasonally popular around the colder months, they can help keep flies away year round. Jars of cinnamon sticks with cloves make a beautiful decoration. They also help create a strong scent which flies don’t like in the least. See: How To Use Cinnamon In Gardens & Flowerbeds – Help Your Plants & Soil!
Here is to enjoying your outdoor spaces this year without the nuisance and health risks that flies can bring!
Follow Our Facebook Page For Great Gardening Tips And Advice! This Is My Garden Facebook Page
This Is My Garden is a garden website created by gardeners, for gardeners. Jim and Mary Competti have been writing gardening, DIY and recipe articles and books and speaking for over 15 years from their 46 acre Ohio farm. They publish three articles every week, 52 weeks a year. Sign up today to follow via email, or follow along!
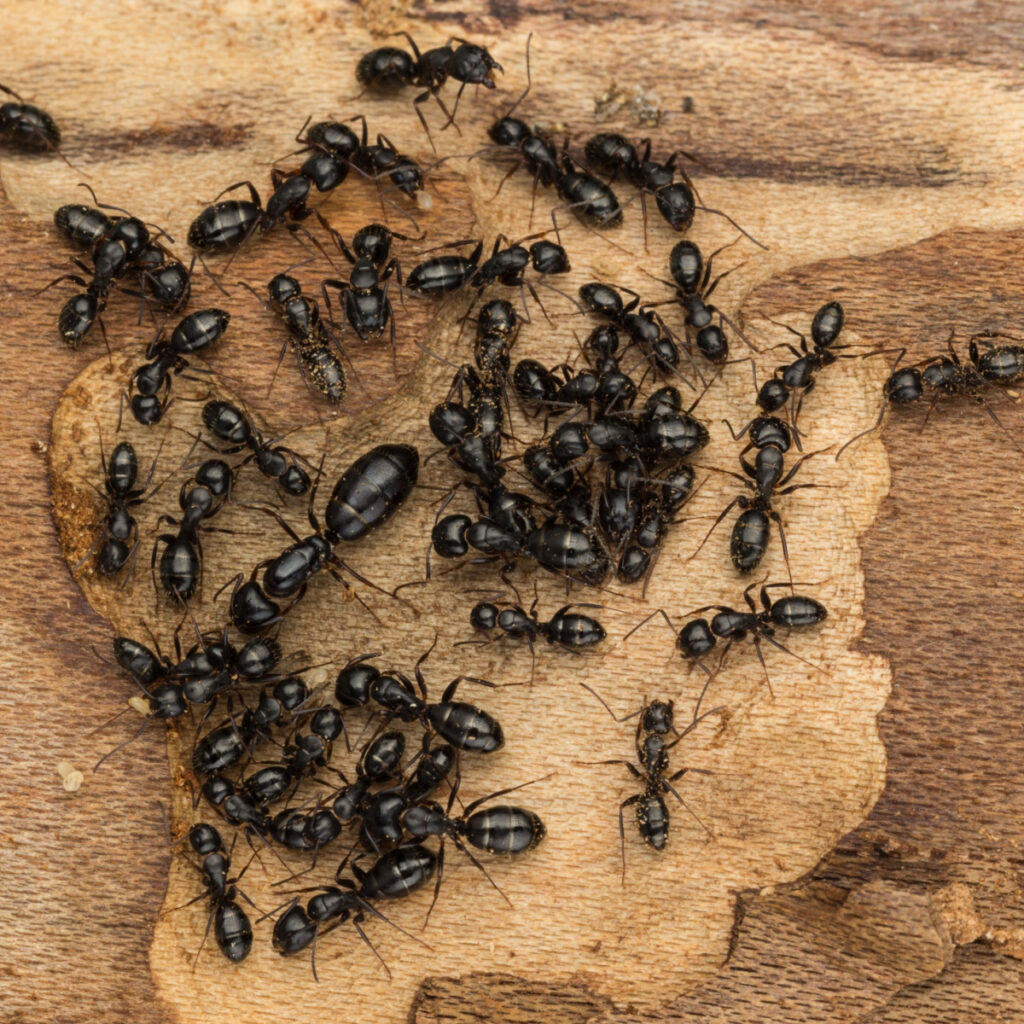
Looking for a way to stop carpenter ants from damaging the wood in your home, shed, barn and other outbuildings – and do it naturally without having to resort to harsh and questionable chemicals?
Carpenter ants can wreak havoc on the wooden structures around your property. Unlike termites, they do not feast on wood but rather use the structure for developing a home and expanding their colony. And as their population increases, so does the damage to the wood around your home and landscape!
Although there are commercial powders and sprays on the market that can eliminate colonies, they can be a bit scary. Especially when using around children, pets and even adults.

But here’s the good news – there are actually quite a few effective, safe and 100% natural methods to control carpenter ants. And – they eliminate the need for using commercial products. Not only can they take care of carpenter ants and the damage they cause in short order, they can also save you considerable money in the process!
Carpenter ants get their name from their incessant habit of building nests and carving tunnels in wooden structures. They do not intend to feast on the wood but merely use wooden structures to create nests and pathways.
They chew through the wood at an alarming rate, quickly turning it into a sawdust-like substance. In fact, one of the first hints that carpenter ants may be present is seeing piles of the wood remnant powder at the base of a structure.
In nature, carpenter ants serve a valuable purpose. They are an important part of the natural cycle of life, helping to break down and decay old trees and stumps into humus. But unfortunately, they also have an appetite for lumber. And around a home setting, that can cause serious trouble.

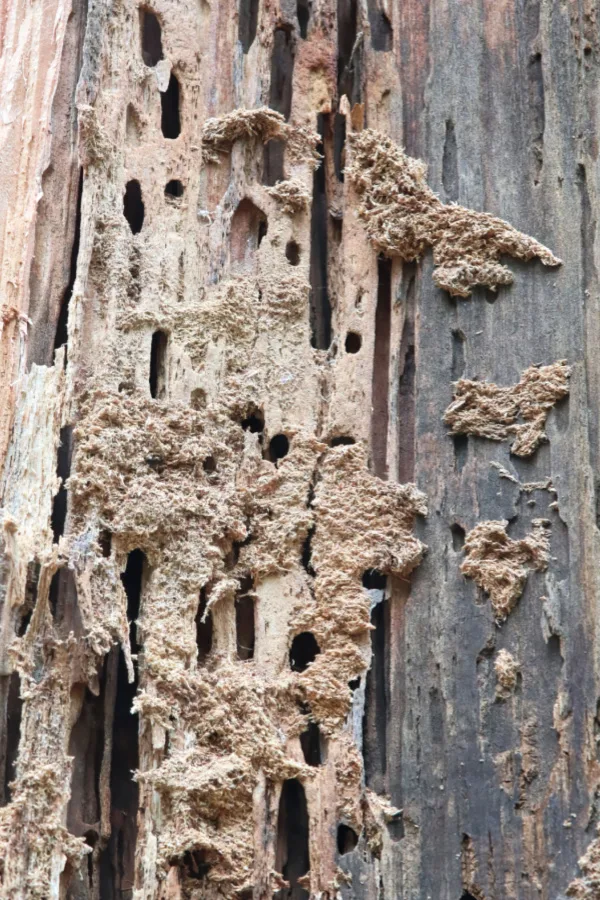
Unfortunately, the more and more they chew and build tunnels, the weaker it leaves the wood. If allowed to build long enough, they can completely destroy foundation beams, walls, trim and more. So much so that it can leave a building structurally dangerous over time.
First and foremost, it is important to control carpenter ants early on. The longer a colony is allowed to develop, the larger it will become and the more damage it will cause. In addition, the larger a colony becomes, the longer it can take to eradicate it
Inspect wood structures around your home often. Be especially careful to check down along foundations where carpenter ants like to find an easy entrance. Look for obvious signs of sawdust and ant activity – and when you see it, begin to treat the area immediately.
Believe it or not, one of the easiest and most effective methods of all for eliminating carpenter ants is by using a basic mix of all-natural liquid soap and water. This safe solution is not a deterrent for carpenter ants, but instead a powerful insecticide that eliminates them.
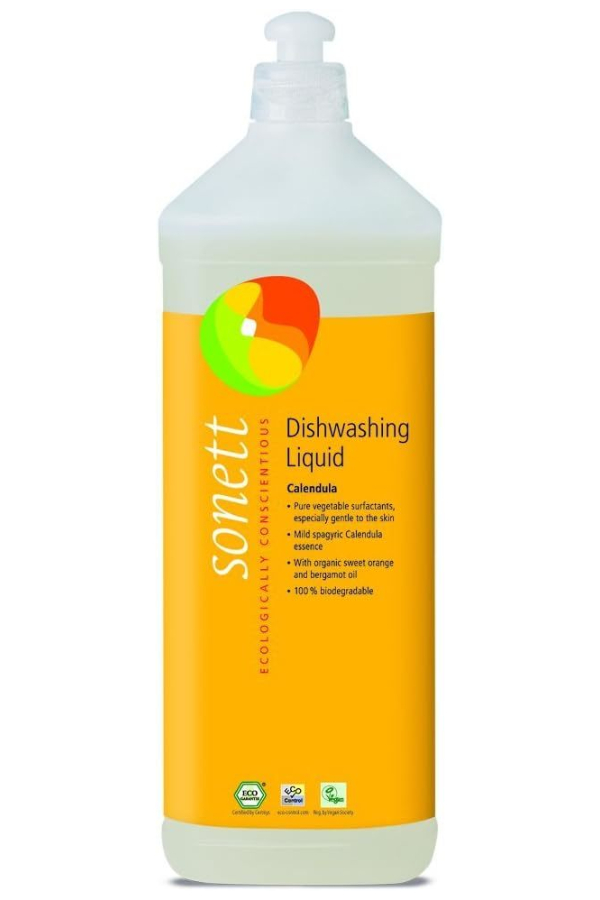
Soap blocks a carpenter ants ability to receive oxygen and interferes with their respiratory system. And by simply mixing liquid soap with water and spraying the ants and affected area, you can usually eliminate an entire colony within a week to ten days.
To make, create your solution with 3 parts water to one part liquid soap. Mix thoroughly and use a hand help spray bottle to apply. Spray the entrance and any affected areas you can get to thoroughly. Apply so the entrance is saturated with the spray and not just slightly damp. Product Affiliate Link : Sonett Organic Dishwashing Liquid
Repeat spraying daily. It is best to spray the area in the evening as the sun goes down. Carpenter ants are most active at night, and usually come out just as the sun sets. By spraying at this point, you can have the best chance of getting the ants coming and going.
Within seven to ten days, you should notice a considerable reduction in the carpenter ant population. Recheck the area a week or so later to make sure the colony has been eliminated.
Baking soda is highly toxic to carpenter ants and will kill them quickly when they ingest it. By itself, baking soda is not enticing to ants. However, when you mix it in with powdered sugar, which happens to be highly preferred, they will gladly consume the baking soda with it.
Mix up equal parts of powdered sugar and baking soda and place strategically at the entrance of the ant colony. If you cannot locate the entrance, place the mix where you see them traveling back and forth.
This method is especially effective for eliminating small colonies quickly. By eliminating the ants foraging, the colony usually dies out fairly fast.
Diatomaceous earth, or DE, is a 100% all-natural powder created from fossilized algae. The fossils are actually the remains of extremely small creatures that once lived in all ancient bodies of water. DE is actually effective against a long list of pests. See: How To Use DE To Battle Pests
Diatomaceous earth has sharp edges, which damage the exoskeleton of ants when they crawl over it. When it does, the ants dehydrate and perish.
To use DE effectively against carpenter ants, sprinkle it around their entrance and along any paths they travel. DE needs to be dry to be effective. Because of this, you will have to reapply any time it rains or when the powder becomes wet from dew or moisture.
Vinegar can be an effective natural solution to all kinds of issues around the home – including getting rid of carpenter ants!
When sprayed around a nest and along the trails where carpenter ants work, vinegar eliminates the pheromone trails that ants use to navigate. In the absence of pheromone trails, ants can’t find their way around, which then disrupts food supply and population growth.
By mixing equal parts of store-bought (4% to 5% vinegar) with equal parts of water, you can spray areas where the carpenter ants have been working. It not only will confuse and deter carpenter ants, it can serve as protection for future attacks as well, keeping carpenter ants from directing others to your wood surfaces.
Cinnamon works in two unique ways against all ants. First, ants detest the smell of cinnamon. They will usually try at all costs to avoid it. Because of that, by simply sprinkling a line of cinnamon in front of their colony, they won’t cross it either way. This eliminates food sources, and eventually, the colony.
However, if the ants do cross the line, the cinnamon dust they breathe will actually kill them. The dust is highly toxic to their respiratory system and leaves them unable to work and live in the colony.
One of the best ways to stop carpenter ants is keep them from arriving in the first place! Carpenter ants love moist locations and wood. To help prevent carpenter ants:
Here is to stopping carpenter ants in their tracks, and keeping your home and structures safe from their damage!
Follow Our Facebook Page For Great Gardening Tips And Advice! This Is My Garden Facebook Page
This Is My Garden is a garden website created by gardeners, for gardeners. Jim and Mary Competti have been writing gardening, DIY and recipe articles and books and speaking for over 15 years from their 46 acre Ohio farm. They publish three articles every week, 52 weeks a year. Sign up today to follow via email, or follow along!
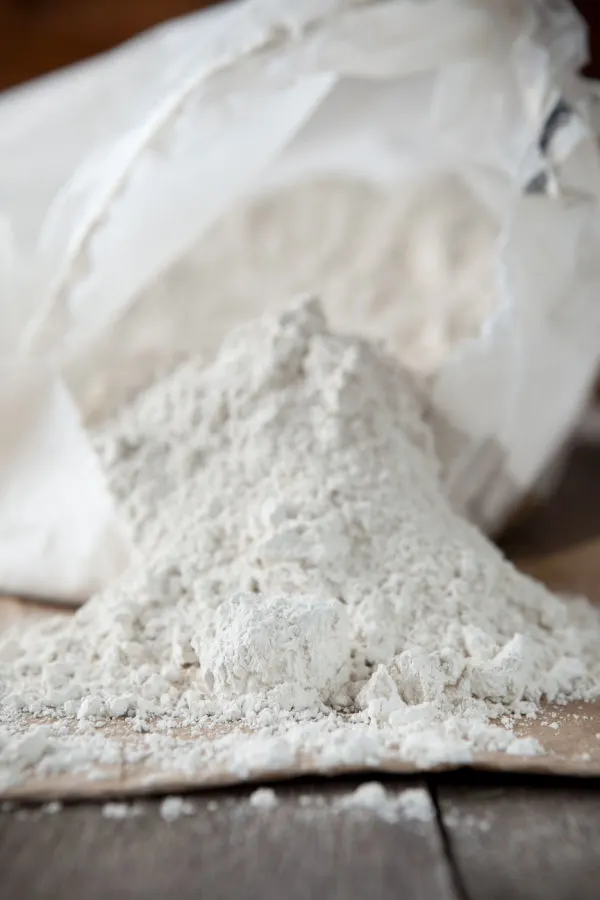
Did you know that one of the best ways to safely and effectively control an outbreak of pests in your garden, flowerbeds or lawn is with all-natural diatomaceous earth?
The list of insects that diatomaceous earth can help control is long and impressive. From aphids, slugs, ticks and cucumber beetles, to Japanese beetles, grubs, spiders and more – it can help gardeners successfully battle an insect invasion in short order. All without the worry of harming you or your pets!
So what exactly is diatomaceous earth? Diatomaceous earth, or DE as it is commonly known, is a powder that consists of fossilized algae. The fossils are actually the remains of extremely small diatoms. These tiny creatures once lived in all types of bodies of water – from streams and rivers, to even large lakes and oceans.

The majority of the algae broke down into what is now silica and is a very common substance on Earth. How common? Silica makes up over a quarter of the Earth’s surface! And as it turns out, the silica and powdery makeup of diatomaceous earth can be very fatal to a wide variety of garden pests, all while being non-toxic to humans and pets!
So how does DE work on pests? In general, the silica powder cuts into the soft bodied skin of insects as they crawl over it, or as it is sprinkled on top of them. When this occurs, the cuts to their bodies dehydrate the insects. In short order, it leads to the insect perishing.
DE actually has a wide range of uses both commercially and at home. In addition to helping to control insect populations, it can be a great weapon against moles in your yard. DE won’t actually kill moles, but it kills the grubs moles look for. And once the grubs are gone – the moles leave too!
DE can also be spread out on your soil and worked in to help break up heavy soils. Not only does it help to keep the soil from being overly clayish and hard, it also allows it to then absorb water and nutrients more easily.
Finally, DE powder can also be used to deodorize compost piles and keep them free of smells. It will also help to kill off gnats and flies that tend to congregate around working compost piles. And more good news – it doesn’t harm earthworms that might be working your pile in the least!
First and foremost, when using DE in your garden, flowerbeds or lawn, you want to make sure your are using “food-grade” diatomaceous earth. It is non-toxic and completely safe to humans and pets, but luckily for gardeners, quite fatal to garden pests. Affiliate Product Link: HARRIS Diatomaceous Earth Food Grade, 10lb with Powder Duster
There are many types of DE available, and many contain added chemicals, pesticides and other additives that can make them unsafe for using around plants – especially ones you may be growing for food.
Food grade DE, however, is all natural. As with any powdery substance, even though it is non-toxic, continuous inhalation can irritate the lungs and nasal canal. For this reason, using a dust mask and gloves when applying DE is always best.
Diatomaceous earth can quickly help to eliminate pest issues when either sprinkled on the soil around plants for ground dwellers, or on the leaves of plants for pests that climb aboard to do their damage.
For starters, when using DE, only use in dry weather. If diatomaceous earth comes in contact with water or gets moist, its sharp edges dull and it won’t kill the pests. Once it gets wet, it will need to be reapplied to be effective.
Depending on each application, the exact way to use diatomaceous earth varies. With that in mind, here is a look at some of the best ways to use DE in your landscape, along with specific instructions for each pest or issue you are trying to control.
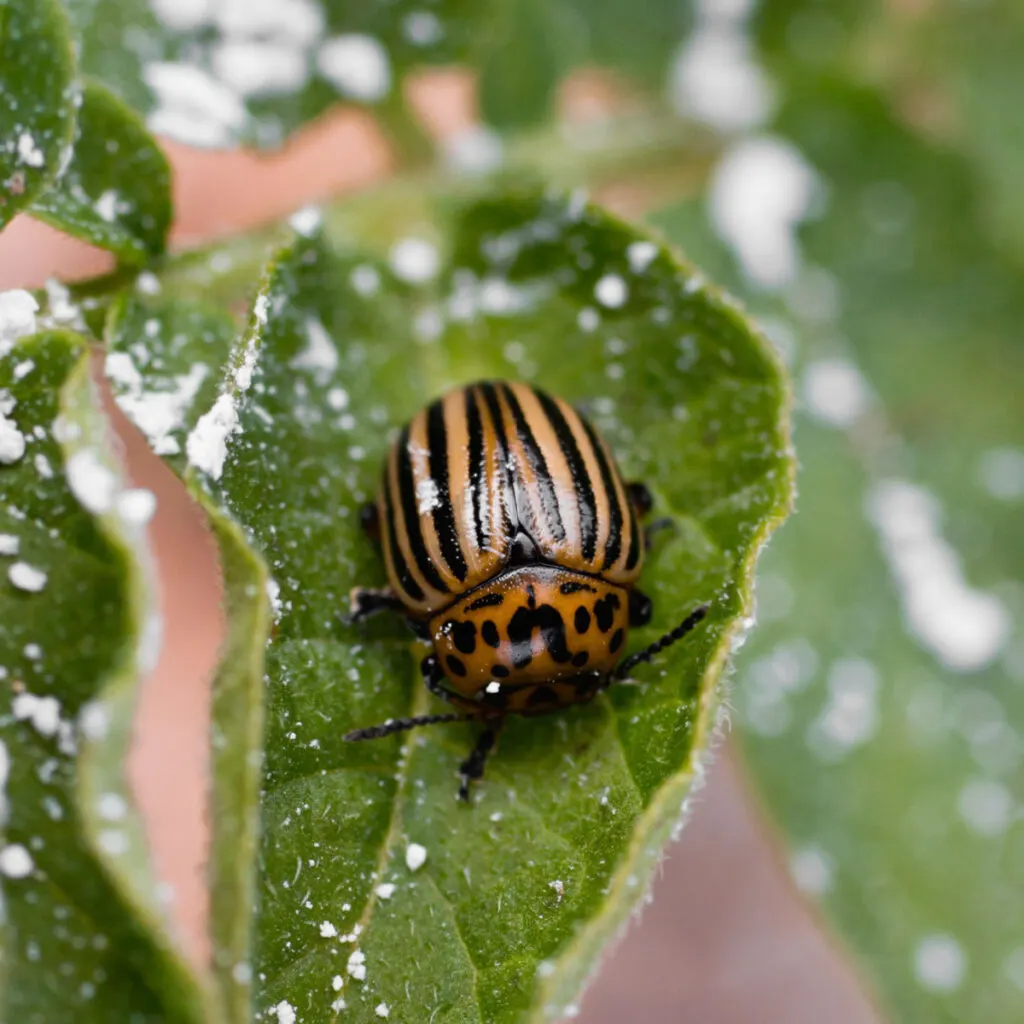
When using on vegetable or flower plants to control against beetles, dusting the foliage is the way to go. This can be effective against both adult Japanese beetles and cucumber beetles.
Once the two pests come in contact with the powder, they suffer from cuts that eventually kill them. Again, you will need to reapply if rain or heavy moisture hits the leaves as once it is wet, it will lose all of its effectiveness.
Aphids eat the leaves of plants and live on all sides of the plant. For effective control, dust the leaves and stems with diatomaceous earth. To do this effectively, it is best to use a powder sprayer. This allows the dust to cover evenly and lightly at all angles.
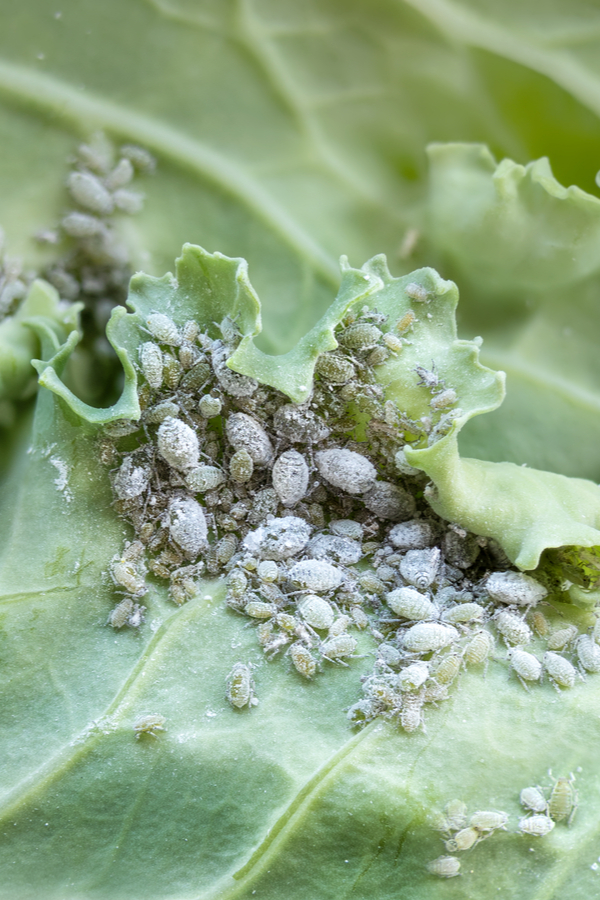

For aphids, that is important as the underside of the leaves is where they hide. Once aphids come in contact with diatomaceous earth, it will inflict cuts on them, and they will die without consuming the leaves.
Grubs can prove fatal for gardens, flowerbeds and lawn with heavy infestations. The good news is that diatomaceous earth can certainly help when it comes to minimizing heavy populations of grubs fairly quickly.
For grub control in the soil, sprinkle ½ cup of DE for every few feet of soil space. Next, mix the DE into the soil with a garden fork or rake. The diatomaceous earth will pierce the wax-like outer skin of grubs as it comes in contact with them, drying out their skin in the process.
DE can also be highly effective against ticks when dusted on lawns. It kills the ticks fast and can help in the fight to keep ticks off of you and your pets. See: How To Control Ticks With Ease
Diatomaceous earth doesn’t actually kill snails or slugs. However, you can use it to protect your plants from them quite easily by using it as a barrier. Slugs and snails won’t cross DE to access plants. Because of this, sprinkling it around each plant or circling entire planting areas can keep them far away.


To be effective, make sure that it stays in a dry protective ring. When it is moist, the snails and slugs are able to cross the paste-like mixture with ease. You will need to reapply a dry coating after rains or heavy dew.
There are a couple of ways to control ants with DE. If you are lucky enough to find the source of the colony, you can eliminate it quite quickly with DE. Sprinkling the powder on and around the ant hill will eliminate any ants as they come or go.
If you want to avoid spending time finding the colony of ants, it is best to sprinkle it around the plants invaded by ants. It will eliminate the ants that come in contact with the powder within 12 to 24 hours.
Diatomaceous earth has a porous structure. Consequently, the porous structure helps it absorb any foul odor like that of rotting compost or organic waste. It can also absorb the odor of cat or dog litter too.
Eliminating odor using diatomaceous earth is simple. Simply mix diatomaceous earth into the top layer of the compost using a garden fork. This will effectively get rid of any foul smells – and will also have the benefit of killing in flies or gnats and their larva that can be in the pile as well.
One thing is for sure, diatomaceous earth can be quite the effective tool for your garden and landscape when used right. Rather than using chemical-based pesticides, this natural powder can effectively keep pests from ruining your flowerbed and garden plants.
It is important to note that DE should be used only when needed, as it can also kill beneficial insects such as honeybees, butterflies and more. If you only have a few pests, it is better to allow nature to run its course that always reaching for DE. As with everything, moderation and balance are the true key to ultimate success! If you are looking for more natural pest-deterrant methods, be sure to check out The Best Marigolds To Grow To Repel Pests, Attract Pollinators – And Add Big Color!
Follow Our Facebook Page For Great Gardening Tips And Advice! This Is My Garden Facebook Page
This Is My Garden is a garden website created by gardeners, for gardeners. Jim and Mary Competti have been writing gardening, DIY and recipe articles and books and speaking for over 15 years from their 46 acre Ohio farm. They publish three articles every week, 52 weeks a year. Sign up today to follow via email, or follow along!