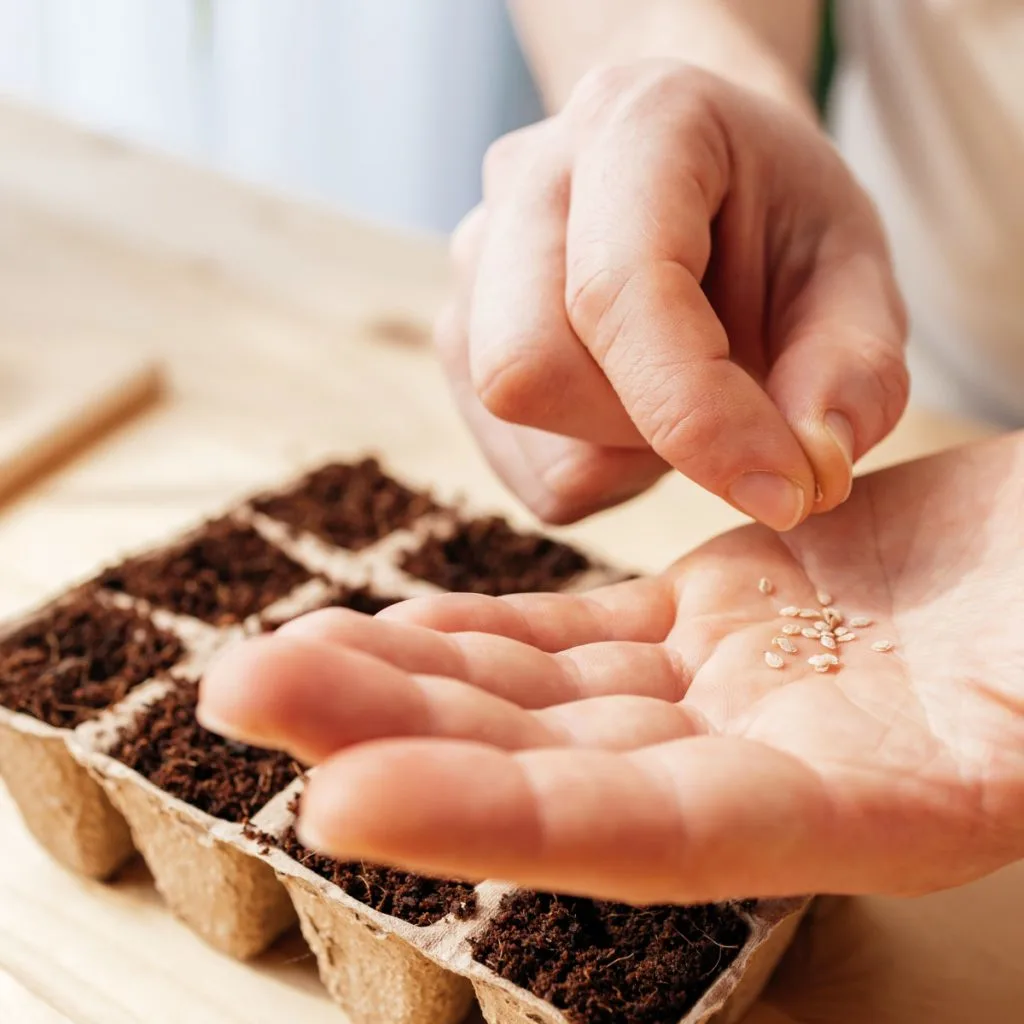
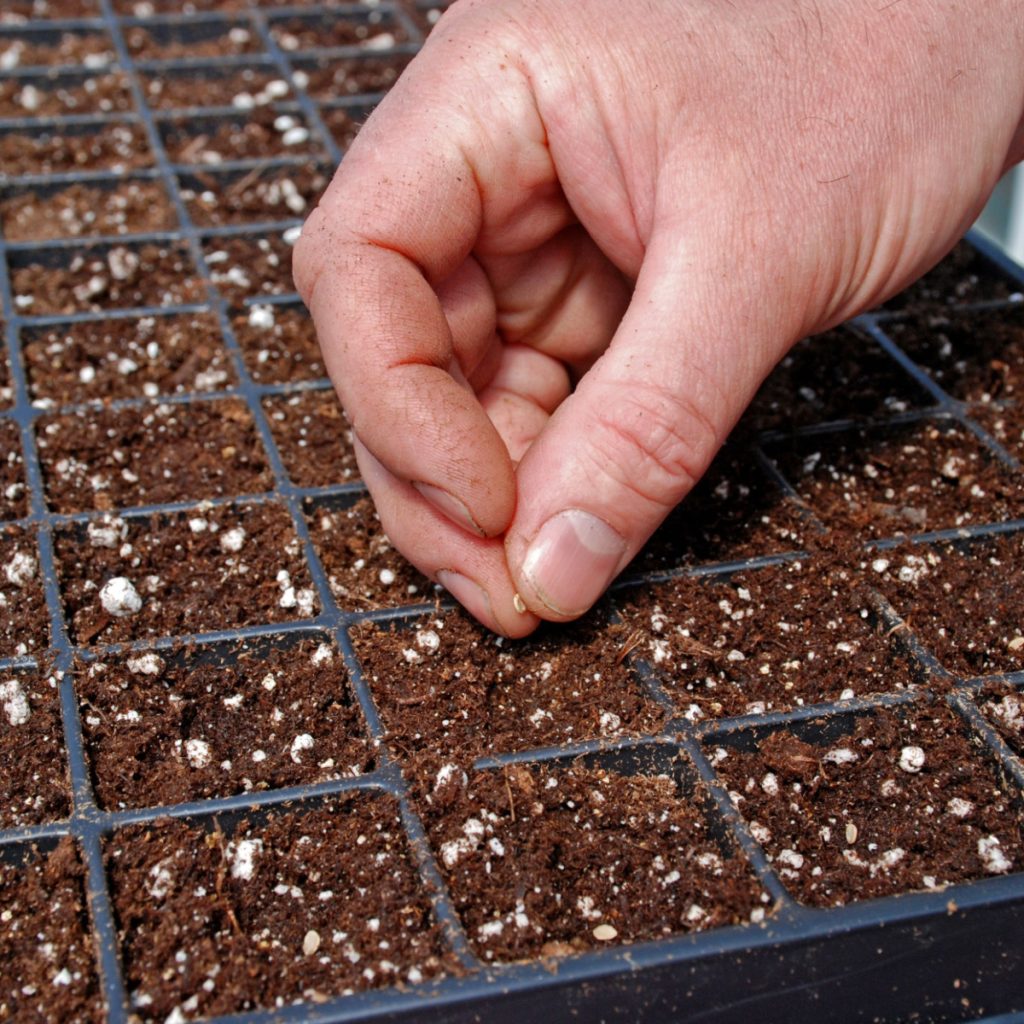
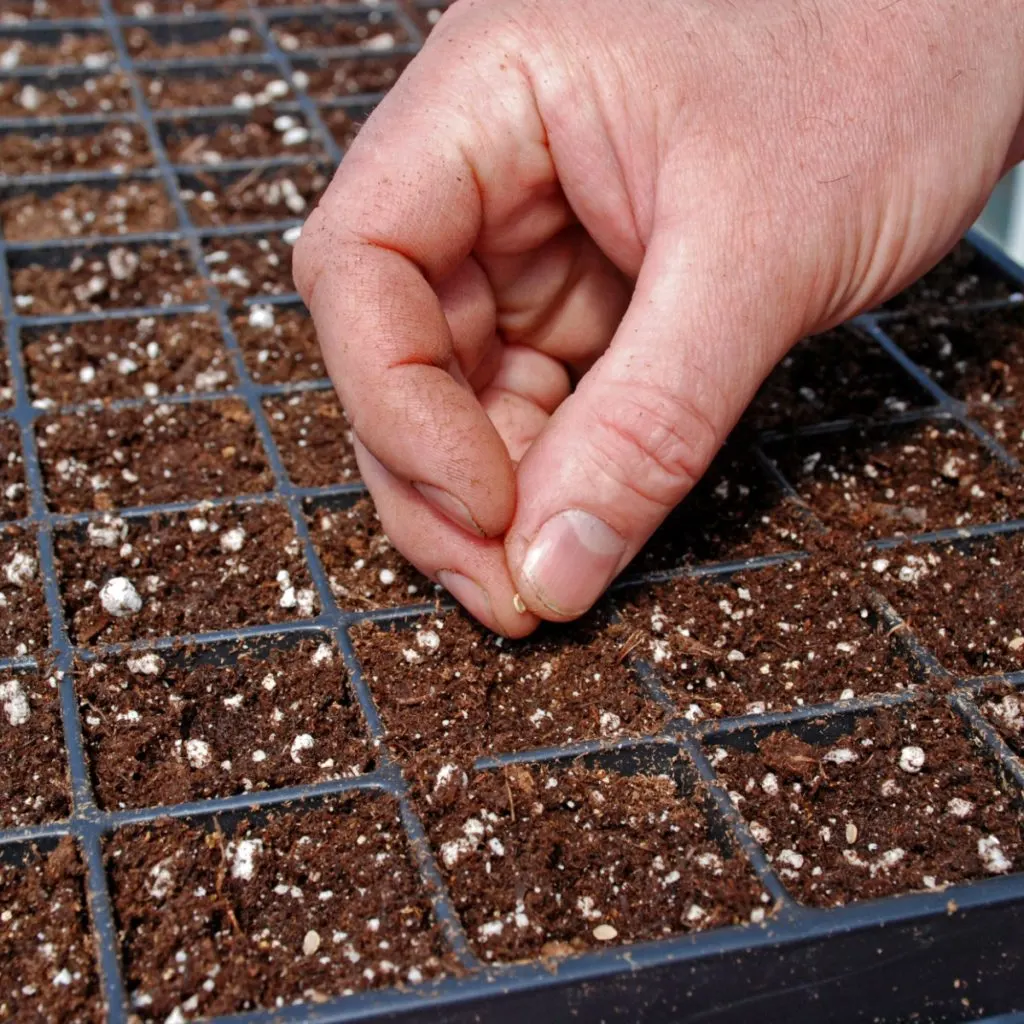
Starting your flower and vegetable plants from seed is a great way to save money, and grow all kinds of new varieties of plants that can’t be found in traditional stores. And everything you need to get started is right here on this page!
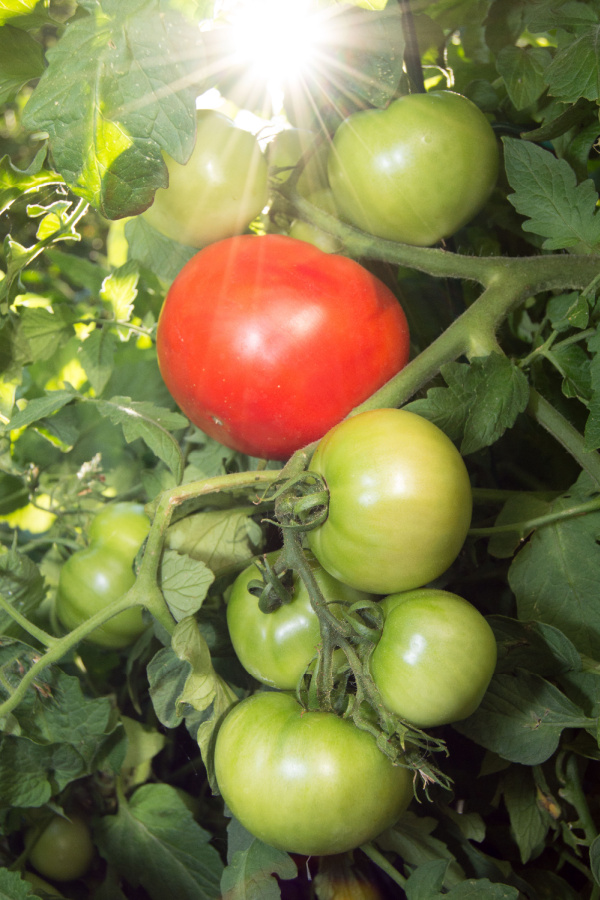
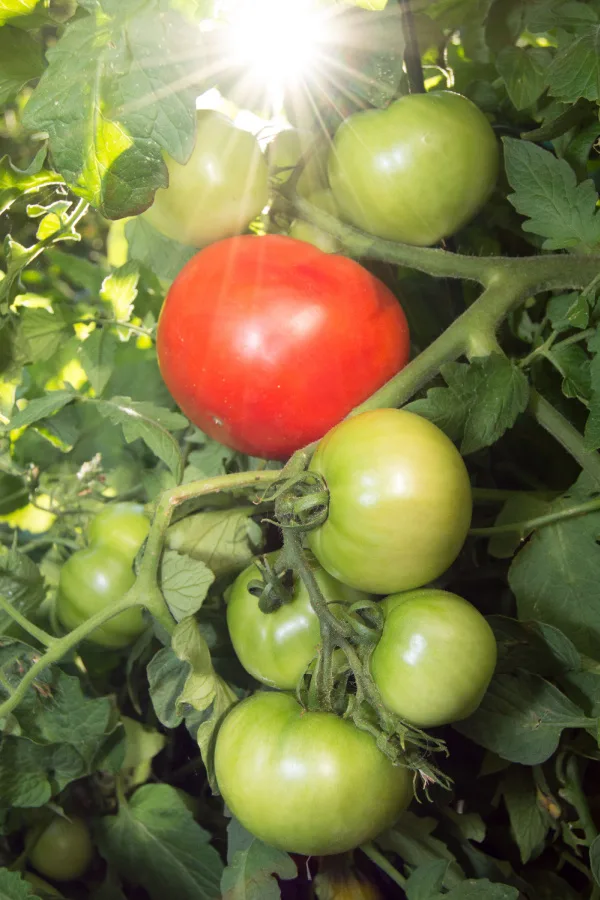
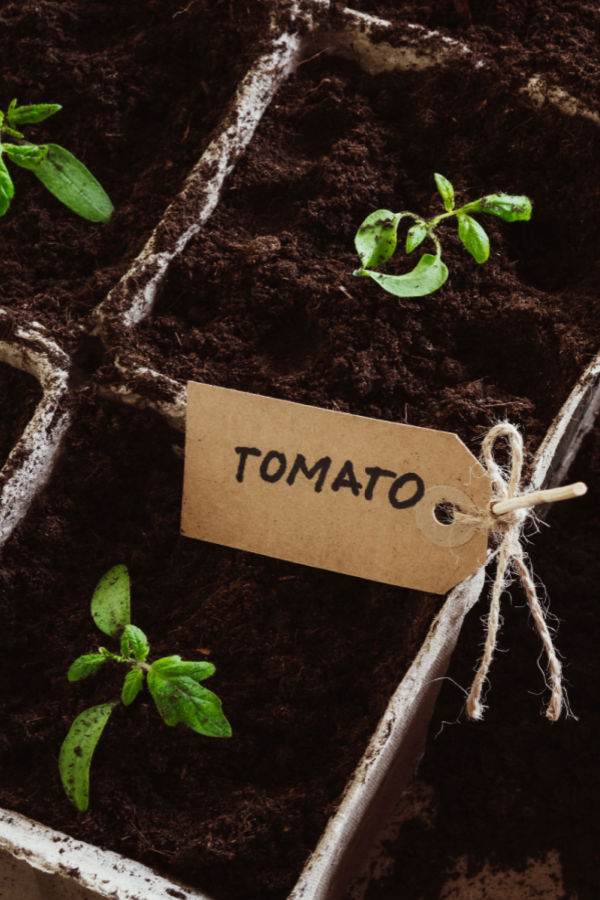
Want to know the perfect time for starting your tomato seeds indoors to have great transplants ready for planting day?
If there is one task that gardeners often worry about more than any other in late winter, it’s trying to figure out when to start their tomato plants indoors from seed at just at the right time. Unfortunately, if you start your seeds indoors too early, it can create all kinds of issues.
Quite often, it forces gardeners to transplant their seedlings into larger containers. In addition, it becomes more and more difficult to get your plants the proper light, let alone find enough space indoors to keep the massive jungle of plants alive and well.
Knowing just the right time to plant your tomato seeds indoors is critical for having great transplants ready for planting day outdoors.
However, it can be just as frustrating if you start your seeds too late. If plants are still weak and small, they simply can’t handle the stress of going into the garden outdoors. And even if they somehow survive, it can delay a tomato harvest by weeks – and certainly lower yields as well.
So how do you get it right? The solution is actually easier than you might think! Success really comes down to following one basic timing formula – and then making sure you have the right lighting in place indoors to help control and regulate the growth of your plants until they are ready for planting day.
How To Know The Perfect Time To Start Tomato Seeds
Know Your Average Last Frost Date
The very first key to success is to find out your specific areas last average spring frost date. This date will be the normal time your location gets a light frost or freeze for the last time in the spring. But, it’s also important to realize that this is not a guarantee for when you can plant.
This date is only the average date for a last frost. However – it’s a great starting point for knowing when to start your seeds. One thing is for sure, it’s best to never use this date to actually plant your transplants outdoors!
One of the biggest mistakes gardeners make is planting too early in the growing season. Even if you avoid frost, the soil is simply too cold early on for plants to develop. As we will cover later in the article, the actual date you want to plant outdoors will be several weeks after your average last spring frost date.
The last thing you want to do is have your tomato plants hit by a frost. That is why planting far after the average last frost date is a must.
So how can you find your last frost date as your starting point? One of the best resources around for this is the Farmer’s Almanac website. Simply type in your city or zip code and it will instantly tell you the last average spring frost. It will even give you the first average fall frost for your area too! See: Farmer’s Almanac First and Last Frost Dates
A Simple Formula To Know When To Start Tomato Plants Indoors
Now that you have your last average frost date in hand – it’s time to use a very easy and simple formula for knowing when to start your seeds. Simply take your average last frost date and subtract seven (7) weeks from it. This is the day you want to start your seeds indoors. Here is how and why the formula works:
On average, it will take tomato seeds about one week to germinate. It then takes about eight full weeks of growing before they are big enough to be healthy, strong transplants. This accounts and leaves enough time for strong indoor growth as well as time outdoors to harden your tomato plants off before planting day.
Using the timing above, you need to have nine weeks of growth from the day you plant your seeds. So why start them only seven weeks before your last average frost? Because you actually want to aim to plant outdoors two weeks after your areas average last frost date.
Listen To Our Podcast Below On Hardening Off Seedlings!
Getting Your Planting Date Perfect
As an example, if your average last frost date is May 14th, you will want to aim to plant outdoors on May 28th. By counting back nine weeks from May 14th and starting seeds on the 26th of March, your plants will have 9 full weeks of growing and be ready to rock!
Allowing an extra two weeks for plants to grow after the average last frost day lets the soil warm up. And warm soil is vital to strong, early root growth. But that additional two weeks also greatly helps lower the risk of plants getting hit by a late frost.
Proper Indoor Lighting
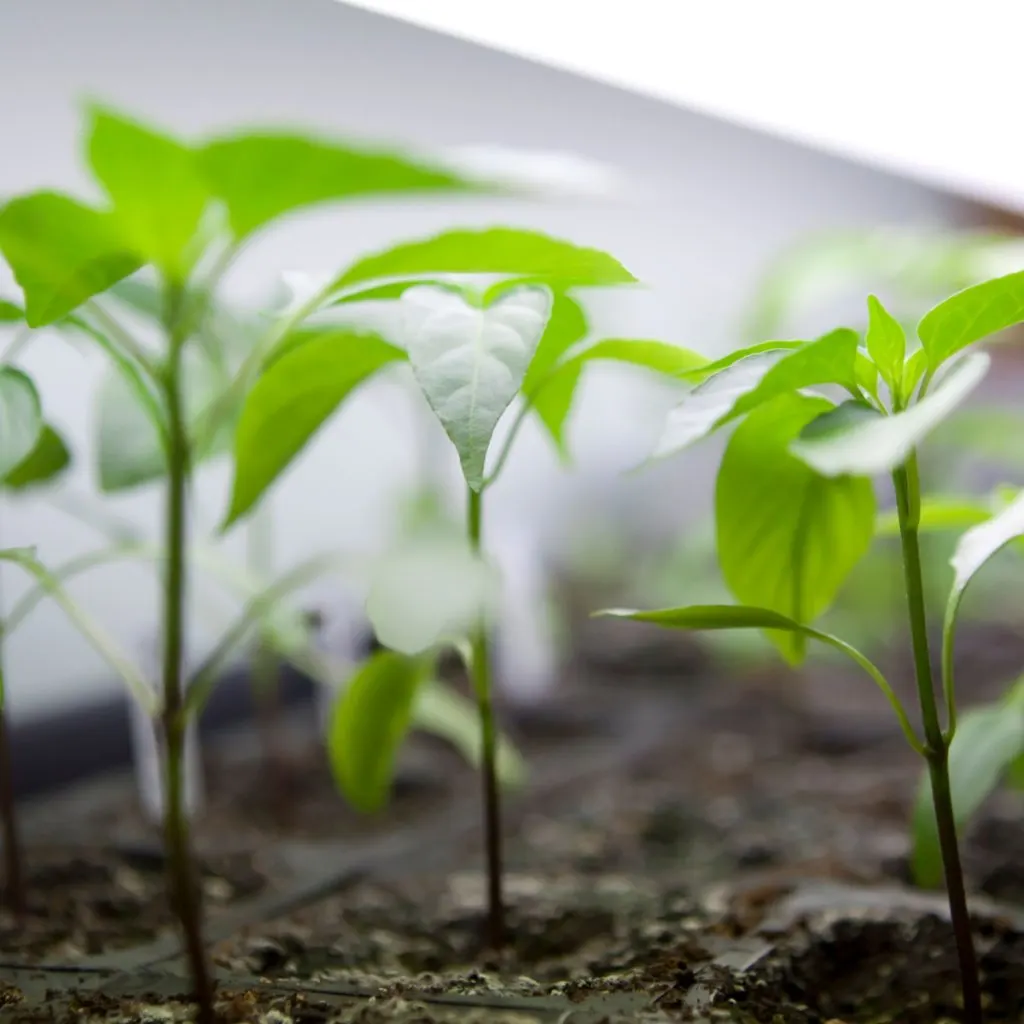
Last but not least, to get your plants to grow both strong and steady while indoors, it’s important to provide your indoor seedlings with a proper source of light. Strong, steady light will keep plants on track perfectly for 9 weeks of growth. And for tomato seedlings, that means artificial light and not light from the sun.
Growing in windows or sunny rooms will not allow your plants to develop correctly. Instead of strong, healthy transplants, you will end up with crooked, weak, long-stemmed plants that spent their weeks indoors stretching for the far away sun.
Window light will usually produce skinny, weak and feeble seedlings – which is exactly why artificial light is a must.
By using simple LED or fluorescent lights a few inches over your seedlings, seedlings will grow strong, steady and healthy. You do not need expensive grow lights, but you should be placing your plants under artificial lighting twelve to fourteen hours each day. See: The Best Lights To Use For Starting Seeds Indoors
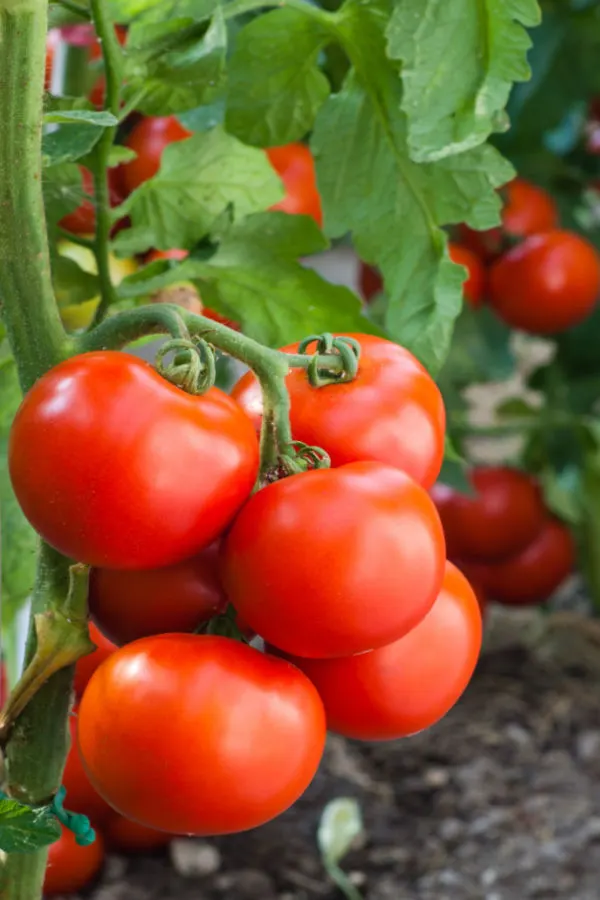
This simple approach of starting seeds while giving them perfect lighting will all but ensure tomato plants that are strong and healthy for planting day. Here is to knowing just when to start your tomato seeds indoors. And, of course, to growing your best tomato crop ever this year!
This Is My Garden is a garden website created by gardeners, for gardeners. Jim and Mary Competti have been writing gardening, DIY and recipe articles and books and speaking for over 15 years from their 46 acre Ohio farm. They publish three articles every week, 52 weeks a year. Sign up today to follow via email, or follow along!
Starting Seeds
Looking for a few seed crops that you can sow early in the spring to get a jump on this year’s garden season?
By early spring, most gardeners are more than ready to start growing something. But even though it may be a bit cold to start planting tomatoes, corn and peppers outdoors, it doesn’t mean you can’t plant a few crops that actually thrive in cooler weather.
Most vegetable plants require warm soil and air temperatures to survive and grow. Tomatoes, for instance, need the soil temperature to be at least 60° to 65°(F) to properly establish and grow. In addition, if the air temperature drops below 40°(F), they can be in danger of frost or freeze damage.
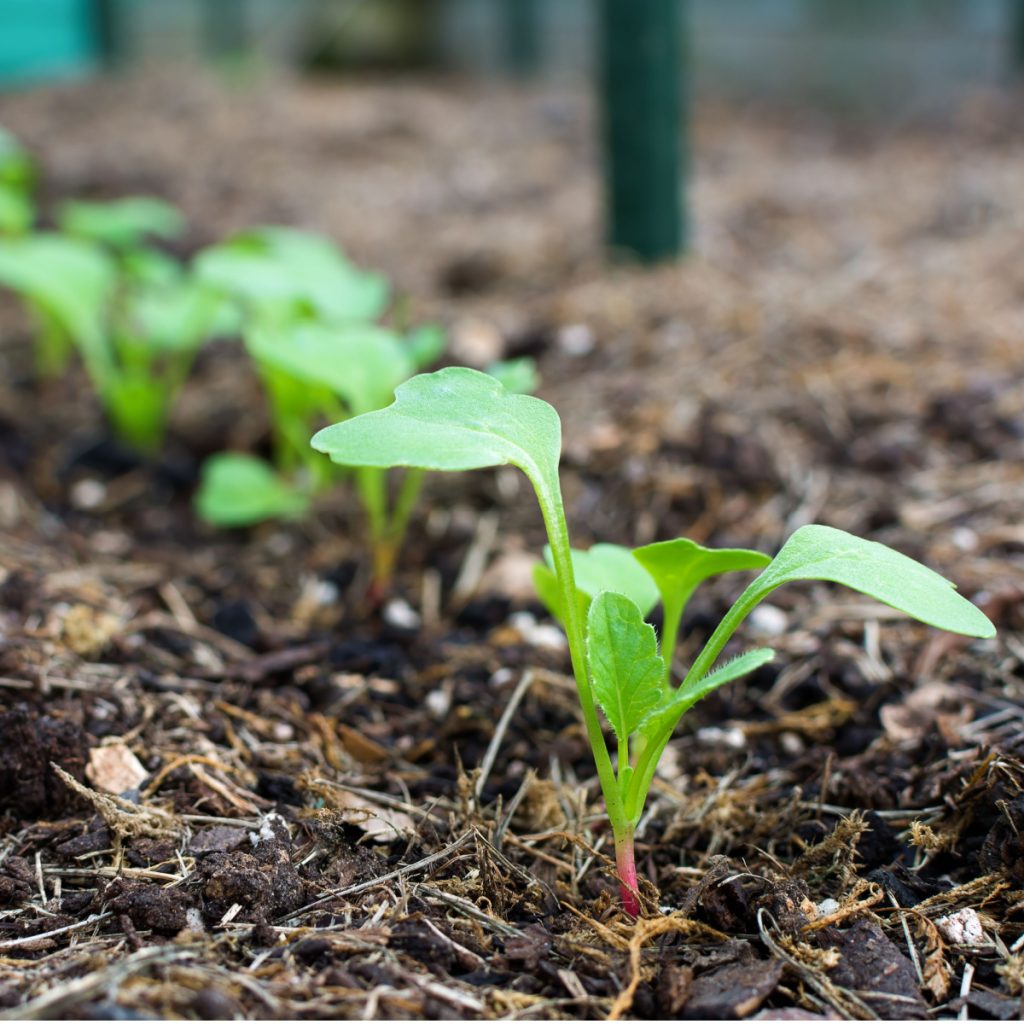
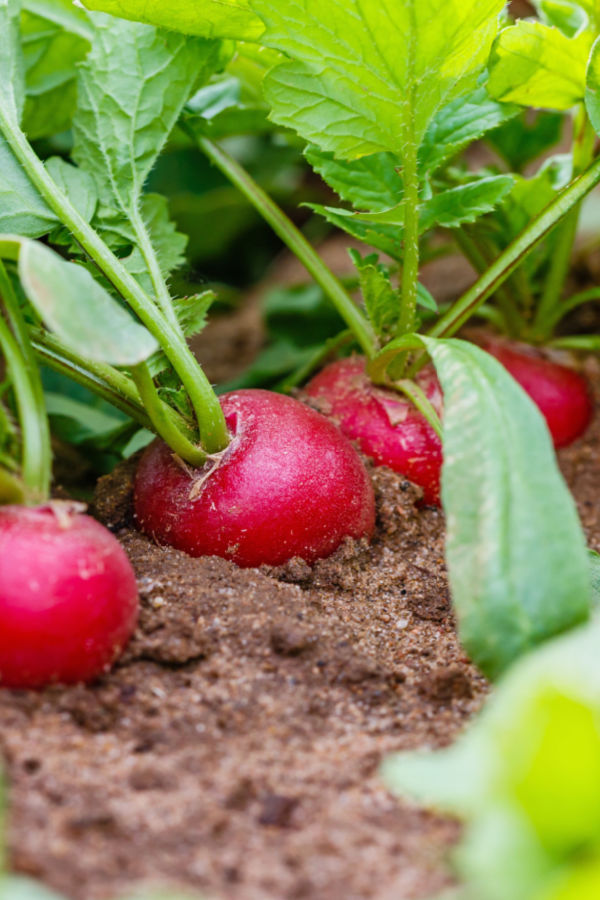
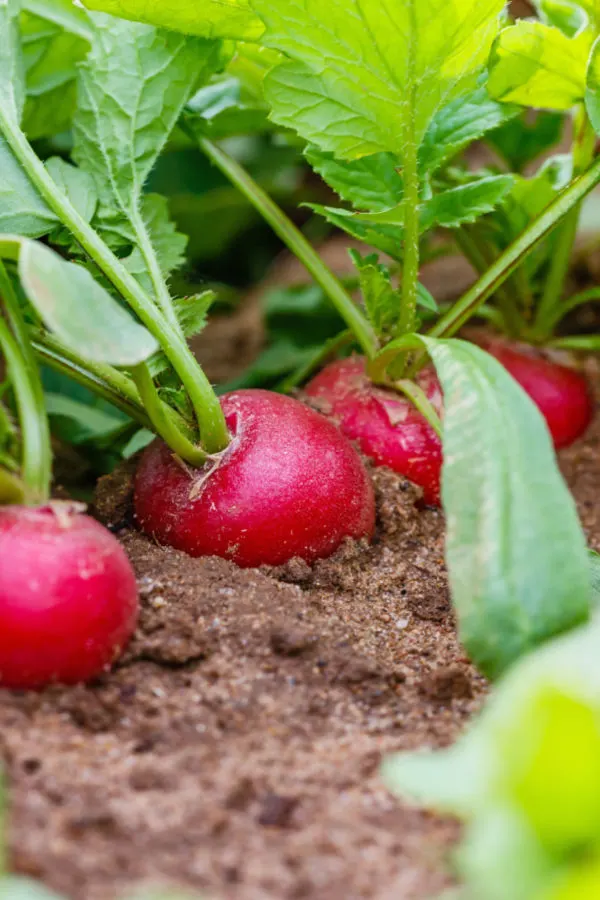
Radishes are an excellent example of seed crops that can go in the ground early.
But with early spring seed crops that just isn’t the case. As you will see below, many crops such as sugar snap peas, radishes, kale, and more can be planted in cool soil with success. And, these same crops can also handle cool air temperatures as well.
In fact, many early season seed crops can handle nights when the thermometer even drops below freezing. And that is exactly why they are perfect for planting early in the garden season!
The Best Seed Crops To Sow Early In The Spring
Planting Sugar Snap & Snow Peas In Early Spring
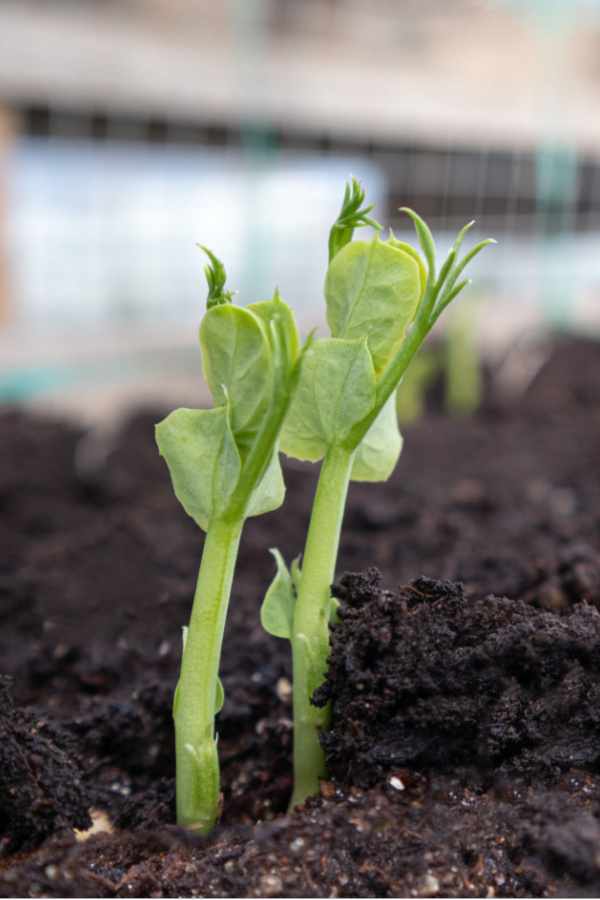
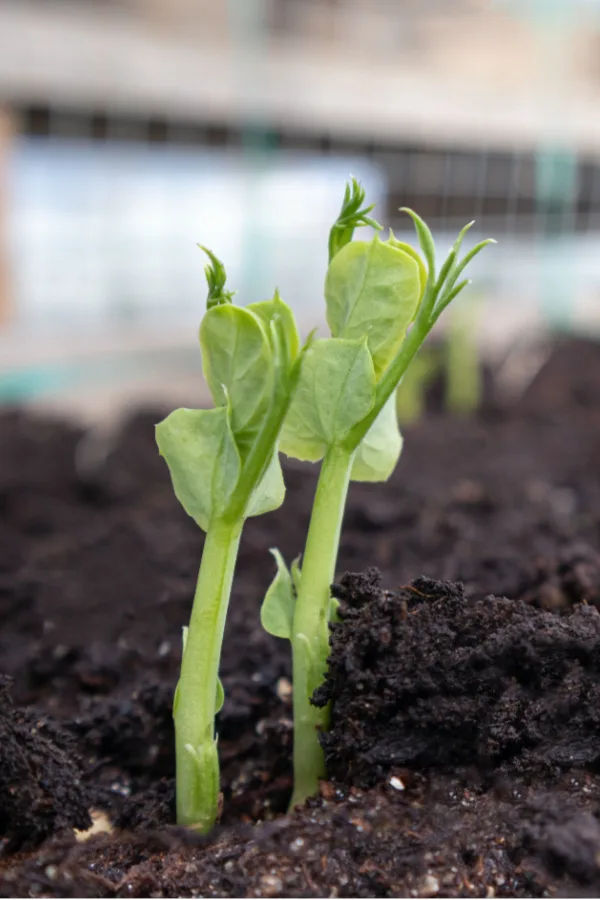
No spring seed planting would be complete without growing a delicious crop of sugar snap peas, snow peas, or both! Both are loaded with vitamins and minerals – and do they ever love growing in the cool air of spring.
Sugar snap and snow peas are ready for harvesting as soon as their pods mature and fill out – and that can be in as little as 45 to 55 days. Seeds can go in the ground as soon as the soil is able to be worked – and the temperature reaches at least 50 degrees Fahrenheit on average. The good news is young pea seedlings can even handle a bit of frost.
Sow seeds 3/4 to 1 inch deep in fertile, well draining soil. Providing support with a small fence, chicken wire or trellis will help keep the tasty peas off the ground and out of danger. This will also make harvesting a much easier task. Affiliate Seed Link: Organic Sugar Snap Pea Seeds
To keep a steady supply coming on through spring, plant a second crop a few weeks after your first. Peas will bolt in the summer heat, so grow them while you can! See our article: Growing Sugar Snap Peas Like A Pro
How To Sow Radish Seed Crops In Early Spring
Radishes are another prime early season grower. And they go from seed to harvest in a flash. You can plant and harvest some varieties in as little as 28 days, while others can be ready in six weeks or less. Even better – they can go in the ground as early as three to four weeks before your last frost!
When it comes to variety, you can find radishes in a wide range of sizes, shapes and flavor profiles. From mild to spicy – and even a little sweet, there is a radish type for everyone. They also happen to be easy to plant as well.
Plant seeds 1/4 inch deep in loose, fertile, well-draining soil. Prior to planting, amend the planting row with compost to help power the seeds and loosen the soil. Thin the seeds after they sprout to allow to grow to full size. Affiliate Seed Link: Cherry Belle Heirloom Radish Seeds
Radishes grow well in the cool spring soil. They also grow fast, maturing in about a month’s time for harvesting.
One thing radishes like is steady moisture. It’s important to water them if spring rains are not falling. You can plant a new row of seeds every 2 weeks to keep a steady supply of radishes coming on strong all spring.
Planting Early Season Spinach
Spinach loves cool weather and soil, making it another perfect early spring seed crop to sow. Much like radishes, spinach germinates and grows fast. In fact, you can harvest some varieties of spinach in as little as three to four weeks.
Spinach can be planted early in the growing season, up to 4 to 6 weeks before your area’s last frost date. Sow spinach seeds directly into the soil 1/4 to 1/2″ deep. Space seeds two inches apart when planting. Affiliate Link: Organic Spinach Seeds – Bloomsdale Long Standing Spinach
Young, tender spinach leaves can be harvested when they reach two to three inches in height. You can also allow the spinach to grow a bit larger for a more mild flavor. Reseed every two to three weeks to keep a continual supply coming on.
Listen In To Our Podcast Below On Planting Seeds Early!
Growing Kale Early
Kale is one of the healthiest crops you can grow in your garden and is versatile in the kitchen. It is perfect for salads, soups, or making deliciously healthy chips for snacking. Even better, it is one of the best seed crops to sow and grow from seed in early spring.
Kale is another vegetable that actually grows and develops better flavor during the cooler weather. You can sow kale about 4 weeks before your area’s last frost date. Much as with most leafy crops, fertile, well-draining soil is a must.
It’s hard to beat the flavor and freshness of a home-grown, just-picked salad. And there is no better way to grow your own than with a great loose-leaf lettuce seed mix. Loose leaf seed mix varieties germinate quickly and grow fast in the cool, early-spring weather.
How fast? Many can be sown and harvested in as little as 28 days! Sow seed 1/4 to 1/2″ deep and harvest by cutting as needed. Lettuce can be cut again for several harvests as it grows back. Affiliate Seed Link : Burpee Looseleaf Blend Lettuce Seeds
This Is My Garden is a garden website created by gardeners, for gardeners. Jim and Mary Competti have been writing gardening, DIY and recipe articles and books and speaking for over 15 years from their 46 acre Ohio farm. They publish three articles every week, 52 weeks a year. Sign up today to follow via email, or follow along!
Starting Seeds
Looking for the best way to start your tomato plants from seed indoors – and have amazing transplants ready in time for your raised beds or garden this year?
Not only is the process of growing your own plants from seed fun and extremely rewarding, it can lead to stronger plants and far better results than when using store bought transplants. And contrary to what many may think – the process can be quite economical and easy.
But even more, growing from seed lets you have control of your plants right from the start! You have the opportunity to give your plants exactly what they need all along the way – and make sure they get the exact care they need before they go in the ground on planting day.
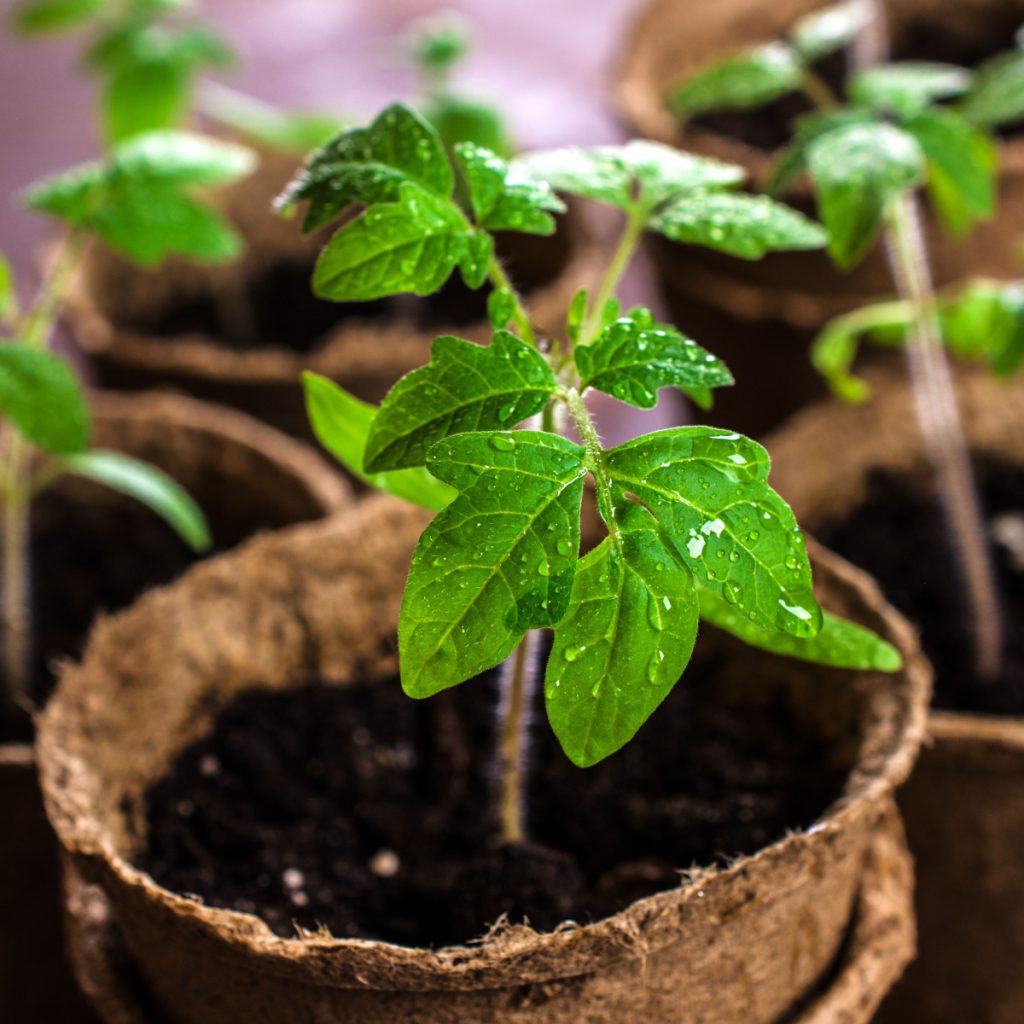
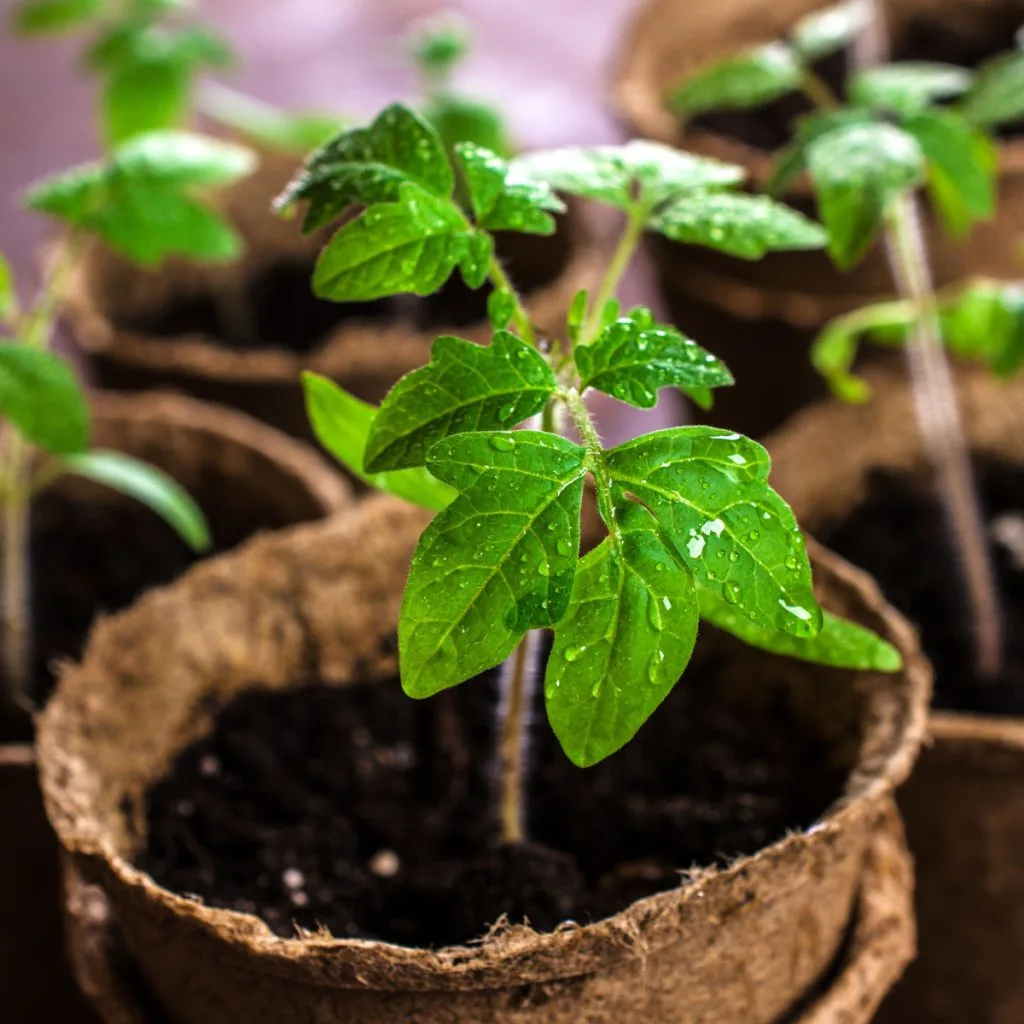
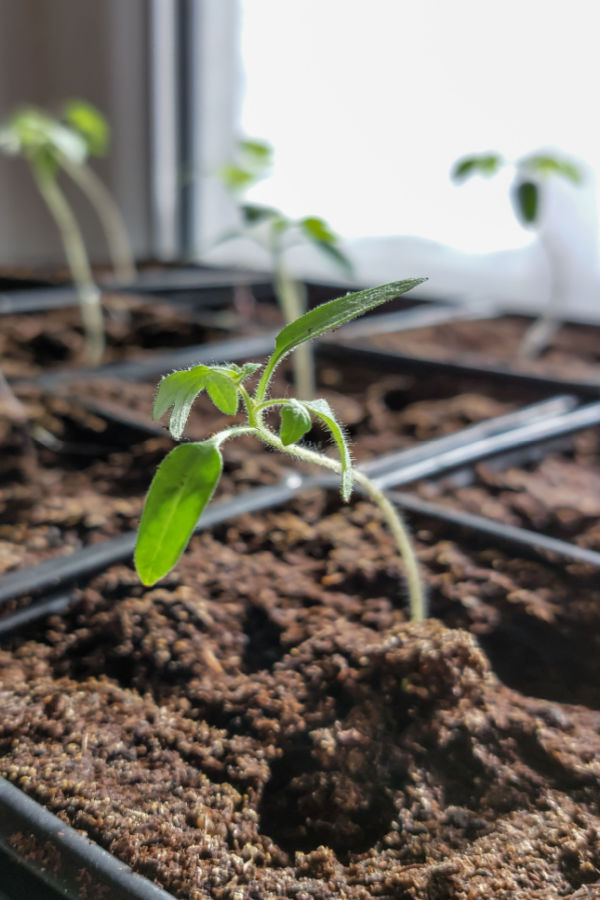
Growing your own tomato transplants is easy – especially when you follow a few simple tips that help them to grow strong roots and thick stems!
Even better – growing your own plants from seed can help save big on a gardening budget. Let’s face it, tomato plants can be expensive to purchase each and every spring. But seeds are far less expensive. Especially when you save them for multiple years.
But here is the best news of all – growing tomatoes from seed couldn’t be easier. As you will see below, it doesn’t require fancy lights or equipment. Nor does it have to be time consuming. In fact, by following four simple secrets – anyone can start and grow amazing tomato transplants in their home with ease!
The Best Way To Start Tomato Plants From Seed Indoors
#1 Start Your Seeds In The Right Soil
Just like tomato plants, tomato seeds need great soil to grow healthy and strong. If you plant your seeds in less than ideal soil, you will get less than ideal results.
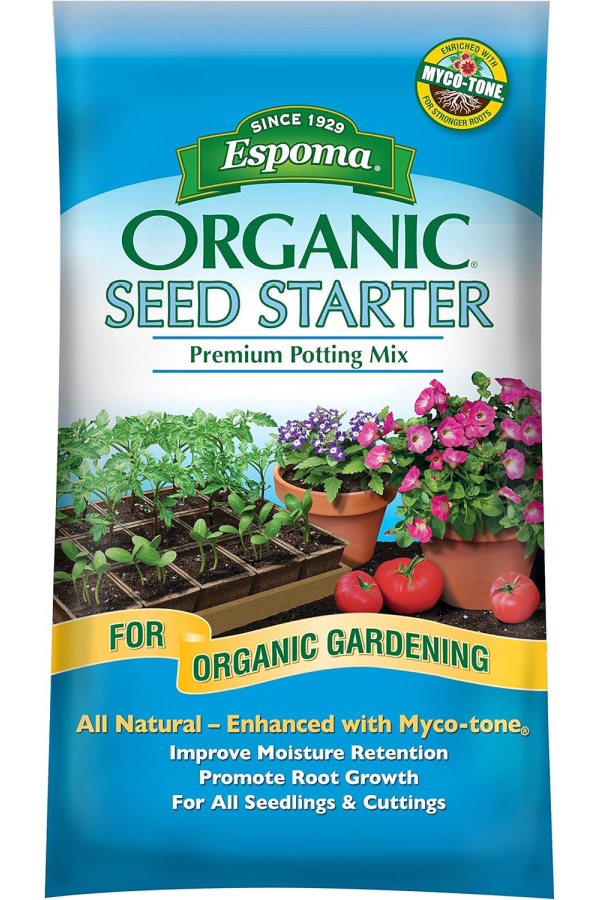
Instead of starting seeds in garden soil, top soil or basic potting soil, it’s important to use soil specifically created for starting seeds. A good seed starting soil is light, airy, well draining and full of the nutrients seeds need.
Seed starting soil allows seeds to germinate quickly and easily. More importantly, the loose soil allows roots to expand freely and quickly. That same looseness also allows excess water to flow through and not rot out tender young seedlings. Affiliate Product Link: Espoma Organic Seed Starter Premium Potting Soil Mix
Seed starting soil is far lighter than other soils and allows for easy germination and fast root growth.
Heavier soil can make root growth difficult. It also simply doesn’t have enough nutrients in it to help seeds take off quickly. Without a doubt, great transplants really do start by planting your seeds in a quality seed starting soil.
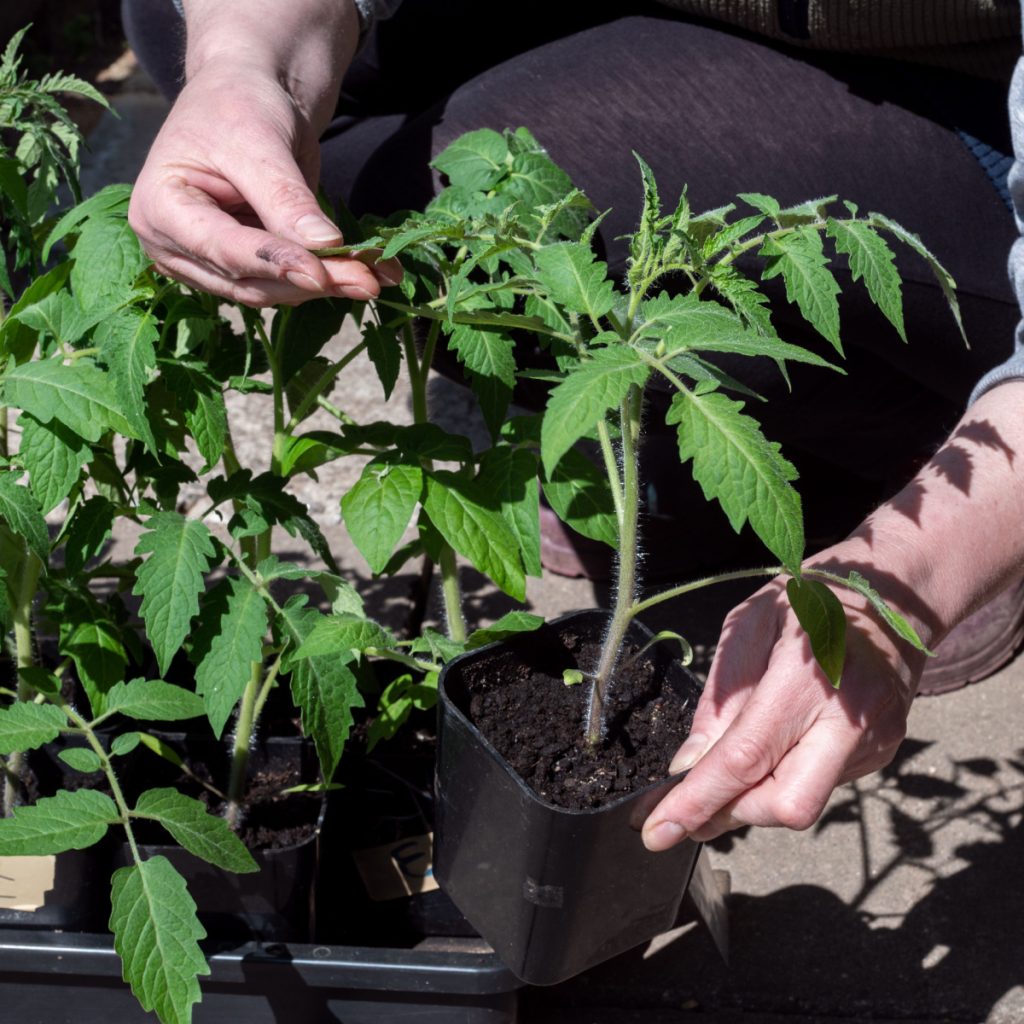
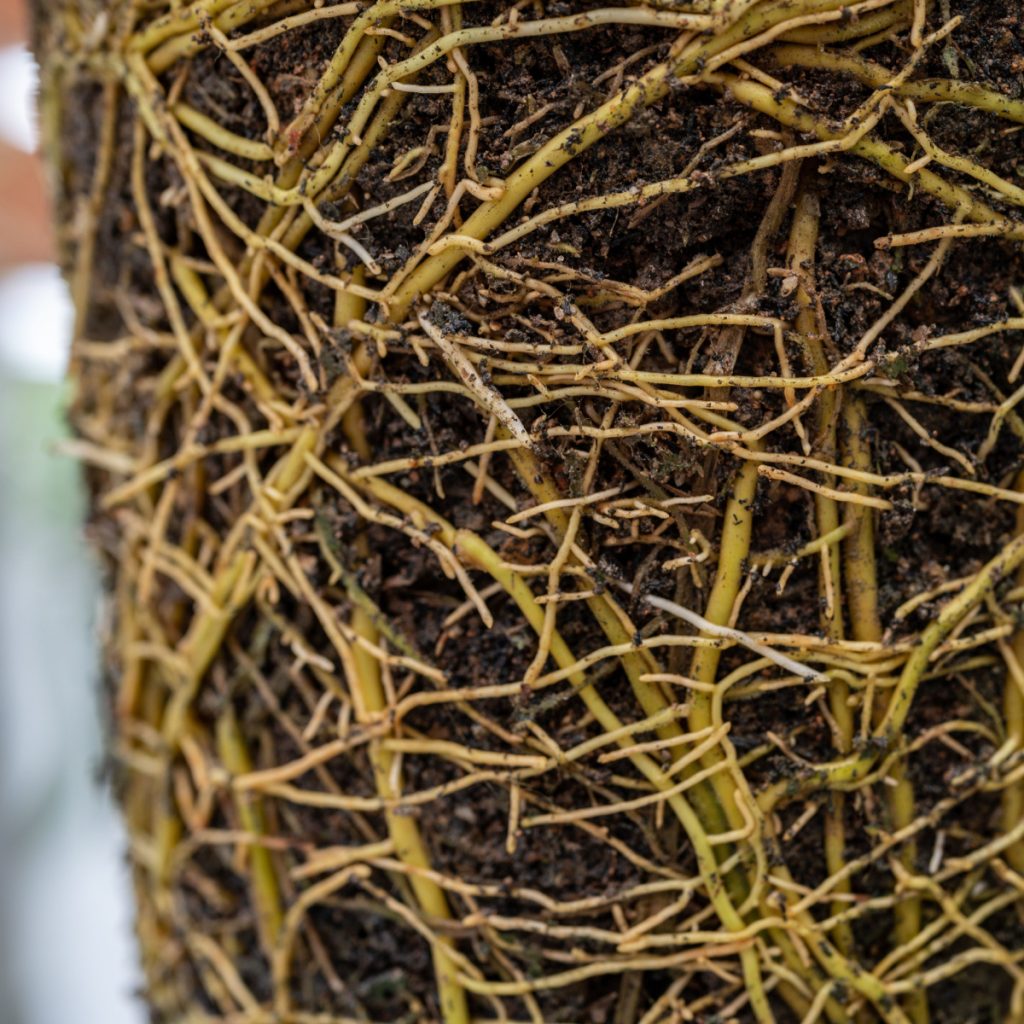
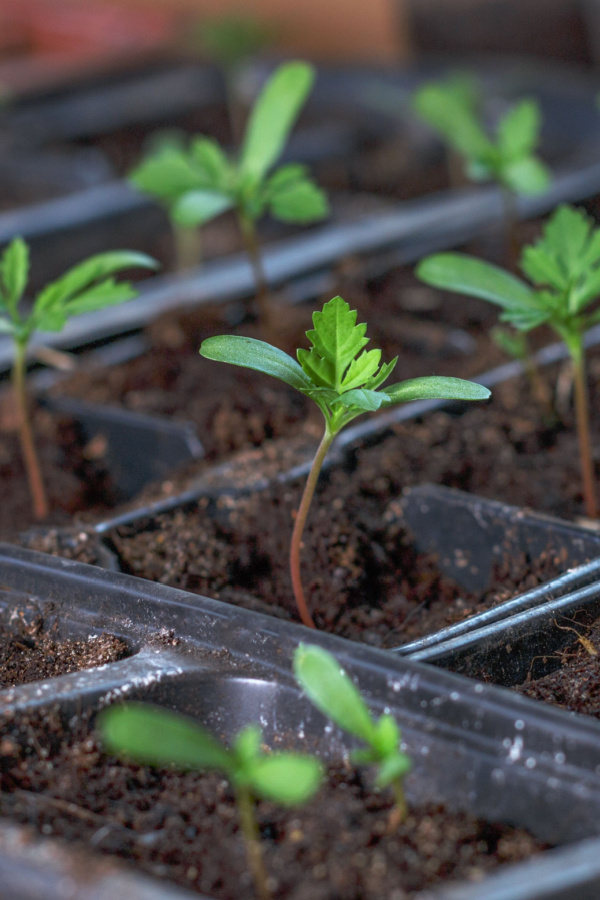
Grow In Larger Seed Cells!
Last but not least, while on the subject of starting seeds in soil – it’s best to use larger seed cells to grow your plants in. Small cells may hold a lot of plants – but it will severely restrict early growth.
Using larger 2 to 3 inch wide and deep seed starting cells instead of smaller 1 inch versions can pay off with far better results . Larger cells allow for more root growth. Even better, they prevent you from having to transplant seedlings more than once – which can temporarily slow growth. Affiliate Link: Seed Starter Trays 300 DEEP Extra Large Cells
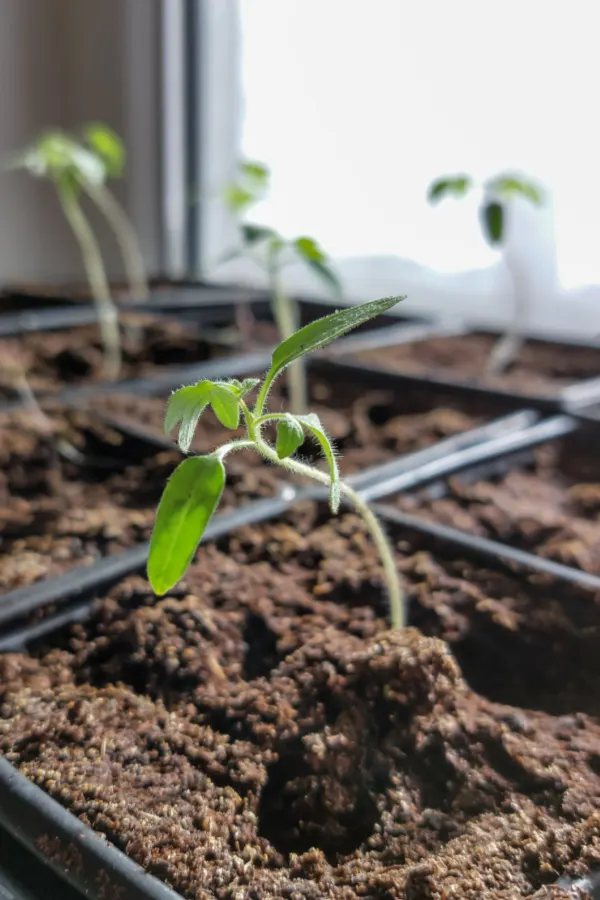
#2 Using The Best Light To Start Tomato Plants From Seed
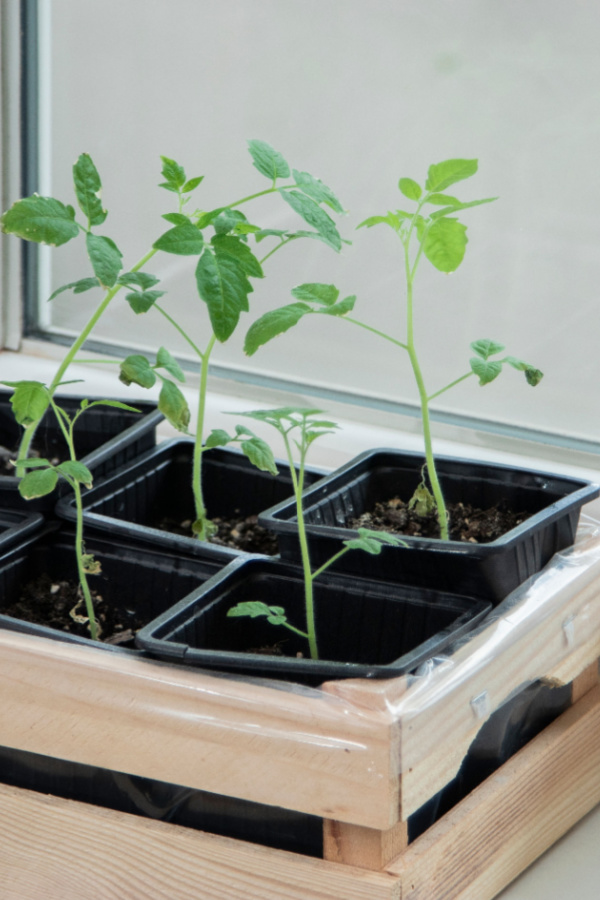
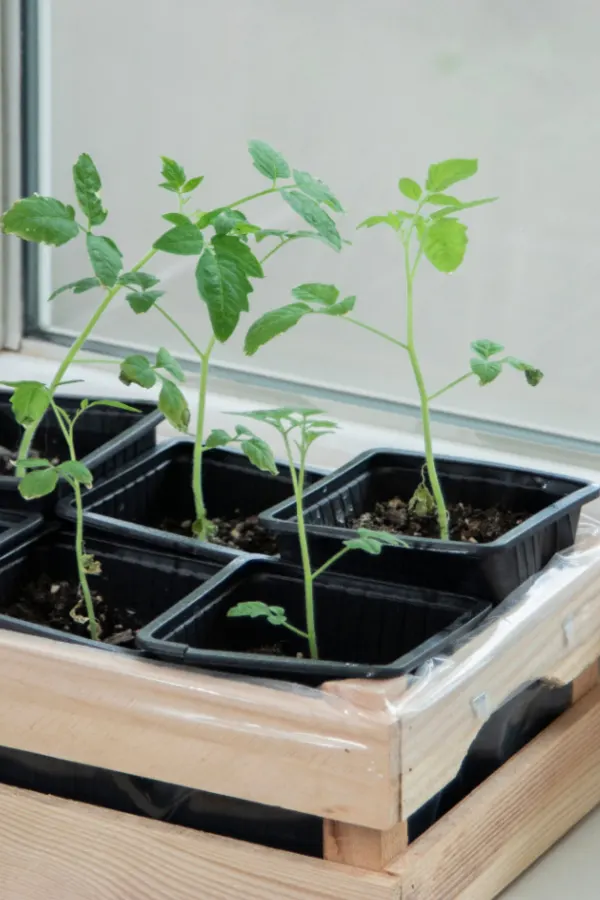
Plain and simple – you can’t grow good tomato transplants in a sunny windowsill! The plants will certainly sprout, but they will grow long and skinny. And the result will be a “leggy” plant that eventually struggle to grow outdoors.
The key to growing strong and healthy transplants is to let them grow low and slow. And the only way to do that is with artificial lighting. Unfortunately, when tomato plants grow in a sunny windowsill, they reach for the sun. And because it’s far away, they develop weak and skinny long stems that bend and lean.
Seedlings that grow in windows grow long, thin and weak.
The good news? It doesn’t take fancy or expensive lights to grow tomato plants. Vegetable plants do not require special grow lights to develop. In fact, an ordinary fluorescent or LED shop light is perfect for giving young plants everything they need to develop.
Simply place these lights directly over top of your seedlings once they sprout. Keep the bulbs about 1 to 1.5 inches above the tops of your plants and leave on for 12 to 14 hours each day.
If there is one mistake gardeners make more than any other when growing their own plants from seed, it’s failing to fertilize plants when they are young. Fertilizing young seedlings with a light dose of liquid fertilizer every few weeks is crucial to developing strong, healthy plants.
Once plants have sprouted and have been up for about 14 days, it’s time to start fertilizing. But the key here is tofertilize lightly. For this, you can also use an all purpose organic liquid fertilizer. However, you will need to use it at 1/4 to 1/5th of its recommended strength for seedlings. Affiliate Link: Espoma Organic 8 Ounce Concentrated Tomato! Plant Food
Give your plants a regular feeding every ten to fourteen days until planting day. The extra nutrients will go a long way to helping give you transplants that are sizable, healthy, and most importantly, ready for planting day outdoors!
Listen To Our Podcast Below On How To Jump Start Tomato Plants!
#4 Watering – How To Water Tomato Plants When You Start Them From Seed
Last but not least, be careful not to over or under water your young tomato plants. When growing indoors, plants will usually need to be watered every day or two. The real key to success is to never let the soil get too dry – or stay too wet.
Allowing plants to dry out too much between waterings will lead to poor root and stem development. When roots dry out, they shrivel. And when they shrivel, they are unable to take in nutrients from the soil. Infrequent watering also causes stress on the plant that can stunt future growth as well.
On the other side, when the soil stays too wet, the tender roots of plants swell up. And when they do this, it also leaves the roots unable to take in needed nutrients from the soil. This can often lead to the tomato plant’s leaves turning yellow and even falling off the plant.
All in all, with good seed starting soil, proper light and a bit of fertilizer and regular water, your plants will reward you with amazing growth. Once planting day rolls around, be sure to check out How To Avoid The 5 Most Common Tomato Planting Mistakes – And Grow Great Tomatoes! Here is to growing your own tomato plants from seed this year. And, to having your biggest tomato harvest ever!
This Is My Garden is a garden website created by gardeners, for gardeners. Jim and Mary Competti have been writing gardening, DIY and recipe articles and books and speaking for over 15 years from their 46 acre Ohio farm. They publish three articles every week, 52 weeks a year. Sign up today to follow via email, or follow along!
Starting Seeds
When it comes to growing your own vegetable and flower transplants from seeds, success all begins with making sure you give your indoor seedlings the right light to grow strong and healthy. And believe it or not, the “right light” doesn’t mean you have to spend a fortune on fancy grow lights!
Many gardeners shy away from starting their own seeds indoors. Perhaps it’s because they had a bad experience in the past trying to grow seedlings in a windowsill. Or, they think it’s probably too time consuming and requires a big investment in special grow lights.
As it turns out, there is no easier, cheaper and more incredibly effective method for starting seeds indoors than by using simple, inexpensive LED shop lights. They not only grow incredibly strong and healthy seedlings and transplants, they do so requiring little in the way of an initial investment in the lights, or in the cost to operate them.
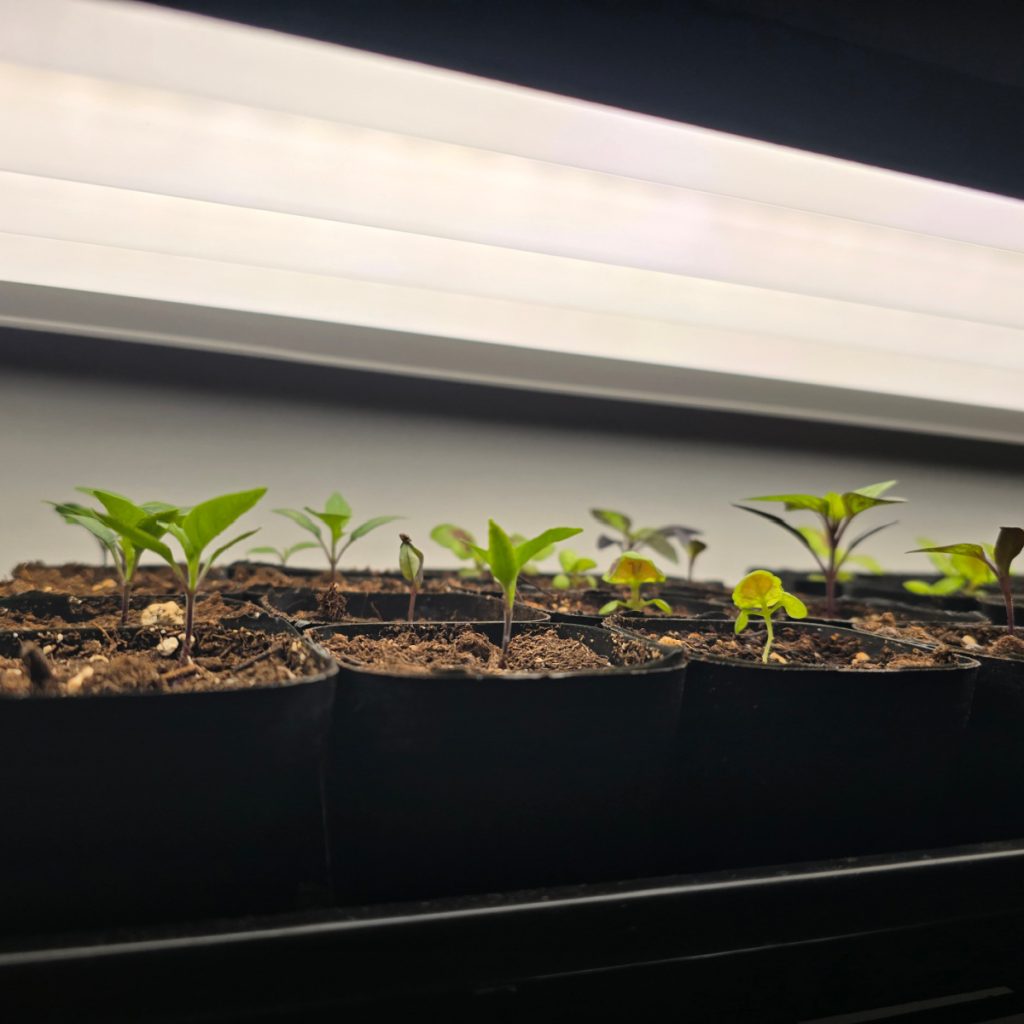
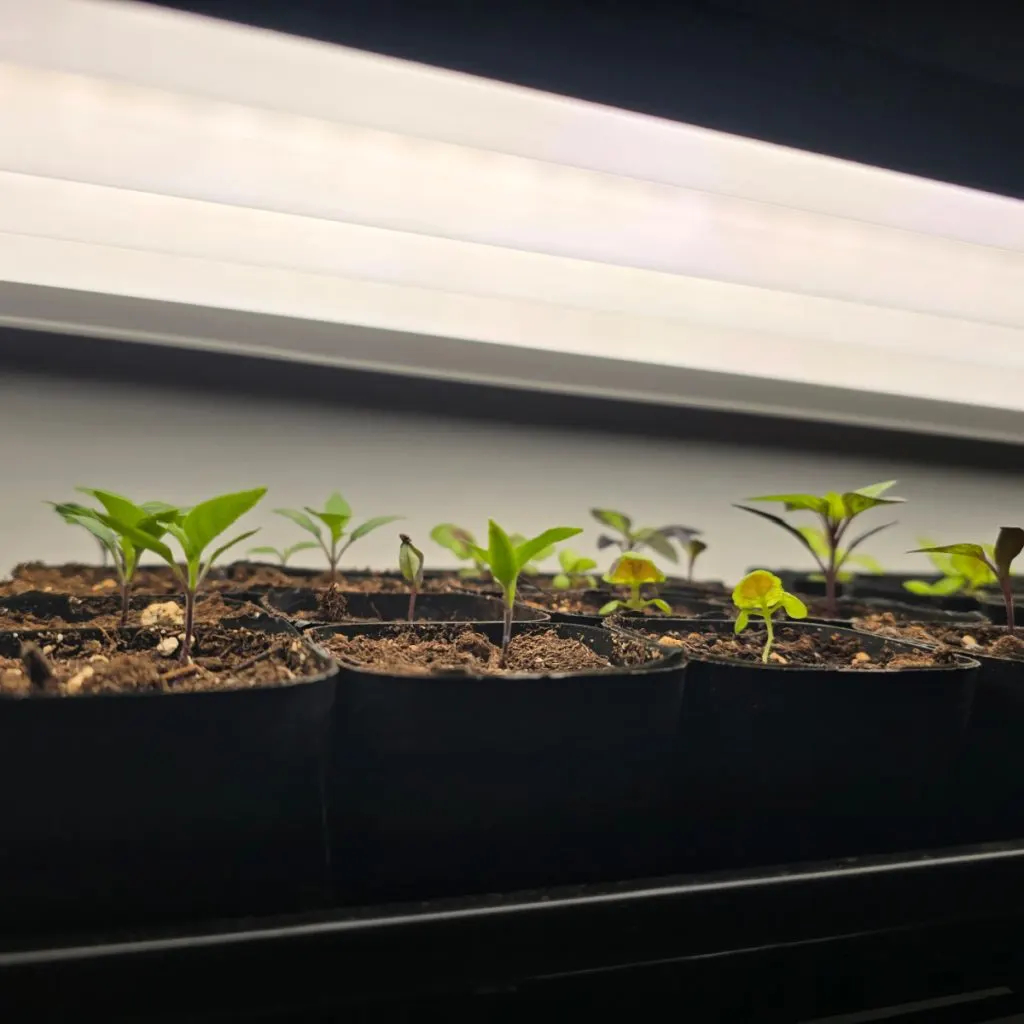
Ordinary LED shop lights provide the perfect lighting for seedlings.
Giving Indoor Seedlings The Right Light
One of the biggest mistakes many gardeners make is trying to start and grow their seeds in a sunny window. Unfortunately, as it turns out, windows are not the best place for seedlings.
The filtered light from the sun through a window is too distant for growing seedlings. The sun works well in a garden because seedlings can grab the sunlight in its full spectrum – all the way from coming up in the east to setting in the west.
But in a window, the seedlings are only able to grab limited sunlight coming from the same direction. The windowsill light spectrum results in young seedlings growing spindly and weak. They do this because they are trying to reach out for the far away light. See our article: The 3 Biggest Seed Starting Mistakes Gardeners Make When Starting Seeds.
This is exactly why if you have ever grown seedlings in a windowsill, you end up with long, skinny plants that are slender and bent heavily to the light. But here’s the good news – that doesn’t mean you need to have fancy lights to grow great seedlings!
Why LED Shop Lights Are The Best Choice
To germinate and grow vegetable and flower seeds, there is simply no need for special lighting. Although expensive grow lights will work to grow your seedlings, they are overkill. They cost unnecessary expenses for the lights, and the energy needed to power them.
Window light will usually produce skinny, weak and feeble seedlings.
Grow lights and indoor growing systems can easily run $100 to $200 or more to purchase, and it can be a costly investment. Especially when you realize they can also consume a considerable amount of energy to run them. But that is exactly where basic LED shop lights come to the rescue!
So why do LED lights work so well? The bright light of an LED shop light is actually quite perfect for growing seedlings. When placed in close proximity to the top of the seedling’s foliage, the bright white light of the LED lights helps grow strong, healthy plants.
No Heat Lights
LED lights are cool by nature, so there is never a worry about burning foliage. They also operate quietly. Even better, without the hum that fluorescent lights can give off. And with most LED lights sporting 40,000 to 50,000 life expectancy hours, they can last for many, many growing seasons. All without the worry of plants growing spindly, weak, and wiry.
The secret with LED shop lights is to keep them close to the top of your plants. This allows the plants to have steady growth without reaching too far for the light.
Perhaps best of all, LED lights are energy efficient, and long lasting. In fact, LED shop lights cost just mere pennies a day to operate, and can easily last for 10 or more growing seasons. LED lights are also far less costly to purchase than fancy grow lights. Affiliate Product Link: LED Linkable Shop Lights
Using The Right Light Indoors To Grow Great Seedlings & Transplants
The key to using LED shop lights for starting seeds is all in the placement of the lights in relation to the top of the plants. To grow strong, sturdy seedlings, the lights need to be close to the foliage. In fact, for optimum growth, place them about one to one and a half inches above the top of the seedlings as they grow.
LED lights are easy to use and operate. You can hang LED shop lights from an existing shelving rack, build your own inexpensive seed starting rack, or simply use a few bricks stacked up on each side of your plants to hold the lights over them. See: How To Build A Simple Seed Starting Light Stand
As they grow, continue to raise the lights to keep them close. This helps the plants grow slow and strong, which is key for developing strong roots and transplants with thick, sturdy stems.
Lighting Requirements
So how long should the lights be left on each day for seedlings? For starters, when you first plant your seeds, the lights should be left off entirely. Seeds do not require light to germinate. Because of this, turning them on will not help in the least. In fact, it actually can dry out seeds quicker, so leaving them off is best.
What seeds do require is a bit of warmth and good moisture. Begin by finding a warm location to place your trays until the seeds first spout. The warmer the soil, the more quickly the seeds will germinate.
Listen In Below To Our Podcast On Starting Seeds Indoors Like A Pro!
In addition, cover your seeds with a loose covering of plastic wrap. You can also use the plastic dome that often comes with seed trays. Either will help to keep moisture in and allow for better germination. Affiliate Link: 10 Packs Seed Starter Tray Seed Starter Kit With Humidity Dome
Once your first few seedlings sprout, it’s time for the lights! Seedlings should receive between 10 to 12 hours of light each day. Again, be sure to keep the lights just an inch or two above the foliage. Remember, it is vital to keep the light right above the top to develop strong, slow growth!
Don’t Forget To Harden Off Your Seedlings Before Planting Day!
As the temperatures begin to warm up, start moving your plants outdoors during the warmer days to get them accustomed to life outdoors. At this point, the plants should be at least four to five weeks old. This process is known as hardening off. And it will have your plants more than ready to hit the ground running come planting day.
When plants first go outside, as long as they are outside receiving most of a day’s natural light, there is no need to supply them with additional LED lighting. Especially if you are bringing them back in at night. If you do have to bring them in for a few days due to cold or inclement weather, the lights will help them continue to grow and should be turned on.
Once the plants are spending most of their time outdoors hardening off, there is no need for artificial lighting. Simply allow them to receive natural light, and they should be ready to go come planting day. Here is to using the right lights indoors to start your seedlings this year!
This Is My Garden is a garden website created by gardeners, for gardeners. Jim and Mary Competti have been writing gardening, DIY and recipe articles and books and speaking for over 15 years from their 46 acre Ohio farm. They publish three articles every week, 52 weeks a year. Sign up today to follow via email, or follow along!
Starting Seeds
When it comes to starting and growing great vegetable and flower plants from seed indoors – it all comes down to avoiding some of the most common mistakes that gardeners often make when they try to start seeds inside of their home.
From seeds that fail to germinate, to fragile seedlings that wither away, or ones that produce spindly, unhealthy plants that are unable to handle outdoor conditions, the process of starting seeds indoors can be discouraging for many. But it doesn’t have to be that way. Especially when you can avoid 3 of the biggest seed starting mistakes that cause a big majority of the issues.
Starting seeds indoors doesn’t have to be a struggle. In fact, by simply adopting a handful of proven techniques, the task becomes surprisingly straightforward – and incredibly satisfying when it comes time for planting day and you have large, robust and healthy plants ready for the outdoors!
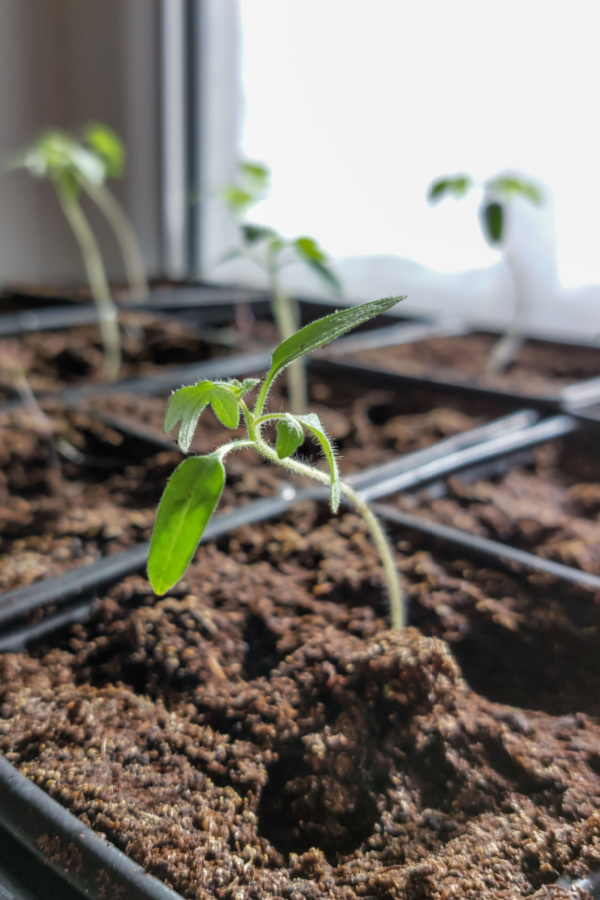
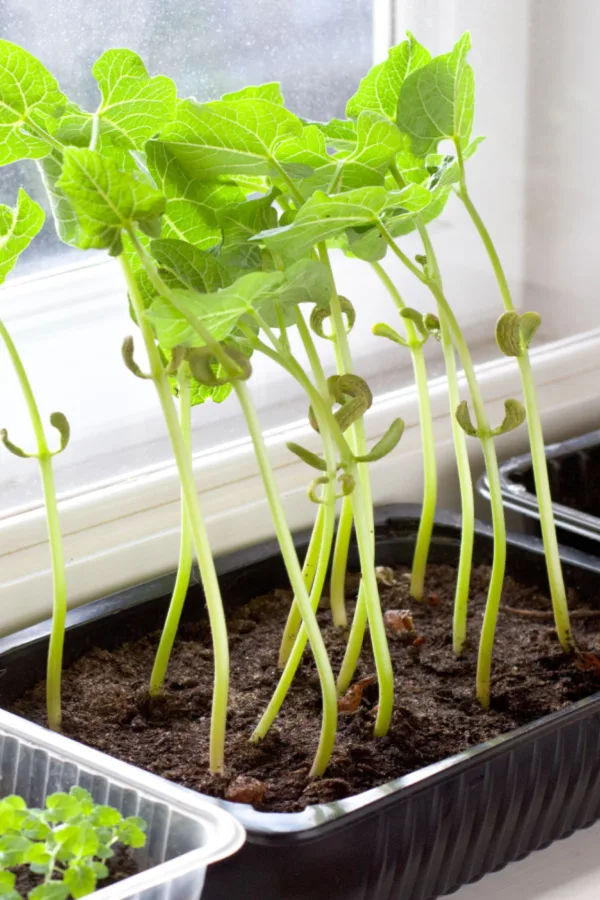
These seedlings are already starting to grow sideways and a bit spindly. Why? Because they are growing in a windowsill – which happens to be a big no-no when starting seeds indoors!
With seedling success in mind – here is a look at 3 common seed starting miscues to avoid – along with a few simple tips that will have you growing great plants from seed!
How To Avoid The 3 Biggest Seed Starting Mistakes Gardeners Make When Starting Seeds Indoors
1. Growing Seedlings In A Window
The biggest mistake gardeners make when starting vegetable or flower seeds indoors is relying on a sunny windowsill for light. It might seem like a good idea, but it almost always leads to poor results.
Seedlings will grow quickly toward the sunlight, but the problem is they grow too fast. And in the process, they become very weak. The light coming through a window isn’t close enough or strong enough. That is because during winter, there isn’t enough sunlight for long enough periods to grow healthy seedlings.
As a result, seedlings grow tall, thin, and fragile. They often lean sideways as they stretch toward the far away light. And – even if you keep turning them, they won’t grow properly. Once those seedlings get outdoors, they just don’t have enough stem strength to hold up to the slightest winds or rainfall.
The Best Way To Give Plants Light
The best way to grow strong, healthy seedlings indoors is to use artificial light. Don’t worry, this doesn’t mean you need expensive grow lights. Simple, affordable LED or fluorescent shop lights will do the trick. Affiliate Link: BOUNDER 4 Pack Linkable LED Utility Shop Light
When seeds grow in a windowsill, they grow out towards the light. And since that light is so far off, they stretch to do so. It leaves plants long, skinny, and very weak!
Position the lights just an inch or two above the seedlings and leave them on for 10 to 12 hours a day. This will help your plants grow slowly and steadily. More importantly, it will produce strong, sturdy, fully developed seedlings.
To use shop lights, you can use a shelving system to hang your lights from, or simply place shop lights on bricks or blocks to keep them at the right height above your seedlings as they grow. All you need to make sure of is that your lights are right above your plants – and they will grow strong, straight and healthy! To learn more about proper lighting, see How To Give Indoor Seedlings The Right Light – With Inexpensive LED Shop Lights!
2. Using Ordinary Potting Soil To Start Seeds – The 3 Biggest Seed Starting Mistakes
Although ordinary potting soil might sound perfect for starting seeds indoors – it’s not. Nor is using regular topsoil or even soil from your garden or raised beds. When starting seeds indoors, to ensure healthy success, you need to use a soil that is specific for allowing seeds to germinate and grow fast.
The first six to eight weeks are critical for seedlings, and using the right soil ensures they get the energy and nutrients they need to thrive.
Seed starting soil needs to be lightweight, full of nutrients, and drain easily. Obviously, garden and topsoil are simply too heavy for that. But so is regular potting soil – and all too often – that is the soil of choice for many when they start their seedlings.
For More Great Seed Starting Info – Listen In To Our Podcast Below On The Secret To Starting Seeds Indoors!
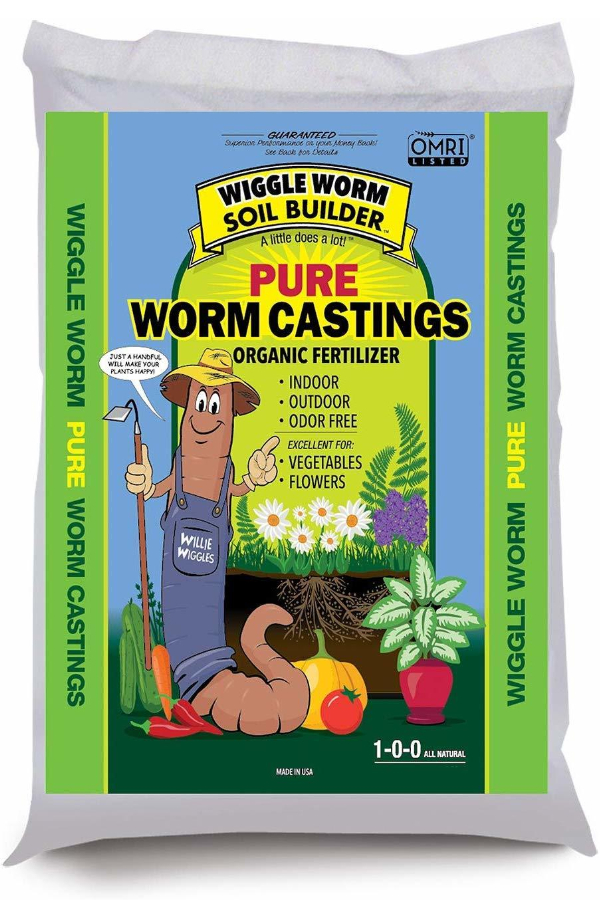
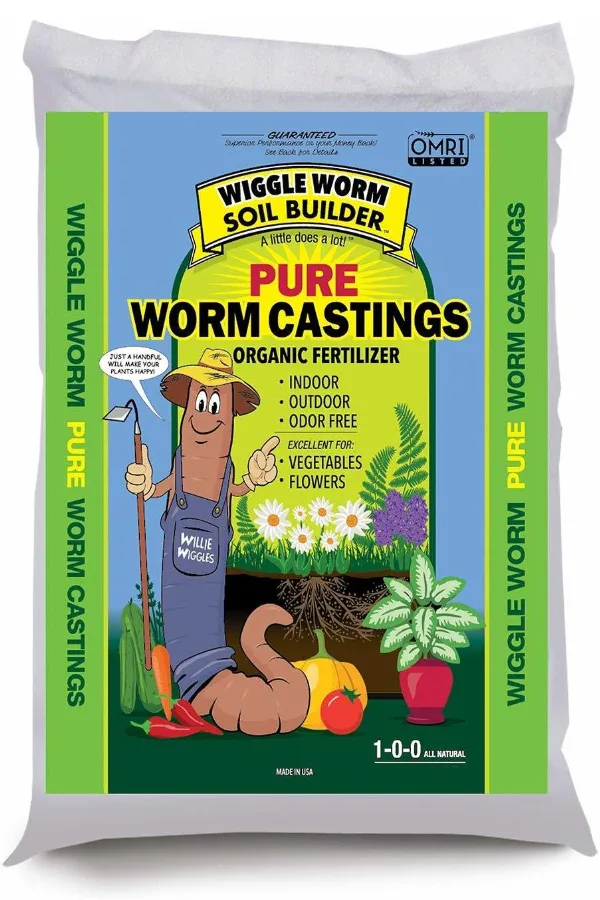
So where can you get seed starting soil? You can often find it in local nursery or garden centers – or online. There are several great options for purchase – the real key to success is to find a soil that is ultra-lightweight and full of nutrient laden materials like compost or worm castings. Affiliate Link: Back to the Roots Organic Seed Starting Soil
You can also create your own seed-starting mix at home using potting soil as a base. The easiest way is to mix equal parts of worm castings, screened compost, and perlite. The worm castings and compost lighten the mix and power it up. The perlite, meanwhile, helps to keep the soil from compacting together.
3. Starting Seeds At The Wrong Time – The 3 Biggest Seed Starting Mistakes
Last but not least, you need to make sure you are starting your seeds indoors at the right time. Unfortunately, planting at the wrong time happens all too often – but it’s easy to avoid with just a little planning!
If you start seeds too early, seedlings can grow too large and outgrow their space well before it’s time to move them outside. On the other hand, starting too late can leave your seedlings too small and too weak to transplant. That often reduces both their chance of survival and productivity.
By using the right soil, the right lighting – and good seeds – your transplants will be healthy and ready to go by planting day!
So, when is the right time to start seeds indoors? It depends on your area’s average last frost date. Once you know that, simply count back the number of weeks each type of seed needs to grow before transplanting.
Most vegetables and flowers require about six to eight weeks, but you should always check your seed packet. Nearly every seed packet includes information on when to start seeds and how long they take to reach transplant size.
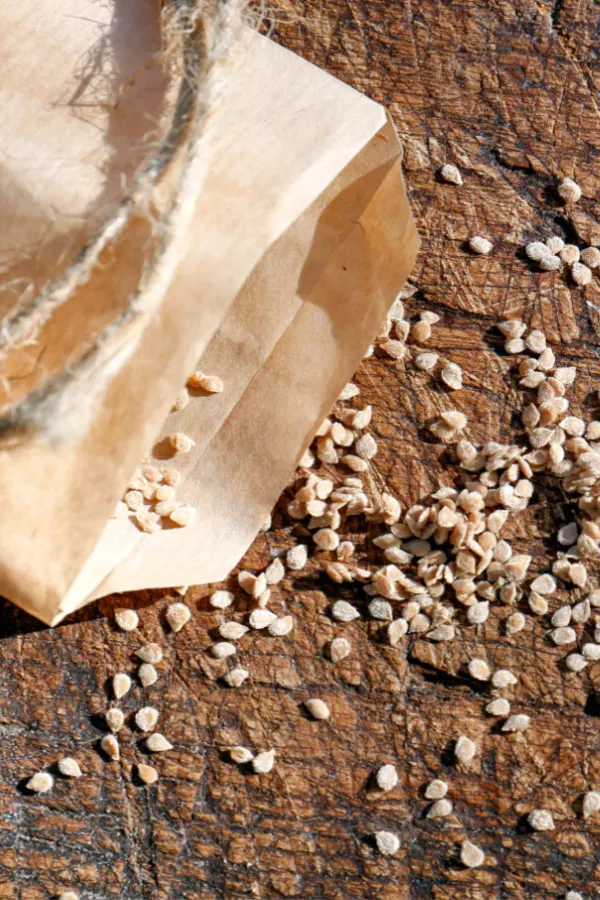
And on the subject of seeds – always make sure you are planting fresh seeds. Seeds that have been around for too many years will germinate with far less frequency. Even worse, they also can have far less strength and productivity as they mature. Affiliate Link: Assorted Vegetable & Herb Seed Packets
Here is to avoiding the three biggest seed starting mistakes commonly made by gardeners. And even more – to growing great transplants for your garden and flowerbeds this year! If you want to grow your garden from seed next year – for free – be sure to check out: How To Save Seeds From Vegetable Plants – And Why Mid-Summer Is The Best Time To Save!
This Is My Garden is a garden website created by gardeners, for gardeners. Jim and Mary Competti have been writing gardening, DIY and recipe articles and books and speaking for over 15 years from their 46 acre Ohio farm. They publish three articles every week, 52 weeks a year. Sign up today to follow via email, or follow along!
Starting Seeds
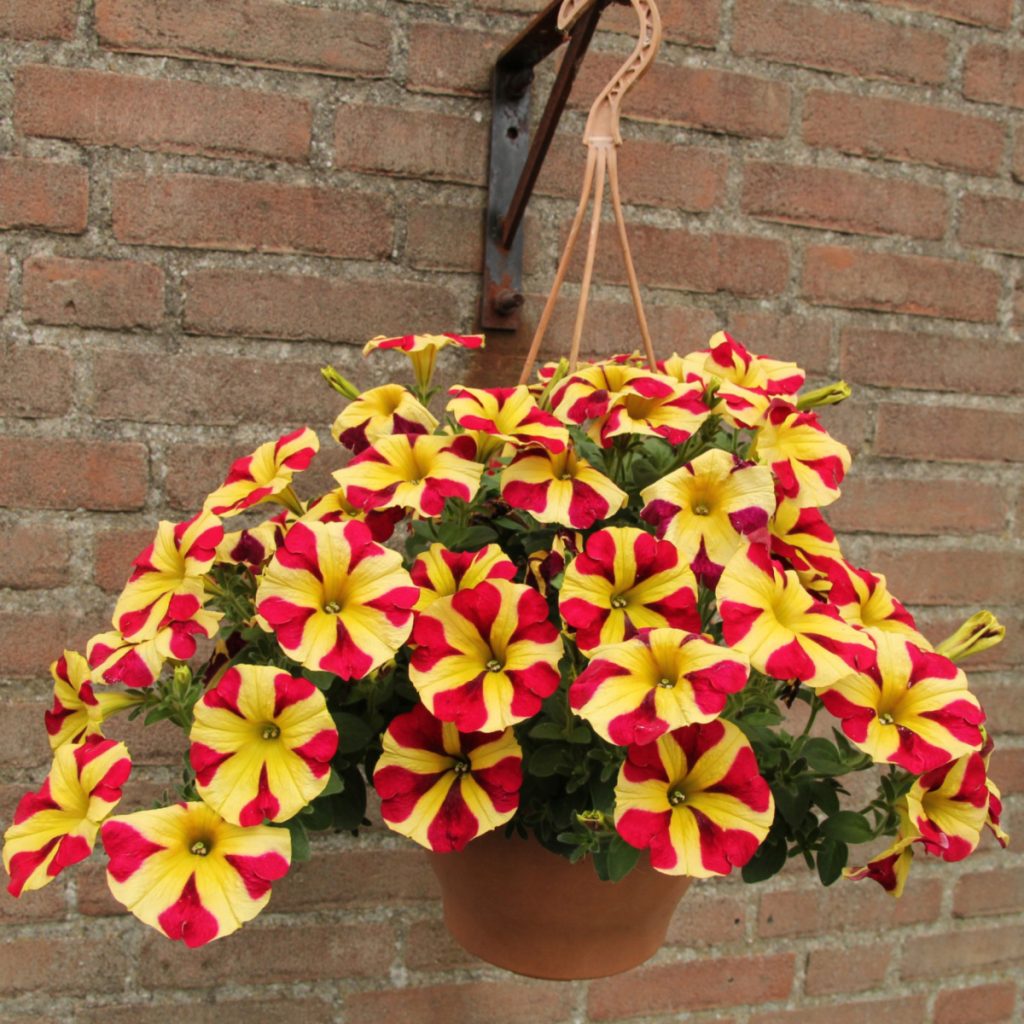
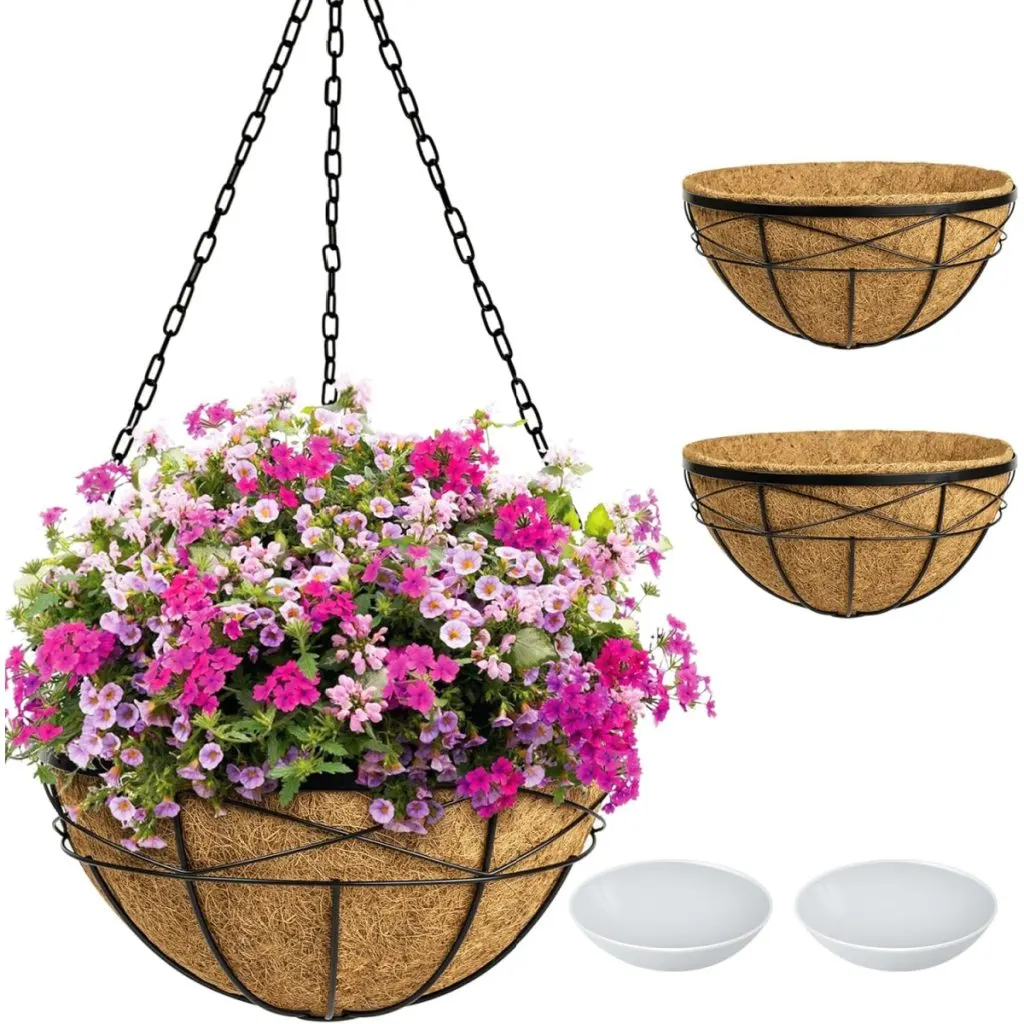
When you take time to grow your own hanging baskets from seed – not only can it help to save big on your gardening budget – it also happens to be one of the best ways to create incredibly unique and stunning planters that can last all season long!
Hanging baskets are by far one of the most expensive purchases gardeners make each and every spring. Smaller flowering baskets can easily range from $25 to $50. And larger ones? As scary as it sounds, they can easily top $75 or more!
What really makes it tough on gardeners is that all too often, the baskets they purchase from stores don’t last the entire season. In fact, many baskets are so over-planted and mature by the time you purchase them in May, they only have a month or two left. But that is where growing your own baskets from seed can save the day!
When you plant your own baskets from seed, you not only save money – but get to grow all kinds of flowers you often can’t find in local stores.
The Advantages Of Growing Your Own Hanging Baskets From Seed
There are actually all kinds of great reasons to grow your own hanging baskets. As noted above, it can certainly be incredibly beneficial when it comes to the savings. But starting your own baskets from seed also allows you to grow unique varieties that are often hard to find or even unavailable in local stores and greenhouses.
But perhaps best of all – by growing plants from seed and creating your own hanging baskets, you also have the advantage of controlling the soil make-up and size of your basket. And those two factors are extremely important in how well hanging baskets grow. And even more – for how long they can stay growing strong all throughout the growing season.
How To Grow Hanging Baskets From Seed – The Secrets To Success!
Starting your own flowers from seed indoors is easier than you might think. And the process doesn’t require expensive equipment nor a big investment in time. All it really takes is following a few simple and timely steps, the first of which happens to be starting your seeds indoors early. But not too early!
Most commercial greenhouses actually start planting their hanging baskets in December. Why? Because in order to have those big, beautiful baskets for spring buyers, the plants need plenty of time to grow.
Unfortunately, because commercial basket planting takes place so early, they often outgrow their containers by mid-summer. But when you grow your own, you can account for that and create baskets that last all season long.
Because they are started so early in the year, many store bought hanging baskets become root bound by early summer. And once they do, they fail quickly!
When To Start Seeds – How To Grow Hanging Baskets From Seed
So how early do you need to start your seeds for hanging baskets? To be sure to have strong, healthy baskets by spring, you will need to start your seeds about 10 to 12 weeks before the last usual frost date in your area.
Unlike bedded flowering annuals and vegetable garden plants, hanging baskets are easy to bring indoors when frost threatens. This means they can be started much earlier in the year indoors to take advantage of the warm and sunny days in between frosts. By allowing them more outdoor time early, they have more ability to fill out.
For best results, aim to start your seeds about 10 to 12 weeks prior to full outdoor life. This will allow them time to grow to the perfect size and begin blooming – but still have plenty of growing life left to last all summer and into fall.
The Best Method For Starting Seeds For Hanging Baskets
The easiest way to start seeds for your hanging baskets are in traditional seed trays. If you have the room, they can certainly be started directly in the baskets. Although this eliminates an extra step, it can be hard to give large baskets enough indoor light early on – so seed trays are usually the better choice.
Starting flower seeds like these marigolds 10 to 12 weeks prior to taking baskets outside for good will have your plants growing at just the right size!
Remember, these plants have to be started far earlier than other vegetable or flower plants. But the good news is you can start them first, then at the four or six week mark plant them into your baskets. That also gives plenty of time to have the room to plant any additional seedlings for your garden or flowerbeds indoors.
What You’ll Need…
For starters, always select fresh, quality flower seeds. Be sure as well to order your seeds early to have a good selection. Ordering early also ensures you have seeds on hand in plenty of time to start. Affiliate Link: Sow Right Seeds – Dwarf Mixed Petunia Seeds
There is no need for special equipment or heating pads to start flower (or vegetable) seeds indoors. A couple of inexpensive fluorescent or LED 4′ shop bulbs will provide more than enough light for seedlings to grow.
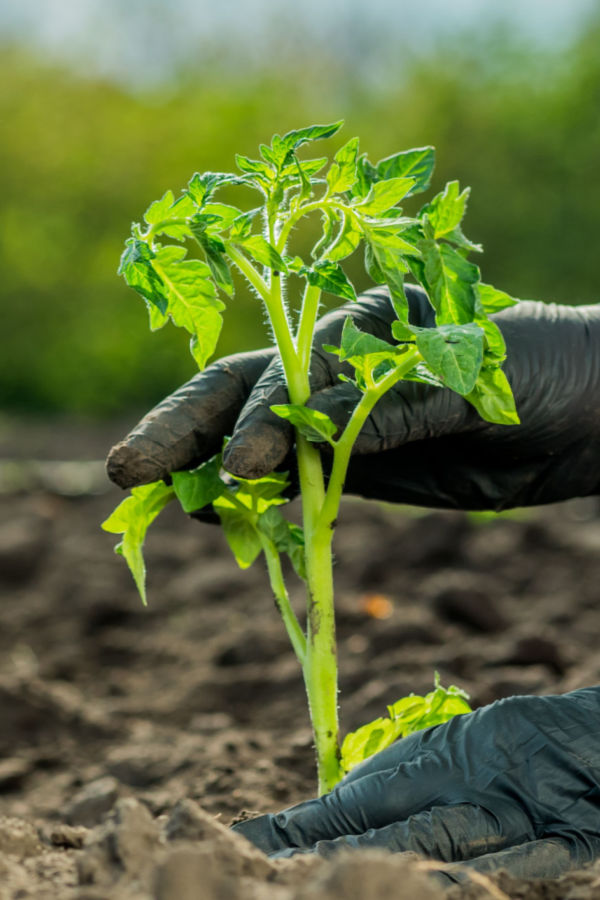
Transplanting Into Baskets – How To Grow Hanging Baskets From Seed
When seedlings get to about six weeks of age, it’s time to get them into their baskets. By planting at this point, the small transplants have time to root easily in their final soil. As for those baskets, select larger diameter baskets to give plants plenty of room to expand and grow their roots.
Unfortunately, hanging baskets smaller than 14 inches in diameter can rarely last an entire season. Plain and simple, the larger the basket, the longer the plants can survive in them! Affiliate Link: 2 Pack 18 Inch Extra Large Deep Hanging Baskets for Plants
Another big tip for success is to always use a quality potting soil mix for your baskets. A great potting soil needs to be lightweight, loose, and filled with nutrients as plants grow.
Last but not least, resist the temptation to over-plant your baskets with too many transplants. For a 14 to 16 inch basket, 5 transplants is more than enough. For 18 inch baskets and larger, 5 to 8 plants per basket will do the trick. Once they get growing, they will fill in quickly!
As daytime temperatures start to warm, set baskets outside in increasing intervals. This step helps plants adjust to outdoor life slowly. Even more, taking them out during warm stretches also helps baskets fill out at a much faster pace.
These 18 inch baskets are more than big enough to handle a full season’s growth. Smaller baskets have trouble sustaining full season root growth.
Long Term Care – How To Grow Hanging Baskets From Seed
No matter how great your potting soil is, hanging baskets need to be fertilized. The nutrients in even the best of potting soils will only last for so long. But when fertilizing hanging baskets, especially early on, the key is to power them consistently, but low and slow.
If you provide too much fertilizer at one time, plants use the energy to grow too many roots and too much foliage. With too little, they simply don’t have the power to grow and produce blooms. So how much is enough?
Unfortunately, this is the issue with many commercially sold hanging baskets. They are given huge doses of fertilizer early on in an effort to fill them out for sale. The only issue is by the time the consumer gets them, the roots and plants are too big to last an entire season.
Fertilizing regularly with a liquid fertilizer mixed at half strength is the ultimate recipe for success. A light solution applied every two weeks works well to keep plants at their best, but without overpowering them. And you can start fertilizing this way as soon as your plants are four weeks old.
Finally, proper watering of your baskets is another must to keep them healthy and strong from start to finish. Never allow your baskets to dry out for long periods of time between watering. Just as important, be careful not to overwater and suffocate the plant’s roots with moisture. For more information on keeping those hanging baskets blooming beautifully all season long, be sure to check out: The 3 Biggest Fertilizing Mistakes That Ruin Hanging Baskets – And How To Avoid Them!
Here’s to getting your seeds ready – and to growing your own hanging baskets from seed this year!
This Is My Garden is a garden website created by gardeners, for gardeners. Jim and Mary Competti have been writing gardening, DIY and recipe articles and books and speaking for over 15 years from their 46 acre Ohio farm. They publish three articles every week, 52 weeks a year. Sign up today to follow via email, or follow along!
Starting Seeds
Wondering how to know when to start your vegetable and flowers seeds inside at just the right time to grow the perfect sized transplants for your garden and flowerbeds this year?
If there is one thing that many gardeners struggle with in late winter, it’s knowing when to pick the best time to start their vegetable or flower seeds indoors. Starting seeds at just the right time can certainly be a challenge. Especially when you consider the consequences of planting seeds indoors too early or too late.
When you start them too early, you end up trying to maintain monstrous plants that are not only hard to control, but hard to keep alive. And if you start them too late? Well, then you end up with plants that might not be big enough to even survive planting outdoors!
Knowing when to start your seeds indoors is one of the biggest keys to success when growing your own transplants.
The Issue With Starting Seeds Too Early
Of the two issues, starting seeds too late can create more serious of problems. Plants that are small and weak have a hard time adjusting to life outdoors. Not only are they more susceptible to damage from wind, storms and quick temperature changes, they are also easy prey for insects and disease.
In addition, with their less than mature roots, they have difficulty establishing into the large space of a garden or raised bed. Because of that, they can quickly dry out and wilt when conditions are dry or windy. They can also just as easily succumb to rot if the soil becomes the least bit wet from heavy spring rains.
The Issue With Starting Seeds Too Early
Unfortunately, starting seeds too early indoors has a few pitfalls as well. With too much time to grow, seedlings often outgrow their container before it’s time for outdoor planting. That can result in having to re-transplant them a second and sometimes even third time.
Not only is it time consuming, it can stunt early growth. Plants go through a shock period before they start to grow again after transplanting. And the more you have to replant your seedlings, the more they will suffer.
Last but not least, overly large transplants can struggle to take hold in the soil. Their overly large roots systems take time to settle in to the soil. They are also often too top heavy with foliage and struggle to stay upright without support.
When transplants are too small at planting time, they have trouble dealing with the wild swings of temperatures and storms late spring and summer can bring.
So how can you plant at just the right time to avoid these issues? The good news is that figuring out the best time is easier than you can ever imagine!
How To Know When To Start Your Seeds Inside – At Just The Right Time!
Knowing when to start your vegetable and flower seeds inside begins with knowing when your specific crops will need to be planted outdoors. From there, it’s all about learning to count backwards.
The first key date to be aware of is your specific area’s average last frost date. A frost date is the average date of the last light frost / freeze that normally occurs in your area each spring. It’s important to realize this is not an exact science. Nor does it mean a frost or even a freeze can’t occur after this date.
But what knowing this date does do is give you a target date for planting outdoors. Once you know your average last frost date, you can then know that by adding two to three weeks to that date, you can be relatively safe to plant outdoors. Again, not a guarantee – but it gives you the best possible date to time up indoor seed planting!
Frost dates are published by a variety of on-line resources and are quite easy to find. In addition, most seed companies have them posted on-line as well. Local extension offices are also a great resource for specific frost dates as well. See: Farmer’s Almanac Average Frost Date Search
Listen To Our Podcast Below On The Secrets To Starting Seeds Indoors!
Counting Back From Your Planting Date – How To Know When To Start Your Seeds Inside
Once you know your last frost date, by adding a few weeks to it, you can come up with your potential “safe” planting date. As an example, if your area’s last frost date is May 3rd, you would add two to three weeks to come up with a potential planting day of May 17th to May 24th.
Once you have that potential planting day time-frame, the next step is to find out how long it takes the specific plants you will be growing to germinate and grow to transplantable size.
In general, most plant varieties require an average of six to eight weeks to germinate and grow to transplantable size. Some will take longer, and others a bit shorter. For instance, hot peppers can take 2 full weeks just to germinate. For peppers, you may need to start them 8 to 10 weeks before planting day.
Meanwhile, cucumbers and zucchini germinate and grow quickly, and may only need 4 to 5 weeks. Most seed packets will have the recommended time frame right on the back of the package.
Whatever the recommendation, once you know the length of growing time needed, simply count backwards from your planting date to know when to start your seeds. Still confused? Here is a simple example to put it all together!
A Seed Starting Walk Through – How To Know When To Start Your Seeds Inside
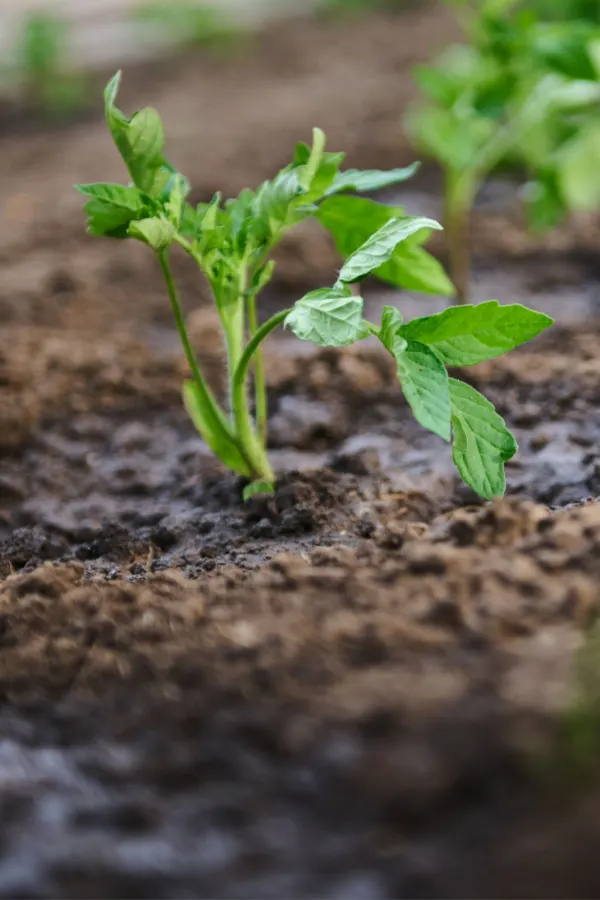
To walk you through the count back method, we will use one of the more common vegetables that gardeners start from seed indoors – tomatoes. For this example, we will set June 1st as the target planting date.
Strong, healthy transplants with a sturdy main stem will have the best chance to flourish once they go in the ground. And the only way to ensure that is to start your seeds early enough to allow good growth!
Tomatoes on average require six weeks of growth. Tomatoes usually germinate about seven days (on average) after planting. Using the count back method, we will start by counting back six weeks. In addition, we will add one extra week to allow time for the seed to germinate as well.
That means you will need to count back seven weeks from June 1st to find your seed planting date. For this example, that means you should start your seeds indoors on April 13th. This will give plenty of time to have strong, outdoor-ready plants that are just the right size.
You can use this count back process for nearly every annual vegetable and flower plant you start from seed. It’s a simple but effective method for always having your plants ready to go come planting time. It also allows plenty of time to get plants hardened off before planting day.
Additional Factors – How To Know When To Start Your Seeds Inside
It’s also important to make sure you order your seeds early! That will ensure you have the seeds you need on hand and ready to go come planting time. All too often, if you wait too long – many seed stores run out of the plants gardeners want most! Affiliate Link: Burpee Seed Store
But one thing is for sure, if you follow the timeline above, you can rest assured your plants will be ready for the outdoors come planting time. Here’s to getting your seeds going at just the right time this year. If you are looking to get the children in your life excited about gardening, be sure to see 6 Great Vegetables Kids Can Grow From Seed – Get Your Kids Gardening Early!
This Is My Garden is a garden website created by gardeners, for gardeners. Jim and Mary Competti have been writing gardening, DIY and recipe articles and books and speaking for over 15 years from their 46 acre Ohio farm. They publish three articles every week, 52 weeks a year. Sign up today to follow via email, or follow along!
Starting Seeds
Looking for a simple checklist to know exactly what you’ll need for starting seeds indoors this year like a pro?
There is no better way to save money and harvest an amazing array of vegetables, flowers and herbs than by starting your own plants from seed. And contrary to what you might hear or think – growing plants from seed doesn’t have to be difficult or time consuming. In fact, armed with the right materials and a few simple growing tips – it’s actually quite easy.
Growing your own plants from seed has so many advantages for home gardeners. For starters, it can save big on your gardening budgets, allowing you to grow individual transplants for mere pennies. But even more, it opens up your world to so many incredible varieties you just can’t find in stores. And all it takes is having a few simple things on hand to grow like a pro!
Not only is growing your own plants from seed fun and rewarding, it can also save big on your plant budget!
The Must Have Checklist For Starting Seeds Indoors
How and when you prepare for starting your vegetable and flower seeds indoors can make all the difference between great success – or frustrating disappointment. One thing is for sure, the earlier you prepare the better.
Unfortunately, when gardeners struggle to grow their own plants, it almost always can be traced back to not getting their seeds started at the right time. And more often than not, it’s usually is because they were started too late to be ready for planting day.
So what all do you need to be ready to grow seeds indoors like a pro? Success really comes down to having four key things at the ready – your seed, good seed starting soil, the proper containers to grow them in – and a few inexpensive LED shop lights to give your plants the right light they need to grow big.
With that in mind, here is a look at each of those 4 key needs – starting with getting the seeds you need now!
#1 Get Your Seeds Early – The Must Have Checklist For Starting Seeds Indoors
Whatever you do, order the seeds of the plants you want to grow early. Ordering seeds early will ensure you get the quantities and varieties of seed you want. But more importantly, it means you will have them on hand in plenty of time to get your plants started!
It’s important to order seeds and have them ready to go early in the year. Waiting can mean not getting the varieties you want, or starting your seeds too late.
Vegetable and flower seedlings need anywhere from 8 to 10 weeks of growth before they are ready to transplant outdoors. And that doesn’t include the 7 to 14 days they need to germinate and sprout. Which means you need to start now by planning your garden in advance.
Doing this early allows you to know what you want to grow and where you will grow each plant. Equally important, it will let you know what seeds you need to purchase now to bring your planting plan to life. A simple plan can save you on seed purchasing costs, but more importantly, have you ready to grow when the time comes.
#2 Seed Starting Soil – The Must Have Checklist For Starting Seeds Indoors
One of the biggest mistakes new gardeners make when starting their own seeds is selecting the wrong soil mix. Having a quality seed starting mix is vital to growing strong, healthy vegetable and flower plants.
A great seed starting mix should be light, airy, and contain plenty of nutrients to feed young seedlings. Avoid using straight potting soil. It is simply too heavy for seeds to germinate and grow.
A seed starting mix, as opposed to straight potting soil, is much lighter in its make-up. This makes it easier for seeds to germinate, establish strong roots, and absorb nutrients quickly. Instead, purchase a soil mix specifically designed for starting seeds, or create your own.
Listen To Our Podcast Below On The Secrets To Starting Seeds Indoors!
When purchasing a commercial seed-starting mix, look to see if it contains soil-aerating ingredients such as perlite or vermiculite. These ingredients help to lighten the soil. They also help young roots to grow easily and absorb moisture.
In addition, look for mixes that contain pulverized compost or organic fertilizers. These will help to power young seedlings with a slow trickle of nutrients that encourage slow but steady growth. Affiliate Link: Gardeners Supply Company SuperRoot Booster Seed Starter Mix
Creating Your Own Great Seed Starting Mix – The Must Have Checklist For Starting Seeds Indoors
You can also create a great seed starting mix quite easily at home. To make, use 2 cups of potting soil, and mix with 1 cup each of perlite and worm castings. Worm castings are actually one of the best ingredients for seed starting soil mixes. Not only do they provide a source of nutrients for young seedlings, they also help to conserve moisture in the soil. (For more information on the many benefits of worm castings, see Why You Need To Use Worm Castings – The Miracle Fertilizer For Gardens, Flowerbeds & More!)
Even if you purchase ready made seed starting soil, it’s a great idea to add in worm castings to it. For purchased mixes, simply add 1/2 cup of worm castings for every 3 cups of seed starting soil. Affiliate Link: 100% Pure Organic Worm Castings
Worm castings give the perfect power to help seeds both germinate and develop quickly.
#3 Seed Trays & Pots – The Must Have Checklist For Starting Seeds Indoors
Although there are a lot of options for both commercial and homemade seed starting trays and containers, some are certainly better choices than others. Especially when it comes to giving your plants the best chance of success.
When purchasing seed trays and packets, look for seed starting trays that grow 36 plants or less. Although you can find trays that can start up to as many as 72 plants, the individual spaces are so small they almost guarantee you will need to transplant your plants before being able to plant them outdoors.
By selecting trays with larger cells, you can eliminate this time consuming and costly step. The same goes when using homemade or recycled containers. Although cardboard egg cartons, egg shells, and toilet paper rolls are good for starting seeds, they aren’t big enough to sustain growth for long.
Instead, opt for larger containers like individual yogurt cups or larger plastic cups that can allow for bigger root development and growth. And perhaps most importantly, they keep you from having to repot your transplants before you plant them outdoors!
#4 Giving Your Plants The Right Light – The Must Have Checklist For Starting Seeds Indoors
It is extremely important when preparing your indoor seed starting supplies to get the lighting right. And contrary to what you might hear, a sunny windowsill is not the answer!
Growing in a window will leave your plants weak, thin and very leggy.
Starting and growing young seedlings in a sunny windowsill is a recipe for seedling disaster. The light coming through a window from the sun is simply too far away to grow strong plants. Once seeds sprout, they spend their time constantly reaching for the far away light of the sun.
Plants that grow in a sunny window end up weak and spindly. Instead of filling out slowly, they grow tall and thin in quick fashion. In fact, so quickly they usually end up falling over in their container in just a few weeks.
Many times, they struggle to survive indoors. And even if they do make it to planting day outdoors, they are often so weak and fragile they can’t handle the stress of transplanting.
Using Inexpensive LED Shop Lights For Seedlings – The Must Have Checklist For Starting Seeds Indoors
One thing is for sure, it is an inexpensive solution to high-priced growing lights. When it comes to starting vegetable and flower seeds, fancy grow lights are simply not needed. The basic white light coming from shop lights is more than enough for big success.
LED shop lights work wonders for growing both vegetable and flower seedlings. Not only are they inexpensive to purchase compared to grow lights – they also operate for pennies a day!
The cool bright lights of these bulbs placed an inch or so above the tops of the plants work wonders for growing strong and healthy plants. And you don’t have to have a fancy plant stand to use them. Simply hang the lights or prop them up over plants and watch your seedlings thrive! Affiliate Product Link : (4) 4′ LED Shop Lights
This Is My Garden is a garden website created by gardeners, for gardeners. Jim and Mary Competti have been writing gardening, DIY and recipe articles and books and speaking for over 15 years from their 46 acre Ohio farm. They publish three articles every week, 52 weeks a year. Sign up today to follow via email, or follow along!
Starting Seeds
Not only is it easy to save seeds from your tomato plants this summer – it can also help you grow your best tomato plants ever next year!
Saving seeds is certainly one of the best ways to save on your gardening budget. Let’s face it, seeds are only getting more and more expensive with each passing year. But there is more reason than ever to save seeds from your tomato plants – and it goes far beyond saving money!
By simply selecting seeds from the best tomatoes growing on your best plants this summer, you can greatly improve the quality of your seed stock. That can lead to stronger, healthier plants and a much larger harvest next year as well. And even better, tomatoes with more flavor than ever!
Saving seeds from your tomato harvest isn’t difficult, but there are a few key steps you must follow to make sure your seeds will be ready to sprout next year.
There is little doubt that by continuing to save seeds from your best tomatoes year after year, you can have a big impact on improving your tomato plants. With each passing year, the seeds and plants develop more and learn to adapt to the soil and conditions far better. And by selecting seeds from your top performers, you are saving seeds that are already performing well.
But when it comes to saving seeds, there are a few simple but key steps you must take to make sure your seeds are ready to sprout and grow next year. Here is a look at which tomato seeds you can save, along with how to collect, dry and store them successfully to plant again next year like a pro!
How To Save Tomato Seeds From Your Tomatoes – And Why Late Summer Is The Time For Saving Them!
Knowing Which Seeds You Can Save
When it comes to saving seeds from tomatoes, it’s important to first know that there are some varieties that will work- and some that won’t. And knowing the difference is critical to planting and growing the tomatoes you want to grow.
The seeds of open-pollinated tomatoes (heirloom tomatoes) can be saved. Hybrid tomato varieties on the other hand should not be saved. Why? Because heirloom tomato seeds are pure. This means the seeds you save from an open pollinated plant will grow to be the exact same plant – and more importantly, produce the exact same fruit.
Not all tomato seeds can be saved. This Celebrity tomato is a hybrid tomato. Unfortunately, if you save the seeds and plant them, they will not produce the same tomato.
The Issue With Hybrid Tomatoes – How To Save Tomato Seeds From Your Tomatoes
Hybrid tomatoes do not work in the same way. Hybrids are a cross of two or more tomato plants. They are bred to create a unique and new tomato plant and tomato.
Because of this, the seeds from a hybrid tomato will not replicate the hybrid when re-planted. Instead, they usually will revert back to one of the original tomato plants that were crossed to create it – or sometimes to a new mutation of it.
It often results in a plant that will not bear fruit or creates a completely different tomato. And that is not a good thing when you want to grow the same great-tasting tomato from year to year!
So how do you know if your seeds are heirloom or hybrid? The easiest way of course is to check the seed packet. They will almost always tell you if the variety is a hybrid or not. If that is not possible, you can always look up the variety on-line. Almost all seed companies list the particulars of each variety, including if it is an heirloom variety or not.
The Process – How To Save Tomato Seeds From Your Tomatoes
The tomato seed saving process is unique when compared to saving seeds from other vegetables. Tomato seeds have a protective gelatin coating on their outer skin.
When this coating stays intact, it makes it very difficult for the seed to germinate the following year. When a tomato plant grows uninterrupted in the wild, the fruit opens up and then falls to the ground. In doing this, the tomato slowly rots and decomposes.
As the tomato decomposes, the protective outer coat of the seed breaks down. This process of rotting actually helps prepare the seeds that fall for growing the following year. Once this layer is gone, it then allows for easy germination of the seed.
When saving your own tomato seeds, all you need to do is follow the same process. That means allowing the seeds to break down enough to have the protective coat removed. It might sound difficult to do, but the process is quite simple.
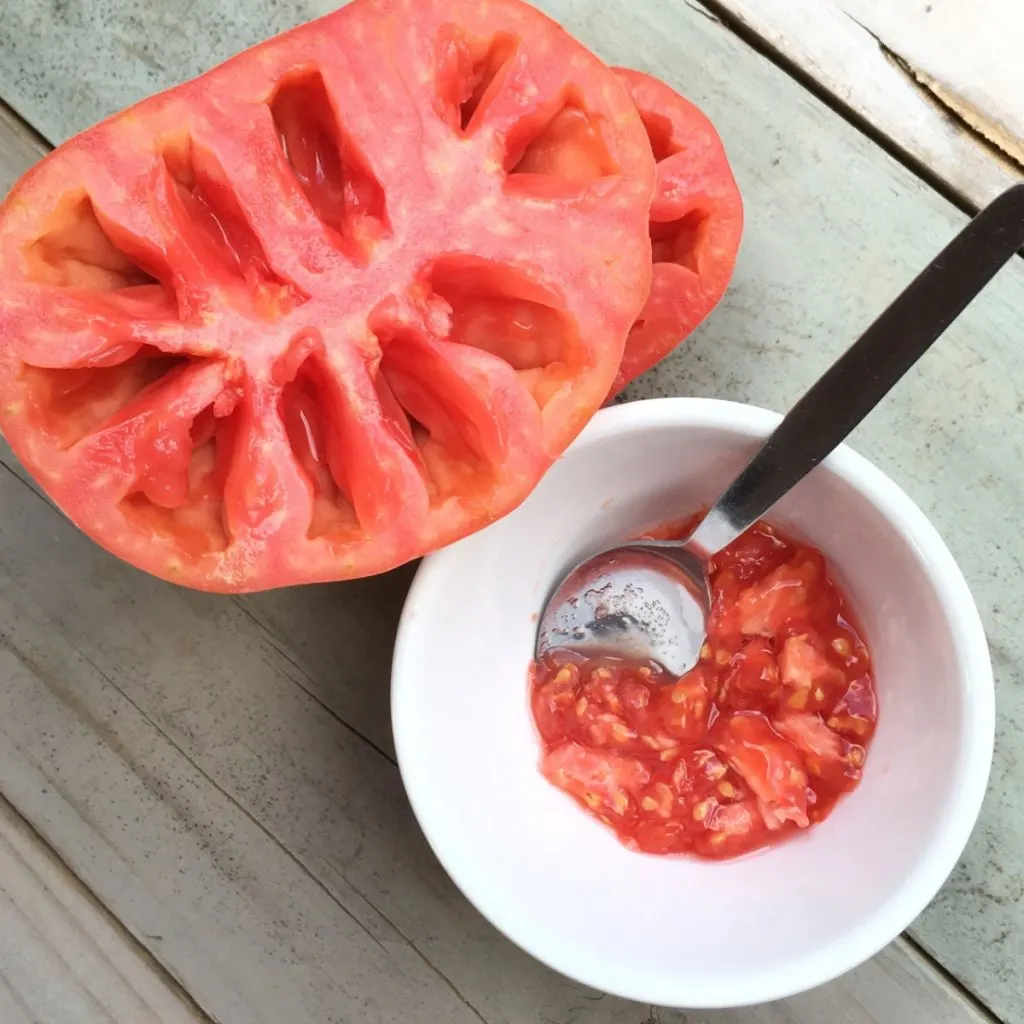
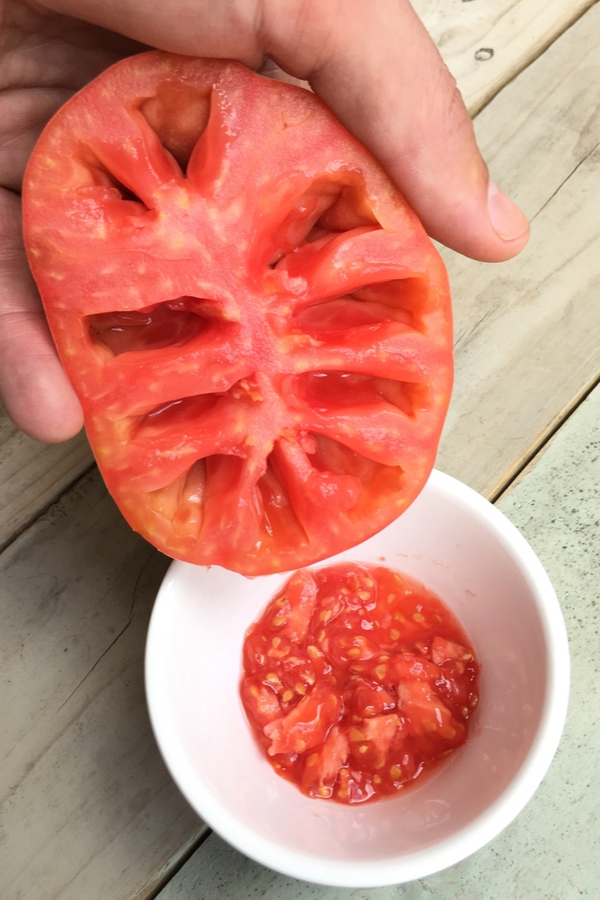
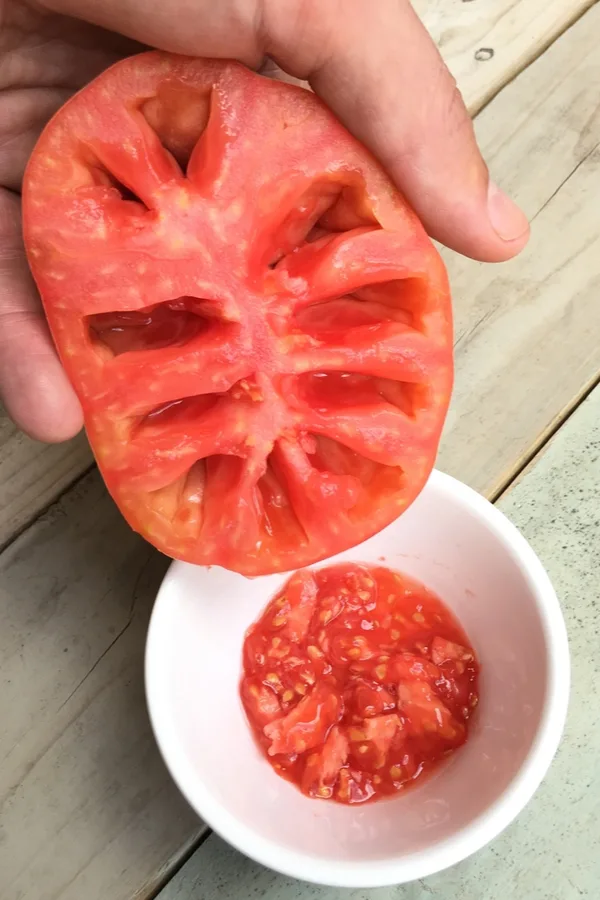
The first step it to remove the pulp and seeds from your tomato.
Saving Tomato Seeds – How To Save Tomato Seeds From Your Tomatoes
When saving tomato seeds, always begin by selecting a healthy, ripe tomato from your best plant. Whether saving seeds from a tomato, a pepper, or any vegetable, it’s best to save seeds from the healthiest vegetable on the best looking plant.
By selecting from the best stock, you ensure the best chance for good growth, health and success. It all comes down to good genetics. By selecting the best tomatoes, it strengthens the odds for the best traits to carry on.
Once you have your tomato, start by cutting it in half. Next, scoop out the pulp and seeds into a clean mason jar. There is no need to add any water or a lid, you need only the pulp and seeds.
Now it’s time to place the jar in a warm, humid location that is out of the way of everyday traffic. The goal here is to let the tomato rot for a few days. By placing it out of the way, you can also avoid the smell of a rotting tomato. One that usually isn’t too pleasant!
Starting your own tomato seedlings from saved seeds saves money – all while helping you grow better tomatoes!
Breaking Down The Protective Coating – How To Save Tomato Seeds From Your Tomatoes
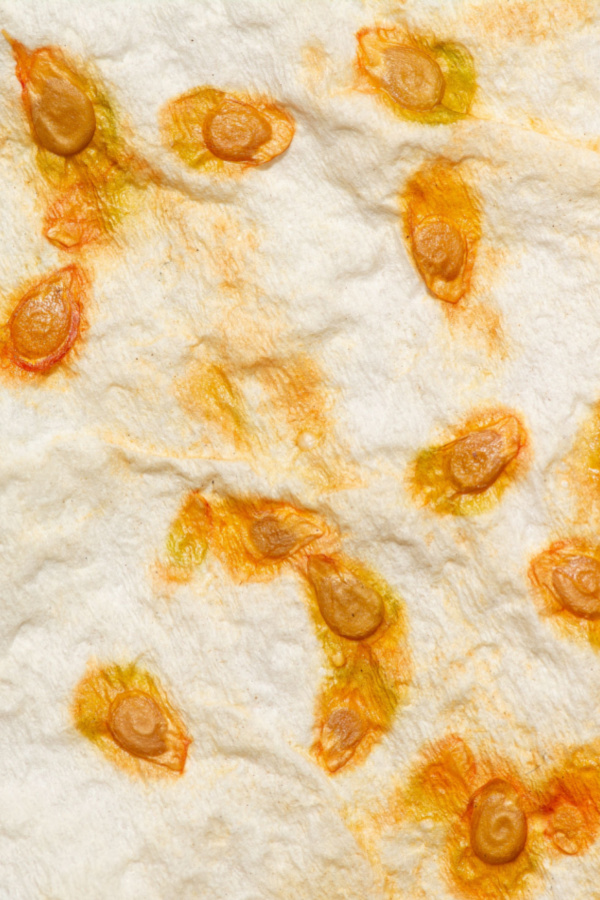
In a few days, the tomato pulp will begin to decompose. Usually, within five days, the pulp will start to display a white or green fuzzy mold. It can take a bit longer in some instances, but a little less than a week is usually a good rule of thumb for getting your seeds and pulp to begin molding.
Once the tomato pulp and seeds have mold covering most of the pulp, it’s time to take action. Begin by pouring water into the jar and wash off the mold. Repeat the process a few times until the seeds are clean.
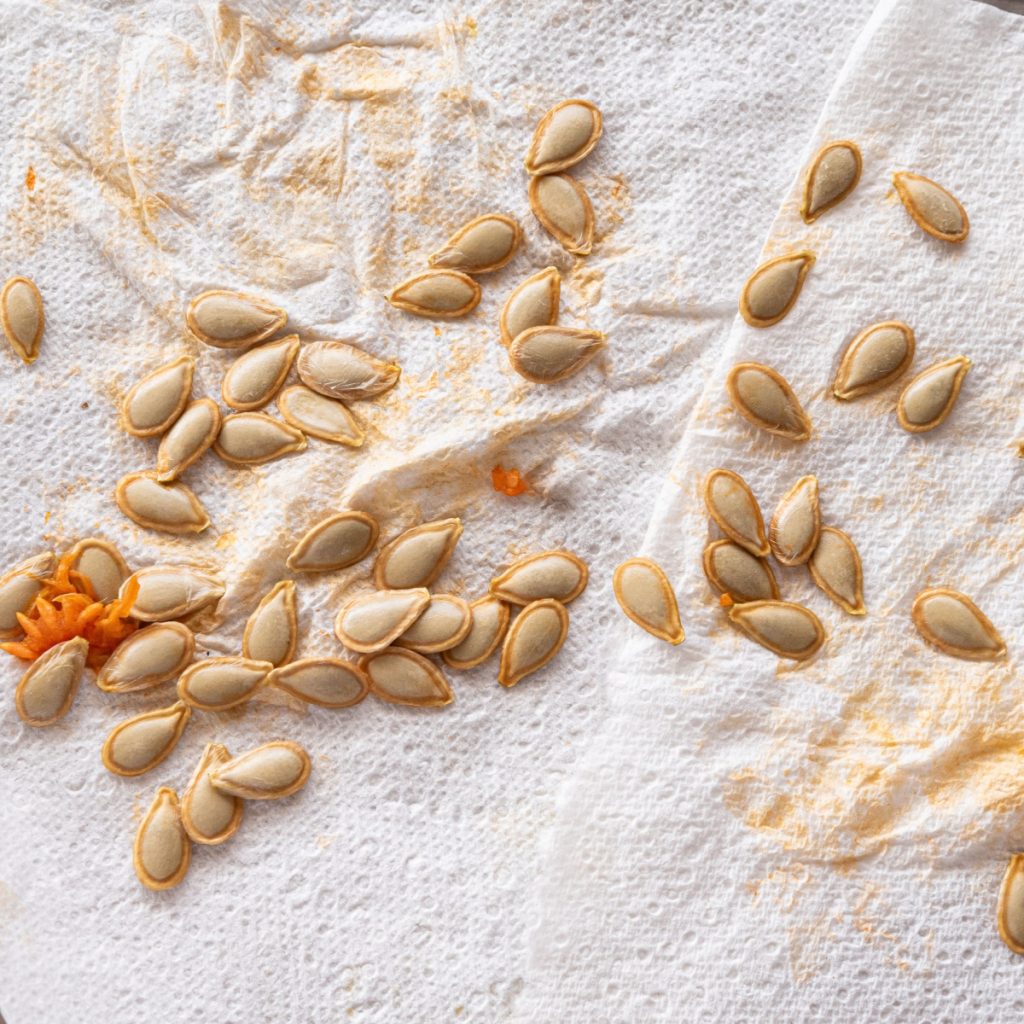
Once clean, fill the jar one more time with water. The good seeds will sink to the bottom, allowing you to skim off the pulp and bad seeds. Once you skim off any remaining pulp and floating seeds, pour the water out. The seeds left are now ready to dry and save.
To dry, place the seeds out on a paper towel or newspaper for a few days. It’s very important to let tomato seeds dry completely before storing. This helps to maintain the seed’s vitality and allows it to store longer as well.
Once dry, put the seeds in a sealed plastic baggie or mason jar with a covered lid. Store in a cool, dry and dark location. If you have room, the refrigerator makes an excellent storage location for seeds.
This Is My Garden is a garden website created by gardeners, for gardeners. Jim and Mary Competti have been writing gardening, DIY and recipe articles and books and speaking for over 15 years from their 46 acre Ohio farm. They publish three articles every week, 52 weeks a year. Sign up today to follow via email, or follow along!
Starting Seeds
Looking to save the seeds from your vegetable plants this year to plant and grow again next year?
Saving vegetable seeds from your garden is one of the best ways to save big on your home gardening budget. But did you also know that it is one of the best ways to grow healthier plants and a have a more productive garden?
By saving seeds this summer from your best vegetables and from your healthiest and highest producing plants, you create a higher quality seed stock to grow from the following year. And the better the seed, the greater chance for even better plants next year!
Whether it’s saving pumpkin seeds (above) – or seeds from any of your vegetables, a few tips and tricks can go a long way to having great seeds on hand for great plants next year!
It’s simple fact that a productive plant gets its start from a healthy, fertile seed. If a seed is weak, old or comes from a less than desirable plant, it is likely the seed will produce a weak and feeble plant as well.
That is exactly why you want to select the healthiest and strongest vegetables to harvest your seeds from. A strong, vibrant plant has the best chance of producing good seed stock. Especially when you take seeds from the fruit when the plant is at it’s peak. And that is exactly why mid to late summer is the perfect time for saving seeds!
How To Save Seeds From Vegetable Plants – 3 Secrets To Success!
#1 Save Your Seeds In Mid Summer
The first fruits and vegetables produced on plants tend to be very small and a bit immature. Most of the seeds that form early are likewise not as developed. Because of this, they do not make good candidates for saving.
Late season fruits are not the best choice either, but for a few different reasons. Late in the year, the seeds in fruit often have more of a chance to be cross-pollinated from other varieties and crops. That means you can end up saving a seed that is not going to replicate your current plant.
Seeds can be quite expensive to purchase year after year, but by simply saving back a few from your open pollinated plants, you can grow for free!
That leaves mid-summer as the absolute best time for seed collecting. For starters, always make sure you are picking from the healthiest and most productive plants in the garden. Plants that show signs of disease or stress can have less than ideal seeds.
In addition, select fully mature vegetables that are ripe. This will ensure that the seeds within the fruit are also mature and have the best chance of germinating.
#2 Save The Right Seeds – How To Save Seeds From Vegetable Plants
When saving seeds, it’s important to know that not all seeds from every plant can be saved. The best seeds to save are heirloom open-pollinated seeds.
An open-pollinated seed is one that develops within the fruit of the plant, and will continue to produce the same crop and the same exact seed, year after year. You can find open-pollinating varieties of seed for nearly every vegetable under the sun.
Seeds That Shouldn’t Be Saved – How To Save Seeds From Vegetable Plants
Unfortunately, you cannot save the seeds from all vegetable plants. And at the top of this list of the non-saves are hybrid plants.
Hybrid plants are created by crossing two or more varieties of a vegetable plant to produce a new plant with new qualities. They can be fantastic plants and produce wonderful results. But the only issue is that the seeds from these plants will not produce the same plant the following year.
Instead, when seeds of these plants are saved, they usually will revert back to grow a version of one of the original plants. In some cases, the plant will produce the original fruit, or because of the mutation, no fruit at all
Now that you know what you can save, let’s cover how to save your seeds! The process for saving vegetable seeds is nearly identical for every vegetable plant except tomatoes, which require an extra step to ensure success.
First we will cover the more traditional seed saving, and then take a look at how to save your tomato seeds as well.
Some seeds from tomato plants like this hybrid version will not regrow the same plant.
#3 How To Save Seeds From Vegetable Plants – The Process
After selecting your vegetable, begin by cutting it in half. Next, gently scrape the seeds from the core, being careful not to damage the seed coating with your knife or scraper.
Next, lay the seeds on a dry paper towel, and place in warm, sunny location to dry. It will usually take a few weeks for seeds to dry out completely. Once dried, take a new piece of a paper towel, and fold the seeds up inside of it. The paper towel is great for absorbing any moisture that might still be in the seed. It will also help protect the seed from any damage from light.
Store in an airtight container or plastic bag, and keep in a cool and dry location. You can keep your seeds in the refrigerator for a longer shelf life. However, if you will be using the seeds the following season, cold storage is not necessary.
Saving tomato seeds is not difficult but it does take a few extra steps to ensure success. Tomatoes have a natural, protective coat around their seed. And without helping the seed break down that outer coating, they struggle to germinate.
Allowing the seeds to dry out on a paper towel will help in absorbing extra moisture quickly.
But fortunately, the process to break down the coating is simple and easy. It all boils down to letting the seeds rot or ferment.
Start by selecting the tomatoes you would like to save, and then scrape the pulp and seeds into a small jar or container. Let the container sit for a few days until it develops a bit of mold on top. Although it might look a bit funky, it is the mold that works to break down the protective coat.
It is a good idea to store the container away a bit as it can produce a bit of odor. After a few days, simply rinse the seeds off with water and allow them to dry out like the other vegetable seeds.
This Is My Garden is a garden website created by gardeners, for gardeners. Jim and Mary Competti have been writing gardening, DIY and recipe articles and books and speaking for over 15 years from their 46 acre Ohio farm. They publish three articles every week, 52 weeks a year. Sign up today to follow via email, or follow along!