Nothing brings a landscape to life more than beautiful trees, shrubs and bushes. Here are all of our how-to articles on planting and maintaining these lasting beauties in the landscape:


Nothing brings a landscape to life more than beautiful trees, shrubs and bushes. Here are all of our how-to articles on planting and maintaining these lasting beauties in the landscape:
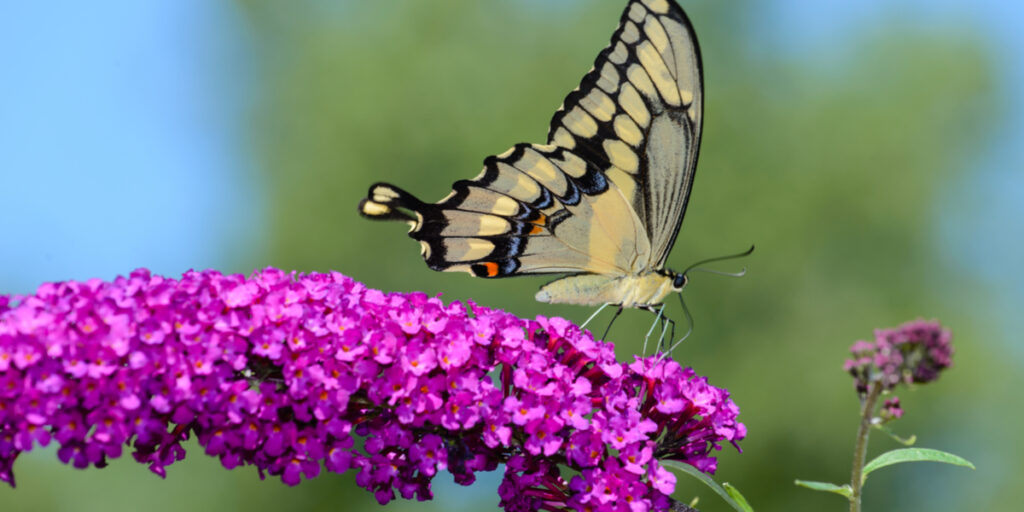
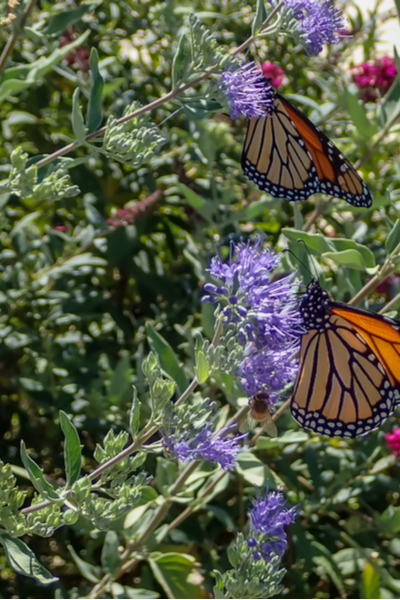
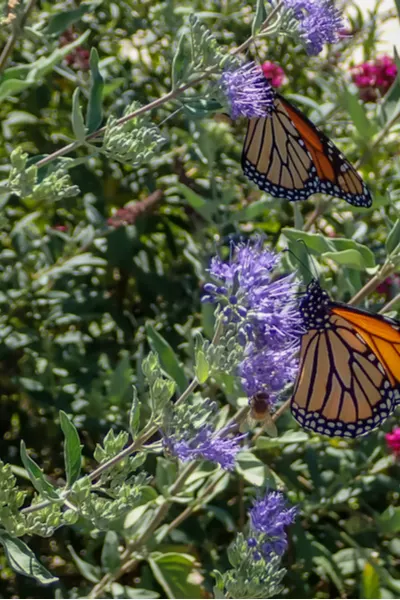
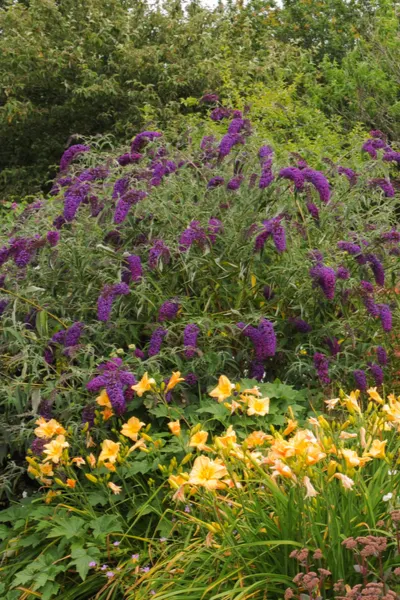
When it comes to attracting butterflies, bees and even hummingbirds, nothing works quite like growing butterfly bushes!
In fact, they have become a go-to plant in recent years for those looking to create their own backyard butterfly gardens.
These deciduous shrubs become overloaded with butterflies as their massive, nectar-filled blooms appear in early summer.
And perhaps best of all, butterfly bushes keep on blooming all summer long, keeping these flying beauties coming back again and again.
Beyond their common use in butterfly gardens, butterfly bushes make for a great focal point when planted in large flowerbeds as well.
At full maturity, many full-sized varieties grow from 6 to 8 feet in both height and diameter.
And, with their quick-growing nature, they work well when planted as a hedge too.

Although butterfly bushes can be planted “bare-root” style in the dormant months of early spring and fall, most are planted as live container-grown plants in mid to late spring and summer.
Butterfly bushes perform at their peak in full sun, so it is important to select an area that receives at least 8 hours of sunlight per day.
Always plant in well-drained and fertile soil. Dig planting holes to twice the size in diameter of the root ball to help loosen the soil for good root expansion and growth.
Add in generous amounts of compost when planting to help the plant adjust to it’s new location.

As a good rule of thumb, mix equal parts of compost and soil back when filling in the planting hole. See : How To Create The Perfect Summer Compost Pile
The top of root ball should be planted even with the surface of the soil. Water in the roots at planting time, and keep well-watered over the following weeks until the shrub becomes established.
Before planting, be sure to check the mature growth size of your selected variety for proper plant spacing.
Butterfly bushes grow quickly, and can compete for space when planted too close.
Butterfly bushes can be invasive in many warm climates.
The key to keeping them in check is to keep plants well-pruned, and remove new starts.

As you will see below, there are also many new more compact varieties available that can be easier to manage.
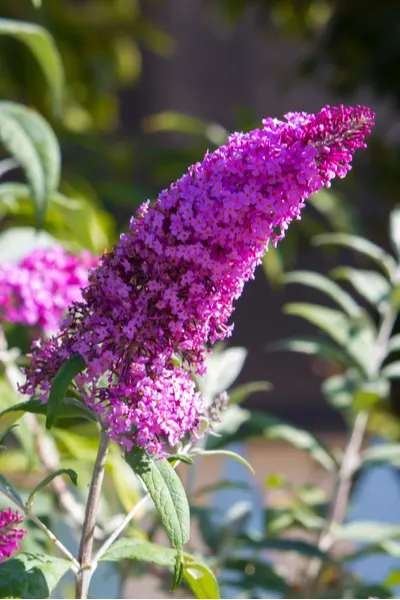
When it comes to available varieties, the sky is really the limit for choosing size and color.
Butterfly bushes can be found with blooms of white, blue, purple and red, as well as a huge mix of hybrid colors as well.
Although traditional butterfly bushes grow quite large, there are also several compact styles available.

The compact varieties have become quite popular in recent years for smaller gardens and settings.
These styles tend to be less invasive than the larger varieties, growing to just a few feet in diameter and height.
Here are a few top choices for butterfly bushes, including a few compact styles:
When it comes to growing butterfly bushes, the Black Night variety is a beauty!
This full size bush has intensely-dark purple / violet blooms. And even better, it blooms from early summer all the way to the first frost!
It is perfect as a focal point, or when used as a hedge plant. The Black Night matures to about 6 to 8 feet in width and height.

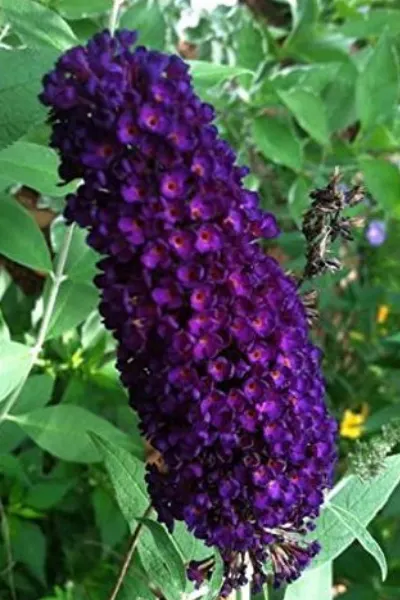
It is hardy in zones 5 through 9, and prefers full sun.
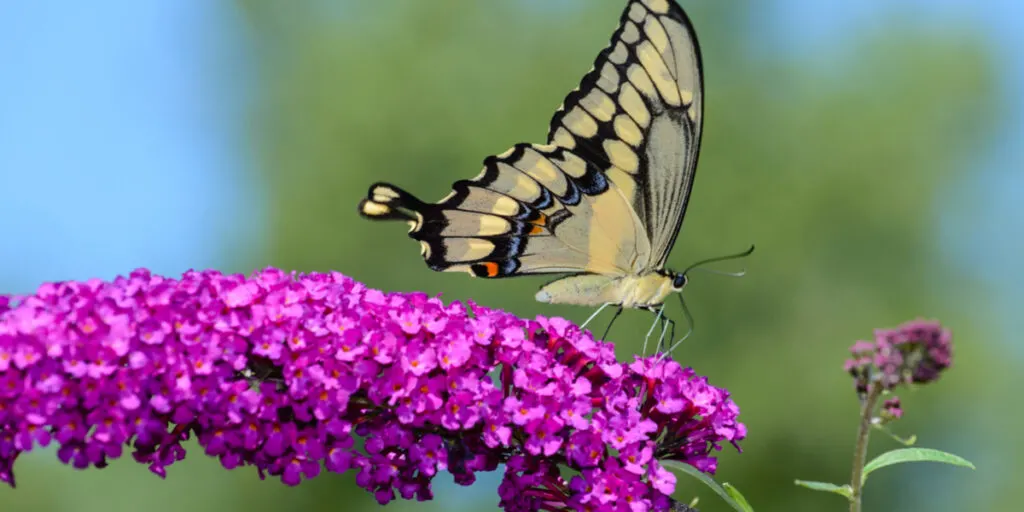
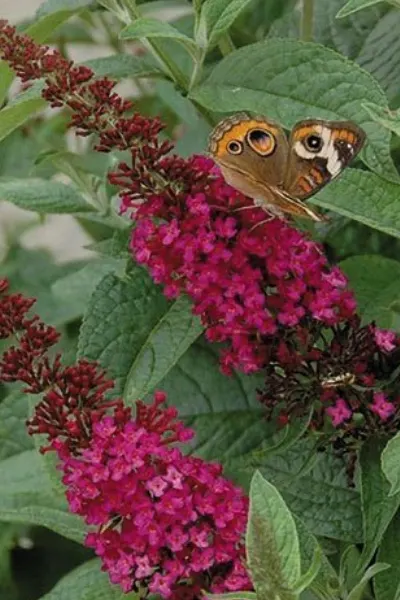
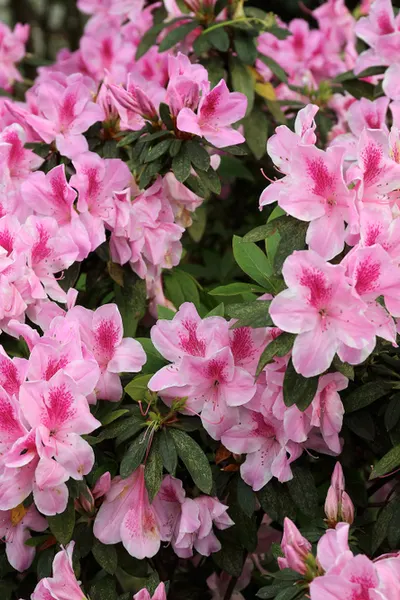
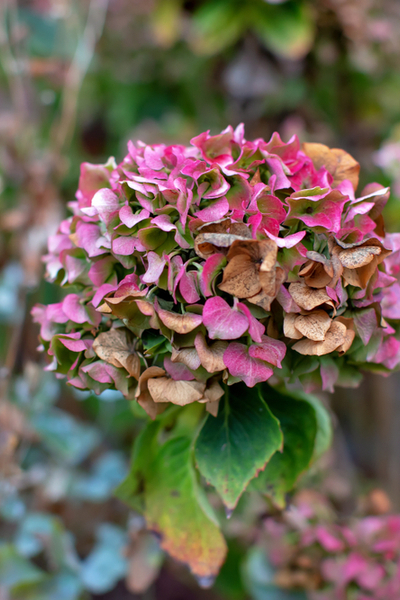
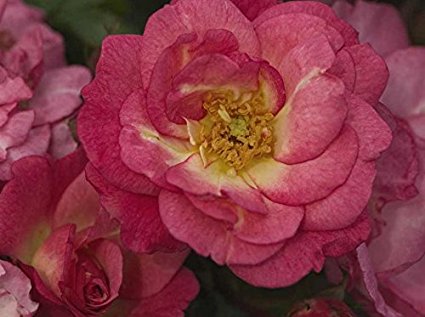
The Miss Molly (pictured earlier in the article) variety is a more compact shrub than the standard butterfly bush.
With it’s dark-red sangria-colored blooms, it is a show-stopper in gardens and flowerbeds! Product Link : Miss Molly Butterfly Bush
Another compact variety, the Blue Chip butterfly bush grows to around 2′ in height and width at full maturity.
It is hardy in zones 5 through 9, the blue-chip is best suited to growing in full sun.
Here is to planting and growing butterfly bushes in the landscape!


This Is My Garden is a website dedicated to spreading the love and knowledge of gardening around the world. We publish two new garden articles each week. This article may contain affiliate links.
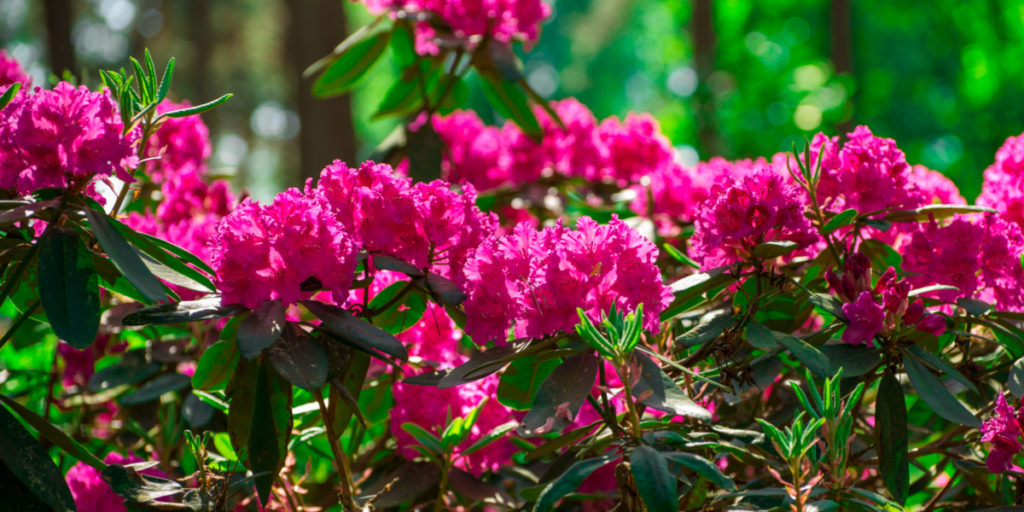
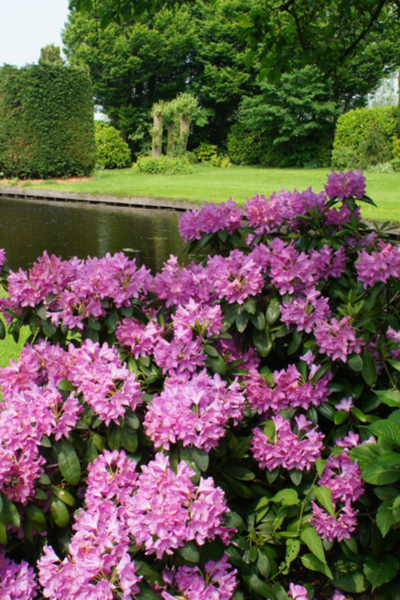
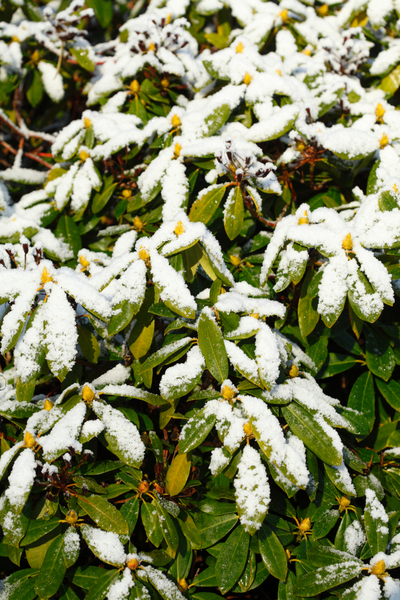
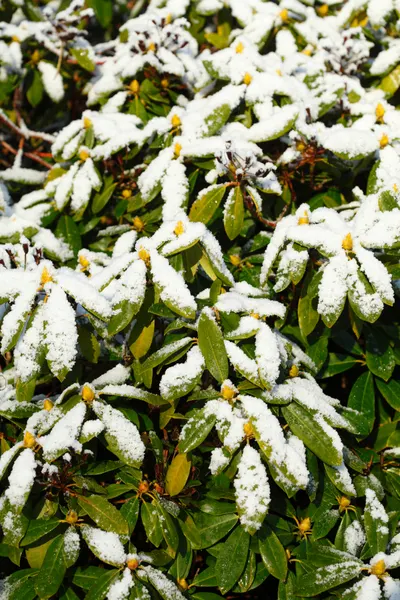
Planting and growing Rhododendrons is an excellent way to add color, texture and beauty to your landscape.
Rhododendrons almost always keep their over-sized foliage throughout the entire winter season. That alone makes them great for keeping a bit of color in beds long after most plants have shed their leaves for winter.
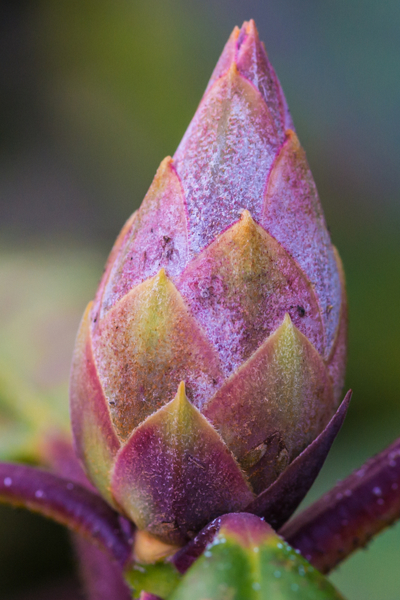
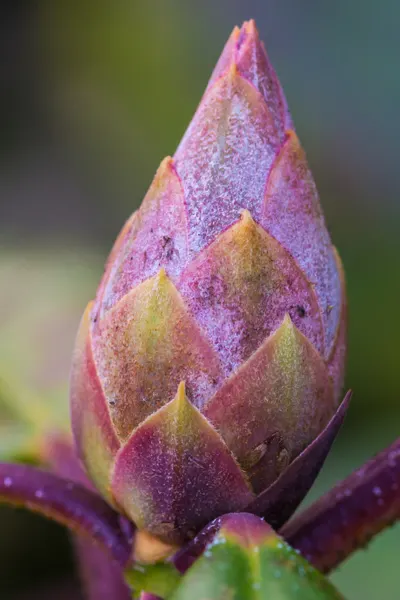
But where Rhododendrons really come to life is in the spring.
Their large, showy clusters of bright and often-fragrant flowers burst from funnel shaped buds. It is simply a magnificent site to behold!


There are well over 850 varieties of Rhododendrons, which happen to be a cousin of the Azalea plant.
Establishing them successfully all boils down to finding which of those 850+ varieties work best for your climate and landscape.
When it comes to growing rhododendrons, it all starts with selecting a variety that works best with your climate.
Their are plant types that can survive winters in near-arctic regions, and others that thrive where the temperature soars.

We have included a few of our favorite varieties at the end of the article that cover many of the ranges, but as with any perennial, always start by reading the plant label to be sure you are selecting a rhododendron that will survive your climate.
With rhododendrons, it is also important to consider where you will be planting.
Most rhododendrons perform best planted where the morning or evening sun will provide most of their light.
Avoid planting in full-sun portions of the landscape, or in areas that receive most of their light during the hot afternoon.
Like their cousin the azalea, rhododendrons prefer the soil to be slightly acidic. They grow and bloom best with a soil PH between 5 and 6.
Last but not least, be sure to give plants enough space to grow.
Some varieties of rhododendrons can grow and spread 4 to 6 feet or more. Again,be sure to read the plant tags to ensure you are providing enough room for the plants to grow as they mature.
Rhododendrons do not require frequent or deep pruning. In fact, it can hurt the plant more than it helps.
With that in mind, it is extremely important to give them the space they need when first planting.
Rhododendrons should be planted in well-drained, rich, and slightly acidic soil.
Dig holes to twice the size and depth of the root ball, and amend the soil with compost or peat-moss to help the plants retain moisture.


If your soil PH is more on the alkaline side, you can also amend the soil with conditioners to help. Fertilizing with an organic acidic based fertilizer is a good idea as well. Product link : Dr. Earth’s Organic Rhododendron Fertilizer
Be sure when planting to keep the top of the root ball level with the soil line.
If the ball is planted to deep it can create water-logging issues for the plant. On the other hand, if it is planted too high, the roots may not receive enough water.
Water the plant thoroughly when planting to help it through the stress of transplanting.
Mulch is key to keeping the soil temperature and moisture level regulated for Rhododendrons. Mulch to a depth of 3 to 4 inches. Pine bark or pine needles are an excellent choice as they are slightly acidic.
As noted earlier, Rhododendrons simply are not fond of a lot of pruning.
They can be lightly shaped when needed, but keep long term pruning chores to the basics of removing any damaged or diseased limbs.
Deadheading spent blooms will help to promote new blooms. Simply cut or snap off old blooms at the base of the stem.
Below are some great choices for Rhododendrons that add big color. For more great long-lasting beauty, check out our article on growing Dogwoods here : How To Plant, Grow and Maintain Dogwood Trees
Golden Torch is a low grower, maturing to a total of just 3 to 5 feet high. The cluster of blooms however are quite large for such a small plant, reaching 4 to 5 inches in diameter in full bloom.
And those blooms are simply beautiful! Lasting for nearly a month, the blooms change and alter their colors in beautiful arrays of yellow, cream and orange.
The Golden Torch is hardy to zones 4 through 8. Plant Link : Golden Rhododendron
The PJM’s are fantastic for those looking for winter hardiness. They are one of the hardiest of all rhododendrons.
They are considered an evergreen shrub, keeping their small, compact leaves the whole year round. Plant Link :Elite Lavender Rhododendron
Polar Night Rhododendrons are a great choice for those looking for a bit of a conversation piece.
Their spectacular spring flowers are deep, dark and almost blackish in color. Plants grow to about 3 foot high and 6 feet in diameter at full maturity.
The Polar Night variety is hardy from zones 4 through 8. Plant Link : Polar Night Rhododendrons
This Is My Garden is a website dedicated to spreading the love and knowledge of gardening around the world. We publish two new garden articles each week. This article may contain affiliate links.
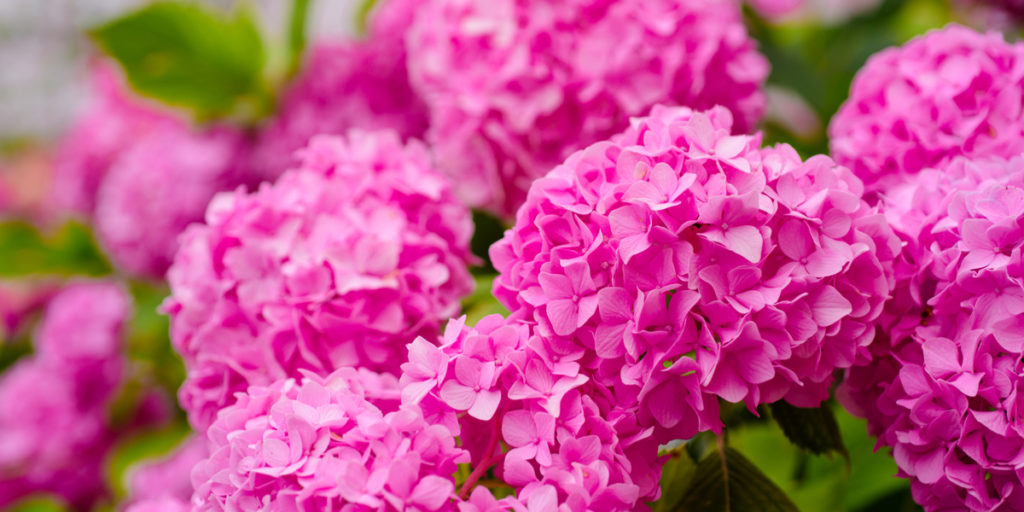
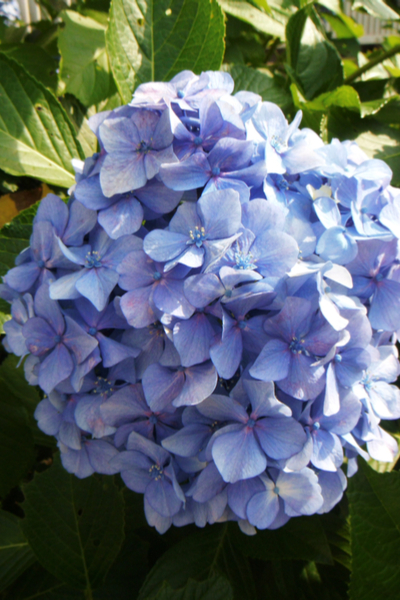
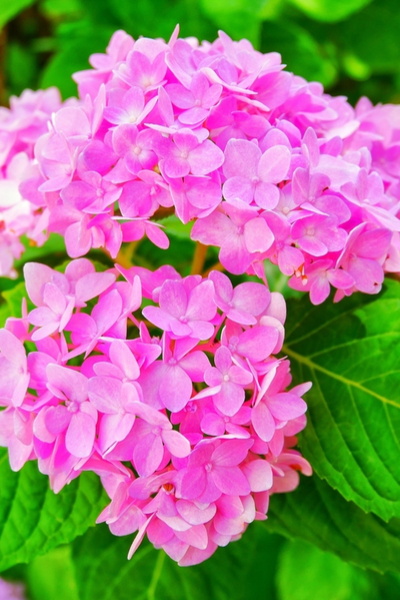
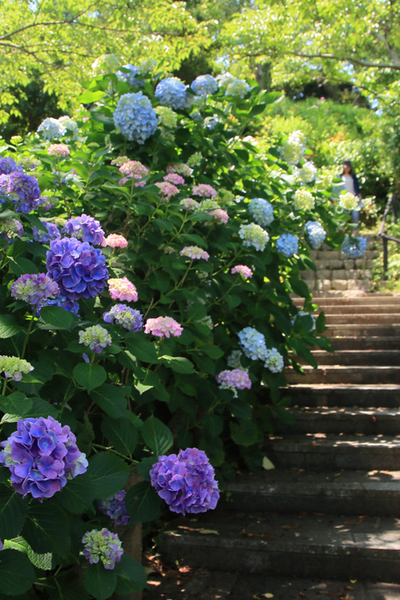
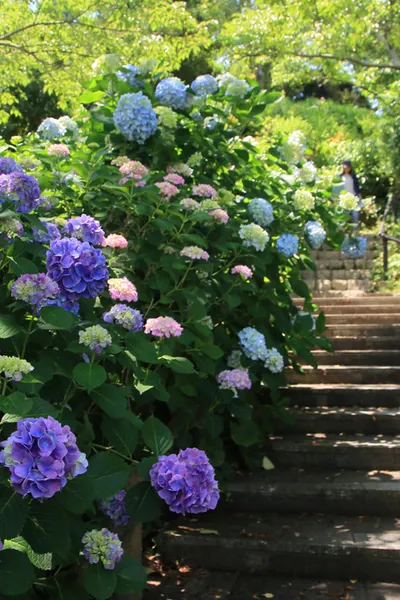
When it comes to growing hydrangeas in the landscape, a few simple tips can go a long way to gorgeous blooming success.
Hydrangeas are well known for their large, mophead-style blooms.
Available in a wide variety of brilliant colors, their beauty is simply stunning.
But what makes Hydrangeas even more special is they can be enjoyed by gardeners from all over.

With both cold-hardy and heat tolerant varieties available, hydrangeas can be grown and enjoyed in nearly any climate.
Even more fascinating, the soil in which they are grown affects how they bloom.
The color of hydrangea blooms are heavily altered by the existing PH of the soil.
Although specific varieties have distinct inherent colors, their blooms do morph a bit based on the make-up of the soil.

Here is how it works:
In general, the more acidic the soil, the more blue your hydrangeas will be.
Alternatively, the more alkaline the soil, the more hydrangeas tend to bloom on the pinkish side of the spectrum.
Success with growing hydrangeas all starts with selecting the right location for planting.
Hydrangeas simply don’t perform well in full sun.

So what is the best location? An area that receives morning sun with afternoon sun is at the top of the list.
Locations that receive evening sun also work well too.
But avoid any area that receive more than 10 hours of full sun each day. It is simply too much heat and sunlight for the plants to perform well.
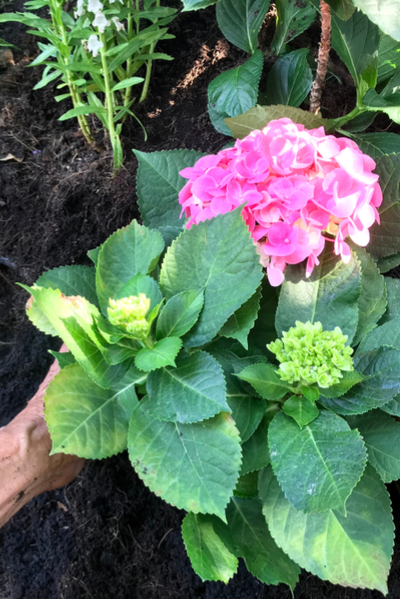
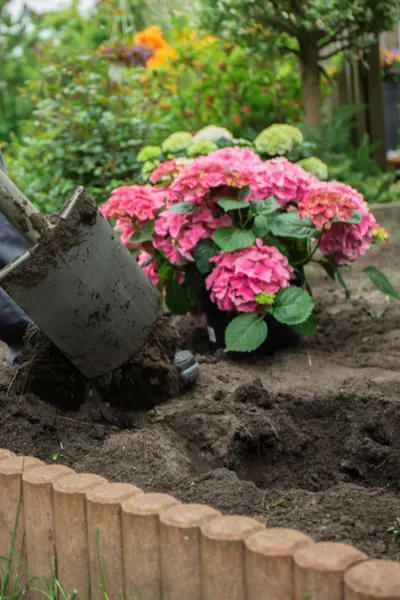
Hydrangeas are best planted in early spring or fall. And they love rich, fertile and well-drained soil.
If you live in areas with hard or clay-like soil, amend planting holes with large amounts of compost. See : How To Make Great Compost
Dig holes to twice the size of the root ball to allow the roots to easily expand. Keep the top of the root ball level with the surface of the ground when planting.

Planting too low can lead to pooling water at the root ball. Too high, and the plants sheds all water.
Apply a few inches of mulch on top to help conserve moisture and protect the plants.
Hydrangeas don’t require a lot of additional fertilizer when grown in good soil.
However, a basic all-purpose fertilizer can be used at planting time, and every few months during the growing season to aid in plant growth and health. Product Link : Jobes Hydrangea Fertilizer
Here are a few great varieties to try : Firelight Hydrangea – Rio Big Leaf Hydrangea
Hydrangeas do not require major pruning from year to year to keep blooming.
Basic care involves making sure to remove any dead or diseased wood in late fall to keep plants healthy.
Deadheading, on the other hand, is an important part of keeping plants blooming during the growing season.

As blooms die off, cut them back to the stem.
This helps keep the plant’s energy focused on producing new blooms, and not wasting it on the blooms that are fading.
Hydrangeas can easily be split to form new plants. It is a great way to create a mass-planting or hedge line without breaking the bank.
Usually, plants can be split and divided every 3 to 4 years with good results.
Use a sharp shovel to dig up the entire root ball of the hydrangea. Dig at least 10 inches from the edges out from the root ball to avoid damaging roots.
Once the root ball has been dug, take the sharp shovel and split down through the middle.
Each division can now be planted to form a new plant.
Large plants can be split more than once to create more plants. Splitting and dividing is best done in early spring or late fall.
Here is to growing hydrangeas in your landscape this year!
This Is My Garden is a website dedicated to spreading the love and knowledge of gardening around the world. We publish two new garden articles each week. This article may contain affiliate links.
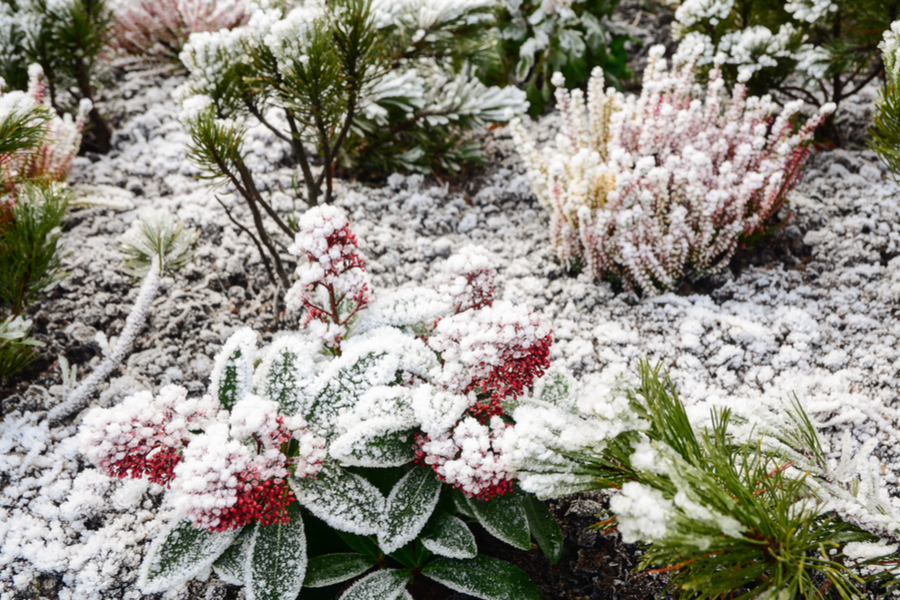
As winter approaches, it’s time to protect perennials, roses and other small bushes from the impending cold weather.
Snow, ice, and fluctuating freezing and thawing temperatures can take a toll on plants.
Without proper protection, many can become heavily damaged, or freeze out all-together.
But with a little care now, hydrangea, rose bushes, lilies, hosta plants and other perennials can remain vibrant and strong through the most sever of winters.
Here are the ins-and-outs of preparing perennials for winter, along with a few tips and tricks for larger perennials such as rose bushes, hydrangea and perennial grasses.
“Do I need to cut the perennials in my flowerbeds back?”

That is the million dollar question for many gardeners.
Nearly all small foliage perennials can be left in-tact through the cold winter months.
In fact, leaving foliage and branches in places is a form of natural protection. It helps insulate the plants roots from the ever-changing temperatures winter can bring.
Leaving plants in-tact also allows for seed heads to form and create new plants while feeding birds and other wildlife.
But many times, there is a need to prune back.

For many gardeners, the thought of looking out all winter and seeing a tangled decaying mess of foliage is too much to handle. And in some cases, leaving those seed heads created too many new volunteers.
If you do choose to cut back the stems and foliage of perennials like hosta plants, daisies, lilies, bee-balm and more, the real key is to provide a bit of freeze and thaw protection at their base.
This can be done easily with fall’s greatest bounty – leaves! Leaves and shredded leaves make an excellent mulch for perennials.
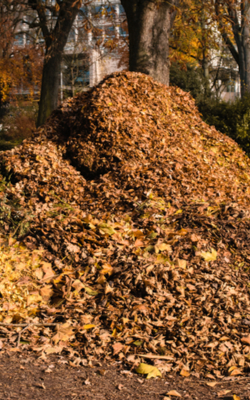

They keep the roots and crowns of plants insulated from the extreme swing of temperatures winter can bring.
There are a few exceptions for some perennials that need a little extra care. Here are a few of the most common perennials that require special attention:
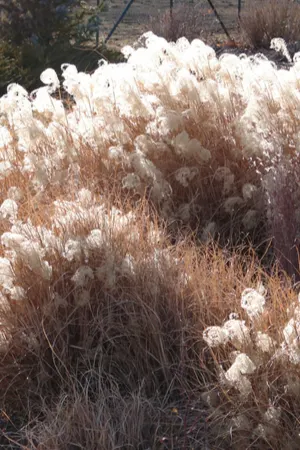
Ornamental grasses can be pruned back in late fall, during the cold of winter – or even in the early spring.
It really comes down to a matter of personal preference. There are, however, a couple of compelling reasons to keep them up until spring.
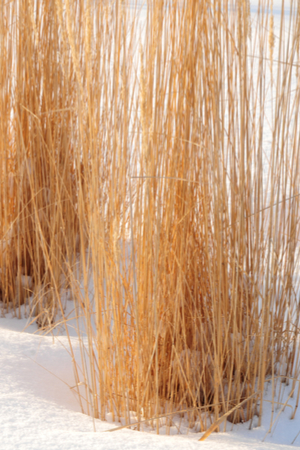

Ornamental grass clumps provide protection for many birds and animals through the cold winter months. Not to mention, they make great nesting material come springtime for the birds.
The thick grasses also can provide a bit of thermal protection for other perennials that may share the bed space. And they also make for an excellent snow and wind block.
As for dividing them, this is a chore that definitely needs to wait until spring. For more see : Pruning Back Ornamental Grasses.
Large shrub bushes are usually strong and tolerant enough to make it through the winter without too much trouble.
One thing you can do to help is to stop all fertilizing in late summer to allow rose shrubs to ease into their normal dormancy period. This goes for both large rose bushes, and for more tender roses.
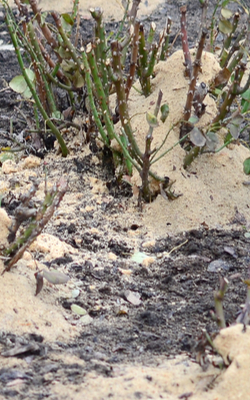
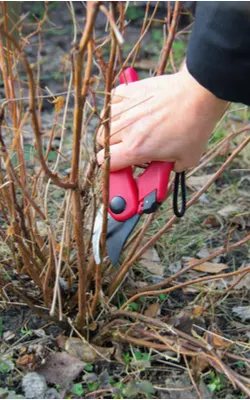
For tea roses and other tender varieties, a bit more protection is required.
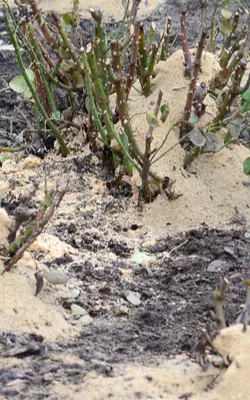
Stop pruning and dead-heading in early fall.This allows the bush to stop producing new shoots, and go dormant faster.
Apply 6 to 12 inches of shredded leaves, sawdust or straw to cover the crown and base. If need be, you can use a temporary cage or fence to keep the mulch mounded.
Do not prune or cut back roses until early spring.
Hydrangeas do not have to be cut back, but doing so can encourage larger blooms.
Hydrangeas grow and set blooms on the same year’s growth. So if left to grow on older branches, the plant will be sturdier, but the blooms smaller.


This happens because some of the energy is spent on maintaining a larger plant.
If you choose to cut back, cut back after the foliage has died back in the fall. Leave about 4 to 6 inches of old wood at the bottom.
This will serve as a nice base to keep blooms and new growth from easily toppling over.
Apply enough mulch to cover the crown and old wood growth through winter.
This Is My Garden is a garden website created by gardeners – for gardeners!
We publish two articles every week, 52 weeks a year. Sign up below to receive them free each week via email, and be sure to follow us on Facebook This article may contain affiliate links
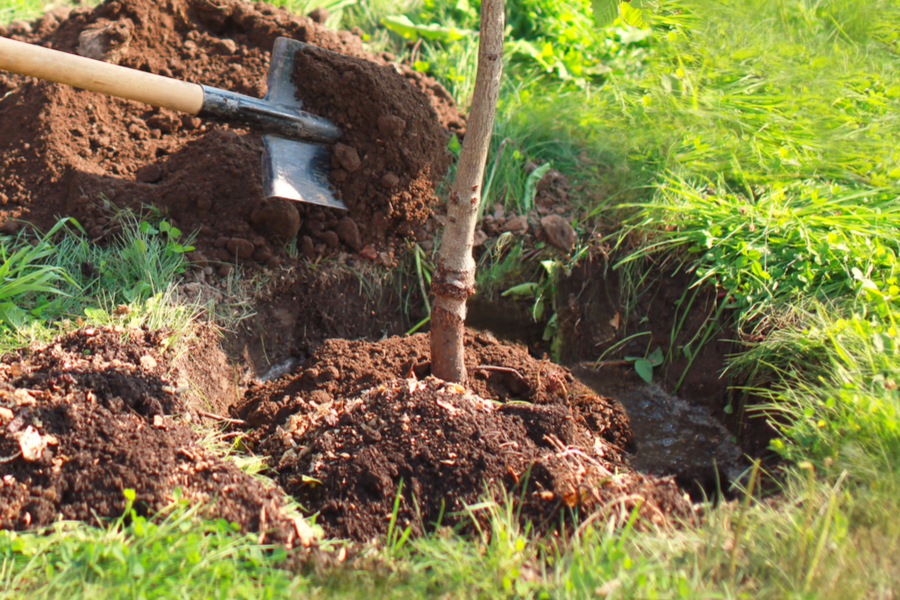
There is simply no better time to plant trees than in the cool, crisp air of autumn.
Whether dealing with fruit, nut, shade or ornamental trees, fall planting gives a tree’s root structure time to gently acclimate to the soil before going dormant for the winter.

Amending the soil with compost or aged manure is a great way to provide nutrients to newly planted trees.
Although trees can be planted nearly anytime the ground is not frozen, the high heat of summer and the wild swing of temperatures throughout spring can be stressful to a newly planted tree.
However, in the cooler fall weather, without the scorching heat or constant freezing and thawing, roots have an easier time settling into the soil. As spring returns, they come out of their dormant state ready to grow and flourish.
Here are a four big keys to successfully planting trees in your landscape this fall.
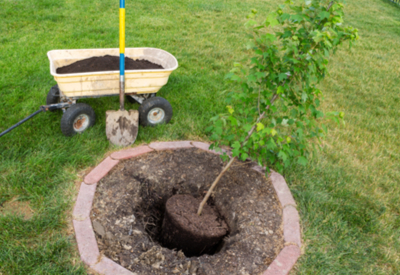
One of the biggest mistakes made when planting trees is not digging the hole large enough.

Dig planting holes 2 times the diameter of the root ball, and 4 to 6″ deeper
Digging to a larger size helps break up the soil, making it easier for trees to spread their roots.
The loose soil is also important for forming air pockets and channels in the soil. These are vital to bring both air, water and nutrients to the root zone.
Planting holes should be dug at two times the circumference, and 6 inches deeper than the root ball. This allows plenty of room for expansion of the roots.
It is important to note that you will not be planting the tree down 4 to 6 inches into the soil. This depth is purely to help break up the hardened earth under the root ball for roots to expand.
Once the hole is dug, its extremely important to amend the soil. Especially if the soil is clay or hardened earth.
When it comes to trees, two of the best amendments to add are compost and aged manure.
Compost has the perfect balance of nutrients that can feed a tree slowly over time. When mixed with the existing soil, around the tree, it helps to keep soil loose and energized.
Aged manure is teeming with life, and much like compost, when incorporated into the soil, it creates a super-soil for trees to flourish.
A few five gallon buckets of either, or a mixture of both mixed into the soil when planting is more than enough to do the trick.
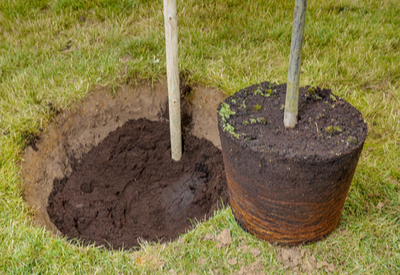
When planting, place 6 inches of the loose soil mix back into the bottom of the hole. This will provide a loose mix for the root ball to nestle on and expand in.
It also ensures that the crown of the tree will be slightly above the soil line when planting.
Finish by adding the rest of the mix to fill in and around the tree.
Don’t forget to mulch!
Once planted, a thick 3 to 4″ coating of mulch will help to keep the plant protected. Mulch not only helps to conserve water, it also helps prevent competing weeds at bay.
Perhaps best of all, it helps keep the soil temperature regulated, and provides valuable insulation throughout winter.

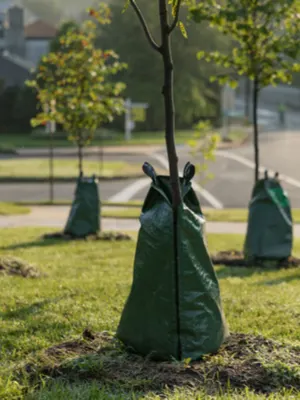
Water bags are a great way to provide water to trees on a slow-release basis.
Just because the weather is cooler in the fall, it doesn’t mean your trees won’t need watering.
The single biggest reason trees fail in their first year is improper watering. That can be because of not enough water, or too much.
On average, a typical 5 to 10 gallon, 1 to 2″ thick diameter (trunk) transplanted tree requires 10 to 15 gallons of water per week during their first year of growth. Product Link : Tree Watering Bags
That means watering with about 5 gallons of water every 2 to 3 days. Especially if mother nature isn’t helping provide any. This excludes of course wintertime when the tree is dormant.
Watering more than this can actually be detrimental to the trees health and growth. Roots can become water-logged, and fail to take in needed nutrients.
After a full year, the roots of the tree should be fully established. At that point, watering is only needed if mother nature fails to provide rain for weeks at a time, or in times of extreme heat.
For more on trees, check out our article on 3 great shade trees for your yard : 3 Excellent Shade Trees To Grow
This Is My Garden is a gardening website created by gardeners, for gardeners!
We publish two garden articles every week, 52 weeks a year. Sign up below to follow along, and follow us on Facebook @ TIMG as well.
You can also share your backyard gardening tips or stories with us at info@thisismygarden.com to be our next feature! This article may contain affiliate links.
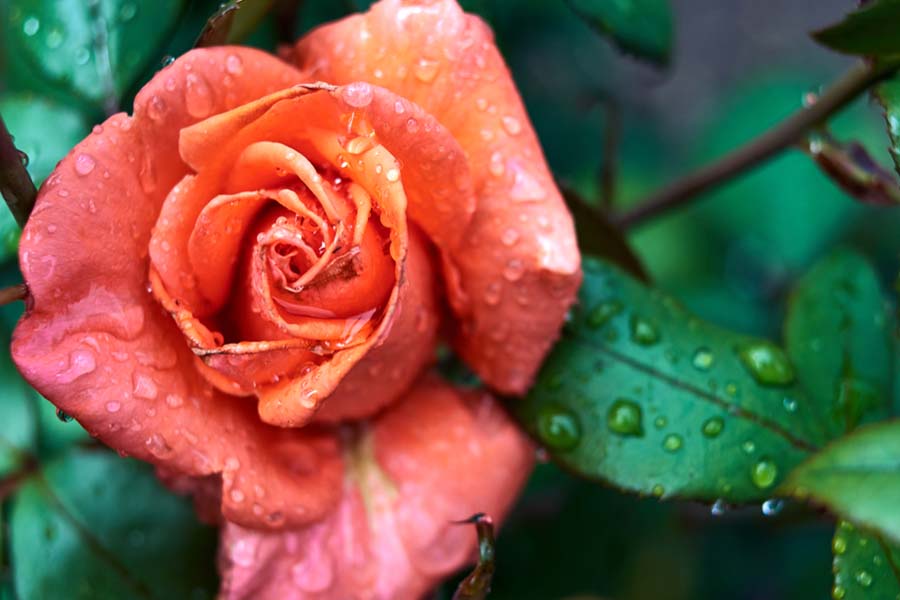
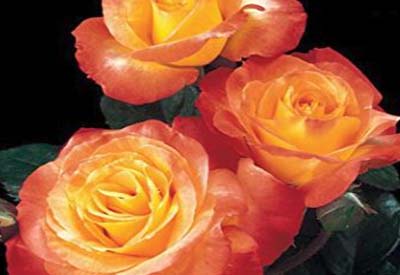
The simple joy of growing easy care roses!
It used to be you needed a proverbial “green thumb” to even think about growing roses. Classic rose bushes, although beautiful, could be a nightmare to grow when it came to controlling pests and disease. Black spot, powdery mildew, brown canker, blight, and a host of other ailments could turn the prettiest rose into an ugly mess.
But that simply isn’t the case anymore with the emergence of easy care roses. Each year, more and more low maintenance, easy care roses are hitting the market. And with stunning beauty! Many are now highly disease and pest-resistant, as well as hardier to both cooler and warmer climates.
They have allowed gardeners of all skill levels to add the classic look of roses to their home landscape. All without the constant worry of endless care and maintenance.
Here is a look at 3 incredible varieties of easy care roses that can add vibrant color to your landscape.
The Chihuly Rose
This wonderful floribunda rose has soft orange blooms with a hint of yellow streaking through. They are simply stunning as cut flowers. This rose is also the perfect choice for attracting honey bees to your yard.
The foliage of the Chihuly is dark-green and is highly disease resistant. This is another rose that has the ability to adapt to a wide range of growing zones – from 4 through 9. It requires full sun to perform best. It is perfect for mass plantings, or when used as a hedge. It can also make the perfect focal plant when used as a single planting around ornamental grasses.
Growing Zones 4 through 9
Mature Height : 3.5 feet tall, 3.5 Feet Wide:
Full sun to partial shade
Product Link – Chihuly Rose Bush
The Sunrise Sunset Rose
As its name implies, this low-maintenance shrub rose will provide classic rose beauty from sun-up to sun-down. It is one of the easiest to care for as well, and is highly disease resistant. Adding to its allure, it grows well in both cool and warm areas, from zones 4 through 9.
Sunrise Sunset has gorgeous fuchsia and pink petals, with amber centers. The dark green leaves add their own touch of beauty as a backdrop to the bright blooms. It spreads well, and can provide a large amount of ground cover with a single planting, or when used in multiple plantings.
Growing Zones 4 through 9
Mature Height : 3 to 5 feet tall, 4 to 6 Feet Wide
Full sun to partial shade
The Granddaddy of all low maintenance, easy care roses! The Knockout Rose bush is highly disease-resistant and easy to grow. Available in a host of colors, most will bloom all season long without the worries associated with traditional classic rose bushes.
They simply don’t require special care or attention, and can be planted individually, in mass plantings, or with annuals and perennials in mixed beds and borders. They do best in full sun.
The Knock Out Rose
To get the most from your knockout roses, you can simply cut back every year in the spring after the last threat of a freeze or frost.
Growing Zones: 5 through 11
Mature Height : 3 feet tall, 3 Feet Wide
Full sun
Product Link : Knock Out Roses
Do you have a garden tip you would like to share? Or perhaps a few photos and a short story about your own garden?
Email us today at info@thisismygarden.com and share it with our TIMG community. You can also use the “Feature My Garden Tip” button at the top of the website to submit your entry. This article may contain affiliate links.
Nothing quite completes a home beautiful home landscape like a few properly placed shade trees.
Shade trees are an excellent way to add lasting color and texture to your home. In addition, they provide much-needed protection from the scorching hot rays of the sun.
A well placed tree or set of trees can keep a house, patio or outside entertaining area up to 10 to 15 degrees cooler on warm, sunny days.
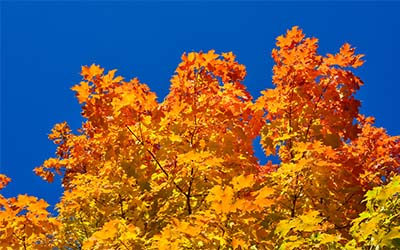
The spectacular fall foliage of the sugar maple tree
The key is choosing a tree that grows well in your area, and that can stand up to a little beating from Mother Nature now and then. Some of the faster growing shade trees may grow a little too fast, leaving them more susceptible to wind and storm damage.
The Bradford Pear tree is an excellent example of this. Although it grows quickly and provides measurable shade in just a few years, that fast growth leads to poor branch strength and structure.
The result is a tree that is easily damaged by high winds.
With that in mind, we thought we would cover a few shade trees today that grow well, but stay strong against the wrath of Mother Nature.
Here are 3 shade trees that grow at a steady rate of 1 to 2 feet of growth per year, and can still stand up to the weather.
Sugar Maple
Growing Zone 3 – 8
One of the most beautiful trees around, the Sugar Maple tree is well known for its spectacular fall foliage.
The leaves of a sugar maple turn colors ranging from a fiery red to a brilliant orange. The tree is known for naturally growing straight and true.
Most species grow anywhere from 40 to 100 feet in height at full maturity. This is also the tree of course, that produces that wonderful maple syrup in the early months of each year!
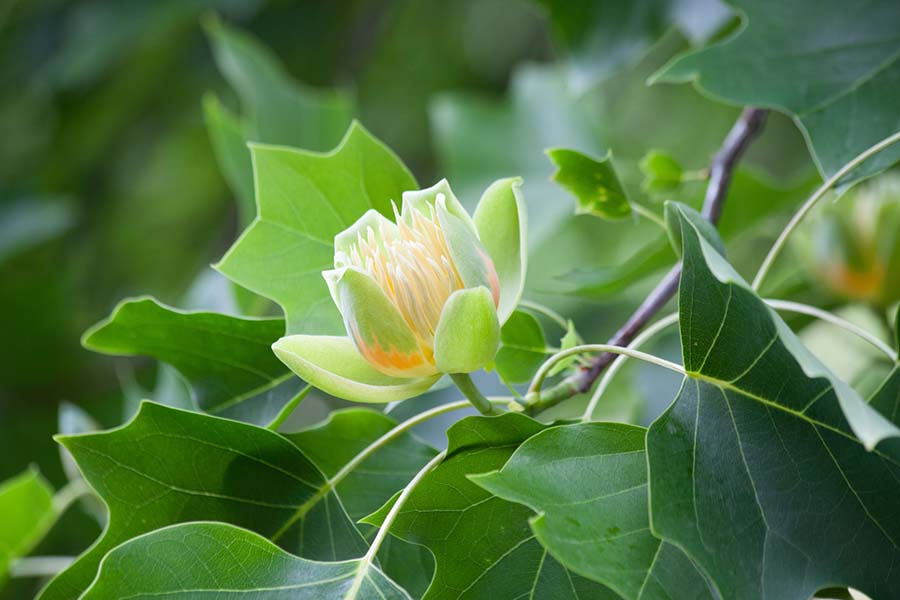
Tulip Tree
Growing Zones 4 – 9
The Tulip tree (pictured at top) is a faster growing shade tree that is extremely hardy and pest resistant. It is well-known and grows extremely well throughout the upper South and Midwestern states.
The tree blooms in late Spring with big, gorgeous tulip-shaped flowers with a hint of orange and yellow.
The Tulip tree grows 60 to 90′ tall and about 40′ wide at full maturity.
Black Alder
Growing Zones 3- 9
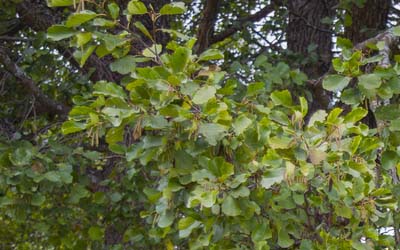
Black Alder foliage
The Black Alder tree is an excellent choice where poor growing soil might be an issue. These trees can grow in a wide variety of problematic soils and have a high tolerance to both waterlogged areas, and locations that tend to be more dry.
They grow in a very dramatic pyramid-style shape, and can reach a height of about 60 to 70 feet. They have glossy green leaves, and the grey bark of the tree stands unique in the landscape.
Alder trees have a very deep and strong root structure, so it is best to plant them out away from the house.
Do you have a garden tip you would like to share on This Is My Garden? How about sharing your tips with fellow gardeners on growing your favorite flowers, shrubs, trees, vegetables and more!
Email us today at info@thisismygarden.com and let us know your favorite garden tip or story.
You can also use the “Feature My Garden Tip” button at the top of the website to submit your entry. This article may contain affiliate links
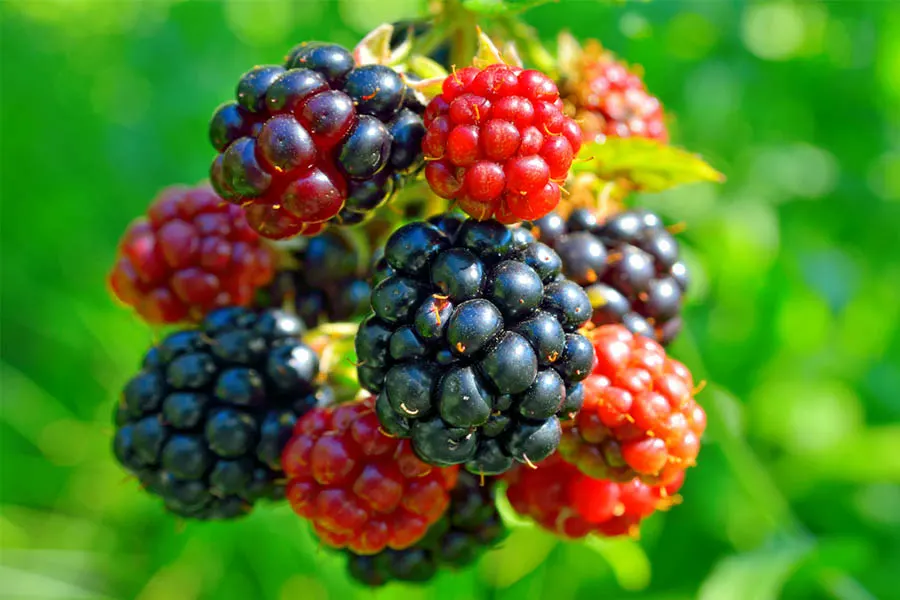
When we received this week’s garden tip article from Stacy Sulinger, it made us long for the taste of a fresh homemade blackberry pie. Or perhaps a scoop of vanilla ice cream with fresh raspberries draped over the top!
Both blackberries and raspberries are members of the bramble family, and are a fantastic perennial crop for home gardeners to grow. Not only are they easy to plant and maintain, a single planting can live and thrive for 15 to 20 years or more.
Stacy, who hails from the western Missouri area, certainly loves her blackberries and raspberries! And we are so glad that she shared her growing knowledge and techniques today. So let’s grow some blackberries and raspberries with Stacy!
Stacy Sulinger – Western Missouri
Growing Zone : 6

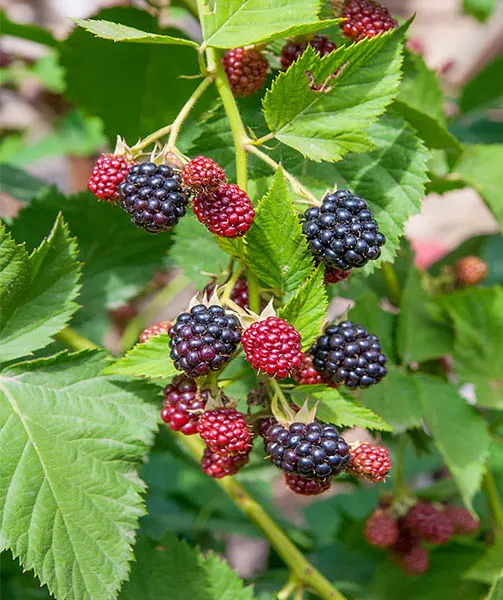
I love the taste of fresh blackberries and raspberries! I use them in pies, cobblers, tarts, jellies and just about anything I can put them in or on!
I think what I love best about growing your own is that you simply can’t beat the flavor of home-grown.
When I see raspberries or blackberries in the stores, they may look perfect, but they simply lack flavor! Not so when you grow your own. And it’s really easy too! I am by no means an expert, but I love growing them.
I thought I would share how I grow mine, and I hope it helps others who might want to as well.
I wish I had some better pictures to show, but it’s winter here now and there just isn’t much to see! I will send in updates this summer when I have more photos.
Selecting Location
Brambles need to receive a minimum of 6 hours of daily sunlight. If they can get 8 or more, they will do even better. They do not do well in overly wet areas, so select a spot that is well drained.


Sloping hillsides, or slightly mounded soils are great locations to grow both blackberries and raspberries. I have mine on a slight slope in my backyard and they have really done well.
Soil Preparation
Brambles will grow in almost all soil types, but they prefer slightly acidic conditions. If you have clayish soil, or a mixture of sand and clay – they will thrive beyond belief. Adding in a bit of compost and sand to the planting area can help get them off to a great start too. To be honest, I have never had to do much to mine. About the only fertilizer I give them is a bucket of compost I put around each crown base in the each spring.
Planting and Support
When it comes to support, what you will need all depends on the variety you choose. There are upright and trailing brambles. I personally think the trailing have the best flavor and produce the most, so that is what I grow.
A trailing bramble can grow 10 to 20 feet long. I use a few posts with wire strung between them like you would see in a vineyard. You can also use a trellis. Simply train them as they grow. I use twine to tie mine to the supports.
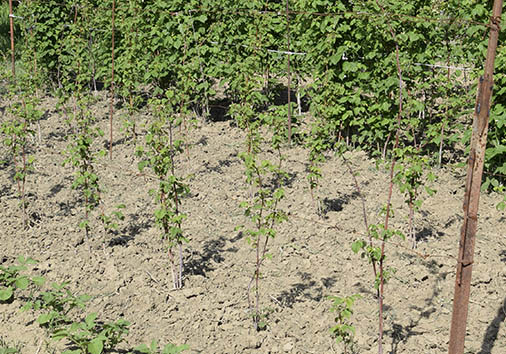

If you do not have wide open space, you can plant the erect type of each. I just have always stuck with trellising stock because they produce so much and I can keep them trained.
I plant raspberries and blackberries the same way, putting them in a slight mound about 2 inches above the soil line. I planted 4 plants of each about 6 feet apart of each, but I could have spaced them even more. They have filled in more than I ever thought they would. They are in their 6th year now, and we routinely get 10 to 15 quarts of each. Sometimes a lot more, sometimes a little less during dry years. For erect types, you can plant them a foot or two apart.
Most newly planted blackberries and raspberries will not fruit the first year. Some people don’t realize that brambles produce on two-year canes. One grows the first season, then the fruit canes grow the next. It’s only the first year that you won’t have fruit, because new fruiting canes for the next year grow each season as well after the first. It all may sound confusing, but it just means you won’t have fruit your first year! 🙂
Long Term Care
You do not need to prune at all the first year. But starting the second year, remove the old shoots that are dying off, and allow the new “alive” shoots to come on for the next year’s harvest. They have really not been hard at all to keep producing. I am going to try a couple of new erect varieties this year that are supposed to have improved flavor. I will keep you updated!
Thanks for letting me share!
Blackberry Links : Apache (erect) Natchez Thornless (Vining)
Raspberry Links : Mysore Black Raspberry Red Raspberry Nova
Thank you Stacy for sharing! And for all gardeners out there – let us know how you grow your favorite flowers, shrubs or vegetables, and have your article featured here!
All you need to do is email us today at info@thisismygarden.com. You can also use our “Feature My Garden Tip” button at the top of the website for your entry. Help make This Is My Garden the best garden site around and share your garden knowledge with fellow gardeners!