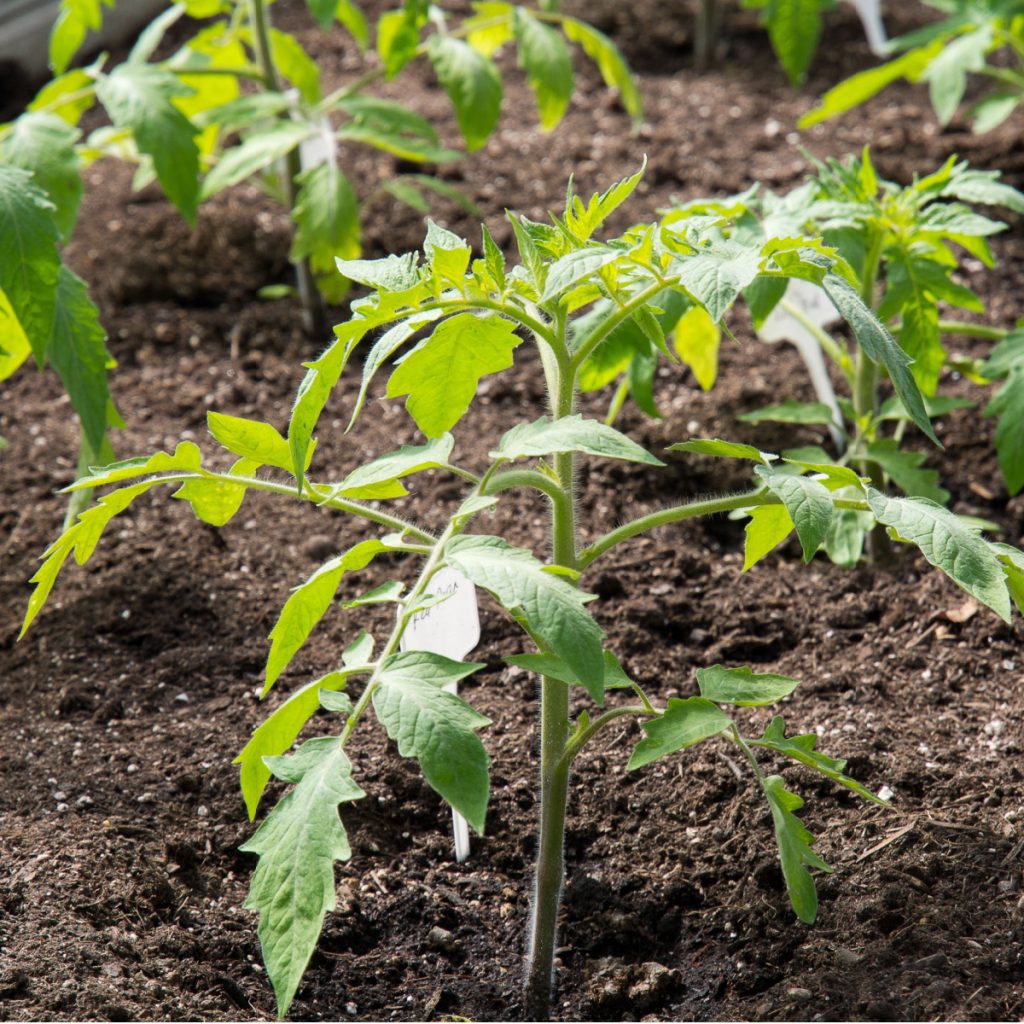
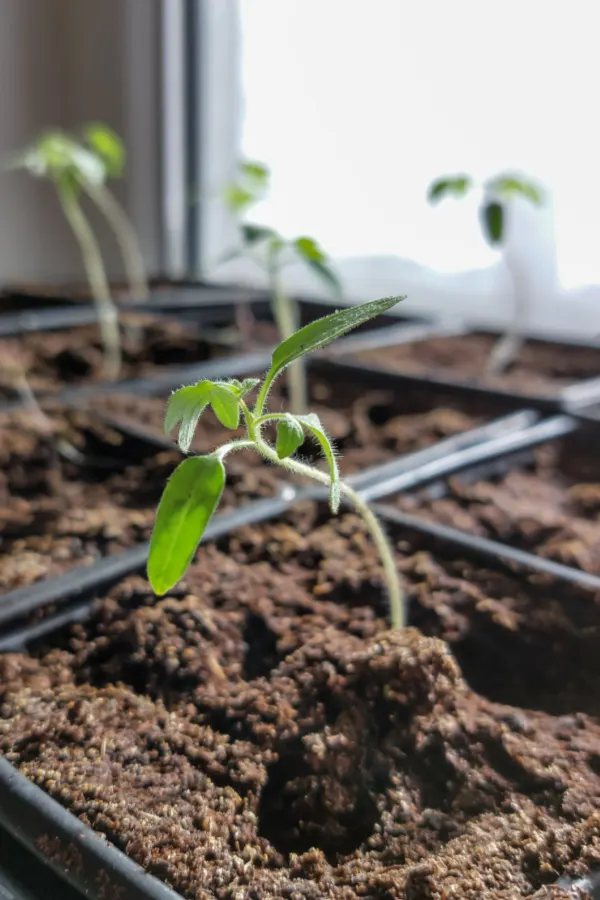
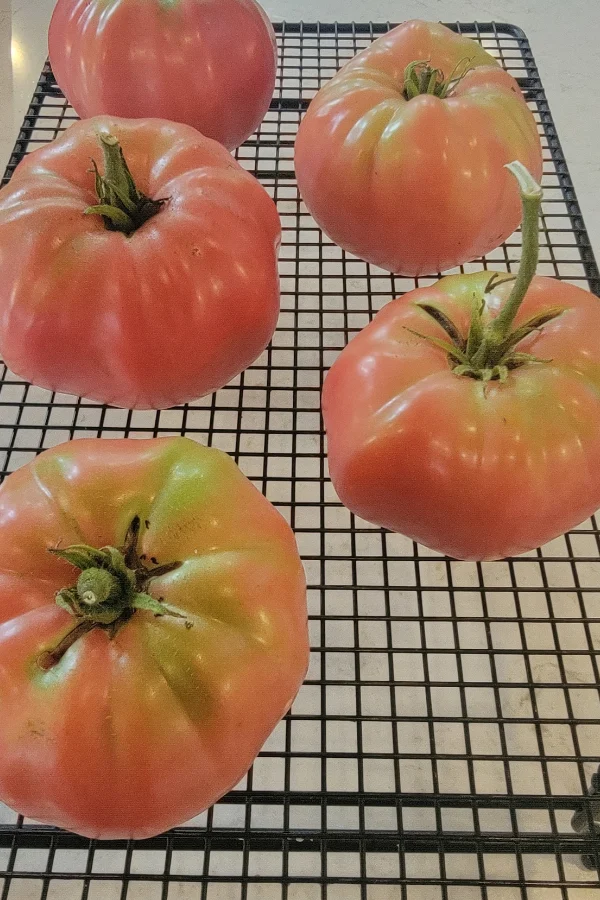
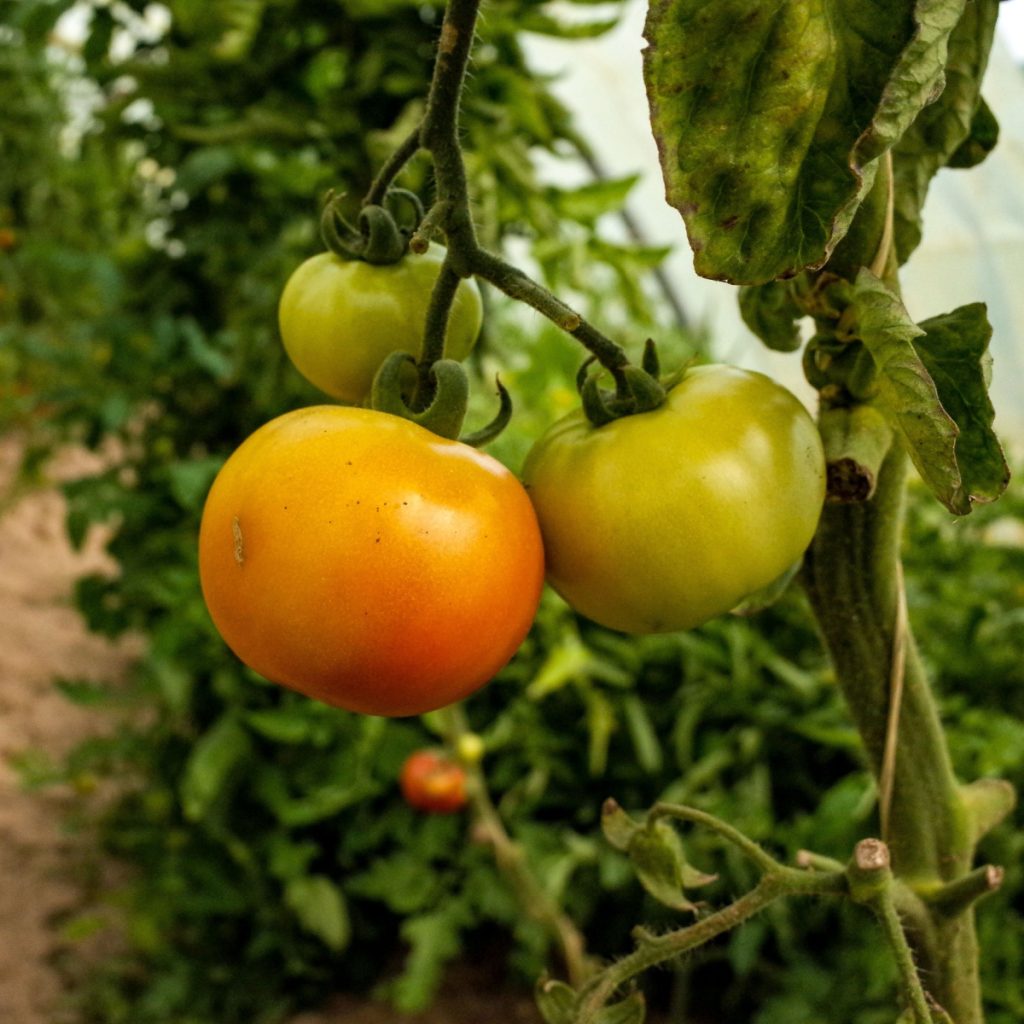
From how to plant, to fertilizing, pruning and staking – see all of our best tomato advice below!


From how to plant, to fertilizing, pruning and staking – see all of our best tomato advice below!
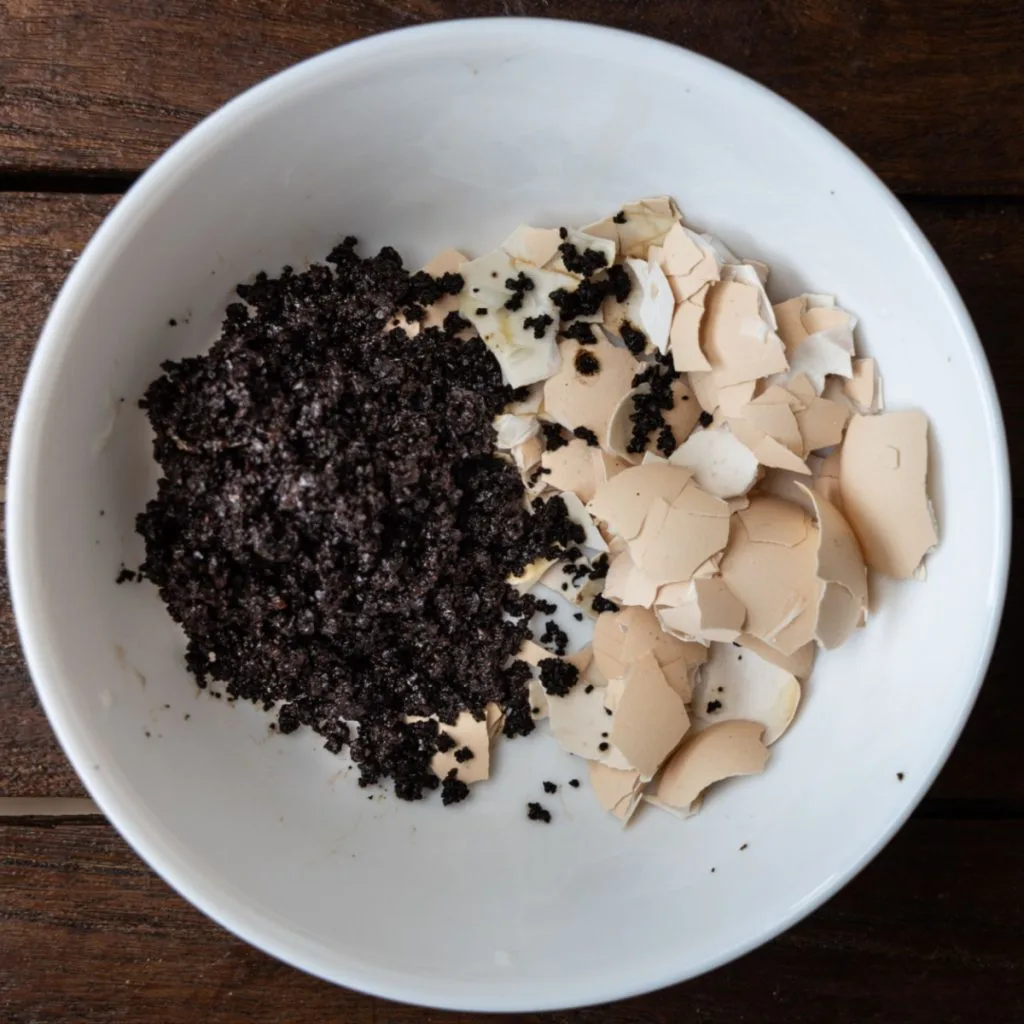
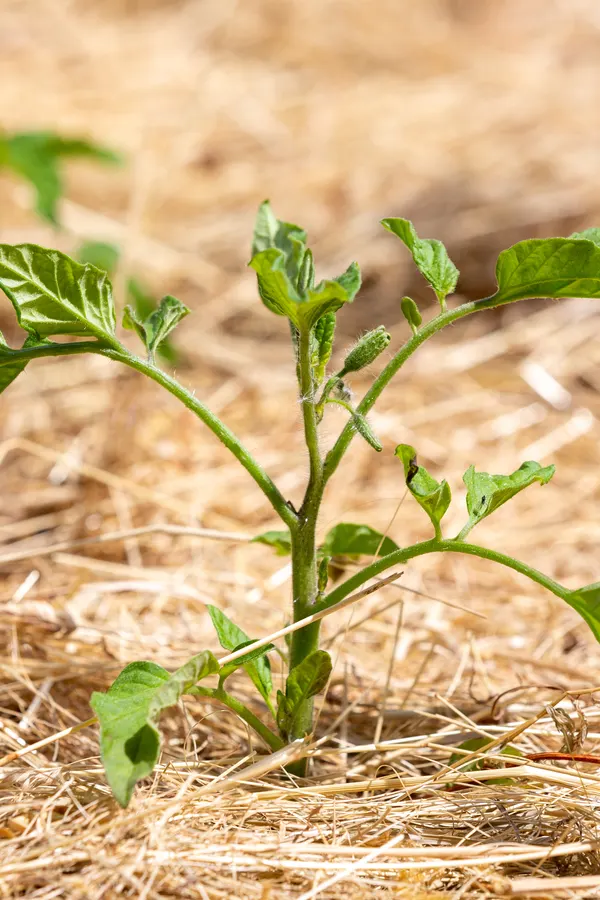
Do you know what happens when you plant tomatoes with coffee grounds and eggshells? The answer is a whole lot of greatness for your tomato plants and you harvest!
By simply using coffee grounds and eggshells in the planting hole of your tomato plants, you can help power your young tomatoes to fast, healthy grow – and set the stage for your best crop of tomatoes ever.
Although there are all kinds of fertilizers that can help tomato plants grow better, there is something special when it comes to using both coffee grounds and eggshells to help tender young transplants get off to a fast start.

For tomatoes, that fast start can make a huge difference when it comes to a bigger and better harvest. But the real secret to success when using both effectively is knowing the correct way to apply them so your plants can best take in the nutrients that are so important to your tomatoes.
So how and why do these two ingredients help tomatoes so much? For starters, whether they are small transplants or mature producing plants, tomatoes are heavy feeders. Really, heavy feeders! And if they fail to get the nutrients they need, they simply will never produce to their full potential.
This can certainly be a problem later on for mature plants when it come to producing flowers and fruit – but if young tomato plants fail to get the nutrients they need early on, not only can it affect their growth, it also can make them easy targets for pests and disease.
But the good news is that is exactly where egg shells and coffee grounds can come to the rescue. Each of the two gives young tomato plants something vital for strong, healthy, early growth.

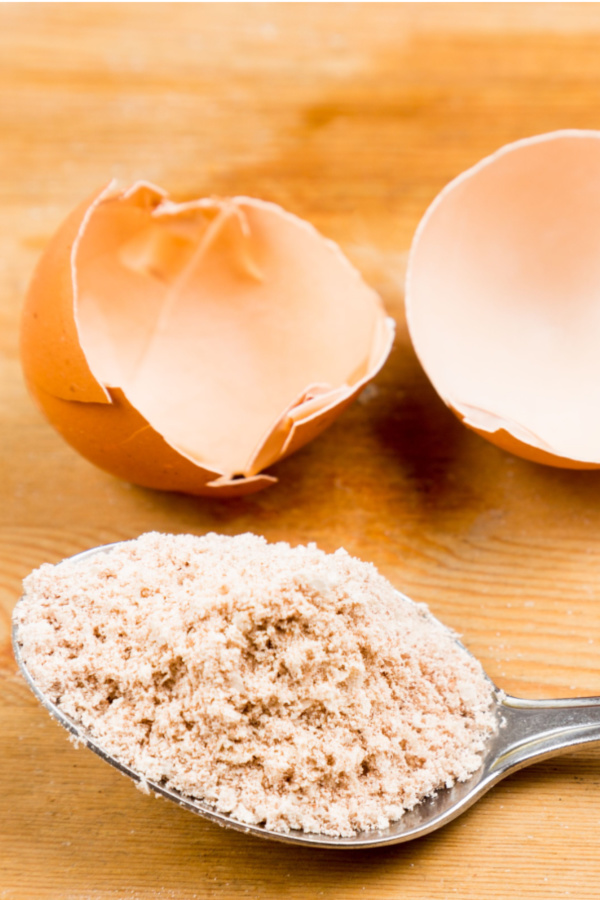
Egg shells contain an enormous amount of calcium. In fact, an egg shell is made up of 95% calcium carbonate. And when it comes to growing healthy tomato plants that produce healthy tomatoes – having enough calcium in the soil is critical.
Calcium is responsible for helping a tomato plant build strong branches and limbs. It also helps the plant move water all throughout those branches and foliage. But of even more importance – calcium is vital for helping to create strong flowering and healthy fruit.
When a tomato plant lacks calcium, it will produce fruit with what is known as blossom end rot. The flowering end of the fruit simply can’t fully develop. Because of that, the tomato that forms will end up with a black, mushy spot that ruins the fruit. See our article: How To Keep Your Tomatoes From Getting Blossom End Rot – The Simple Cure!
This is exactly where adding egg shells, or precisely, ground egg shells to your soil can prevent this from ever occurring. And, even more, help your plants grow healthier and stronger in the process.
You might be wondering why it’s important to use ground eggshells and not whole eggshells or small pieces. Unfortunately, larger egg shell pieces take too long to break down. In fact, it can take well over a year for a whole or even large egg shell piece to decompose.
Because of that, if you use large pieces, the plants growing this year really won’t benefit from the shell’s nutrients. But by grinding the egg shells into a fine powder (which can easily done with a coffee grinder), the calcium can absorb into the soil and the plants far faster.
Coffee grounds supply a different nutrient need for tomato plants. Spent coffee grounds contain nitrogen. And early on, nitrogen is very important for the development of tomato transplants. Nitrogen is responsible for helping plants grow strong stems, branches and foliage.
But what really makes the nitrogen in coffee ideal is that it is extremely easy for tomato plants to absorb. As the grounds become wet and decompose in the soil, they quickly leach out the nitrogen. The same goes for the phosphorous and potassium that are in coffee grounds as well – which can quickly get into the plants roots to help with plant and bloom development.
But if all that wasn’t enough reason to use coffee grounds, they are also great for helping to absorb and hold moisture. And for young tomato plants, that can be a huge help! Tomatoes need a lot of water to grow. And since the coffee grounds are “planted” near the roots, they help to hold that moisture right where plants can use it best.

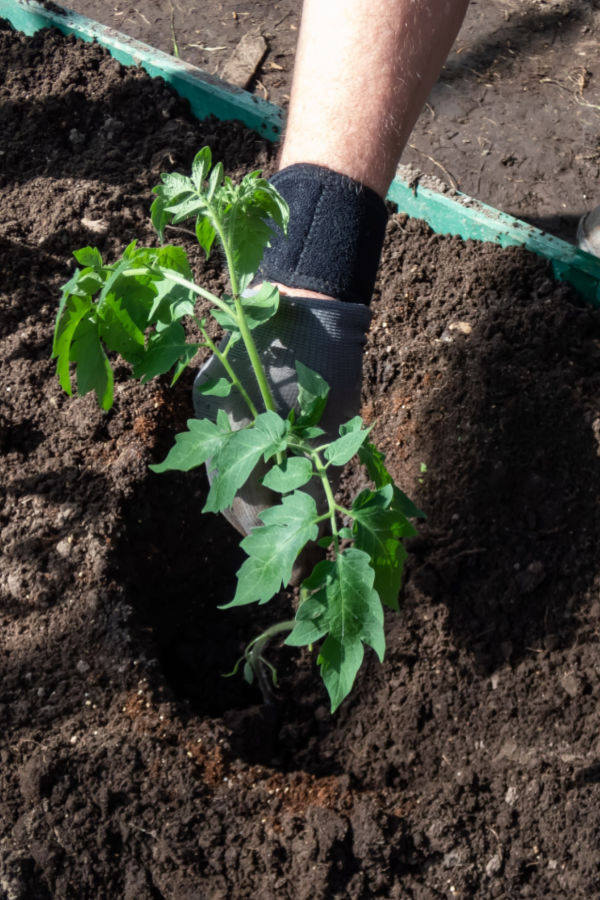
So how do you plant both ingredients with your tomato plants? And how much of each should you use? For strong and healthy tomatoes, it’s best to mix in two to three tablespoons of each into every tomato planting hole. Remember with the egg shells to first grind them into a powder to help them work fast
To help your tomato plants as quickly as possible, always mix the two ingredients toward the bottom of the hole. This is where the roots of the plant will be, and it will allow them to absorb much faster.
But don’t just stop with using them in the planting hole. You can also sprinkle both egg shell powder and coffee grounds on top of the soil. The nutrients from each will then soak into the soil slowly every time it rains or you water. For this, sprinkle two tablespoons of each a few inches around the main stem.
Here is to powering your tomatoes this year with eggshells and coffee grounds – and to your best tomato harvest ever!
Follow Our Facebook Page For Great Gardening Tips And Advice! This Is My Garden Facebook Page
This Is My Garden is a garden website created by gardeners, for gardeners. Jim and Mary Competti have been writing gardening, DIY and recipe articles and books and speaking for over 15 years from their 46 acre Ohio farm. They publish three articles every week, 52 weeks a year. Sign up today to follow via email, or follow along!
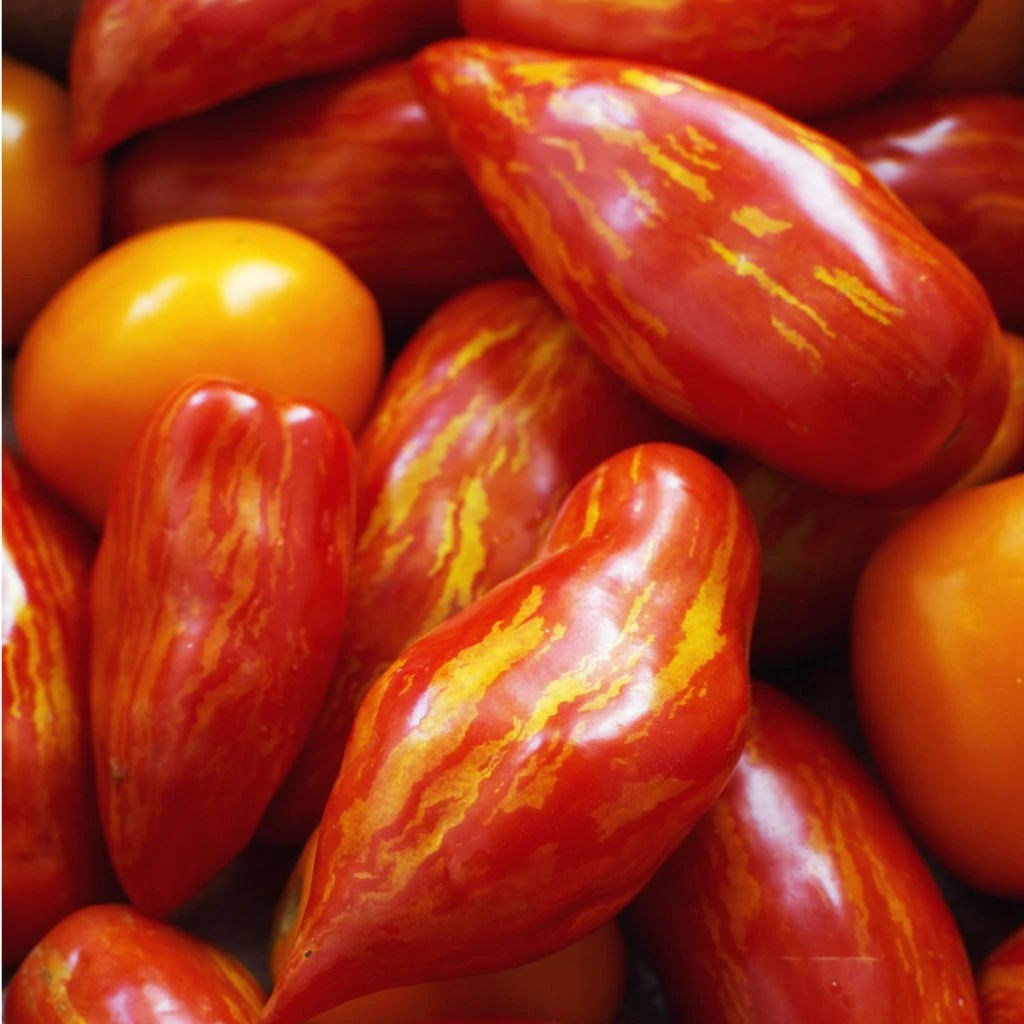
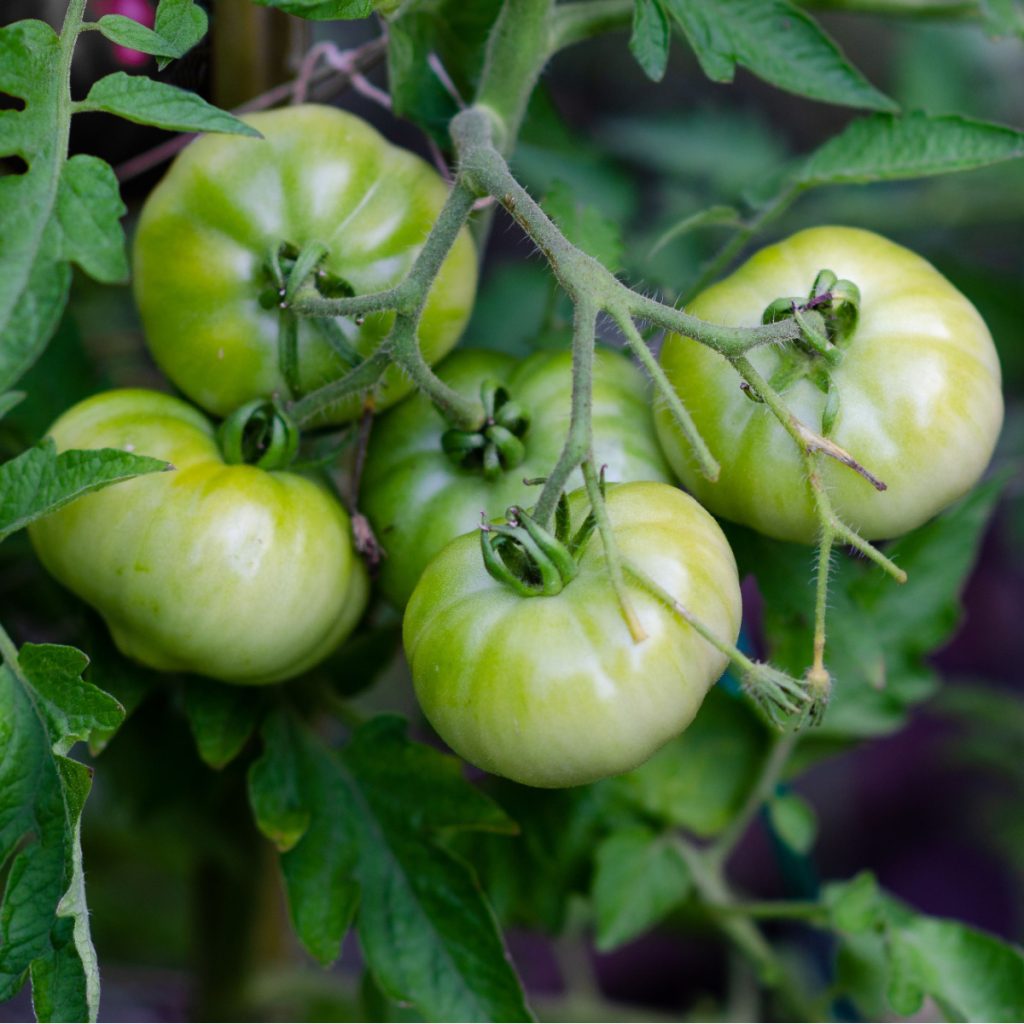
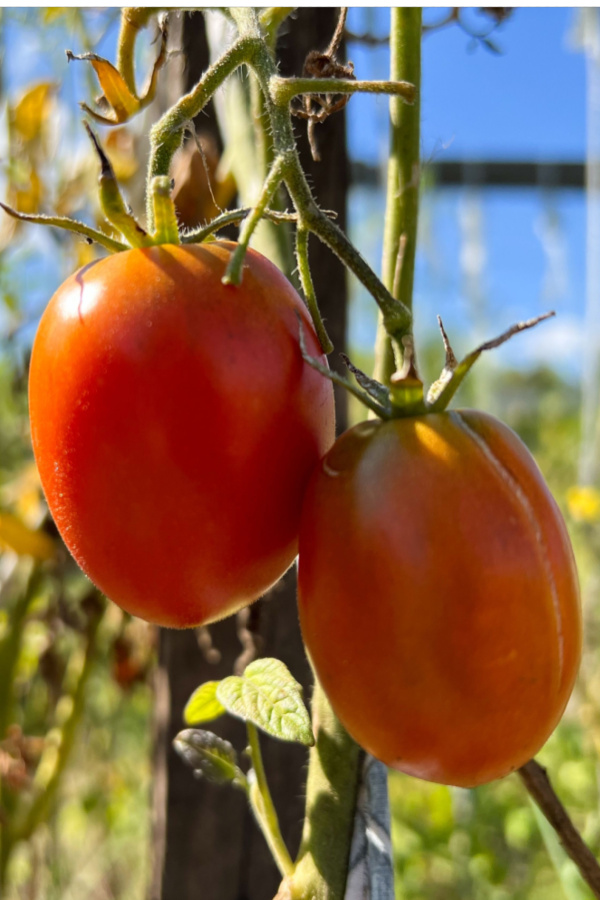
As we do every year, we like to select a must try tomato for the upcoming season – and this year, hands down, it is all about growing the Blush Tiger tomato.
From incredible flavor to heavy production and eye-catching color, Blush Tiger delivers on every level. The tomato plant will give you mountains of juicy tomatoes with loads of flavor. Whether you enjoy tomatoes fresh from the vine, blended into juice, simmered into soup, or tossed into salads, Blush Tiger is definitely a winner!
So why is it such a great tomato? What truly separates Tiger Blush from many other tomato varieties is its combination of beauty, reliability, and taste. The plants are strong growers, the fruit sets heavily, and the tomatoes themselves have a flavor that is sugary sweet.

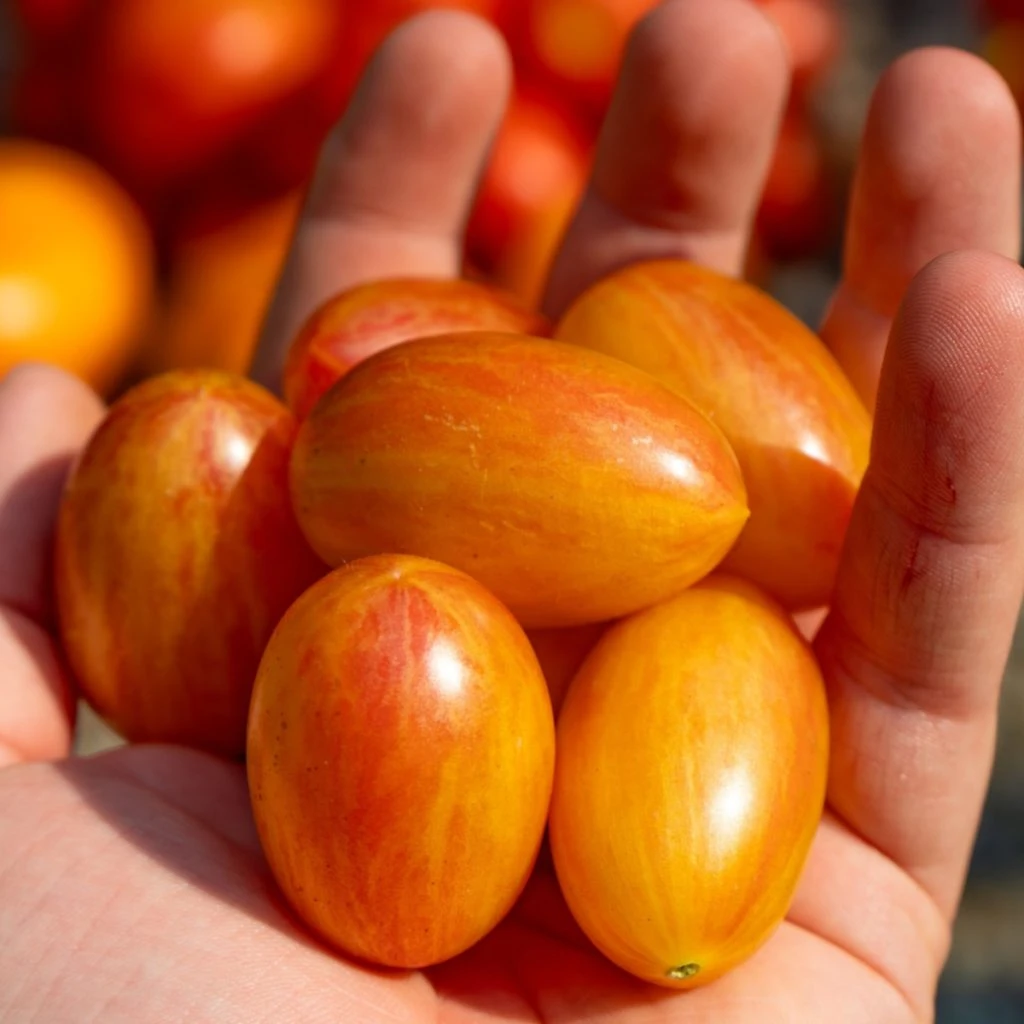
Blush Tiger tomatoes produce small to medium-sized fruit with an elongated shape and striking striped skin. Depending on if they are grown in a traditional garden or in containers, the sizes can range from to 2 to 3.5 inches in length.
As the tomatoes ripen, their golden-yellow background becomes accented with deep red streaks. It creates a look that is both unique and attractive.
Flavor is where Blush Tiger tomatoes truly shine. The taste is rich and well balanced, combining natural sweetness with just enough acidity to keep it bright and refreshing. Unlike many smaller tomatoes that can taste one-dimensional, Tiger Blush offers seriously rich flavor in every bite.
The flesh is firm yet juicy. But the thin skin makes them enjoyable for fresh eating without being tough or chewy. Because of their balanced flavor, Blush Tiger tomatoes are incredibly versatile in the kitchen. They are excellent eaten fresh and add both color and taste to salads.
When cooked, their natural sugars deepen, making them ideal for fresh tomato juice, homemade tomato soups and pasta sauces! Last but not least, Blush Tiger has incredibly impressive production. The plants are indeterminate, meaning they will continue to grow and produce fruit until frost. Once flowering begins, clusters of tomatoes form steadily, providing a big harvest week after week.


One challenge with this variety is availability. Because it is an heirloom, it’s often difficult to find as a transplant at local garden centers. Most large retailers do not carry it, and finding smaller specialty nurseries can be a challenge as well.
But there is good news – Blush Tiger is easy to grow from seed! Even better, as an open pollinated plant, growing it from seed once means having seeds every year to continue growing for free! Affiliate Link: Blush Tomato Seeds (20+ Seeds) | Non GMO
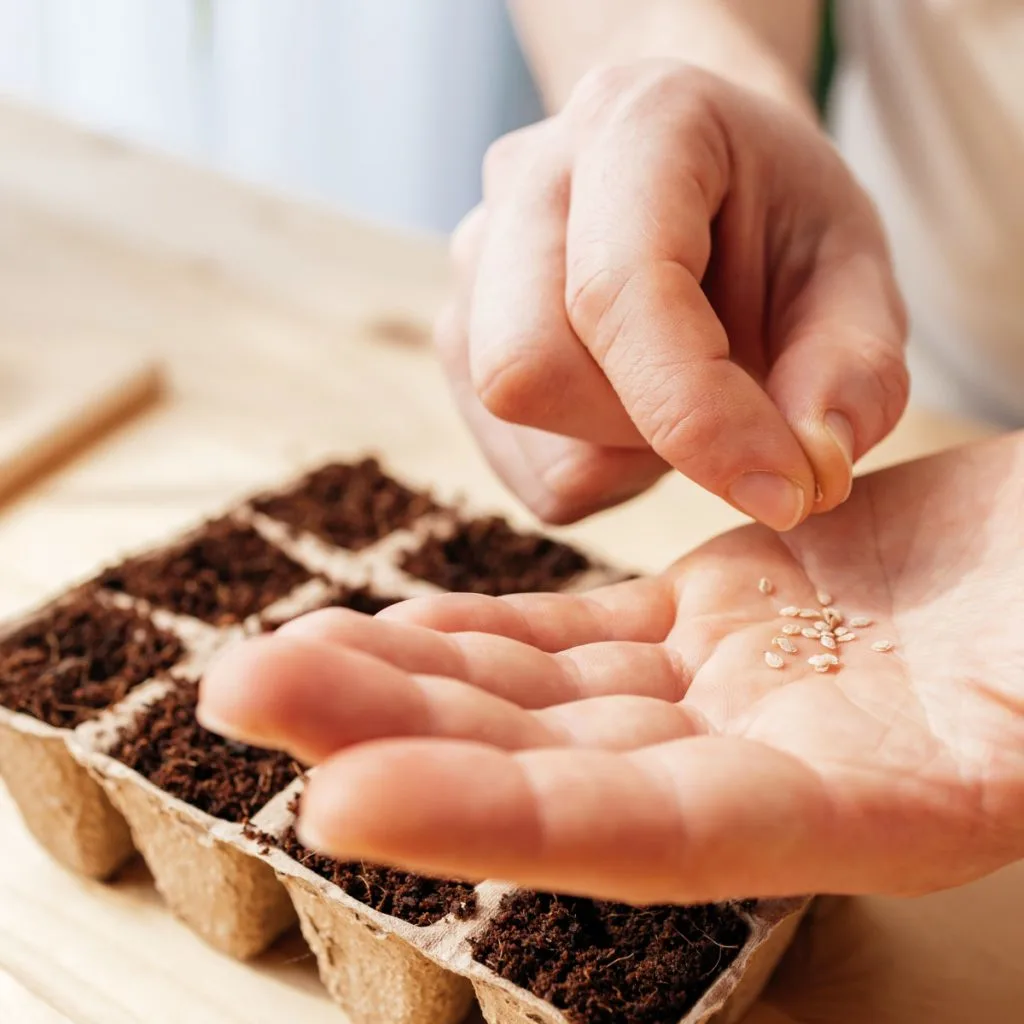
Blush Tiger tomato seeds should be started indoors about eight weeks before the last expected frost date. This timeline allows seedlings to develop strong roots and sturdy stems without becoming overgrown. It allows plenty of time to harden them off before planting.
Plant seeds in a high-quality seed-starting mix that drains well. The seeds should be planted about a quarter inch deep and lightly covered with soil. Water gently so the soil remains evenly moist but not saturated. Affiliate Link: Seed Starter Natural Potting Soil Mix for Germination and Growth
Tomato seeds germinate best when soil temperatures stay around 70 degrees Fahrenheit. Keeping the soil warm during this stage improves germination rates and speeds up emergence. Unfortunately, if the soil is too cool, the seeds can rot away before sprouting.


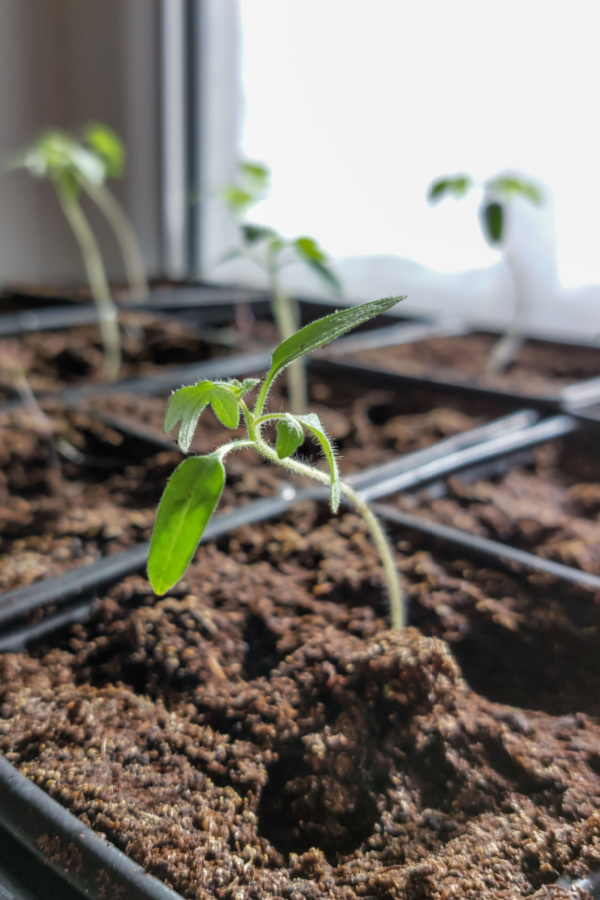
Once seedlings emerge, it’s all about giving your plants the right kind of light they need to grow. Without enough light, plants will stretch and become weak. Windows will not provide enough light to produce healthy plants. Instead, artificial light placed within an inch or two of the top of plants is the way to go.
The good news is there is no need for special lights – ordinary LED shop lights are a great choice for giving plants the light they need. See: How To Use LED Shop Lights To Start Seeds Indoors – Grow Vegetables & Flowers With Ease!
Once the first true leaves appear, begin feeding with a diluted liquid fertilizer to support steady, healthy growth. Continue with a light feeding every two weeks until planting day arrives.
Before transplanting Blush Tiger tomatoes into the garden, you will need to harden your young transplants off. This process gradually exposes plants to outdoor conditions such as sunlight, wind, and temperature changes.
Start by placing seedlings outside for a short time each day. Slowly increase their exposure over about a week. Whatever you do, don’t skip this step! Hardening off greatly reduces transplant shock and helps plants establish quickly once planted.

Plant Blush Tiger tomatoes outdoors after all danger of frost has passed and soil temperatures have warmed. The soil temperature should be at least 60 degrees to allow for fast root growth. When planting, choose a location that receives at least six to eight hours of direct sunlight each day.
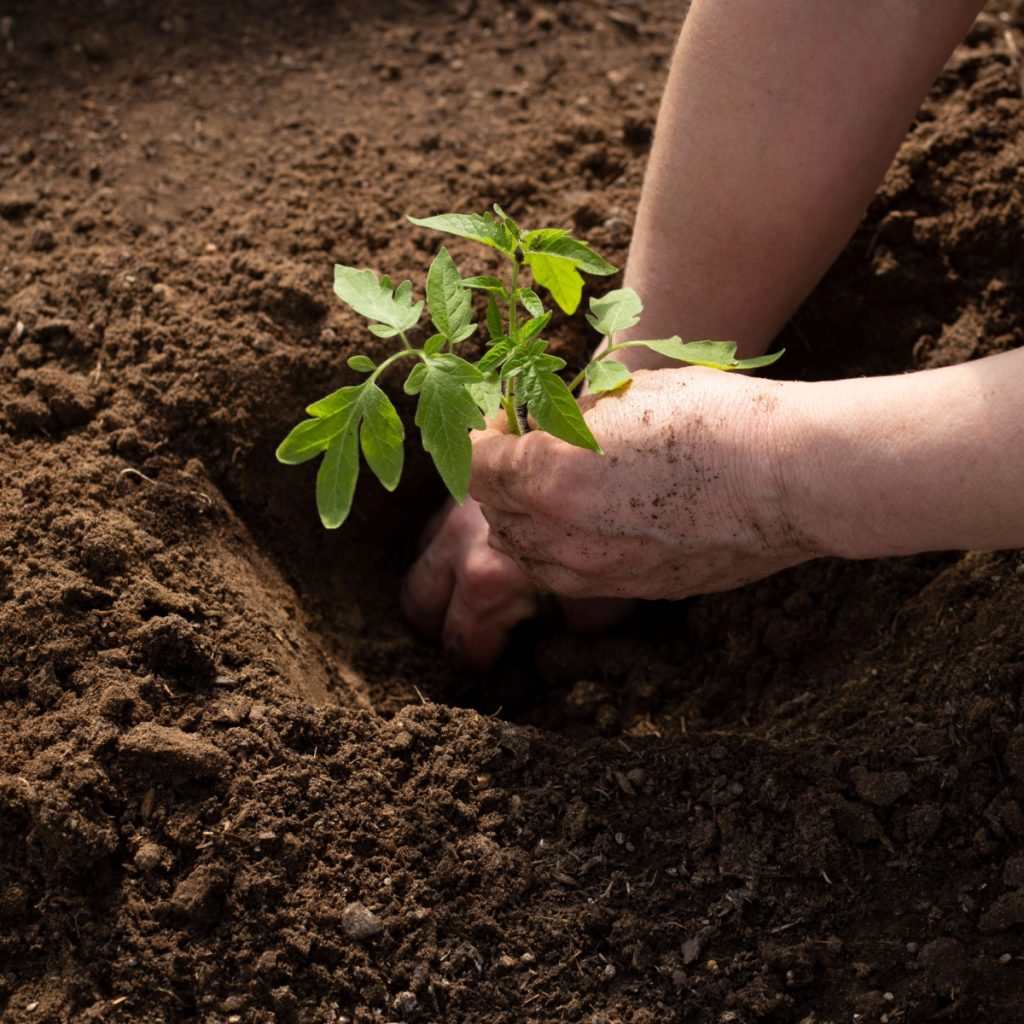
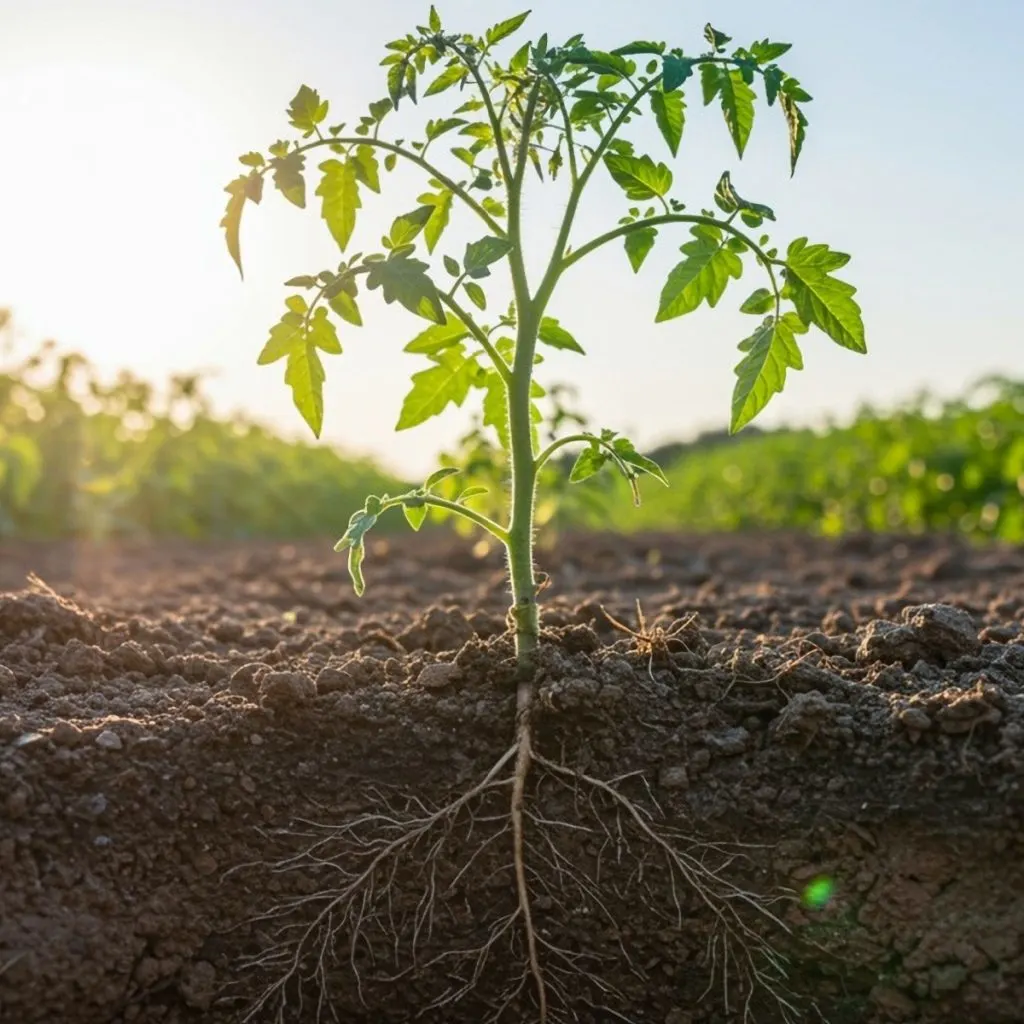
Plant your seedlings deep, making sure to bury part of the stem below the soil line. Tomato plants develop roots along buried stems, which leads to stronger, more resilient plants. Space plants at least 24 inches apart to allow good airflow and for room to grow.
Because Blush Tiger tomatoes are indeterminate and heavy producers, they require support. Stakes, cages, or trellises are a must to help keep plants upright and make harvesting easier.
Blush tomatoes are ready to harvest when they reach full color and feel slightly soft when gently squeezed. Fully ripe fruit offers the best flavor and sweetness. Harvesting regularly will encourage the plant to continue producing. During peak season, checking plants every few days ensures tomatoes are picked at their best
One thing is for sure, once you start growing Tiger Blush tomatoes, they are likely to become a permanent favorite in your garden year after year!
Follow Our Facebook Page For Great Gardening Tips And Advice! This Is My Garden Facebook Page
This Is My Garden is a garden website created by gardeners, for gardeners. Jim and Mary Competti have been writing gardening, DIY and recipe articles and books and speaking for over 15 years from their 46 acre Ohio farm. They publish three articles every week, 52 weeks a year. Sign up today to follow via email, or follow along!
Want to know the perfect time for starting your tomato seeds indoors to have great transplants ready for planting day?
If there is one task that gardeners often worry about more than any other in late winter, it’s trying to figure out when to start their tomato plants indoors from seed at just at the right time. Unfortunately, if you start your seeds indoors too early, it can create all kinds of issues.
Quite often, it forces gardeners to transplant their seedlings into larger containers. In addition, it becomes more and more difficult to get your plants the proper light, let alone find enough space indoors to keep the massive jungle of plants alive and well.

However, it can be just as frustrating if you start your seeds too late. If plants are still weak and small, they simply can’t handle the stress of going into the garden outdoors. And even if they somehow survive, it can delay a tomato harvest by weeks – and certainly lower yields as well.
So how do you get it right? The solution is actually easier than you might think! Success really comes down to following one basic timing formula – and then making sure you have the right lighting in place indoors to help control and regulate the growth of your plants until they are ready for planting day.
The very first key to success is to find out your specific areas last average spring frost date. This date will be the normal time your location gets a light frost or freeze for the last time in the spring. But, it’s also important to realize that this is not a guarantee for when you can plant.
This date is only the average date for a last frost. However – it’s a great starting point for knowing when to start your seeds. One thing is for sure, it’s best to never use this date to actually plant your transplants outdoors!
One of the biggest mistakes gardeners make is planting too early in the growing season. Even if you avoid frost, the soil is simply too cold early on for plants to develop. As we will cover later in the article, the actual date you want to plant outdoors will be several weeks after your average last spring frost date.

So how can you find your last frost date as your starting point? One of the best resources around for this is the Farmer’s Almanac website. Simply type in your city or zip code and it will instantly tell you the last average spring frost. It will even give you the first average fall frost for your area too! See: Farmer’s Almanac First and Last Frost Dates
Now that you have your last average frost date in hand – it’s time to use a very easy and simple formula for knowing when to start your seeds. Simply take your average last frost date and subtract seven (7) weeks from it. This is the day you want to start your seeds indoors. Here is how and why the formula works:
On average, it will take tomato seeds about one week to germinate. It then takes about eight full weeks of growing before they are big enough to be healthy, strong transplants. This accounts and leaves enough time for strong indoor growth as well as time outdoors to harden your tomato plants off before planting day.
Using the timing above, you need to have nine weeks of growth from the day you plant your seeds. So why start them only seven weeks before your last average frost? Because you actually want to aim to plant outdoors two weeks after your areas average last frost date.
As an example, if your average last frost date is May 14th, you will want to aim to plant outdoors on May 28th. By counting back nine weeks from May 14th and starting seeds on the 26th of March, your plants will have 9 full weeks of growing and be ready to rock!
Allowing an extra two weeks for plants to grow after the average last frost day lets the soil warm up. And warm soil is vital to strong, early root growth. But that additional two weeks also greatly helps lower the risk of plants getting hit by a late frost.
Last but not least, to get your plants to grow both strong and steady while indoors, it’s important to provide your indoor seedlings with a proper source of light. Strong, steady light will keep plants on track perfectly for 9 weeks of growth. And for tomato seedlings, that means artificial light and not light from the sun.
Growing in windows or sunny rooms will not allow your plants to develop correctly. Instead of strong, healthy transplants, you will end up with crooked, weak, long-stemmed plants that spent their weeks indoors stretching for the far away sun.
By using simple LED or fluorescent lights a few inches over your seedlings, seedlings will grow strong, steady and healthy. You do not need expensive grow lights, but you should be placing your plants under artificial lighting twelve to fourteen hours each day. See: The Best Lights To Use For Starting Seeds Indoors
This simple approach of starting seeds while giving them perfect lighting will all but ensure tomato plants that are strong and healthy for planting day. Here is to knowing just when to start your tomato seeds indoors. And, of course, to growing your best tomato crop ever this year!
Follow Our Facebook Page For Great Gardening Tips And Advice! This Is My Garden Facebook Page
This Is My Garden is a garden website created by gardeners, for gardeners. Jim and Mary Competti have been writing gardening, DIY and recipe articles and books and speaking for over 15 years from their 46 acre Ohio farm. They publish three articles every week, 52 weeks a year. Sign up today to follow via email, or follow along!
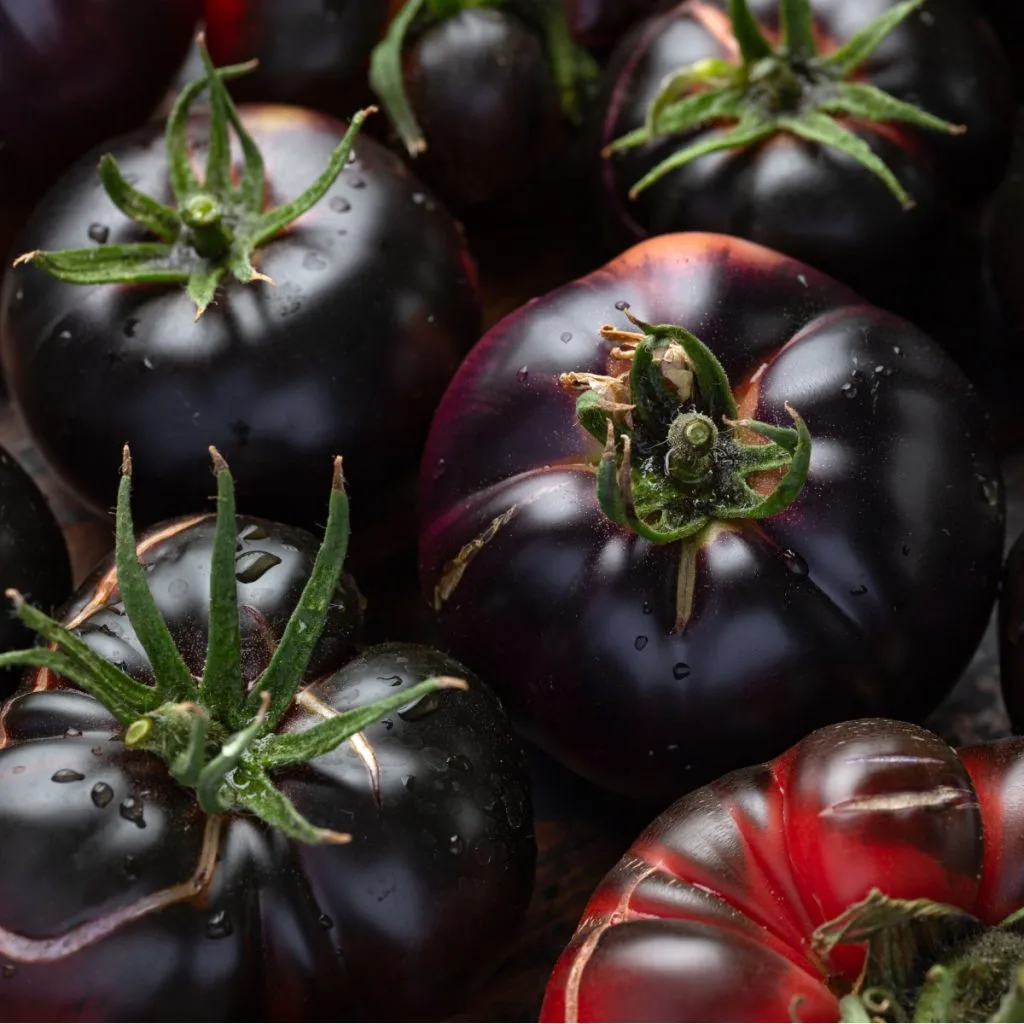
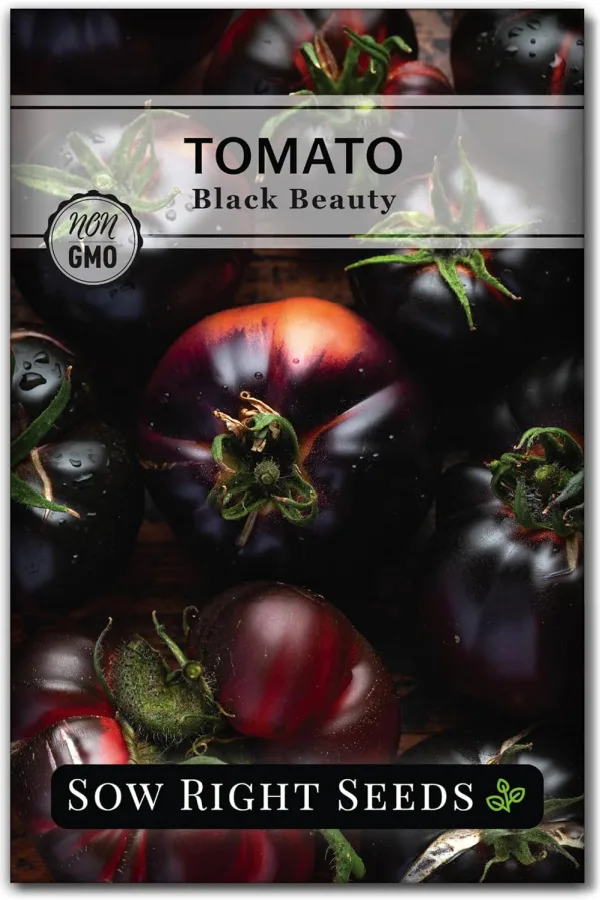
If you’re looking to grow a one-of-a kind, incredibly beautiful, and amazingly delicious tomato in your garden this year – then you need to grow Black Beauty tomatoes!
Known for their deep, dramatic coloring and rich, complex flavor, Black Beauty tomatoes stand out as one of the best looking and tasty tomato varieties you can grow. And is the variety ever gaining fast notoriety due to its striking appearance and impressive flavor!
Despite their bold look, Black Beauty tomatoes are surprisingly easy to grow when given the right conditions. In fact, with proper planting, sunlight, watering, and support, the plants will reward you with a steady harvest of flavorful fruit all throughout the growing season.

Black Beauty tomatoes are classified as an indeterminate variety. That means they will continue to grow, flower, and produce fruit all season long until frost arrives. The growth habit makes them ideal for gardeners looking for a long, steady harvest instead of a single large flush of tomatoes.
So what makes them so amazing to grow? One of the most unique features of the Black Beauty tomato is its coloring. When the fruit is exposed to sunlight, the shoulders turn a deep purple-black – while the entire underside remains red. The more sun the fruit receives, the darker the color becomes.
This not only makes the tomatoes visually stunning but also increases their antioxidant content. But more than anything else, flavor is where Black Beauty tomatoes truly shine. They offer a rich, slightly sweet taste that is far more complex than traditional red tomatoes. The flesh is juicy yet firm, making it perfect for slicing, salads, fresh eating and more.
Plants typically grow tall and vigorous, often reaching six feet or more when properly supported. They produce medium to large-sized fruits, usually weighing between 8 and 12 ounces. With good care, each plant can produce an impressive number of tomatoes over the course of the season.
Starting Black Beauty tomatoes from seed is almost a must. Why? Because they are usually hard to find as transplants at local nurseries and stores.

Seeds should be started indoors about six to eight weeks before your last expected frost date. This gives the plants plenty of time to develop sturdy roots and strong stems before moving outdoors. Affiliate Link: Black Beauty Tomato Seeds
When starting seeds, make sure to use a high-quality seed starting mix to start your seeds. The lighter texture allows for better drainage and helps prevent damping-off disease. Plant seeds about a quarter-inch deep and gently water them in. Keep the soil consistently moist but never soggy.
Black Beauty tomato seeds germinate best when soil temperatures are between 70 and 80 degrees Fahrenheit. For these tomatoes, a seed-starting heat mat can significantly improve germination rates and speed. Once seedlings emerge, provide bright light immediately to prevent them from becoming leggy. Affiliate Link: BN-LINK Durable Seedling Heat Mat for Seed Starting.
Once seeds germinate, use led or grow lights to produce strong seedlings. Grow lights positioned a few inches above the plants work best for slow and steady growth. Do not try to grow in a sunny window. It simply will not give the tomato plant enough light to grow strong.
Before planting outdoors, seedlings must be hardened off. Gradually expose them to outdoor conditions over 7 to 10 days, starting with short periods of shade and slowly increasing sun exposure and time outside. This step is critical for preventing transplant shock.
Black Beauty tomatoes thrive when planted in full sun. Choose a location that receives at least six to eight hours of direct sunlight each day. The more sun the plants receive, the darker and more vibrant the fruit coloring will be.
As with all tomatoes, quality plays a major role in growing healthy Black Beauty tomatoes. They prefer loose, fertile soil with good drainage. Before planting, add plenty of compost or well-aged manure to the soil. Tomatoes perform best in soil with a slightly acidic to neutral pH.
When planting, bury the tomato plants deeper than they were in their containers. Remove the lower leaves and plant the stem several inches into the soil. Tomatoes form roots along buried stems, which helps create stronger, more resilient plants. See our article: How To Plant Tomatoes Right! 6 Simple Secrets To Grow Your Best Crop Of Tomatoes Ever
Space plants about 24 to 36 inches apart to allow for proper airflow and growth. Crowding plants can lead to increased disease and reduced fruit production. Install stakes, cages, or trellises at planting time to avoid disturbing roots later in the season.
Consistent care is the key to growing productive Black Beauty tomato plants. Watering should be deep and regular. Provide your plants about one to two inches of water per week depending on weather conditions. Inconsistent watering can lead to issues such as blossom end rot or cracked fruit.

Always water at the base of the plant rather than overhead. Wet foliage increases the risk of disease, especially during warm and humid weather. Early morning watering is ideal, as it allows any moisture on leaves to dry quickly.
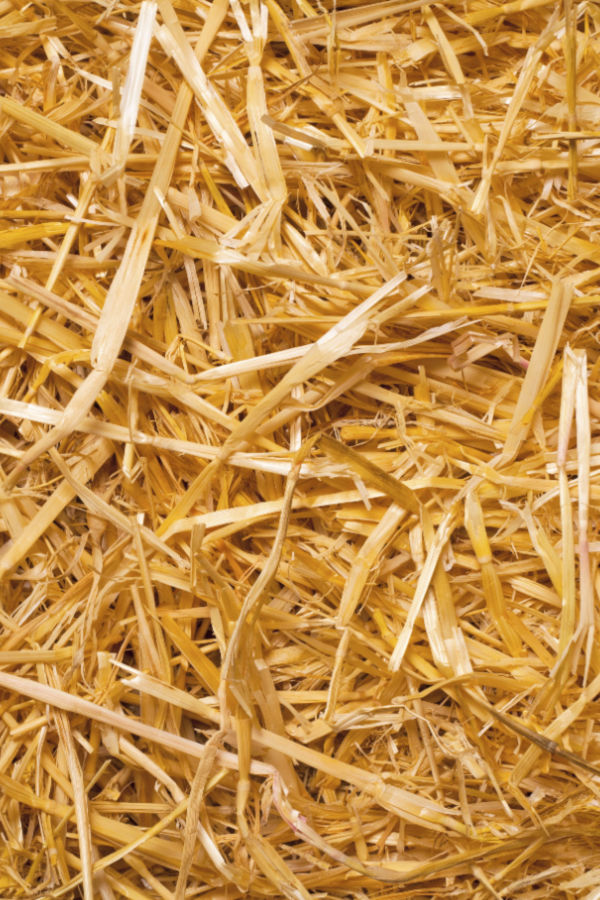
Mulch is important as well. Be sure to apply four to six inches of organic mulch (straw, shredded leaves or grass clippings) around plants. This will help plants conserve moisture and keep out competing weeds.
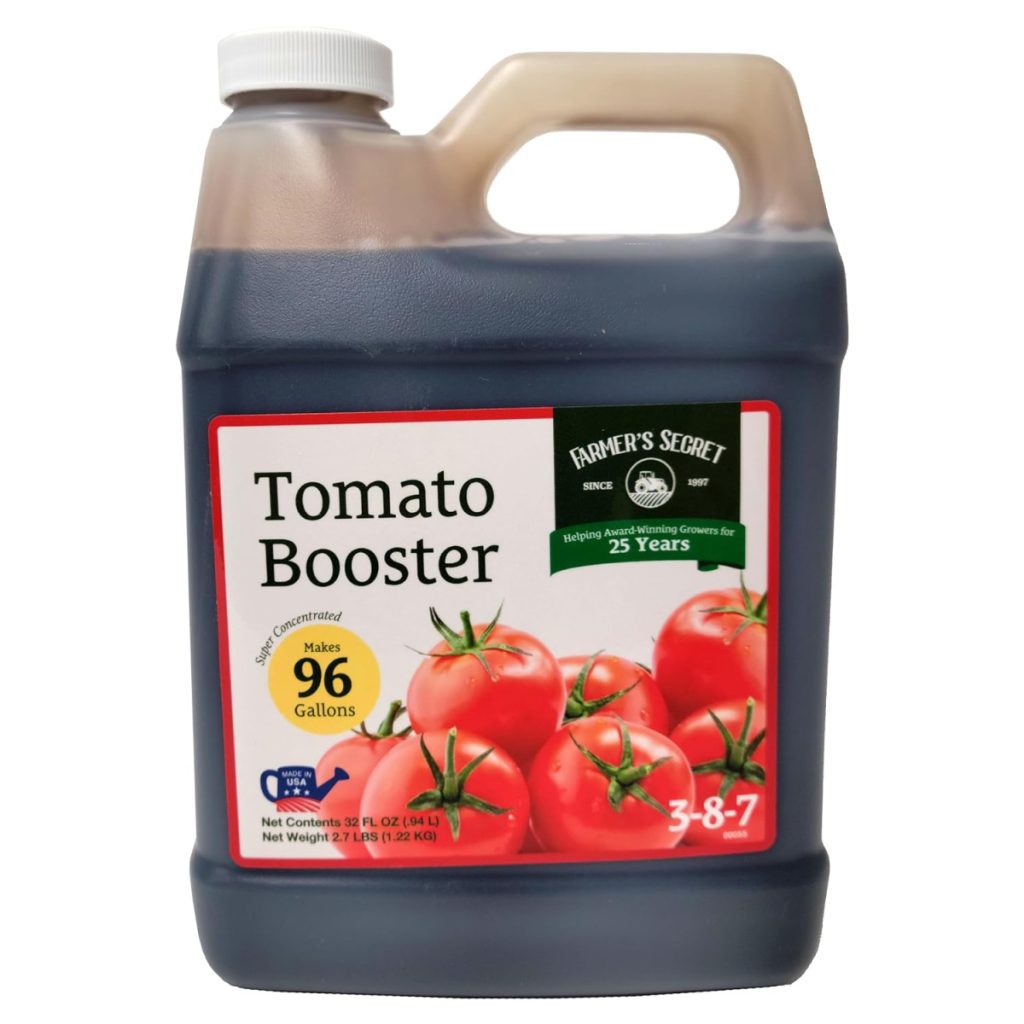
Fertilizing should be done carefully. Too much nitrogen can result in lush green growth with fewer tomatoes. Use a balanced fertilizer or one slightly higher in phosphorus and potassium to promote flowering and fruit development. Affiliate Link: Farmer’s Secret Tomato Booster Fertilizer (32oz) – Super Concentrated – 3:8:7
Pruning can improve airflow and redirect energy into fruit production. Remove any suckers that form below the first flower cluster, especially in tighter garden spaces. Because Black Beauty tomatoes grow tall and produce heavy fruit, proper support is essential. Tie stems gently to stakes or trellises as they grow to prevent breakage and keep fruit off the ground.
Knowing when to harvest Black Beauty tomatoes is one of the most important parts of growing this unique variety. Unlike traditional red tomatoes, color alone is not always the best indicator of ripeness. The deep purple shoulders will appear early, but the fruit needs time to fully mature.

A ripe Black Beauty tomato will feel slightly soft when gently squeezed and will have a rich aroma. The underside of the fruit will typically turn from green to a deep red or reddish-brown when fully ripe. Taste-testing one tomato is often the best way to learn when they are ready.
Harvest tomatoes regularly to encourage continued production. Leaving overripe fruit on the plant can slow down new flower and fruit development. Use clean garden shears or gently twist the fruit from the vine to avoid damaging the plant.
Once harvested, Black Beauty tomatoes are best stored at room temperature. Refrigeration can dull their flavor and affect texture. For the best taste, use them within a few days of picking.
One thing is for sure, growing Black Beauty tomatoes in your garden can be special. From their dramatic appearance to their outstanding flavor, they bring beauty, nutrition, and excitement to the vegetable garden!
Follow Our Facebook Page For Great Gardening Tips And Advice! This Is My Garden Facebook Page
This Is My Garden is a garden website created by gardeners, for gardeners. Jim and Mary Competti have been writing gardening, DIY and recipe articles and books and speaking for over 15 years from their 46 acre Ohio farm. They publish three articles every week, 52 weeks a year. Sign up today to follow via email, or follow along!
Looking for a few simple tips and tricks to recharge your tired and depleted soil where your tomato plants grew this year?
Tomatoes are one of the most rewarding crops to grow in the garden, but they are also one of the most demanding. Anyone who has grown them knows that tomato plants take a lot from the soil. They grow fast, set heavy amounts of fruit, and keep producing for a long stretch of the season. Because of that, the ground where tomatoes were planted usually ends up completely drained of nutrients.
When tomato plants are finished for the year, the soil they leave behind needs special attention. If you plant new crops into that same space the following season without recharging the soil, they will most likely struggle to grow. Especially if you will be planting tomatoes there again!

Tomatoes are what gardeners call “heavy feeders.” That means they pull a lot of important nutrients out of the soil as they grow. They use up nitrogen for leaf and stem growth. They also consume phosphorus for root and flower development, potassium for strong plants and healthy fruit, and calcium to avoid issues like blossom end rot.
Without these elements being replaced, the soil is left depleted. Although crop rotation helps – in many raised beds or small backyard gardens, growing often mean tomatoes return to the same spot every season. In those cases, recharging the soil is the only way to keep it productive.
The good news is that rebuilding the soil after tomatoes is not complicated, expensive, or overly time-consuming. In fact, with a few simple steps, you can bring life back to the soil and have it ready for next year’s planting. No matter if you grow in a traditional garden – or raised beds.
One thing is for sure, in a garden, recharging tomato soil is best done right after the plants are pulled at the end of the season. Leaving the space bare over winter can lead to erosion, nutrient loss, and compacted soil. Instead, cover crops and soil amendments can work wonders together to restore balance.
Cover crops are one of the easiest and most effective ways to heal soil. Crops like cereal rye, oats, and field peas are all excellent choices. As soon as the tomato plants are removed, seeds can be sown directly into the soil. They then germinate quickly and provide a blanket of growth that protects the soil through the fall and winter.
Cover crops don’t just cover the ground. As they grow, they capture nutrients and store them in their leaves and roots. When the plants die back naturally in late winter or early spring, they decompose and release those nutrients back into the soil.
Oats and rye are particularly helpful because they add large amounts of organic matter. Field peas do that too, but they also fix nitrogen, making them especially useful for soils where tomatoes grew. Affiliate Link: Outsidepride Dundale Field Peas Seeds – 10 lbs.
Some gardeners plant a mixture, such as rye with peas or oats with peas. This helps to give the combined benefits of each. Whether you use a single crop or a blend, a cover crop will re-balance soil nutrition, improve structure, and reduce weed growth the following year.


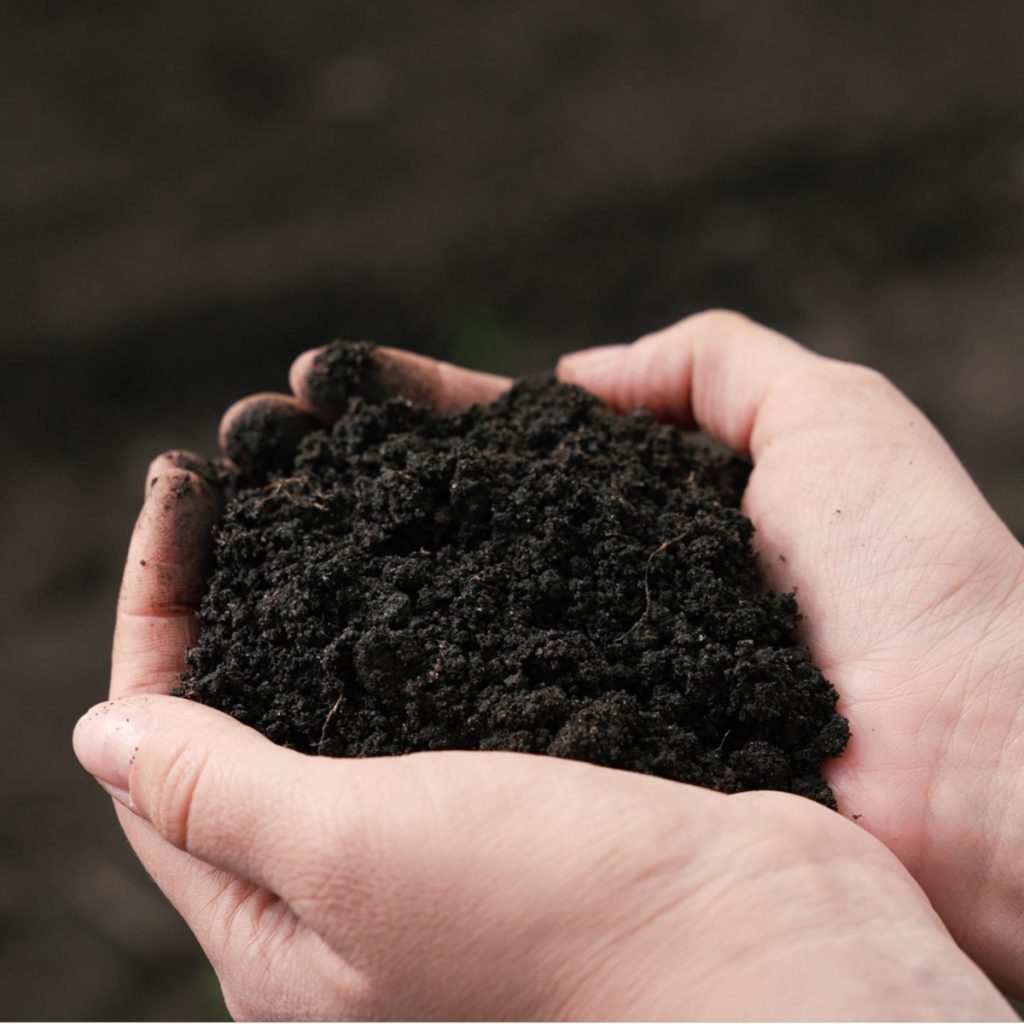
While a cover crop is powerful, the soil where tomatoes grew often needs an extra boost. That’s where compost comes in. Compost contains nearly every nutrient plants need. It also improves soil texture, allowing roots to grow easily and water to drain properly.
To recharge tomato soil, work in a few shovels of compost directly into each planting hole or along the row where your tomatoes grew. This restores much of what was lost during the growing season.
Along with compost, pulverized eggshells are extremely valuable. They release calcium back into the soil, which is one of the nutrients tomatoes consume the most. See our article: The Best Way To Use Egg Shells In Your Garden – And Why!
Sprinkling two to three tablespoons of crushed shells in each hole and then mixing them in with compost can help set the stage for healthier soil. Once compost and eggshells are in place, sow your cover crop seeds. By spring, your garden soil will be rich and full of life again.

Raised beds are popular for growing tomatoes, but they come with a challenge. Unlike a traditional garden, a raised bed has a limited amount of soil. Once tomatoes pull the nutrients out, there’s no natural way to replace them unless you add them back in. That means recharging raised bed soil is even more important.
For raised beds, it all starts by adding compost. A good rule is to add enough compost to equal about 5–10% of the total soil volume. For example, if you have a 12-inch-deep raised bed, add about an inch of compost across the entire top and then mix it in.
Eggshells should also be added, just like in a traditional garden. For raised beds, sprinkle one to two tablespoons of ground shells for every two square feet of space.
One of the best additions you can make to a raised bed is worm castings. Worm castings are full of beneficial microbes and balanced nutrients. They act as a gentle fertilizer that won’t burn plants, while also improving the soil’s ability to hold moisture. Add ¼ to ½ cup per square foot and work it into the soil along with the compost.

If your raised beds are large enough, you can plant cover crops in them too. Rye, oats, and peas all do just as well in raised beds as they do in open soil. For small beds where a cover crop isn’t practical, adding more compost in the fall and again in the early spring is the best alternative.
Tomatoes grown in containers create the biggest soil challenge of all. The limited volume of soil in a pot or bucket becomes quickly depleted during the season.
Unlike garden plots or raised beds, its impossible to recharge the soil in place. Trying to reuse the same soil the following year will almost always lead to weak, unproductive plants. The best practice is to empty the containers into a compost pile. Over time, it will break down, recharge, and become usable again in other garden areas. See: How To Save & Recharge Old Potting Soil – And Reuse It Again Next Year!
For the next growing season, start with a fresh mix of soil. A blend of 50% new potting soil and 50% finished compost works wonderfully. This way, you can still reuse some of the old soil indirectly while ensuring your new plants have everything they need to thrive.
Beyond compost, eggshells, and worm castings, a few other natural amendments can make a big difference when recharging tomato soil.
Here is to taking the time now to recharge your tired tomato soil – and to growing an even better crop next year!
Follow Our Facebook Page For Great Gardening Tips And Advice! This Is My Garden Facebook Page
This Is My Garden is a garden website created by gardeners, for gardeners. Jim and Mary Competti have been writing gardening, DIY and recipe articles and books and speaking for over 15 years from their 46 acre Ohio farm. They publish three articles every week, 52 weeks a year. Sign up today to follow via email, or follow along!
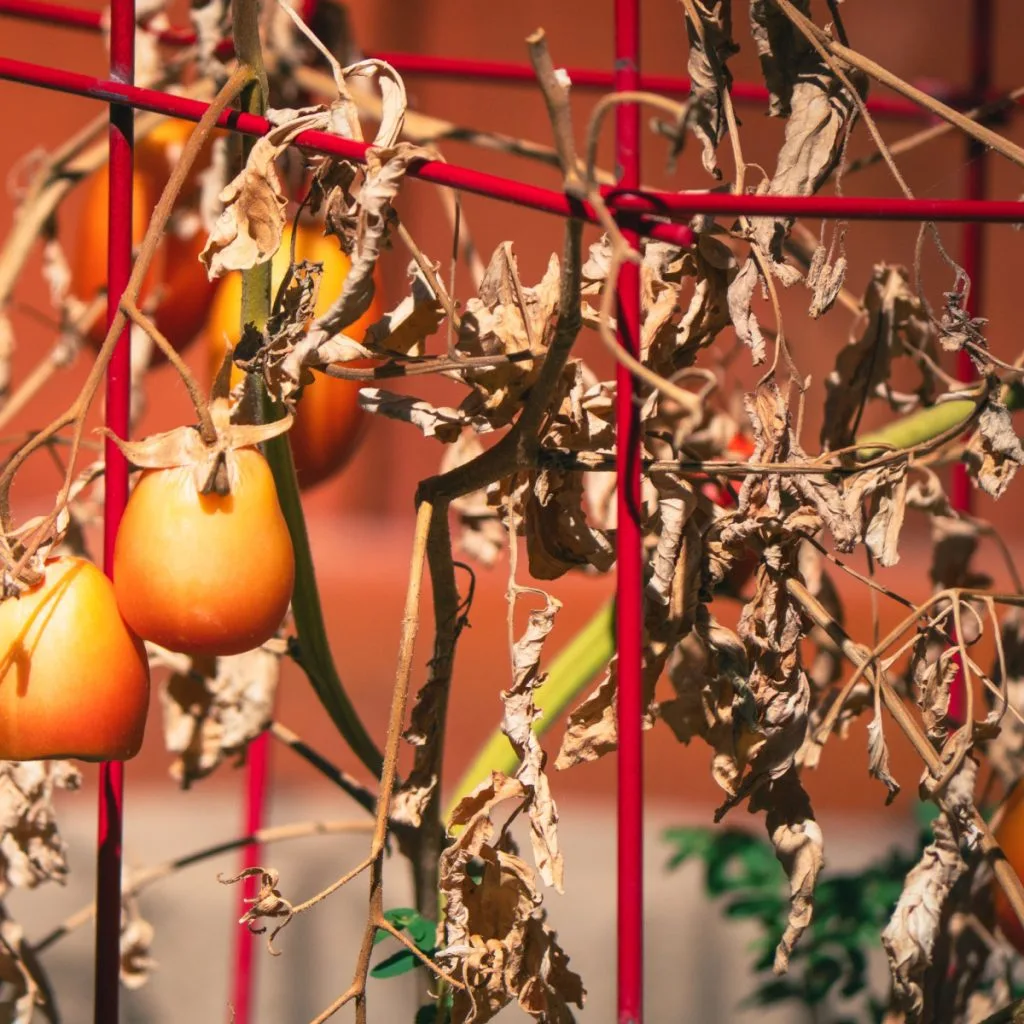
Want to know a few simple ways to ripen all of those green tomatoes still hanging from your dying tomato plants at the end of the season – without having to keep your plants in the ground?
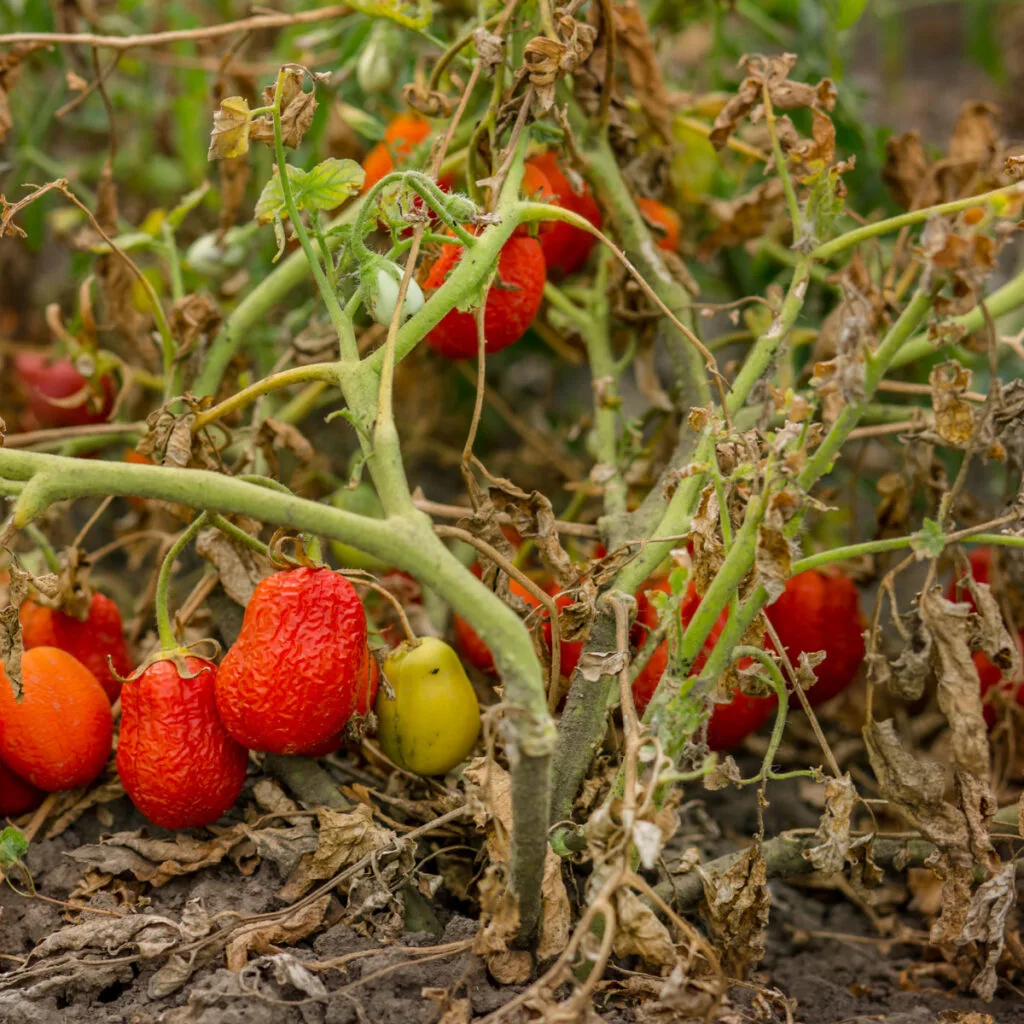
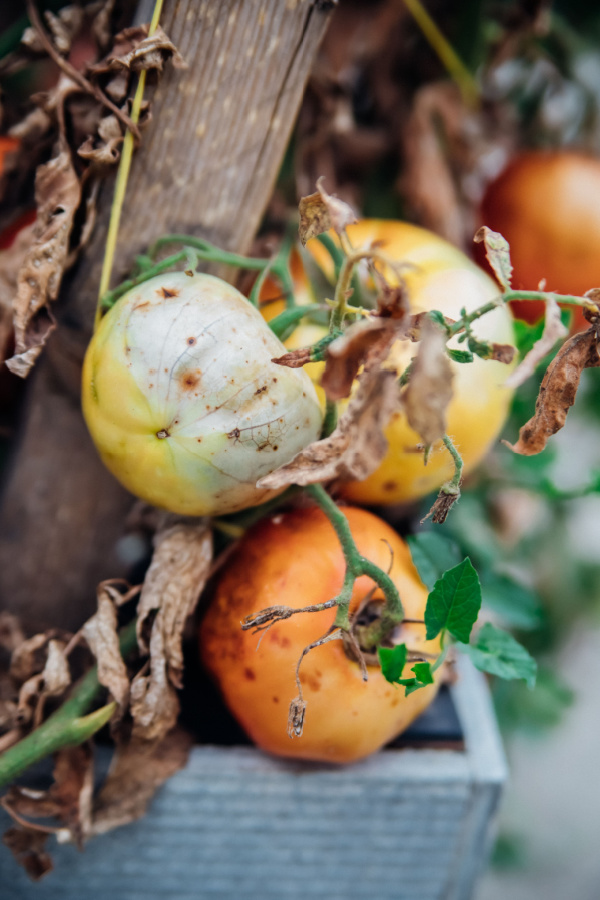
As summers draws to a close, tomato plants quickly start to lose their luster. The once proud plants that were flowering strong and producing tomatoes a few weeks back finally run out of steam and begin to turn pale and weak. But that doesn’t mean they still don’t have a few green or slightly blush tomatoes left on their branches to ripen!
It can be quite the dilemma for gardeners. Do you leave the plants in place and try to get a few more tomatoes to mature? Or do you finally give in to the unsightly plants and pull them out and give up?

The good news is this is one time when your really can have your cake and eat it too. Once your tomato plants take a turn for the worse – it’s actually far better to pull up the dying plants and clean up your garden. But that doesn’t mean you can’t still ripen the green tomatoes that were on the vines. In fact, it’s actually easier than you could ever imagine to simply ripen them off of the plant!
Not only can leaving old tomato plants in your garden or raised beds be an eyesore, it can also cause serious long-term issues for your garden.
Dying and decaying plants are a huge attraction for pests and disease. As the foliage dies off, pests take up residence to increase their populations for the following season. In addition, blight and mildew can take hold and overwinter as well.
Last but not least, all of the rotting and remaining fruit fall to the ground to litter it with seeds. Seeds that next year will become thousands of volunteer “plants” that will take energy from the plants you put in the ground.
That is exactly why pulling old plants as they fail is the best course of action. But when you do, it’s also the perfect time to pick those old plants clean of the remaining green or slightly pink tomatoes – and ripen them off the vine!

Not only is maturing tomatoes off of the plant easy, it’s actually better for the tomato. Even during the peak of harvest season, it’s best to pick tomatoes before they completely turn.
Why? Because picking tomatoes early in the season helps both the plant and tomato. It helps the plant by conserving energy to use on creating more blossoms and tomatoes. And it helps the tomato by keeping it out of harms ways from pests, heat, sun scald, and more.
The fact is, tomatoes ripen better off the vine that on it. When given the proper air flow, temperature and humidity levels, they will turn faster than ever.
Contrary to popular belief, tomatoes do not need direct sunlight to ripen. In fact, they actually prefer shade over sun. In addition, they also ripen best at around 70 degrees with 80 to 90 percent humidity levels. And last but not least, they need good circulation.
Luckily these are all conditions that can be created off the vine quite easily. And late in the season, it can let you not just ripen tomatoes that have started to turn, but your green tomatoes too!
As you clear out your plants and pick off the remaining tomatoes, there are a few simple tricks to get the most from your remaining harvest.
One thing you don’t want to do is wash or clean off the tomatoes at this point. Doing so can actually cause them to rot before they ripen. Also be careful as you pick the fruit off to keep the tops in tact and damage free. Keep in mind the less you handle the tomatoes, the better.
Begin by discarding any tomatoes with blemishes, bruises or cuts. Also get rid of any that are not firm to the touch. They simply will not be able to ripen without rotting late in the season. Next, you need to separate the remaining harvest into two types – slightly turning tomatoes, and totally green tomatoes.
For tomatoes that have already started to blush or slightly turn, ripening is a breeze. Because they have already started the process of ripening, it will take far less effort.
Find a location that is not in direct sun and that is cooler with at least a slight breeze. Covered porches can be great for this. The next best option is inside in a cool but not cold room. Again, keep them out of direct sunlight. Do not ripen in a basement as the moisture is often too high.

If doing this outside be aware that animals and pests can find them if not protected. It is certainly not past a racoon to visit a ripening station and take the pick of the crop!
Next, use a wire cooking rack or some other rack that allows air above and below the tomatoes. This will help to ripen all around evenly. Do not sit on metal or wood pans directly as the bottoms can rot out. If a breeze is not present, turning on a ceiling fan or small fan. Affiliate Link: Checkered Chef Cooling Rack For Cooking & Baking
Using a fan for four to six hours each day will help give them air to ripen faster. It’s not necessary, but it will speed it up a bit. Turn the tomatoes carefully every day to help promote even ripening. Usually within 5 to 10 days, depending on how much the tomato had already turned, your tomatoes will be ripe.
If your late season tomatoes are totally green, you will need to take an extra step to help them out. This is because since they have not “broke” or started to turn, they need to get to that point before the air rack method will work well.

To help your green tomatoes get started, all you need is a brown paper bag and a banana. Simply place the green tomatoes in the bag along with the banana. Next, fold the top of the paper bag so it is closed and let it go for a few days.
The ethylene gas in the banana will help to speed the ripening and start to turn the green tomatoes. Once they have started to blush or slightly turn – then all you have to do is take them out and place them on the wire rack or mesh. And the rest, as they say, is history – as the tomatoes can finish ripening and you can enjoy more tomatoes than ever!
Here is to pulling those old tomato plants and picking the last of your green end of the season tomatoes – and getting them to ripen off the vine. And if you haven’t saved your seeds for next year – now’s the time! See: How To Save Heirloom Tomato Seeds For Next Year.
Follow Our Facebook Page For Great Gardening Tips And Advice! This Is My Garden Facebook Page
This Is My Garden is a garden website created by gardeners, for gardeners. Jim and Mary Competti have been writing gardening, DIY and recipe articles and books and speaking for over 15 years from their 46 acre Ohio farm. They publish three articles every week, 52 weeks a year. Sign up today to follow via email, or follow along!
Looking for the best way to get rid of your tomato plants after they die off in late summer or fall?
As crazy as it sounds, what you do with your tomato plants as they die off this fall – and how you dispose of them – can both have a huge impact on how well your tomato plants grow in your garden next year. And even more, it can also play a major role in the future performance of your other vegetable plants too!
Whether it be in a traditional garden, a raised bed or in a container garden, one of the most important chores a gardener can perform in the fall is to clear away their vegetable plants as they die off. And the faster the better!

Leaving decaying plants in a garden space is the quickest way to create a whole host of future issues. As plants break down, they become easy targets for mold, mildew and disease to find a home. They also become excellent food and cover for a long list of garden pests.
Although this is true for all vegetable plants, it is especially true when it comes to tomato plants. The simple fact is, the longer you leave dying tomato plants in their space, the more danger you bring to next year’s crop.
Whether it be mildew, blight, or a host of other ailments, tomato plants are one of the biggest carriers of disease. Unfortunately, the longer the plants stick around, the more likely they are to become infected. Not only infecting the tomato plants, but the surrounding soil and other vegetable plants in the process.
That is even more true when it comes to the dreaded soil borne disease of blight. As decaying foliage and fruit fall, they drop infected spores onto the soil surface. Spores that can then live for years to infect future tomato crops. See: How To Keep Tomato Blight Away
But rotting tomato plants also attract pests and insects by the thousands. Tomato hornworms, aphids, tomato root nematodes and a long list of other pests love to feast on decaying foliage and rotting fruit. And when they do, they often lay eggs that can come back to haunt next year’s crop even worse.

It’s obvious to see how important it is to get your old tomato plants out of their growing space as they begin to die off. But here’s the kicker – you also have to be careful with the plants once you take them out!
One thing you do not want to do with your old tomato plants and rotting fruit is place them in your home compost pile.
For most of the crops you clear from the garden in the fall, the compost pile is the perfect choice. After all, the plants break down, give back their remaining nutrients – and then help to create amazing compost. Compost that can then be used next year to help power a new garden with new plants.
Vegetable crops such as beans, greens and peas are a great example of this. Not only do they add good foliage that breaks down fast, they are also filled with nutrients. In addition, they have little chance of carrying disease to your pile.
But tomato plants are a different story. Because of the likelihood of carrying disease, they are best left far away from a home compost pile. In order to kill blight spores and other pathogens, a compost pile needs to get extremely hot. And for an extended period of time.
Unfortunately, home composting bins and piles simply do not have the size, air flow or ingredients to reach those temperatures. And that means the pathogens survive. And when the finished compost is used next year, they infect other plants as well.
So why leave out the rotting tomato fruits? For starters, they too can carry blight spores, mildew and other health issues to your compost pile. But even more, it’s best to leave them out to keep volunteer seeds from becoming an issue next growing season.
Just as with the pathogens, a home pile does not get hot enough to kill the seeds from the tomato fruits. And a single tomato can have hundreds of tiny seeds. When those seeds pass through the compost, that means they will sprout wherever it’s used to become next year’s weeding problem.
So with all of those dangers, what exactly is the best way to get rid of dying tomato plants and bad tomatoes? Obviously, the first key is to keep them as far away from your garden space as possible.
At the same time, simply throwing them in your weekly trash is such a waste. Especially when it is needlessly filling landfills with materials that still have value. With that in mind, here are three great alternatives:
Although you should not add tomatoes to your home compost pile, that doesn’t mean you can’t still compost them. After all, like all living plants, they still add valuable minerals and nutrients back to the soil when they break down. And this is exactly where trench composting works!

Trench composting is actually a great way to compost everything if you don’t have a compost pile. And is it ever easy! In fact, it’s as simple as digging a deep hole and burying the plant material. The plants then break down, and add their resources back to the soil.
With non-tomato materials, you can do this anywhere in your garden. But with tomatoes, it’s important to bury the materials away from the garden. It keeps your garden safe and allows you to dispose of your tomato plants with ease!
Another great way to get rid of old tomato plants after they die is at a community or local municipal composting facility. These facilities use high heat composting methods that kill off pathogens and seeds. The end result is perfectly safe and blended compost that is great for powering flowers and vegetables.
Simply clear the plants and place into approved compostable yard waste bags. Always be sure to clear any fruit that has fallen down to the soil as well to keep it out of your garden.
If you happen to have leaves and other yard waste and don’t have a home compost pile, these composting centers are a great option in place of simply throwing valuable organic materials to the curb to put in a landfill. Affiliate Product Link: Leaf / Compost Bags


Burning your plants in a fire pit or outdoor burn pile is another effective way to destroy plants and pathogens that can live in old tomato plants. The important thing here is following all local burn laws and rules.
If you live in an area where fire is a constant danger, this is obviously not a good solution. As for then using the ashes in the garden or in your compost pile, that is a matter of personal debate. Some experts and gardeners consider it completely safe, others play it safe and simply spread the ashes out away from the garden or their compost pile.
Here is to finding the best way to get rid of dying tomato plants from your garden this fall, and to keeping next year’s garden safe and ready to grow!
Follow Our Facebook Page For Great Gardening Tips And Advice! This Is My Garden Facebook Page
This Is My Garden is a garden website created by gardeners, for gardeners. Jim and Mary Competti have been writing gardening, DIY and recipe articles and books and speaking for over 15 years from their 46 acre Ohio farm. They publish three articles every week, 52 weeks a year. Sign up today to follow via email, or follow along!
Looking for the best way to revive and recharge those tired looking tomato plants growing in your garden or containers late this summer?
By late summer, even the healthiest and most productive indeterminate tomato plants can start to slow down. After spending months producing blooms and ripening fruit, plants often begin to look worn out. Leaves turn yellow, lower stems dry up, and fruit production slows.
But just because the plants are looking tired doesn’t mean the harvest is over. With a few simple late-season care steps, you can breathe new life into those tomato plants and keep them producing right up until the first frost!

Unlike determinate tomatoes, indeterminate tomato plants are designed to keep growing and producing fruit until frost kills them. However, by the time late summer arrives, they’ve often put in a lot of effort. Months of producing flowers, setting fruit, and fighting off pests and disease take a toll.
Several factors contribute to late-season slowdown. Plants can start to struggle in late summer for a few different reasons.
The most common is simply a lack of energy. Over time, they use up much of the nutrients in the soil that fuel their growth and fruit production. Without fresh nutrients being added back, the plants simply run out of the energy they need to keep producing.
The heat of mid to late summer also adds stress. Especially when water or nutrients are not supplied consistently. As plants become bushier, the lower leaves and old branches can block airflow. This poor circulation not only makes them more vulnerable to disease but also reduces their ability to absorb sunlight.
Last but not least, another common problem by late summer is fruit overload. When too many ripening tomatoes are left on the plant at once, the plant focuses all its energy on ripening those fruits. And it leaves little strength for producing new blooms and setting additional fruit.

Fortunately, all of these issues can be addressed with the right care techniques. The key is to give them the right nutrients at the right time, improve airflow and plant health by pruning – and stay on top of harvesting so plants don’t become overburdened. And here’s how to do just that!
One of the fastest ways to revive tired tomato plants in late summer is to feed them with a balanced but targeted nutrient boost. At this point in the season, your goal isn’t to encourage more foliage growth – it’s to keep plants producing flowers and ripening fruit. That means focusing on phosphorus and potassium, not nitrogen.
Nitrogen is great early in the season for strong leaf and stem growth, but too much nitrogen now will cause plants to push out green foliage at the expense of blooms and fruit. Phosphorus helps with strong root systems and better flower production, while potassium improves fruit size, quality, and ripening speed.
Look for a water-soluble liquid fertilizer with a lower nitrogen number and higher middle (phosphorus) and last (potassium) numbers in its N-P-K ratio. Ideally, you want around twice the amount of phosphorus and potassium. Affiliate Link: Farmer’s Secret Tomato Booster Fertilizer (32oz) – Super Concentrated – 3:8:7 Ratio

Instead of feeding a large dose all at once, give plants a half-strength dose every 5 to 7 days. This steady feeding provides a consistent supply of nutrients without overwhelming plants. A big one-time dose doesn’t always help because the nutrients leach away before the plant can use them fully.
For example, if the label says to use 1 tablespoon of fertilizer per gallon of water, cut that to ½ tablespoon per gallon. Water the base of each plant slowly. Make sure the solution soaks down to the roots. Avoid getting the liquid on the foliage to reduce the risk of disease.
By feeding regularly and lightly, you keep plants energized and ready to keep producing right through the last weeks of the season.
As tomato plants grow, their lower leaves and older branches begin to yellow and die back. Leaving this foliage in place can reduce airflow, shade out new growth. It can also create a humid environment that invites fungal diseases. Late summer is the perfect time to do some selective pruning to help plants recover.
Begin by removing all of the dead, yellowing, or diseased leaves from the bottom 12 inches of the plant. This area is often the first to show signs of stress, and clearing it helps air circulate freely. A clean lower section also allows sunlight to reach the soil, which can help keep it drier and less hospitable to disease.
If you notice stems that no longer have flowers or fruit forming, trim them out. This redirects the plant’s energy to newer, more productive branches. Always use clean, sharp pruners, and disinfect them between plants to avoid spreading disease.
This type of late-season pruning not only refreshes plants but can also help them bounce back with a burst of new growth and flowers.
One of the easiest ways to slow a tomato plant’s production is to let too much ripening fruit remain on the vine at once. When plants have to direct all of their energy into ripening dozens of tomatoes, they stop producing new flowers.
Make a habit of harvesting tomatoes as soon as they start to blush. Blushing is the first sign of color change from green to yellow, orange, or red, depending on the variety. Once a tomato reaches this stage, it no longer needs to stay on the vine to ripen. See our article: How To Know When To Harvest A Tomato – The Answer Might Surprise You!

Picking at the blush stage reduces the plant’s workload, freeing it to send energy into producing more flowers and setting new fruit. It also reduces the risk of damage from pests or sudden weather changes, since ripening tomatoes left on the vine are more vulnerable to cracking, rot, and chewing insects.
To ripen blush-stage tomatoes indoors, simply place them in a single layer in a warm, dry location out of direct sunlight. A countertop or table works well. You can also place them in a paper bag with a banana or apple to speed ripening, as the ethylene gas these fruits give off encourages faster color change.
By keeping the plant picked clean, you’ll not only protect your tomatoes from damage but also encourage the plant to keep producing right up until frost.
Many gardeners are surprised at how well their tired tomato plants revive and bounce back after a few weeks of this late-season care. Often, you’ll see a fresh flush of blooms followed by another wave of tomatoes that can carry your harvest right up until the first frost hits.
Follow Our Facebook Page For Great Gardening Tips And Advice! This Is My Garden Facebook Page
This Is My Garden is a garden website created by gardeners, for gardeners. Jim and Mary Competti have been writing gardening, DIY and recipe articles and books and speaking for over 15 years from their 46 acre Ohio farm. They publish three articles every week, 52 weeks a year. Sign up today to follow via email, or follow along!
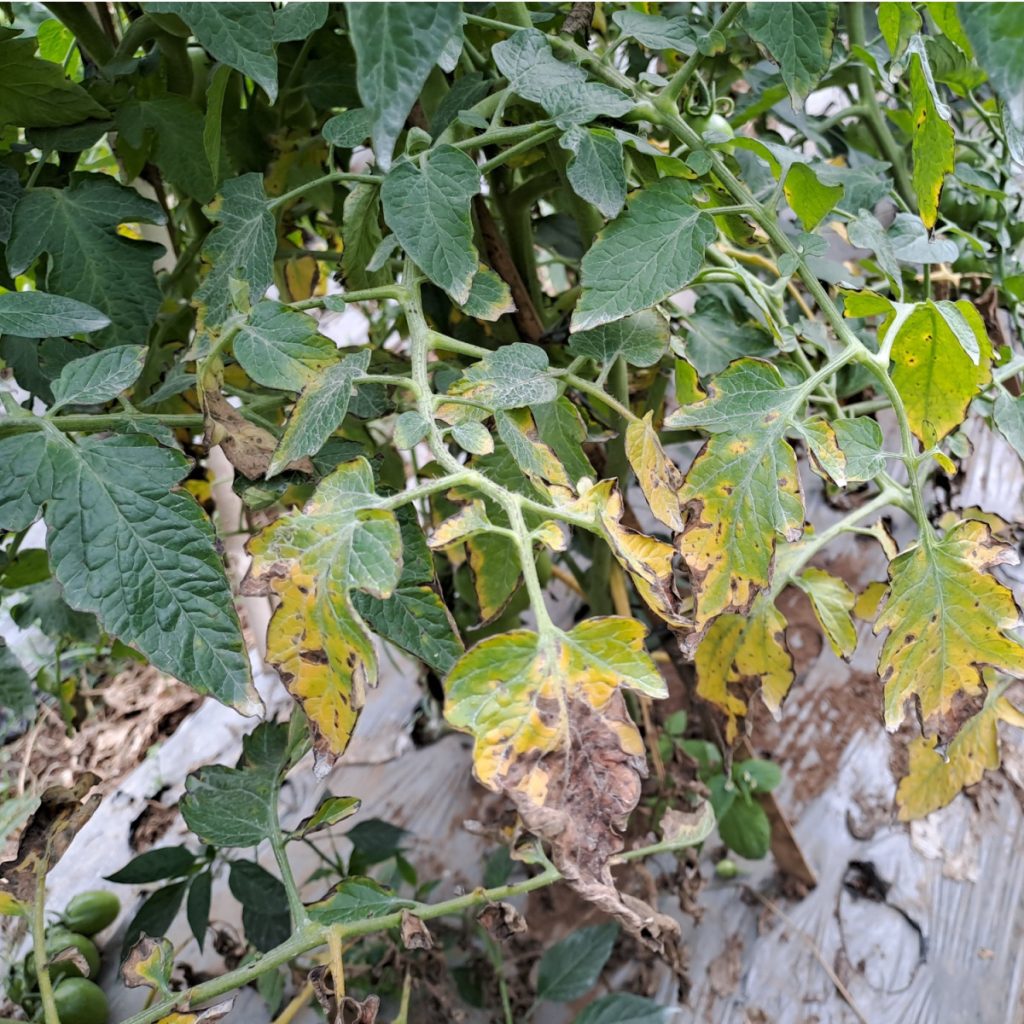
Are the leaves on your tomato plants turning brown? As summer hits full stride and tomato season gets into full swing, many gardeners get worried when some of the leaves on their tomato plants begin turning brown – and in some cases – even begin to die and fall off.
This can be especially true for the lower leaves of tomato plants in mid to late summer. Quite often, when a plant has any issue at all – it will show up first on the lowest leaves. And if the issue is serious enough – it then spreads to the rest of the plant.
One thing is for sure, for tomato growers, the last thing they want is trouble with their plants after nurturing them all spring and early summer. Especially now that they have finally matured enough to start producing a harvest!

So what is the cause? Could it be a lack of water or nutrients? Maybe the start of the dreaded tomato blight or another tomato disease? Or could it be an invasion of pests trying to mount an attack on your plants?
The truth is, there can be a lot of reasons the leaves of a tomato plant start to fail or fade in mid summer. As you will see below, late season blight is certainly a major culprit for the failure of many late season tomato plants. So is a lack of nutrients. But surprisingly, in other cases – the plant dying back is completely natural.
So before you begin to think your tomato crop might be in serious jeopardy, here are a few important things to know about how your tomato plants grow in mid to late summer – and how those yellowing or browning leaves might not be the end of the road for your plants – or your tomato harvest.
One of the biggest reasons tomato plants suffer in the summer is from a lack of nutrients. Tomato plants are heavy feeders. Because of that, they can quickly use up the available nutrients in the soil. And when they do, the leaves and the plant can begin to suffer.
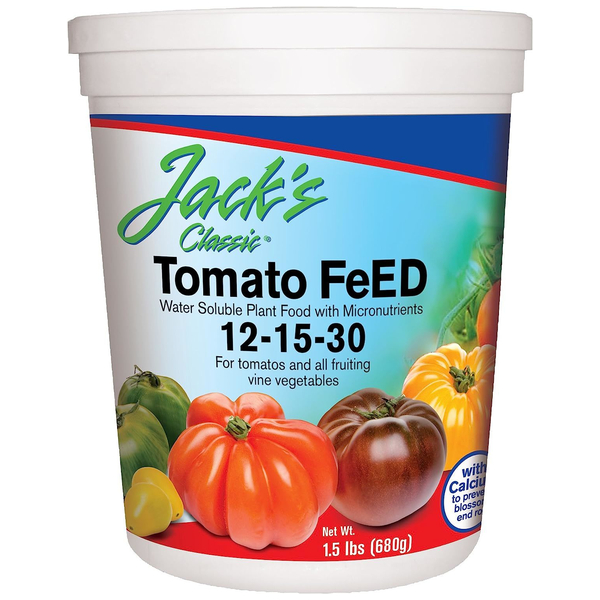
Summer fertilizing is vital to keep your plants strong, healthy and producing. Fertilize your plants every seven to ten days with a liquid fertilizer that has more phosphorus and potassium than nitrogen. This will help it continue producing blooms and fruit, and not just green up the foliage. Affiliate Link: Jack’s Classic Tomato Feed Fertilizer

When fertilizing, give your plants half of the recommended dose by diluting the mix in half. This allows you to feed more often, but with a steady supply of power for your plants.
Another big reason tomato plants suffer in mid summer and their leaves turn brown is from either too much or too little water. Tomato plants need between 1 and 1.5 inches of rain weekly. If it’s not falling from the sky, watering is vital to keep the foliage strong and the plant producing.
More than anything else, keep plants watered during extended dry periods. When watering, water deeply and not just for a few minutes at the surface. This will help the plant grow its roots deeper, protecting them from drying out easily.
So what if you are growing indeterminate tomatoes and still having a problem with your plants not producing more and starting to look weak? In some cases, your plant might be suffering from fruit overload.
If you allow too many tomatoes on a plant at once, it will cause the plant to stop producing. This is called fruit overload and is common not just on tomato plants, but on many vegetable plants.
Tomato plants should be harvested often in the growing season. This will keep the plant’s energy on growing and producing. And don’t worry if those tomatoes are not fully ripe. As it turns out, it is better to pick tomatoes as they barely start to turn and let them ripen off the vine!
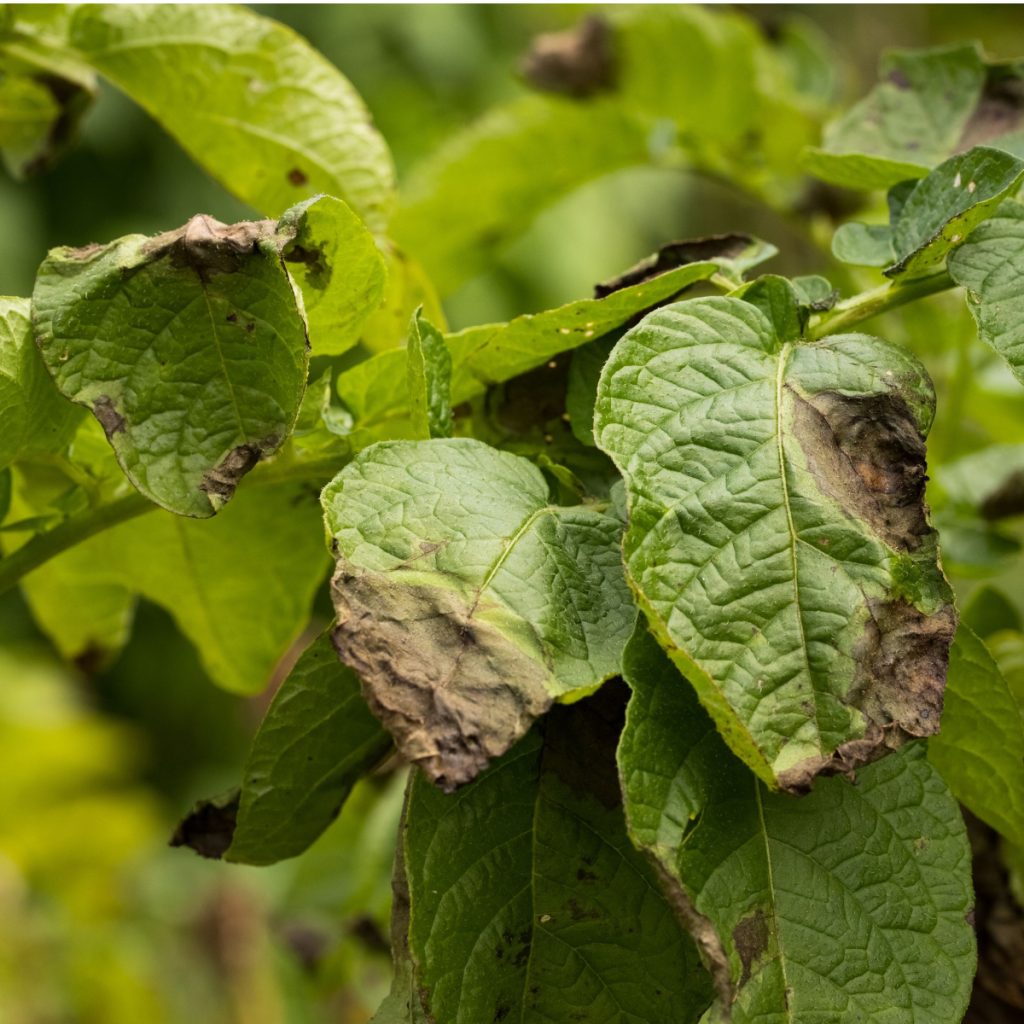
Tomato blight is certainly a big issue for many tomato plants in late summer. Although blight can occur at any point in the growing season, it is most prevalent near the end of the growing season.
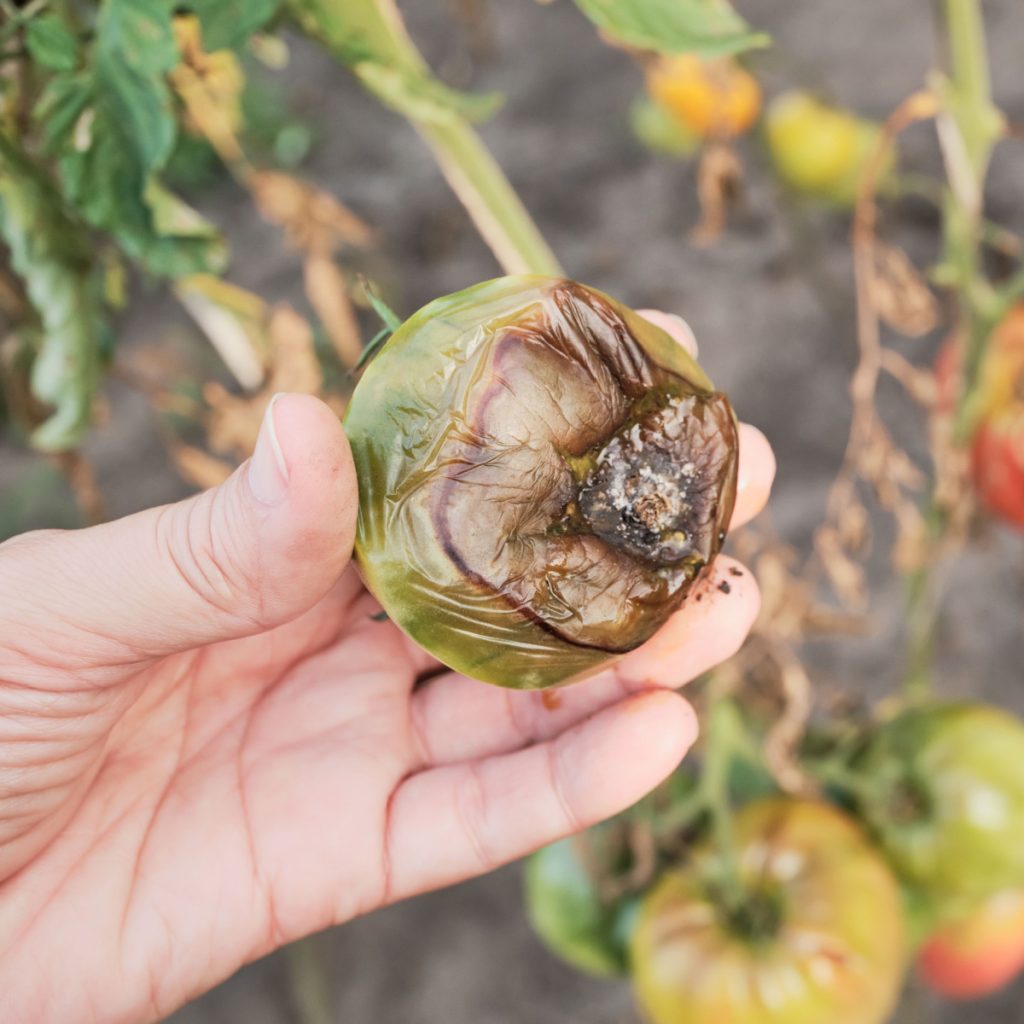
Tomato blight is a spore disease that infects the soil and plants. The spores can spread quickly via the wind, especially as plants grow larger late in the season. Although dying, browning foliage is a symptom, the real tell-tale sign of tomato blight is greasy, oily spots appearing on your tomatoes. When you see this, it is definitely time to pull the plants.

Tomato blight is highly contagious, and controlling it as quickly as possible is extremely important. Do not compost the plants, but instead burn or discard them. In addition, locate next year’s plants as far from the space as possible. For more, see: What To Do If Your Tomato Plants Show Signs Of Blight – Why & How To Act Fast!
Last but not least, in some cases, the reason a tomato plant’s leaves may be yellowing and dying off can be 100 percent natural. Why would a tomato plant suddenly begin to die in the middle of summer? Because it may be a determinate tomato!
Tomatoes are either determinate, or indeterminate. Indeterminate tomatoes will grow and produce until killed off by a frost or a freeze. But determinate varieties of tomatoes have a set life span. They produce their entire crop over a three to four week period, and then quickly die off.
A great example of this is with the Roma tomato. Roma tomatoes are quite popular among home gardeners. But Roma tomatoes are determinate plants. So after their main crop has ripened, they will die off – no matter what.

Unfortunately, this plant is often mistaken every year by gardeners as having a late season issue – when in reality, it has simply run its course. So before you think your plant may be in trouble, check to see if it might just be a determinate variety.
Here is to keeping your tomatoes producing this year – and to a great harvest right up until late fall. And if your tomato leaves are turning brown – to finding out why and fixing the issue fast!
Follow Our Facebook Page For Great Gardening Tips And Advice! This Is My Garden Facebook Page
This Is My Garden is a garden website created by gardeners, for gardeners. Jim and Mary Competti have been writing gardening, DIY and recipe articles and books and speaking for over 15 years from their 46 acre Ohio farm. They publish three articles every week, 52 weeks a year. Sign up today to follow via email, or follow along!
Are you worried your tomato plants might be starting to show early signs of blight – and more importantly- want to know what you should do about it?
Tomatoes may be one of the most popular crops to grow in a home garden, but they’re also one of the most susceptible to disease. And one of the most destructive and fast-moving diseases of all that can affect your tomato plants is blight.
Both early blight and late blight can strike tomato plants during the growing season. The disease thrives in warm, humid weather, which makes late July and August one of the most dangerous times of all for tomato plants.

Unfortunately, once blight starts, it can spread quickly. Not just to nearby tomato plants, but to other crops and even into the soil itself. The key to controlling blight is simple – act fast and act smart. If you catch the signs early and follow the right steps, you can sometimes slow or even be lucky enough to stop it to help save some of your harvest. But at the very least – you can save the rest of your garden and future tomato crops!
Blight is a fungal disease that spreads through tiny spores. It can be carried by the wind, by insects and animals, or even by your garden tools. And once on top of your garden soil, the spores can easily splash up on plants whenever it rains or you water.
Unfortunately, July and August often bring the perfect storm for blight to develop. Overnight moisture and high daytime humidity create the ideal environment for the spores to grow. And once they do, they spread fast.
Blight doesn’t just weaken plants – it can completely take away all of their leaves and destroy fruit. It also can spread to other nearby plants and more permanently infect your garden soil for crops in future years. And that is exactly why fast action is critical the moment you see the first signs.
Although both diseases are known as “blight,” early blight and late blight are caused by different culprits. And they also have slightly different symptoms.


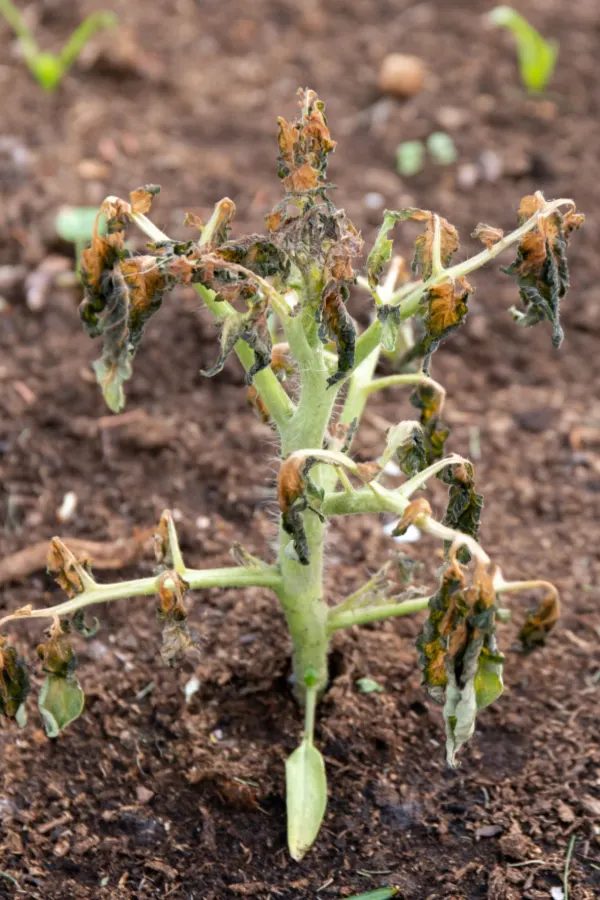
Early blight usually shows up first in mid to late July, especially on older or lower leaves of the tomato plant. It often starts after a rainy or humid period and will gradually move up the plant if not controlled.
Early blight starts with small brown or black spots on the lower leaves of the tomato plant. These spots usually have concentric rings inside them that look like a target or bullseye. As the infection spreads, the leaves around the spots begin to turn yellow.
Eventually, the affected leaves start to shrivel up and fall off, with the disease moving higher up the plant as it worsens. Long term, early blight can reach stems and fruit, causing rot and weakening the entire plant.
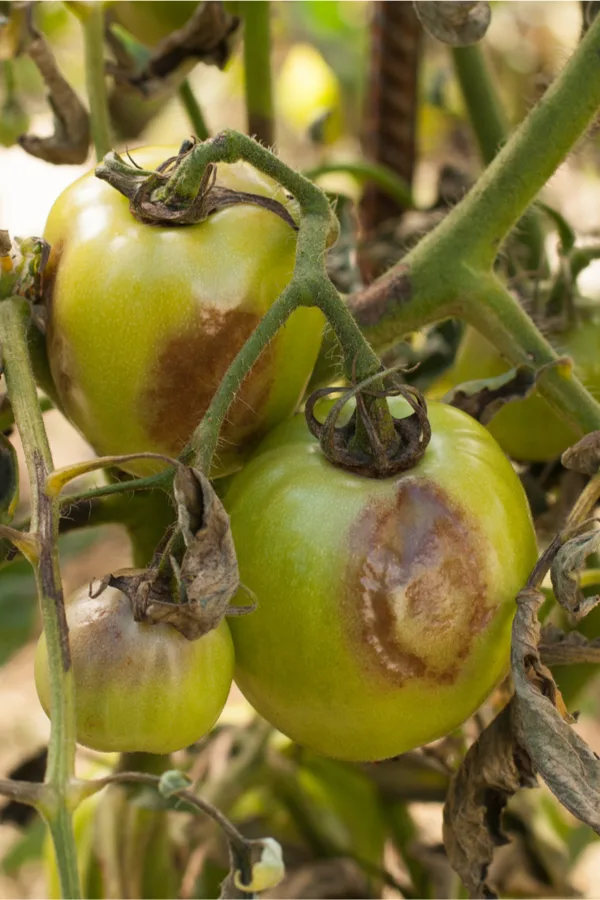
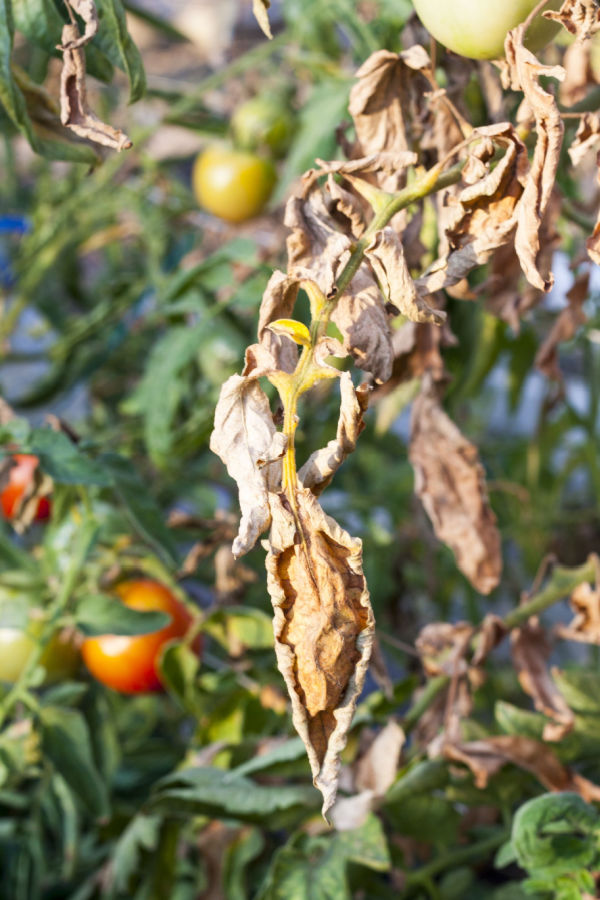
Late blight tends to hit later in the season – in late July or August. It can be far more aggressive. Unlike early blight, it can wipe out a plant in just a few days and quickly spread through most of an entire garden.
Late blight often shows up as large, irregular-shaped spots on the leaves that look greasy or soaked with water. You might also notice white, fuzzy mold growing on the undersides of the leaves, especially early in the morning. As the disease spreads, the stems and foliage can quickly turn black and collapse. The fruit may develop firm brown spots that later begin to rot and ooze.
No matter which type of blight you suspect, fast and decisive action is your best chance to control it.
As soon as you spot brown, black, or yellowing leaves with blotches or rings, begin removing them from the plant. Even if only one or two leaves show signs, it’s better to remove them than risk the spread.
Use clean garden scissors or pruning shears to snip the leaves at the base. Do not pull them off with your hands, as this can damage the plant and spread spores to nearby leaves. Most importantly, do not throw leaves with blight in your compost pile. Instead, place them in a plastic bag, seal it, and put it in the trash.
This step is often overlooked, but it’s critical to stopping the spread of disease. After cutting infected leaves or working with a blighted plant, immediately sanitize your tools before moving to another plant.
You can do this with a mixture of 1 part bleach to 9 parts water, or by wiping tools down with rubbing alcohol or hydrogen peroxide. Let the tools dry before using again. Also, wash your hands or wear gloves if handling multiple plants.
After removing the infected leaves, monitor the plant daily. If the disease continues to spread up the plant or begins to affect stems and fruit, it may be time to take further steps.

Often, with early blight, removing infected leaves and improving airflow can slow or stop the disease. But with late blight, if conditions are right, the disease can keep spreading even after trimming.
If new leaves begin showing symptoms or large parts of the plant are affected, it’s time to remove the entire plant before it contaminates others.
Unfortunately, once blight shows up, it usually takes over. And when it starts to, it’s time to get the plants out entirely. This is the hardest step for many gardeners, but also the most important. If a tomato plant shows extensive signs of blight – especially if fruit is rotting, stems are blackening, or the infection keeps spreading – the best action is to remove the whole plant completely.
One of the most dangerous parts of a blight outbreak is not just the damage it causes to this year’s crop, but what it can leave behind in the soil. Blight spores, especially those from early blight, can survive in the soil for multiple years. If you don’t take steps to protect your garden soil, the disease can return next season. Possibly even stronger than before.
Remove the entire plant and place it into a garbage bag. After removing any infected plants, it’s important to cover the area with a thick layer of mulch, such as straw, shredded leaves, or untreated grass clippings.
This helps stop remaining spores from splashing up onto nearby plants during watering or rainfall. Mulch also protects the soil surface and reduces the chances of any dormant spores becoming active again.

In the fall, once the gardening season is over, make sure to remove all plant debris from your garden, especially anything that might be infected. Don’t leave stems, leaves, or fruit behind to rot. Again, dispose of this waste in the trash – not the compost pile.
Blight spores can stay in the soil for up to three to even five years. Because of that, it is best to move your tomato plants to a new area of the garden. Also, avoid planting potatoes, peppers, or eggplant in the same area where you had a blight outbreak the year before. See: How To Avoid The 5 Most Common Tomato Planting Mistakes
These crops are all members of the nightshade family and are highly susceptible to the same blight pathogens. Try rotating with crops like beans, peas, or leafy greens instead.
Last but not least, once you have had blight, try to plant blight resistant tomato varieties. While no variety is completely immune, many have been bred to better withstand common blight strains and may slow the spread or reduce overall damage. For more tips on growing great tomatoes all season long, see: How To Revive Tired Tomato Plants In Late Summer – And Get More Tomatoes!
Here is to acting fast if you see the first signs of your tomato plants getting blight!
Follow Our Facebook Page For Great Gardening Tips And Advice! This Is My Garden Facebook Page
This Is My Garden is a garden website created by gardeners, for gardeners. Jim and Mary Competti have been writing gardening, DIY and recipe articles and books and speaking for over 15 years from their 46 acre Ohio farm. They publish three articles every week, 52 weeks a year. Sign up today to follow via email, or follow along!