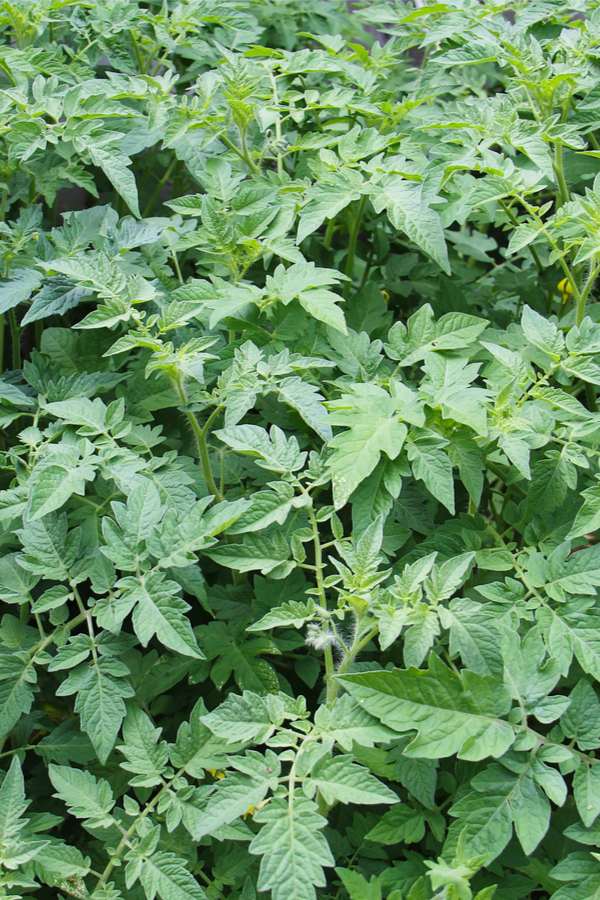
From how to plant, to fertilizing, pruning and staking – see all of our best tomato advice below!


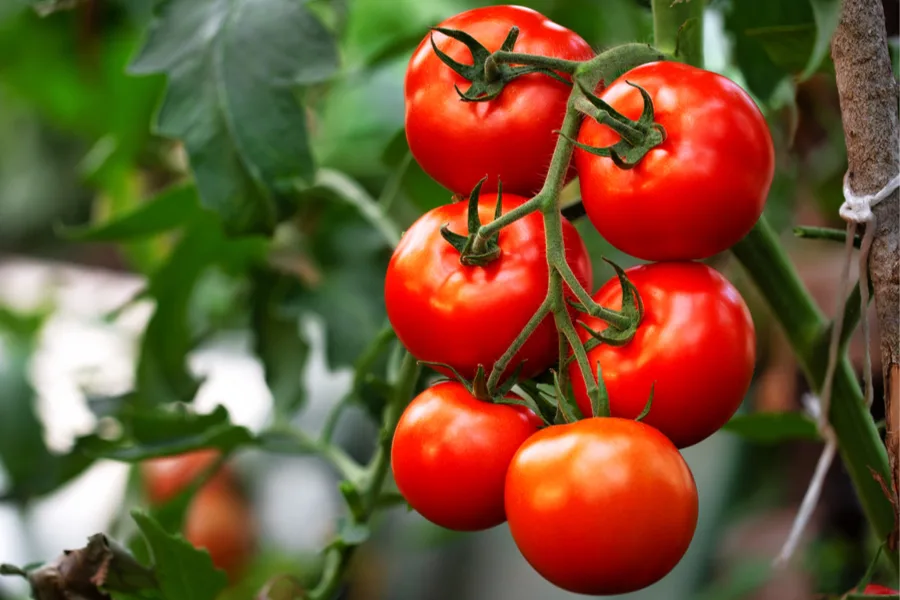


From how to plant, to fertilizing, pruning and staking – see all of our best tomato advice below!
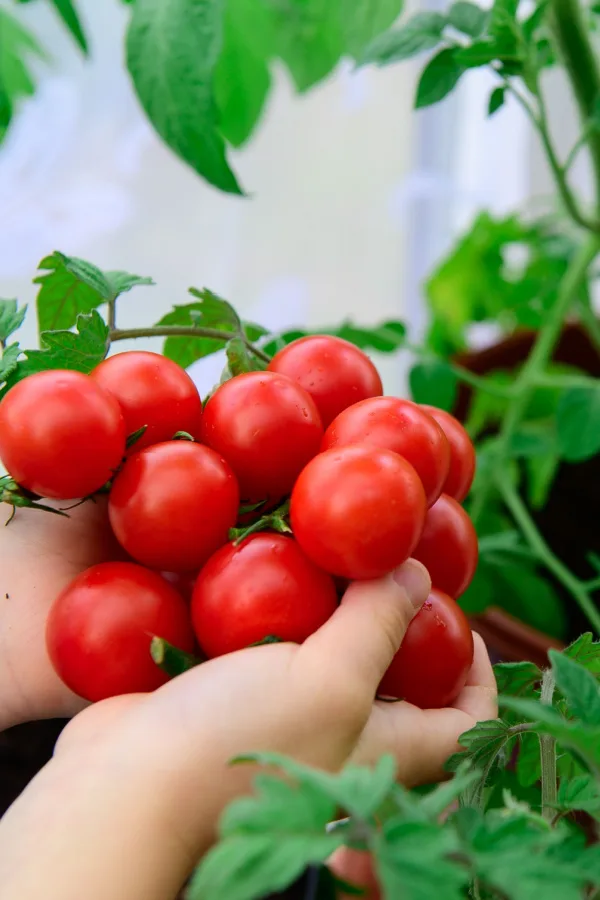
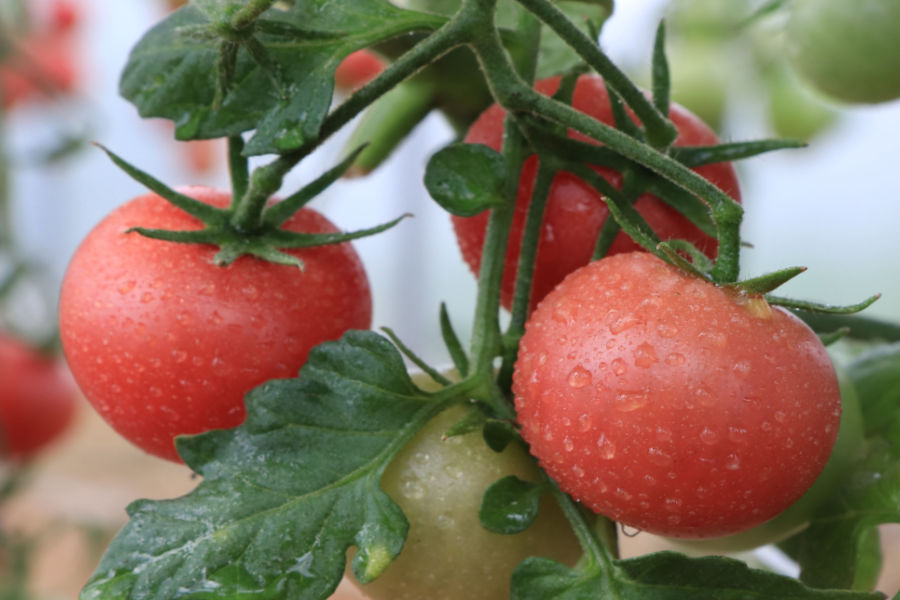
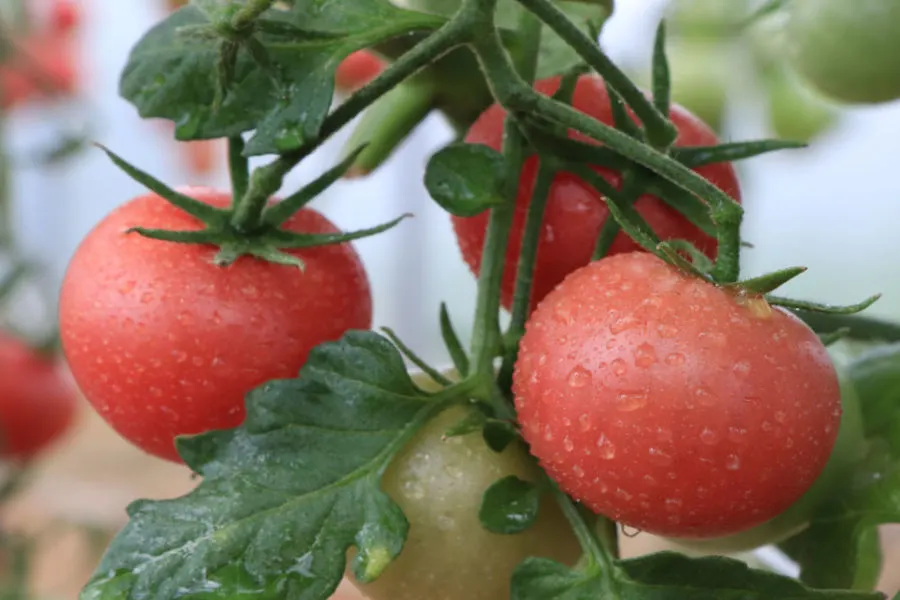
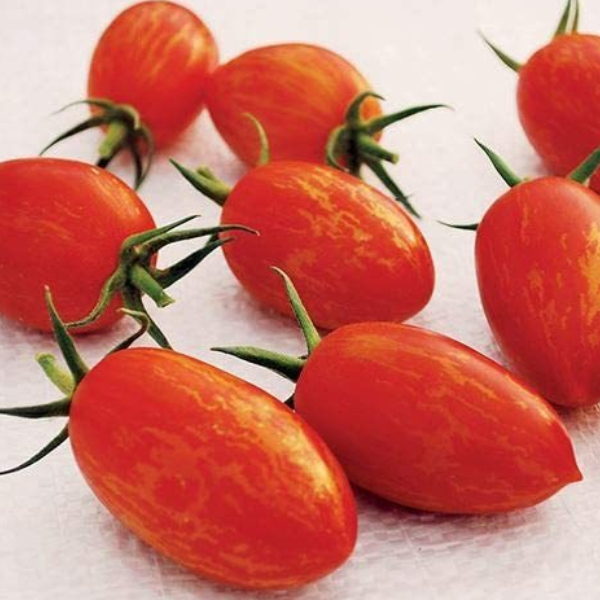
Did you know that you can enjoy growing and harvesting cherry tomatoes indoors all winter long?
Cherry tomatoes are one of the most popular vegetable choices to grow for home gardeners. Not only can you get a huge harvest from just a few plants, they also produce much faster than their larger slicing counterparts. And are they ever good!
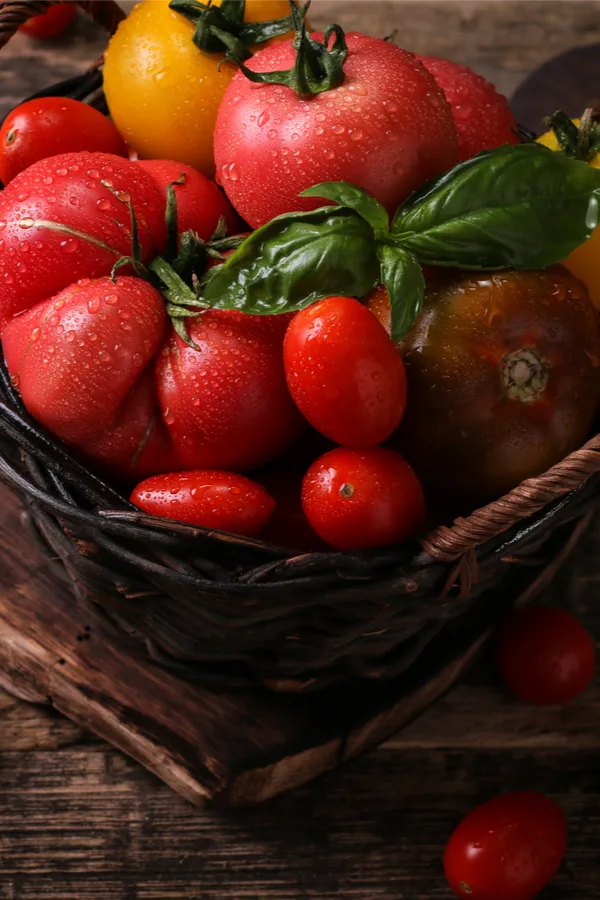
Cherry tomatoes are perfect for eating fresh in salads or for adding to salsas, juice, and sauces. And with so many different cherry tomato varieties available on the market today, there are near endless options when it comes to color and flavor.

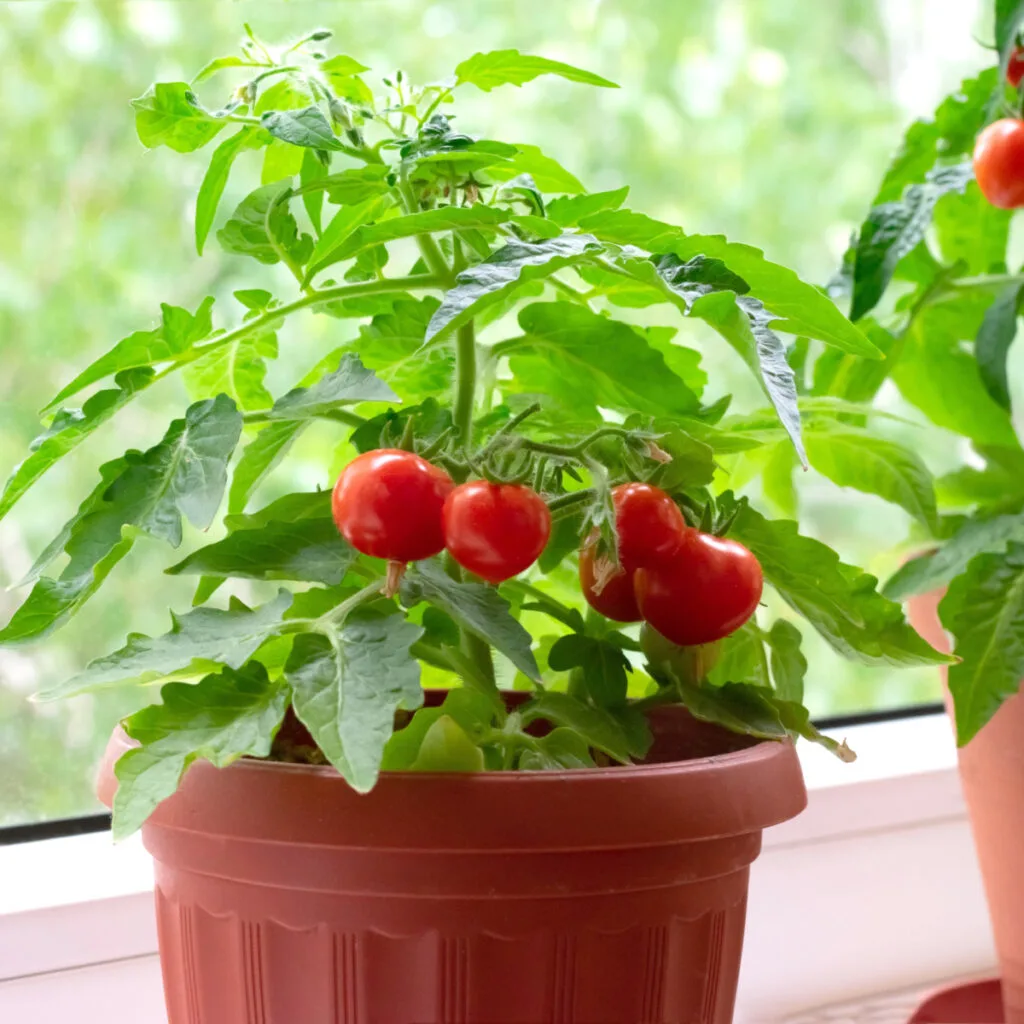
While it is quite difficult to grow larger slicing tomato inside, cherry tomatoes are actually the perfect size and shape for growing inside year-round. And since they also happen to be self-fertilizing, there is no worry about the need for pollinators like bees and butterflies to find your plants.
In fact, all you really need for indoor tomato growing success is a warm room, a little bit of light and a few tomato seeds – and you’re ready to grow!
When growing cherry tomato indoors, success all starts with selecting a variety that is well suited to small spaces.
It’s best when growing indoors to look for varieties that are labeled as being “patio” or “container” friendly. There are also newer dwarf type cherry tomatoes that are even smaller and perfect for indoor growing. (For specific varieties to grow, we included a few great selection at end of the article to try)
All of these “smaller” types are usually much more compact and don’t need large containers to grow extensive roots. Their smaller plant size makes them perfect to sit on shelves or in any space where the lighting is just right.


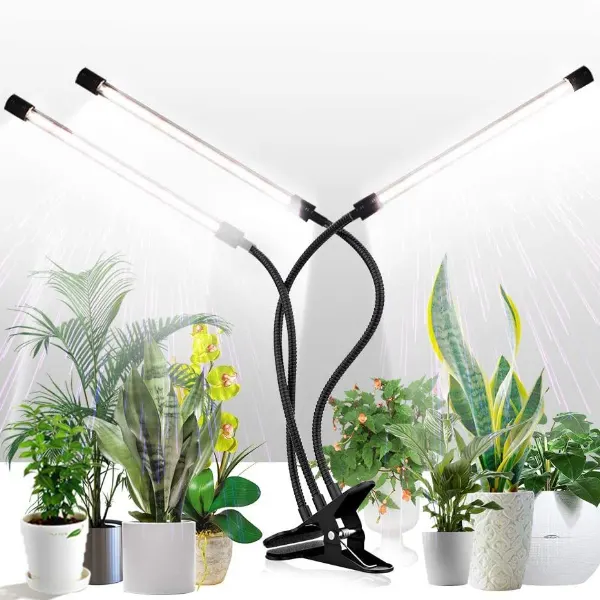
In order to grow tomatoes indoors, you will need a few basic supplies beyond your seeds, including potting soil, a good container or pot – and depending on the lighting in your house, an inexpensive fluorescent or LED shop light.
Just as if you were growing tomatoes outdoors, you need to have good soil to produce great plants. The soil needs to be light, airy, and retain moisture well.
A good all purpose potting soil is great for this, especially if you add in some additional worm castings and coffee grounds to the mix. These help to add even more energy to the soil to help plants reach their full potential and yields.
Since you are growing indoors in smaller containers, you can start your seeds right in the final growing container. This eliminates the need for transplanting and keeps the seedlings growing fast. See: How To Create The Best Potting Soil For Potted Plants – The Perfect Potting Soil Recipe!
When selecting your pot or container, it’s first important to make sure it has plenty of holes for drainage. Poor drainage can lead to the roots becoming waterlogged. For indoor plants, and especially tomato plants, that can spell big trouble.

As for size, if the cherry tomato plant is less than a foot tall at its mature height, a container of around 6 to 8 inches in diameter and at least 4 to 6 inches in depth is ideal.
For larger cherry tomato varieties, aim for a final container that is at least 12 inches in diameter and 8 to 10 inches in depth. The larger you can go, the better as it will allow for a more extensive root system to develop.
When growing tomatoes indoors, lighting is usually the biggest key of all. Tomato plants require at least 6 to 8 hours of direct daily light in order to grow healthy and strong. They will still grow with less light, but not as well – and certainly not as productively.
You can grow tomatoes in a sunny, southern facing window. But in most cases, it’s far better to give your indoor tomatoes a dose of daily artificial light to really get them to produce.
The good news – it doesn’t have to be fancy, expensive or hard to do. There is no need to purchase expensive grow lights. Tomatoes do not require a special spectrum of light to grow, which means ordinary fluorescent or LED lights will work perfectly fine.
To use, keep the lights a few inches above the tomato plants at all times. Leave the lights on for around 12 to 14 hours each day. If you are supplementing window light, adding 4 to 6 hours of artificial light will help.
Unfortunately, using only window light will usually leave plants leggy and thin. It’s better to use a combination of both if possible – as it will lead to better overall plant growth.
When your plants are growing in window light, always make sure to rotate the plants so all sides of the plant get sufficient light. When using overhead artificial light, all that is necessary is to keep the lights overhead.


So how do you keep indoor tomatoes growing strong? The first key is to water smart. It’s best to keep the soil of your growing cherry tomato plants moist but not overly saturated. Only water after the top two inches of soil is dry to touch.
Tomatoes are heavy feeders, so be sure to give your indoor plants half a dose of all-purpose liquid fertilizer every two weeks. As an alternative, you can apply compost tea or worm casting tea weekly for a more natural, slow-release fertilizer option.
As mentioned earlier in the article, cherry tomato plants are self pollinating so they do not require pollinators such as bees and butterflies. Outdoors, they rely on wind and even the flapping wings of wasps, bees and butterflies to spread pollen. But indoors, it’s easy to mimic this quite easily in order to help them out.
The first method to help pollination is to add an oscillating fan to the growing space. This helps to move pollen around, and just a few hours a day of a fan will work wonders. You can also gently shake the plant every day when there are blooms present.
Lastly, you can also hand pollinate to help transfer pollen from one flower to another. All methods will work, and it really comes to down to finding the one that is easiest and most effective for you.

The best way to encourage your plant to keep producing cherry tomatoes when growing indoors (or anywhere for that matter) is to harvest the fruit early and often.
Thankfully, with indoor growing, you don’t have to worry about pests, bugs, or most diseases ruining your plants or tomatoes. But harvesting the tomatoes regularly will still help in overall production. Not only will it let you enjoy fresh cherry tomatoes right away, it also helps to encourage plants to send resources to produce new blooms for future fruit more quickly.
When it comes to overall harvest, the type of plant you are growing matters. If you are growing an indeterminate variety of tomato, it will continue to produce as long as you keep watering and fertilizing. Determinate varieties will produce most of their crop all at once and then begin to die off.
So what are some of the best varieties of cherry tomatoes to grow indoors? Luckily – we just happen to list 6 of the best of the best below!
Tiny Tim Tomato – Despite being compact in size, this determinant variety features large clusters of 1-inch-sized fruit. It grows well in containers as well as in hanging baskets and requires no staking or support. Days to Maturity: 60 days. Affiliate Product Link: Tiny Tim
Yellow Balcony Tomato – This small cherry tomato variety is the ideal dwarf size for growing indoors and yes, on balconies in the summer too! It grows to a total height of around 20 inches, but produces tons of small yellow fruit with a delicious sweet tomato flavor.
It is a determinate variety, so you can plant a new plant every few months to keep fresh tomatoes coming on!. Days to Maturity: 85 days. Affiliate Seed Link: Yellow Balcony Tomato Seeds

Red Robin Tomato – This dwarf tomato variety is perfect for small space growing. It is a determinant cherry tomato cultivator that reaches only up to a foot tall. The fruits are around 1 inch in diameter and feature a mildly acidic flavor profile. Days to Maturity: 55 days. Affiliate Seed Link: Red Robin
Patio Choice Red Hybrid Tomato – This determinate cherry tomato variety produces a large yield of half-ounce-sized red fruit. The vines only reach between 24 to 30 inches, which makes it a great choice for hanging baskets or small trellises. Days to Maturity: 65 days. Affiliate Seed Link: Patio Choice Red Hybrid
Small Red Cherry Tomato – This variety is an indeterminate plant that stays fairly compact. It is great for growing in hanging planters or in containers. The fruit is on the sweeter side with a slight tartness. It features a high water content which makes it great for juices. Days to Maturity: 60-90 days. Affiliate Seed Link: Small Red Cherry
Tidy Treats Tomatoes – Not only is this an indeterminate tomato variety that will produce heavily for you for a long growing season, but it also has the growth patterns of a more compact determinate variety. Basically, it’s the best of both worlds! You get tons of sweet cherry tomatoes while not taking up a lot of space in your home. Days to Maturity: 50-55 days. Affiliate Seed Link: Tidy Treat
Here is to growing your own tomatoes indoors this year in the winter – and to enjoying that fresh tomato taste even as the snow flies outdoors!
Follow Our Facebook Page For Great Gardening Tips And Advice! This Is My Garden Facebook Page
This Is My Garden is a garden website created by gardeners, for gardeners. Jim and Mary Competti have been writing gardening, DIY and recipe articles and books and speaking for over 15 years from their 46 acre Ohio farm. They publish three articles every week, 52 weeks a year. Sign up today to follow via email, or follow along!
Looking for a simple method using your oven to make sun dried tomatoes from the fresh tomatoes growing in your garden this summer?
Harvesting fresh, ripe tomatoes from your garden and turning them into sun-dried tomatoes has a certain magical quality. Being able to concentrate and save the fresh taste of summer the whole year round really is special.
The good news is that when it comes to preserving tomatoes – it honestly doesn’t get much easier than creating delicious sun dried tomatoes in your oven. And when dried, the super sweet flavor of the tomatoes rises to a whole new level. And can it ever add all kinds of amazing versatility to your meals, appetizers and more!
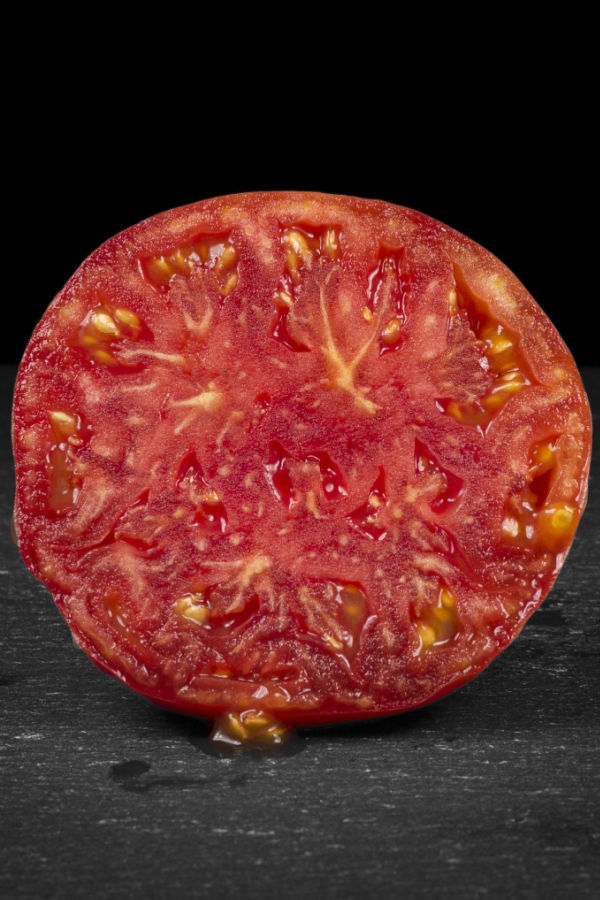
First, more than anything else, it’s important to pick the best of the best tomatoes before you start the dehydration process. Always be sure to select tomatoes that are firm, ripe, and meaty. Meaty tomatoes are not only thick and full of flavor, they also usually have far less seeds.
San Marzano, Roma, Grape and cherry tomatoes are all great examples of tomato varieties that are perfect for making sun dried tomatoes. All are meaty and sweet – and all typically produce an abundance of tomatoes throughout the summer months.
These features are essential for getting the best sun dried quality while in the oven. Because of their smaller size, the cherry and grape tomatoes have the added advantage of taking slightly less time in the oven.
Once you’ve chosen your preferred variety, it’s time to clean them. Gently rinse the tomatoes to eliminate any dirt and debris. With a fresh kitchen towel or paper towel, carefully pat them dry.


Next, cut the tomatoes in half. If they are small cherry or grape tomatoes, that is more than enough for drying in the oven. If using slightly larger varieties, cut into smaller but equal size pieces. Quartering or even cutting into eighths can usually produce the perfect size for dehydrating.
The next important step is to remove the seeds from the tomato slices before drying them. The watery membranes that surround the seed area holds a lot of moisture – and all of that excess water will greatly delay the oven’s drying effects.
With a tiny spoon or by using your finger, carefully scoop out the seeds and remove the core. Be careful not to harm the flesh while doing this step.
To pull out additional moisture, lightly sprinkle the tomatoes with salt. Give the salted slices roughly 30-40 minutes to sit. Blot them dry with a paper towel after they have rested. This technique will not only improve the flavor of your sun-dried tomatoes, it will also help the drying process to go smoother and faster.
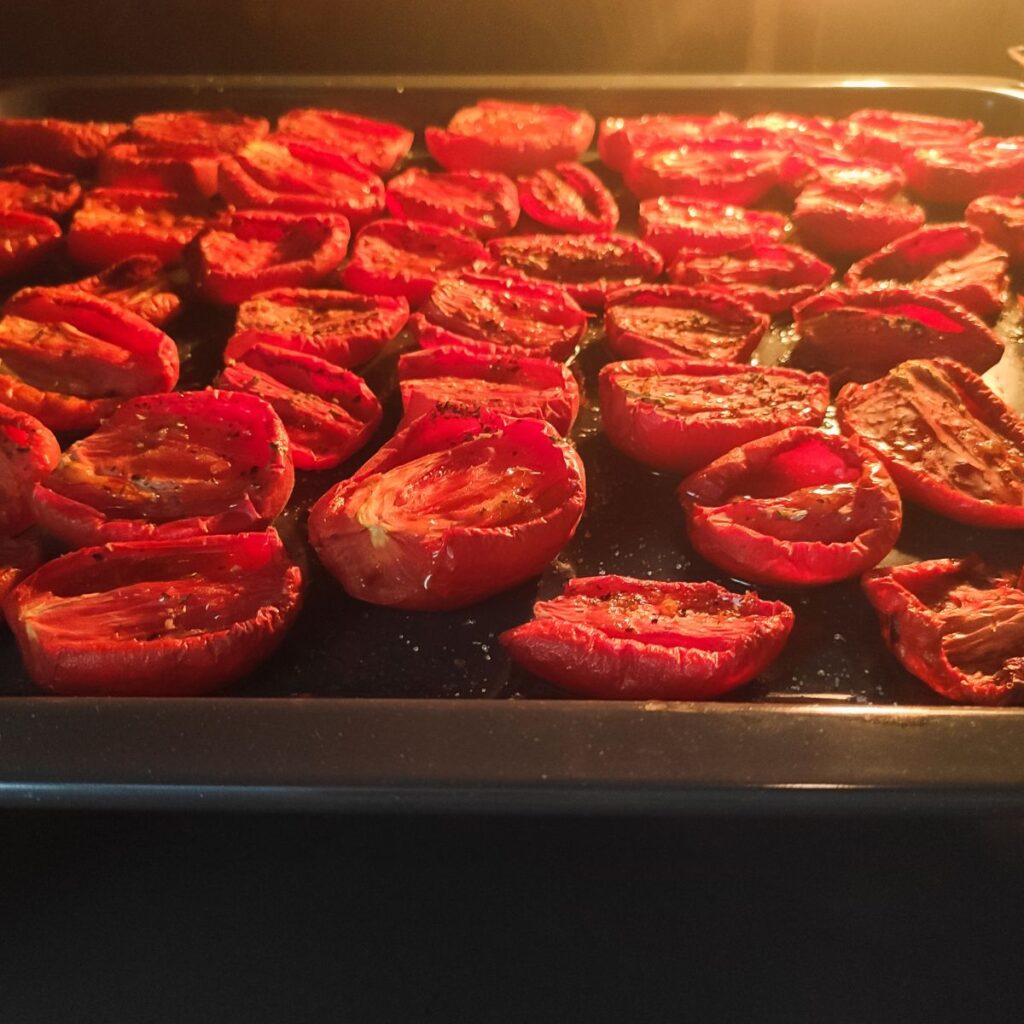
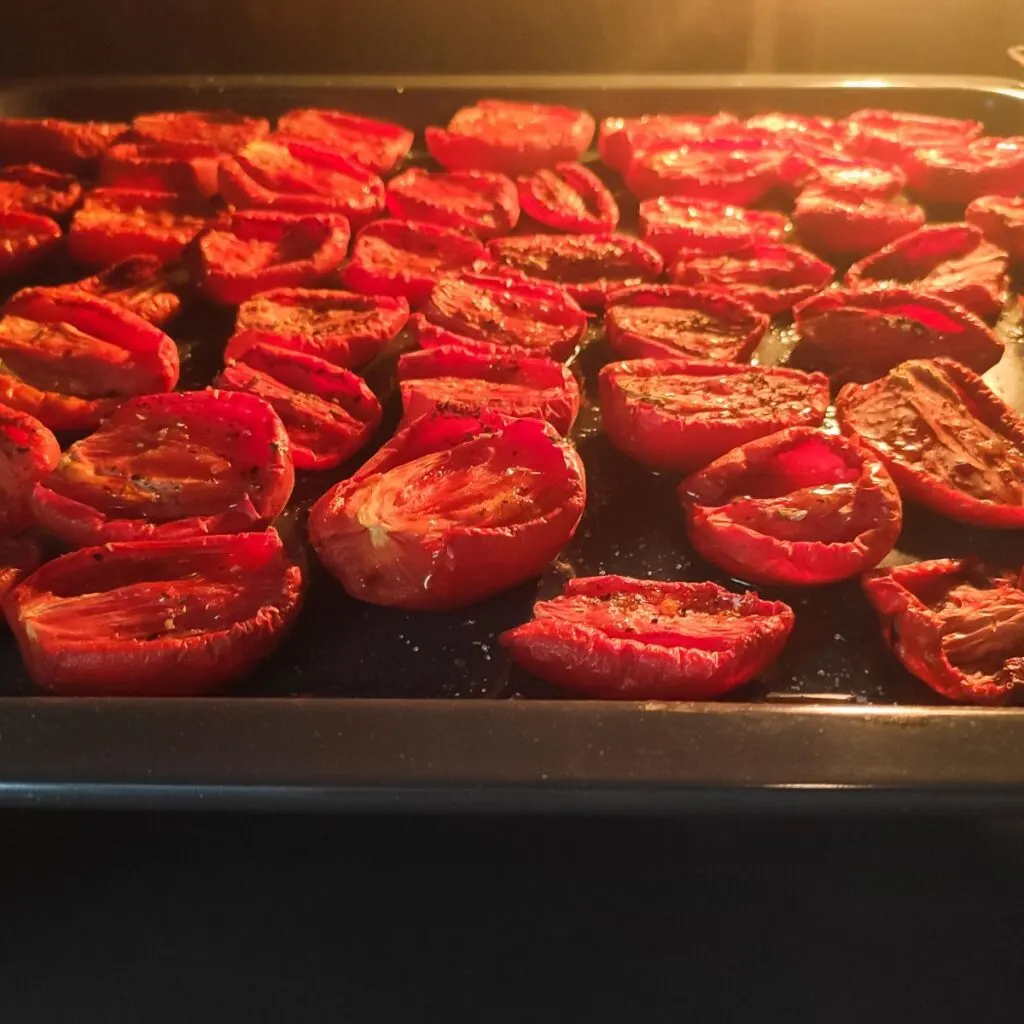
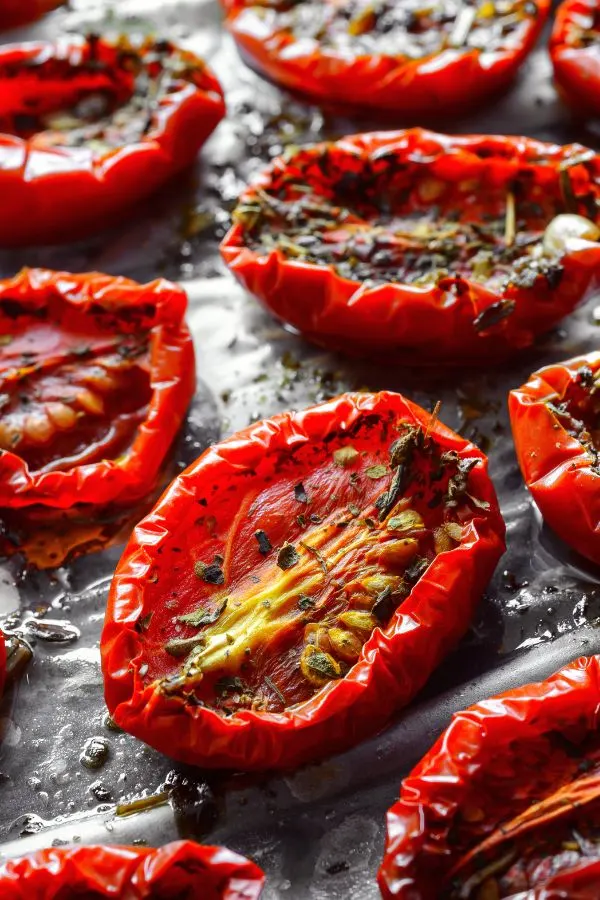
Now it’s time to heat up the oven! Preheat to 225°F (107°C) – this “low and slow” temperature is always best for making sun dried tomatoes in the oven. The low temperature and longer cooking time may take longer to dry them out – but it is exactly what gives your tomatoes great flavor!
The tomatoes’ bright color and flavors are preserved by the low heat, which allows for a gradual drying process.
As we know, the tomatoes themselves are already crammed with flavor. This can more than make them fantastic on their own. Because of this, when considering adding additional ingredients into the mix, it’s important to keep it simple.
One option is olive oil. Once the tomatoes are cut side up on the parchment lined baking sheet, add a small drizzle of good quality olive oil. This small addition can add big flavor and can elevate the dish nicely.
Another potential choice is adding Italian seasoning. The fragrant mixture of basil, thyme and oregano is very complimentary to traditional Italian flavors. Again, don’t overpower with too many additional ingredients. With the dynamic flavor of the tomato, simple is always best.


Now that your tomatoes are ready and your oven is preheated, it’s time to start drying. Begin by lining a rimmed baking sheet with parchment paper. Be sure none of your tomatoes overlap on the baking sheet. It’s very important to have one even layer.
In addition, leaving a little room between each slice will ensure a nice, even drying of all of the tomatoes. On average, the tomatoes should dry in the oven for 3-4 hours. Depending on the temperature of your oven and the thickness of the tomato slices, the drying time may change.
Because all of these factors vary, begin checking your tomatoes at the 2.5 hour mark. Continue to leave in the oven if you still see pockets of moisture and monitor frequently from outside the oven. Using the oven light helps to check when ready without letting the heat escape. When done, the tomatoes should look shriveled, leathery and dry.

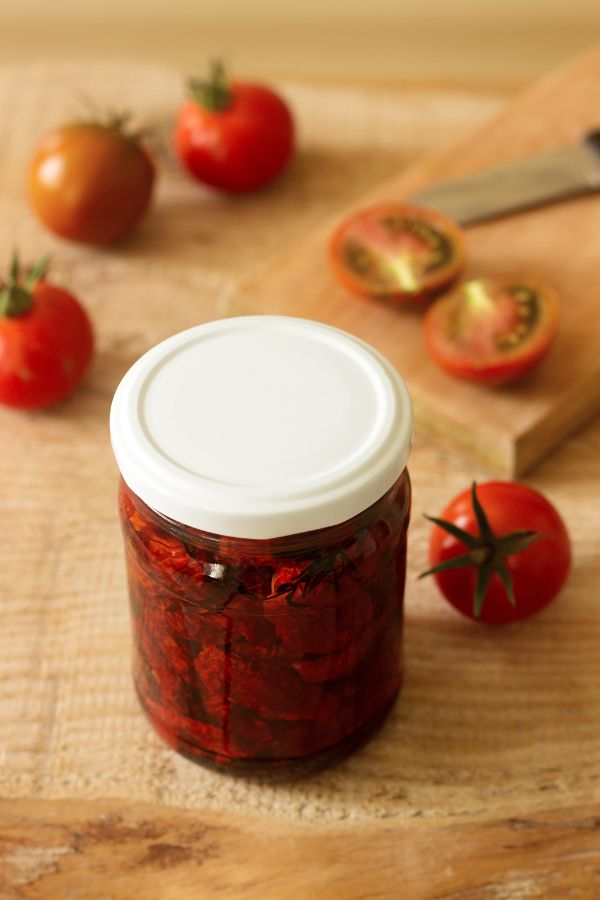
When the drying process is complete, carefully remove and allow the tomatoes to finish cooling on the baking sheet. Once the tomatoes are at room temperature, transfer them to an airtight container or a glass jar.
The tomatoes themselves can be kept in the refrigerator for up to 1-2 weeks. Adding a nice olive oil into the container before storing can make them last for an additional couple of weeks when refrigerated.
For longer lasting sun-dried tomatoes, freezing is the way to go. You can freeze them in a resealable bag or freezer container. When kept in a sealed container, frozen sun dried tomatoes can last for more than a year.
One thing is for sure, making sun-dried tomatoes in the oven really is a simple process. And while the ingredients are simple as well, the flavor is pretty extraordinary! The tastes and textures will certainly up the level of your dishes and add a nice touch of summer no matter the time of year.

So, if you happen to have extra tomatoes from your harvest this year – be sure to not let any go to waste. Indulge in the satisfaction of sun-drying your tomatoes in your oven, and enjoy a bite of summer every time you open them up. They even make great presents too!
For more great recipes from the garden, check out our garden recipe tab on the website! See : Garden Fresh Recipes
Follow Our Facebook Page For Great Gardening Tips And Advice! This Is My Garden Facebook Page
This Is My Garden is a garden website created by gardeners, for gardeners. Jim and Mary Competti have been writing gardening, DIY and recipe articles and books and speaking for over 15 years from their 46 acre Ohio farm. They publish three articles every week, 52 weeks a year. Sign up today to follow via email, or follow along!
How you fertilize your tomato plants during the summer months can play a critical role in just how many tomatoes your plants produce – and even more – for how long they will continue to produce late into the summer and fall.
Tomato plants are one of the heaviest feeding vegetable plants a gardener can grow. Not only do they require a tremendous amount of nutrients to develop strong roots, branches and foliage early in the season, they need even more to then flower and fruit.
Because of that massive need for nutrients, tomato plants often deplete the soil of energy by the time summer arrives. Unfortunately, that also happens to be exactly when they need power more than ever in order to fruit!

When tomato plants run out of energy from the soil, not only can it affect their production, it can also affect their health. Plants that lack energy begin to lose their vitality and strength. In short order, their roots weaken and shrivel. And with feeble roots, the stems and foliage begin to suffer quickly as well.
As they weaken, the plants then become an easy target for disease and pest attacks. Before long, without a source of additional nutrients, plants simply wither away – and end their production long before summer is over. Unless, of course, you can power them up with the perfect dose of energy all summer long!
There are three simple but extremely important “secrets to success” when fertilizing tomato plants during the summer months.
The first is to give your plants the right type of energy they need to produce more blooms and tomatoes. The second is to make sure to give them that energy in a form they can easily and quickly absorb. And the third and equally important key is to provide your plants consistently and evenly with that power.

With those three critical needs in mind – here is an in depth look at how to perfectly power up your tomato plants during the summer to ensure a big harvest!
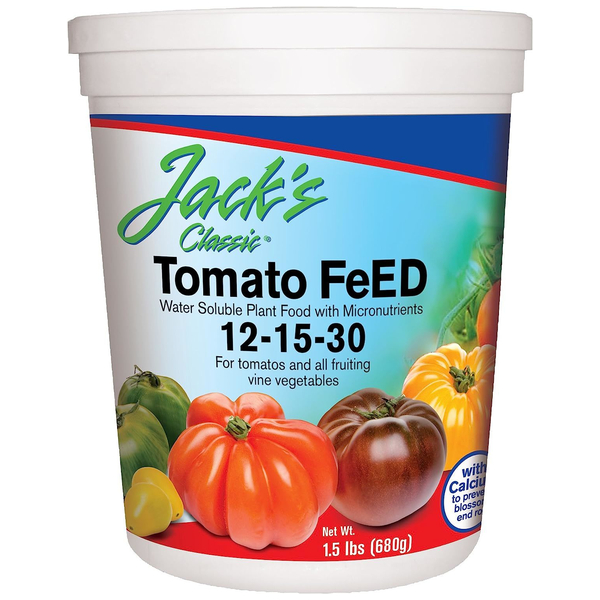
First and foremost, it’s extremely important to select a fertilizer that has the right balance of nutrients for maximum production. For tomatoes, that means choosing a fertilizer that contains a higher balance of phosphorous and potassium and a lower dose of nitrogen. See our article: Understanding N-P-K
Nitrogen is important for a tomato plant’s growth and development. Especially early in the season as the plant fill out. But once summer arrives, feeding your plant a lot of nitrogen will only cause it to keep growing – and not focus on producing blooms or tomatoes.
Phosphorous and potassium on the other hand are exactly what your tomato plants need and crave to produce blooms and set fruit. Phosphorous is the critical nutrient for setting blooms and fruit. And although potassium helps with that as well, it is also extremely important for plant health and helping to turn the fruit as they ripen.
Nearly all fertilizers will carry an N-P-K ratio on their label. The N-P-K ratio stand for the make-up percentages of the nitrogen, phosphorous and potassium levels within the fertilizer.
For best success, when selecting a fertilizer for your plants, look for a bloom or bud powering fertilizer with higher P&K numbers within the N-P-K ratio. This will allow your plants to be fed the best possible nutrients for maximum production. Product Affiliate Link : JR Peters 51324 Jack’s Classic 12-15-30 Tomato Feed, 1.5 lb
Not only do you want to use a fertilizer that is more robust in its phosphorous and potassium levels, you also want those bloom building nutrients to be in liquid form.
Granular fertilizers certainly have their place in powering plants, but they tend to break down slowly over time as they leach into the soil. For tomato plants that are producing, granular fertilizers are simply too slow to really help power maximum fruiting.
Instead, liquid fertilizers are the way to go for fertilizing tomatoes in the summer. Liquid power can absorb into plants both through the roots and through a plant’s leaves. Not only that, but liquid also absorbs fast, going to work far faster than granular fertilizers.

When fertilizing with liquids, always try to fertilize early in the morning or late in the day. This will help protect the foliage from the sun’s rays, which can burn foliage with mid-day sun.
Last but not least, it is extremely important to be consistent and steady when fertilizing. It is far better to power your tomatoes more often (every 7 to 10 days) but with less energy each time than to give your plants a huge dose of energy once a month.
When tomato plants receive too many nutrients all at once, it can actually slow or even stop their tomato production. Instead of using the energy to set more blooms and fruit, they use all of it to simply grow larger. You end up with huge, dark green plants that look great but have no tomatoes!
But when plants are given a steady but lower dose of nutrients every seven to ten days, they use that low and slow power perfectly, using the energy to set more blooms and fruit instead of simply growing bigger.

For best results, when using liquid fertilizer, mix the dose at half strength. At half strength, the fertilizer can be applied to plants every week to ten days. All without worry of overpowering them with too excess nutrients that will spur only growth.
The good news is that for indeterminate tomato types, the lower but steady stream of nutrients, plants will stay strong and steady all summer long, and even more, have enough energy to keep producing right up until the first frost.
Here is to fertilizing your tomato plants this summer – and to harvesting your best crop of tomatoes ever this year!
Follow Our Facebook Page For Great Gardening Tips And Advice! This Is My Garden Facebook Page
This Is My Garden is a garden website created by gardeners, for gardeners. Jim and Mary Competti have been writing gardening, DIY and recipe articles and books and speaking for over 15 years from their 46 acre Ohio farm. They publish three articles every week, 52 weeks a year. Sign up today to follow via email, or follow along!
Looking for a few great ways to quickly and easily find the tomato hornworms attacking your tomato plants – and save them before it’s too late?
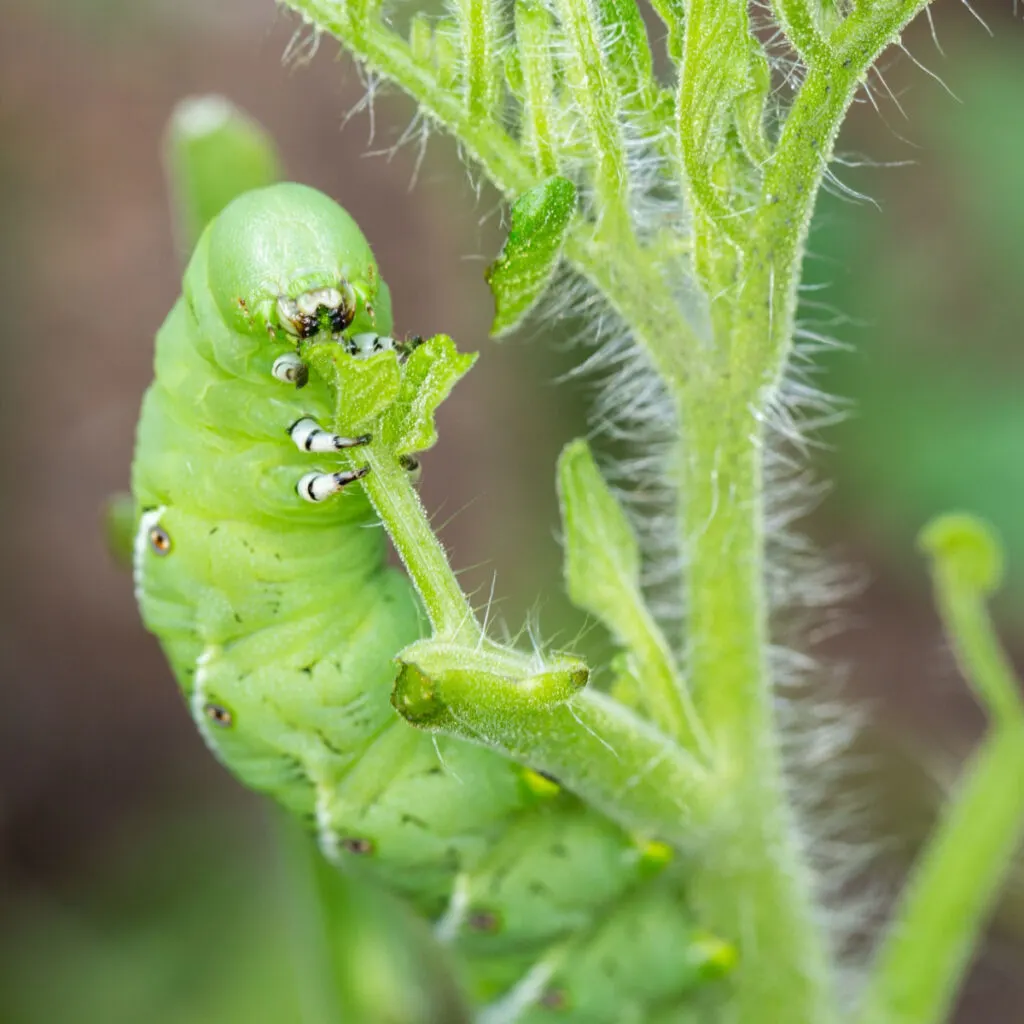
Tomato and tobacco hornworms are notorious for consuming the foliage, stems and even the fruit of tomato plants. As summer hits full stride, the big green worms with little horns start to arrive in full force. And if you are not on the lookout – they can take out your tomato plants in quick fashion!
Unfortunately, hornworms don’t limit their eating to just tomato plants, They also attack and destroy pepper and potato plants as well. In fact, any plant that belongs to the nightshade family is at risk, including eggplant and tomatillo plants as well.

If left unchecked, hornworms can seriously impact a garden’s health and production levels. Much like when aphids or whiteflies attack tomato plants, it can leave the plant weak and vulnerable. See: How To Protect Your Plants From Whiteflies
The more foliage that is stripped from a plant, the harder time it will have recovering to set fruit. And considering hornworms will eat the fruit as well – it’s important to find them quickly, before the damage becomes significant.
As you will see below, finding hornworms can often be quite difficult for gardeners. They have an amazing ability to camouflage themselves on a plant. In fact, quite often, you can be staring directly at one and simply think they are part of your plant!
Knowing how to stop them all begins with understanding their life cycle, and knowing how and when they attack. There are actually two types of common hornworms, the tobacco hornworm, and the tomato hornworm.
Tobacco hornworms have a small red spike protruding from the top of their body and 7 white stripes. Tomato hornworms, on the other hand, have a brown spike on top and 8 stripes. Unfortunately, both varieties will consume tomato and other nightshade plants.

Hornworms begin their life cycle as a moth emerging from a pupa state from the ground in early spring. The moths are magnificently large creatures and are incredibly adept at flying. So adept that they are sometimes confused as a hummingbird. Like hummingbirds, they are equally impossible to catch.
Once they emerge, the hornworm moth feeds on the nectar of flowering plants. As they feed, they also deposit tiny eggs on the foliage of young, tender vegetable plants. Not long after that, the damage for gardeners and their tomato plants begins in earnest.
Once laid, hornworm eggs usually hatch within three to four days into a caterpillar (hornworm). Making matters worse, not only does the egg laying cycle occur in late spring/early summer, it can also happen a few more times later in the summer as well.
Finding the eggs can be quite difficult. Not only are they green and small, they are nearly translucent, which makes them even harder to spot. When you add in that tomato plants usually have thick foliage, looking for and removing the eggs first is just not a viable option for keeping plants safe. One thing is for sure, if you do happen to notice eggs – remove them!


The single most important factor to keep your plants safe from hornworms is to be proactive. Daily patrols of your garden to look for damage and signs is the real key to stopping tomato hornworms.
An adult hornworm can and will devour large portions of a plant in a single day, but if you can find them when they first start to grow and remove them, damage will be minimal. Allow them to get bigger, and they will defoliate your plants with lightening speed.
There are three simple and effective ways to look for and find tomato hornworms. Two can be accomplished during daylight hours, while the third option, using a black light, needs to be performed in the dark. Let’s first cover the daylight options – spotting hornworm manure and spotting hornworm damage.
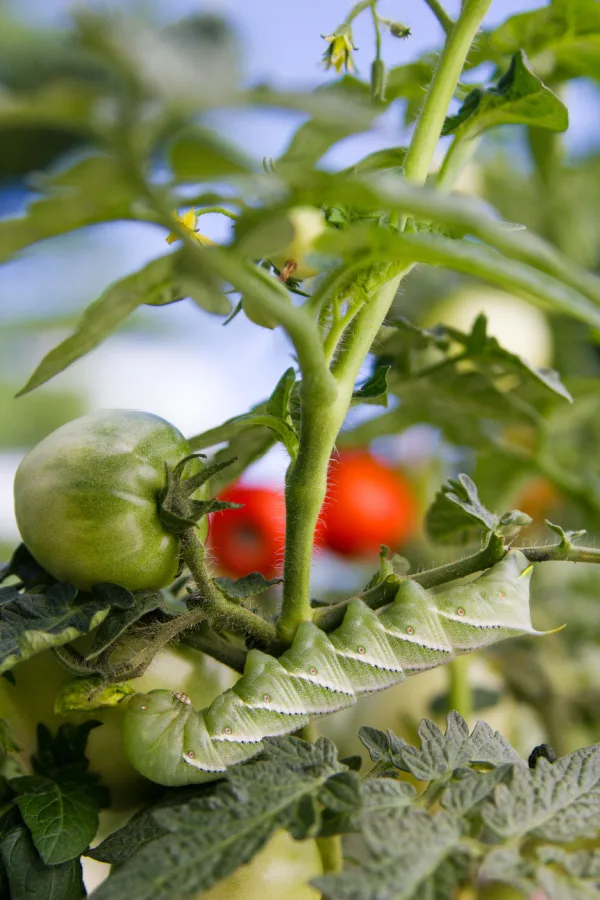
The best and easiest way to find and stop tomato hornworms early is to look for their manure on the leaves of plants. Small hornworms with small manure can usually be found a day or so before you will start to see significant damage to your plants.
As you walk your tomato plants, pay careful attention to the foliage for small green lumps of hornworm manure. When hornworms are small, the manure will be tiny in size, almost like grains of green sand. As a hornworm grows, the manure grows too.
Adult hornworms can leave behind manure that will look like tiny round rocks anywhere from 1/8″ to even a 1/4″ in diameter. If they are green, they are fresh and the hornworm will be nearby. If the pebbles are brown, it’s older manure and the hornworm is likely far away on the plant.
When you spot the green manure, scan the nearby branches and leaves. Start by looking in the limbs directly above and you are likely to find a tomato hornworm lurking. It takes some practice, but once you start looking for manure and the worms above – you will be amazed at how quickly you can find them!
While you walk your plants, also look for the presence of any hornworm damage. Hornworms will chew and strip the limbs and foliage. If you spot only nubs of a branch, there is likely a hornworm nearby.
Small hornworms will chew tender leaves. You can usually find them right at the base of a stem and leaf joint. The small hornworms are the most difficult to locate, but if you can remove them early, they really can’t cause much damage to your plants.


Although adult hornworms can reach lengths of up to four inches, they can still be hard to spot too. Their body is perfectly camouflaged to blend in with the green foliage, and they seem to become one with the plants.
When you spot large limbs that have been gnawed off, a large hornworm is going to be nearby. Again, look at the joints and them major stems near leaves. Quite often, they will be perch there, blending in perfectly with the surrounding foliage.
Another great method for finding hornworms involves the simple use of a black light at night. The body of a hornworm is translucent. The stems, leaves and fruit of a tomato are not.
Because of this, by shining a black light on your plants, hornworms will glow bright green under a black light. This same method also works incredibly well for locating scorpions that might be lurking around if you happen to live in an area where they are present.
Simply stroll through your plants in the evening after the sun has set with an inexpensive black light flashlight. As you shine the light on your plants, the hornworms will light up, making them easy to spot and remove. (Product Link : Letion UV LED Blacklight)


It is actually quite an efficient way to look for and eliminate tomato hornworms – especially if you are having trouble finding their camouflaged bodies during the day!
During your daily strolls looking for hornworms, if you happen to come across a hornworm with white eggs on its back, you are in luck. In spite of what many think, these are not the eggs of the hornworm. Instead, they are the eggs of a paper wasp, which is actually quite beneficial in the fight against hornworms.
Braconid, or common paper wasps deposit their eggs on the back of hornworms. As it turns out, they do this because the eggs and young wasps can feed from the hornworm. Eventually, this results in the death of the hornworm.
Wasps are truly a big help for tomato growers. Not only do they help keep your plants safe from hornworms, they are also one of the biggest aids for pollinating tomato plants. It’s just one more reason leaving a few of those paper wasp nests around can really help your harvest!
Here is to finding and getting rid of the tomato hornworms in your garden this year – and to protecting your harvest!
Follow Our Facebook Page For Great Gardening Tips And Advice! This Is My Garden Facebook Page
This Is My Garden is a garden website created by gardeners, for gardeners. Jim and Mary Competti have been writing gardening, DIY and recipe articles and books and speaking for over 15 years from their 46 acre Ohio farm. They publish three articles every week, 52 weeks a year. Sign up today to follow via email, or follow along!
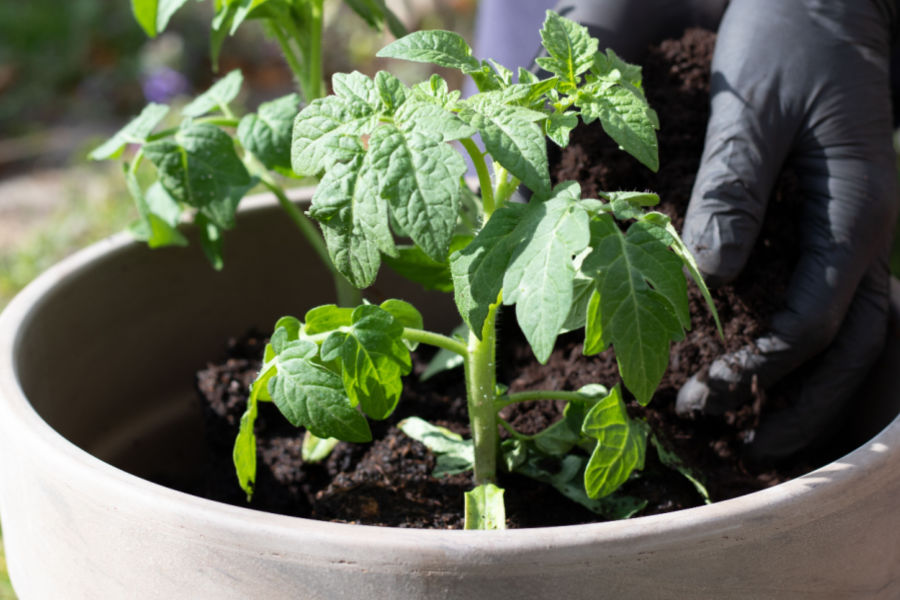
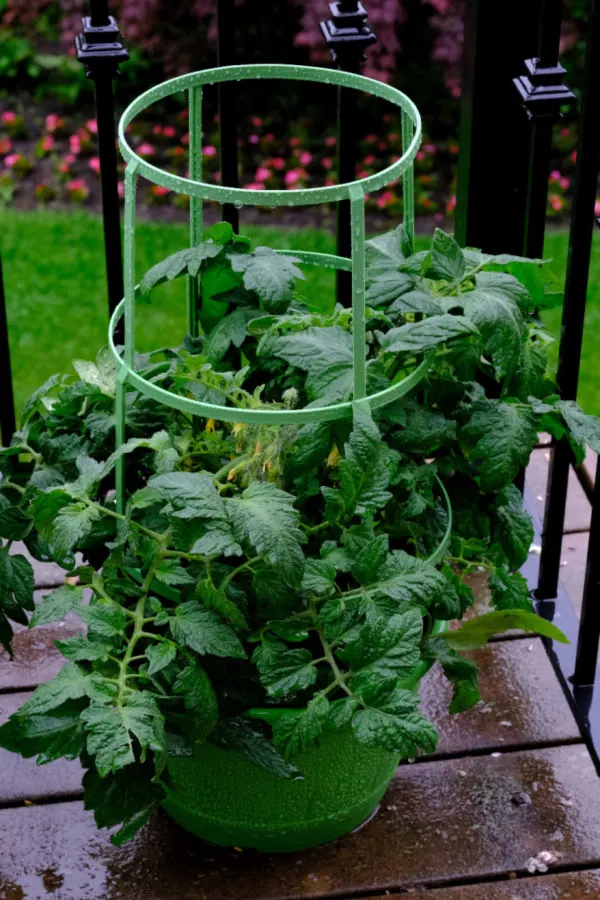
Looking for the best way to fertilize the tomato plants you have growing in pots, containers, grow bags or 5 gallon buckets?
Growing tomatoes in containers is becoming more popular than ever. Whether it’s planting a mini cherry tomato plant in a small pot on your back patio to enjoy for salads or snacking, growing a few slicing tomatoes in a hanging tomato grow bag, or growing full size heirloom tomatoes in 5 gallon buckets or large containers – the sky is the limit when it comes to growing tomatoes outside of a traditional garden setting.
There are actually a lot of built in advantages for growing tomatoes in containers. For starters, it doesn’t require a big yard or space. In fact, all you need is a sunny patio, balcony or deck – and you’re in business!

Even better, planting and maintaining tomatoes in containers is far easier than in a traditional garden. There is no need for heavy tilling or digging to plant. Nor is there the worry of constant weeding once the plant starts to grow.
Perhaps best of all, when growing in pots and containers, you are less likely to encounter many of the pests, disease and growing issues that tomatoes can often have.
With your plants being off the ground, pests have a harder time attacking. As for disease and growing issues, the chance of tomato blight and blossom rot are severely reduced as well since the tomatoes are growing in fresh new potting soil each season.
But one thing you do need to do with container tomatoes is provide them with plenty of power – and that means fertilizing is a must. But as you will see below, how and when you give your tomato plants that energy can make a huge difference in just how successful they are!
Tomato plants require a tremendous amount of nutrients to grow and produce their fruit. Even in a tradition garden or raised bed setting, tomato plants almost always need more nutrients than the surrounding soil can provide. But when growing in a container, that need is multiplied!

Because of the limited soil space, tomato plants in containers use up the available nutrients quickly. That is why it’s so important to start fertilizing tomatoes growing in containers right from the start.
A steady supply of energy from the get go will help plants develop strong roots, stems and foliage. And that sets the stage for strong blooming and great production later on. But for big success, the fertilizer you provide needs to be given in small but steady doses.
Too much or too powerful of a fertilizer will cause your tomato plants to grow enormous amounts of foliage. They may look dark green and healthy, but unfortunately, they are spending all of the excess energy on growing only foliage and roots – and not blooms.
Over-fertilizing will actually reduce your overall yields. Plants that get too much food will stop producing blooms and simply concentrate on growing bigger. Even worse, their roots will grow too big as well – often leading to the plants becoming root bound.
Of course, under-fertilizing will cause the plant to grow at too slow of a pace. And, that in turn will lead to a smaller harvest as well. So how can you fertilize your tomato plants in containers just right?
The answer is to simply provide your container tomato plants a light but very steady and consistent dose of nutrients – and the easiest and best way to do that is with liquid fertilizer!
Liquid fertilizers are perfect for tomato plants in containers for a couple of very big reasons. First and foremost, they can absorb into the plants quickly. Both through the roots as the liquid leaches into the soil – and through the leaves and stems.
But what also makes using liquid fertilizer on your tomato plants even better is that you can easily control the strength and dose by simply diluting your mix. By weakening the strength of the fertilizer, you can then give your plants a lighter but more regular dose of energy – allowing them to grow at the perfect slow and steady pace that sets the stage for big production!
So how often should you be applying liquid fertilizer to your plants? If giving a light and steady dose, the feedings should be applied every 7 to 10 days – and right from the start! With that in mind – here is a look at the best liquid fertilizers to use on your plants:
Compost tea is 100% organic and an excellent choice for powering tomatoes. Made from simply soaking compost in water, the nutrients are easy for plants to soak up. It also happens to be free to use if you have your own compost pile!

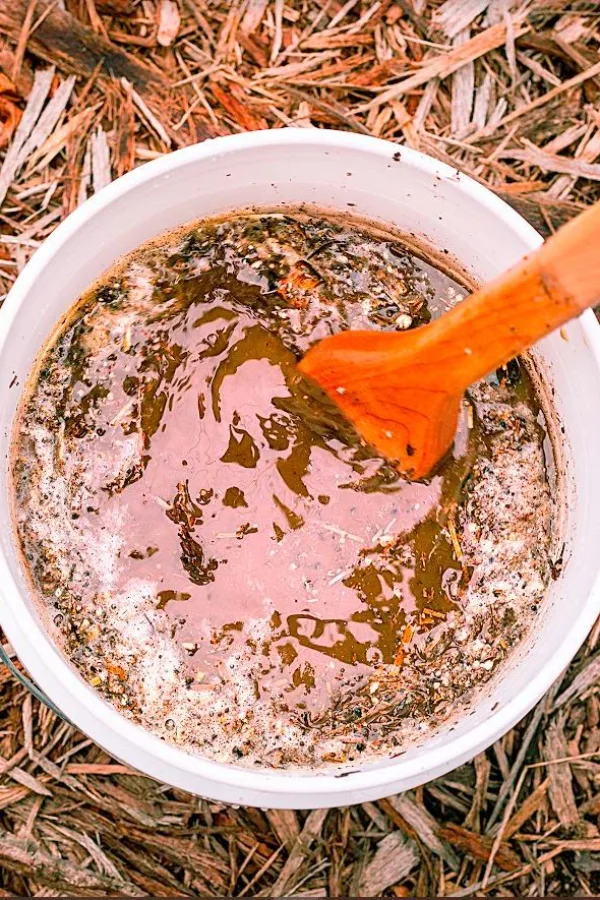
Even better, the nutrients in compost tea are so pure, stable and low, you don’t need to dilute the mix when applying. For best results, simply water your plants once a week with the tea. See : How To Make Homemade Compost Tea
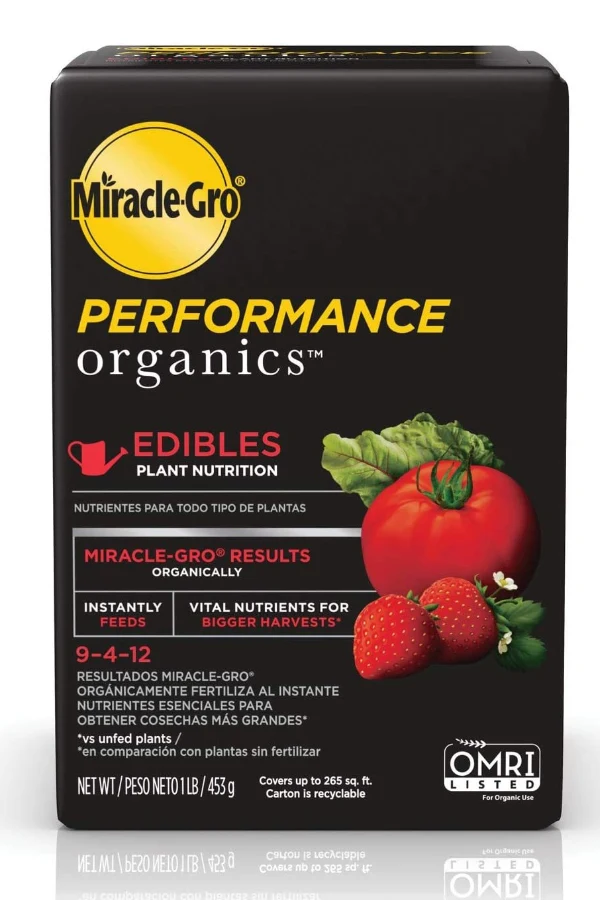
When growing any edibles, it is always best to choose an organic fertilizer. The good news is there are plenty of great commercial organic fertilizers on the market today to choose from. But when selecting a commercial fertilizer, be sure to select one that does not have an overly high nitrogen content.
Nitrogen is important for plant growth and foliage growth. But phosphorous is key for fruit production and potassium is big for helping plant health and ripening the fruit. When looking at N-P-K ratios, look for a balance, or one that is higher in the phosphorous and potassium numbers. Avoid any fertilizer with a higher nitrogen rating than the other two.
As for diluting, best practice is to dilute the mix to about 1/3rd of the recommended rate. This will allow you to fertilize your plants every seven to ten days without overpowering them. Product Affiliate Link : Liquid Performance Organic Edibles Fertilizer

Worm casting tea is another great organic option for powering tomatoes. Much like compost tea, it can be used at full strength and delivers the perfect low and steady punch of power for your tomato plants.
To create your own liquid casting tea for tomatoes, steep 1 cup of castings in one gallon of water and allow it to soak in for a few days. Shake up or stir the castings a few times each day to help them soak into the water. Then simply strain and water your plants!
Worm casting tea is great for all of your vegetable plants, annuals and more. And be sure to put the leftover grounds after straining into your compost pile! Product Affiliate Link : Pure Worm Castings
Here is to powering your container tomatoes this year with liquid fertilizer – and to having your best crop of tomatoes ever!
Follow Our Facebook Page For Great Gardening Tips And Advice! This Is My Garden Facebook Page
This Is My Garden is a garden website created by gardeners, for gardeners. Jim and Mary Competti have been writing gardening, DIY and recipe articles and books and speaking for over 15 years from their 46 acre Ohio farm. They publish three articles every week, 52 weeks a year. Sign up today to follow via email, or follow along!
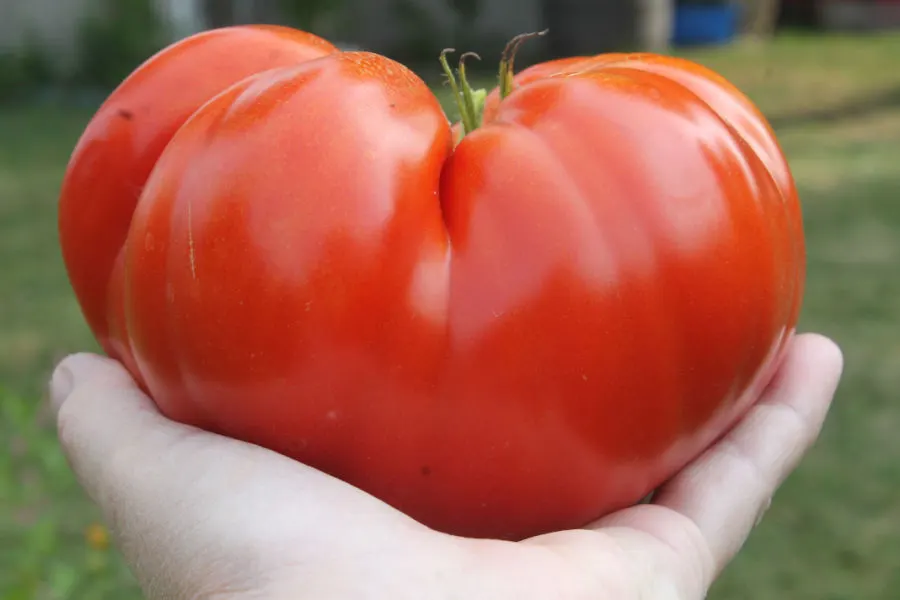
Are you looking for a few huge, show-stopping tomato varieties to plant this year to grow bigger than life tomatoes?
There is something so special about seeing a massive tomato growing in your garden. Watching a large, green globe begin to take shape on a plant can be quite exciting. Perhaps it’s the wonder of seeing just how big it will grow. Or the anticipation of just how juicy and delicious it will taste.
But let’s be honest, for most gardeners, it all comes down to having those all important bragging rights! Who doesn’t want to grow the biggest tomato around? And, of course, show it off to all their fellow gardeners and friends!

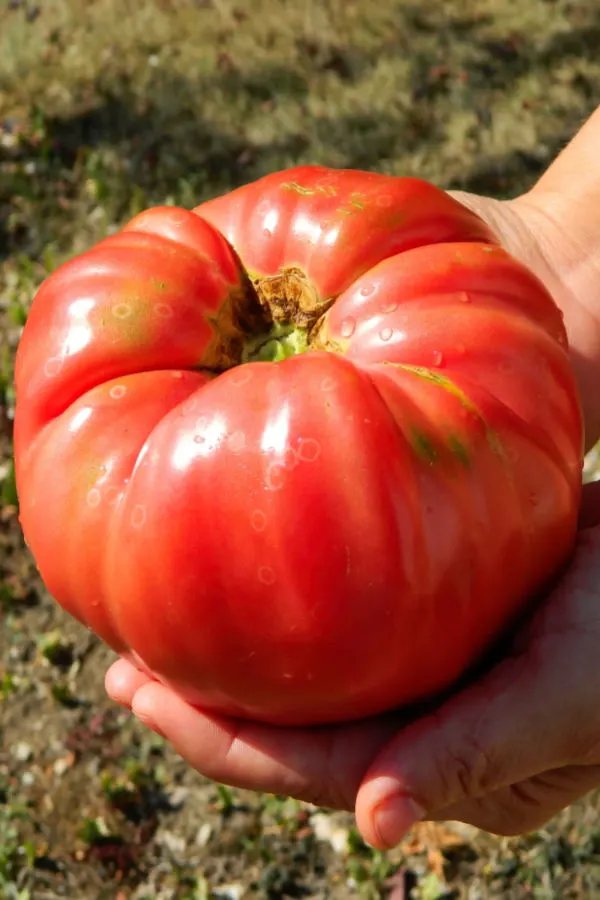
One thing is for sure, planting a few large variety tomato plants can really add a lot of fun and excitement to your garden season. Especially when you consider just how beautiful and flavorful big tomatoes can be.
With that in mind, here are three incredibly tasty tomato plant varieties to grow in your garden this year that can produce some of the biggest and most flavorful tomatoes around!
When it comes to hearing oohs and aahs from your neighbors, friends, and family, the Big Rainbow tomato won’t disappoint! In fact, with its incredible size, color and flavor, the Big Rainbow is one of the most beautiful marbled tomatoes you can grow. And can it ever grow big!
The plant produces gorgeous tomatoes that often grow to two pounds or more, and with streaks of intense red, gold, orange, and yellow running throughout the flesh, it is simply stunning to behold. But even more, the taste is simply divine!
Perfect for slicing and eating, this is definitely a tomato you will want to show off on salads, platters, and more. The plant is an indeterminate variety that will continue to produce all season long right up until the first frost.
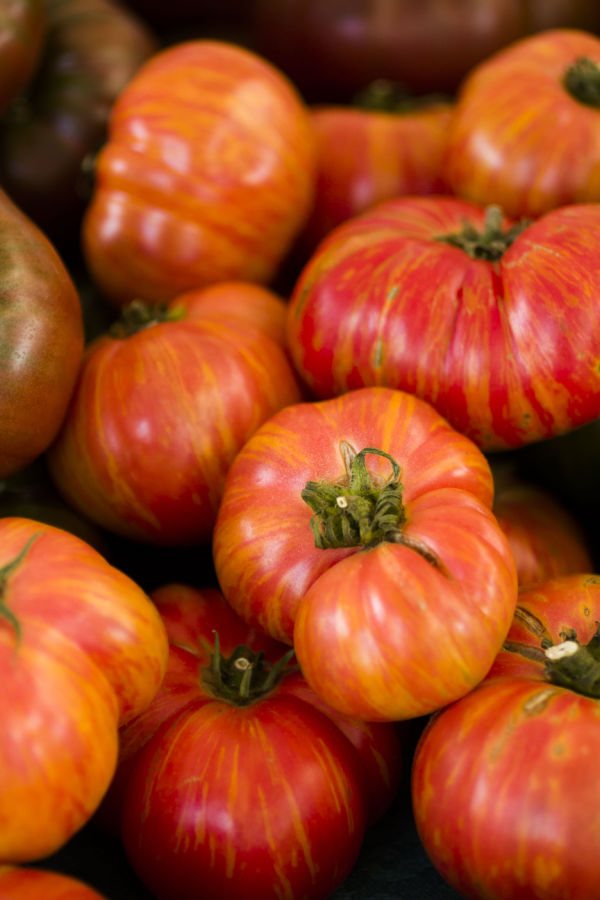

Slice this one up thick for that “wow” factor – green shoulders, gold, orange, and yellow flesh with beautiful red marble streaks throughout and on the blossom end. Juicy and fruity sweet, Big Rainbow Tomatoes are a knockout on a platter, in a salad – or the perfect compliment to any sandwich.
Perhaps one of the best known “BIG” tomato varieties of all, the Mortgage Lifter is a massive tomato producing plant with a great backstory.
Way back in the early 20th century in the depression era of the 1930s, a home gardener found himself and his family in a desperate financial situation. But he found an amazing solution to the issue growing right in his backyard garden.

Radiator Charlie, as he was affectionately known by friends, loved experimenting with plants. And after crossing a few of his best tomato plants for a few years, he came up with a classic beefsteak tomato plant that grew insanely large tomatoes. How large? Most grew to two pounds or more, with some maxing out at in excess of a whopping 4 pounds!
Realizing he had something special, Radiator Charlie began growing the plants and selling them for $1 each. He then used the profits to pay off the mortgage on his West Virginia home – and the rest as they say is history!
The tomatoes are more than just eye candy. The heirloom beefsteak plant produces meaty tomatoes that are great for fresh eating, or for slicing up on all kinds of sandwiches. And the flavor? It is as sweet and delicious as can be!
The Pink Ponderosa is another heirloom tomato that is sure to be the envy of fellow gardeners. Although it will grow fruits a bit smaller than the Mortgage Lifter and Big Rainbow, the Pink Ponderosa plant produces some of the tastiest big tomatoes around!
This tomato variety has a long line of roots dating back to the late 1800s in Luxembourg. It has become quite popular once again with the resurgence of heirloom tomatoes over the last few years. With very few seeds and loads of juicy fruit, it is a great multi-purpose tomato for growing in the garden.
With bright pink tomatoes that can grow to nearly a pound each, its light reddish-pink interior oozes with flavor. And even though it may produce a bit smaller, its higher production levels more than make up the difference.
Like the other two featured tomatoes, Pink Ponderosa is an indeterminate, meaning it will keep on producing right up until the first frost with proper care. As an heirloom seed variety, it’s important to note that the seeds from all three varieties can be saved from tomatoes to grow year after year – all for free!
There you have it, three great tomato varieties to grow huge tomatoes oozing with flavor! As always, make sure to get your seeds in plenty of time to have them ready to start indoors.
For more great tips on tomato growing, be sure to check out our article How To Get Tomato Plants Growing Better! 3 Big Tips To Power Tomatoes Fast. It will have your seedlings taking off like never before, and help you get the most from your tomato plants!
Follow Our Facebook Page For Great Gardening Tips And Advice! This Is My Garden Facebook Page
This Is My Garden is a garden website created by gardeners, for gardeners. Jim and Mary Competti have been writing gardening, DIY and recipe articles and books and speaking for over 15 years from their 46 acre Ohio farm. They publish three articles every week, 52 weeks a year. Sign up today to follow via email, or follow along!
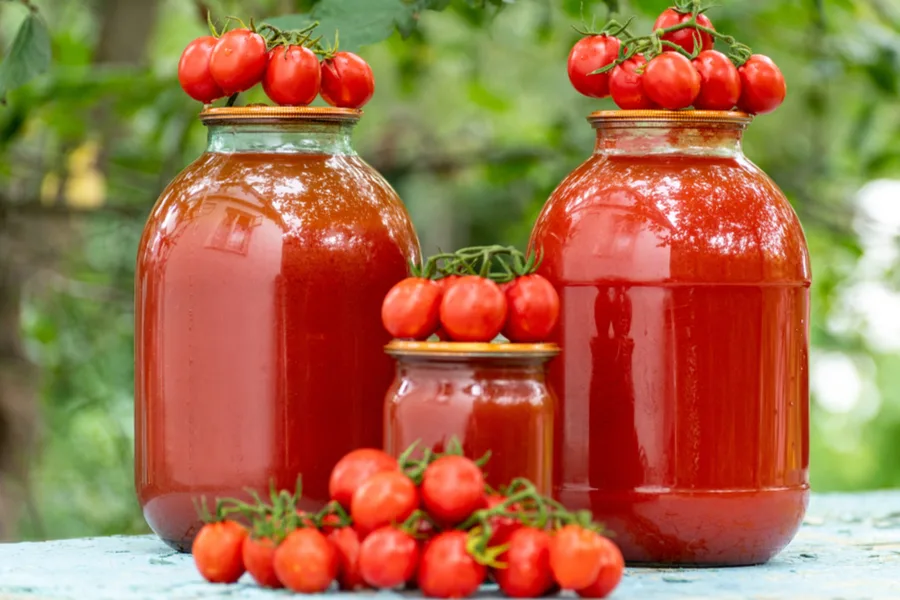
One of the easiest and most efficient ways to preserve your tomato harvest is to make and can delicious homemade tomato juice!
It is hard to beat the incredible taste of homemade tomato juice. Especially when it’s made from the tomatoes straight from your garden, or from fresh tomatoes from a neighbor or local farmer’s market. Not only is it delicious, it is also one of the most useful canning items to store in your pantry for year round use.
Tomato juice is refreshing and nutritious to drink all by itself. But it also happens to be the perfect ingredient for all kinds of dishes, soups, drinks & more!
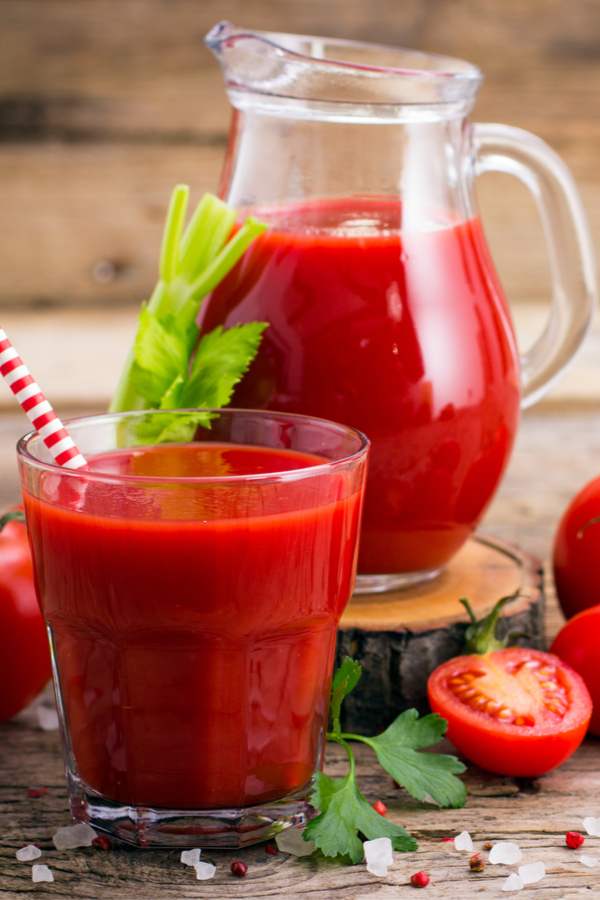

You can use tomato juice as a base for all types of soups – including chili, vegetable and plain old tomato soup! But it is also the ideal ingredient for adding flavor and moisture to casseroles, roasts, and more. And we certainly can’t forget it is the star of the show for an incredibly refreshing Bloody Mary!
One of the best things of all about making and canning homemade tomato juice is just how easy the entire process can be.
Preserving your own delicious tomato juice is one of the most uncomplicated canning recipes of all – making it ideal for those who might not have a lot of experience with canning, or have never even attempted canning at all.
Canning fresh vegetables can be intimidating to first timers for sure. But as you will see below, making and preserving your own tomato juice is a breeze. By simply following a few tried and true steps, you can safely and quickly turn a large harvest of tomatoes into wondrous juice.

And speaking of large harvests, making and canning tomato juice also happens to be one of the best ways to use and store an overabundance of tomatoes before they go bad. Especially when it comes to turning those seemingly endless cherry tomatoes into something useful!
With that in mind, here is a classic, tried & true recipe for making and canning delicious tomato juice from fresh tomatoes:
So how many tomatoes do you need to can a batch of tomato juice? It will all depend on the variety of tomatoes you are canning, but a good rule of thumb is that 25 pounds of fresh tomatoes will make around 6 to 8 quarts of juice.
To start, begin by washing and cleaning your tomatoes. Select only firm, ripe tomatoes for processing. Remove any small spots or blemishes with a knife. Avoid using tomatoes that are past their prime, or have anything more than a small blemish.
Using tomatoes that are in poor shape or have started to decay can be harmful to your batch. They often can contain bacteria that can spoil a batch – and there is nothing worse than having to throw away all of your hard work because of trying to save a few bad tomatoes!
Once they are clean, dice your tomatoes into small chunks. This will make the process of cooking them down go much faster. As a best practice, one-half inch chunks work well, allowing the tomatoes to cook down at a quick pace.

Dice enough tomatoes to fill a six or eight quart stock pot. Heat the tomatoes on medium-low heat, allowing them to cook down slowly. Cooking down too fast or at too high of a temperature can risk burning the flesh of the tomatoes at the bottom of the pot.
It is extremely important once heating has begun to stir the pot every 5 to 10 minutes. This will also help keep the tomatoes from sticking to the bottom of the pan and burning. As the tomatoes begin to cook down, there will be a bit more room in the pot to add in additional chopped tomatoes.
As the tomatoes cook, the level of juice and pulp will go down. When this happens, add more chopped fresh tomatoes to the pot to refill it to the top. Do this until the pot is nearly full of tomatoes that are partially cooked down. This will give you enough juice to can six to eight quarts of juice.
Now it is time to cook the pot of tomatoes down completely. They need to heat and cook down until the tomato chunks fall apart completely. This process can take anywhere from a half hour to an hour depending on the variety and overall ripeness of the tomatoes.
Once they have cooked down, it is time to remove the skins and seeds. If you have a tomato press / strainer or mill, it works wonders for removing and separating the seeds and skins quickly.

As another option, a food mill will do the job as well, just not as quickly. It is a bit slower than the tomato strainer, but certainly gets the job done. If you plan on making a lot of juice, the tomato press / strainer is a wise investment for sure. Product Link: CucinaPro Tomato Strainer
After separating the juice from the skins and seeds, place the juice back in a stock pot and heat on medium to medium high heat. Allow the tomato juice to heat to a slow, rolling boil. Once the tomato juice begins to roll, allow it to boil for a full 10 minutes. You are now you are ready to can!
You will need to sterilize your canning jars before canning. This keeps any bacteria out of the jars and keeps your tomato juice safe. Sterilize pint or quart jars by first running through your dishwasher. Next, heat the jars and lids in a separate pot on top of the stove.
Once heated, fill jars with the hot tomato juice, adding in one tablespoon of lemon juice per jar. The lemon juice helps to increase the acid level to a safe level. It will not affect the overall taste of your juice.
Fill each jar near the top, leaving 1/2″ of head space at the top of the jar. At this point, you can also add in a half teaspoon of salt per quart jar for taste. It is not needed for safety reasons, only for taste if desired. To finish, wipe the rim and seal with a warm ring and lid.
At elevations from 0 to 2000 feet, process quarts in a hot water bath for 45 to 50 minutes. Due to their smaller size, pints will need to process for 40 to 45 minutes. When pressure cooking, it will take 20 minutes for quarts, and 15 for pints with 6 lbs. of pressure.


If you live in a higher altitude than 2000 feet, you should consult with your local extension office or check with the Ball canning guide for proper times and pressure. When done, remove jars and place on a towel and let cool for 24 hours.
Check to make sure all jars are sealed by pushing on the lid. If the lid is down and won’t move it is sealed appropriately. If not, immediately place in your refrigerator and use within 2 weeks. The jars can then be safely stored and used as needed. At this point, the rings that held down the lids can be unscrewed and taken off.
For more of our garden fresh recipes – check out our RECIPE TAB on the website!
Follow Our Facebook Page For Great Gardening Tips And Advice! This Is My Garden Facebook Page
This Is My Garden is a garden website created by gardeners, for gardeners. Jim and Mary Competti have been writing gardening, DIY and recipe articles and books and speaking for over 15 years from their 46 acre Ohio farm. They publish three articles every week, 52 weeks a year. Sign up today to follow via email, or follow along!
When it comes to growing great tomatoes in containers on your porch, deck or patio, big success starts with selecting the best, most flavorful varieties for small space growing!
Whether you have a backyard garden or not, raising a couple of potted tomatoes on your patio is a great way to keep tomatoes close at hand.
After all, sometimes you just need a few tomatoes for a salad, sandwich or a burger. And that is exactly where growing a few delicious patio tomato plants is the perfect solution. Especially when you can grow delicious varieties that teem with flavor!

One thing is for sure, the resurgence of heirloom tomatoes has opened up everyone’s taste buds to intense flavor. And although many of those amazing heirlooms are better for large spaces, there are quite a few compact heirlooms that work incredibly well for patio planting.
In today’s article, we will take a quick look at a few of the biggest secrets to successful patio tomato growing, along with 5 amazing container tomatoes to grow that will fill your back deck, porch or patio with sensational flavor!
Before we get to those 5 delicious varieties, it is important to cover a few special growing needs when it comes to patio tomatoes.
There are 5 simple but major keys to successfully growing tomatoes in containers – and if you get all five right, you are almost assured of a wonderful harvest!
First and foremost, selecting tomato varieties that grow well in containers is a must. Small to mid size plants are best for patio growing. With smaller root structures, these varieties can grow and produce without needing massive amounts of soil.
Next, since there will be less soil in a container than in a traditional garden setting, it is vital to use great soil. That means potting soil that is lightweight, full of nutrients, and that drains well too.
Tomatoes require a lot of nutrients from the soil. Without those nutrients, they simply can’t grow to develop strong foliage, stems and fruit. For best results, select a quality soil that contains plenty of compost or other natural additives. See : How To Create The Best Organic Potting Soil
You also need to locate your tomato plants patio in a location that receives plenty of light. If there is one thing tomatoes need for strong growth, it’s plenty of sunshine. In fact, for optimum performance, tomato plants should receive at least 6 to 8 hours of sunlight.
Don’t place your plants under awnings or behind trees or shrubs that shade them. Get them out into the sun where they can soak up the rays!
If there is one is one task that can really make or break patio tomatoes, it is watering. As in too much water, or not enough! Allowing patio tomato plants to dry out too much between waterings can cause serious stress to the plant. Just as over-watering your plants can do as well.

It is important to remember that container plants dry out much faster than ones in a garden. Add in that they can grow large root structures, and it usually means the plants will require daily watering to survive and produce.
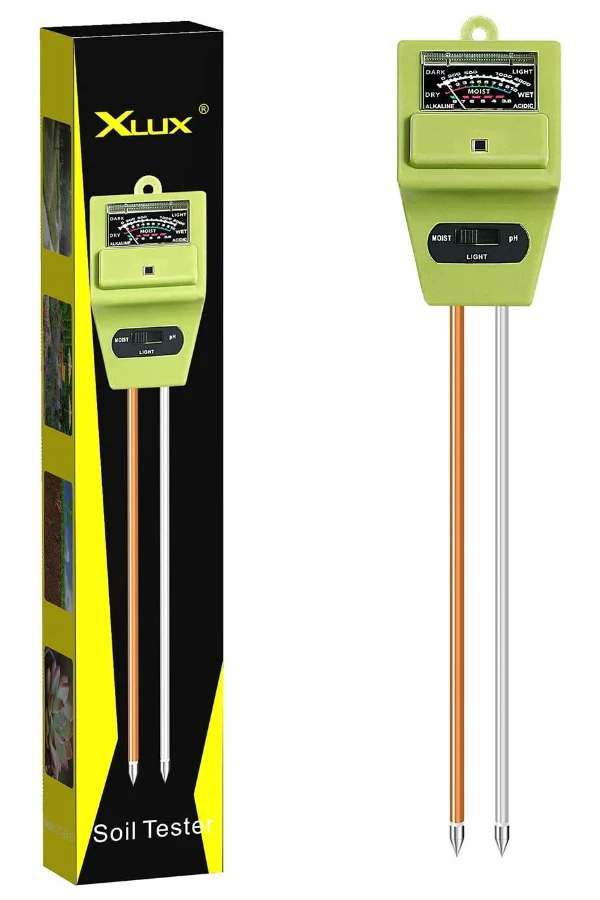
If you plan on growing a fair amount of patio tomatoes, or for that matter, grow a wide range of patio planters and baskets, it is often wise to invest in a simply digital moisture thermometer. With a simple probe into the soil, you can tell if its time to water or not. Product Link : 3 in 1 Moisture, PH & Light Reader
Finally, because your tomatoes are growing in a container, they also need to be fed o a regular basis to keep the plants healthy and strong. Even the best potting soil will run out of nutrients by mid summer.
To keep your container tomatoes supplied with power, plants should be given a small dose of nutrients every few weeks. Compost tea, worm casting tea, or a liquid fertilizer are all excellent options for fertilizing tomato plants.


The fertilizer should be applied to plants every two to three weeks as plants develop. Fertilize at these intervals until the plant begins to produce and then lower to monthly applications. Be careful not to over-fertilize. Over fertilizing can promote excessive foliage growth and actually limit fruit production.
Now that we have covered how to grow patio tomatoes, let’s take a look at 5 of the best varieties to grow for big flavor and high yields!
The Tigerella tomato plant produces a stunning fruit with red and orange stripes. As delicious as it is to eat, it may be even more beautiful to look at!

An earlier maturing plant, the Tigerella can begin to yield its two inch round fruits in as little as 60 to 70 days from planting. And can it ever produce a lot of tomatoes!
The Tigerella is known for big yields, and does require a stake or cage to help support the plant in a container setting. As an indeterminate variety, it will produce right up until the first frost. Product Link : Tigerella Seeds
Just as its name implies, the 1 to 2 inch fruits of the Red Torch tomato plant look like flames from a fire! This hybrid variety is an indeterminate, meaning it will keep on producing right up until the first frost.
Not only are the tomatoes of the Red Torch beautiful, they are loaded with nutrients too. In fact, the Red Torch is a monster superfruit when it comes to packing loads of Vitamin’s A & C. It is also high in potassium too.

Red Torch matures early and is a vining style plant. Because of this, a small cage or stake in the container can make harvesting a breeze. The variety has a high resistance to disease, and is self pollinating as well, so it can easily grow and produce as the only tomato plant around. Seed Link : Red Torch Tomato Seeds
If you are looking for a plum tomato that is incredibly tasty, the Beaverlodge 6806 variety is perfect! This compact tomato plant is perfect for patio growing. It produces a huge crop of round to plumb shaped tomatoes that are loaded with flavor.

Beaverlodge is a fast maturing tomato that can produce a viable crop early in the season. It is a determinate tomato, so you may want to start a few seeds in late spring to have a second harvest in late summer to early fall. Seed Link: Beaverlodge Plum Seeds
The San Marzano tomato (pictured near the beginning of the article) is one of the most versatile tomatoes you can grow! With a small seed core and meaty flesh, this paste tomato is wonderful for fresh eating, or for making salsa, sauce and more!
With it’s upright and compact growth, the San Marzano can grow quite easily on a patio, especially when planted in larger containers. Seed Link: San Marzano Tomato Seeds
The Artisan Blush tomato makes a lot of “top growing” lists when it comes to tomato plants, whether in a traditional garden, raised beds, or in pots and containers.

The Artisan produces a massive crop of 2″ long cylindrical fruits. Not only are they super sweet, but they also happen to be beautiful to look at. Their fruit matures to an yellowish-orange color when ripe, and is so sweet, many think it tastes like a peach. See: The Tiger Blush Artisan Tomato – The Most Amazing Tomato Ever
Supporting the plant with a cage or stake in the container is a must. The plant produces a large quantity of fruit that can topple it over without support. The Artisan Tiger Blush is an intermediate variety that will produce up until the first frost. Seed Link : Artisan Blush Tomato Seeds
Here is to growing a few patio tomatoes this year, and enjoying an incredible harvest of tomatoes, right out your back door!
Follow Our Facebook Page For Great Gardening Tips And Advice! This Is My Garden Facebook Page
This Is My Garden is a garden website created by gardeners, for gardeners. Jim and Mary Competti have been writing gardening, DIY and recipe articles and books and speaking for over 15 years from their 46 acre Ohio farm. They publish three articles every week, 52 weeks a year. Sign up today to follow via email, or follow along!
If there is one topic that seems to confuse gardeners the most when it comes to growing tomatoes, it is knowing the difference between determinate vs. indeterminate tomatoes, and which one is the best to grow for their garden.
It usually leads to a whole slew of questions. Is a determinate better to grow than an indeterminate – or vice-versa? Can they be grown together in the same garden? And, does it make a difference if you want to eat your tomatoes fresh or can them?
These are all great questions for sure. And you will be happy to know that today’s article will answer all of them, and a whole lot more!

The truth is, both indeterminate and determinate tomatoes are wonderful to grow in your garden. They both produce tomatoes with amazing flavor that can be consumed fresh, or preserved by freezing, canning, or even drying. In addition, both can also be grown side by side without difficulty.
So what is the actual difference between the two? In short, it all comes down to how the two types grow and produce their tomatoes.
As you will see below, deciding which is the best for you to grow (or growing both in many cases) all depends on what you will be using your tomatoes for. With that in mind, lets start by taking a look at what makes determinate and indeterminate tomatoes different.
Determinate tomatoes are varieties of tomatoes that bloom, fruit and mature their entire crop all during a specific time frame.

The growing cycle for a determinate tomato is very distinct. They will grow and produce their blooms all during the same time frame. That means, of course, determinates will also ripen their fruit over the course of a specific time frame too.
Once a determinate variety has completed this cycle, the plants will die off. Unfortunately, this can sometimes lead to a little confusion for gardeners. As they watch their plants begin to die off in mid to late summer, they assume there must be an issue with disease, pests, water or nutrients.
Because of this, they often think they need to spray their plants, water more, or perhaps add more fertilizer to spruce them up. But with determinates, the reality is, the plant is simply completing its life cycle.
So you might be asking, why would I want to grow a variety that lives for a shorter time? The answer to that question is how an indeterminate produces its crop of tomatoes.
The biggest advantage of growing determinate varieties compared to indeterminate tomatoes is that they produce a large harvest in a short time.
For most varieties, that time frame is usually two to three weeks. That can be a huge plus for those who want to preserve some or all of their harvest. Whether freezing or canning large batches of salsa, tomato sauce, chili or even tomato soup – it’s important to have plenty of tomatoes on hand. (See: 3 Great Ways To Freeze Tomatoes)
It is far better when preserving to have fresh, ripe tomatoes. If you have to store your harvest over the course of a few weeks to get enough for processing, it can certainly be hard to keep all of those tomatoes at their best.
But with the large, all-at-once crop a determinate variety produces, it makes them perfect for the task!
That is not to say determinate varieties are not wonderful for fresh eating too. They are just as juicy and delicious as their indeterminate counterparts. You just need to keep in mind that the harvest is for a more limited time.
Determinate tomatoes can be planted at staggered times to keep fresh tomatoes coming on. This allows for big harvests, but at different times of the season.
Two great examples of prolific determinate tomatoes are Roma and Marglobe tomatoes. Both produce and ripen abundant crops over a two to three week time frame. They are also both perfect for canning, preserving and fresh eating!
One final point regarding determinates: always be sure to provide good support early. Determinate varieties often require more robust tomato stakes and cages to support their all-at-once heavy fruit load. Support them early, and with good, strong supports!
So now that we have covered determinate tomatoes, it’s time to take a look at indeterminate varieties.
Indeterminate tomato varieties continue to grow, bloom and produce throughout an entire season. And they will do so until the first hard frost or freeze finally takes them out.
Indeterminate tomatoes are usually a bit slower to get their first fruits ready for harvest. But once they do, they will keep on producing and providing into late fall. Although they keep producing, they do not have as large of a harvest all at once as determinates do.
Indeterminate tomatoes are a great choice for gardeners who love having fresh tomatoes on hand all season long. But just because they produce all season doesn’t mean they aren’t great for canning too!
In fact, indeterminate tomato varieties such as San Marzano and Better Boy are among the top canning tomatoes around. And even though both are indeterminate varieties, they actually produce a fairly steady harvest all summer.
The list doesn’t stop with just those two. Mortgage Lifter, Brandywine and a whole host of other indeterminates are also amazing fresh or for canning too!
With their continual growing habits, indeterminate tomatoes usually grow a bit larger over time. Because of this, you will need to plan on having supports large enough to handle the plants.
Heirloom varieties like the Mortgage Lifter tomato can sometimes reach 10 feet or more. Especially if they have good support. Not all will grow that large, but you do need to be prepared to provide adequate support.
The real key is to remember that the harvest will be spread out with these varieties. Not just through the summer, but into fall too. That means you may need to can or freeze in smaller batches when preserving.
Another option is to plant a mix of both types of tomatoes. This way, you will always be at the ready for any tomato need!
There is often a lot of confusion about determinate and indeterminate tomatoes and whether they are heirloom or hybrid tomatoes.
It is important to understand that just because a tomato plant is an indeterminate or determinate variety, it does not mean that it is or isn’t an heirloom or hybrid variety. They are actually two completely different things.
The term heirloom refers to the fact that a tomato plant is an open-pollinating type. That means it can produce the same crop from seed year after year. On the other hand, a hybrid tomato is a cross of two or more tomato plant varieties. When seeds of hybrids are replanted, they will not produce the same results.
So to clear any confusion, as far as determinate and indeterminate tomatoes go, remember that both can be found in heirloom or hybrid types.
Here is to growing the best tomato varieties for you and your family this year!
This Is My Garden is a website dedicated to spreading the love and knowledge of gardening around the world. We publish two new garden articles each week. This article may contain affiliate links.
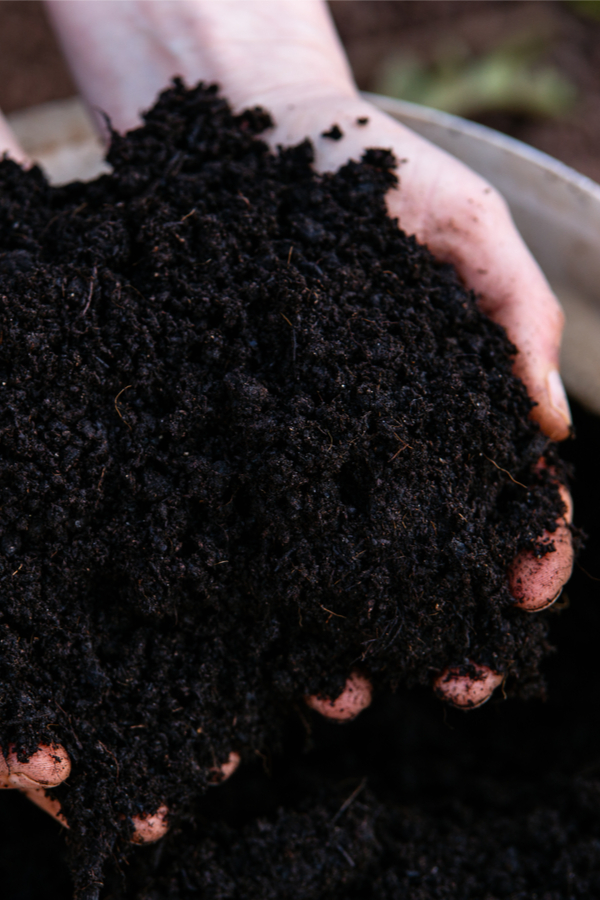
When it comes to growing healthy, productive and delicious tomatoes in your garden naturally, there is no better way to power your tomato plants than to fertilize them with compost.
You simply can’t get more organic and natural than compost. Created from the remnants of once living plants and organic material, it is both safe and powerful. And can it ever invigorate plants – especially when it comes to the tomato plants growing in your garden!
The nutrients within compost are a perfect match for what tomatoes need to thrive. But even more, they are in a form that can easily absorb into the plants roots and foliage.

Tomato plants require a tremendous amount of nutrients from the soil in order to grow healthy and strong. In addition to a tomato plant’s need for nitrogen, phosphorus and potassium, they also need calcium, magnesium and other minerals.
All of these important nutrients help to maintain healthy foliage, produce blooms and ripen fruit. Not just when they are seedlings and young plants, but as they begin to flower and fruit as well.
No matter how rich and fertile soil might be in early spring, it can lose its vitality during the season. As plants continue to draw and deplete resources from the soil, it becomes more difficult for them to find and locate the nutrients they need.
Unfortunately, when this happens, the plant begins to suffer. For starters, poor nutrient levels lead to less growth and fewer tomatoes for you to enjoy. In addition, a weak plant is also a prime target for pests and disease. And that is exactly why tomatoes need a boost of energy from time to time.
But here’s the catch, fertilizing tomatoes can be a tricky business. Fail to give them enough nutrients, and they struggle in some cases to even survive. But give them too much energy, or too much at once, and it can result in big trouble for the plants as well.
When tomato plants receive too much fertilizer, they use all of that excess energy to promote growth. And lots of it! That might sound good on the surface, but that massive growth comes at the expense of setting flowers and fruit.
Quite often, a tomato plant that has too many nutrients will look beautiful at first glance. In fact, it can have massive growth, sturdy, thick stems, and deep green foliage. But unfortunately, if you look closer, you will see very few blooms or future tomatoes on the plant.
This is the direct result of too much fertilizer absorbing into the plant. Instead of using the excess nutrients to create more flowers and tomatoes, they use it to expand and grow. And while in that massive growing mode, the plant shuts down its flower and fruit production.
The good news is, with compost, over fertilizing is never an issue. The balanced nature of compost supplies the nutrients needed for strong, steady growth, without overpowering plants.
Even better, compost can be utilized quite easily in two distinct methods. And when used together, they supply your tomato plants with the energy they need, right when they need it most.
With that in mind, here is a look at how to use compost to energize your tomato plants this year with a simple one-two approach!
Powering your tomato plants with compost couldn’t be easier. The nutrients within compost are easily and quickly absorbed by plants. And depending on how the compost is used, it can supply those nutrients to the roots, or through the leaves of the plants.
When first planting your tomatoes, compost should be liberally in the planting hole. Mixing in a 50/50 ratio of soil and compost into the planting hole is the perfect way to get your tomatoes off to a great start. (See: How To Best Plant Tomatoes!)
The compost helps to loosen the soil and conserve moisture for the expanding roots, all while leaching nutrients to power growth. But that is not where composts power ends for energizing plants.
Once planted, compost can then be used to supply nutrients using two simple methods – top dressing ( mulching), and compost tea. Together, they will supply nutrients at just the right time, and in just the right way.

As you will see below, top dressing will provide the low & slow nutrients tomato plants need for development. Meanwhile, compost tea can supply a more powerful but balanced punch of energy when your tomato plants need it most.
Once you plant your tomatoes it is extremely important to apply a thick layer of mulch. Mulch not only helps repel weeds, it also aids in conserving moisture and regulates the soil temperature.
But if you mulch with compost, you get all of those benefits and more! By using a layer of compost mulch a few inches thick and six to 12 inches around each plant, you can power plants too. Every time it rains or you water, the compost leaches nutrients right to the roots below.
It is the perfect slow and steady release of nutrients tomato plants need to grow strong. And as the plant continues to grow, you can add more compost around the plants base every month to continue the slow release boost.
Top dressing your tomato plants with a thick coating of compost provides the slow, steady trickle of nutrients plants need to develop good roots and foliage. Meanwhile, compost tea can help to power up plants for blooming and tomato production!
Compost tea can be made by simply steeping water and compost in a 5 gallon bucket. By soaking in the water for a few days, the compost imparts its nutrients into the water. And is it ever powerful! (See: How To Make Compost Tea)
Compost tea is a quick and effective boost of energy for plants, especially during their first few months of growing. By watering your plants with the tea, they plants absorb the nutrients both through the foliage and root zones.
But with compost tea, the nutrients absorb fast. And together with the low and slow of top dressing, it is the perfect fertilizing combination. By the way, if you do not make your own compost, bagged compost will work for making tea. Product Link : Bagged Compost
As for how often you should apply compost tea to tomato plants, a good rule of thumb is every two to three weeks for the first few months after the plants have been planted outdoors. Then, as plants begin to produce, you can simply let the slow and low compost mulch take back over.
It truly is a one-two fertilizing combination that will work wonders for your tomato plants. And, best of all, it is 100% natural and organic. It really doesn’t get much better than that! Here is to fertilizing your tomato plants naturally this year with compost.
Follow Our Facebook Page For Great Gardening Tips And Advice! This Is My Garden Facebook Page
This Is My Garden is a garden website created by gardeners, for gardeners. Jim and Mary Competti have been writing gardening, DIY and recipe articles and books and speaking for over 15 years from their 46 acre Ohio farm. They publish three articles every week, 52 weeks a year. Sign up today to follow via email, or follow along!