Nothing brings a landscape to life more than beautiful trees, shrubs and bushes. Here are all of our how-to articles on planting and maintaining these lasting beauties in the landscape:


Nothing brings a landscape to life more than beautiful trees, shrubs and bushes. Here are all of our how-to articles on planting and maintaining these lasting beauties in the landscape:
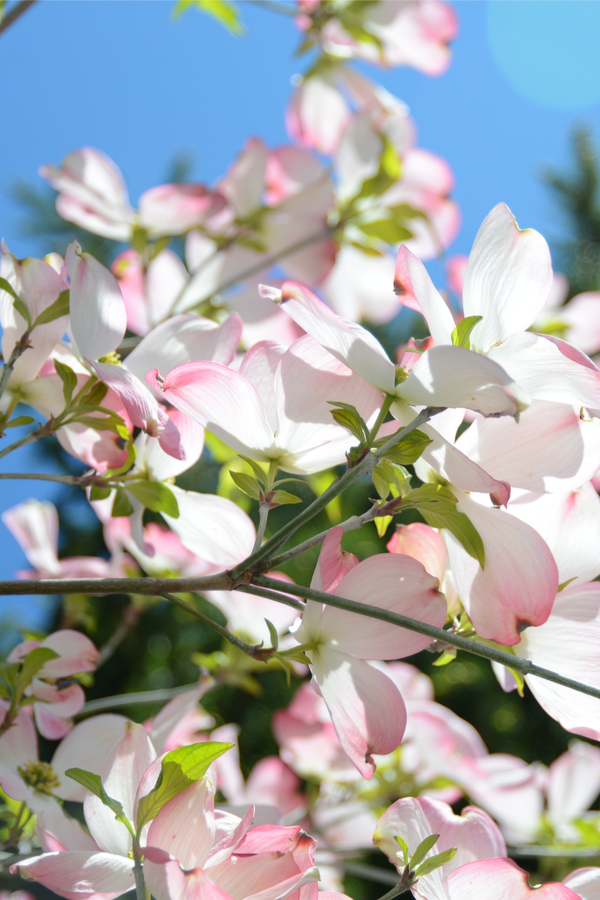
When it comes to planting and maintaining dogwood trees in your landscape, a few key tips can go a long way to keeping your trees growing healthy and strong, year after year.
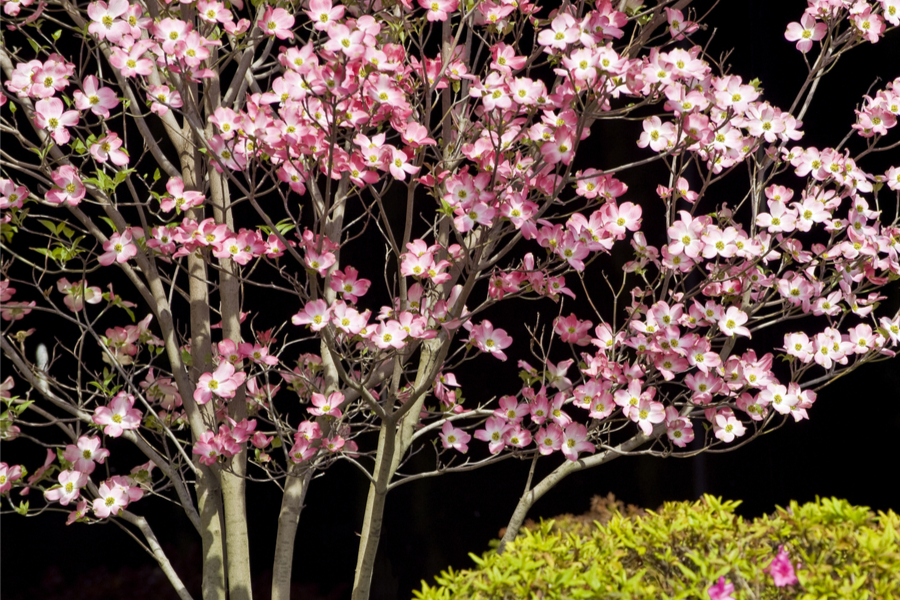
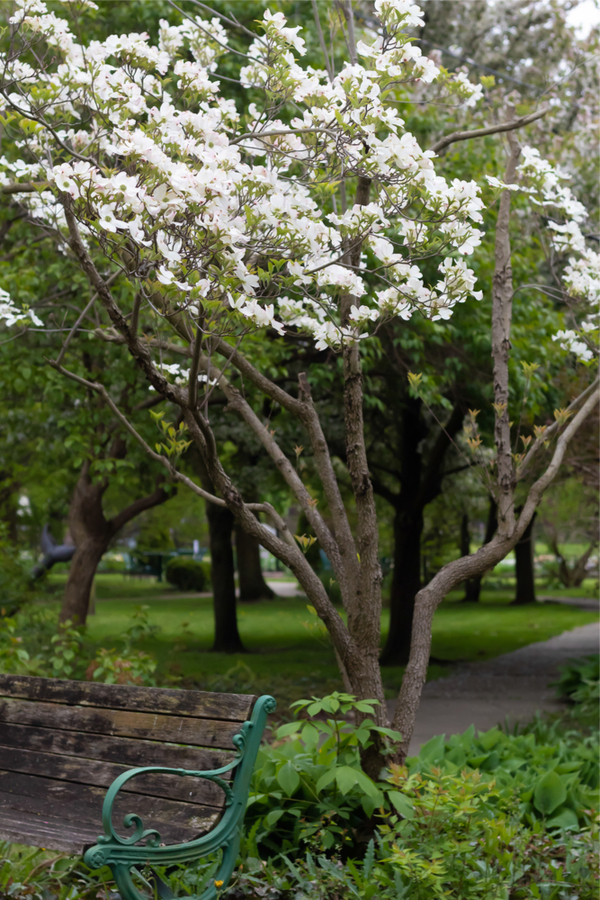
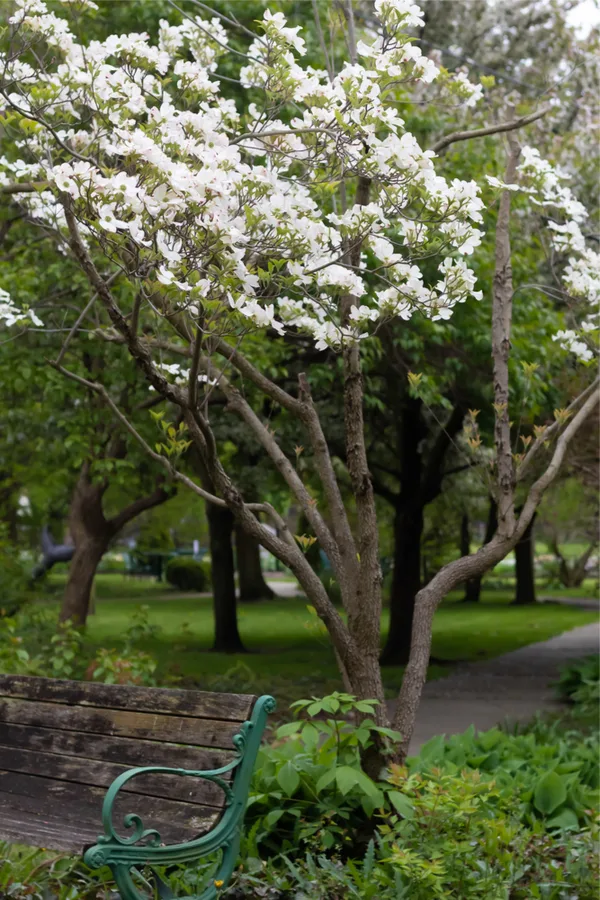
Dogwood trees are well-known and revered for their beautiful pink, white or reddish flowers. As they come into full bloom in early to mid-spring, they can light up a landscape like no other tree.
With bloom sets that can last upwards of three to four weeks, it’s easy to see why the dogwood is a favorite selection for so many. But the beauty of the tree goes far beyond just its spring flower show. In fact, the dogwood actually provides incredible interest year round!

Dogwoods have so much more to offer a landscape than just spring color. As their blooms fade, the tree begins to showcase a canopy of wispy foliage. Foliage that provides not just beauty, but a wondrous canopy of shade.
But as spring gives way to fall, the dogwood tree once again brightens the landscape with glorious color. Its leaves turn from pale green to intense hues of red and purple. So intense that it rivals the beauty of one of Autumn’s biggest and best colorful trees, the maple!
But as winter approaches and the deciduous tree begins to lose it leaves, dogwoods still have a bit more to offer for the long winter ahead.

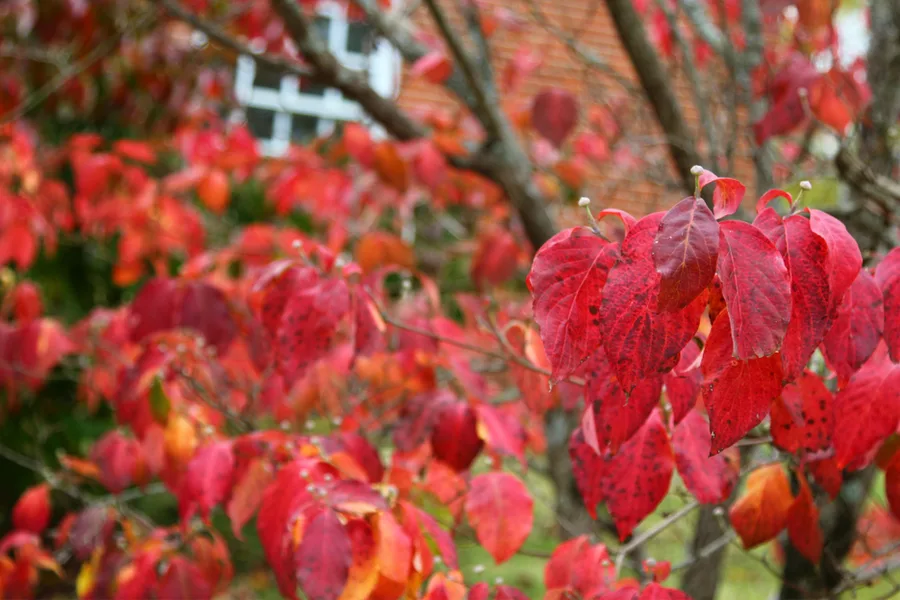
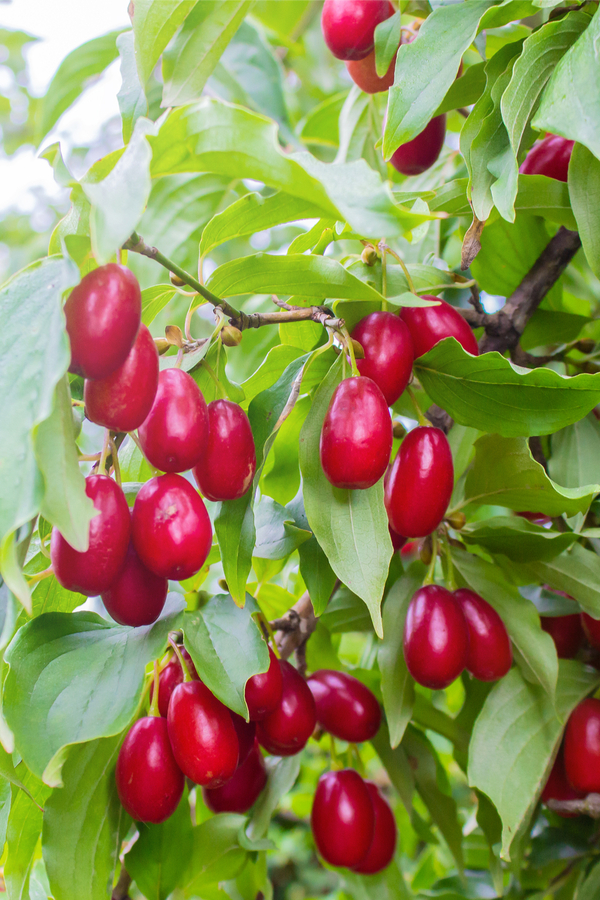
As the leaves fall off, they reveal a gorgeous limb structure that is full of interest and beauty. Even better, some species even produce red berries for winter that bring even more color to nature’s pallet.
The berries are not only beautiful, but an important food source for many species through the long winter months. In fact, they help to feed everything from foxes, squirrels, rabbits and deer, to a host of birds.
Dogwoods are native to the Eastern portions of the United States. They can be grown successfully in zones 3 through 8, although there are a few varieties that can grow into zone 2.
Once young trees are established, they require little long-term effort other than minor pruning and shaping. But for many, getting them established can be a challenge.


When there is an issue, it more often than not comes down to location – as in too much or too little sun, and too wet or too dry.
Dogwoods perform best in partial sun. Although they can survive in both full shade and full sun locations, planting them where they will receive a bit of both is the best recipe for success.
Dogwoods also require a fair amount of water, so locating them in partial shade helps them conserve moisture on hot summer days. And on the subject of water, although they need moisture, too much can lead to root rot and weak root structure.
Avoid selecting location where water will pool or collect. Soggy roots keep the roots from absorbing nutrients from the soil. The result are weak trees that can easily topple over, or rot at the base.

And finally, when selecting a location for planting, keep in mind that dogwoods benefit from a little protection. Nearby trees or structures can provide helpful shade and protection from high winds.
When selecting a dogwood tree to grow, choosing tried and true trees varieties give the best chance of success. Two of the most well-known and common varieties for planting are the Flowering dogwood and Kousa dogwood.
The Flowering dogwood is native to the US, and the most well know of the dogwood family. The Kousa dogwood variety is native to China and Japan. It flowers a bit later on average than the Flowering dogwood, and produces a slightly different berry.
The best time to plant Dogwood trees is in the early fall. The next best time is in early spring once the soil has thawed. Of the two, fall is the better option because it gives the tree an opportunity to settle in without the heat and stress of summer.
When spring rolls around, the tree is accustomed to its space, and is better suited to handle the summer season. Spring planting can still be successful, but additional watering and care is often needed to help trees through the heat.
Dogwood trees can be planted from bare root, or from potted root balls. If you are planting bare root stock, you will definitely need to plant in fall or early spring, before the tree begins to bud and flower.
Dogwoods planted as root ball trees can be dug in at any time, but the spring and fall are still better, providing less stress on the trees.
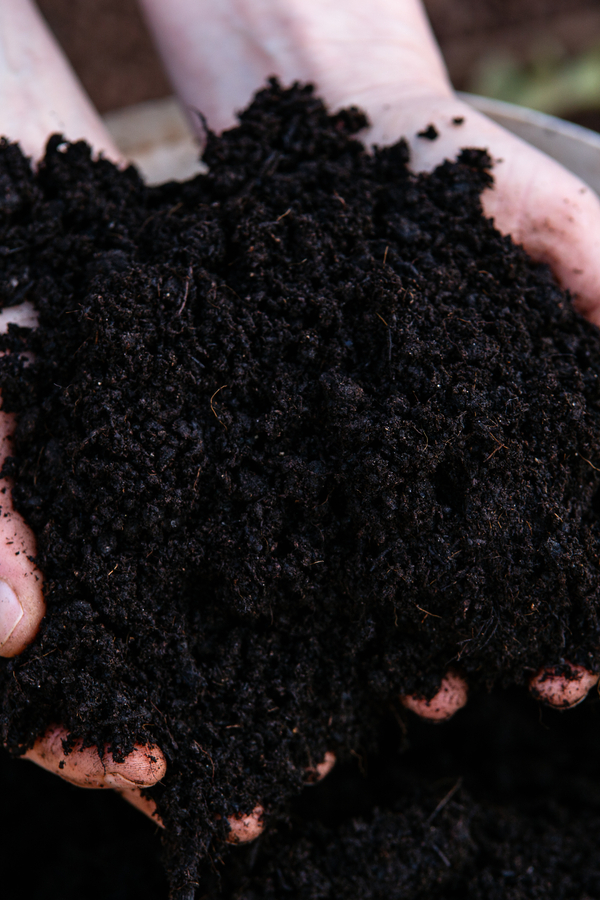
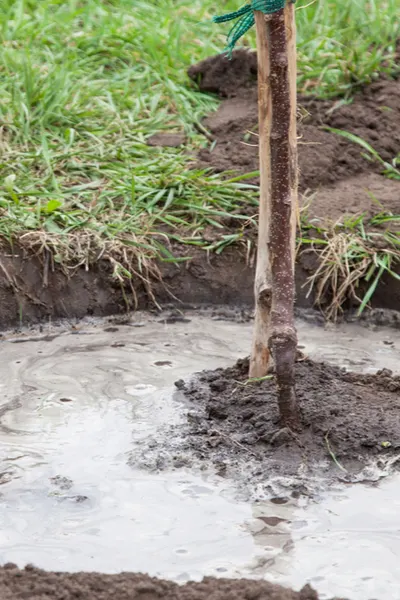
Dogwoods prefer rich and fertile ground to grow strong. Amend planting holes with a 50 percent mixture of compost to soil. Dogwood trees should have their crown set slightly above the soil, not below.
When planting, set the root ball in the hole, making sure the top of the root ball is about 1/4 above the ground level. Water the tree thoroughly when first set in the hole, and then again after planting.

Mulch can be used around the drip line of the tree to help retain moisture, but take care to keep it away from direct contact from the trunk.
Newly planted dogwood trees need to have regular watering during their first full year of growth. Water every week or two during the first growing season.
If it is extremely hot, or you have long stints of dry periods, you will need to water even more frequently. (See: How To Best Water Newly Planted Trees)
Dogwood trees require little long-term care once they are established. Prune back any dead or diseased limbs as needed. For all additional pruning or shaping, remove limbs and suckers during the summer. This helps to eliminate removing potential blooms in the off season, and keeps the sap to a minimum.
Dogwoods heal over quickly from a pruning cut in the summer, but in the cool months, they can bleed sap for a long period. Here is to adding a dogwood tree or two to your landscape – and enjoying four season beauty!
Follow Our Facebook Page For Great Gardening Tips And Advice! This Is My Garden Facebook Page
This Is My Garden is a garden website created by gardeners, for gardeners. Jim and Mary Competti have been writing gardening, DIY and recipe articles and books and speaking for over 15 years from their 46 acre Ohio farm. They publish three articles every week, 52 weeks a year. Sign up today to follow via email, or follow along!


Is it really possible to melt snow and ice safely from sidewalks and driveways without harming perennials, shrubs, trees, lawns – and pets too?
When winter arrives with all of its fury, it can certainly make for dangerous and slippery conditions. Especially when it comes to the driveways and sidewalks right outside of our home.
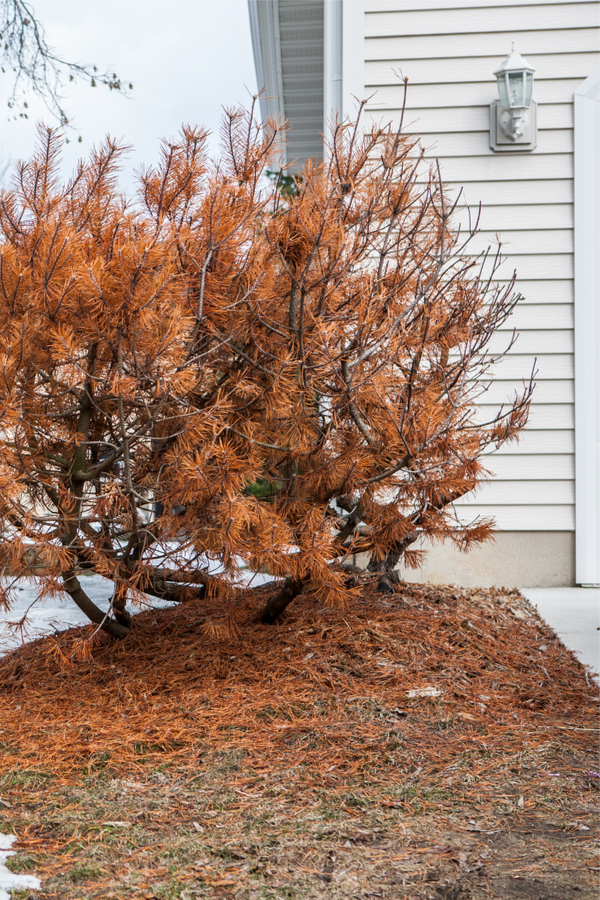
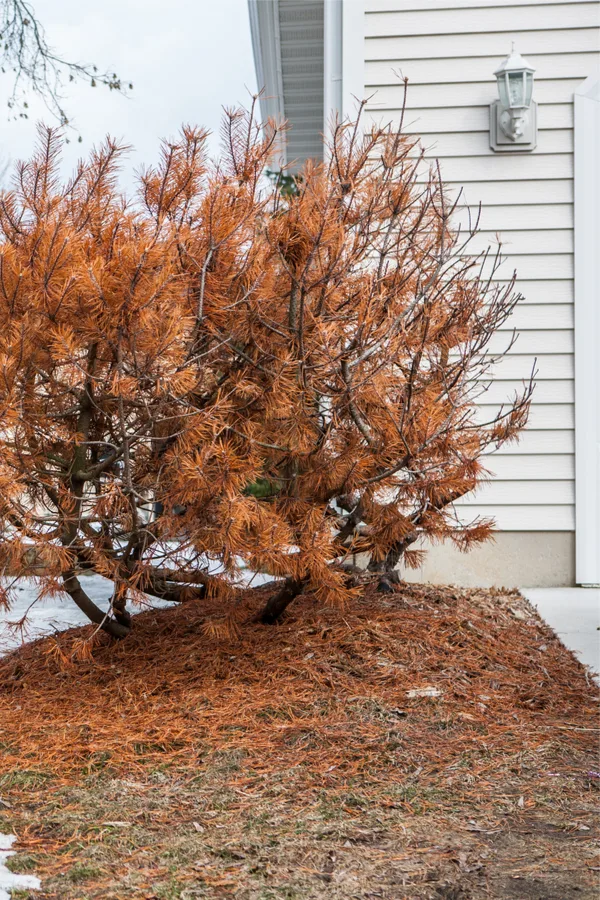
But before you head out to spread rock salt and other snow melting products, it’s important to know that many of the most popular choices are quite harmful to plants. In fact, not only can they injure plants, but in many cases they can kill them entirely.

Not only that, many can also be harmful to pets too. Whether by licking and ingesting the products, or by irritating their paws and fur when they walk across it.
And if that wasn’t enough, these same ice melting products can leave lasting damage to the very sidewalks and driveway surfaces you are trying to clear!
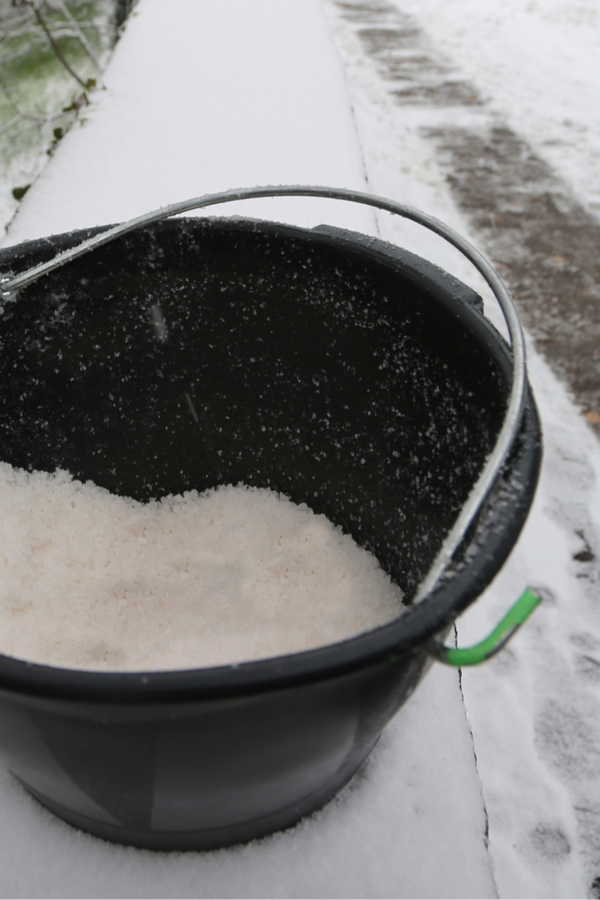
One of the most commonly used products for melting snow and ice is rock salt. It is fairly inexpensive, abundant, and works well in preventing ice and snow build up on surfaces.
But rock salt also happens to be one of the absolute worst for damaging perennials, shrubs and trees. And it can be equally bad for pets and surfaces too.
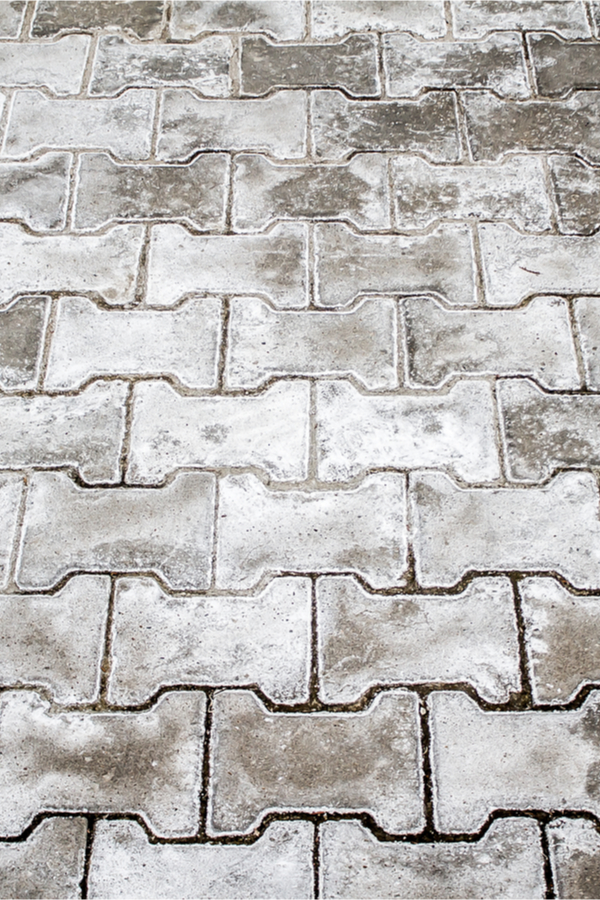
Rock salt, although highly effective at melting snow and ice, is also highly corrosive. And not just to plants, shrubs and trees, but to the concrete sidewalks, bricks and asphalt it’s applied to.
After the snow and ice melt off, much of the salt flows off into the surrounding soil. As it does, it penetrates into the soil, and then is absorbed through the roots of plants.
Salt, by its very nature absorbs water. And as it does, it robs vital moisture from the plants that can quickly injure them. And the damage can be deceiving in winter, when plants are still lying dormant.

But as spring emerges, many plants affected by excessive salt levels in the soil will fail to bloom or set leaves. And for lawns, the damage is easily noticeable by large brown or bare spots where the salt has pooled to. It is the same effect that using Epsom salt on plants can have over time as well. See : Why Epsom Salt Isn’t Good For Plants
The salt that doesn’t melt or wash is quite harmful to sidewalks and driveways too. The corrosive salt can easily etch and stain the surface permanently. And of course, it can certainly irritate or damage paws of pets that walk across it too.
So what are the safest and most effective solutions? Well, in terms of pure safety for plants and animals, simply clearing the walks and applying a bit of sand for traction is the best option.
But other options for treatment do exist. In the past few years, a whole slew of new products have hit the market that are safer for pets, plants and surfaces.


Many contain natural ingredients like beet juice and pickle juice, which have been shown to help melt snow and ice at much lower temperatures than rock salt. Products like Melt also contain calcium, which actually helps improve the soil.
Products like these are pet and kid-friendly and safer for the environment. They are also of course much safer to use on grass, plants and trees. They also help to put a dent in the estimated 20 million tons of salt that is used and applied every year just for snow and ice removal.
Here is to melting snow and ice safely on your walkways and driveway this year!
This Is My Garden is a website dedicated to spreading the love and knowledge of gardening around the world. We publish two new garden articles each week. This article may contain affiliate links.
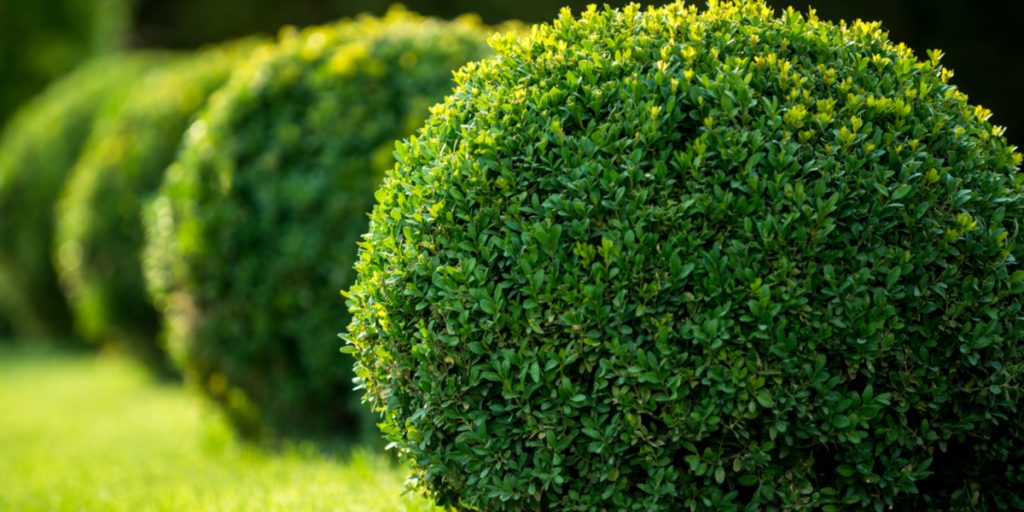
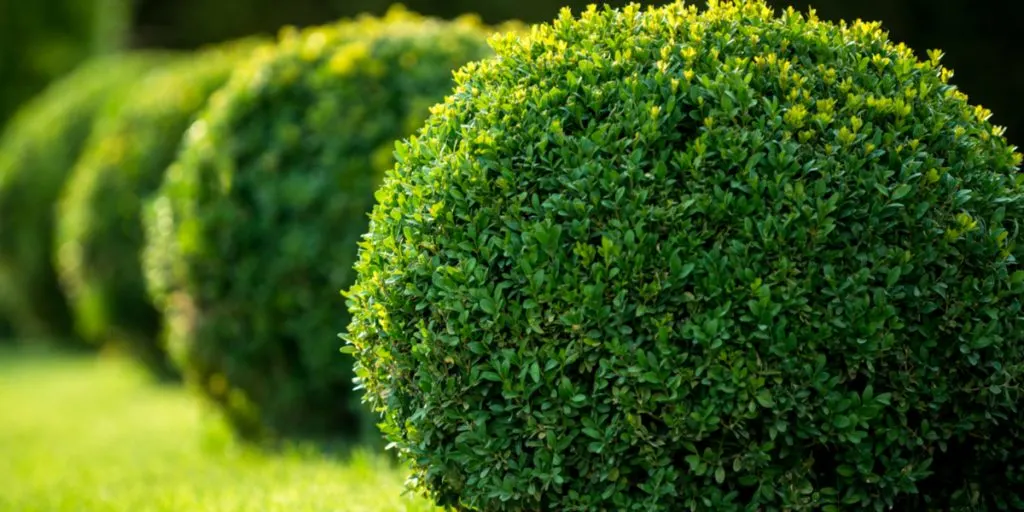
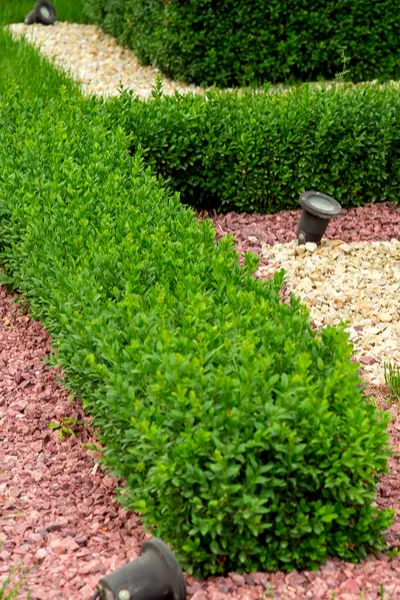
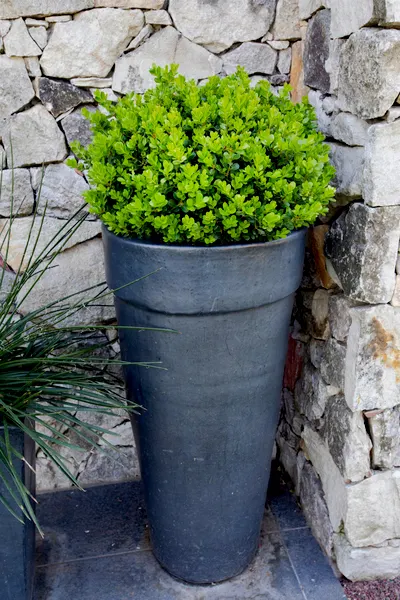
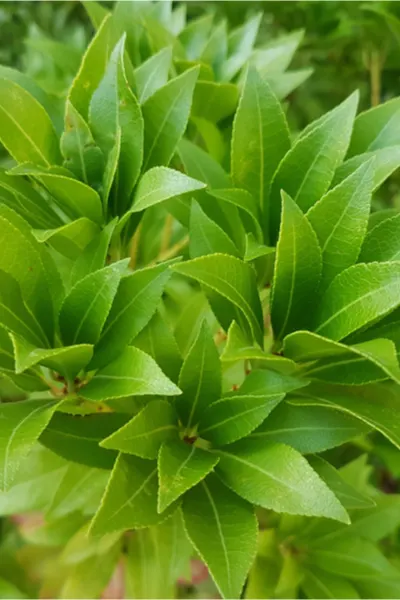
Planting and growing boxwood shrubs in your landscape is an excellent way to add year round foliage and interest to flowerbeds, patios and more. Even better, it is interest that won’t attract hungry deer!
Boxwoods are an easy care shrub that bring all kinds of versatility to nearly any landscape design. They can be shaped into hedges, grown as individual shrubs, or planted in small groups to anchor entrances and walkways.

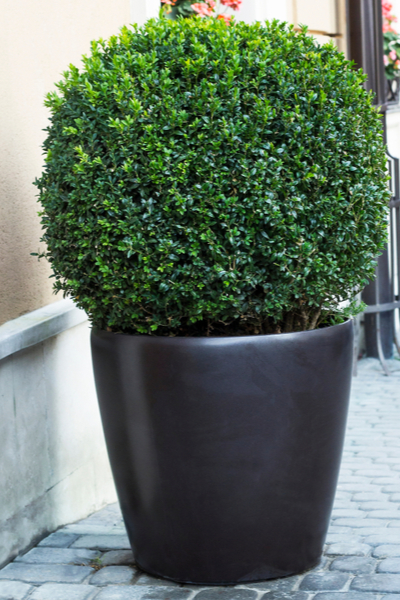
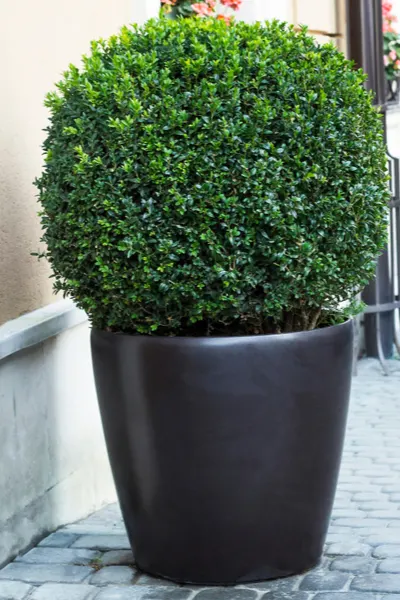
In addition, they perform well in pots and containers, making boxwoods a great choice for patios too. Throw in that they can grow well in full sun or partial shade, and are highly drought resistant and they become even more attractive.
But what really makes boxwoods a great choice is that deer rarely if ever bother them. In fact, the shrub produces a toxic chemical in its leaves that serves as a highly effective repellent to deer.
And not just for the boxwoods, but for other varieties of plants growing nearby! Here is a look at how to plant and grow boxwoods all over your landscape, including how to keep them well maintained for years to come.
A big advantage to planting boxwoods is that they adapt to nearly any soil type. As long as that soil is not overly moist.
Boxwood shrubs might be able to handle sun, shade, and everything in between, but one thing they can’t handle is excess moisture. The roots are highly susceptible to rot, and excess water can take a quick toll.
There are, however, several steps you can take in the planting process that will help to alleviate excess moisture.
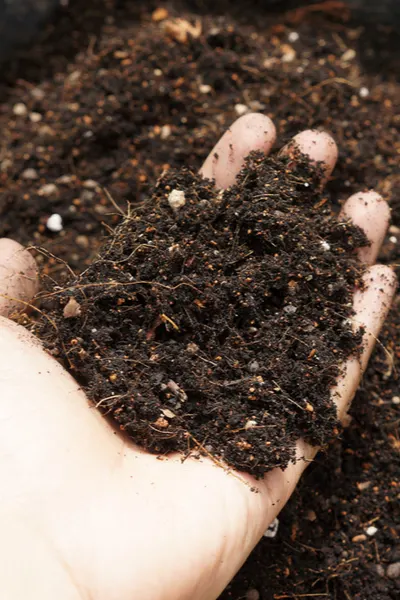
Before planting boxwood shrubs, begin by amending the planting hole with plenty of compost. Compost is the ultimate equalizer when it comes to moisture issues.
Not only will it hold enough moisture for plants to survive, but it also can drain excess moisture with ease. Add in that it provides plenty of trace elements and nutrients, and it is the perfect choice for creating great soil prior to planting. See : How To Create The Perfect Compost Pile

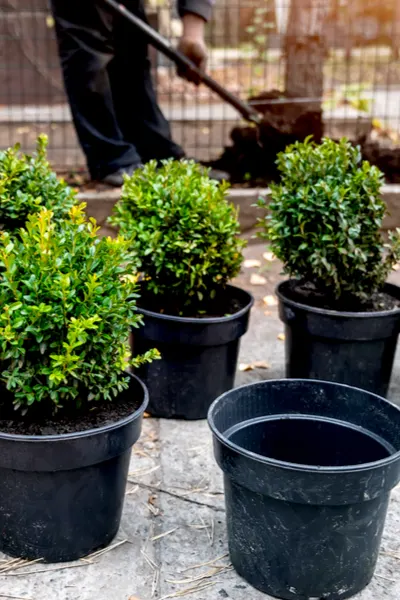
Dig planting holes to twice the width of the container the plant came in, and about 25% deeper. This will allow the roots to stay closer to the soil surface as they grow, which for boxwoods is ideal. Planting too deep can easily create water logging issues for the plant.
Fill the bottom of the hole with a mix of compost and soil. Then set the plant in the middle of the hole, being sure the crown of the plant is at the surrounding surface soil level or just slightly above. This is important, as you do not want the plant crown to sit down below where water can pool around the roots.

Finish by watering the plant into the hole, and filling the remainder of the planting hole with a 50/50 mix of compost and soil. Adding a light layer of mulch (a few inches) will complete the planting process.
Boxwoods are best planted in late fall, late winter or early in the spring. Always avoid planting in the heat of summer as it simply puts too much stress on the shrub.
Boxwoods are highly drought tolerant shrubs. Once established, they will rarely, if ever require watering. For the first year, water every few weeks when if rain has not fallen. Always be sure to check the soil prior to watering to make sure it is indeed dry.
Keep the plants lightly mulched year round to help suppress weeds and control the soil temperature. Be careful to avoid heavy applications of mulch around the base of plants. This again can keep moisture levels too high for the plant.

Although boxwoods are an evergreen, they do not require a special fertilizer. In fact, they will perform best with a spring application of all-purpose organic fertilizer.
Many mistake the boxwood shrubs to be more like pine and other evergreen plants, requiring more acidic fertilizers. This is not the case, and traditional all-purpose fertilizers will work best. Product Link : Jobes All Purpose Organic Fertilizer
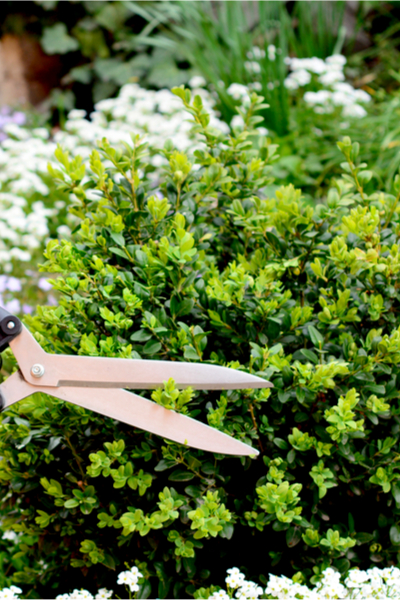
The foliage of boxwood shrubs grows quick, and is easy to shape as it does so. Frequent clippings in the spring and summer will help to keep the growth and foliage compact and full. Avoid late season pruning as it can expose the plant to extreme cold and winter damage.

As for varieties to select, the sky is the limit. There are literally hundreds of species! Your best bet is to check with your local nurseries or extension office to see which varieties grow well in your area. Here is to adding year round greenery to your landscape by planting and growing boxwood shrubs!
This Is My Garden is a website dedicated to spreading the love and knowledge of gardening around the world. We publish two new garden articles each week. This article may contain affiliate links.
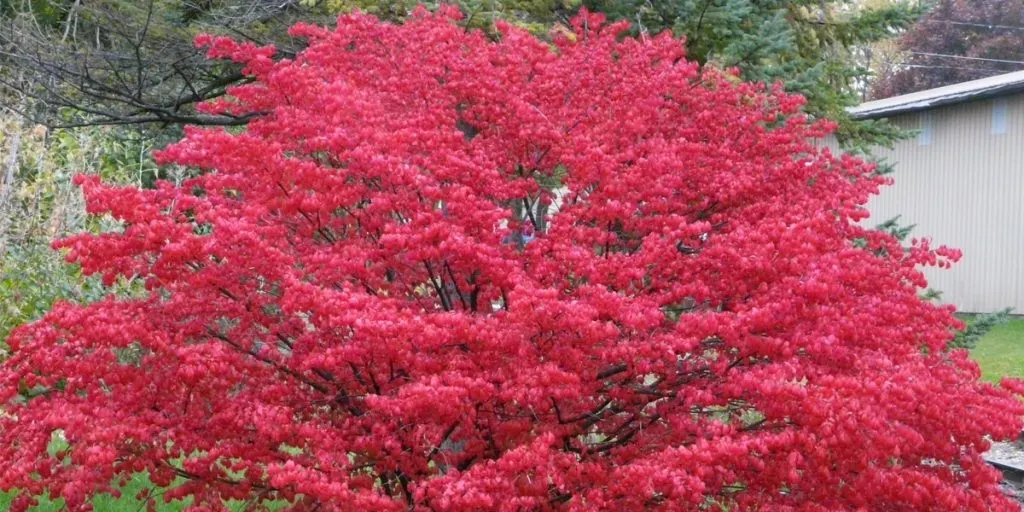
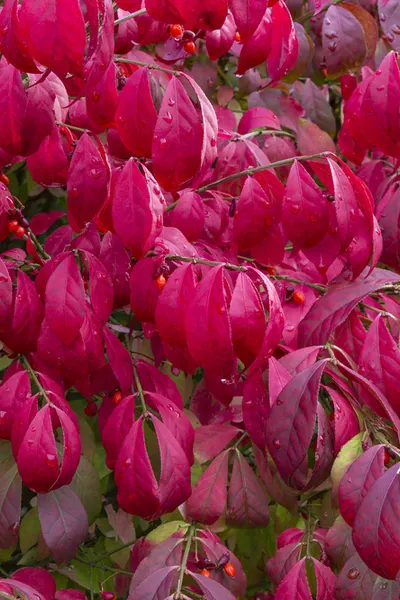
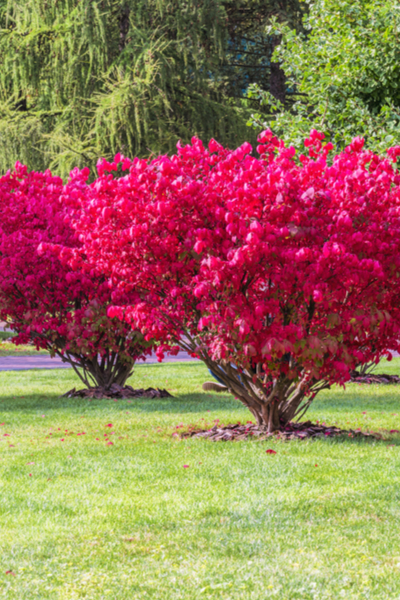
Although growing burning bushes can add big spring, summer and fall color to your landscape, there are a few downsides to planting this shrub that blazes in autumn with bright red foliage.
Burning bushes are known for their fast growth and beautiful leaves. Especially as autumn rolls around, and their canopy of foliage turns to a fiery red.
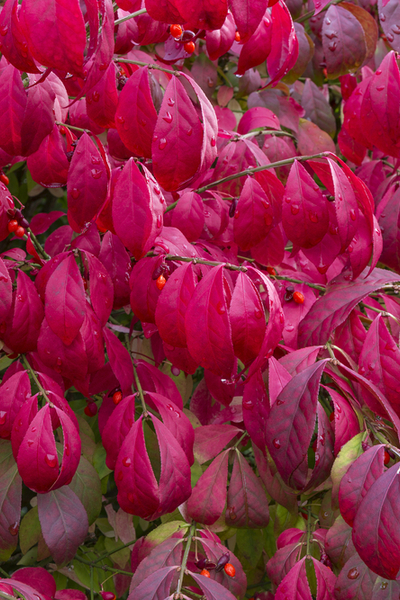
But they can pose a few problems as well. And with that in mind, the pros and cons should be weighed before adding them into your plant mix. Here is a look at how to grow burning bushes, along with a few cautionary traits to consider before planting.
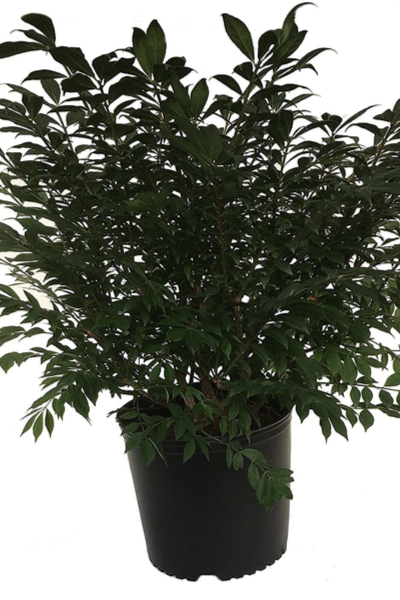
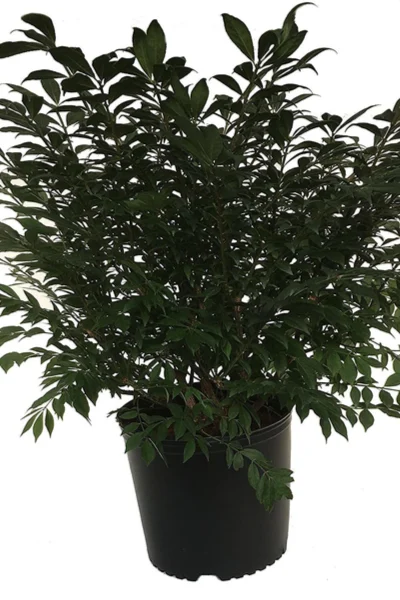
Burning bushes (Euonymus alatus), certainly bring a lot of versatility to the landscape. For one, they are perfect for growing as a hedge plant for walkways and driveways. But they also make for a wondrous focal point as a stand alone shrub.
Even better, they tolerate nearly any soil condition. Although these hardy shrubs prefer full sun, they can adapt well to shadier areas of the landscape too.
Best of all, they also tolerate a wide spectrum of growing zones . In fact, Compactus, one of the more popular of all varieties, grows well from zones 4 through 8.
So with all of these positives, what could possibly be wrong with planting and growing burning bushes? Well, believe it or not – plenty!
For all of its positive growing traits, burning bushes come with a few undesirable qualities. At the top of the list is the fact that many states and areas have listed it as an invasive species.
Since first arriving from Asia many years ago, the bush has spread rapidly. Its adaptability to nearly any soil condition has made it a hardy shrub with little to keep it in check.

And it also spreads easily in two unique ways. First, burning bushes can tunnel underground through long roots and new shoots. If left unchecked, it can create a bevy of new plants in just a few years.
But Euonymus alatus also spreads and replants easily thanks to the birds and wildlife that consume its fall berries. The berries are actually seeds, and when deposited elsewhere, can grow new plants quickly.
As if the invasive part wasn’t enough, Euonymus alatus can also be quite toxic when ingested. Both the leaves and berries of the shrub contain toxins harmful to humans and common household pets.
Although rarely fatal, it can cause a whole slew of digestive and circulatory issues when consumed. The good news: the shrub’s leaves and berries are only toxic when ingested, and not via skin contact with the foliage or fruits.
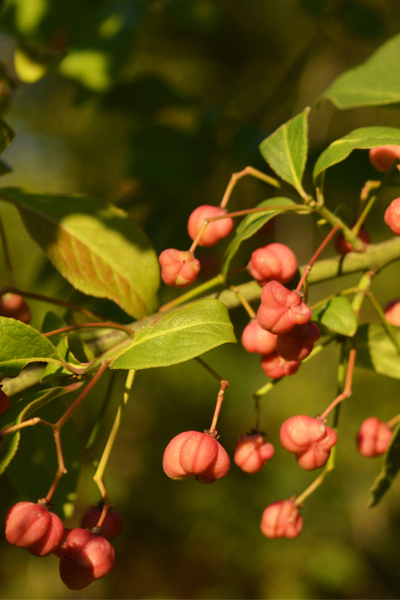

Interestingly enough, the berries are actually an important source of food for birds, squirrels and chipmunks – especially in the winter when food can be scarce.
So what is the verdict on Euonymus alatus? Are they safe for planting?
It first depends on where you live. As mentioned earlier, the plant is banned from growing in many states. It’s important to first check first with your extension office to see if it is safe to plant in your area.
If you are able to plant, certainly use caution if small children and pets will be able to come in contact with the shrub’s leaves and berries. You can also help the spread of growth from roots by removing any new shoots that appear.
For more information on trees and shrubs for your landscape, check out our Trees & Shrubs tab on the website.
This Is My Garden is a website dedicated to spreading the love and knowledge of gardening around the world. We publish two new garden articles each week. This article may contain affiliate links.
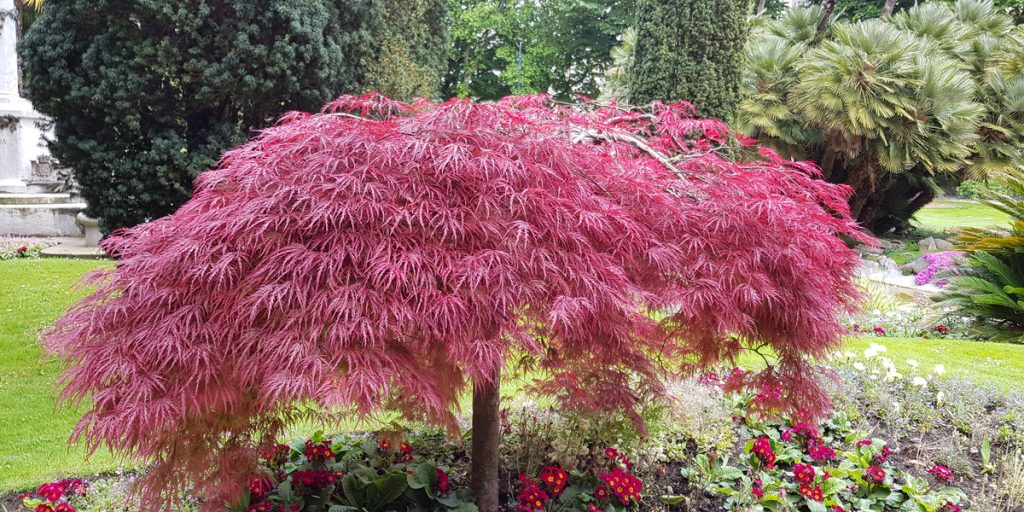
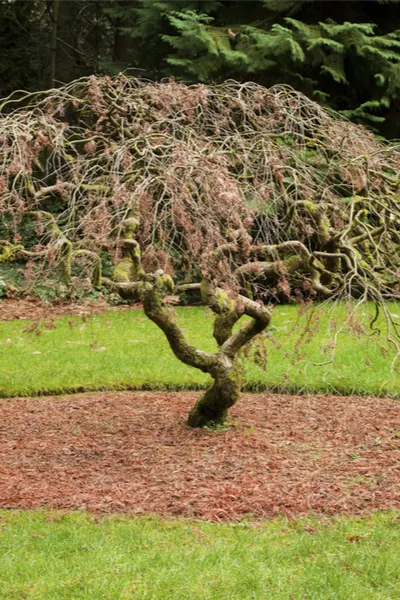
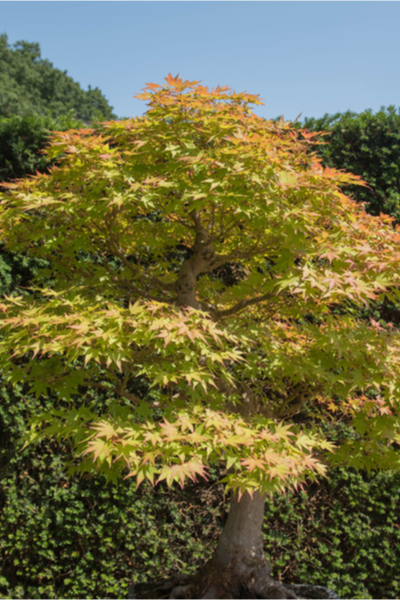
Nothing adds a little pizazz to a landscape like a beautiful dwarf Japanese maple tree.
The tree’s compact growth, combined with its crooked, rambling branches deliver big interest, even in the dead of winter when the leaves are long gone. And it only gets better when its wispy, airy foliage comes to life in the spring, summer and fall!

Best of all, with their slow growth and small size, these gorgeous mini-trees can fit into many yards where large trees simply aren’t an option. And with varieties available in hues of red, purple and green, there is a tree to fit almost any outdoor space.
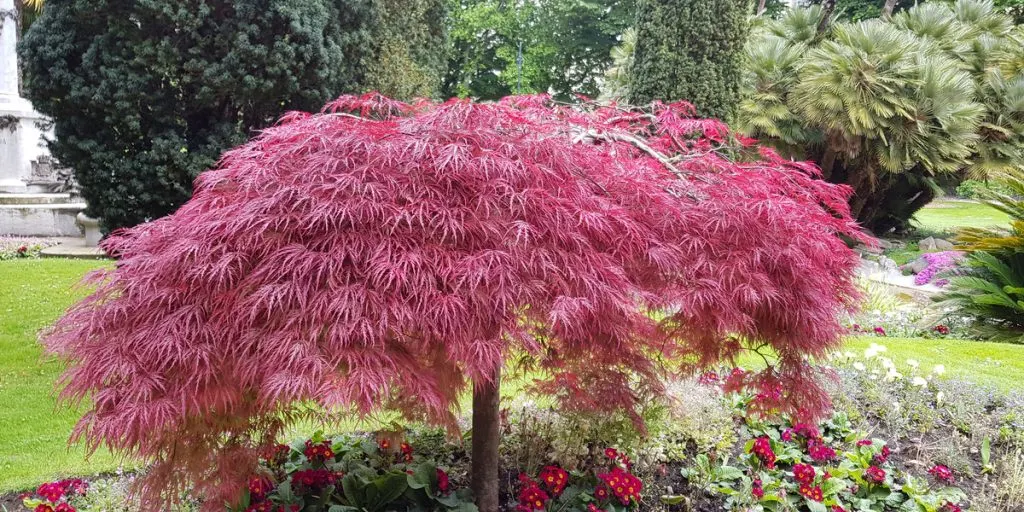
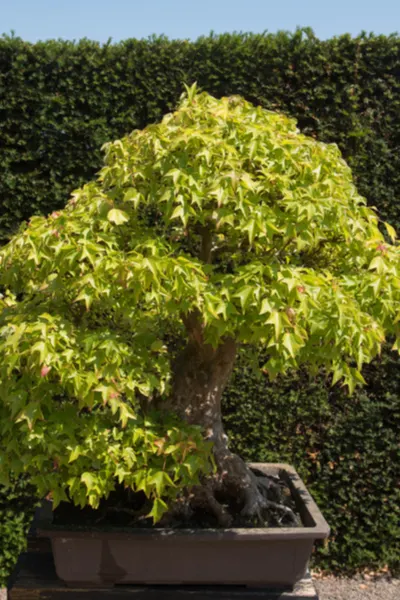
There are quite a few dwarf options to choose from when it comes to Japanese maple trees. In fact, you can find varieties that grow anywhere from a few feet tall, to 8′ or more in height. Many grow just as wide as they do tall, spreading out anywhere from 4 to 8 feet at full maturity.

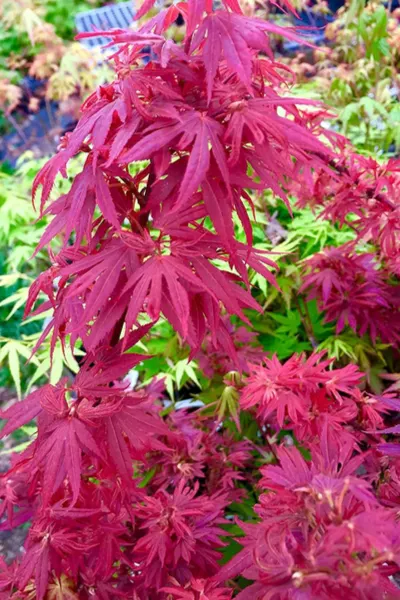
From deep red varieties like Aratama Dwarf Japanese, to Weeping Green Laceleaf, selecting the right tree really comes down to finding a color, size and branch style most suited to your landscape.
It’s important when selecting your tree to first make sure it is compatible with your growing zone. Most dwarf varieties will perform well in Growing Zones 5 through 9, although there are a few options that can survive colder winters.
Long-term success boils down to selecting a safe, protected location with the proper soil conditions.
First, lets cover the subject of location. Nearly all varieties of dwarf Japanese maple trees perform best in partial to full sun. At minimum, be sure the trees receive at least 5 to 6 hours of light each day.

But even more important is selecting a location that is protected from harsh winds and cold. Trees tucked in around a house, outdoor structure, or even other trees will have a much better chance of long-term survival.
Dwarf Japanese maples struggle in overly wet or hard soils. They need soil with good draining qualities to keep excess moisture to a minimum. Amending the planting hole with a 50/50 mix of compost and soil will help tremendously with drainage.
Dig the planting hole to one and a half times the depth, and 2 times the circumference of the root ball. Plant the crown level with soil as it was growing in the pot, and fill in with the 50/50 mix.
Japanese Maple trees require little long term maintenance once properly planted. They are fairly drought resistant, and once established, rarely require watering unless conditions are extremely hot and dry for prolonged periods.
Long term management really comes down to a bit of fertilizing and pruning each year.

Light pruning will help to keep the trees growth and size in check. Pruning should be performed in late winter/early spring when the tree is dormant. In addition, fertilize each spring with a balanced feeding of 10-10-10 to provide plenty of nutrients for continued root growth.
For more information on planting trees, check out our Tree & Shrubs tab on the website.
This Is My Garden is a website dedicated to spreading the love and knowledge of gardening around the world. We publish two new garden articles each week. This article may contain affiliate links.
How and when you water newly planted trees plays a huge role in not only a tree’s survival, but its long-term health as well.
The first few years of a tree’s life are critical in building and establishing a strong, healthy root system. A tree’s roots, much like any plant, are its major lifeline.

Not only do roots soak up nutrients and moisture, they also help to anchor the tree against mother nature. A weak root system leads to poor plant health, and one that will have trouble standing up against strong winds and storms.
Here is a look at how and when to water newly planted trees for success, along with how best to continue watering trees as they mature.
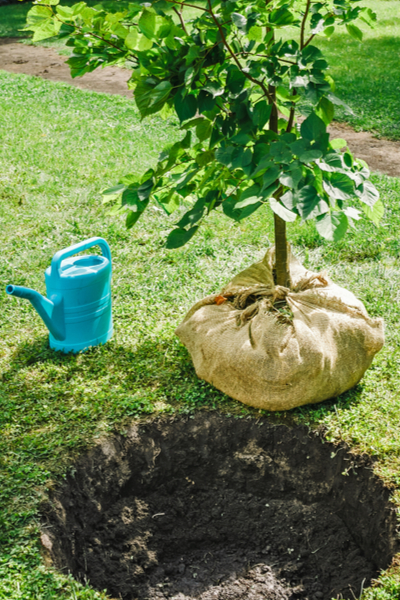
Whether it be a fruit tree, ornamental tree, or a classic shade tree, a newly planted tree requires frequent watering. And that watering needs to start right at the time of planting!

Transplanting is stressful for any plant, but especially so with trees. And it’s vital to keep the root ball well-watered to keep the plant hydrated, and keep that stress to a minimum.
When planting, the root ball needs fully hydrated before covering with soil. The best way to do this is to place the root ball into the hole and fill with water.
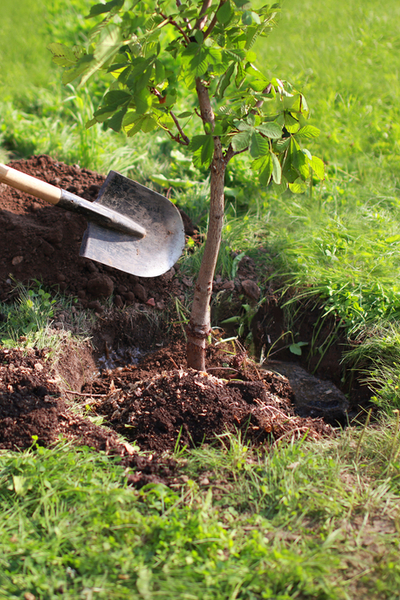

Once the water has soaked in and drained from the hole, cover with soil and water in once more.
Once trees have been planted, they should be watered every other day for the first few weeks. Trees are best planted in the cooler temperatures of spring and fall, but if planted in the summer, daily watering may be needed for the first two weeks to combat the additional heat.
The amount of water should be based upon the size of the trees trunk. A good rule of thumb for newly planted trees is 5 gallons of water for every inch in diameter of the trunk.

After a few weeks, cut back watering to once a week as the plant begins to set it’s roots. It is important to avoid over-watering at the point too, as it can prevent the roots from searching into the surrounding soil and taking hold.
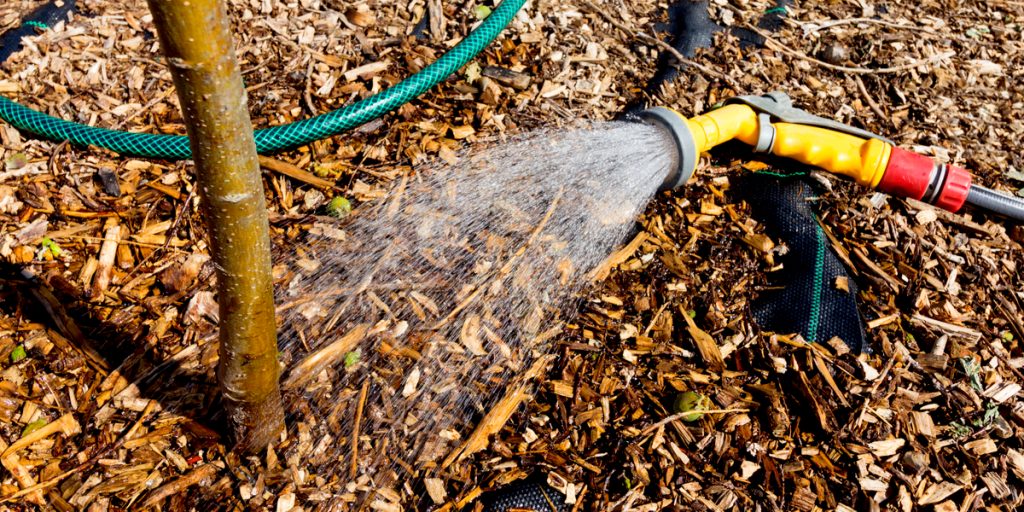
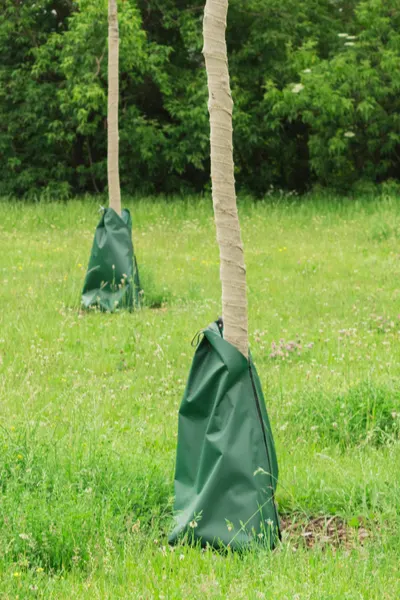
One of the best ways to water young trees is with a 5 gallon bucket with a few holes poked in the bottom. The slow release lets the water have time to soak in, and not simply run off. Tree Watering Bags are a great solution as well, as they allow the water to release slowly over time.
One of the biggest mistakes made with new trees is not providing water to their roots when trees are dormant.
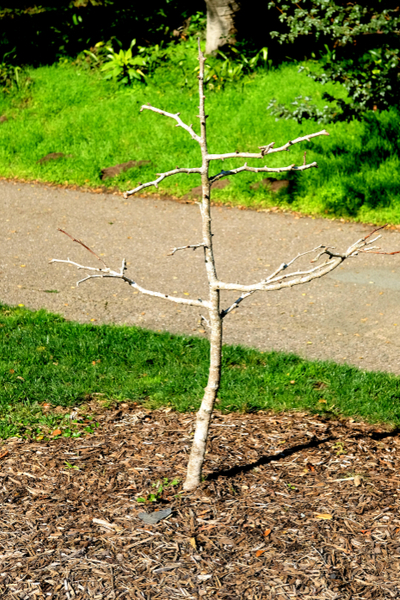
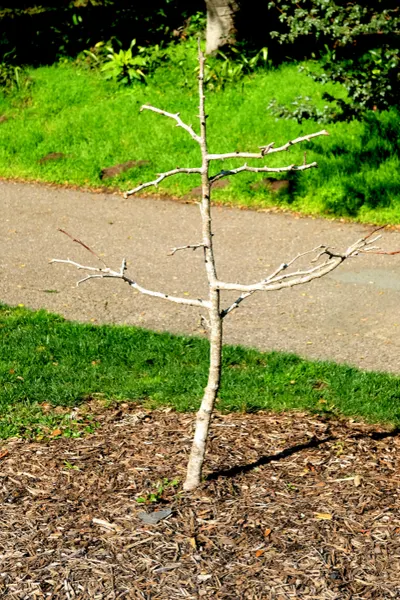
Young trees, especially trees that have been in the ground for 2 or less years, require watering even when the tree is overwintering. As long as temperatures remain above freezing, water trees every few weeks through dormant periods.
If the ground freezes or temps drop below freezing, watering is not necessary.
As a young tree continues to grow and mature, proper watering is still vital to the trees overall health and success.
Trees that have been established for one to three years should still be watered during extended dry and or extremely hot periods. Most trees require an average of an inch of rain every week to 10 days. If Mother Nature is not providing that, it’s time to water.
Once a tree has matured a bit and has become fully established (usually around 4 to 5 years), it will rarely if ever require watering. The only exception would be during an extreme drought or extended heat wave.
Last but not least, mulch those trees! When it comes to conserving moisture around newly planted and young trees, mulch is absolutely critical.
Mulch immediately at the time of planting to help keep water in, and competing weeds out. The mulch should be 4 to 6 inches deep, and cover at minimum the extended root ball area.

Shredded hardwood is an excellent choice, but straw and other mulches will work too. Do not use rock mulches initially as they will heat up from the sun and dry out the soil below.
Here is to watering for success! For more on adding trees to your landscape, check out our article Adding Fruit Trees To Your Landscape.
This Is My Garden is a website dedicated to spreading the love and knowledge of gardening around the world. We publish two new garden articles each week. This article may contain affiliate links.
Today’s This Is My Garden article takes a look a close look at 3 tree varieties, that although still quite popular among homeowners, should avoid being planted for the long-term damage, headaches, and issues they cause.
Nothing adds lasting beauty, protective shade and life to a landscape like trees do. But one thing is for sure – not all trees are the same!
And when you consider that most trees outlast a human’s lifespan, picking the wrong one for your home can be a real issue. With that in mind, here are 3 tree varieties to avoid planting in your landscape at all costs:
Unfortunately, as beautiful as a silver maple tree can be, it can cause serious long-term issues for homeowners.
For years, the silver maple was a top choice for planting in backyards across America. And it is easy to see why it became so popular. It grows fast, and provides a fair amount of shade in short fashion.
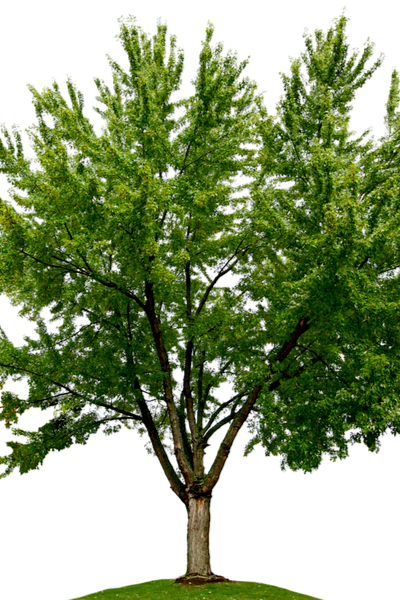

But that is about where the positives end! Below the surface, the silver maple creates major headaches for homeowners. It’s root grow far and wide in search of food and water, and are extremely aggressive and strong.
Strong enough to break up concrete sidewalks, septic tanks and systems, and even foundations. In addition, the roots tend to grow above the surface, making mowing and maintenance difficult as well.
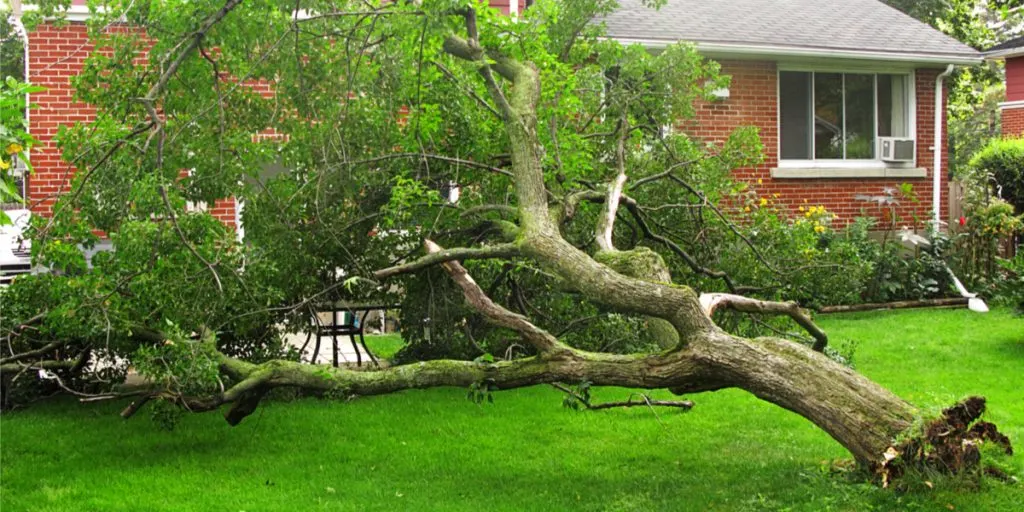
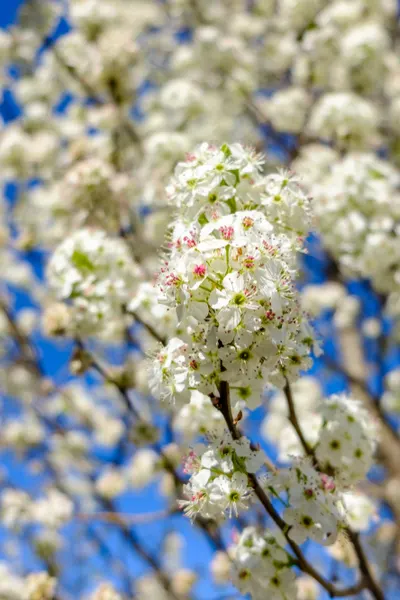
Much like the silver maple, the Bradford pear tree became extremely popular over the last 30 years.
It is a fast grower, and for many homeowners, it provides quick shade. It also provides beautiful blooms and early spring foliage as well.
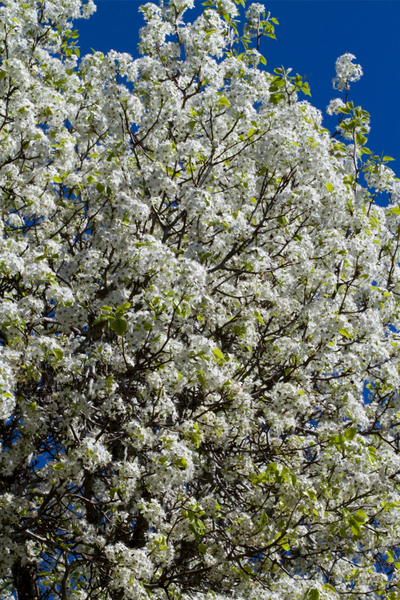

But the biggest issue with a Bradford pear tree is that it grows a little too fast. So fast that it’s trunk and branches do not have time to develop strength.
The result is a weak tree that becomes easy pray to wind and storms. Not only does it result in constantly falling branches and limbs, it also usually ends with the tree eventually splitting, or falling over completely.
The Cottonwood tree is certainly an impressive tree when it comes to massive growth. Not only can it grow nearly 3 feet per year, it can reach staggering heights of 100′ or more.
But the plus side of the column ends there, and it is certainly a tree to avoid planting in a backyard! The fast and massive growth simply does not work well in most backyards. Within 10 to 15 years, they can take over a smaller yard with shade, snuffing out many other sun-loving plants.

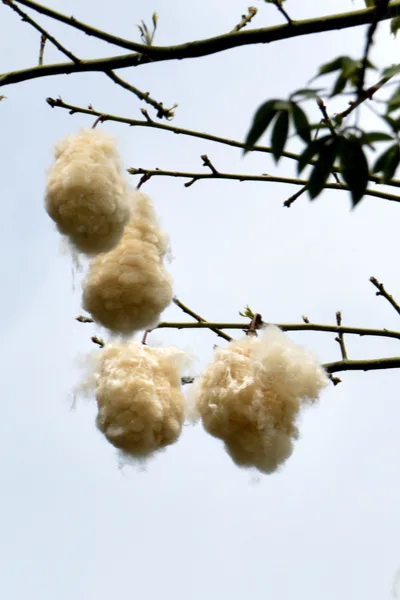
Cottonwood trees are also highly susceptible to disease and pests. Aphids and beetles love them, and the trees attract these pests and more to backyards when planted.
And finally, another big drawback to the cottonwood tree is the incredible amount of “fluff” it produces early each summer. Not only will it clog gutters and drains, it is also a massive problem for many allergy sufferers.
So there you have it – 3 trees to avoid planting in your landscape! For more info on planting trees in your landscape, be sure to check out our Shrub / Tree section on the blog.
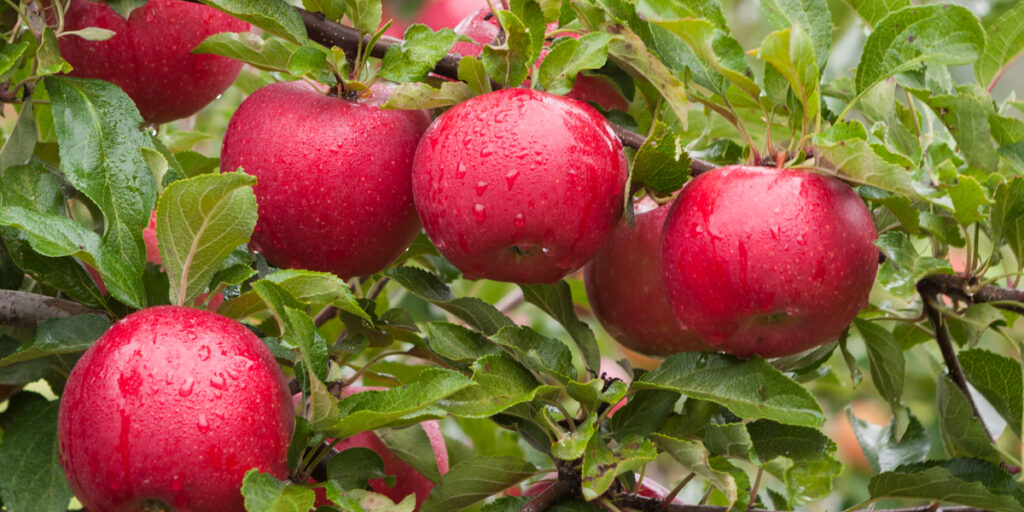
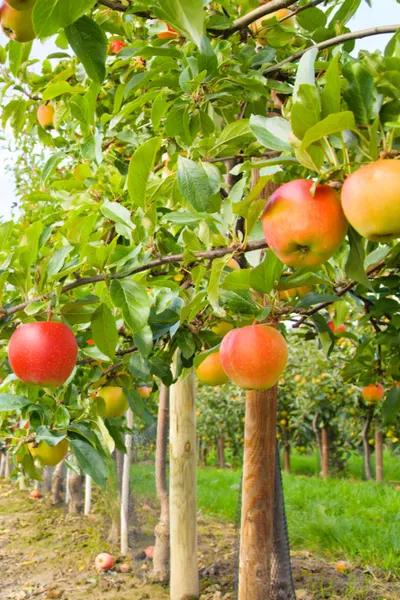
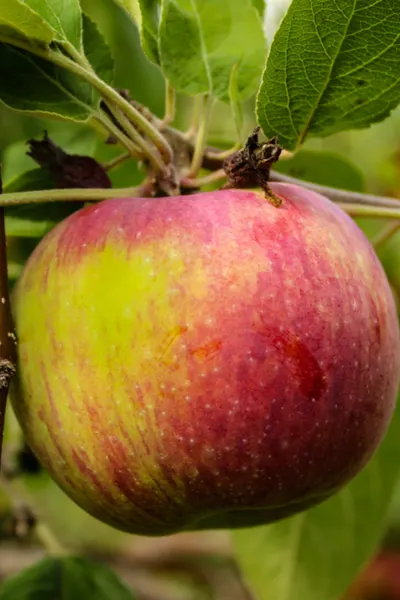
And if you are looking to add fruit trees, check out: 3 Great Apple Tree Varieties To Plant In Your Backyard.
This Is My Garden is a website dedicated to spreading the love and knowledge of gardening around the world. We publish two new garden articles each week. This article may contain affiliate links.
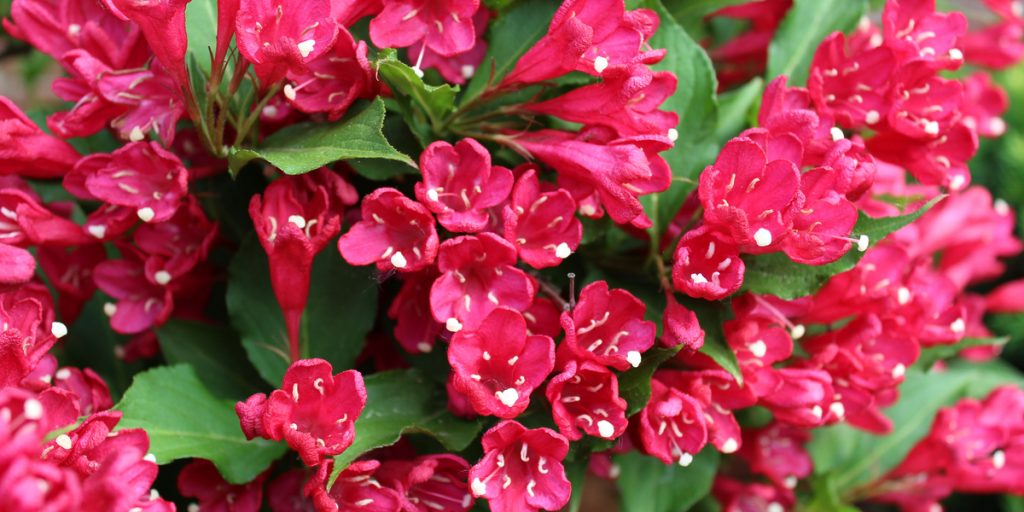
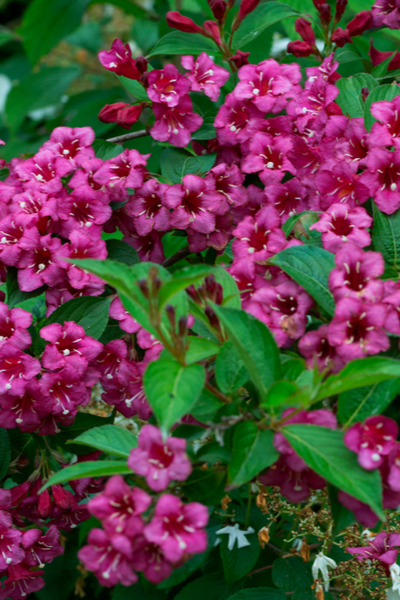
If you are looking for an incredible low-maintenance shrub to add to your landscape, consider growing weigela! Not only does this flowering shrub add beautiful color and texture, it also happens to be resistant to deer too!
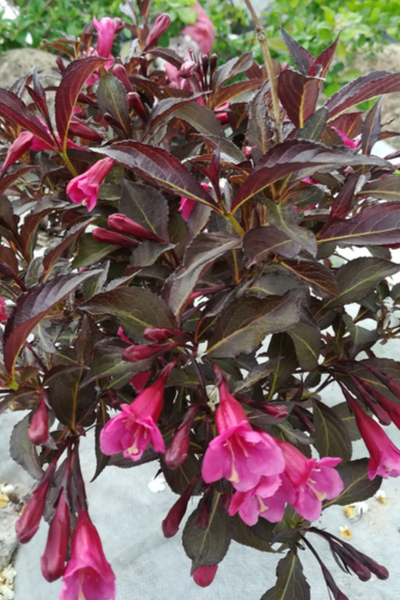
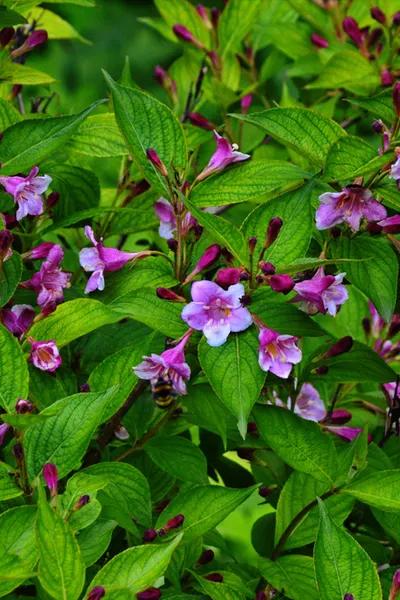
Weigela has become increasingly popular in recent years. Available in a variety of colors in leaves and blooms, it is an extremely hardy perennial bush with beautiful mid to late spring flowering.
In addition to it’s deer-resistant qualities, weigela has few issues from other pests. And, it also happens to be highly drought tolerant as well.

But perhaps best of all, weigela requires minimal effort when it comes to pruning, fertilizing, and long-term care. It really is the perfect, low maintenance shrub for the landscape.
Although they can vary by variety, weigela is generally hardy in growing zones 4 through 8. As with any perennial, be sure when selecting an individual plant that it will indeed work in your area.
Most varieties of weigela, like the popular Wine and Roses mature 4 to 6 feet in both diameter and height. There are also a few dwarf styles available, along with larger bushes that can top 6 to 8 feet.

Weigela prefers sun, but tolerates partial shade with a fair amount of success. Avoid, however, planting in full shade. Full shade will result in weigela bushes that grow spindly, with little to no spring blooms.
Weigela is best planted in fertile soil that drains well. Dig planting holes 1.5 to 2 times the diameter of the root ball, and a few inches deeper as well. This will give roots plenty of room to spread out and establish.
To help supply plenty of nutrients and promote good drainage, plant weigela with a 50/50 mix of compost to soil.
Begin by filling the bottom of the planting hole with a few inches of the compost / soil mix, being sure the top of the root ball is slightly above the surface of the ground. This helps keep the plant’s roots from becoming waterlogged.
Next, again using the 50/50 compost-soil mix, fill in the hole around the shrub. Slightly tamp in the soil and water thoroughly to help set the roots in place.

Finish by mulching with at least 2 to 3″ of mulch a minimum of 12″ in diameter around the base. This not only helps repel weeds, but keeps moisture around the roots as the plant acclimates to the soil.
Weigela is one of the easiest shrubs of all when it comes to long term care. It holds it shape fairly well, and rarely if ever requires severe pruning.
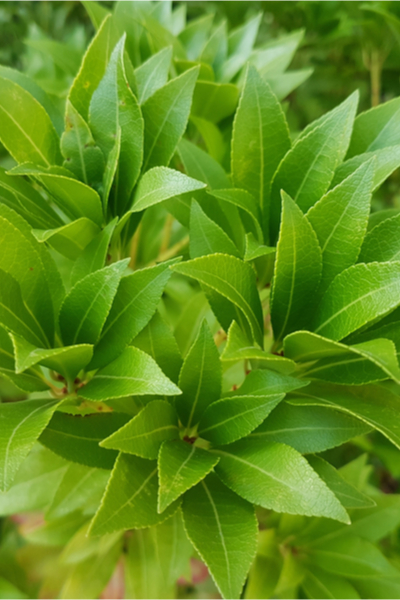
Light pruning of renegade branches helps the shrub to keep it’s shape, and also encourages new growth and more blooms near the tips. Pruning should take place during the winter months when the plant is dormant.
Weigela is not a heavy feeder from the soil, and requires only light fertilizing to keep it healthy and blooming.
Fertilize lightly in early spring using a basic shrub & tree fertilizer. This not only helps the plant develop it’s late spring blooms, but aids in promoting a denser fill of foliage too. Product Link : Jobes Organic Slow Release Shrub Spikes

Here is to adding low-maintenance beauty and color to your landscape this year by planting and growing weigela! For more information on adding shrubs and bushes to your landscape, be sure to check out our Shrubs & Bushes category on the blog.
This Is My Garden is a website dedicated to spreading the love and knowledge of gardening around the world. We publish two new garden articles each week. This article may contain affiliate links.
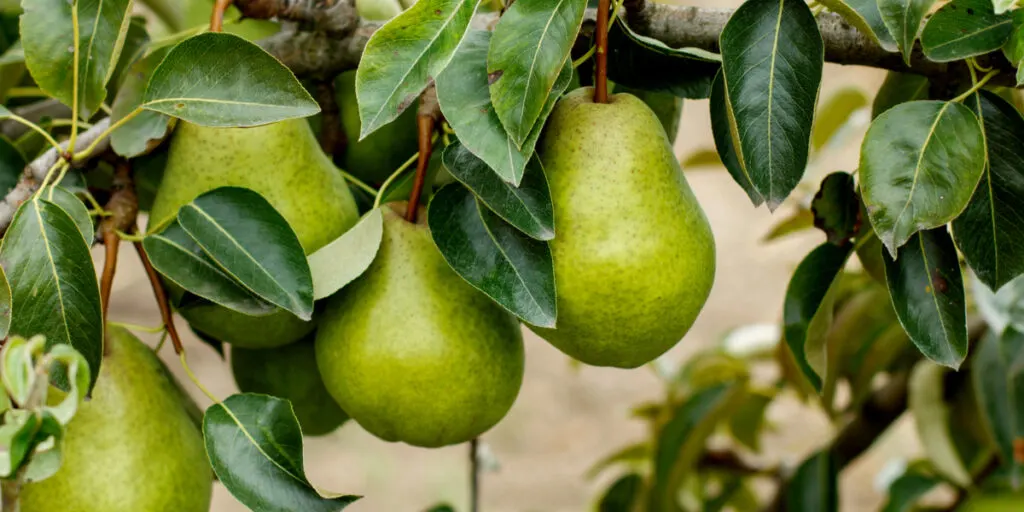
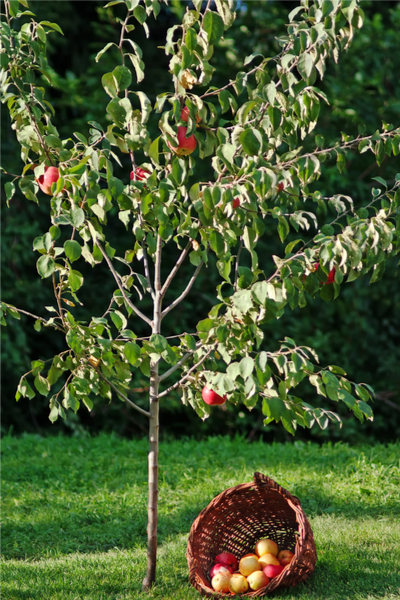
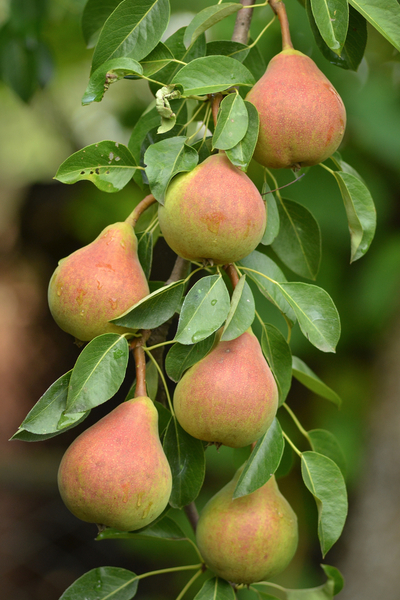
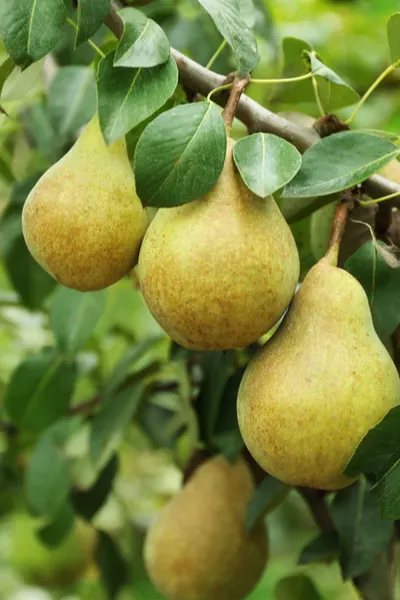
Planting a few dwarf pear trees is a great way to add perennial fruit to your landscape. Especially when space is a big concern!
Pears are one of the easiest and hardiest of fruit tree to plant. And one of the most productive.
But for many fruit trees, it can sometimes be tough finding enough space for them to grow.
And that is where dwarf varieties can come to the rescue. Not only are they great for smaller spaces, they are big on flavor and production too.
And that is especially true when it comes to planting and growing dwarf pear trees.
Although standard pear trees need at least 18 to 25 feet of spacing, dwarf pear trees can be planted with as little as 10 to 15 of available space.
And even better, they can be kept to 10 to 12′ in height as well. A height that makes it easily manageable to pick, prune and maintain.

And beyond all of the great tasting fruit, pear trees can add a lot of lasting color and texture to your overall landscape. Especially in the spring when they are loaded with flowers!
Here are a few planting pointers, along with 3 great dwarf selections for planting pear trees.
Pear trees should be planted in fall, late winter, or very early spring for best results.
You need to plant at least two varieties in order to have good cross pollination and fruit set.
Most nurseries will have charts or labels to tell you which trees are best for cross pollinating. We have indicated that as well with the 3 varieties below.
Always dig planting holes at least 4 to 6 inches larger than the planting container. Pear trees do not need a lot of additional nutrients to grow well.
Finish by planting the top of the center roots slightly above ground ( an inch or so). This helps to keep the tree well drained at it’s core. For more on planting fruit trees, be sure to check out our article : The Keys To Planting Fruit Trees
One of the most well-known of all pear tree varieties, Bartlett pears are prized for several reasons.
For one, they are extremely productive. Bartlett pears produce big yields of extremely juicy and sweet pears. And they do so early on in their growing cycle.


In fact, they can bear fruit as early as in their third full year of growth. It will take up to 5 to 7 years for a full crop, but it’s nice to know you can start sampling early on!
Bartlett pear trees are considered self pollinating, but they will produce much better if given a partner. A Moonglow pear tree is an excellent choice for second pollinating tree.
Bartlett pears are hardy in zones four through eight, and usually are ready to harvest in August. Product Link : Bartlett Pear Tree
Not only is the Moonglow pear a great pollinating partner, it is an excellent choice for eating too!
Hardy in zones 5 through 8, the Moonglow tree will grow to around 10 feet tall. It makes a great choice for planting dwarf pear trees when space is at a premium.

Their blooms are a spectacular show of color in late April to May. Moonglow pears are a greenish-yellow with a slight red tint when ripe. Porduct Link : Moonglow
Of the three choices listed, Seckel pears are the smallest. But are they every packed with juicy flavor!
They are also a perfect pollinator for Moonglow pear trees. The Seckel variety is hardy in zones 5 through 8, and is often referred to as the dessert or candy pear for it’s sweet flavor.
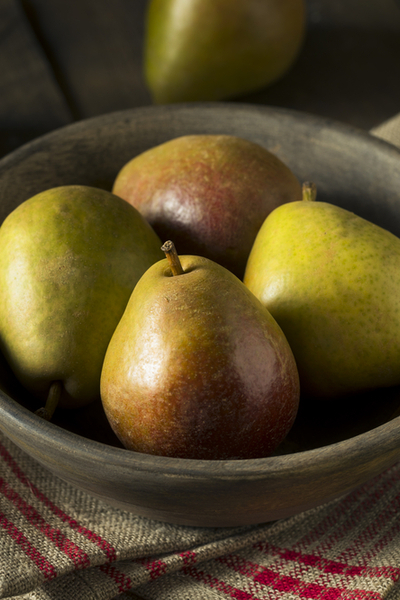

Dwarf Seckel trees will grow 6 to 8 feet wide and around 10′ tall when fully mature.
Here is to adding a bit of perennial flavor to your landscape by planting dwarf fruit trees!
This Is My Garden is a website dedicated to spreading the love and knowledge of gardening around the world. We publish two new garden articles each week. This article may contain affiliate links.
When it comes to planting fruit trees, there is no better time than fall for putting them in the ground!
Although fruit trees can be planted at any point throughout a growing season, autumn provides numerous advantages versus spring and summer.
A fall planting allows just enough time for the roots of a fruit tree to become established before winter. And that acclimation period is extremely important.
Excessive heat and sunlight can both make it difficult for new transplants to settle in.

But autumn’s cooler temperatures, along with it’s shorter daylight cycles help trees acclimate with less stress.
And with lower heat and humidity levels, a tree’s root system is also less likely to dry out as well. And nothing is more important to a newly planted tree’s root system than water!
In essence, a fall planting sets the stage for a tree to be ready for fast growth the following spring. And more importantly, not have to spend all of it’s resources and efforts on simply surviving.
For starters, always select varieties that are hardy and tolerant to your growing zone.

Local extension offices and nurseries are both great resources for knowing the trees that grow best in your area.
Just as important is selecting varieties of fruit trees that can pollinate with each other.
Many fruit trees are not self-pollinating.
That means they are unable to pollinate on their own, and require a second tree in order to bear fruit. And in many cases, that doesn’t mean just a second tree of the same variety.
Self-sterile fruit trees require a completely different species of fruit tree to pollinate and produce fruit.

Although it can sound quite complicated, most nurseries have easy to read pollination charts that can help you select compatible varieties of fruit trees. ( See : 3 Great Apple Trees To Plant)
So now that you know when and what to plant, it’s time to get digging!
Begin by creating a planting hole two to three times the diameter of the tree’s root ball. In addition, dig the hole to one and a half times the depth of the container as well.
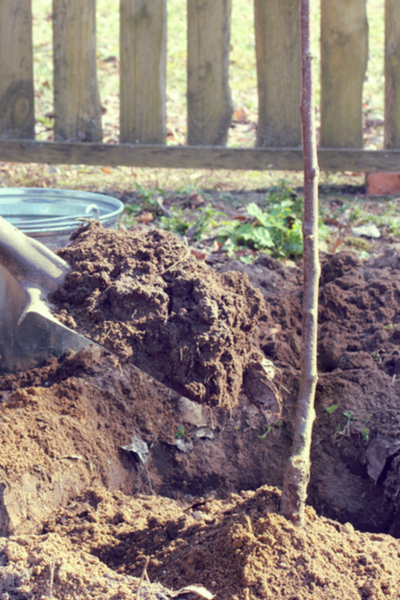

This allows plenty of space for the trees roots to expand and settle in.
Before planting, mix in equal amounts of compost and soil to the bottom of the hole. Fill the hole up enough so that the tree’s root ball sits an inch above the soil line. ( See : How To Make Great Compost)
The base of the trunk should be just above ground level. This allows for good drainage and root growth.
Next, water the entire root ball generously until the water pool around the hole. Allow the water to soak in, and then fill in the remainder of the hole with equal amounts of compost and soil.
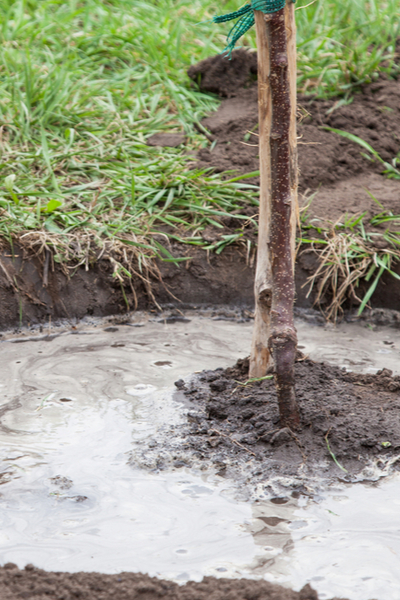
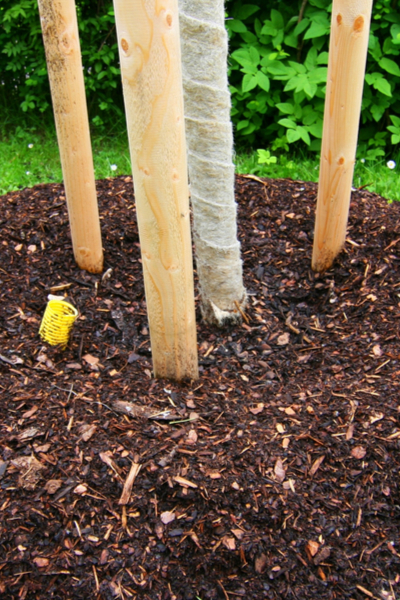
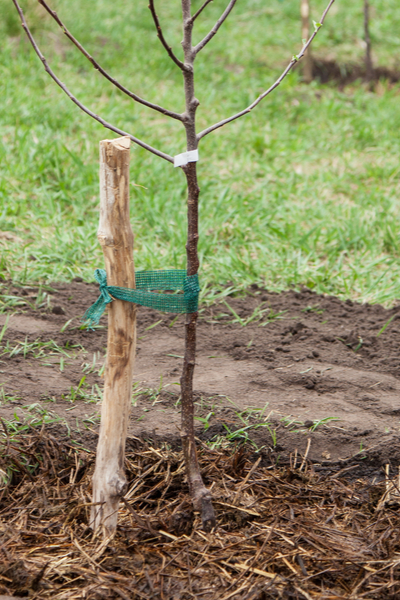
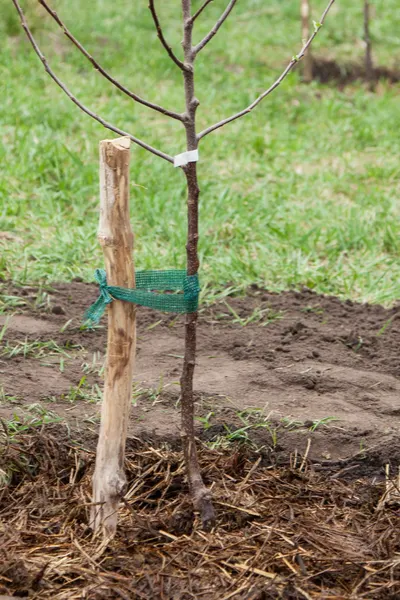
It is always a good idea to stake newly planted trees. Drive a stake in a few feet from the root ball, being careful to protect the trunk as you tie the tree off.
A piece of used garden hose works well to secure the line or rope around the trunk. It will keep the line from digging into the bark and damaging the tree.
Finish by applying a 2 to 3″ layer of mulch. This will help the tree retain moisture and protect the roots from heavy freezing and thawing throughout winter.
Continue to water the trees regularly through late fall every 3 to 5 days until winter sets in.
On average, dwarf trees should be planted about 8 to 10 feet apart. If planting in rows, allow at least 12 feet between rows.
For semi-dwarf trees, allow 10 to 12 feet between each tree, and 15 feet between rows.
When in comes to full size fruit trees, sizing and spacing can vary greatly. It is best with full size trees to follow the guide on the label for spacing requirement.
Here is to adding fruit trees to your landscape this fall!
This Is My Garden is a website dedicated to spreading the love and knowledge of gardening around the world. We publish two new garden articles each week. This article may contain affiliate links.